Subscribe to Pleasure in Simple Things via RSS ReaderFollow Pleasure in Simple Things on InstagramFollow @InSimpleThings on TwitterLike Pleasure In Simple Things on FacebookFollow Pleasure In Simple Things on PinterestEmail Jackie

the magic gardens

November 2, 2012

“Art should not be segregated in museums; it needs to live free among us.”  

 – Isaiah Zagar (creator of Philadelphia’s Magic Gardens)

The Magic Gardens

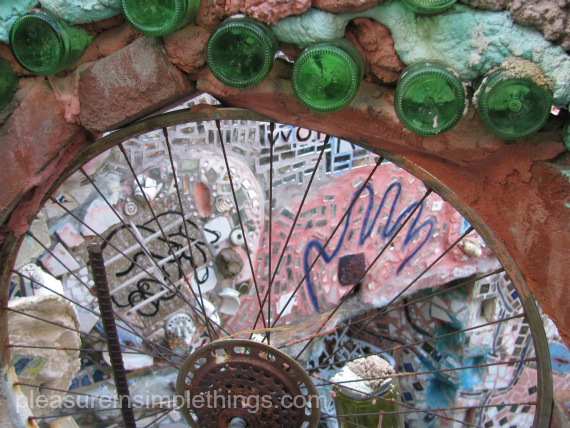
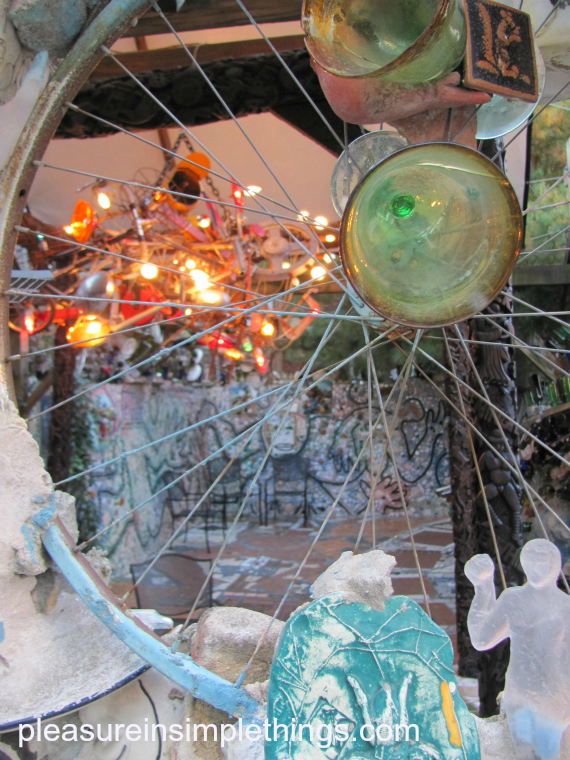
This Friday field trip is a glimpse into a really unique mosiac environment.  The Magic Gardens in Philadelphia’s South Street neighborhood includes a fully tiled indoor space and a massive outdoor mosiac sculpture garden that spans half a block.  I would like to share my first trip to The Magic Gardens with you.

The Magic Gardens


The Magic Gardens

A photo from The Magic Gardens in Philadelphia.

The artist, Isaiah Zagar, spent fourteen years excavating tunnels and grottos, sculpting multi-layered walls, and mosaicking the 3,000-square-foot space.

The Magic Gardens

The Magic Gardens

The gardens are really one of those things that need to be experienced to be fully enjoyed.  So, I urge you to check it out if you find yourself visiting Philadelphia.  I hope some of the phtos here will give you a sense of what a unique spot Isaiah Zagar has provided for the South Street community as well as all who visit.

The Secret Gardens

The Secret Gardens

I plan on making repeated visits to the gardens – it is not even possible for one’s senses to absorb everything in one visit!

The Secret Gardens

The Magic Gardens

A photo from Philadelphia’s Magic Gardens.

The Magic Gardens

Hope you enjoyed sharing some of my trip to Philadelphia’s Magic Gardens.

The Magic Garden

Thank you for visiting my blog.  My prayers to those that suffered loss during the storm, Jackie

no comments

tony danza giveaway & october winner

November 1, 2012

Tony Danza

Congratulations to Tracy R., winner of the October book giveaway…a very special one!  Tracy has won signed copies of  Life Lessons From the Chocolate Factory…10 Rich, Satisfying Nuggets to Nibble On for her ENTIRE book group in addition to a conference call from author Christopher Holl!!  Thank you so much, Christopher, for providing such a generous giveaway!  Hopefully, Tracy will provide us with some photos and news from her book group session!!

For November, the giveaway is a book written by a celebrity…a multi-talented celebrity.  His name is Tony Danza!

I got the chance to meet Tony recently when he appeared in Connecticut at an R.J. Julia’s bookstore event in Madison.  (I enjoyed talking with him about two favorite cities –  comparing NYC and Philly.)  And, this month’s giveaway is a signed copy of his first book I’d Like to Apologize to Every Teacher I Ever Had:  My Year as a Rookie Teacher at Northeast High.  If it sounds a little familiar, it may be because the subject was the topic of an A&E reality series called TEACH.  Tony experienced the life of a first-year teacher – teaching tenth-grade English at Northeast High – Philadelphia’s largest high school.  His students didn’t care about his celebrity…heck, they weren’t even born when Who’s the Boss  aired; never mind Taxi!  And, even though A&E cancelled the show after six episodes, Tony completed his year as teacher – a career he had aspired to long before he started acting.

The book is an insightful account you will truly enjoy.  Be sure to enter to win often – before the end of November.   Details for entering are here.

Thanks for visiting,  Jackie

1 comment

easy caramel corn

October 30, 2012

This time of year is a natural for popcorn.  Caramel corn?  Even better!  Very seasonal and very yummy. For a long time I was intimidated just thinking of trying to make it.  Plus, all the recipes always called for popping popcorn the old fashioned way – on the stove.  These days, I would never think of doing that – it creates such a mess!  Microwave popcorn is so much easier and neater!  So, I would like to share the instructions for making this delicious treat using the ‘conventional’  bag of microwave popcorn!

I love it because I always have the few ingredients needed to make it in my house, so if I decide to turn the usual popcorn up a notch…I am ready!  Of course, you wouldn’t want to buy a butter flavored popcorn…pick something unflavored or, a natural flavor.  I buy the grocery store brand  organic ‘natural’ flavor.  It has a little salt in it, but that’s it.  I don’t add any salt of my own since I don’t normally use much salt.  You may decide you want to add some.

One batch (or 3 oz. microwave bag) fits great on a cookie sheet, so if you decide to make more than one batch, just plan for one cookie sheet per bag.  You might fit two bags on one sheet if you have a really large baking sheet.

This is a great snack for the sports fans in the house…a sweet departure from the usual nachos while watching the big game.  If you are making this for the kids,  you can toss in peanuts (aka Cracker Jacks) and/or candy corn as fun additions.

Because I planned on serving this batch of the caramel corn I made to ‘the guys’, I got a little ‘corny’ (pun intended) with the presentation and served it in a tin that announced it as “the best ever caramel corn.”

A photo of caramel corn made using microwave popcorn and served in a chalkboard tin.

Tins are a great way to store and present the caramel corn.  This tin was spray painted completely with chalkboard spray paint – making it easy to change up the message, depending on its use.  An easy way to repurpose an ugly tin!  This one has been used many times over and will later serve as storage for holiday treats and  be adorned with some fun red and green chalk.

Easy Caramel Corn Recipe

  • 3 oz. bag of microwave popcorn, popped  (I use the natural flavor – it just has a little bit of salt)
  • 6 tablespoons unsalted butter
  • 1/3 cup packed light brown sugar
  • 3 tablespoons light corn syrup
  • 1 teaspoon pure vanilla extract

Heat oven to 300 degrees.

In a medium saucepan, combine the butter, sugar, and corn syrup.  Cooking over medium heat, stir constantly until the mixture bubbles and lightens in color, 4 or 5 minutes.

Remove from heat.  Stir in the vanilla.

Pour over the cooked, cooled popcorn in a large bowl and toss to coat with a rubber spatula.

Spread the popcorn mixture on a lipped baking sheet and bake 30 to 35 minutes, when the color will deepen, tossing once halfway through cooking time.

Remove from oven and toss before letting cool on the baking sheet.  Wait until completely cool to serve.

Store in a tin or other airtight container at room temperature.  You can keep it for up to a week…if it lasts that long!

Hope you enjoy this easy caramel corn recipe.  You might want to spray paint a tin of your own to store it in…you can later use it for holiday cookies!

Thanks for visiting, Jackie

5 comments

coastal jack-o-lanterns

October 28, 2012

coastal pumpkins

pumpkin carving 2012

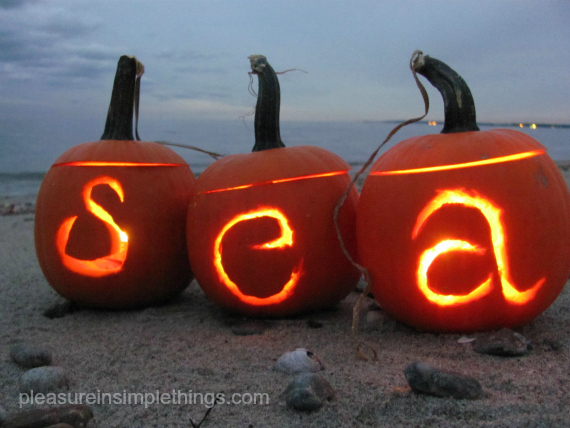
Well, Halloween is not that far away so I thought I would share some of this year’s pumpkin creations.  I say ‘some’ because I have not yet finished carving…I have my largest pumpkin and a couple small ones left to carve before Wednesday.  As you can see, I have a coastal theme going.  I never was one for ghosts or goblins…

seahorse jack-o-lantern

I can’t even watch a scary movie!

fish jack-o-lantern

A photo of some of this year’s coastal theme jack-o-lanterns.

With the kids grown, I am no longer carving pumpkins to cater to their tastes.  (Although I have to admit, last year I carved a pumpkin with  “T-Shirt Time” for my daughter to display in her college apartment.)

coastal jack-o-lanterns

Carving pumpkins is almost therapeutic…don’t you think?

coastal jack-o-lanterns

I will be collecting some seeds too…the good friend that gave me my favorite white pumpkin is planning on using the seeds to grow some white pumpkins of her own for next year.   And, my daughter requested some roasted pumpkin seeds for her visit home on Thanksgiving.

coastal pumpkin carving

A photo of some of this year’s coastal jack-o-lanterns.

So, these are my jack-o-lanterns so far…(haven’t even taken the drill out yet!)

jack-o-lanterns by the sea

Enjoy your Halloween!  Have a safe one!

Thanks for visiting, Jackie

2 comments

philadelphia shell show & festival

October 26, 2012

Phjladelphia Shell Show 2012

Wow!  What a field trip I have for you this week.  I attended the 2012 Philadelphia Shell Show & Festival at The Academy of Natural Sciences in Philadelphia and as a fanatic of anything ‘beachy’ and a definite shell lover, I was in heaven!

I planned my trip in advance.  I knew when the shell show was scheduled and I went to the museum expecting to see many shells…but I found it was so much more than that…I saw so much more than just individual shells.  There were many competitions for shell creations in many varieties – in addition to straight shell displays and collections.  The exhibitors were not just from across the country, but from other countries as well.

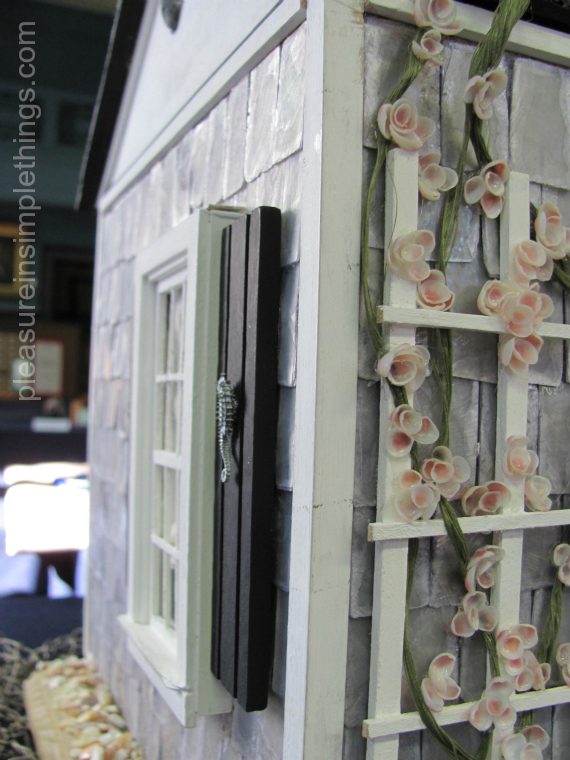
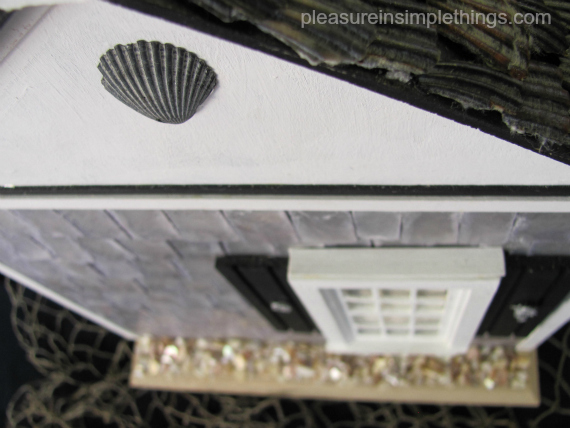
I took SO many photos and fell in love with SO many shells and shell creations that I could not possibly share them all here.  What I have decided to do is to share with you my very favorite creation from the show called “A Summer Place” created by Donna Klees from Ardmore, PA.  It received first place in the artistic division – hobbyist category.

Philadelphia Shell Show 2012

A photo of one of the amazing creations from the 2012 Philadelphia Shell Show & Festival. This shell house crafted by Donna Klees from Ardmore, PA won a first place prize.

Donna created this sweet little house of shells…

Philadelphia Shell Show 2012

Isn’t the trellis amazing?

Philadelphia Shell Show 2012

Philadelphia Shell Show 2012

And, the scallop shell roof!

Philadelphia Shell Show 2012

Philadelphia Shell Show 2012


Philadelphia Shell Show 2012

Gotta love the details in the windows…

Philadelphia Shell Show 2012


Philadelphia Shell Show 2012

Philadelphia Shell Show 2012

A photo from the 2012 Philadelphia Shell Show & Festival.

If you would like to see more shells from the show, I will be sharing some additional photos on my facebook page – I was very impressed with the collection of sailor’s valentines that were presented and you can see some of those samples on my page. Click here to see my facebook page.

As an ending photo, I would like to leave you with this whimsical creation by Bill Jordan from Fort Myers, FL.  He is a great guy and an amazing craftsman that I met at the show…love ya Bill!  According to Bill, Sanibel Island’s beaches are so covered with shells that you will regularly see people bending over in search of them.  The locals have dubbed this sight the “Sanibel Stoop”…the inspiration for Bill’s creation:

Creation by Bill Jordan

A creation by Bill Jordan at the 2012 Philadelphia Shell Show & Festival

Thank you so much for visiting.  Hope you enjoyed sharing some photos from the 2012 Philadelphia Shell Show & Festival.

Have a great weekend, Jackie

2 comments

planting succulents in a pumpkin

October 23, 2012

Succulents planted in a pumpkin

seasonal succulents

I have taken a real interest in succulents recently.   There are probably two big reasons for this.  One is that I saw a photo of a succulent garden in a huge conch shell.  I love shells, so the photo immediately caught my interest and got me excited to try and plant some succulents in shells.  Second, a new Home Depot nearby carries a huge selection of succulents.

I actually had a really early love for succulents.  The first plant I ever personally owned as a kid was a cactus plant I bought in Arizona when I visited Phoenix with my grandparents.  My first magazine subscription wasn’t Teen Beat, but rather Arizona Highways because I adored the pages filled with photos of various desert plants across the backdrop of gorgeous sunsets! Although the varieties of succulents available here in New England aren’t the same as out West, Home Depot does have quite a large selection.

I read as much as I could find on the subject of succulent container gardens and also watched some videos on the subject.  The cool thing about succulents is that they can be planted in virtually any type of container.  I decided since it is October, I would try a pumpkin as my first container garden.  Also, because I love the way white pumpkins mix with succulents.

Planting is pretty simple.  The big difference from planting any other type of plant is that succulents require a fast draining soil.  Instructions on creating an appropriate soil are easy to find, but it is actually more cost effective to just buy a prepared soil at Home Depot.

Most succulent container gardens use a top dressing – most often rocks.  I would love to use sea glass in a future garden, but for the pumpkin I decide to use some reindeer moss and also decorate with some Spanish moss.  I will probably use the sea glass idea for a terrarium when the pumpkin starts breaking down and I need to move the plants to a new container.

photo of succulents in a pumpkin

A photo of succulents planted in a white pumpkin.

Don’t they look great in the white pumpkin?  Small white pumpkins planted with succulents would look great at individual place settings at the Thanksgiving table!

I hope you enjoyed succulent gardening in a white pumpkin!

Thanks so much for visiting, Jackie  

7 comments

reflecting by steam train

October 19, 2012

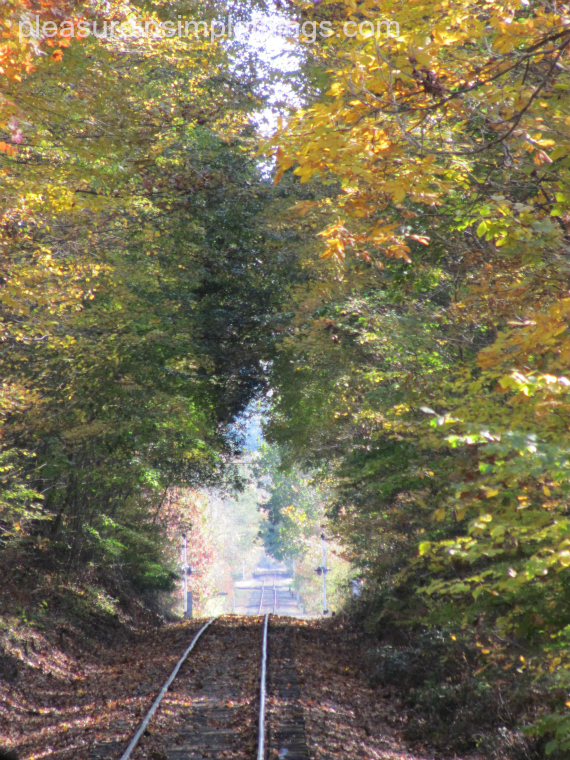
Riding the Essex steam train through the Connecticut River Valley was a very exciting trip when my children were young…there was much commotion and anticipation as our family would prepare for one of our MANY trips to Essex to ride the magical train.  The kids were always SO animated and seeing the trip through their eyes was always such a thrill.  Riding the train for the very first time without them was a much different experience.  It was a time of quiet…a time of reflection…and, a time of enjoying nature.

But also, a time of missing my two little ones…

Ones that aren’t so little any more…sigh


And, as I enjoyed the quiet beauty of the Connecticut River Valley, I also enjoyed the memories of many trips that weren’t so quiet….

The trips where I didn’t really enjoy the nature around me…

I was much too busy enjoying the two little kids that were growing up way too fast


The real beauty for me in the Essex steam train ride is something no one else will ever see.

Thanks for sharing this week’s Friday field trip.

So glad you could join me on the Essex steam train.  Have a great weekend, Jackie

2 comments

cheese & herb fondue in a pumpkin

October 16, 2012

I love using pumpkins for serving containers and flower vases at this time of year.  When I saw this idea about cooking a fondue in the oven right inside a pumpkin, I thought it was great!  I soon found out that it also tastes great!  I’d like to share the recipe…a great one for seasonal entertaining.  A great appetizer or first course served right from the pumpkin!  Here is the recipe I used, taken from one published by the Fig Cooking School in New Haven, CT.

 Ingredients:

  • 1/4 cup chopped shallots
  • 1/4 pound stale bread, cut into small cubes
  • 1/4 pound cheese, such as gruyere, emmentahal, cheddar, smoked gouda, asiago, parmesan, or any combination, cut into 1/2 inch cubes
  • 3 cloves of garlic pressed or minced
  • 1/4 cup fresh scallions, chopped
  • 2 teaspoons or more of fresh herbs (i.e., parsley, rosemary, thyme)
  • 1/2 cup dried cranberries
  • 1 sugar or Cinderella pumpkin, weighing about 3 pounds
  • 1/3 up or more of heavy cream

Preparation:

  1. Preheat oven to 350 degrees.
  2. Sautee shallots until they are crispy and set aside.
  3. Combine chunks of bread and cheese along with cranberries.  Season with salt and pepper.
  4. Add shallots to the bread and cheese mixture.  Combine well.
  5. Add any herbs you choose, along with the scallions and the garlic.  Toss well.
  6. Using a very sturdy knife, cut off the cap of the pumpkin, just as you would a jack-o-lantern.
  7. Scoop out the stringy pumpkin and the seeds and generously salt the inside of the pumpkin.
  8. Pack the filling tightly into the pumpkin (there shouldn’t be any air pockets.)
  9. Pour in cream until the bread mixture is moistened and there is a bit of liquid on top (do not have the bread “swimming” in heavy cream).
  10. Put the cap back on and bake until the ingredients are bubbling and the meat of the pumpkin is tender enough to be pierced with a fork.  Do not let it burn; the pumpkin will turn black and collapse as it cools.


A photo of the fondue prepared and put inside the pumpkin – ready for the oven.

Place a large spatula under your creation and move it gently to a beautiful platter.

Serve as a side dish or an appetizer on small plates.

A photo of the completed fondue from the oven – ready to serve on small plates.


I hope you enjoy this creamy pumpkin fondue at one of your seasonal gatherings!

Thanks for visiting, Jackie

no comments

diy ballard designs burlap wreath

October 12, 2012

This week, friday field trip is through the pages of the Ballard Designs catalog.  Don’t you just love this catalog!? 

It is always such an exciting day when the Ballard Designs catalog arrives in the mail!  So many beautiful things!  This burlap wreath really caught my eye when I opened the latest edition in this week’s mail.  I love the neutral color and, heck, I have plenty of scrap burlap around…I know I can make my own!  Do you want to try your hand at making a Ballard Designs inspired wreath?  Read on.

A photo of my completed diy Ballard Designs inspired burlap wreath.

These are the materials I used:

  • 60 pieces of burlap – 1″ x 8″ rectangles
  • some additional burlap scraps (to cover the wreath)
  • 1, 8″ grapevine wreath
  • glue gun and glue sticks

(optional:  white ribbon and white berries or other decorative accents)

First, I covered the wreath with scraps of burlap just in case it showed through.  I simply used scraps I had and glued them onto the grapevine wreath using the glue gun.

BIG WARNING!  Since the burlap is such an open weave, the hot glue is going to be extremely dangerous…I suggest you use something other than your fingers to press down onto the burlap or wear some type of gloves to protect your fingers from burns.  Be very careful!

I cut rectangles from the burlap – 1″ by 8″ pieces…I cut mostly by eye, so the sizes of the pieces were not extremely accurate.  I estimated that I would need about 50 loops and ended up needing 60.  From here on, it is just a matter of glueing on the strips by gluing one side and then the other side directly to it.  I just glued them randomly around the wreath, filling in spots that seemed empty as I went.

The strings happened pretty naturally as pieces would unravel…I helped a few along.

And, that is it!  I really love it!  The original was hung with a long strip of burlap, but I wanted to use a white ribbon.  I also decided to add some decorative white berries.  I planned on saving it as a holiday decoration, but I like it everywhere I hang it…I think I may leave it on one of my inside doors…maybe I will add some sparkle to it come the holidays!

If you are a Ballard Designs catalog  ‘virgin’, do yourself a favor and check it out:  www.ballarddesigns.com

I hope you enjoyed this friday field trip with a Ballard Designs catalog inspired diy burlap wreath!

Thanks for visiting, Jackie

P.S. This wreath is posted on “Friday Happy Hour” …check out some of the other great ideas:  http://www.craftberrybush.com/2012/10/party-time-happy-hour-5.html

11 comments

using that leftover pumpkin

October 9, 2012

3 pumpkin recipes

I know it seems like I am going into autumn kicking and screaming…and, maybe I am (a little)…I do love summer (miss it already!)  But, I am doing my best to embrace the new season.  Of course one of the true signs, especially here in New England, is pumpkins!  We have quite a few places to pick pumpkins here in Connecticut and visiting a farm is a sure-fire way to get in the seasonal spirit.

In my house, we love to use fresh pumpkins for our favorite pumpkin recipes, but there always seems to be too much or not enough pumpkin for what the current recipe requires…when there is not enough, I end up supplementing with canned pumpkin (100% pumpkin…not pie filling) and when there is too much, I have a few favorite ways to use the leftover pumpkin.

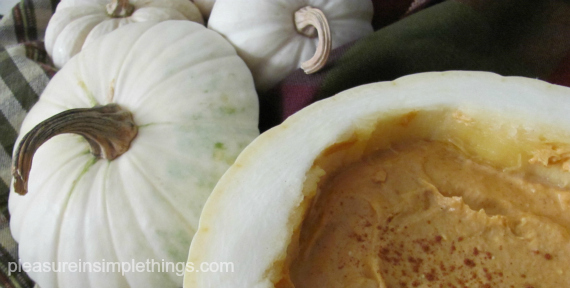
PUMPKIN CREAM CHEESE is a great way to use any leftover pumpkin because you can adjust the recipe to whatever amount you have left.  It is a great dip for apple slices or gingersnaps (or you could make your own ginger cookies using the recipe from this previous post https://pleasureinsimplethings.com/great-ice-cream-sandwiches/).  Served in a pumpkin, (approximately 5″ diameter pumpkin  is a good size for 8 oz. of cream cheese) this spread makes a nice addition to a seasonal table.  It is also great as a spread on bagels.

Pumpkin Cream Cheese

  • 8 oz. cream cheese, softened
  • 1/2 cup sugar (you can use white or brown)
  • 1 cup pumpkin
  • 3/4 teaspoon cinnamon
  • 1/4 teaspoon ginger
  • 1/8 teaspoon cloves

Blend the cream cheese until smooth, then add the rest of the ingredients and blend together until smooth.  Store in the fridge.  Tastes better when made ahead so that the spices have time to blend together.

ICED PUMPKIN LATTE is something I not only use leftover pumpkin for, but also leftover coffee!  I always save any extra coffee from the morning to drink as iced coffee later in the day, storing it in my fridge.  With a little extra effort, I can have a pumpkin latte.  This is a real treat for me since I usually drink my coffee black.  You may think of this time of year as one for warm weather drinks, but I enjoy iced drinks all year ’round…I am sure this would taste just as good warmed up, if you are so inclined.  I find it tastes best to make ahead and store in the fridge so that the spices have a chance to really blend…yum!

Iced Pumpkin Latte

  • 2 cups milk
  • 4 tablespoons pumpkin
  • 2 tablespoons sugar
  • 2 tablespoons vanilla
  • 1/2 teaspoon pumpkin pie spice*
  • 1/2 cup strong coffee or 2 shots of espresso

Add the pumpkin and the sugar to 1/2 cup of the milk and whisk or blend until dissolved.  Add this and all the remaining ingredients into a pitcher and store in your refrigerator.

When ready to serve, be sure to stir to combine…if you want your drink foamy, you can either briskly whisk or put into blender to add air. (I don’t bother with this step – I just stir enthusiastically!)

Pour into a cup with ice.  Makes two servings.  If you want to get fancy, you can add whipped cream and sprinkle cinnamon on top.  Enjoy!

*to make your own pumpkin pie spice, you can mix 1 and  1/2 teaspoons cinnnamon, 1/2 teaspoon nutmeg, 1/4 teaspoon cloves, and 1/2 scant teaspoon of ginger – measure accordingly for your recipe

PUMPKIN PIE SMOOTHIES are a great way to use leftover pumpkin as well as yogurt or bananas you may have left over.  Pretty much any yogurt or fruit you have around the house tastes good in a smoothie, so don’t be afraid to vary the recipe according to what you have on hand.  This pumpkin pie smoothie recipe is adapted from Chop Chop magazine:

Pumpkin Pie Smoothie

  • 1/4 cup orange juice
  • 1/4 low-fat or skim milk
  • 1/2 cup plain low-fat yogurt
  • 1/4 cup pumpkin
  • 1/2 ripe banana
  • dash or cinnamon
  • 1/2 teaspoon vanilla extract
  • 2 or 3 ice cubes

Put all the ingredients in the blender.  Blend on medium until mixture is smooth, about a minute.

If you find you still have pumpkin left after using these recipes, you can freeze it in a plastic bag in the size desired…you can freeze 1 cup for the cream cheese recipe to defrost when you need a quick appetizer.  You can also put tablespoon increments into an ice cube tray, popping into a plastic bag when frozen, to keep handy to defrost for future iced pumpkin lattes!

These are just a few easy ways to use your leftover pumpkin.  I am sure you can think of many more…it is really easy to add pumpkin to muffins, pancakes, or waffles – chocolate chip pumpkin waffles anyone?

Enjoy!  Thanks for visiting, Jackie

1 comment

Back to top