Subscribe to Pleasure in Simple Things via RSS ReaderFollow Pleasure in Simple Things on InstagramFollow @InSimpleThings on TwitterLike Pleasure In Simple Things on FacebookFollow Pleasure In Simple Things on PinterestEmail Jackie

diy animal ornaments

December 3, 2012

diy animal ornament

Isn’t it great to be able to find a use for something old?  Even better if you fall in love with the results!  That is what happened for me when I decided to turn old plastic animals into tree ornaments.  I am sharing an easy tutorial on how I did it.

This is what you will need:

  • plastic toy animal
  • ModPodge (or white glue thinned down with water)
  • wax paper
  • pages from an old book, cut into strips
  • twine or ribbon (for hanging)
  • straight pins (a couple for each animal)
  • glue gun & glue
  • black paint or permanant marker
  • sparkles (optional)

1.  Decide what animal you will be working on.  If you don’t have one, you can easily find one at a dollar store or craft store.  I am partial to sea creatures, so I started with a dolphin.  As it turned out, the dolphin was the quickest because it had simple lines.  The more complicated the shape of the animal, the longer it will take because you will be covering the body with the strips.

2.  Assemble your materials.  I put the ModPodge in a paper cup I had trimmed down – just to make cleanup easier.  You can’t see it in the photos, but I used a sheet of wax paper to keep the animal on during the process and for drying.

3. & 4.  The first thing I did was to attach a hanger.  I used a piece of twine.  I decided to use two straight pins to attach the twine since the body of the animal is hollow.  (Just be sure it does not come out the other side of your animal.)  I then put a big glob of hot glue on the point of attachment – just to be extra sure it stayed attached…overkill?

5.  Next, I put ModPodge on both sides of a strip of the book page and attached it to the dolphin.  I continued attaching pieces in random directions until the entire piece was covered.  (You will want smaller pieces for more detailed areas.)  There is no need to cover it all in one sitting…I did mine over the period of a few days because I would work on it when I had a couple free moments.

6.  When the animal is completely covered, let it dry thoroughly.

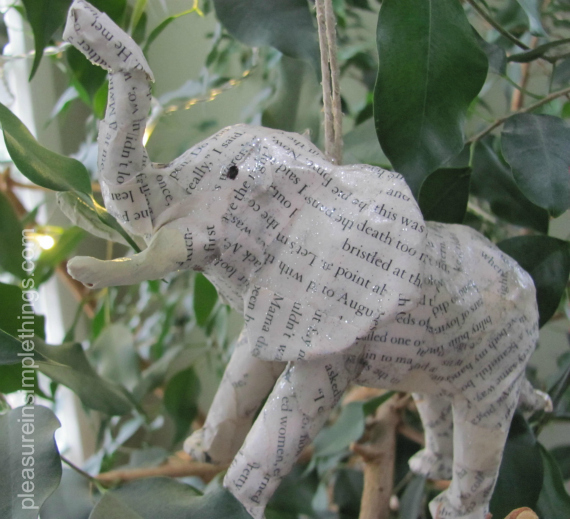
I originally had planned to accent my piece with a thin gray paint wash, but I liked the way it looked and decided to leave it the way it was.  I did add some sparkle (great with the reflection of the Christmas lights) and added a couple features with a marker (I wanted to use dimensional paint, but the bottle of black I had was dried up).  On the elephant, I painted just the tusks in an off white.

I love the way they came out!

I don’t have my tree up yet, so I couldn’t demonstrate how they will look when they are actually on the tree…for the opening photo, I hung the elephant on one of my houseplants – you get the idea!  On this project, I repurposed the plastic animals and the old book…can you tell which book I used?  Any readers out there?  In the spirit of the season, if you can guess the book, I will send you a holiday gift.  The first one to email me the correct title gets the surprise!

I hope you enjoyed this easy diy tutorial to transform your plastic toy animals into Christmas ornaments…  Now, to figure out how to repurpose all those Legos and Matchbox cars!

Thanks for stopping by, Jackie

12 comments

december giveaway & tony danza winner

December 1, 2012

adriana trigianiadriana trigiani

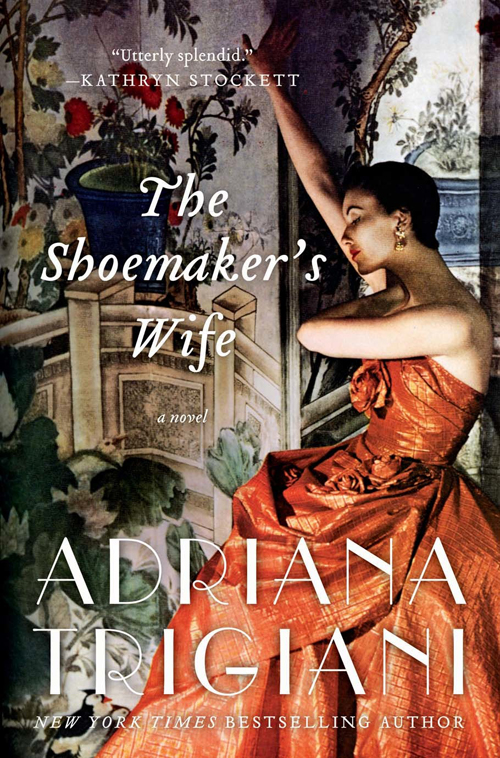
Congratulations to Theresa N. from South Carolina, the winner of the November giveaway!  Theresa has won an author signed copy of Tony Danza’s first book, I’d Like to Apologize to Every Teacher I Ever Had:  My Year as a Rookie Teacher at Northeast HighClick here to see some photos of when I met Tony and had him sign your book!  I know you will enjoy it!  For December, the giveaway book is a wonderful, historical fiction by Adriana Trigiani titled The Shoemaker’s Wife.  The story of Enza and Ciro starts in the Italian Alps at the turn of the last century.

Through the love story of Enza and Ciro, this rich epic tells the story of the immigrant experience in America over twenty years.  I loved the book and was very excited to get the opportunity to meet the author when she was recently in Connecticut, courtesy of R. J. Julia’s bookstore in Madison.

I have to admit, having never seen Ms. Trigiani before, I was a little surprised by her presentation…it was more of what you would expect from a stand-up comic than a best-selling author.  I didn’t realize she had a comedy background…including a stint as a writer on The Cosby Show!  She kept the crowd in constant laughter as she discussed her family and her Italian heritage.  The Shoemaker’s Wife, she explained, was inspired by her own family and took over 20 years of research for her to develop…truly, a labor of love.

A copy of The Shoemaker’s Wife, signed by Adriana Trigiani, will be December’s giveaway selection.  To enter to win, simply leave a comment on any post during the month of December.  Each comment will qualify as a ‘chance’ to win.  Click here for more details.  Good luck!

A photo of the author Adriana Trigiani. Her debut novel was Big Stone Gap.

 Happy December!  Thank you for visiting, Jackie

1 comment

easy diy gift ideas

November 30, 2012

A photo of the beachy pencil gift…It can be adapted to any interest – I am working on a book lovers edition to give to my book group friends this year!

The holidays hang heavy in the air – and what a festive air it is! – and I am working on some homemade gifts.  I know many others out there are also making gifts for the holidays, and sometimes it takes a little inspiration to come up with something new for those special people on your list.

For today’s Friday field trip, I am going through the pleasure in simple things ‘archives’ – posts of 2012 – and have picked out some do-it-yourself gift ideas for you!  Simply click on the gift name in green to be directed to the instructions to make that particular gift.

I will share more ideas in the days ahead, but I hope this list will help you find something to make that will be perfect for someone on your list!  Enjoy!

GIFTS…

A photo of chalkboard magnets – a fun gift idea that is easy enough to have the children help create!

A photo of easy to make color-dipped wooden spoons that can be created in any color.

EDIBLE GIFTS…

A photo of homemade Irish Cream in decorated bottles…a great holiday gift to make!

HOLIDAY THEMED GIFTS…

A photo of an easy and inexpensive ornament you can make yourself.

FLORAL GIFTS…

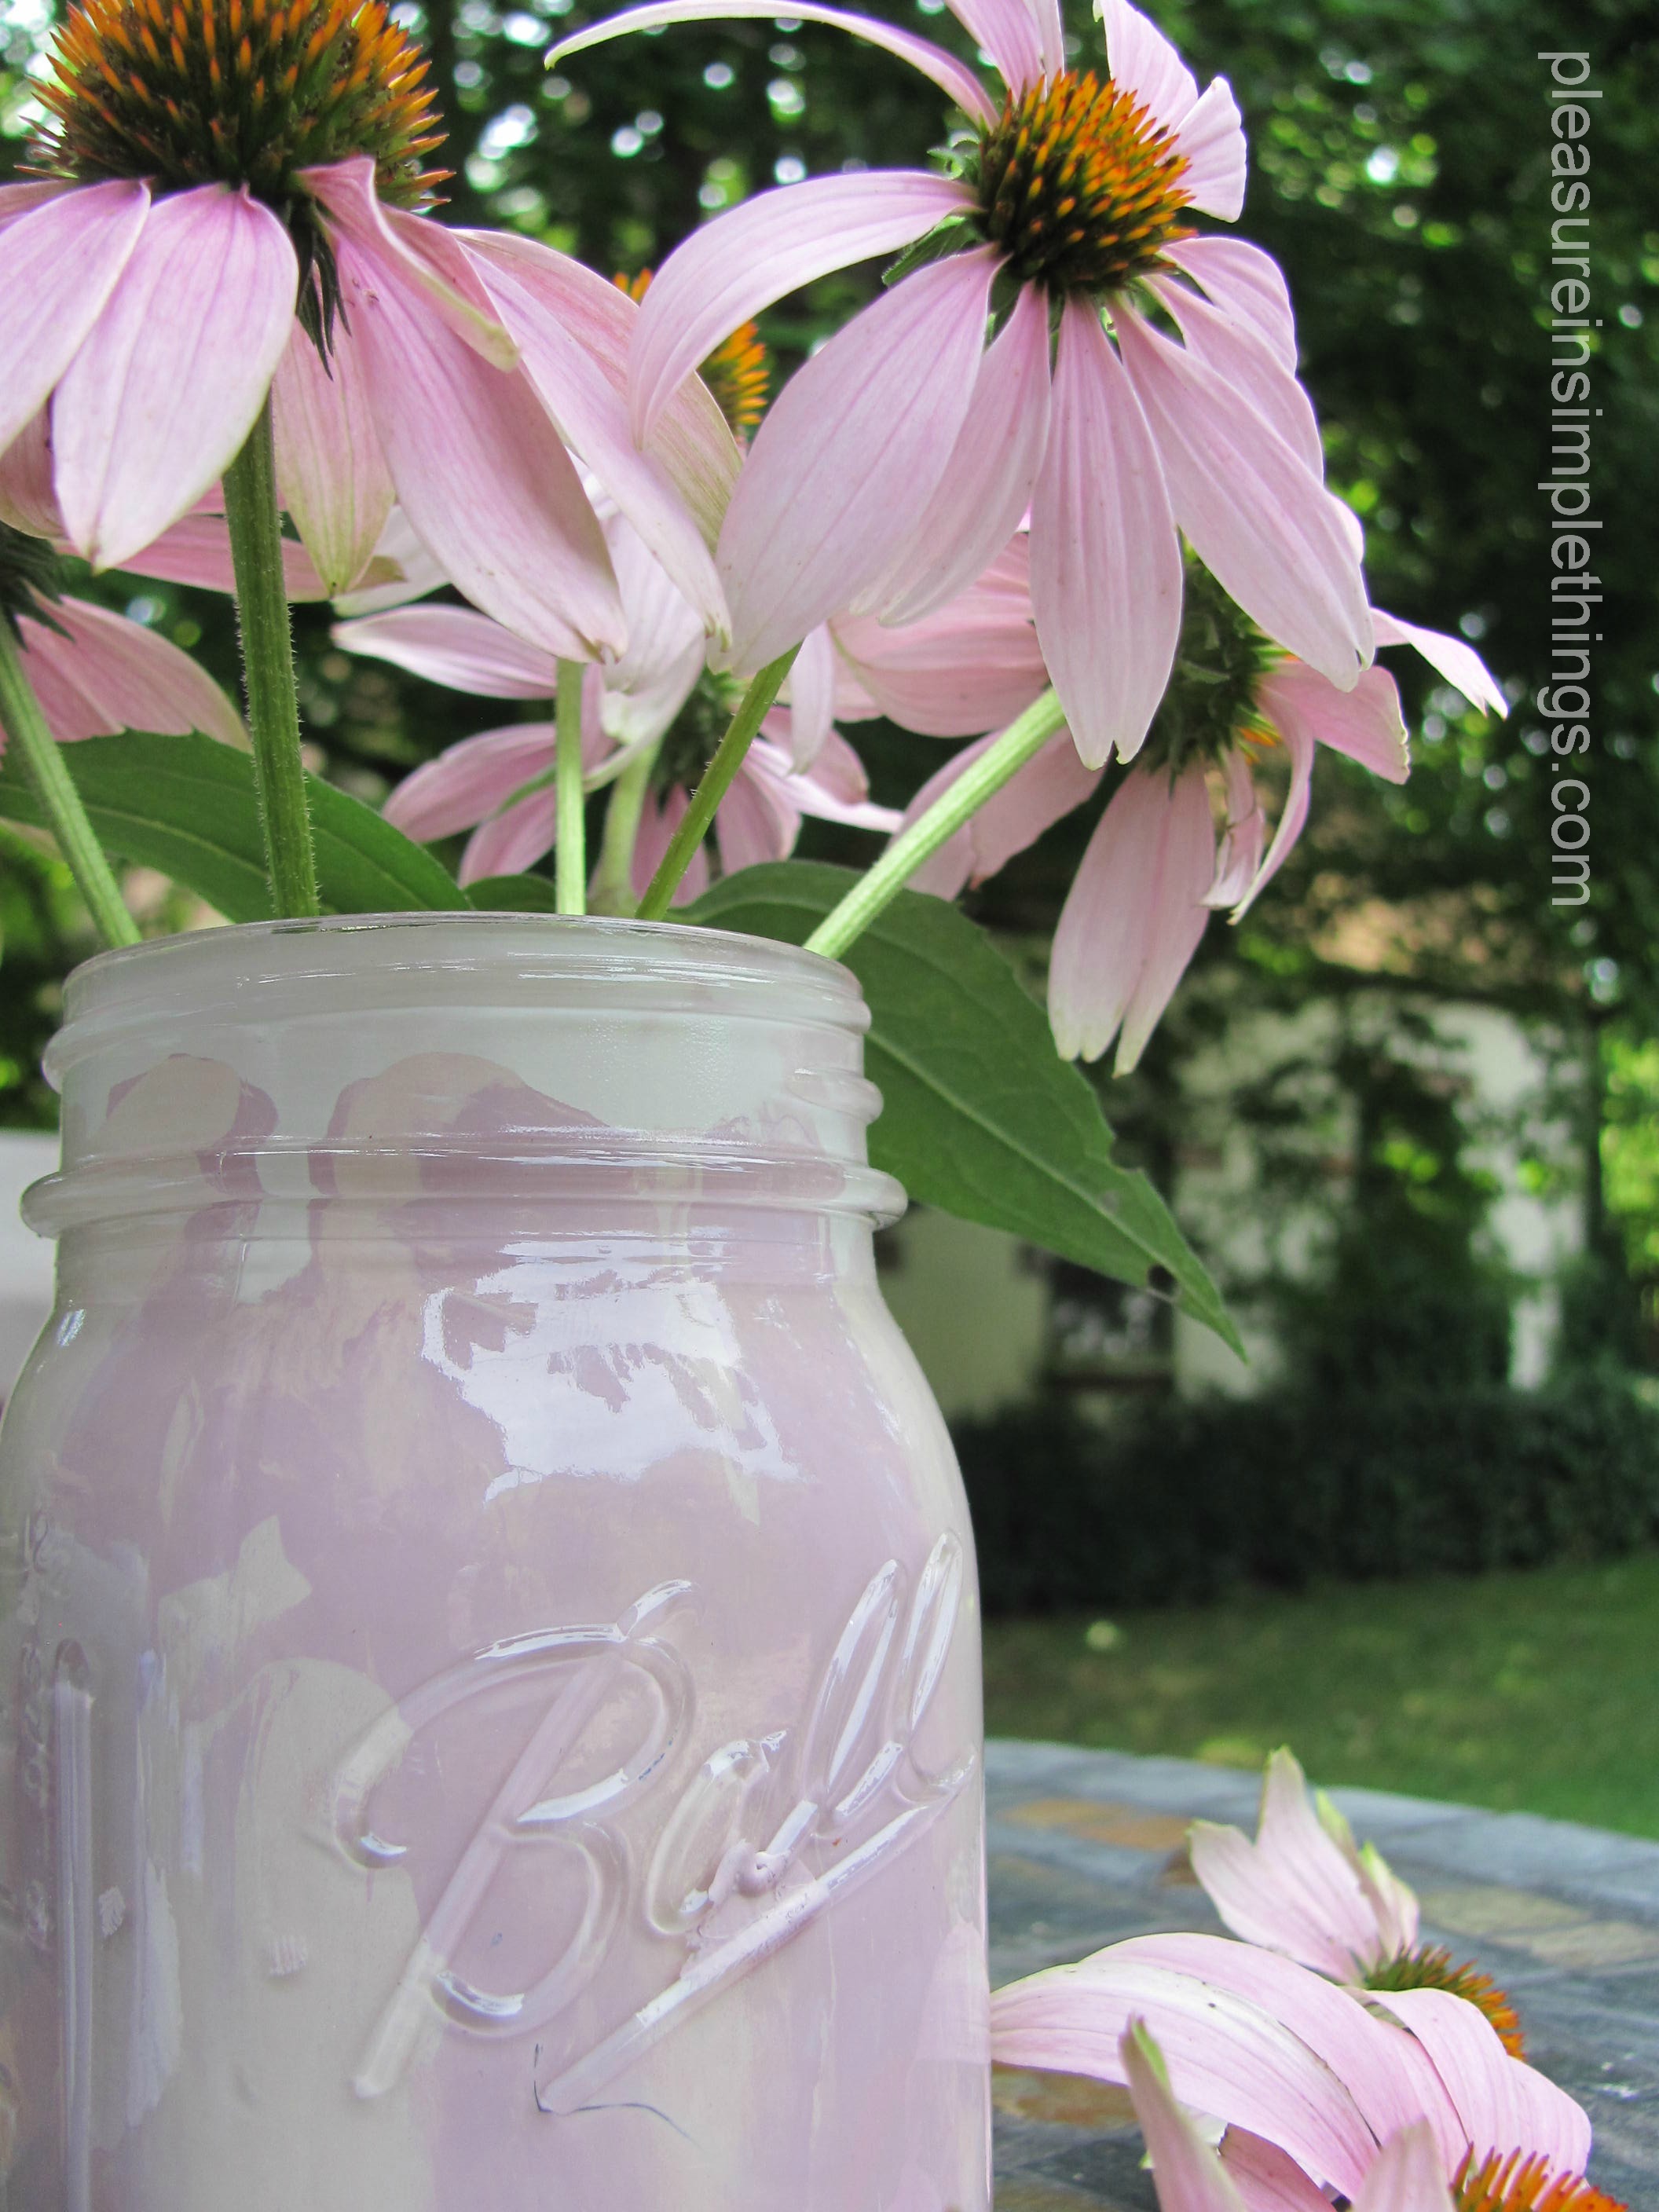
A photo of a painted glass vase that is easy to create and can be made in festive colors or metallics to give as a holiday gift.

WRAPPING IDEAS…

BOOK IDEAS…

  • My Favorite Reads  Scroll down to the ‘recommended’ section to find a great book for the reader on your list.


Thanks for visiting!  Have a wonderful weekend and enjoy pleasure in simple things, Jackie 

P.S. I may be a little late posting November’s book giveaway winner…I have been without internet service for a week!  Hope to get up and running soon!  Thanks B. for letting me use your computer today :)

3 comments

5 ways to dress up votives for the holidays

November 27, 2012

holiday votives

Don’t candles just scream the holidays?  Now that Thanksgiving is just a fond memory of pies past, holiday decorating is in full swing and candles always play a big part.  Standard votive holders are a great part of creating a seasonal ambience.  Because votive holders are small and inexpensive (less than $1. each), they can be grouped in large numbers at little cost to pack some great holiday punch!

There are so many ways to transform these mild-mannered little guys into something beautiful for the season.  Here, I am sharing five easy ways to transform these simple glass containers into something special for your holiday vignettes.

1.  Reason for the season

holiday votives

Covering a votive with a favorite prayer or religious saying is a great way to pay homage to the season.  Here, I simply typed up a prayer on my computer and printed it out on vellum instead of regular printer paper.  After trimming it to the proper size, I attached the two ends together with a decorative sticker.  A wax seal in red is another great option to attach your message in an attractive way.

2.  Chalkboard fun

holiday votives

Adding a chalkboard sticker or painting the votive with chalkboard paint is a great way to write out a holiday word (think jingle, jolly, sparkle, joy, etc.).  Or, use as place cards and/or table favors at your holiday get together by writing the guests names on the chalkboard section.  I cut a rectangular shaped piece from chalkboard Contact paper – a handy items to have on hand for a multitude of uses.  For something more playful, try cutting the shape into a snowman, santa’s hat, candy cane, or other seasonal shape.

3.  Shells are always welcome

holiday votives

In my home, shells are always a part of my coastal decor – including my holiday decorations.  Any natural items are always beautiful to use to decorate.  Tie shells onto votives with scraps of ribbon or raffia, or use a glue gun to attach securely.  I love scallop shells on the votives because the candles gives a wonderful glow through the transluscent shells when lit.  Shells, sand dollars, starfish, sea glass, or even mini red and white bobbers clipped onto a Christmas ribbon – in keeping with a coastal theme – are great items to use!

4.  It’s a wrap

holiday votives

Any scraps of fabric can be wrapped around or decoupaged onto the votive.  I love to use burlap, because the candle glow comes through the loose weave of the fabric.  I like to tie a piece of burlap with a ribbon and then glue on a small piece of linen stamped with a holiday word.  (Try stamping  ‘ho’ on three separate votives to group together!)  These can also be utilized as place cards or menu cards.

5.  Christmas icons

holiday votives

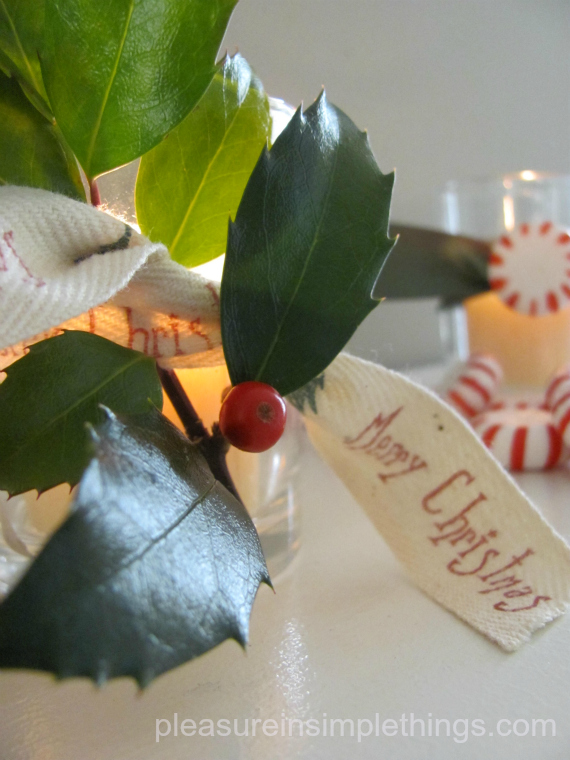
What item instantly makes you think of the holidays?  A candy cane?  There are so many icons that can be utilized to give an instant holiday feel…think red & white or ribbon candy, a jingle bell, or a holly sprig.  These are all items that will give a votive an instant holiday transformation.  Grab your holiday favorite, or pick up an inexpensive ornament at a discount store…maybe a red sled, an ice skate, or an angel…either tie with a pretty ribbon or raffia, or glue onto your votive to complete the look.

I happen to celebrate Christmas, but these ideas work just as well no matter what holiday you may celebrate.  Incorporate your own icons and colors into your decor.

I hope you enjoyed these five easy ways to dress up your votives for the holidays…a great way to take pleasure in simple things.  Enjoy!

 Thank you so much for stopping by, Jackie
I am sharing at Craftberry Bush…check it out!

2 comments

taken for granite

November 23, 2012

taken for granite

This week’s Friday field trip is a visit to another gift shop.  Unlike last week’s, this shop is one of my frequent destinations.  Since today is “black Friday”, it seems appropriate to share a visit to my very favorite gift shopping location.

Today, we are visiting Taken for Granite in Stony Creek, CT.

taken for granite jewlery

A wonderful sensory experience at any time of year, the shop pulls out all the stops for the holiday season.

Our visit is during this year’s holiday open house – the first night of the weekend event.  The open house is the start of the magnificent display of holiday gift items offered for sale.

What really sets a gift shop apart from the rest?  To not only offer wonderful items and to present them in a lovely way – but, to provide extraordinary gift wrapping.  In this area, any shop would be hard-pressed to compare to the artful wrapping provided by Taken for Granite.  Each year, new wrapping designs are created that are a gift in themselves.

A photo of a package with one of the exquisite wrapping designs included when purchasing a gift at Taken for Granite – one of the reasons it makes a wonderful spot for holiday shopping.


Visiting in the evening provides an extra feeling of holiday magic since the outdoor patio and nearby shed are given a dose of decorating and lights…complete with a roaring fire.

taken for granite

You can hear many shoppers planning their holiday gift giving and decorating as they are inspired by all the beautiful displays and decorations throughout the store.  Taken for Granite is as much a source of inspiration for beautiful and unique holiday decor as it is a source for wonderful gifts.

taken for granite

A selection of refreshments offered in the quaint outdoor shed at the Taken for Granite holiday open house.


taken for granite

I hope you enjoyed your visit to Taken for Granite.  If you live in Connecticut or plan to be visiting, try to include a trip to this lovely, coastal inspired gift shop located outside New Haven.

Thank you for visiting.  Remember to take pleasure in simple things, Jackie 
2 comments

individual brownie mousse tortes

November 20, 2012

Don’t you think desserts look so much more elegant as single servings?  I think so.  That is the reason I purchased a cheesecake pan (with removable bottoms) that bakes up a dozen mini cheesecakes at a time.  I was thrilled the first time I used it and created a dozen salted caramel cheesecakes.  Yes, the pan was a pain to clean…especially the twelve little removable bottoms!…but, I thought so worth it!  I decided recently to try out the pan again.  This time, I adapted a favorite brownie torte recipe my friend Tracy gave me over (I guess I won’t say how many) years ago!

I was able to perfect a recipe after a couple tries and the results were fantastic.  With the holidays upon us, it is the perfect decadent dessert to impress your guests.

The tricky part is definitely the baking time.  Obviously, the baking time is reduced for a small single serving dessert when the original recipe is for a full-sized torte.  In this instance, there are two layers.  The bottom layer is basically a brownie and the top layer is a chocolate mousse.

brownie mousse torte

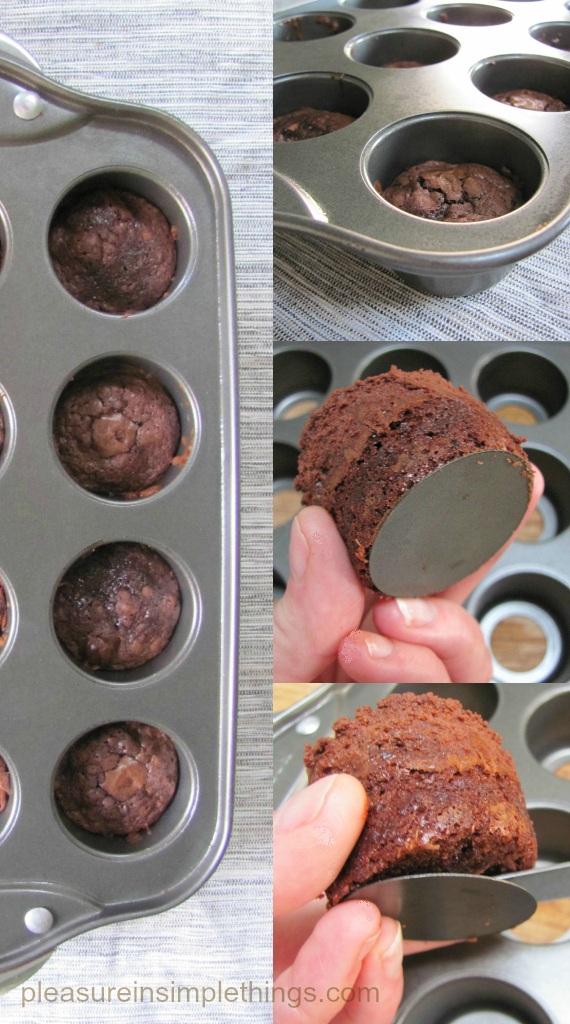
First, prepare a brownie recipe – either your own or a box.  I like to prepare mine from scratch, but sometimes it is so much less expensive to buy a boxed mix, it is hard to resist!  The only thing I changed was to add two teaspoons of instant espresso and a few mini chocolate chips into the batter.  I filled each compartment a little less than half with brownie mix.  It ended up being about half the usual cooking time – a total of 18 minutes.  You will have to watch carefully.  The first batch I made, I filled the compartments half way and found after they cooked there was not enough space left for the mousse.  This was easily corrected (but time consuming) by taking each torte out and slicing it to create a thinner bottom layer.  The second batch, I knew not to put very much batter in each section.  I had quite a bit of batter left, so I cooked the remainder in a muffin tin to cook and eat as brownies.

browniemoussetorte

A photo of individual brownie mousse torte.

After the brownies cooled completely, I made a mousse and filled over each brownie to the top of the compartment with the mousse.  After this step, I garnished each dessert, by melting 1/2 oz. of baking chocolate and drizzling over the top of each torte.  Then, the pan was put into the fridge to set.

Chocolate Mousse Recipe (for top layer)

  • 1 & 1/2 cups semi-sweet chocolate chips
  • 1 oz. unsweetened baking chocolate
  • 1 tsp. instant coffee or espresso powder
  • 1/4 cup water
  • 2 Tbsp. butter
  • 1 cup whipping cream

In a small saucepan, combine chocolate chips, 1 oz. unsweetened chocolate, 1 tsp. instant coffee, 1/4 cup water and 2 Tbsp. butter.  Cook over low heat, stirring constantly, until mixture is smooth.  In small bowl, beat whipping cream until soft peaks form.  Fold warm chocolate mixture gently into whipped cream. 

When you are ready to plate the desserts, carefully remove each one by pushing from the bottom carefully….if there is any sticking, you may need to loosen the outer edge with a dull knife.  My pan is made of a nonstick surface and I didn’t have any trouble getting the desserts out of the pan.  The bottom ring of each compartment of the pan needs to be removed by slipping a knife carefully underneath each one.

It may take a little extra work to make the torte in individual portions, but I think it is well worth the result.

I hope you will try these indivdual brownie mousse tortes for your holiday table.

Thanks for visiting.  Have a blessed Thanksgiving… and, remember to take pleasure in simple things, Jackie

3 comments

an enchanted holiday shop

November 16, 2012

christmas shop at maynard greenhouse

The Christmas Shop at Maynard Greenhouse in Old Saybrook is the destination for this week’s Friday field trip.  This trip was actually planned last summer.  Last summer was when I first heard about a garden shop in Old Saybrook that transfomed into a Christmas shop each year at holiday time.  It surprised me that I had not heard of the store, considering I travel to both garden shops AND Christmas shops all over Connecticut.

Intrigued, I made a note on my November 2012 calendar to make a trip to The Christmas Shop at Maynard Greenhouse.  It turned out the store had not yet opened for the season on the day a friend and I scheduled our trip to the shop.  Even so, the owner was gracious enough to let us in the store when we arrived…as she worked on getting it ready for the opening.

the christmas shop at maynard greenhouse

Even though the holiday display was not yet completed, it was obvious the shop was enchanting…a beautiful collection of gift items, holiday ornaments, paper and ribbon products, and even some antiques.

Of course, I particularly loved the corner where some coastal inspired ornaments were displayed!

the christmas shop at maynard greenhouse

There were so many items we really adored in the shop.  Even though we were disappointed we didn’t get to see the displays in their completion, timing the trip as we did unkowingly gave us some time to share in conversation with the shop owner…it made for a very enjoyable shopping experience…

the christmas shop at maynard greenhouse

the christmas shop at maynard greenhouse

It also made it imperative that we schedule another excursion to the shop!

the christmas shop at maynard greenhouse


the christmas shop at maynard greenhouse

I hope you enjoy these photos from my visit…enough to get anyone in the holiday spirit!

the christmas shop at maynard greenhouse

A selection of enchanting holiday items on display at The Christmas Shop at Maynard Greenhouse in Old Saybrook, CT.


My favorite spot!

the christmas shop at maynard greenhouse


the christmas shop at maynard greenhouse


the christmas shop at maynard greenhouse

Hope you enjoyed today’s visit to The Christmas Shop at Maynard Greenhouse .

Thank you so much for joining me on this week’s Friday field trip.  Remember to take pleasure in simple things.  Have a great weekend,  Jackie

5 comments

diy ornament from ikea heart

November 13, 2012

diy ornament

I found this three pack of glass heart ornaments at IKEA for $5.99.  Boy, did that get my holiday spirit in full swing!  It was tough to limit myself to one package…but,  I did.  My initial intent was to monogram an initial on the front…very simple, very elegant.  But, I ended up changing my mind as I got going.

ikea ornament

First off, I removed the ribbons – red and white gingham is just not my thing… I decided to use some scraps of paper I had with some (French?) writing…it seemed romantic and the perfect thing to combine with a heart.  I cut the paper to the size of the heart.  I then brushed Mod Podge on the right side of the paper and adhered it to the glass.  When it dried, I wrote my (romantic) message on the back with a super fine permanent marker and brushed Mod Podge over it to protect it.

diy ornament

Next, I embellished the heart with a little key and some sparkle.  There are many ways to go with decorative touches, but I thought the key went so well with the heart and the romantic theme.  I used old twine to tie the key onto the ornament and used my glue gun to add a little piece of glittery twig.

diy ornament

A photo of my completed ornament crafted from an IKEA glass heart ornament.

Lastly, I tied on my own piece of ribbon to replace the gingham.  I have plenty of various ribbons, but I really liked the look of the seam binding…it is actually white seam binding that I had coffee stained to look less white and more ‘antiquey’.  That’s it!

diy ornament

For the second heart, I also decided to use paper with script writing.  For the third, I used an old book page that I first rubber stamped with a crown.

diy ornament


diy ornament

There are so many ways to adorn these beautiful (and affordable!) glass hearts, and making ornaments is a great way to use scraps of paper and ribbon you may have left over from other projects.  Nostalgic black and white photographs would also work really well.  Wouldn’t these ornaments also make great shower or wedding favors?  Or, to give as a great ‘first home’ or ‘first holiday together’ ornament?

diy ornament

This is just one of the many ways to use this item…and there are many more great items for holiday gift creations at IKEA.  I have a few more IKEA projects in mind.  If you live near an IKEA, I suggest a trip…it will definitely spark some creative ideas!  I hope you enjoyed this ornament diy.  This is my first official ornament creation for 2012!

diy ornament

Thanks so much for visiting!  Take pleasure in simple things, Jackie

3 comments

counting our blessings

November 9, 2012


Today’s Friday field trip is my first social gathering outside my house since Sandy hit.  I was invited to have lunch at a friend’s house with a group of women.  Of course, our conversation started by discussing the horific week we had been through…our coastal state being hit hard…many still suffering from loss of homes and; even life.  So heartbreaking.  We all felt truly lucky knowing that a loss of power and water and some fallen trees was a small inconvenience compared with what so many of our friends and family had endured.  What we soon discovered, was that we were all able to tell of  wonderful accounts of people we knew coming together to help each other since the storm hit…amazing accounts…everyone finding a way to help in their own way during a time of disaster.


tulips


It was hard to believe we were able to enjoy such a calm, relaxing afternoon after the week of turmoil caused by Hurricane Sandy.  The afternoon turned into a time of reflection on how to help those we know…and a time to reflect on how thankful we all are for the blessings in our life.  So, as we sat enjoying each other’s company and our surroundings, we also realized that this time of tragedy put a sharp focus on what is important in life.  It gives us a strong reason to go forward in the best way we can.  Being together on this afternoon was the perfect way to spend the day…


And, the perfect time to remember to take pleasure in simple things.  Sincere prayers to all affected by Sandy.


If you would like to help with Sandy Relief and your way to help is through a monetary donation, consider texting a $10. donation to the Red Cross…it’s easy to do!

Text REDCROSS to 90999 to give $10 to American Red Cross Disaster Relief, which helps people affected by disasters such as hurricanes, floods, earthquakes, wildfires and tornadoes.


Thanks for visiting, Jackie

3 comments

3 quick tips for organizing holiday wrapping

November 6, 2012

organize ribbons with a hanger

Can you believe it is already November? November for me signals getting my holiday plans in order. I start making and buying holiday gifts as early as June, and when November approaches I like to think I am pretty well organized. One thing I take stock in as soon as November hits is my holiday wrapping. Traditionally, I like to wrap everything on Thanksgiving weekend – so that means when November rolls around I need to have all my wrapping necessities in order! Working full time makes being organized, particularly around the holidays, a must! While everyone else is shopping the day after Thanksgiving, I am enjoying my wrapping (I love wrapping gifts!)

Then I can spend the height of the holiday season soaking in the season and working on handcrafted items and decorations instead of stressing!

I thought I would share with you the three organizing tips I find most important to prepare for holiday gift wrapping. They have worked so well for me.

The first thing I do is organize my ribbons. I like to use a hanger to keep all the ribbons in order and I organize by color families. I always use natural tones in my wrapping. It makes it much easier if you limit yourself to a color family…that way, you can buy pretty ribbons you may see any time during the year, knowing they will play into your theme. I have been collecting coastal themed ornaments my whole life and I always decorate with whites and natural tones. Each year I may pick an accent color – like turquoise, burgandy, or lime green – and add some accents, just to change things up a little. Brown kraft paper is always a staple for me as are brown kraft handled gift bags that may be painted or decorated in some way, and assorted shells and natural items.


The second thing I do is to put any package tie-ons, gift cards, shells, etc. into a hanging shoe holder with clear pockets. This makes it really easy to see what I have that I can use or what I may need to pick up. Having everything laid out in front of me makes it so much easier when I start my wrapping.


The third, and definitely the most important organizing tip for me for holiday wrapping, is to color-code the gifts for my family. I pick a color scheme for each person and wrap all their corresponding gifts appropriately. Even little items inside the Christmas stockings are wrapped in the appropriate color scheme. This makes things so easy. Items can be wrapped the second they are purchased (to prevent snooping!) and there is never any question as to who the package belongs to. When it comes time to put the gifts by our tree, I simply group them by the wrapping and add some last minute embellishments…each person has their own decor! You can choose a favorite color, school colors, etc. This system really works great. Because I have been using this system for so many years, I usually pick the color or theme for each family member the year before when I find an inspirational wrapping item I really love on an after-holiday sale rack.

I hope you enjoyed these three quick and easy ways to get your holiday gift wrapping items organized.

Let the wrapping begin!

Thanks for visiting, Jackie

4 comments

Back to top