
There certainly are an infinite number of ways to decorate homemade tree ornaments. The best thing about making some is tailoring them to individual taste and décor!
I recently saw a box of clear glass ornaments on clearance at the craft store and decorating them to my taste and décor was my exact plan. Actually, the box of ornaments was the only holiday item left in the whole Christmas section of the store on the day I stopped in! People definitely were shopping earlier this year!
I had to purchase the box because it ended up costing less than $2. after the sale price and with a coupon! Since a snow storm was predicted for Connecticut, I thought coming up with four ornament designs would be a good indoor project while housebound.
And, as a special fun holiday countdown, I am posting the four DIY ornament designs I came up with as a four- day countdown! For today and the next three days, I will put up a post each day on how I created one of the four ornaments I designed from the plain glass balls! Today marks day number one of four.
The first design I created uses a paint marker to decorate one of the clear glass ornaments. (Remember my pussy willow ornament from years ago? Click here for easy DIY instructions. That post also shared how to fill a glass ornament to create a cute book club themed ornament.)
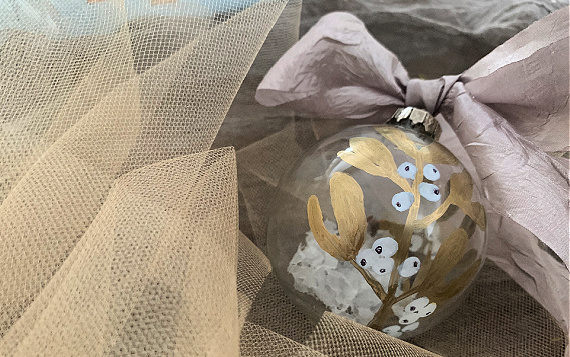
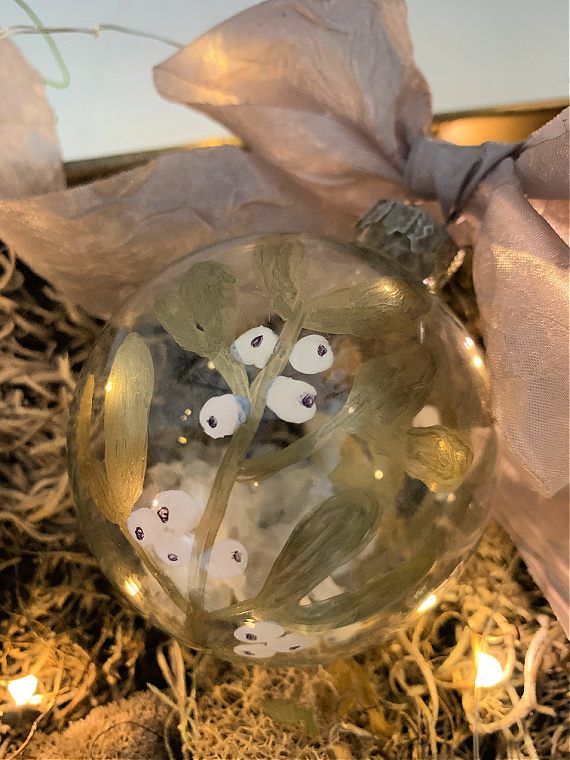
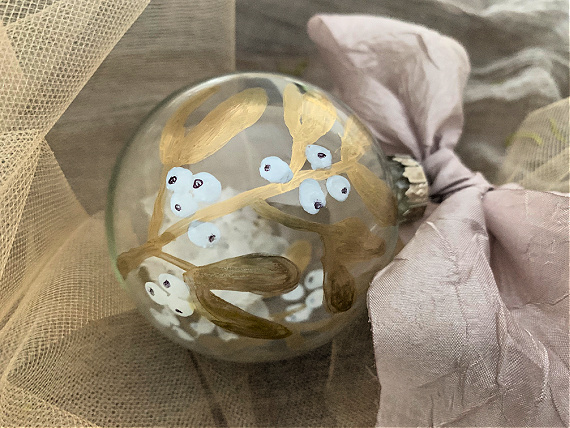
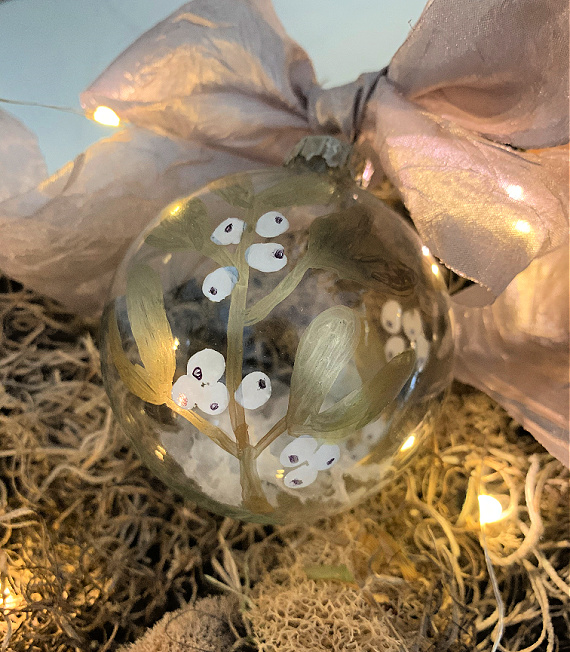
I am calling the design I created for the first ornament ‘snowberries.’ I simply drew some ‘stems’ with a gold paint marker. Then, I used a white paint marker to add white circles. To make a suggestion of berries, I used a black permanent marker to add a little bit of definition to each white circle or ‘berry’.
To finish it off, I just put a little bit of ‘snow’ inside the ornament…just a little…keeping the clear look, but suggesting a little iciness with the added snow!
That’s it! Pretty simple!
One thing I did in advance was to spray the top of the ornament. I didn’t like the look of the original silver top so I removed the top and sprayed it a champagne gold and let it dry before replacing it.
I hope you were inspired by ornament number one! Check back tomorrow for ornament DIY number two!
Thanks for stopping by!
Remember to take pleasure in simple things, Jackie