Subscribe to Pleasure in Simple Things via RSS ReaderFollow Pleasure in Simple Things on InstagramFollow @InSimpleThings on TwitterLike Pleasure In Simple Things on FacebookFollow Pleasure In Simple Things on PinterestEmail Jackie

Tag: diy


coat closet to pantry diy

14
April

pantry shelf

I have a small coat closet off my kitchen that I hadn’t opened all winter.  Not because I don’t have coats.  Believe me, I have tons of coats!  But I wore the same warmest, longest winter parka I have for the entire winter and there had been no room for switching it up!

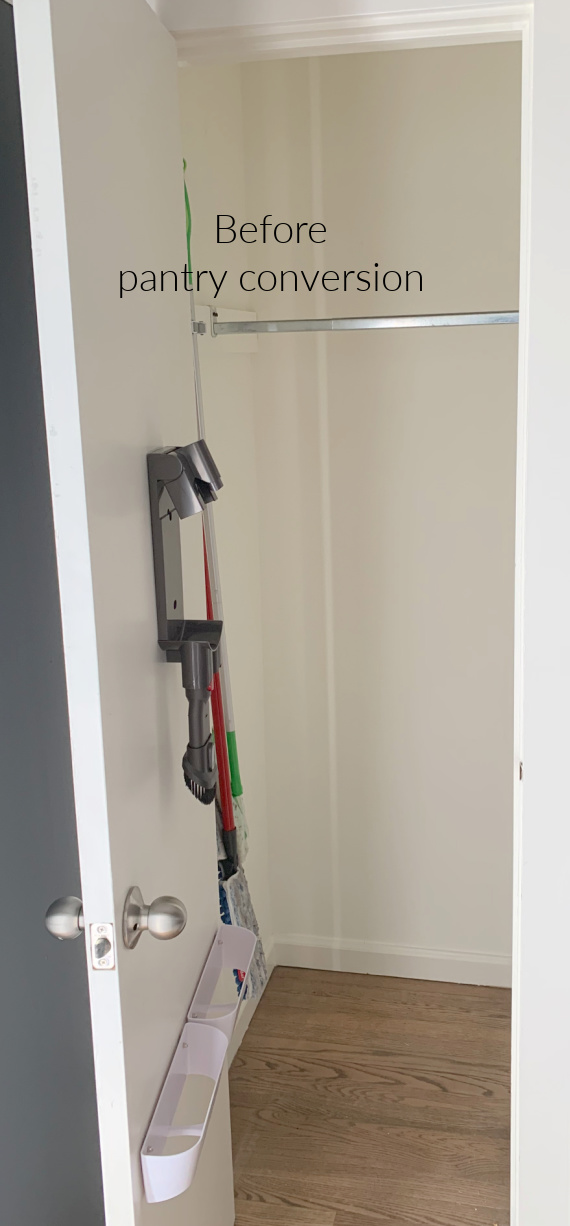
before pantry conversion

Every time I looked at the closet, I thought about what a waste of space it was.  One day I was just fed up with that closet and I took out every last coat and piled them up on my couch.  I looked at the empty closet and got so excited about the possibilities!  The only thing left in the closet was a single shelf and the bar where the coats had hung.  My first inclination was to remove the bar and fill the closet with shelves.  But, when I started thinking about what would be most convenient to store in the closet, I changed my mind.

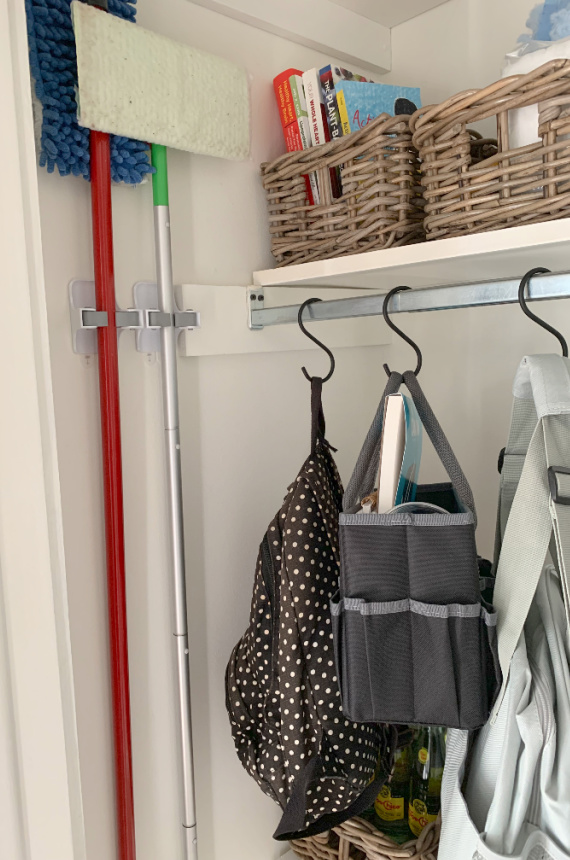
What would be great to have in that closet?  My lunch bag and a couple other bags I use on a regular basis for starters.  Well, those things would be great to hang on the existing bar!  I decided to use S hooks (Which I happen to LOVE for organizing – it’s how I hang all my jeans in my closet!) to hang these items on the bar.

closet redo

pantry conversion

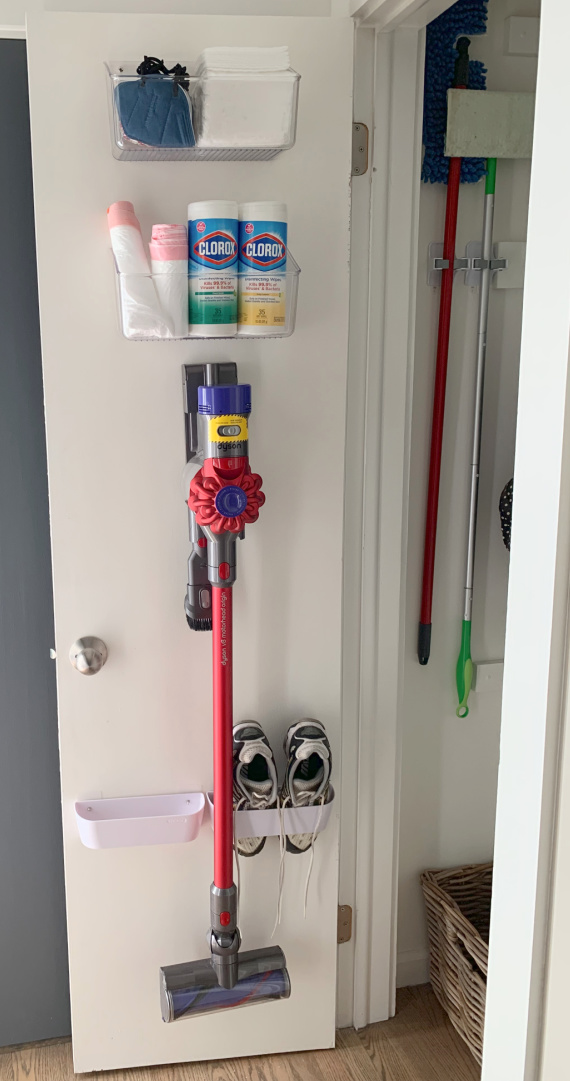
What else would be handy?  Definitely some cleaning products – mops and my Dyson.  So, I added mop holders first off and also mounted my Dyson to the inside of the door.  After mounting the Dyson, I examined the inside of the door and I saw more available space.  Next, I added a really cool rack I found on Amazon to store a couple pair of exercise shoes that usually lived on my kitchen floor.

closet door shoe storage

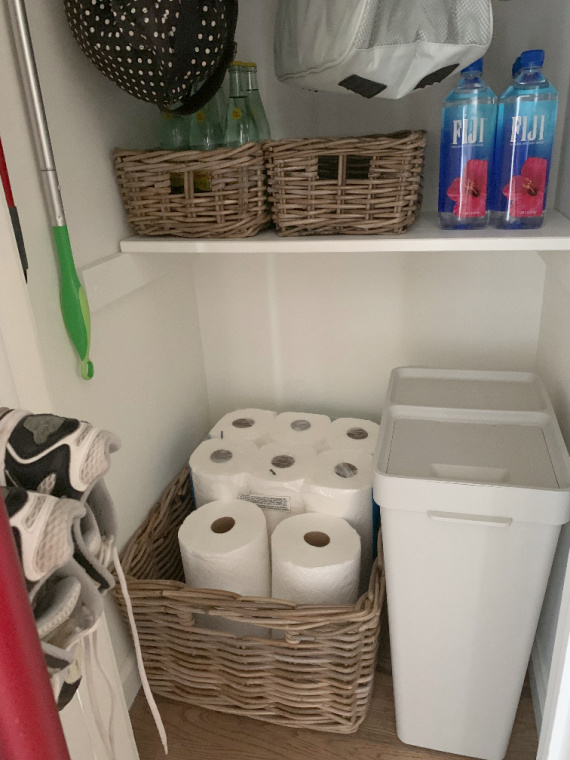
This closet already felt like heaven!  Next, I needed a place to put returnable cans.  Presently, I was hanging a plastic bag on the closet door handle for this purpose and it just had to go!  I bought a waste bin that fit nicely inside the closet to throw my empty cans and water bottles until I returned them to the store.

new pantry floor

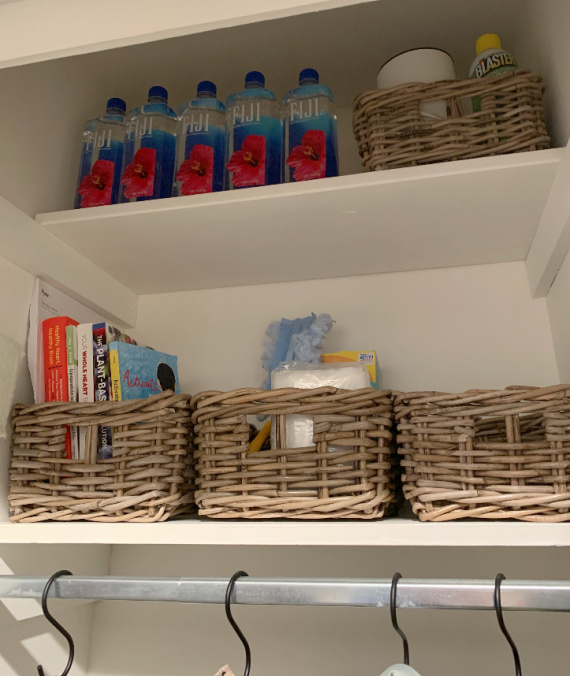
This closet was everything already!  And, I still had some room!  I put a large basket on the floor and decided to keep the shelf that existed in the closet; adding two more.  I used my favorite IKEA baskets (Byholma) on the shelves to store some health books and cleaning products.

My son cut some wood for my two added shelves and I painted them the same as the rest of the closet (BM Simply White).

I added a hook for that one coat I wear all winter and a couple of bins to the inside of the door – I wanted to utilize every bit of space.

closet door makeover

Point is – the coat closet wasn’t working for me so I needed to find something that would!  Moral of the story is not to accept what is there just because it is there lol!

Now this closet makes me SO happy!  I use it ALL the time and it is so much more practical as a pantry type closet rather than a coat closet.

What, you ask, happened to all the coats?  I purchased two wardrobes (Brimnes) from IKEA for storing the coats and that is where they stay until the rare occasions they are needed!

I hope I have inspired you to rethink/rework some of your space!

Thanks for stopping by!

Have a great weekend and remember to take pleasure in simple things, Jackie

Comments Off on coat closet to pantry diy | diy

easy diy gingerbread gift wrap

2
December

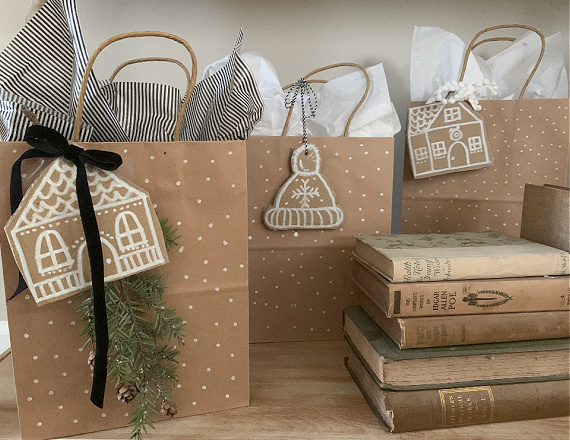
gingerbread giftwrap diy

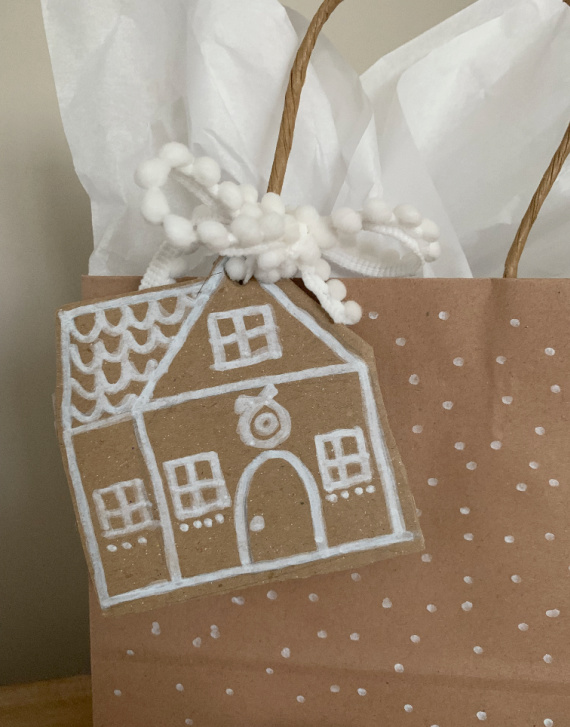
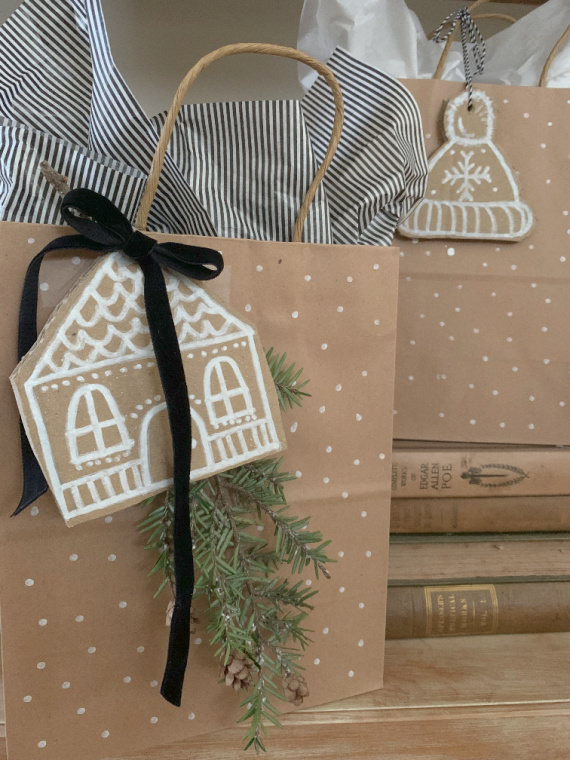
Hi!  I know it has been a minute…but, I’m happy today to have some time to show you a really simple, very low-cost way to wrap your holiday packages!  These DIY gingerbread gift tags are made from discarded cardboard and a marker!  So easy!

diy gingerbread giftwrap

If you don’t already have a white, oil-based marker or a white permanent chalkboard marker, purchase one from the craft store to complete this project.  If you want to make coordinating wrapping paper, purchasing kraft paper is not necessary – brown bags work just as well!  (Note:  Trader Joe’s holiday shopping bags work great since they already have a gingerbread house design on brown paper bags!)

neutral christmas

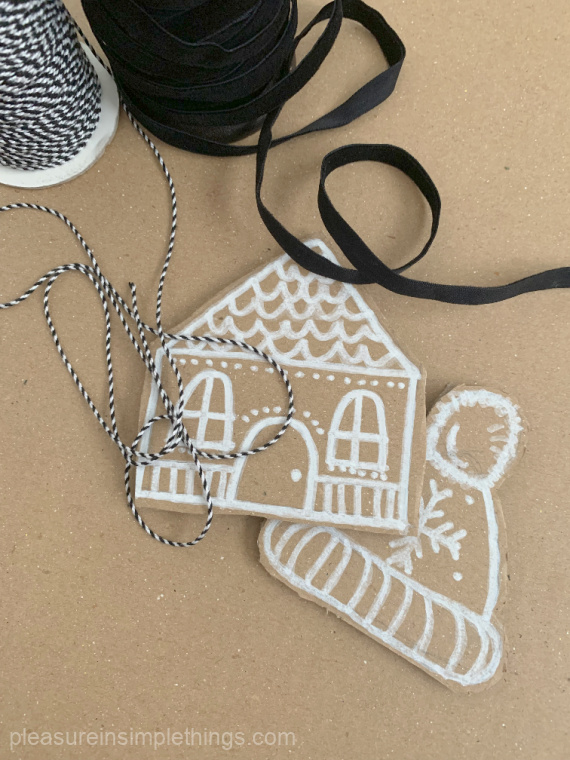
A pencil can be used to draw some basic shapes onto corrugated cardboard.  (There is certainly plenty of this around with all the holiday deliveries rolling in!)  Then, draw the shapes onto the cardboard using a white, oil-based marker and decorate them as you would gingerbread – except use a marker instead of royal icing!

easy diy holiday tags

When the drawings are completed, cut out the shapes and add a hole in the top for hanging.  Simple!

gingerbread house gift tag

To coordinate gift bags, just use the same white marker to add a blizzard of ‘snowflake’ dots.

Isn’t this a great project to do with children?  All their original drawings can easily be transformed into gingerbread gift tags!

holiday giftbag diy

Thanks for stopping by!  Have a great weekend!

Remember to take pleasure in simple things, Jackie
1 comment » | diy, holiday

diy aussiedoodle canvas bag

11
March

aussiedoodle bag

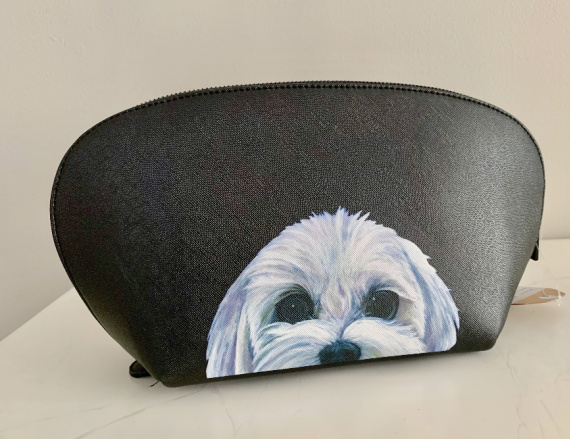
I recently spied a canvas bag with a puppy pattern on a holiday clearance table in a gift shop.  I thought it was adorable and wished it was an Aussiedoodle instead of the breed pictured on the canvas since my fave puppy in life happens to be an Aussiedoodle!

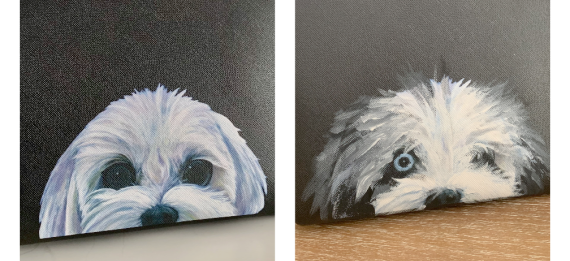
Then I started thinking – even if I found a bag with an Aussiedoodle pictured, it probably wouldn’t be a blue merle (his coloring) with one blue eye like my buddy Goose!

dog pouch

So, I decided to buy the bag I saw on sale and modify it to resemble my friend Goose!

acrylic paints

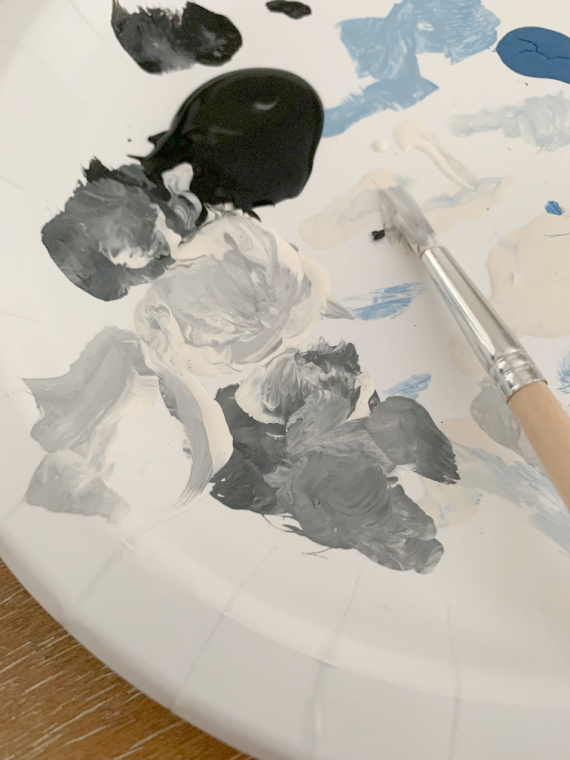
I just used some acrylic paint and revised the image on the canvas.  Now the bag reminds me of my buddy!

before and after puppy bag

Just goes to show that inspiration is everywhere!

goose on the couch


Thanks for stopping by!  Have a great weekend!

Remember to take pleasure in simple things, Jackie
 

1 comment » | diy, inspiration

diy bunny topped jars

4
March

diy ceramic bunny jars

Today I have another easy DIY Target bargain bin Easter project!

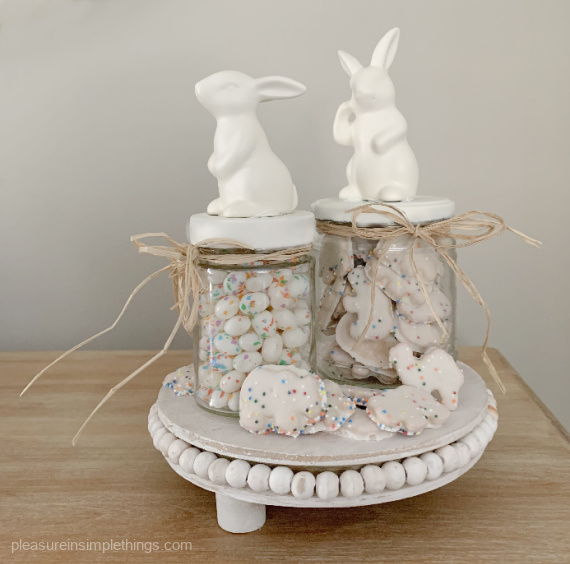
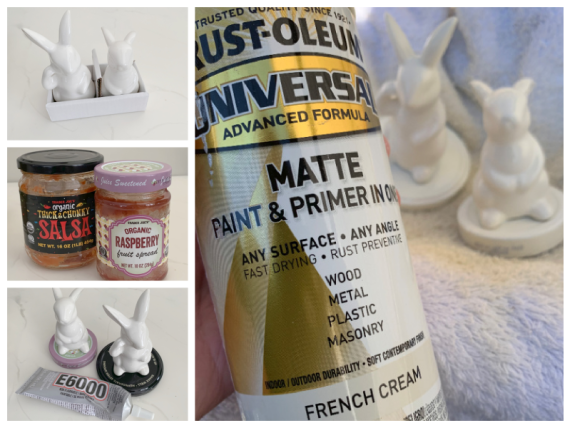
You may remember this squirrel topped jar project (click here).  Well, today I have an Easter version using bunnies!  The bunnies are ceramic and I found them in the Target bargain bin.  When I saw them, I knew instantly I wanted to use them on jar tops so I went straight to the Easter candy section to decide what I would use to fill the jars.

Inspired by walking through all the seasonal aisles, I thought a ‘funfetti’ theme would be cool!  Target had some ‘funfetti’ jellybeans.  I picked those up and then I went over to the cookie aisle and found some iced circus cookies that would also be great with my theme!

I would get the jars I needed for my project from my recycling bin.

collage of DIY

The first step of the project is to prepare the jars.  Usually, labels come off easily after being soaked in hot water.  Any stubborn adhesive usually comes off with acetone (or nail polish remover).  After the jars are delabeled and washed, I prepare the bunnies.  This just requires a little sand paper (or emery board) to roughen up the bottom surface of each bunny.  This makes for a better adhesion to the jar tops.

diy bunny jars

I use a really strong adhesive called E6000 because I happen to have it on hand, but I am sure a glue gun would work as well.  I am very careful to follow the directions on the E6000 label because there are a lot of warnings associated with this product!

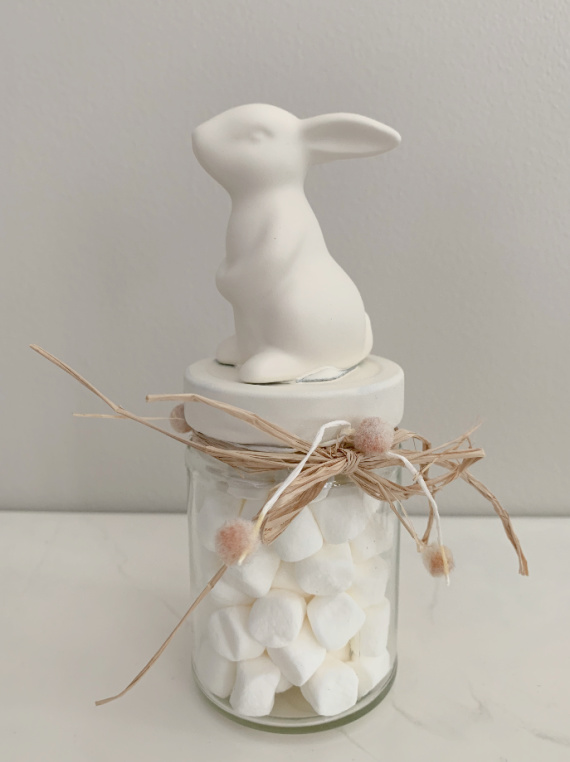
After the adhesive is totally dry, the bunny-clad jar tops can be spray painted the color of choice.  I chose my favorite off-white color since I think it goes best with the theme I chose.  And, even though the original bunnies have a shiny surface, I prefer a matte finish.

diy bunny jar

An easy project, right?  And there are so many variations possible based on favorite candy, color, theme, etc.!  I made a couple variations to show you some possibilities – but, they really are endless!

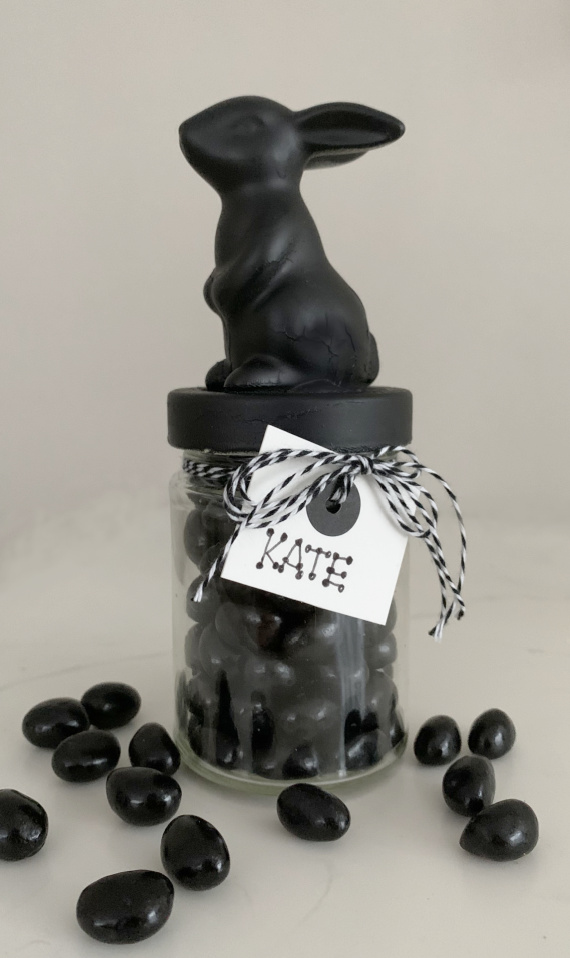
black jelly bean lover

Isn’t there always one that loves black jelly beans? I used leftover chalkboard paint for this one.

Use spray paint left from other projects like I did or purchase some from a building supply or craft store.

bunny tail jar

Certainly, the jars don’t need to be filled with sugary snacks – these contain carrot and celery sticks!  (These bunnies are painted in a glossy finish.) Or, how about using raisins as ‘bunny poop’?

healthful bunny jars

In my family on Easter, we always have a guess at how many candies are in a candy-filled jar and the winner gets the jar of candy!  You may want to incorporate the same idea into your holiday traditions and make a cute jar to go with it!

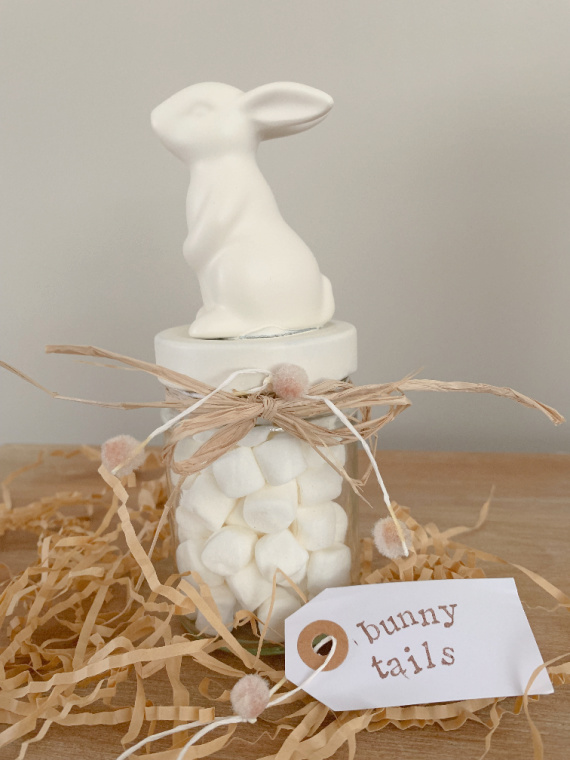
jar of bunny tails

I hope you are inspired to create your own bunny jars!

Thanks for stopping by!

Remember to take pleasure in simple things, Jackie

1 comment » | diy, holiday

sweater weather decor

3
December

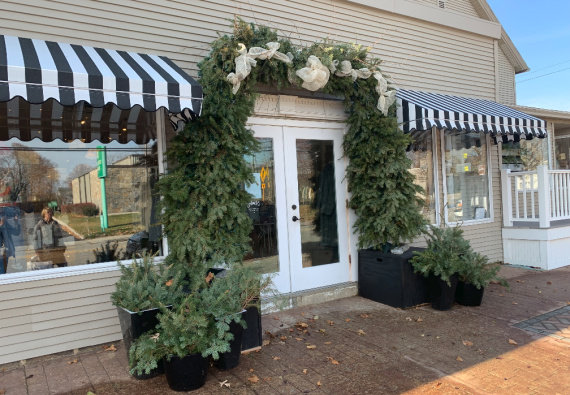
storefront

One of the great things about spending some time visiting favorite stores at the holidays is picking up some decor inspiration.

I have a quick DIY to share with you from a visit to one of my fave gift shops.

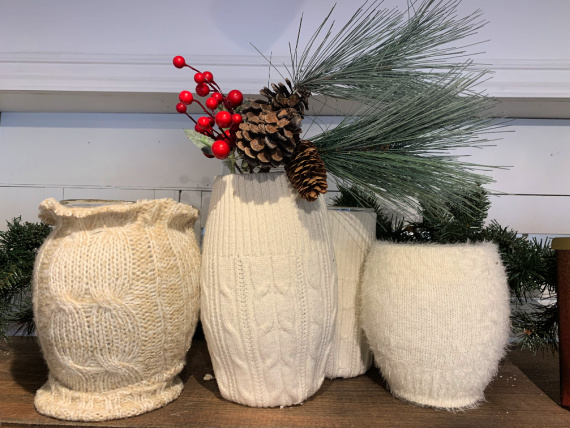
sweater vase closeup

Out and about on a recent shopping excursion, I saw these vases at Grace in Niantic, Connecticut all wrapped up in ‘sweaters.’  So cute, right?

What a great way to turn any old, boring clear vases (the ones that come from the delivered floral arrangements) into fun seasonal elements!

And even if you don’t have any old sweaters or clear vases laying around – they are the perfect items to thrift!

sweater vases

Love this!  Use sweaters that best match your decor.  Check out my creations in upcoming Instagram stories!

Happy crafting!  Thanks for stopping by!

Remember to take pleasure in simple things, Jackie

Comments Off on sweater weather decor | diy, holiday, inspiration

mini cloche diy

5
November

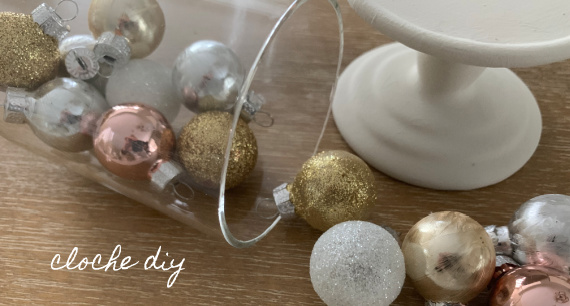
diy cloche

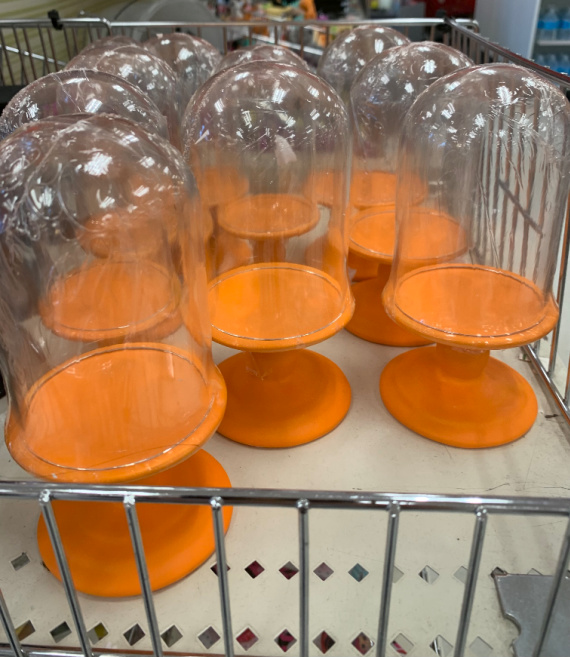
This is one of those super easy, super satisfying DIYs!  I happen to see these great mini cloches in the Target bargain section.  And, they weren’t made of plastic – they were ceramic with glass domes!  I was so in love with them, but, of course, not in love with the color!

target cloche

I knew it would be super easy to fix them up by simply painting them with chalk paint!  What an easy transformation!

halloween cloche

And, they will be super for Christmas!  Since I don’t yet have my Christmas decorations out, I purchased an ornament at Walmart for $1.98 just so I could use the ‘guts’ of it to give you an example of a Christmas themed mini dome!

collage diy cloche

mini winter cloche

There you go!  And they will look super displaying some of my little bottle brush trees!  Everything looks better in a cloche!

Thanks for stopping by!  Here’s to some great finds in the Target bargain bin!

Have a fabulous weekend and remember to take pleasure in simple things, Jackie
Comments Off on mini cloche diy | diy, style

pumpkins with natural style

22
October

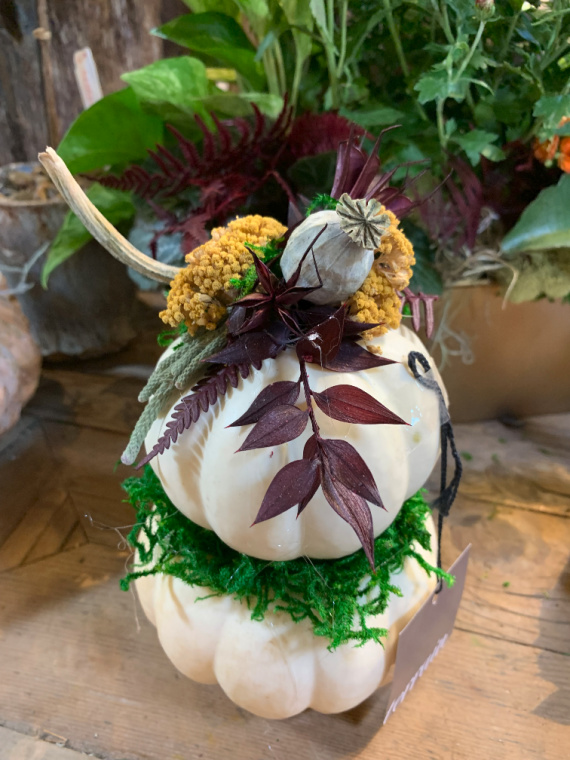
stacked pumpkins with dried

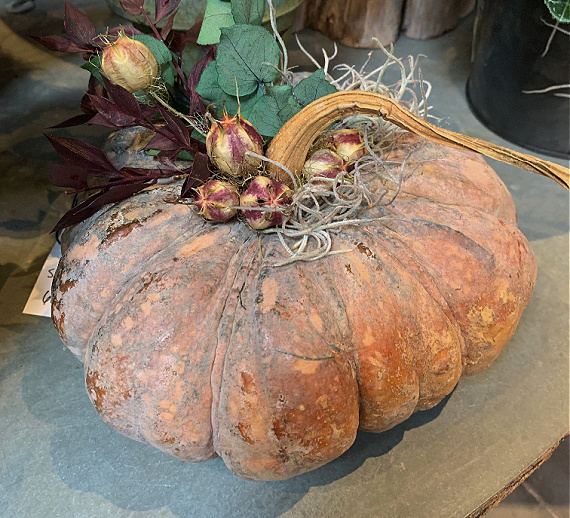
At Terrain recently, I couldn’t help but admire some of the pumpkins adorned with natural elements.  They reminded me of some pumpkins I decorated with found materials last year.  You can see those by clicking here.

heirloom pumpkin with dried

I thought you may be inspired by the ones I saw at Terrain.  I especially like the decorated heirloom pumpkins!

decorated heirloom pumpkin

white pumpkins with dried flowers

I hope these photos will get you started on decorating some of your own!

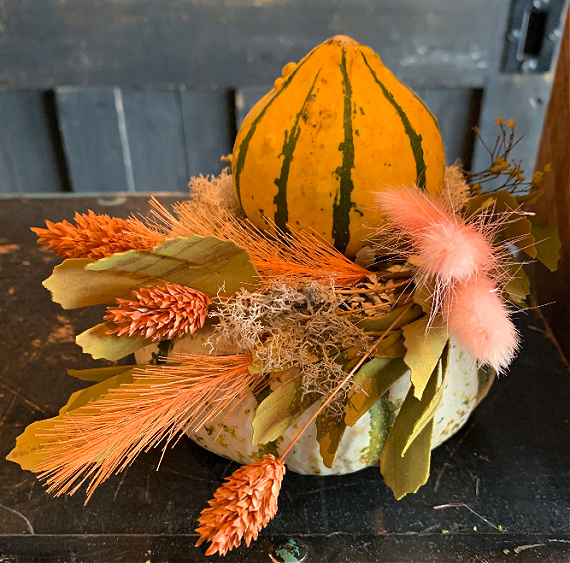
decorated gourds

Enjoy!

dried flower pumpkin

Have a fabulous weekend and remember to take pleasure in simple things, Jackie

Comments Off on pumpkins with natural style | diy, inspiration, style

diy oyster shell garland

27
August

home made shell garland

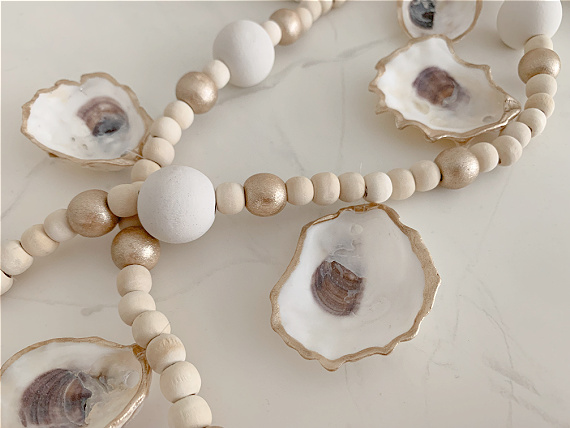
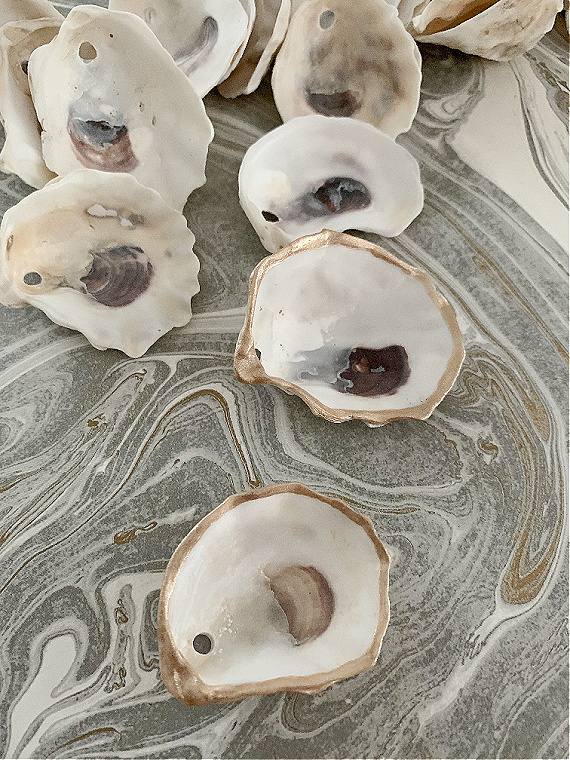
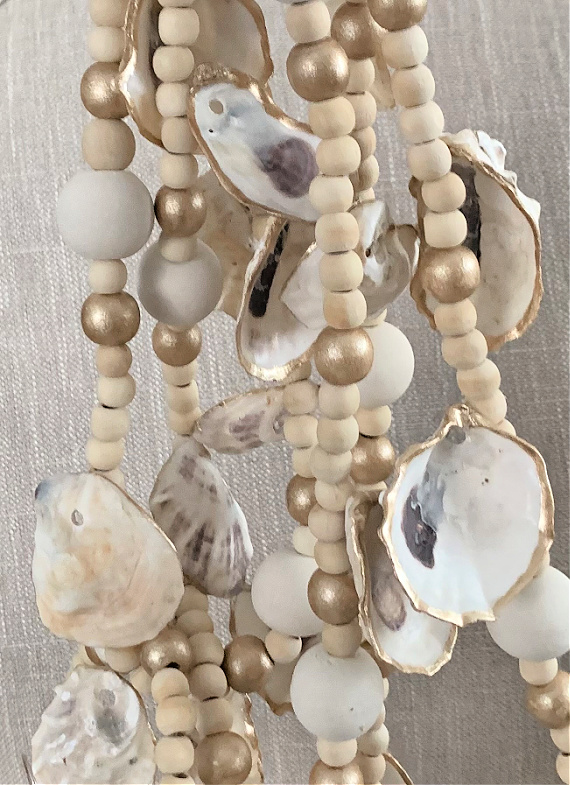
Painting or decoupaging shells is fun, but a shell in its natural state is a thing of real beauty.  I’m getting a jump on the holidays by putting together a garland of natural oyster shells. I did add a little paint – some golden highlights along the edge of the shells.  A holiday garland needs a little sparkle!

I started by collecting a bunch of oyster shells all around the same size – about 2”.  This is a very easy size oyster shell to find on my town beach so I picked a few up every time I’d walk at the beach.  I rinsed them off but they didn’t really require any additional cleaning – the ocean did that for me!

gold edged shells

On a rainy day, I spent some time drilling a hole in each shell.  I used a masonry bit to make a hole in each shell in the center, about a ½ inch from the top.  This is super easy to do by putting each shell, one at a time, into a vice to hold it still while drilling.  It only takes a few seconds to make each hole.   This way, there are no accidents if the drill slips – it may take a little longer, but safety first!  I also wear eye protection.

drying painted beads

I estimated I would need a couple dozen shells for this project.  I could always go back and get more if I decide I needed them.  I intend to use the garland on my fireplace mantel, and I thought a couple dozen would be a good number since I wanted to string them between natural wood beads.  My plan was to alternate the shells with the beads on some fishing line.  (By the way, fishing line is a must have for decorating – it blows string, thread, twine etc. away in the strength department.  I use it so much in my decorating – particularly at the holidays and it has been invaluable setting up store displays.  I learned this very young because my dad was a boat owner and also an avid fisherman – there was always fishing line handy in our garage!  The larger the number or ‘test’, the stronger the line.  The number indicates how many pounds of a fish the line can hold before breaking!)

shells and beads

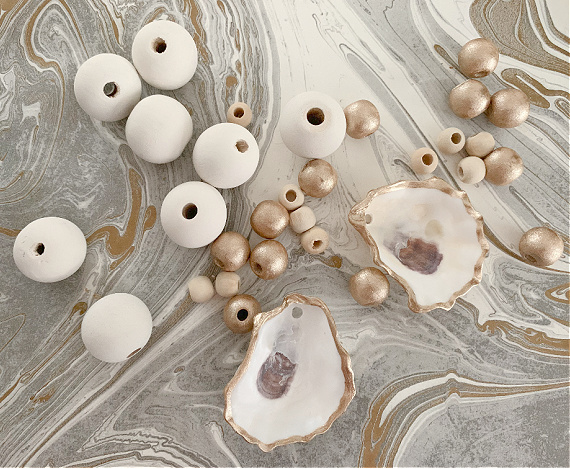
I purchased some wooden beads in 3 sizes.  I decided on a pattern for my garland in advance by laying out the shells and the beads on a table and deciding what looked best.

Next, I added a little holiday bling!  Using a champagne gold metallic paint and a thin paint brush, I painted a thin gold edge around the perimeter of each shell.  Aren’t they beautiful?  One of these shells would look gorgeous mounted in a shadow box frame!

shell garland title

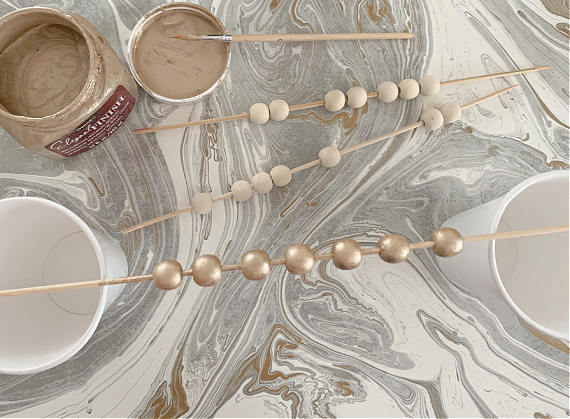
Next, with the assistance of some skewers and some paper cups, I painted some of the wooden beads with the same gold paint I used on the shells.

I decided to white wash the largest size bead.  I did this in the same way I painted the gold beads, but I used a 50/50 white paint/water mix.

vertical hanging oyster garland

After all the beads were dry, I strung them in my decided upon pattern onto the fishing line.  The shells would be tied on last.  I didn’t want more than one hole in each shell – if I strung them with a single hole they would not hang the way I wanted – so, I tied each one on with fishing line after the beads were all strung.

A very easy project, but oh so satisfying!

creating a diy garland from shells

I think I may have a seaside theme to my holidays this year – I’ve been collecting some miniature bottles for another ‘beachy’ project!  Maybe paint a few more oyster shells with added gold script names to use as place cards for the table?  Glue a faux pearl to the inside?

Thanks for stopping by!  Have a fabulous weekend!

Remember to take pleasure in simple things, Jackie
Comments Off on diy oyster shell garland | diy, holiday, sand & sea

brick stencil diy

13
August

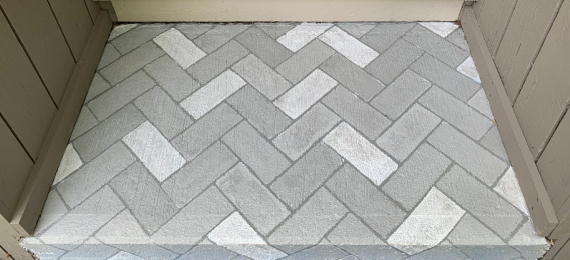
finished brick stencil

I feel like I’ve organized and revamped just about every little nook and cranny in my home over the time of our COVID-19 isolation.  I think spending so much time in the house has motivated a lot of us to get our places organized and looking good!

It got to the point where I really had nothing else I could tackle without investing money (that I didn’t have).

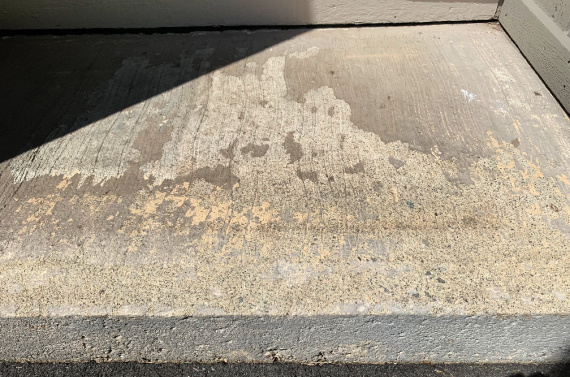
The one thing I started thinking about was the small rectangle (2 ½ x 4 foot) of concrete I had outside one of the house entrances that looked less than appealing to me.  At one point, I had a mason look at it to discuss my idea of covering it with some type of stone to improve its look.  I was discouraged from doing it because of possible drainage issues.  Of course, I didn’t want any water problems, but it still always bothered me to look at that cement!

before concrete

With so many projects completed and nothing in the queue, I decided to revisit that piece of concrete and figure out how to make it look a little better!  I decided I would paint it since it had some worn off paint on it and I wanted to neaten it up.

Instead of using solely a solid color, my plan was to use a stencil to paint a simple brick pattern.  I have stenciled many things, but never concrete.  I was willing to give it a try.  I figured it couldn’t look much worse than it already did and most of the finished product would end up covered by a doormat anyway.

I used three colors of paint – gray, beige and white – utilizing some leftover concrete paint.  I wanted to paint the gray first and then stencil the ‘bricks’ using mixtures of gray and white.  The gray would serve as the ‘grout’ color.

setting up stencil

I checked the weather and picked a day to start the project when there would be a 3 day stretch without rain so I would have plenty of time to complete the project before any bad weather.

I started by using a putty knife to scrape off any loose pieces of paint.  It seemed the paint that was on the cement was very uneven in application so that there were some thicker sections that were peeling off.  After doing a quick scrape, I swept off all the loose pieces of paint in addition to any dirt, leaves, etc.  Then, I applied my first coat of paint with a small roller using the gray concrete paint, covering the entire surface.

painted gray concrete

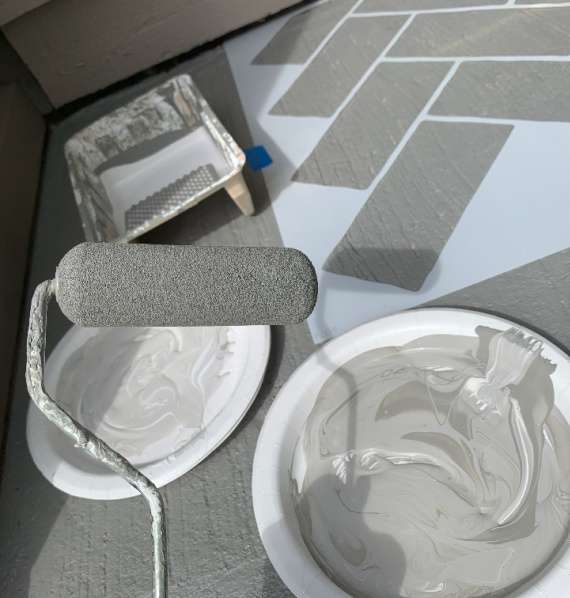
I waited until the next day to apply the ‘bricks’ with the stencil.  This was the fun part!  I used the white as well as a mixture of white and gray to create a tonal look for the ‘bricks.’  I used three different colors that I mixed on paper plates – using the white and gray.

Using blue painting tape, I positioned the stencil in place.  I started painting early in the day since I knew I would need to wait each time I repositioned the stencil after painting a section.

I started from the section by the door first, starting with the stencil in the center.  I waited a couple hours before moving the stencil each time.

stenciled bricks on entrance

After I had the stenciling completed, I waited until the next day for my last step.  I painted a wash (a mixture of half beige and half white paint) over the entire surface and rubbed with a soft cloth.  This muted the colors of the ‘bricks’ and made the new paint coordinate perfectly with my house color.

An easy project!  The hardest part is buying the concrete paint – finding a small quantity.  Most places don’t sell quarts of concrete paint and buying anything larger is crazy for a small project like mine!  Using leftover paint is the way to go for a small project, if you can manage it.  Of course, a larger quantity would be needed if you were painting an entire patio – which could easily be done!

I am very satisfied with my result!

finished brick stencil

I hope you may be inspired to tackle one small project at your home!

Thanks for stopping by!  Have a fabulous weekend!

Remember to take pleasure in simple things, Jackie
Comments Off on brick stencil diy | diy, inspiration, style

diy oyster shell necklace

28
May

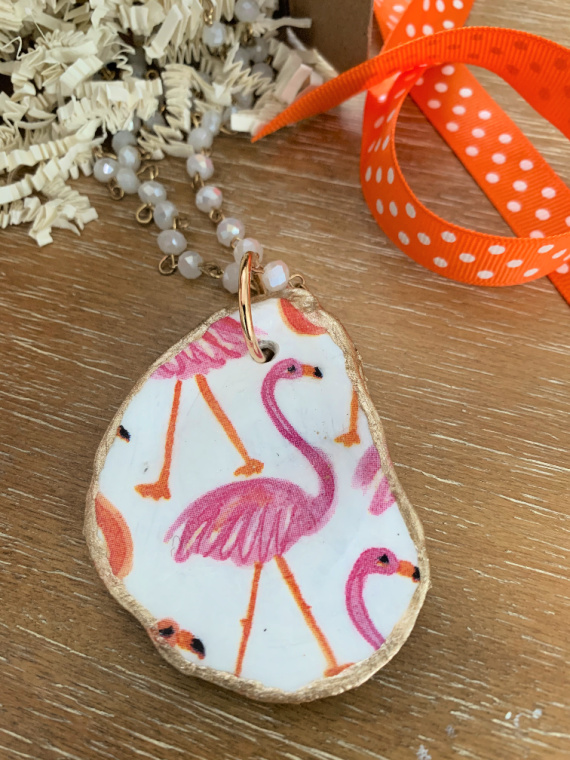
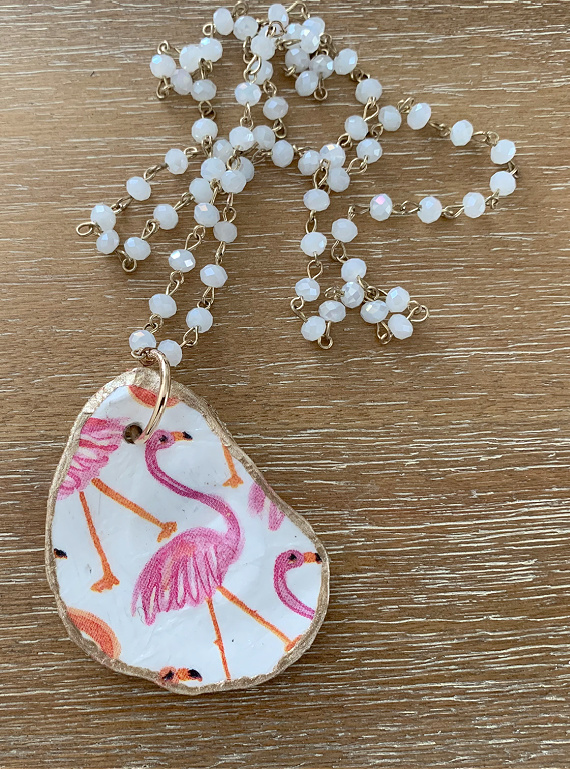
flamingo oyster necklace

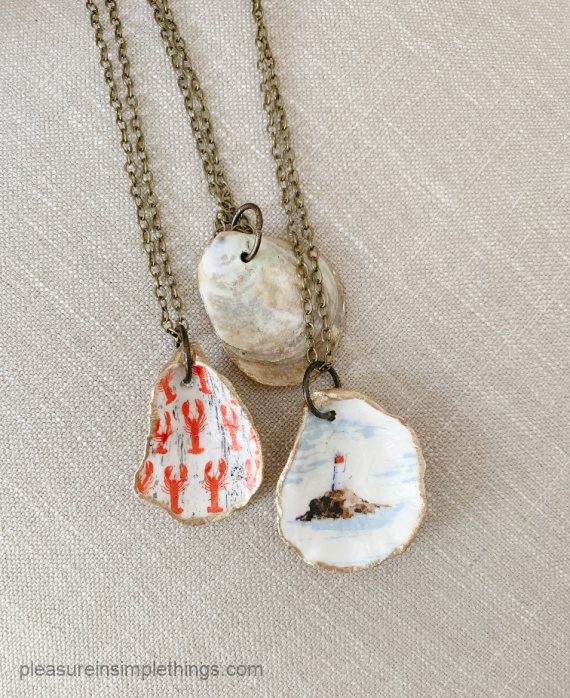
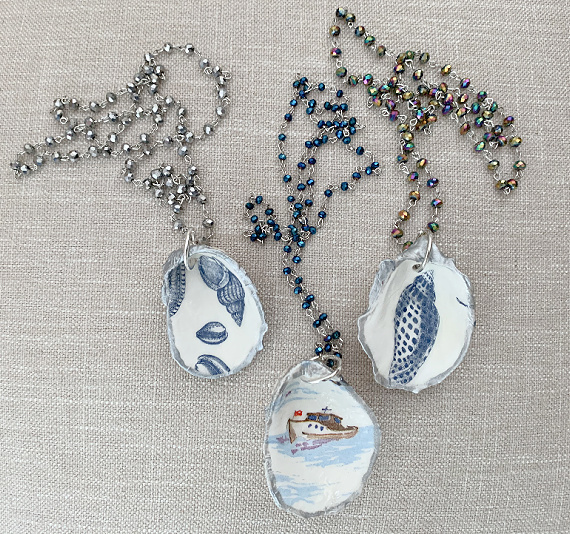
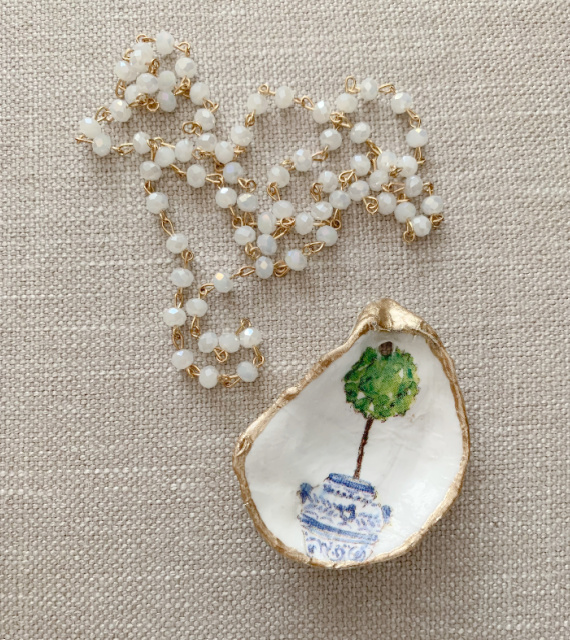
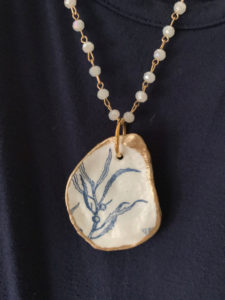
I had some fun the last couple weeks making some necklaces from decoupaged oyster shells.

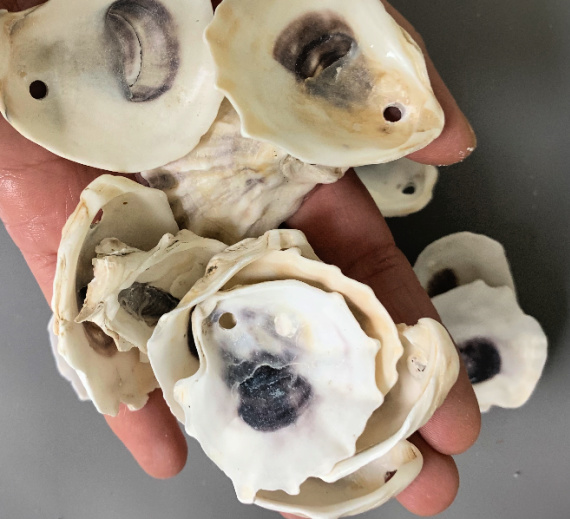
I had been putting holes in some shells to create some garlands and decided to drill some extras to create necklaces.

holes in oysters

I have shared plenty of decoupaged shells in the past.  If you still haven’t tried to make some, click here for simple instructions.  Summer is a great time to try this craft made from some collected beach shells!

nautical diy oyster necklaces

oyster necklace flamingo

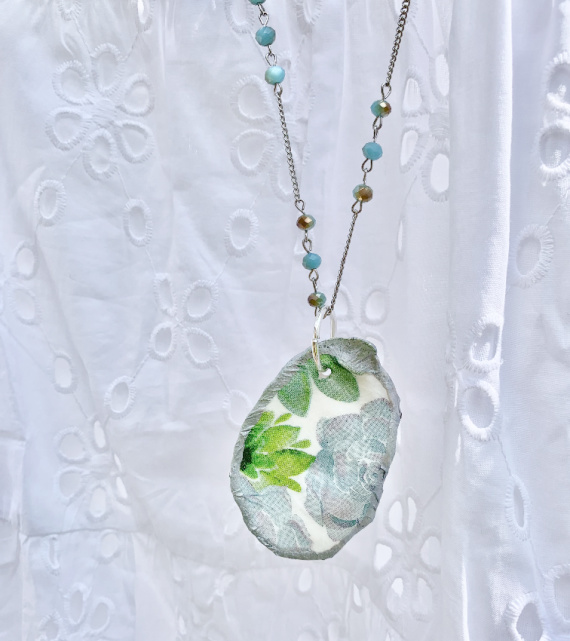
For making necklaces, drill the holes in the shells first.  Then, decoupage – being sure to use the end of your paint brush to punch the appropriate hole where you have drilled after decoupaging.  Next, add the chain, beads, rawhide, etc. of your choice to complete the necklace!

oyster necklace succulent

diy necklace succulent

I happen to like a long necklace – with a 30” chain – but, your creation should reflect your own personal style.

silver and nautical oyster shell necklac es

Have some fun with it!

topiary oyster necklace

Thanks for stopping by!  Happy Memorial Day weekend!

necklace oyster shell navy

Remember to take pleasure in simple things, Jackie
Comments Off on diy oyster shell necklace | diy, inspiration, sand & sea, style
Back to top