Subscribe to Pleasure in Simple Things via RSS ReaderFollow Pleasure in Simple Things on InstagramFollow @InSimpleThings on TwitterLike Pleasure In Simple Things on FacebookFollow Pleasure In Simple Things on PinterestEmail Jackie

christmas in october

October 24, 2014

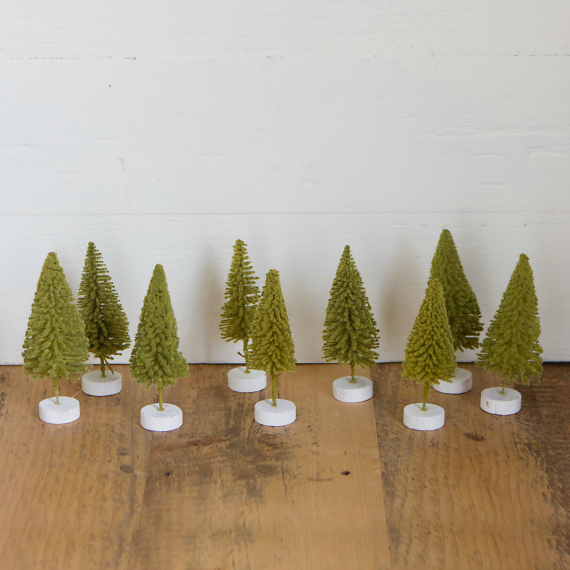
brush trees terrain pleasure in simple things

Hi friends!  Earlier this week I shared my first Christmas post of the season with a gift tag tutorial.  Today, I am continuing the holiday spirit with a shopping trip!  Who doesn’t love a shopping trip, right!  For today’s Friday field trip, I am sharing some of the items I’ve seen on an early shopping trip and am excited about for the upcoming holiday season.  So, grab a cup of cocoa or tea on this cold, windy day and enjoy!

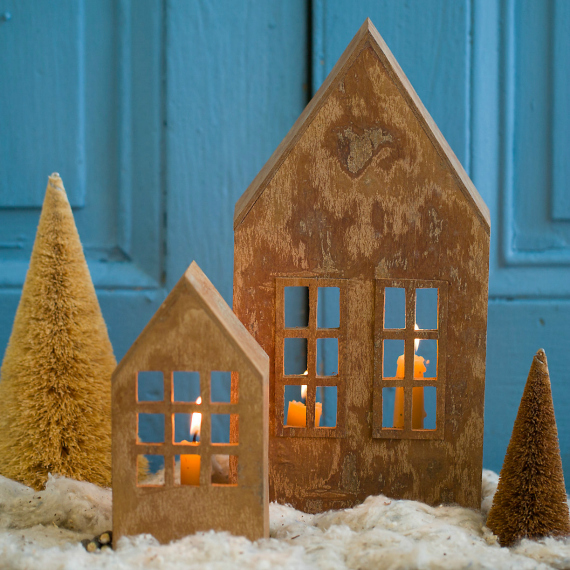
The first photo is one of some bottle trees at Terrain.  You probably already know of my love for Terrain.  This season, they are carrying bottle brush trees in many shades – including aqua and teal (did you see the photo on my Instagram?)…so exciting!  Another really cool item I saw in the Westport store, was a candleholder in the shape of a house and made of cinnamon bark…can’t you just imagine the smell when the candle is lit!?  I wish you had a scratch and sniff screen!

cinnamon bark house terrain pleasure in simple things

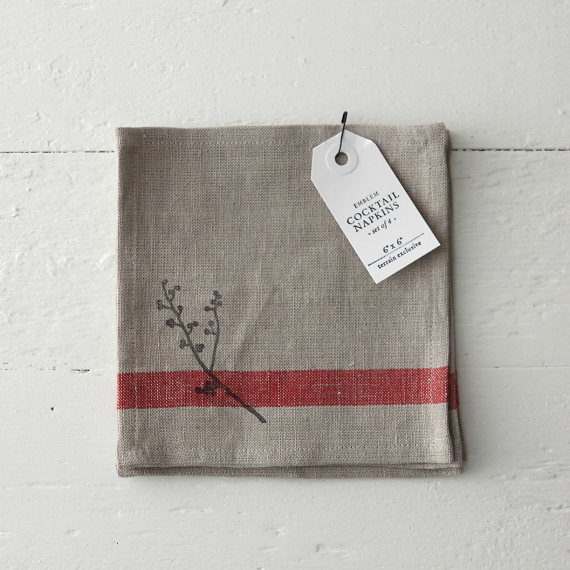
I also loved these cocktail napkins..so natural yet elegant!  Since there are only two Terrain stores in the country, you may not have the opportunity to shop this fabulous home and garden resource.  If not, take some time to check the website for some great holiday inspiration.

cocktail napkins terrain pleasure in simple things

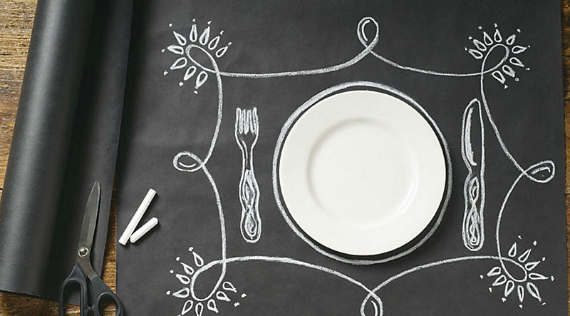
Talking about inspiration…what about this chalkboard wrapping paper at Paper Source!  Definitely 50 feet of fun!

chalkboard wrapping paper source pleasure in simple things

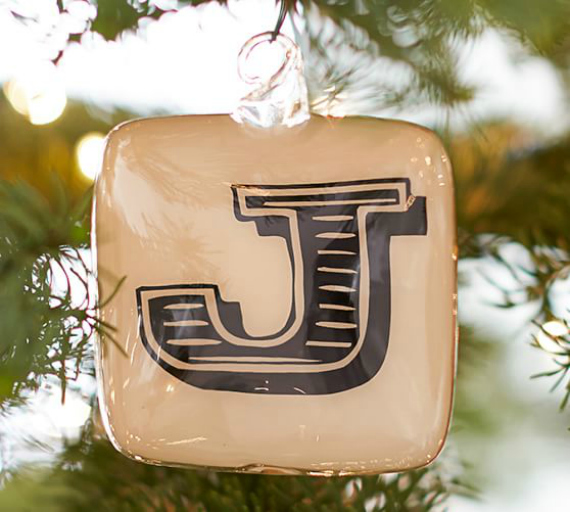
Christmas always involves ornaments and I love looking at the variety of ornaments offered at each of my favorite stores throughout the holidays.  With my passion for typography, I could not ignore this stunner from Pottery Barn!  I want to hang them up in many word combinations…like fa la la and ho ho ho!

Initial Ornament pottery barn pleasure in simple things

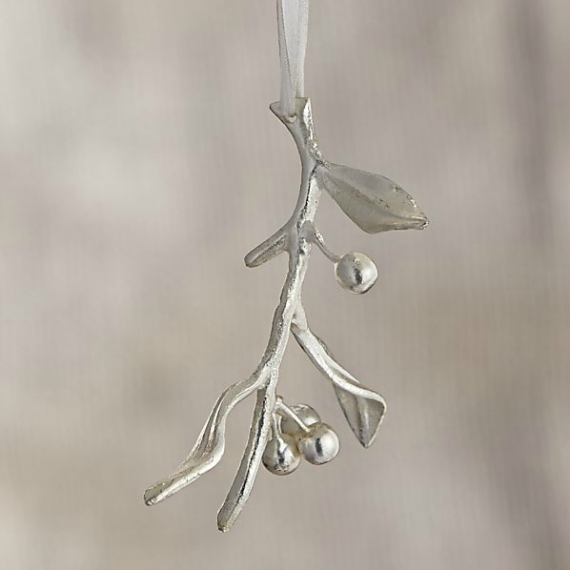
I have been enarmored with this mistletoe ornament at Crate & Barrel for a couple of years now…so happy they are still offering it!  I love to put them on packages of bridal shower or engagement gifts…so lovely!

silver-mistletoe-ornament crate and barrel pleasure in simple things

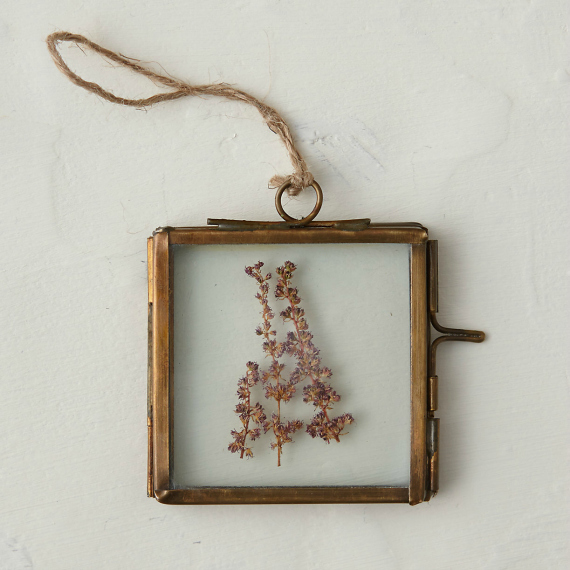
I LOVE this Terrain ornament!  Any favorite dried flower can be added…from your own garden or from a special bouquet!  Even a lock of hair or small photo would be a great addition!

terrain ornament pleasure in simple things

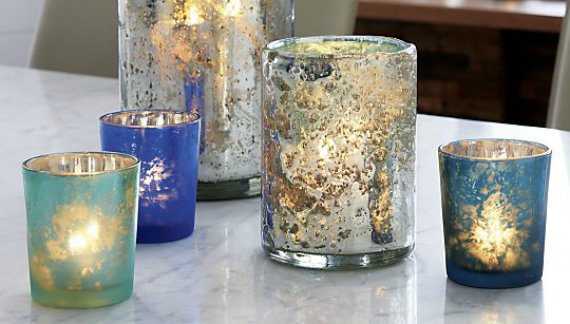
Mercury glass votives are always a lovely way to add some sparkle during the holidays.  This year, Crate & Barrel not only offers some really inexpensive options, but has colors that remind me of the sea.  At only $4.95 each, you can create a pretty cluster at a reasonable price for a beautiful sea inspired glow.  :)  Also, be sure to check out their snowflake hurricanes.

mercury-turquoise-tealight-candleholder crate and barrel pleasure in simple things

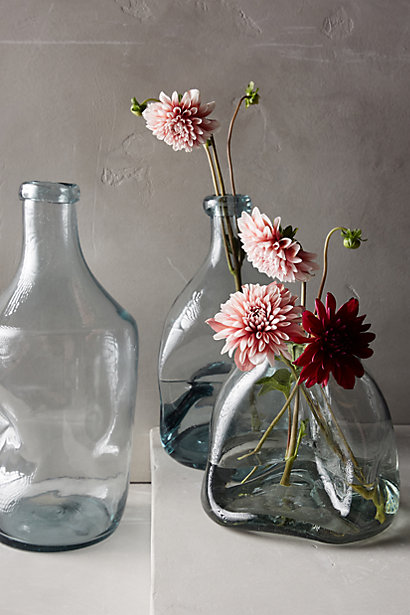
Fresh flowers are great all the time, but at the holidays they are always a requirement.  Anthropologie has not yet put out their holiday merchandise, but I love these pinched vases as an artistic way to display a few beautiful blooms.

pinched glass vase anthro pleasure in simple things

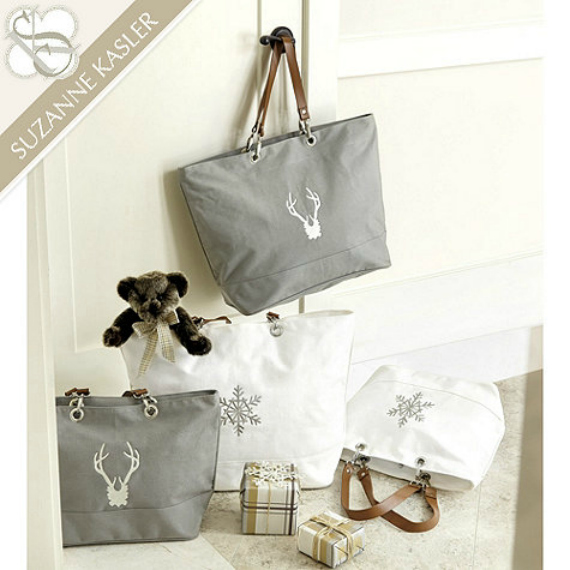
Ballard Designs always offers some beautiful holiday items, and this year is no exception.  These gray and white antler totes really appeal to my neutral color passion!  The Suzanne Kasler collection this year also features bears in a gray tone.

Tote bag ballard designs pleasure in simple things

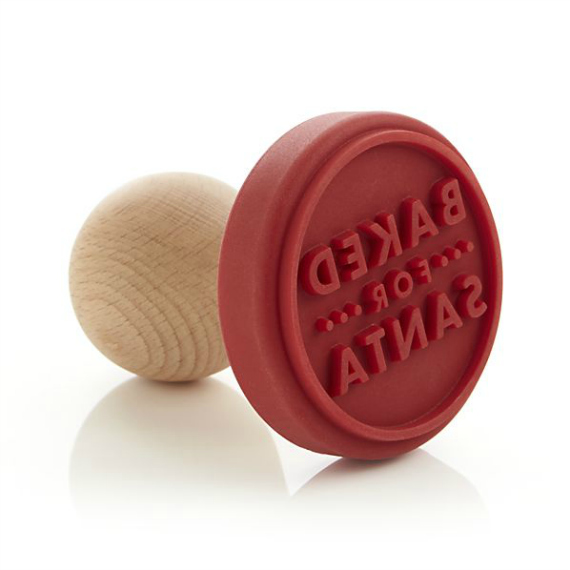
Christmas is always so very exciting for the children and it is wonderful to find great items for the kids (or the kids in us!) :)  This cookie stamp from Crate & Barrel is sure to leave a smile on the faces of the kids during a Christmas Eve cookie making session for Santa!

cat-baked-for-santa-cookie-stamp crate and barrel pleasure in simple things

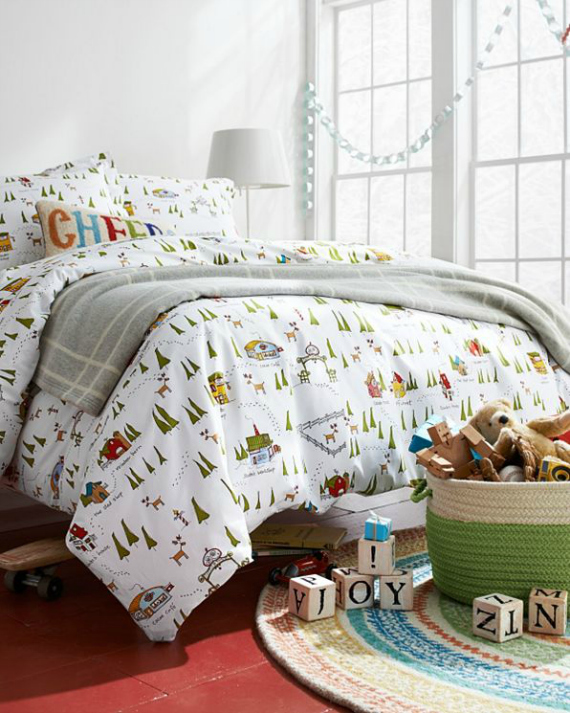
Decorating the children’s rooms in a special way during the holiday is a great way to add to the excitement to the season.  This year, Garnet Hill  has a pattern called “North Pole” that is cheery and seasonal…

north pole sheets garnet hill pleasure in simple things

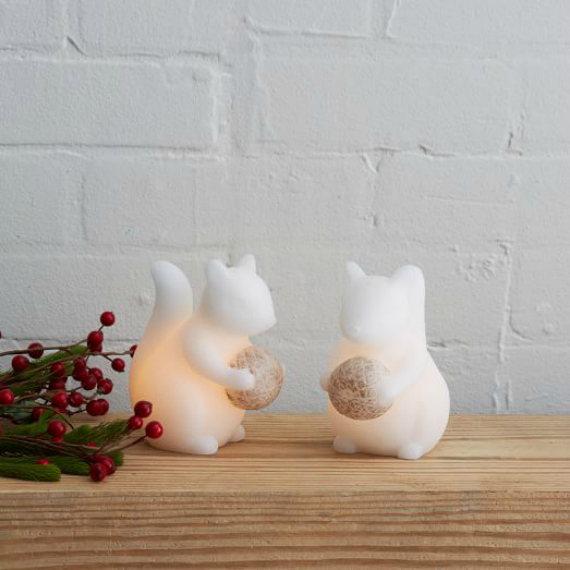
And, for the cutest little night light, how about this flameless squirrel candle from West Elm that can be used all year long!

west elm squirrel light pleasure in simple things

With all the shopping and decorating, a relaxing cup of tea is always in order during the holidays…even better in a pretty mug.  This monogrammed vine mug is from Terrain and oh, so pretty!  It would also make a great holiday gift for that special teacher!

vine mug terrain pleasure in simple things

The last item I am going to share is also from Terrain.  I love this inexpensive hanging zinc bucket as an alternative to a front door wreath!  Filled with greens or holly, it makes for a really interesting addition to the outdoor decor!  Don’t you love the dots!  It would also make a great indoor organizer for wrapping supplies.

zinc wall bucket terrain pleasure in simple things

So that is it for today’s Friday field trip!  I hope you enjoyed our little preseason holiday shopping trip!  There is so much more to explore as the stores start stocking up…let me know some of your favorites!!

Please note that none of the photos in this post were taken by me…they came from the respective store websites.

Have a wonderful weekend and remember to take pleasure in simple things, Jackie

Sharing at Shabby Nest.

1 comment

anthro inspired holiday gift tag

October 21, 2014

finished holiday gift tag pleasure in simple things Anthro inspired

It is not even Halloween…why am I sharing a Christmas craft?  Well, we had a rainy weekend last weekend and I decided to make some gift tags for the holidays. Having some items prepared in advance definitely takes some of the pressure off come December! (Although, traditionally I have done my Christmas wrapping the day after Thanksgiving! I know – cringe worthy for any last minute types out there!)

supplies for holiday gift tag tutorial pleasure in simple things

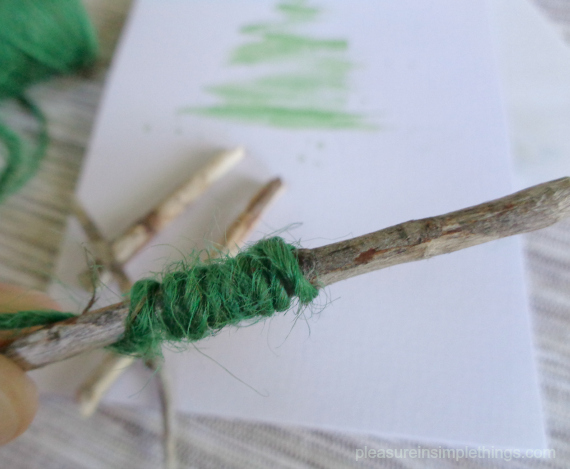
Anthropologie always has such cute tie-ons as part of their holiday wrapping each year. This year, one of the designs reminded me of a hand painted Christmas card I had made many years ago. It had been an easy design using watercolors – I had done an abstract tree by just making a few horizontal lines on some watercolor paper. Anthro has done the same type of design as a holiday package tie-on, adding an embellishment that I think is so cool – a twig wrapped in green string as a tree trunk!

Their design inspired me to create some gift tags reminiscent of the design I had used on my cards so many Christmases ago. Today, I am sharing a tutorial.

make watercolor lines for xmas gift tag pleasure in simple things

If you don’t have watercolor experience, don’t be intimidated! And, you don’t need any fancy supplies. When I made those tree Christmas cards years ago, I used paint from a dollar store children’s watercolor set! That is all you need to create this card! You can pick up a kit (that includes a brush) at a dollar store or children’s craft section of a bargain store. Watercolor paper (don’t use regular paper) is available in craft or hobby stores. The amount you need will depend on the number of cards you intend to make.

Think about the shape of a tree and picture a triangle shape on the watercolor paper. For purposes of this tutorial, I made pencil marks to better guide you (my triangle is 3” high). If you need to make your own pencil marks, you will want to make them much lighter than this so they will not be visible on your finished card.

Using a brush dipped in water, brush the water onto the paper in the triangle shape. Don’t saturate the paper; just give it a light wash of water in the triangle shape.

finishing watercolor lines for holiday gift tag pleasure in simple things

Next, mixing water with the green paint, paint random horizontal lines across the paper using the triangle as your guide. Some of the lines may stay within your imagined/pencil triangle shape and some may be a little longer. Make one or two lines at a little bit of an angle rather than perfectly straight across. Once you are happy with the look, leave the tree to dry.

using a twig embellishment for holiday gift tag pleasure in simple things

Next, load a little bit of paint on the brush. Hold the brush over the tree and lightly tap the middle of the brush handle…this will give you some speckling on your paper. See the green dots on my card?

You may want to experiment and try a few trees to get a better feel for the paint and the paper before you create a final tree.

completing twig embellishment on holiday gift tag pleasure in simple things

Next, find a thin twig to use as the trunk of your tree (mine is 4 ¼” high). Using green thread, string, yarn, or twine; wrap a length around the middle section of your twig – securing with dots of glue. Use a glue gun to attach the completed trunk onto the painted tree.

 attaching embellishment on holiday gift tag pleasure in simple things

Cut or rip (for deckled edge) the tag to desired size (mine is 5” x 6”).

If you want a little bling – add some optional glitter. I finished up my card by brushing on a little glitter paint in random spots using a cotton swab.

That’s it! You have a beautiful, hand painted gift tag for your holiday wrapping!

 finished Anthro inspired holiday gift tag on package pleasure in simple things

I am using my creations as flat gift tags, but they can easily be adapted to a folded card or a tie-on (by adding two small holes – one on each side of the twig, and using some green thread to tie onto a package) if that is your preference.

I don’t like writing names on my gifts…I always identify packages by the wrapping theme/color or by writing an identifying letter or initial somewhere on the package where not readily visible. If you would rather have names on your tags, simply add the words ‘to’ and ‘from’ with a thin permanent marker.

writing on gift tag pleasure in simple  things

If you make your tag into a folded card, include a few holiday words inside – like: Oh, what fun! Jingle all the way! Making it Merry!

Rather not make your own tree gift tags? You can always get some similar ones, gratis, at Anthropologie when you make holiday purchases!

Thanks so much for stopping by!  Remember to take pleasure in simple things, Jackie

Sharing with NancherrowCraftberry Bush, Crafts a la ModeLiz Marie, and Elizabeth & Co.

3 comments

patriotic tie-dye on the beach

July 4, 2014

patriotic tees pleasure in simple things diy

Happy Fourth my friends!  For Friday field trip today, I am taking you to the beach to show you my summer shirt creations made to wear to today’s neighborhood parade and party on the beach!

Tie-dye is the perfect beach craft – not only because it is fun, but because as a beach activity, there is very little mess or clean up.

Both experienced and first-time tie-dyers enjoy making their own patriotic creations!

If you want to hold your own patriotic tie-dye session, not much is needed to have a really fun time that produces some great results!

patriotic tie=dye pleasure in simple things

Patriotic Tie-Dye Supplies

  • 1 bottle Rit Liquid Dye (8 oz.) in navy blue
  • 1 bottle Rit Liquid Dye (8 oz.) in cherry red
  • Rubber bands
  • 2 cups salt
  • All cotton tee shirts
  • 2 plastic dish pails (each large enough to accommodate 3 gallons of water)
  • Rubber gloves to protect hands from dye (optional, but recommended)

The most economical way to purchase shirts is to choose (all cotton) shirts in multiple packs at a discount store.  But, you don’t necessarily need to purchase shirts – you can use some shirts or other articles you already own!  (It is fine to use a white shirt with writing…maybe a tie-dyed version of a shirt from your alma mater!)  Another option, if purchasing shirts is not in your budget, is to simply ask your guests to bring their own!

tie-dye on the beach pleasure in simple things

As everyone gets wrapped up in the excitement of the activity, it is inevitable at our house that one of the kids raids their sock or underwear drawer to add some extra articles of clothing to the mix…old pillowcases and sheets are also fair game!

beach tie-dye pleasure in simple things

First, be sure to wet the articles of clothing you intend to dye and wring out excess water in preparation for dyeing…this produces the best results.

The next step is to add tie-dyeing at the beach pleasure in simple thingsthe elastics.   The elastics prevent the dye from getting to the part of the shirt they are attached to, so be sure to make them tight!  There are so many variations of designs that can be created.  Even experienced tie-dyers come up with new designs… If you are at a loss for ideas, you can use an online resource to find suggestions for applying elastics for specific designs.  We like to just wing it and see what results!

After the shirts are prepared with the elastics, prepare the dye baths.  I prefer liquid dye and I use it double strength.  For each color, first dissolve 1 cup of salt (it helps better set the dye) in 3 gallons of hot water before mixing in an 8 oz. bottle of liquid dye.

tie-dye on the beach pleasure in simple things

As far as the actual dyeing, like Easter eggs, everyone comes up with their own favorite technique.  That may be leaving the entire piece in one color…it may be dipping various parts of the shirt in each color, etc.  Dip or submerge your shirt into the desired color(s) and have fun!  The longer the piece remains in the dye, the stronger the color.

patriotic tie-dye on the sand pleasure in simple things

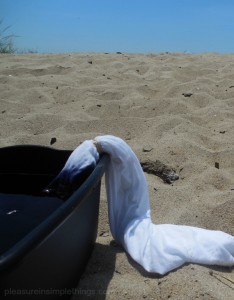
When you are done, squeeze the excess dye from the finished product and rinse with cold water from the hose until the runoff runs clear.  Cold saltwater helps set the color, so we end the process by throwing the item into the ocean!

tie-dye at the beach pleasure in simple things

Now to remove the elastics…this is the best part!  Everyone loves pulling off the elastics after the dyeing process to proudly admire the final results!  And, every shirt looks so good…it is impossible to mess up a shirt – every one looks super!

You now have a tee in patriotic colors!  Enjoy!

After the shirt is dry, you can further embellish it with fabric paint – In the past, I have used silver metallic puffy fabric paint to add stars to a 4th of July tee.

tie-dye at the beach pleasure in simple things

Thanks for stopping by and I hope today’s field trip will inspire you to hold a tie-dying session of your own!

Have a wonderful weekend!  Remember to take pleasure in simple things, Jackie

Sharing with Silver Pennies, Coastal Charm, and Sand & Sisal.

no comments

patriotic mason jars

June 17, 2014

patriotic mason jars pleasure in simple things

Annie Sloan Chalk Paint can be very dangerous.  Once you have some in the house, you can think of so many ways to use it!

patriotic mason jar with peony pleasure in simple things

Painting mason jars is nothing new, but since I had some leftover paint from my last furniture project, I thought I would share how I decided to paint some blue Ball jars to use at my 4th of July celebration at the beach.

patriotic mason jars pleasure in simple things

I liked the idea of using blue jars so that it would be possible to catch glimpses of the inside blue hues even after the jars were painted.

patriotic mason jars pleasure in simple things

I started by painting the outside of the jars with two coats of Paris Grey.  Then, after cutting a kitchen sponge into a star shape, sponged stars onto the jars using Primer Red.  I used some sandpaper to distress them a little bit and then gave them a coat of clear wax.

pleasure in simple things patriotic mason jars

For the one jar I wanted to use as a candleholder, I masked off a star shape (a little smaller than the size of the sponge star) before I started the painting process (also leaving the metal top ring screwed into place).  By masking off the star, the clear blue jar stayed clear in the masked area, enabling light from a candle to shine through.

patriotic mason jar candleholders

I finished them off by tying some twine around the tops of the jars.

patriotic mason jars

Fun and patriotic!  I will use them on the 4th to hold picnic utensils, but they will also be great all summer for flowers, candles, etc.

pleasure in simple things sparklers in a patriotic ball jar

Thanks for stopping by and remember to take pleasure in simple things, Jackie

Sharing at Shabby Nest, Craftberry Bush, and Finding Silver Pennies.

1 comment

homage to earth day

April 22, 2014

earth day quote

Pretty much every item you can think of on this earth (pun intended) has been covered with chalkboard paint, hasn’t it?  So, I am pretty certain someone has already thought to paint a globe with chalkboard paint.

earth day quote

I think it is a great way to revamp an outdated globe and to honor our dear Mother Earth on Earth Day!  I just couldn’t convince myself to throw it out during the purging of all the old ‘stuff’ I cleared from the ‘new’ guest room…I have a particular fondness for globes – outdated or not – since one of my children was born on Earth Day!

chalkboard globe

So, now the old globe sits proudly in the new guest room.

And, since the globe is an accessory (my second!)  in the room where guests will be staying, my idea was to decorate the chalkboard in one of two ways:

1.  To write Welcome!  in an outline shape of my state (Connecticut),  or

chalkboard globe

2.  Draw two states – mine and the one the visiting guests hail from!

Earth Day quote

In light of the occasion, you may also enjoy this post on repurposing brown bags…Happy Earth Day!

Thanks for stopping by!

P.S. I took the butterfly photos in this post used with the quotes last summer – we haven’t had any weather yet this year that warrants butterflies!

Remember to take pleasure in simple things, Jackie

Sharing with Finding Silver Pennies, Sand & Sisal, and Coastal Charm.

no comments

happy easter!

April 18, 2014

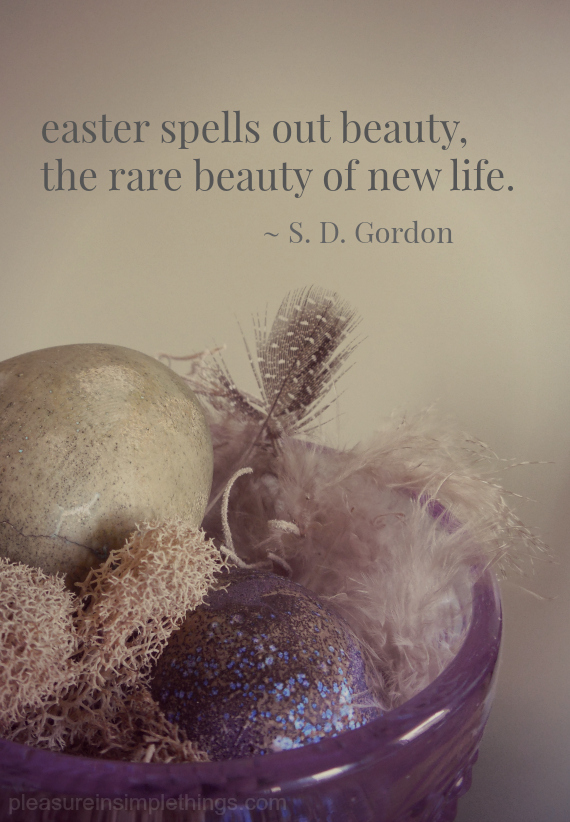
easter quote

Today is Good Friday and I want to wish all my friends who celebrate, a blessed Easter!  I am excited that my family will all be together for the holiday and I hope that you too are surrounded by the ones you love this weekend.

For Friday field trip today, I have assembled some Easter posts in one place in case you need some last minute Easter inspiration…links from past posts…Enjoy!

favorite ways to decorate eggs

a vintage egg cup collection

eggs from natural dyes

a recipe for Easter butter cookies

some Easter nostalgia

Easter basket ideas for the college set

growing eggs in eggshells

diy easy paper egg holders/place cards & (grass heads for the kids!)

dyed eggs for coastal décor

dye for creating eggs in shades of gray

Thank you so much for visiting! 

Have a wonderful weekend and remember to take pleasure in simple things, Jackie

no comments

shades of gray…and purple

April 15, 2014

gray easter eggs

Here comes the egg lady!  I joked around this week that the late night cashier at the grocery store’s ’10 items or less’ aisle must call me that!  It is probably true…I have stopped in late night at the grocery store so often lately – each time for just a carton of white eggs!

easter eggs

I already admitted I have an egg dyeing obsession…but it looks like I am now down to my last batch for the year.  It’s Easter week and, since I’m making all the desserts for Easter dinner, I have no more time to dye eggs!

gray easter egg

Any free time I have this week will now be spent planning and making the Easter desserts!

easter eggs in purple glass

I dyed my last batch of eggs in shades of gray.  I love neutral shades for egg dyeing, but gray dyed eggs are particularly beautiful.  The best way to make gray dye is to simply mix 1/2 cup of room temperature water, 1 tablespoon of white vinegar, and some black paste food coloring.

gray easter eggs

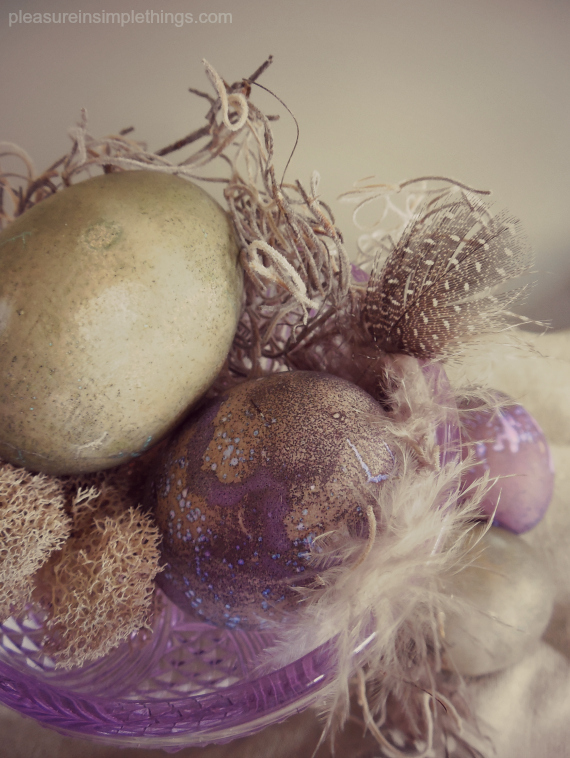
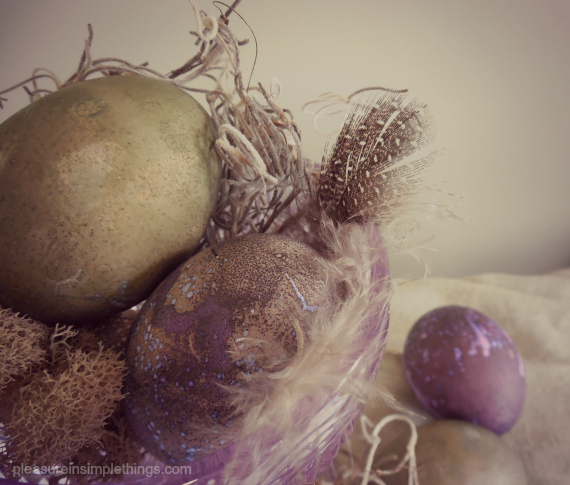
Because I put together a vignette with a pretty iridescent purple glass I picked up in the clearance section at Anthropologie, I decided to dye a couple of my last dozen of eggs purple before putting them into the gray dye.

easter eggs

I made various shades of gray eggs by varying the time in the dye.  I also rubbed off some of the color on the eggs so the wouldn’t look “too perfect.”

easter eggs in purple glass

The irregular shading gives them so much character!

purple and gray eggs

So that is it…the last of this year’s egg dyeing! :(  I hope you will try dyeing some gray eggs, if you haven’t already! :)

gray and purple eggs

Thanks so much for stopping by!  Remember to take pleasure in simple things, Jackie

Sharing with StoneGableSand & Sisal, Coastal Charm

no comments

coastal egg decorating

April 11, 2014

coastal easter egg designs

Today for Friday field trip, I’m kicking it back to kindergarten.  I’m adapting some old school techniques to egg decorating to create some Easter eggs to use in my coastal décor.

Coastal decor Easter eggs

I am using two easy techniques that you – like me – probably used in grade school, but may not have thought about using in creating your Easter egg designs!

blue ball jar and coastal eggs

It was probably earlier than kindergarten when my siblings and I discovered this first technique. ..purely by accident.  During our egg dyeing sessions, inevitably, the hard boiled eggs we were preparing to dye were constantly being dropped by our young, clumsy hands during our egg dyeing frenzy.

dyed easter eggs and tray

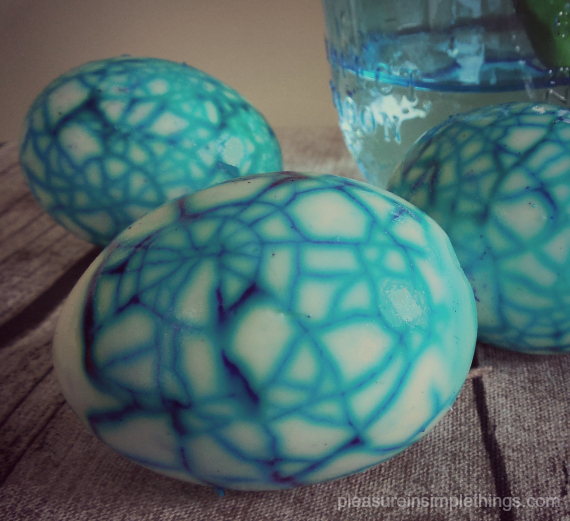
We would soon learn that the many cracks these drops created in the shells would cause the eggs inside to take on the dye.  When it came time to eat the eggs, no one wanted to eat the ones that had been cracked and dyed with the spider web-like effect.  Of course, as we got older, this became a cool effect that we would purposely emulate and enhance – learning by experience (the obvious) that the longer the egg remained in the dye, the more pronounced the design would appear.

beachy easter egg designs

It made me smile this month when I saw a full page in the current Real Simple magazine giving instructions to create this very same effect on an Easter egg.  The instructions said to crack the egg with a spoon…or, (not mentioned in the magazine) drop egg continually on a table while excitedly anticipating the Easter bunny’s arrival!

coastal easter eggs

The second old school technique I use on eggs wasn’t used on eggs at all back in kindergarten.  We used it to create a leaf painting.  Various shaped leaves were placed on a paper and paint, in fall colors, was splattered over the leaves.  When the leaves were removed, their shapes would appear, like magic, against the splattered background.

Coastal decor Easter eggs

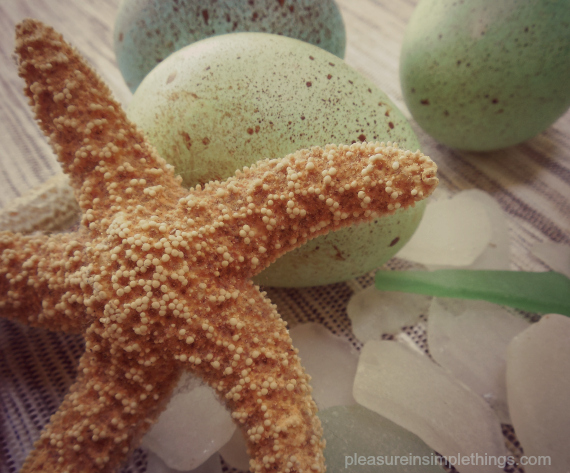
The splattering was done with an old toothbrush and a Popsicle stick.  Rubbing the Popsicle stick across a paint filled toothbrush created a beautiful splattered effect.  I used this very same technique to create the eggs shown here – using brown paint on eggs dyed in sea glass colors.

coastal decor easter eggs

What was it that Robert Fulghum said?  “All I really need to know I learned in kindergarten?”

splattered easter eggs

Have a great weekend and remember to take pleasure in simple things, Jackie

Sharing with Common Ground, Shabby Nest, Fridays UnfoldedCraftberry Bush, and Crafts a la Mode.

3 comments

easter place cards

April 8, 2014

grass in eggshell placecard

I promised to show you how to use the grass-filled eggshells from an earlier post.  One of the ways I use them is as Easter place cards.  Making a simple paper holder, the eggs help serve as part of pretty place cards on an Easter table.

grass in eggshell placesetting

grass in eggshell easter placecards

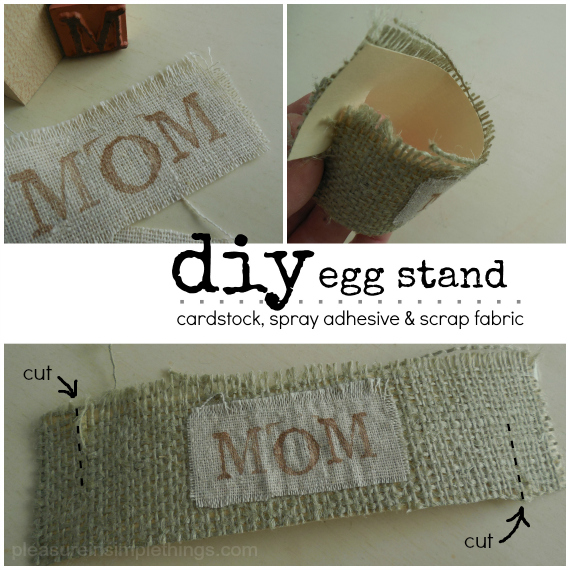
To make the egg holder, use any scrap of fabric or paper you may find attractive that fits well with your table top color scheme.

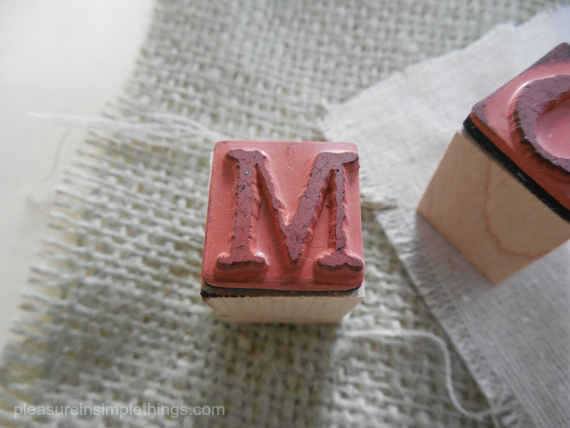
letter stamp for diy placecards

Options can include:  a pretty paper cocktail napkin, magazine page, newspaper, scrapbook or wrapping paper, wall paper, brown paper, empty seed packets, paint chips…even birch bark.

diy paper egg stands
Just add an egg you have planted with grass…or, any decorated egg and you are good to go!

There is another way go…if you have kids, you may have seen this coming…grass heads!  Instead of adding names to the placeholders, have the children draw the person’s likeness on the egg with a marker.  Guests can be asked to find ‘their egg’ to locate their seat…sure to get the young artists giggling!

kids grasshead placecards
There is still plenty of time to plant some grass heads before Easter!

Join me Friday for more egg fun!  Friday field trip this week is kickin’ it back to kindergarten by using some easy techniques from my childhood to make some great egg designs…see you then!

Thanks for stopping by. 

Remember to take pleasure in simple things, Jackie

Sharing with Finding Silver Pennies, Little Red House, and Crafts a la Mode.

no comments

april fools’ day gum magnets

March 25, 2014

April Fools' Day gum magnets

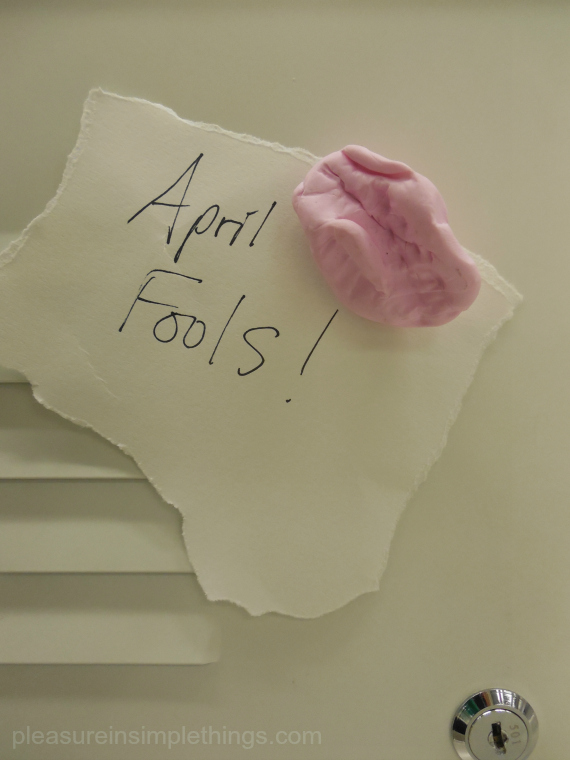
This April Fools’ Day, I am creating some fun fake gum magnets!

Years ago, I found similar magnets in a novelty shop and gave them as a gift.  They were such a hit!  I knew I could come up with a way to make some on my own and I quickly found they were super easy and very inexpensive to recreate.

Because these are great magnets for school lockers, they are perfect to slip into your child’s lunch bag on April Fools’ Day.

Fake gum magnets in two colors

To make these you will need:

  • modeling clay
  • ¾ inch round magnets
  • glue (I used Gorilla Glue)
  • rubber bands
  • your oven

That is it!  Other than some protective covering for your teeth and hands (yes, I did say teeth – read on)…

In the interest of safety, I was extremely cautious in handling the modeling material.  I used protective gloves when handling it and never let it come in contact with my body.  I encourage you to do the same.  My teeth marks may have not come out as prominent as they could have, because I had several layers of plastic between me and the modeling material!  I didn’t want to risk having any of it touch my mouth!

fake gum magnet collage

I used round ¾ inch diameter magnets.  Remember, the magnet will determine the size of the ‘gum’ since the modeling material will need to be large enough to conceal the magnet.

Gum comes in all colors these days, but I ‘stuck’ to the more traditional colors – white and bubblegum pink.  As an added bit of fun – the white modeling material I used was also glow-in-the-dark!

So, just pinch a gum-sized piece (wads) of the modeling clay and shape it into a rough oval shape.  You know what chewed gum looks like and that is the look you are trying to simulate.  Look at a real piece of chewed gum if that helps!  I may have exaggerated the size of my pieces a little bit, but I thought that made it fun!

The only thing you have to do, is to put a couple bite marks into the material…like I said, I did this with several layers of plastic over my teeth.  Then, use a magnet to mold the spot where it will later be attached – you will be gluing this on after you set your ‘gum’ pieces in the oven.

Fake gum magnet for April Fools Day

After I got the pieces looking the way I wanted, I followed the directions on the modeling material and put my pieces of ‘gum’ in the oven for half an hour to make the shapes permanent.  I put them directly on the oven rack on a piece of parchment paper.

After the pieces were cooled, I used glue (just a bead or two of Gorilla Glue) to attach the magnets – holding them snug with elastic bands since the glue swells as it dries – and let them dry overnight.

Cool, right?

I think they make a great April Fools’ Day surprise…very practical and sure to leave a smile on the recipient’s face!

Thank you so much for stopping by.  Remember to take pleasure in simple things, Jackie

Sharing at Crafts a la Mode, Craftberry Bush, and  Silver Pennies.

2 comments

« Previous Entries     Next Entries »