Subscribe to Pleasure in Simple Things via RSS ReaderFollow Pleasure in Simple Things on InstagramFollow @InSimpleThings on TwitterLike Pleasure In Simple Things on FacebookFollow Pleasure In Simple Things on PinterestEmail Jackie

Tag: Easter


egg tea infuser diy

20
March

homemade tea infuser pleasure in simple things blog

I am a sucker for a cute tea infuser.  I have seen so many great ones…sometimes they are just too hard to resist buying!  Have you seen the one that looks like the Titanic?  The problem is – these store bought tea diffusers, though cute, never hold enough tea for my taste.  So, today for Friday field trip, I am taking you into my kitchen to show you a quick and easy homemade tea infuser.

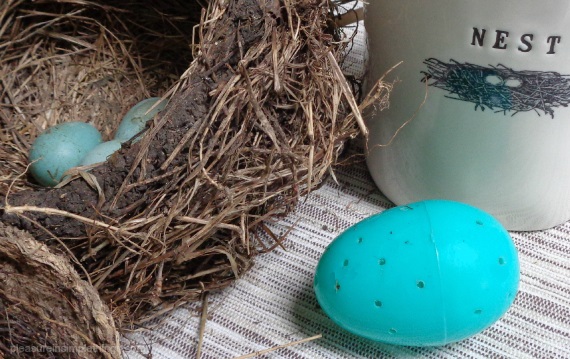
easter egg tea ball pleasure in simple things blog

Not only is it cute and seasonal, but it holds plenty of tea!  First, purchase some small plastic eggs – the kind that are used to fill with treats.  There are plenty of them around at this time of year!  I found a bag of 12 assorted colors at Target for less than $2.  I figure if they are food safe to put candy inside, they must be safe enough for tea!  (And, since I don’t even bring my tea water to a boil, I don’t think the plastic will be in danger of melting lol!)

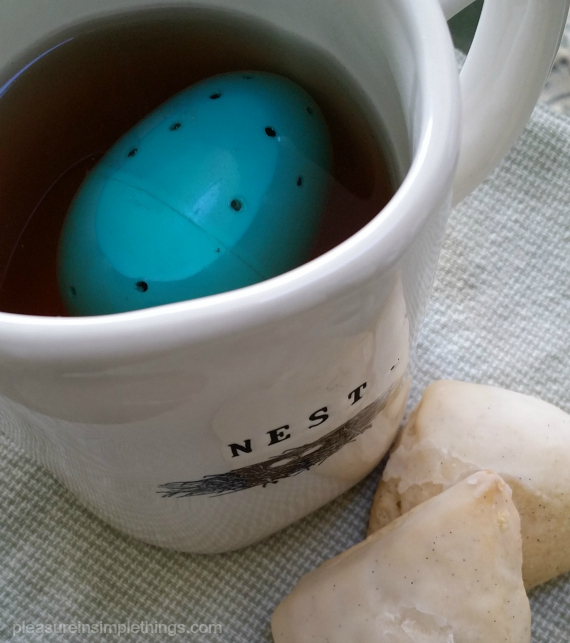
easter egg tea diffuser pleasure in simple things blog

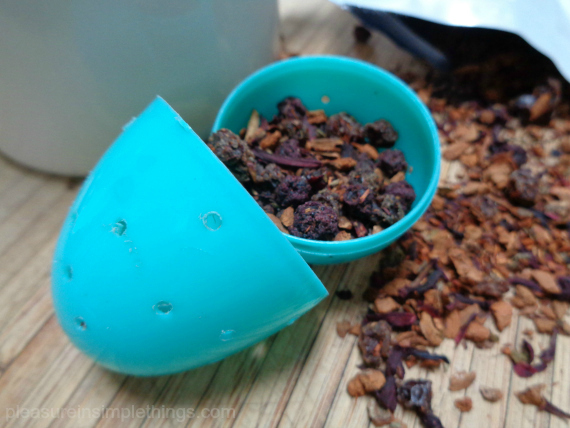
Now just (carefully) use a power drill to make some holes in the egg.  That’s it!  Determine which size drill bit to use based on the tea you normally use.  You obviously don’t want the holes so big that all the tea slips through.

Now you have a reusable infuser!

And, they also make for a great gift paired with a pretty mug for your favorite tea drinker!

eggs for crafting tea infusers pleasure in simple things blog

We are expecting four inches of snow today…I may need an extra cup of tea or two! ;)

Thanks for stopping by!  Have a wonderful weekend welcoming the new season!  xo Jackie

Sharing at House of Hipsters, Nancherrow, and Love of Home.

3 comments » | diy, food & festivities, gift ideas

happy easter!

18
April

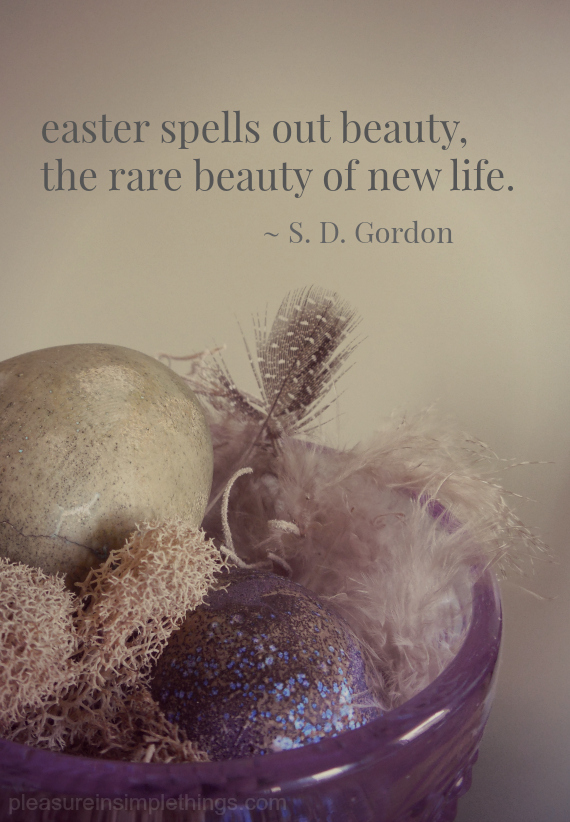
easter quote

Today is Good Friday and I want to wish all my friends who celebrate, a blessed Easter!  I am excited that my family will all be together for the holiday and I hope that you too are surrounded by the ones you love this weekend.

For Friday field trip today, I have assembled some Easter posts in one place in case you need some last minute Easter inspiration…links from past posts…Enjoy!

favorite ways to decorate eggs

a vintage egg cup collection

eggs from natural dyes

a recipe for Easter butter cookies

some Easter nostalgia

Easter basket ideas for the college set

growing eggs in eggshells

diy easy paper egg holders/place cards & (grass heads for the kids!)

dyed eggs for coastal décor

dye for creating eggs in shades of gray

Thank you so much for visiting! 

Have a wonderful weekend and remember to take pleasure in simple things, Jackie

Comments Off on happy easter! | field trips, holiday, inspiration

easter place cards

8
April

grass in eggshell placecard

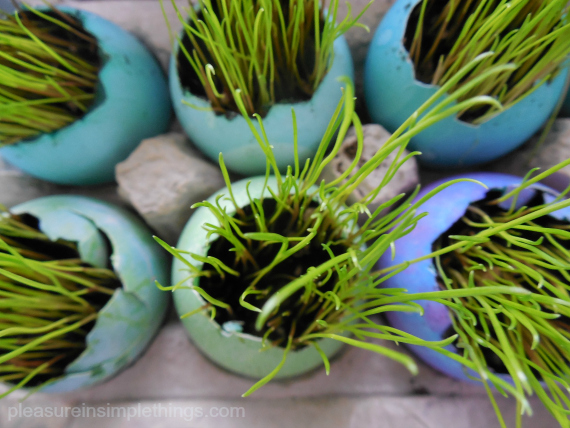
I promised to show you how to use the grass-filled eggshells from an earlier post.  One of the ways I use them is as Easter place cards.  Making a simple paper holder, the eggs help serve as part of pretty place cards on an Easter table.

grass in eggshell placesetting

grass in eggshell easter placecards

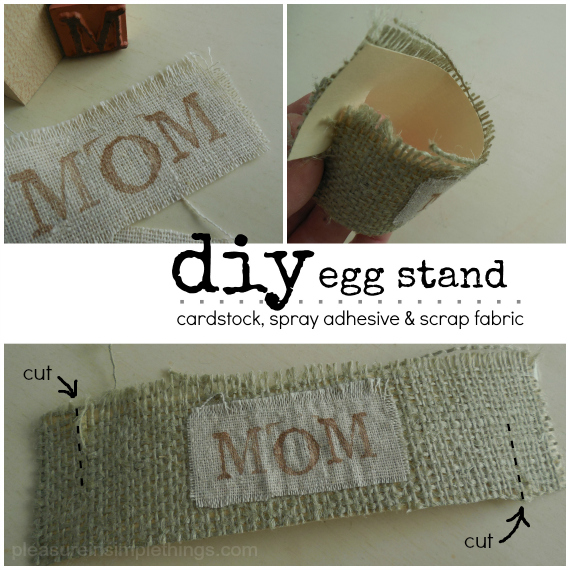
To make the egg holder, use any scrap of fabric or paper you may find attractive that fits well with your table top color scheme.

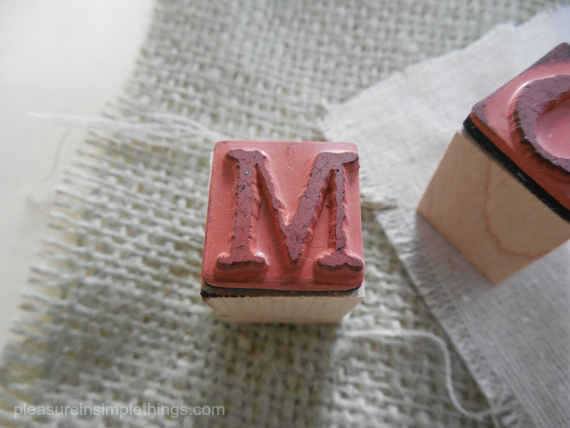
letter stamp for diy placecards

Options can include:  a pretty paper cocktail napkin, magazine page, newspaper, scrapbook or wrapping paper, wall paper, brown paper, empty seed packets, paint chips…even birch bark.

diy paper egg stands
Just add an egg you have planted with grass…or, any decorated egg and you are good to go!

There is another way go…if you have kids, you may have seen this coming…grass heads!  Instead of adding names to the placeholders, have the children draw the person’s likeness on the egg with a marker.  Guests can be asked to find ‘their egg’ to locate their seat…sure to get the young artists giggling!

kids grasshead placecards
There is still plenty of time to plant some grass heads before Easter!

Join me Friday for more egg fun!  Friday field trip this week is kickin’ it back to kindergarten by using some easy techniques from my childhood to make some great egg designs…see you then!

Thanks for stopping by. 

Remember to take pleasure in simple things, Jackie

Sharing with Finding Silver Pennies, Little Red House, and Crafts a la Mode.

Comments Off on easter place cards | diy, food & festivities, holiday

growing grass in an eggshell

18
March

growing grass in eggshells

The best place to plant Easter grass?  In an eggshell of course!

Planting grass in preparation of Easter has become a tradition in my house.  Containers of many types and varieties have been hijacked over the years for the annual planting, but eggshells remain the favorite vessel of choice!

It is easy to get beautiful results with just a little preparation.   First, decide how many eggs you want to use as planters.  Buy the number of extra-large white eggs you wish to plant.  Obviously, extra-large eggs give you the most room to plant, but you can use any size.  I prefer to use white eggs since I dye them in various colors before I plant in them.

To prepare the egg, use a sharp pointed knife to pierce the pointy end of the egg – this works best with a quick, sharp jab to make a hole.  Once the shell is broken, use your fingers to carefully remove some of the shell to make room for the planting.   (If you prefer, you can turn the egg horizontally, making a hole in the side and planting the grass the long way in the egg.)

growing grass in eggshells for Easter

Empty the contents of the egg.  You can also carefully remove the thin white membrane inside the shell (optional).  Treat the shell gently.  Next, dye the egg as you would any Easter egg.  It is easy to match any décor based on the way the egg is dyed/decorated.  Put the egg in the dye very gently – filling the inside of the egg with the dye so it will sink down and completely submerge into the dye.  (You can dye the eggs before you empty them if you find it easier…I don’t – in case I should ruin one in the emptying process, I haven’t wasted the time dyeing it!)

There is no need to go out and purchase a dye kit…dye is easily created at home with food color.  I like to use paste food color, because it comes in a wide variety of colors and is very vibrant, but liquid food coloring works just as well.  This is the dye I used:

Recipe for Easter egg dye

Once the eggs are dyed and dry, you can start the planting process.  You will need potting soil, grass seed, and a spoon.  If you need to purchase grass seed, go to Home Depot and purchase the smallest bag you can find.  Pick the fast growing seed that is sold for repairing existing lawns – it really does grow fast!

Spoon potting soil carefully into each prepared egg.  I put the eggs in the original carton for the growing process…it is an easy way to keep them in position and it makes for an easy clean up.  Next, spoon grass seed to cover the dirt surface in each egg.  Then, spoon a little more potting soil on top.

grass seed and potting soil

For your first watering, use about 4 teaspoons of water in each egg.  This will give your soil the initial moistness it requires.  For every day forward, add one teaspoon of water each day and keep the carton(s) in the sunniest spot in the house you can find.

grass in eggshells day 1

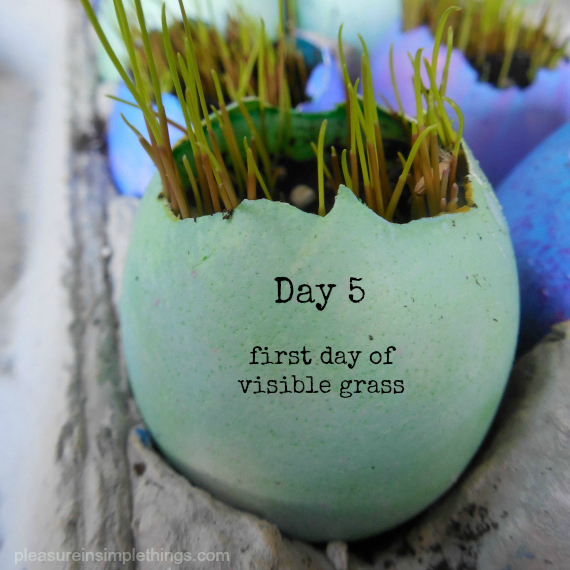
It is amazing how fast the grass will grow once it is sprouted.  The day grass begins to show, it will gain quite a bit of length.  The photos I am showing here were taken the first and second day the grass started to show.  The grass will be visible in less than a week, so plan accordingly.

day 6 grass in eggshells

Like any grass outside, this grass can be trimmed – just use scissors.

The same planting process can be used for any container…just be sure to protect any surfaces that are not waterproof…I line containers with a plastic sandwich bag if needed.

And that is it!  Very satisfying results in under a week!  What am I planning for these cuties?  I will share that with you in an upcoming post.  Meanwhile…give it a try!

Thank you so much for stopping by!

Remember to take pleasure in simple things, Jackie

Sharing at Craftberry BushCrafts a la ModeCoastal Charm and  We Call it Junkin.

15 comments » | diy, garden, holiday

baby chicks

29
March

baby chicks

In the spirit of Easter, I thought Friday field trip today would be a visit with some baby chicks :)

baby chick

These little ones are only one week old…

baby chick

Sure to put a smile on anyone’s face :)

baby chick

They are just so adorable!

two baby chicks

A perfect symbol for Easter…one of new life.

baby chick

Just remember, as you get involved with all your holiday preparations…

baby chick

to take pleasure in simple things…

baby chick in a basket

and to hold your loved ones close.

closeup of a baby chick

Easter is a time to celebrate with those you hold dear.

baby chick

Wishing you and those you love, a very blessed Easter!

baby chick

Thanks for sharing.  Love, Jackie

Sharing at Crafts a la Mode.

5 comments » | field trips, holiday

easter butter cookies

19
March

easter butter cookies

I always loved the butter cookies my friend Kim would bring to bridal showers…rich, buttery cookies that looked so sweet and tasted wonderful.  They were small round sandwich style cookies, with a pastel tinted filling.  At one point I finally asked her if I could have the recipe and I started calling them “Kim’s shower cookies” whenever I would make them.

easter butter cookies

For Easter, I decided to make “Kim’s shower cookies” but cut them in egg shapes rather than circles.  I chose to tint the filling a lavender color.

easter butter cookies

Easter butter cookies


Don’t they make a great “Kim’s Easter cookies?”

easter butter cookies

easter milk and cookies


Easter Butter Cookies Recipe

Cookies

  • 1 cup softened unsalted butter
  • 1/3 cup heavy cream
  • 2 cups flour

Filling

  • 1/4 cup softened unsalted butter
  • 3/4 cup confectioner’s sugar
  • 1 egg yolk
  • 1 tsp vanilla
  • food coloring

Combine the cookie ingredients and chill for 1 to 2 hours.  Roll dough out to 1/8″ and use a cookie cutter to cut out cookies, putting on an ungreased baking sheet.


easter butter cookies

Sprinkle with granulated sugar and pierce each cookie 3 times with a fork.  Bake in a 375 degree pre-heated oven for 7 to 9 minutes.  Cool cookies.

Combine filling ingredients and mix well.  Tint the filling to desired color with food coloring.

Assemble the cookies, sandwich style, spreading the filling on one cookie and placing a second cookie on top.

The number of cookies will vary depending on the size of your cookie cutter.  I made two dozen completed cookies using a 2 1/2″ egg shaped cookie cutter.

These cookies can be made ahead and stored in your fridge to make your holiday a little less hectic :)


easter butter cookies

pink tulip

I hope you enjoyed sharing my Easter butter cookie recipe.  Thanks Kim ;)

Thanks so much for visiting, Jackie

I am sharing this post at Coastal Charm, Timewashed,  The Well Crafted Home, Craftberry Bush, The Shabby NestA Pinch of Joy, and Craftionary.

5 comments » | food & festivities, holiday

favorite ways to decorate easter eggs

5
March

easter egg decorating

Decorating Easter eggs has always been a passion for me.  I have never stopped enjoying decorating eggs.  When I was small everyone in my family had their own favorite way to decorate the eggs…my mom had a steady hand and could do a great job creating stripes with the dye…those with less patience just threw the egg in the dye and left it while moving on to another activity.

Me, I always liked to try something different.  And, over the years I have discovered that there are an infinite number of ways to decorate eggs.  I usually plan one whole day before Easter to work on Ukranian egg dyeing and another to replicate the natural egg dyes my grandmother created (I will post these next week) from fruits and vegetables…that is in addition to a general egg dyeing session.

Today, I would like to share some of my favorite ways to decorate Easter eggs that I have used over the years.  I hope they will create some inspiration for you as you create your own.  Here are seven of my favorite ways to decorate Easter eggs:

easter egg decorating

Numbers or letters are always a motif I like on any home product so, of course, I also like to use them on eggs.  These numbers were simply written on using a marker.  Pick your favorite style of number and draw it right onto the egg.

easter eggs


decorated easter eggs

Letters can be written on in the same way….or, you can use some self-adhering rhinestones from a craft store to add some bling.

blinged easter egg

I love to create eggs that look like eggs in nature and I have tried many different techniques.  For example,  splattering paint onto the egg with a toothbrush is great for creating speckled eggs.  For a simple technique that creates a great result, simply apply gel stain to the surface of the egg by using an old rag.  For these eggs, the color I used was called mahogany.

easter eggs

Okay, technically this is not an egg ‘decoration’, but more like an egg ‘creation’, but I had to include it as one of my favorites.  This is a very easy technique and I love the way these eggs coordinate with my coastal style.  Use whatever twine, ribbon, etc. you may like and apply it to a small balloon after coating the twine with ModPodge.  Yes, it is messy, but very easy.  Once the twine is wrapped around the balloon in a desired pattern and has dried, pop and remove the balloon, and you have a beautiful twine egg!

easter eggs with twine

twine easter eggs

Using chalkboard paint is a favorite of mine because it makes a great Easter placecard.  The chalkboard paint is applied directly to the egg.  These days, chalkboard paint can be purchased or made in a variety of colors, so you don’t have to limit your choice to black.  Here I wanted a black and white egg, but you are only limited by your imagination.  You can dye the egg first if you prefer or want to dye the egg to match the color of your decor.

easter egg placecard

Seldom is anything decorated done in my house without some type of coastal influence.  Here, I have dyed a batch of eggs and then used small rubber stamps to add some of my favorite coastal words…sand, sea, surf, sun.  Inspirational words work really well also.  Of course, names of guests or family members is another option.

coastal decorated easter eggs

Here are some more coastal inspired eggs.  In this case, I used stickers to mask off a white area.  I created the shape I wanted by cutting it out from Contact paper and stuck it onto the egg where I wanted the pattern to remain white.  Then the egg was dyed.  After it dried, I used a very thin permanent marker to outline the shape and add a few details.

coastal easter eggs

I hope you enjoyed sharing some of my favorite ways to decorate Easter eggs.  Use these easy techniques as inspiration to create some of your own decorated Easter eggs.  Please pin your favorite!  If you want to keep the eggs indefinitely, be sure to remove the contents of the egg before dyeing.

decorated easter egg

Thanks for sharing.  Remember to take pleasure in simple things, Jackie

P.S. Sharing this post at Coastal Charm, Craftionary, Timewashed, The Shabby Nest , A Pinch of Joy, 6 Days of Spring at French Country Cottage,  The Inspiration Gallery at Craftberry Bush, and At The Picket Fence.

26 comments » | diy, holiday

easter nostalgia

1
March

plate

Can you believe Easter is in March and it is already March?  This week, Friday field trip is a little trip back in memory to Easter’s past.  I will also be sharing some Easter basket ‘goody’ ideas for Easter bunnies ;)

Easter was so fun when the children were young… leaving the carrot with the front teeth marks on the kitchen table so the kids could find it in awe;  sure that the Easter bunny had visited and quickly thinking about the treats in store as they scrambled to rifle through their baskets!

My kids are college students now and Easter is celebrated a little differently.  It still retains its awe, but in a much different way.  It is the one holiday in our family where everyone is together, so it makes for a very special day.

In the morning, my kids still discover filled Easter baskets on Easter morning.  They are the Easter baskets I made for them…yes, wove them….when they were babies.  My daughter had a thing for yellow when she was small so hers was accented in yellow and filled with yellow ‘grass’.  For my son, I made an apple basket and dyed it blue.

handwoven Easter basket

The basket contents these days are little different than when they were small, but I think the baskets are just as well received.  Not as much candy in recent years, although their favorite candies are still included.  My son loves Lindt truffles (red) and my daughter loves pear jelly beans.  Jelly Belly brand jelly beans have always been a tradition in the Easter baskets.  Each basket receives an assortment box, but my daughter always gets an additional extra bag filled exclusively with the pear flavored variety…that Easter bunny is just so darn thoughtful!

handwoven easter basket

In recent years, egg hunts in the living room are replaced with a GPS egg hunt throughout the town and beyond with teams of twenty-somethings scrambling to locate the hidden eggs and be the first back to grandma’s house.

My young niece and nephews still search the yard for filled plastic eggs that my sister has strategically placed around my mother’s yard.  When that is completed and trading of the contents ensues,  everyone makes a guess as to how many jelly beans are in the huge glass jar my mom has filled and whose contents were accurately counted the day before.  The person with the closest guess wins the entire jar (…and, may or may not share with the group lol).  We always think my sister, the math teacher, is sure to win; but that is never the case.

candy carrot

An “oldie but goodie.” I started making these as a Kindergarten room mother…cellophane is shaped into a cone and is filled with anything orange…candy, goldfish, etc…fun!

My favorite part of Easter?  Taking the annual ‘goofy cousins’ photo at some point during the day.   And, I still love coloring eggs with my daughter which we schedule best we can sometime before Easter.  What makes your Easter special?

Do you have trouble thinking of items to include in your child’s Easter baskets as they become college age?  Necessities are always appreciated…you can’t miss with socks and underwear!  Commercial washers and dryers are brutal on these items!  Here is a list of possible goodies to choose from in a variety of price ranges.  Remember to consider the recipient’s special interest or college major to make the items more personal.  Have fun with it!  Send me an email if you need some suggestions.

Easter Basket Gift Ideas

Easter basket gift ideas

I found these for my nursing student’s Easter basket :)

  • Candy – favorites or novelty
  • Band-Aids
  • Alix & Ani bracelet
  • James Patrick Keil bracelet
  • Vitamins, aspirins, etc.
  • Any toiletry item
  • Toothbrush economy pack
  • Lottery tickets
  • ITunes certificate
  • Train/bus ticket to come home for a family function
  • Laundry card, token, or coins
  • Dunkin Donut or Starbucks certificates
  • Printer cartridge
  • Drug store, gas station or Amazon certificate
  • Chegg money for renting textbooks
  • Paper cups/plates/utensils
  • A gift certificate to something local to their school
  • Key covers – they have fun ones in Home Depot
  • Cell phone covers – can be personalized/decorated
  • Family photo – a recent one or one from childhood
  • Concert or sporting event tickets local to their school
  • Easter motif socks or boxers

    hair brush

    I found these hair brushes in a pattern my daughter is sure to love!

  • Laundry bag or laundry bag for delicates
  • Hair elastics
  • Nail polish pen
  • Emery boards in funky pattern
  • Flash drives (these come in silly patterns – surfboards, Legos, sushi, etc.)

I hope you enjoyed today’s Easter nostalgia and some tips for Easter basket gifts.  I hope my Easter nostalgia caused you to reminisce about some special moments of your own Easter’s past.

Stop back tomorrow when I will announce February’s book giveaway winner and the giveaway selection for March.

Have a wonderful weekend.  Thank you so much for visiting, Jackie

1 comment » | holiday, nostalgia

Back to top