Subscribe to Pleasure in Simple Things via RSS ReaderFollow Pleasure in Simple Things on InstagramFollow @InSimpleThings on TwitterLike Pleasure In Simple Things on FacebookFollow Pleasure In Simple Things on PinterestEmail Jackie

coastal nail colors

April 5, 2013

kayak at beach

This is an unusual Friday field trip.  It is a trip to the beach…we all need that right about now, don’t you think?  I know, a Friday field trip to the beach is not that unusual…especially for me.  But, the reason for the trip to the beach is a little unusual…the reason is to create a nail polish collection!

I have always wanted to create a nail polish collection and I have been inspired to do so from so many sources…I could create an entire collection just from the colors of my sea glass or, an entire collection of neutrals just from the white flowers in my garden.!  And, there definitely is plenty of color inspiration at the beach…many more colors than I wanted for just one collection.  I decided the collection would be six shades…the top six…and these shades would be the ones I most wanted to wear.    A versatile collection and, a realistic one.  Cutting it down to six was not easy!  This meant I had to eliminate watermelon slushie, beach donuts, gull, lavender sea glass, and ragosa – to name a few.

Connecticut coast photo

color of clouds

I think a beach collection has to contain some blue…there is so much blue at the beach.  Rather than go with the obvious…water…I decided to get inspired by the sky.

The beauty of the sky at the beach is that it is always changing.  Sometimes, when the weather is the most severe, the sky is the most beautiful.  A clear sunny day may be what a beach lover craves, but it certainly is not the most beautiful sky at the shore.  This photo illustrates this point perfectly… a clear, sunny day would not be as beautiful as the sky I captured  in this photo on a very cloudy day.  Because of this, the blue shade inspired from the sky is named cloud.

a photo of the water meeting the shore

color of a beach stone

Neutral colors are definitely my favorites and there are plenty to choose from at the beach.  Just as beautiful as a shell or a piece of sea glass, are the many stones at the beach.  They are sometimes speckled or striped…some are the most beautiful when wet with salt water.  The color inspired by one of these beauties is called beach stone.

photo of a beach house

color of a beach fence

Old whitewashed fences and posts are everywhere at the beach.  The old ones have so much more charm than anything new.  The age of the shore is part of the beauty contained in the wood.  This is the inspiration for the third color called old fence.
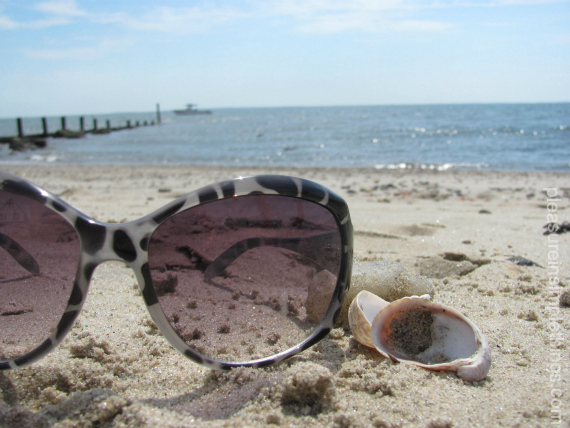
photo of sunglasses on the beach

color of sunglass reflection

Not all the color inspirations at the beach are natural objects…a beach umbrella, a horse on the carousel, or a striped beach towel can all prove to be color inspirations.  Here, I am inspired by the color of my sunglass lenses and I am naming this color reflection.

shell

color of the inside of a shell

An obvious choice for color inspiration is a shell.  The subtleties of color on some of the shells (both interiors and exteriors) on the beach are just so beautiful. Here it is the blush of mauve.  I’ve named the color shell.

photo of wet footprints at the beach

color of wet footprints at the beach

For the last color, it really needed to be a gray tone to round out the collection.  And gray is an easy color to come by at the beach.  For this shade, I was inspired by the wet footprints on the sun-bleached wooden path and named it footprint.  That makes six…

I present to you, the entire CONNECTICUT COAST NAIL COLOR COLLECTION 2013:

coastal nail polish collection

What do you think?  I would wear all of them!

I hope you enjoyed our Friday field trip to the beach to create a fantasy nail polish collection.

Dreaming of warm days and salty breezes :)

Thanks so much for visiting.  Have a wonderful weekend, Jackie

I am sharing at Boogieboard Cottage,  A Pinch of Joy, and Little Red House.

4 comments

lemon floral place setting

April 2, 2013

flowers in a lemon

For a great pop of spring color at a place setting, arrange some flowers in a fresh lemon.  Since you only need a few flowers and some lemons to create these cheery floral arrangements, they are an economical way to add some pretty freshness to a spring table.

flowers arranged in a lemon

fresh lemons

diy flowers in a lemon

You will need half of a large lemon for each place set at your table, in addition to some fresh flowers and some floral oasis.  As you can see, I am reusing an old piece of oasis.  After slicing a large lemon in half, cut and remove the insides of each half, keeping the rind intact.  (Don’t waste the insides…I used mine to make Arnold Palmers.)  Cut a piece of floral oasis to fit snugly in each lemon half.  Saturate the oasis so that it is wet but not dripping.

Arrange a few flowers in the color(s) of your choice – purchased or from your garden – in the foam.  You will only need a few for each half.  I have also added a little Spanish moss to mine.

The perfect little arrangement to adorn a place setting :)

fresh flowers in a lemon

fresh flowers in a lemon

Hope you enjoyed today’s easy diy fresh lemon floral place setting arrangements.  A fast, easy, and inexpensive way to add some bright freshness to your spring table.

Thanks so much for visiting.  Remember to take pleasure in simple things, Jackie

Sharing this post at Coastal Charm, Common GroundCraftionary, and Craftberry Bush.

no comments

monthly book giveaway for april

April 1, 2013

the storyteller ~ jodi picoultjodi picoult giveaway

Hi everyone…how was your weekend?  It’s the first of the month, so I need to announce the monthly book giveaway winner and next month’s giveaway selection.

Congratulations to Theresa N. from SC!  She is the lucky winner of the March book giveaway – a signed copy of the New York Times bestseller, Hoda:  How I Survived War Zones, Bad Hair, Cancer, and Kathie Lee by Hoda Kotb.  You can read more about the book and see photos of Hoda by clicking here.  I know you will enjoy the book Theresa!  Happy reading!

For April, I have a very exciting selection!  I have not yet actually had the chance to read the book myself…it has not been out very long.  I know there are many Jodi Picoult fans out there who would love to win her newest release, The Storyteller!  This book has been signed by Ms. Picoult at a recent appearance in Philadelphia.  I have received offers to buy this book, but it is not for sale!

It is this month’s book giveaway…and, no purchase is involved!  Just  ‘like’ the pleasure in simple things Facebook page or leave a comment on the blog and you are automatically entered in the random monthly drawing.  Good luck!

I hope everyone enjoyed a Happy Easter weekend :)

Remember to take pleasure in simple things, Jackie

no comments

baby chicks

March 29, 2013

baby chicks

In the spirit of Easter, I thought Friday field trip today would be a visit with some baby chicks :)

baby chick

These little ones are only one week old…

baby chick

Sure to put a smile on anyone’s face :)

baby chick

They are just so adorable!

two baby chicks

A perfect symbol for Easter…one of new life.

baby chick

Just remember, as you get involved with all your holiday preparations…

baby chick

to take pleasure in simple things…

baby chick in a basket

and to hold your loved ones close.

closeup of a baby chick

Easter is a time to celebrate with those you hold dear.

baby chick

Wishing you and those you love, a very blessed Easter!

baby chick

Thanks for sharing.  Love, Jackie

Sharing at Crafts a la Mode.

5 comments

…a few more eggs

March 26, 2013

natural saffron egg dye

I know I already posted my favorite ways to decorate Easter eggs (including coastal style).  But, I thought you might like to see the results of some of the natural Easter eggs I dyed.  My grandmother always used onion skins and beets so I had to dye some in ‘old school’ fashion.  I also dyed some using my gift of saffron I told you about in this post in addition to dyeing some with red cabbage.

eggs dyed with red cabbage

If you don’t remove the insides of your eggs before dyeing, it is hard to part with the ones you really love..at least it always is for me!

egg dyed with onion skins

I make egg salad from the insides of the eggs and recycle the outsides by using them in terrariums or houseplants…or to create mosiacs.  You don’t throw out the colored egg shells, do you?  When I was a kid I saved all the colored shells…I just couldn’t part with them.  Over time, I discovered ways to use them…

Easter eggs dyed with saffron

My favorite was to create mosaics.  You can do this too….or, as a project for the kids.  I suggest giving your children the task of separating the shells by color (a good way to keep them occupied for a while!) and then use the assorted shells to create designs by glueing them onto notecards.  A great gift to give grandma for Mother’s Day!

eggs dyed with beets and saffron

eggs dyed with beets

eggs dyed with red cabbage

I hope you enjoyed seeing some more of my decorated Easter eggs.  This batch used only natural dyes from plants.

You still have time to get some eggs dyed before the weekend!  If you don’t want to use natural dyes, you can mix 1/2 cup boiling water, 1 tsp. white vinegar, and food coloring in a coffee cup and use that to dye your eggs…no need to buy a kit.  I wish I knew this when I was a kid…we would split up the color tablets from the egg decorating kit between the four siblings and there was always a fight over a color everyone wanted!

Oh, and remember to save the shells so you can do some experimenting…

Have a blessed Holy Week my friends…remember to take pleasure in simple things :)


easter quote

Thanks so much for visiting, Jackie

P.S.  The natural dyes I used in the photos in this post:  1.saffron, 2.red cabbage, 3.onion skins, 4.saffron, 5.saffron & beets, 6.beets, 7.red cabbage, 8.saffron & beets

I am sharing at Coastal Charm.

4 comments

terrarium love

March 22, 2013

terrarium elements

Today, Friday field trip is a visit to my friend’s house.  Her name is Phyllis, and we are getting together for what she affectionately refers to as “a playdate.”  On this occasion, we are making terrariums.  We had recently picked up some terrarium plants and supplies at Terrain and we were very anxious to start creating!  I am sure we will have future field trips to Phyllis’s home since it is amazing!  I have so much inspiration I could share with you…her decor, her gardens, her handcrafted jewelry…well, everything!  But, for today, I will limit my sharing to our terrarium creations.

terrarium

When I got to Phyllis’s house we started right in…covering her large kitchen island with newspaper and taking out all our various supplies.  In addition, her entire dining room table was covered with assorted containers and possible decorative terrarium items.  She showed me the terrarium she had already completed.  Wow!  It is so beautiful…a little watering can!…and a hanging plant!  Isn’t it great?

Completed Terrarium


close up Terrarium


close up Terrarium view

Because Phyllis already knew all the terrarium basics, I didn’t have to worry about doing alot of research.  She explained about the rocks for drainage on the bottom (I think I would have figured that out) and a layer of activated charcoal (I would not have figured that out) before the layer of soil.  So, after a quick lesson on how to proceed, I needed to decide exactly what I wanted to put into the terrarium.

plant for terrarium

I figured I had two ways to go.  I could do an Easter/spring theme and use eggs and nests OR I could do my standard (coastal/beach) theme.  I decided to go with a ‘beachy’ theme and got some possible items assembled.  The interesting thing about putting a terrarium together is that you don’t really need as many plants or decorative items as you may think.  Less is really more.  So, I decided my main decorative item would be a sand castle.

terrarium elements

From there, I would use some rocks, shells, sea glass, and moss that reminded me of the beach.  For the plant?  Phyllis and I had both fell in love with a plant called Breynia Snow Bush that we found at Terrain and that would serve as the highlighted plant in my creation.

terrarium elements

And…this is what I came up with…what do you think?  I love it!  Isn’t the little colored gravel so great?  I think it is sold as fish tank decor.  I had some old glass ‘bubbles’ that were used many years ago with floating candles that lent themselves perfectly to the ‘beachy’ terrarium.

photo of coastal theme terrarium

Adorable, don’t you think?

closeup beach terrarium

You are probably wondering what Phyllis was working on…wait until you see!  Phyllis and I had both been intrigued by the ‘pussy willow teepees’ we saw in some of the terrariums at Terrain…like the one on this bunny arrangement.  So, Phyllis decided to create one in a pretty metal container she had on hand.

bunny terrarium

This beautiful arrangement is what she came up with!  So gorgeous!

pussywillow tent planting

She created the “teepee” from stalks of pussy willow.  She attached them on top by putting an elastic band around a piece of moss she harvested from her yard.  So beautiful…and with the pussy willow and the addition of some real quail eggs from Terrain, the perfect Easter arrangement!  You can see in this closeup that the elastic is not even visible once it is put into the moss.

making a pussywillow tent

Playdate successful!

Consider ‘shopping’ your basement and garage for possible terrarium containers and decorative items…Terrain has some really cool terrarium items if you want to purchase some or supplement what you can find around your house.  Miniatures from train sets or Christmas villages can also be used.  The sand castle I used was actually a repurposed photo holder – I just trimmed off the wire stand.  Just remember to use soil appropriate to the plants you select.

I hope you enjoyed my Friday field trip to create terrariums.  Special thanks to my partner in crime!  I forgot to mention the homemade golden pea soup I had for lunch (so yummy!) or the eggplant and famous key lime pie (heaven!) from The Pantry in Fairfield…ahhh..the perks of the playdate!  Thank you so much for stopping by!

Have a fabulous weekend, Jackie

I am sharing at Little Red House, Serenity Saturday, The Inspiration Gallery, Craftionary, Common Ground, Give Me the Goods Monday, and The Well Crafted Home.

16 comments

easter butter cookies

March 19, 2013

easter butter cookies

I always loved the butter cookies my friend Kim would bring to bridal showers…rich, buttery cookies that looked so sweet and tasted wonderful.  They were small round sandwich style cookies, with a pastel tinted filling.  At one point I finally asked her if I could have the recipe and I started calling them “Kim’s shower cookies” whenever I would make them.

easter butter cookies

For Easter, I decided to make “Kim’s shower cookies” but cut them in egg shapes rather than circles.  I chose to tint the filling a lavender color.

easter butter cookies

Easter butter cookies


Don’t they make a great “Kim’s Easter cookies?”

easter butter cookies

easter milk and cookies


Easter Butter Cookies Recipe

Cookies

  • 1 cup softened unsalted butter
  • 1/3 cup heavy cream
  • 2 cups flour

Filling

  • 1/4 cup softened unsalted butter
  • 3/4 cup confectioner’s sugar
  • 1 egg yolk
  • 1 tsp vanilla
  • food coloring

Combine the cookie ingredients and chill for 1 to 2 hours.  Roll dough out to 1/8″ and use a cookie cutter to cut out cookies, putting on an ungreased baking sheet.


easter butter cookies

Sprinkle with granulated sugar and pierce each cookie 3 times with a fork.  Bake in a 375 degree pre-heated oven for 7 to 9 minutes.  Cool cookies.

Combine filling ingredients and mix well.  Tint the filling to desired color with food coloring.

Assemble the cookies, sandwich style, spreading the filling on one cookie and placing a second cookie on top.

The number of cookies will vary depending on the size of your cookie cutter.  I made two dozen completed cookies using a 2 1/2″ egg shaped cookie cutter.

These cookies can be made ahead and stored in your fridge to make your holiday a little less hectic :)


easter butter cookies

pink tulip

I hope you enjoyed sharing my Easter butter cookie recipe.  Thanks Kim ;)

Thanks so much for visiting, Jackie

I am sharing this post at Coastal Charm, Timewashed,  The Well Crafted Home, Craftberry Bush, The Shabby NestA Pinch of Joy, and Craftionary.

5 comments

a trip to marvin gardens

March 15, 2013

garden sign markers

Today’s Friday field trip is to Marvin Gardens in Wilton, Connecticut.

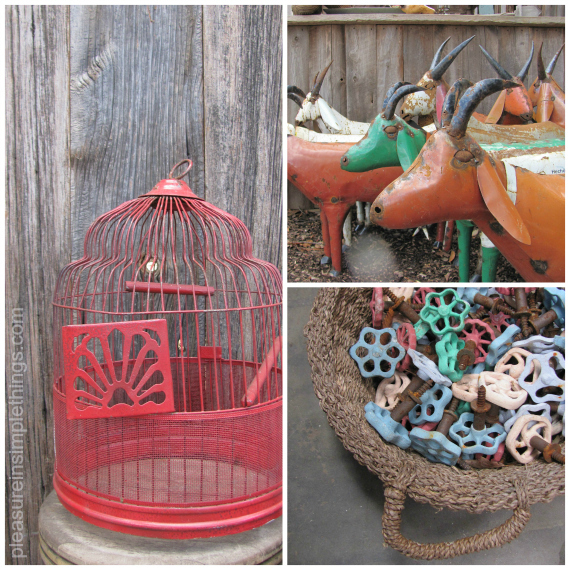
If you are a decorator or designer in Fairfield County, you probably already know about this gem of a place.  It houses an amazing array of all things decorative.  Inspiration lurks in every nook and cranny; indoors and out.

wire cage

antique

As it turned out, I probably didn’t time my visit the best for photo taking purposes, since the shop was in the middle of a move – moving the entire inventory to a new space a few hundred feet down the road.  The nice part about the timing of my visit was that a huge moving sale was in progress (through April 1st) and some items were reduced as much as 50%.  Very bad temptation…especially at this time of year when so many items were just crying out to be put in the garden or used as a container to plant something in!

collage of garden items

bird whistle

Today I will share a few of the items that inspired me…I will need to make another visit when the move is complete so I can share some photos of the new space.

old aqua box

mice

collage of colorful items

old bottles

Wonderful items, don’t you think?

marvin gardens sign

Truly a treasure hunt!

ceramic pots

A great place to find a unique piece for home or garden.

buddah head

Hope you enjoyed your visit to Marvin Gardens in Wilton, Connecticut.

marvin gardens sign

Thanks for visiting.  Have a wonderful weekend!

Remember to take pleasure in simple things, Jackie

(P.S.  It’s a yellow property…weren’t you remembering Marvin Gardens from Monopoly?…it’s yellow, right next to the “go to jail” square).

I am sharing at the Vintage-Love Party at Blue Egg Brown Nest.

no comments

st. patrick’s day tea

March 12, 2013

shamrocks in a teacup

I saw some adorable little shamrock teacups and saucers in The Christmas Tree Shop (a bargain store here in New England) about a month ago and and all I could think of was planting shamrocks in the cup!  And, I had the perfect Irish friend to give it to.  So, I purchased one and waited for some shamrocks to be available for sale…which they always are as St. Patrick’s Day comes close.

shamrocks in a teacup

I was so excited when I saw a shamrock plant in one of the bargain stores…yes!

planting shamrocks

planting shamrocks for St. Pat's

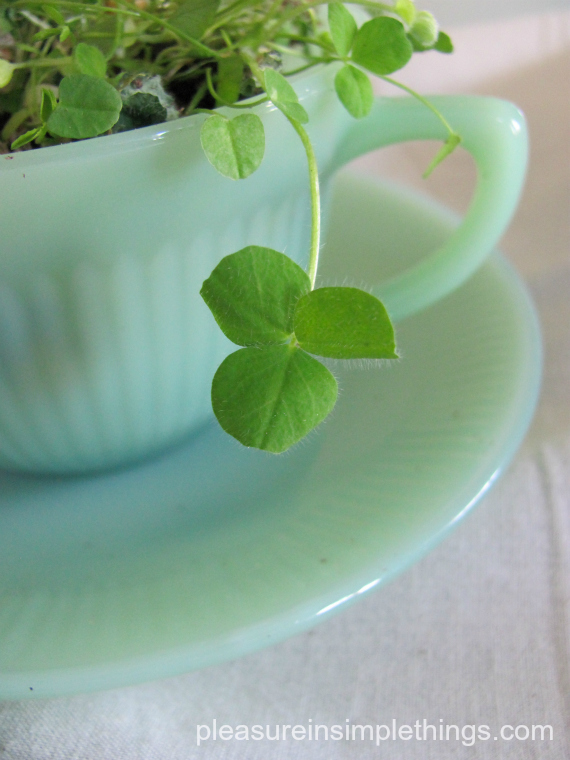
I simply planted the shamrocks into the teacup…my one shamrock plant was big enough to use for two cups…I used the sweet little shamrock teacup and…

shamrocks in a teacup

A photo of shamrocks planted in a sweet little teacup for St. Patrick’s Day.

planted some in one of my Jadite cups to add a little St. Patrick’s Day spirit to my own home :)

shamrocks in Jadite

Get yourself some shamrocks and plant them in a container that makes you smile!  I can’t send you a shamrock-filled teacup, so, as a gift to you, here is a St. Patrick’s Day blessing you can pin or send to a friend :)  Happy St. Patrick’s Day!

An Irish Blessing for St. Pat's

Have a happy and safe St. Patrick’s Day week!

St. Patrick's Day teabag

Thanks so much for visiting, Jackie

P.S. Please ‘like’ my facebook page by clicking here or the facebook icon at the top of the page so I can share more ideas/inspiration during the week that don’t fit in my posts :)

I am sharing at Coastal CharmTimewashed, Shabby Creek CottageCrafts a la Mode, CrationaryThe Shabby Nest, Little Red House, and Craftberry Bush.

13 comments

a day at the philadelphia flower show

March 8, 2013

spring flowers

For Friday field trip this week, I am sharing some of my day in Philadelphia last Saturday…so; technically…I guess it is a Saturday field trip!

My weekend was planned around the fact that the largest and oldest flower show in the world was taking place at the Philadelphia Convention Center.  The theme for the 2013 show was “Brilliant!” and was a homage to all things British.

I had never been to a flower show – never mind the largest – so I was excited!

Since I was visiting my daughter for the weekend, I decided to plan my flower show visit during the time she was working at the hospital.

I got an early start and headed over to the Free Library for a couple hours before the flower show started at 11:00.  I was very lucky that the programming for “One Book, One Philadelphia” happened to coincide with my visit.  The selection for the year is The Buddha in the Attic.  I really enjoyed the book so it was easy to spend time at the library checking out the exhibits related to this year’s selection.

The Free Library in Philadelphia

A photo of the Free Library in Philadelphia.

As 11:00 approached, I reluctantly left the library (I didn’t have enough time to see the rare book collection) and headed over to the Convention Center.  Wow!  What a crowd had formed waiting for the 11:00 start.  While I waited, I was intrigued by this sculpture in the lobby:

Philadelphia convention center sculpture

Cool, right?

When I got into the flower show, I checked the schedule and decided to attend some presentations in the seminar rooms before making my way into the main show area.  Living outside New York City and having attended various shows at the Javits, I was pretty right on with what I expected to find inside the show as far as crowd, etc. ($4.50 for an iced tea!)  But, I had no experience on attending garden shows and I was a little taken aback by the darkened room and theatrical lighting.  I thought to myself I think I made a mistake with this.   But, I soon found out there was ‘something for everyone’ as I made my way around the show area.  Although the theatrical type displays did not appeal to me, I found some areas that were more in tune with the natural elements I admire.

photo of table with radishes

Natural style at Philadelphia flower show

My favorite part of the show was probably the Gardener’s Studio.  This was a presentation area and every hour, on the hour, I rushed back; anxious to see the next presentation.

jonathan wright from chanticleer

Jonathan Wright from Chanticleer – a public garden outside Philadelphia – demonstrates how to create indoor arrangements by using branches from the winter garden.

It was impossible to get photos of the flower exhibits because of the sheer mass of people and because of the crazy lighting.  I did take a few photos, but not of the typical things everyone else seemed to take.  If you want to learn more about the show, you can check the Philadelphia Flower Show website or see some of the many photos on line.  Better still, plan a visit next year because you really have to be there in person to truly appreciate it…besides, everyone should attend the Philadelphia Flower Show at least once in their lifetime!

Sculptures at Philadelphia Flower Show

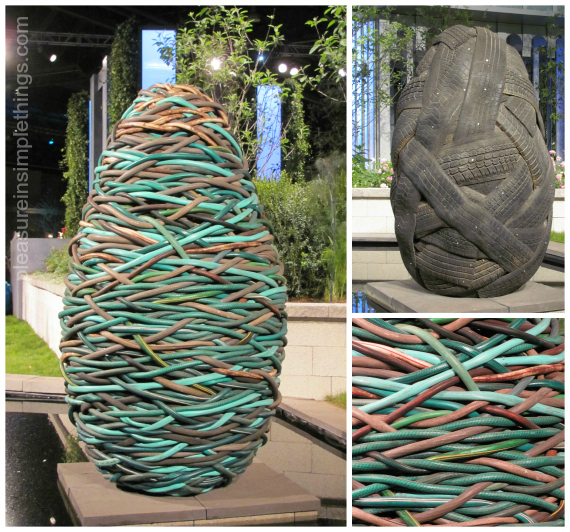
A photo of some curious egg-shaped sculptures at the Philadelphia Flower Show – one from hoses and one from tires.

In addition to all the flower displays, the retail area was really fun.  Some of the retailers rivaled the flower displays in their creativity and beauty.  I fell in love with Chive, a Canadian company that sells a wide array of vessels for flowers.  They carry some really unique pieces…all beautiful.  Here is an example of one:

flower vase from Chive

One of the many unique flower vessels available from the Canadian company, Chive.

Aren’t these flatware holders adorable?  Cutlery Couture offered a wide selection:

Cutlery Couture

One of the many styles of cutlery holders offered at the Cutlery Couture booth at the Philadelphia Flower Show.

Some really unique jewelry pieces were available at Elements:

Elements at Philadelphia Flower Show

A selection of the offerings of Elements at the Philadelphia Flower Show.

I had to stop and admire the fresh flowers from The Hawaii Tropical Flower Council.  They were even hand crafting orchid leis to order!  Beautiful!

Hawaiian Flowers at Philadelphia Flower Show

This wonderful item is the work of artist Michelle Masters – a creator of topiary art and fine art originals:

Michelle Masters

A sample of the topiary art by Michelle Masters at the Philadelphia Flower Show.

If I hadn’t had a ticket for the afternoon tea, I may still be wondering around the marketplace area!  The tea was a lovely way to meet some new people and admire the fresh roses that were everywhere.

Garden Tea at the PHiladelphia Garden Show

After the tea, it was time to meet my daughter so I said ‘cheerio’ to the Philadelphia Flower Show, but not before making a vow to return next year.  Wait!  We had one last stop before we left Center City for the day.  We can never be in Center City and not visit the West Elm Philly store!

West Elm PHiladelphia

west elm philadelphia

NOW we can say good-bye to Center City for the day…a day well spent :)  Especially the part I got to spend with my daughter :)

Thanks so much for visiting.  Have a wonderful weekend, Jackie

1 comment

Back to top