Subscribe to Pleasure in Simple Things via RSS ReaderFollow Pleasure in Simple Things on InstagramFollow @InSimpleThings on TwitterLike Pleasure In Simple Things on FacebookFollow Pleasure In Simple Things on PinterestEmail Jackie

personal reflections at longwood gardens

May 10, 2013

Longwood Gardens

Friday field trip this week is to Longwood Gardens.  With over 1,000 acres of garden, woodland, and meadows, it almost doesn’t seem correct to refer to it as  ‘gardens’ since it is so much more like a museum than a garden.  And, like a museum, a visit to Longwood is a very personal experience.  Today, you are seeing Longwood through my personal reflection.

tulips at Longwood Gardens

Longwood Gardens fountains

My visit was in late April and most visitors were preoccupied with the tulips in bloom – certainly the sheer number of blooms was awesome…no question about that.  The Flower Garden Walk display boasted over 100,000 bulbs in bloom!  So, I am sure many left Longwood the same day as I, with cameras filled with photos predominately of tulip masses.  Not the case for me.  In fact, the rose arches I was so obsessed with were not even in bloom! 

Rose Arch at Longwood Gardens

This trip, my personal favorites…in order of fascination were – the copper beech trees, the whimsical topiary garden, and the rose arches.  And, I should mention (in case you don’t already know), that I have a special affinity for all flowers white!  (If you need some proof, you can check out the white flowers in my garden last spring.)

white tulips en masse at Longwood Gardens

Copper Beech trees at Longwood Gardens

Copper beech tree at Longwood Garden

copper beech at Longwood Gardens

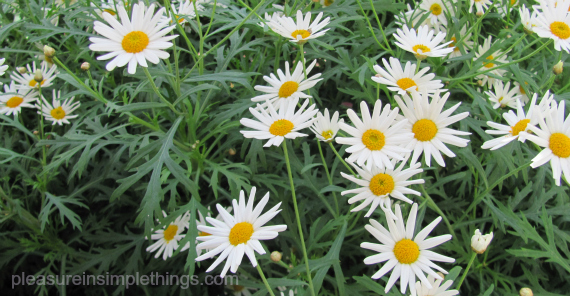
Recently named #2 on the national list of top public gardens, Longwood Gardens, in Kennett Square, Pennsylvania is a truly amazing place to visit.  Each visit is a unique and visually exciting experience.Topiary Garden at Longwood Gardensdaisies at Longwood Gardens

Topiary Garden at Longwood Gardens

Every day this living museum provides something different bursting into bloom – cycles differ year to year.  Even the weather changes the way things look each visit.  On one trip you may observe a hummingbird that changes your whole perspective of a flower… or a sunny spot one visit may be in the shade the next visit and change the experience…Longwood showcases nature at its most inspiring.  

Longwood Gardens

We took full advantage of the beautiful day by enjoying a picnic lunch in the space provided by Longwood.  I am so glad we did since I enjoyed the beauty of this tree while we ate…

magnolia tree bloom

Less than an hour outside Philly, Longwood is an easy place for me to visit while staying with my daughter in the city and I continue to visit…each time a new adventure :)

Thank you for visiting and sharing my visit to Longwood Gardens.   I will leave you with a very amateurish video of the beautiful Italian Water Garden…sorry, I have only used the camera a couple of times and I am still trying to learn how to use it…but, you can get some idea of how beautiful the water garden is!  Couldn’t resist adding the song!

Have a wonderful Mother’s Day weekend!  I love celebrating the results of my motherhood – my two greatest accomplishments in life :) 

Remember to take pleasure in simple things, Jackie

Sharing with:  Tablescaper, Craftionary, Mona’s Picturesque, Craftberry Bush, Nuture Photography Spring Challenge, and Common Ground.

18 comments

may is national bicycle month

May 7, 2013

bicycle image by Vitis Viniferacredit: Vitis Vinifera

May is National Bicycle Month.  Because bicycles hold a very special place in the hearts of my family, I wanted to recognize them in a special way.

bicycle quote

So, to pay homage to the bicycle, I would like to share a few of my favorite bicycle images from Pinterest.

bicycle image from temp filescredit: temp files

You are welcome to also share my favorite bicycle quotes…I will post them throughout the month on my facebook page.  If you want to check out some more great bicycle images, check my pinterest board a love for bicycles.

bicycle images by Clairecredit: Images by Claire

bicycle anders schennemann photographycredit: Anders Schennemann Photography

bicycle in sunsetcredit: unknown

I hope you enjoyed these beautiful cycling images in celebration of National Bicycle Month…

If you need more to satisfy your cycling self, maybe you would like to

listen to the best bicycle song ever

or, share some of my favorite bicycle items from around the web:

pick one of these cool bike bells or handle bar airplanes to add to your ride

get a book with a magnificent collection of cycling images

read the story of a very talented cyclist I know and like, or

a great book to learn about the Tour de France past doping culture first hand

hold your book collection with these cool bookends

watch a great film

find a special spot for this beautiful pillow with a vintage bicycle image

enjoy a post-ride beverage from these beautiful bicycle printed glasses

write a special note on extraordinary personalized stationery sporting a red bicycle….

Happy cycling!  Cyclisme heureux!  :)

Thanks for stopping by, Jackie

If you have any great cycling images, please feel welcome to share on my facebook page.

I am sharing at Coastal Charm and A Pinch of Joy.

1 comment

handcrafted fabric tableware

May 3, 2013

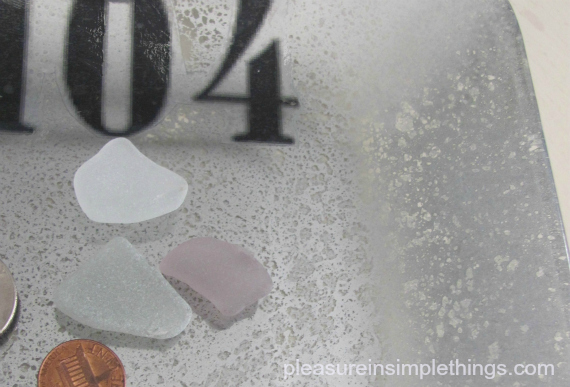
handmade coasters with sea glass

I recently fell in love with the handcrafted fabric placemats, coasters, and table runners created by artisan Eileen Duffy.  For Friday field trip this week, we are taking a trip to Eileen’s studio.

Now living in Connecticut and commuting into New York City, Eileen can be found selling her wares at upscale farmer’s markets in Connecticut on the weekends.

photo of handcrafted fabric coasters

closeup of handcrafted coaster

A former Ralph Lauren designer, and more recently the designer of her own handbag collection, Eileen has decided to focus on creating her table accessories while she continues her fashion and prop styling work in the city.

handcrafted table runner

Can you guess which ones are my favorite?

handcrafted fabric coasters with starfish

Eileen seeks out really cool textiles from a variety of sources to create her beautiful, and surprisingly affordable, handcrafted table accessories.

handcrafted fabric coasters

Some of her fabrics feature some really great flower photography.

handcrafted fabric coasters

handcrafted fabric tableware

In the photo below, you can see one of Eileen’s inspirational ‘mood boards’ hanging in the studio.

handcrafted fabric tableware

If you live in Connecticut, or are close enough to visit on a weekend, Eileen can be found at The Dudley Farm Farmers’ Market in Guilford.  It is a great place to purchase local and organic seasonal produce and handmade crafts.  The market sits on ten acres of sheep pasture and gardens filled with flowers and heirloom vegetables.  Check the Dudley Farm website for the current time schedule and directions.

handcrafted table runner

I hope you enjoyed today’s Friday field trip to Eileen Duffy’s studio to see some of her handcrafted fabric coaster, placemat, and table runner creations.  Thanks for letting us take a peek Eileen!

Have a wonderful weekend!  Thanks so much for stopping by!

Remember to take pleasure in simple things, Jackie

I am sharing at The Tablescaper, The Shabby Nest, Craftionary, Little Red House, and Craftberry Bush.

4 comments

monthly book giveaway for may!

April 30, 2013

Mary Ann Wasil's book

nancy 003Congratulations to Nancy from New Jersey for winning the April book giveaway!  Nancy has won a copy of Jodi Picoult’s newest novel The Storyteller.  With the weather getting nice and warm, be sure to do some outdoor reading Nanc ;)  Now, on to the May selection…

Since May is the month we traditionally recognize mothers, this month’s giveaway book is written by one of the most amazing moms I know.  It is the newly published memoir My Intense and Meaningful Life with Cancer, A Diary of Healing written by Mary Ann Wasil.  It is the touching, and humorous account of this mother’s battle with breast cancer.

The author of this book is the mother of three.  Many are impressed by her beauty (both inside & out)…by her wonderful relationship with her children…by her courage…by her amazing attitude…these things are impressive to me too, but the thing that impresses me most about Mary Ann is her dedication to giving back.  She is not content focusing on her own recovery.  She has established a nonprofit called The Get in Touch Foundation to help others and to affect change.  This foundation helps girls of all ages (starting in grade 5) to ‘get in touch’ with their bodies, information, and each other to help in the crusade against cancer.  Mary Ann has made an amazing commitment with her life and I would like to share her story with you…I hope you win one of the three signed giveaway books!

Because this book is so special, I have decided to give away three signed copies!  This month, I am asking you to say you are a cancer survivor, know a cancer survivor, or want to help eliminate cancer…just write this in a blog comment, in a tweet, in an email, or on my Facebook page and you will be entered to win one of the three copies I will give away at the end of the month!

Good luck!  In the meantime, you can meet Mary Ann here.

photo of copies of Mary Ann Wasil's book

Thanks so much for visiting!  Remember to take pleasure in simple things, Jackie

7 comments

random acts of flowers

April 26, 2013

flowers and seaglass

Today’s Friday field trip is a step back in time…back to the late 20th century…to celebrate the May Day (May 1st) tradition of leaving flowers anonymously on neighbor’s doorsteps as a signal to the start of spring.

flower quote by Monet

may day coastal flowers

For my May Day ‘baskets’ I used discarded cigar containers…apparently, some cigars are sold in glass tubes similar to a test tube…who knew?  So, I took some discarded containers and repurposed them as May Day flower containers to leave as surprises :)  Who wouldn’t enjoy finding some fresh flowers on their doorknob?  Using fresh flowers, some scraps of ribbon, twine, sea glass, shells, and driftwood I created some pretty May Day surprises to hang on unsuspecting…insert suspicious laugh here…doorknobs.

flower

May Day coastal flower

Flower quote from the Koran

May Day daisies

May Day daisies

flower quote

hanging May Day flowers

Pink flowers for May Day

pink  flowers for May Day

Emerson flower quote

a250endingFlower tubes 033

I hope this inspires you to come up with your own variation of this May Day tradition.  A fun way to celebrate spring and put a smile on someone’s face :)  Thank you for sharing this week’s Friday field trip…a trip back in history to celebrate May Day with flower surprises!

Giving flowers is a simple pleasure that can surely make a difference in someone’s day.

You only need a stem or two to let someone know they are thought of in a special way.

Thank you for visiting!  I will be busy the next couple days….you can follow my adventures on Instagram :)

Have a really wonderful weekend, Jackie

Sharing with Common Ground, Craftionary, Roses & Stuff, Shabby Nest, Coastal Charm, Little Red House, A Pinch of Joy, Mona’s Picturesque, and Nurture Photography Spring 2013.

20 comments

the best of jelly shots

April 23, 2013

fish shaped jelly shots

As soon as the weather gets nice and picnics come to mind, so do jelly shots.  My sister always makes Jell-O eggs (yes, Jell-O in the shape of eggs) for Easter …I always wonder what it would be like to create a jelly shot egg!  I have never tried it since I have a niece and some nephews well below the legal drinking age, but Easter always seems to start me thinking about making jelly shots.

Back in my college years, I discovered Jell-O shots and started making and bringing them to parties.  I would prepare Jell-O, substituting most of the water in the recipe to some type of alcohol and pour it into small paper cups.  I loved experimenting with flavors of Jell-O and liquors to come up with some cool combinations.

Over the years, I discovered that using Knox gelatin opened up a whole creative avenue…no longer were my creations limited by the flavors of Jell-O…Knox could make any liquid become a gelatin!  Flavor combinations became much more sophisticated.  And, small paper cups were replaced…shapes were cut or fancy molds were used.

vodka pink lemonade jelly shots

A fun way to serve a school of fish shaped jelly shots is on skewers. These are vodka pink lemonade jelly shots.

If you are less adventurous and would like some recipes already proven to be winners, check out the recipes of Michelle Palm.  Her blog, with tons of recipes for jelly shots, is amazing and contains more recipes than you could ever think of…for any occasion!  Today, I adapted one of her recipes for my ‘fish’ shots.  I chose the vodka pink lemonade for this post because it is pretty basic – a real crowd pleaser – everyone seems to like pink lemonade!

Vodka Pink Lemonade Jelly Shots Recipe (makes a school of fish)

  • 2/3 cup frozen canned pink lemonade, thawed
  • 2/3 cup water
  • 2 envelopes + 1 tsp. Knox gelatin
  • 2/3 cup vodka

Pour the lemonade mix and water through a strainer into a medium size sauce pan.  Sprinkle the gelatin over the surface, letting it saturate for about 2 minutes.  Heat over low heat, stirring constantly to dissolve – about 5 minutes.  Remove from heat and stir in vodka.  Spoon into molds and refrigerate until set.

I used fish shaped ice cube trays that I purchased at IKEA.  There are 12 fish in each tray and this recipe filled 4 trays.

fish shaped vodka pink lemonade jelly shots

Please remember that this recipe contains alcohol.  It should not be used or consumed by anyone except a responsible adult that is of the legal drinking age.

If you want to make some shots for the under 21 set, you can also use Jell-O brand gelatin to make Jell-O jigglers which only require adding water, or you can use your own fruit juice to make Knox Blox… these can be made from any fruit juice and the instructions to make them is right on the Knox gelatin envelope.  Another really fun idea for the kids is to make glow–in-the-dark gelatin by using tonic water.

steps in making fish jelly shots

Hope this inspired you to create your own ‘school’ of jelly shots… (with or without alcohol), they are a fun warm weather treat!

Thanks so much for visiting!

Remember to take pleasure in simple things, Jackie

Sharing at Coastal Charm,  Little Red House, The Inspiration Gallery at Craftberry Bush, and  A Pinch of Joy.

7 comments

‘spruced up’ in westport

April 19, 2013

beautiful bookmarks at Spruce

It is that time of year in Connecticut…the time when ones thoughts are consumed with warm weather and gardening (as you can tell, I am still in a gardening state of mind)…And, for Friday field trip this week, I am going to take you on a visit to a new home and garden store in Westport center called Spruce.

Spruce in Westport, CT

The store has been opened almost a year, but quite honestly, I only recently became aware of it because I usually tend to concentrate my store perusal to Main Street when I am in that part of Westport.  Spruce is definitely worth the short walk from Main…it is located at 90 Post Road East.   A Paper Source has recently opened right next door which gives me two great reasons to walk over to the Post Road when I am in the downtown area.

Spruce in Westport, CT

Spruce in Westport, CT

In 2010, Spruce started with one store in Connecticut…there are now 7 Spruce stores in 3 states.

coastal items from Spruce in Westport, CT

Spruce in Westport, CT

As you can see, they carry a lovely selection of home and garden items, gifts, jewelry and clothing, and other accessories.

Spruce in Westport, CT

Bracelets from Spruce in Westport, CT

Assorted merchandise at Spruce in Westport

I hope these few photos gave you a little bit of an idea of what Spruce has to offer…I had a great time visiting!

  and Chad at Spruce in Westport, CT help to make your shopping experience a fun time!

Patty and Chad at Spruce in Westport, CT help to make your shopping experience at this home and garden decor store a fun time!

Entrance of Spruce in Westport, CT

Hope you enjoyed our Friday field trip to Spruce in Westport, Connecticut.  You can learn more about the store by visiting the Spruce website.  Be sure to visit the store if you find yourself in the Westport area.

Have a really wonderful weekend.  Thank you so much for stopping by!

Remember to take pleasure in simple things, Jackie 

I am sharing at Little Red House and The Tablescaper.

7 comments

repurposed brown bags

April 16, 2013

bookmark made from a Terrain bag

April 22nd is Earth Day…in the spirit of the day, I am repurposing the brown bags I have accumulated from my Terrain purchases to use them in some fun and beautiful ways.  If you aren’t lucky enough to have a Terrain near you, any brown bag will do!  The Terrain bags have one up on the traditional brown bag since they are embellished with some beautiful floral designs.  You may have other stores you frequent that use brown bags with some type of design that would make your creations more interesting…Trader Joe’s, as an example.

Once I got started with this, I realized I could create a number of posts…I had so many ideas!  But, I limited my creations to seven.  Here is the bag I started with:

Terrain shopping bags

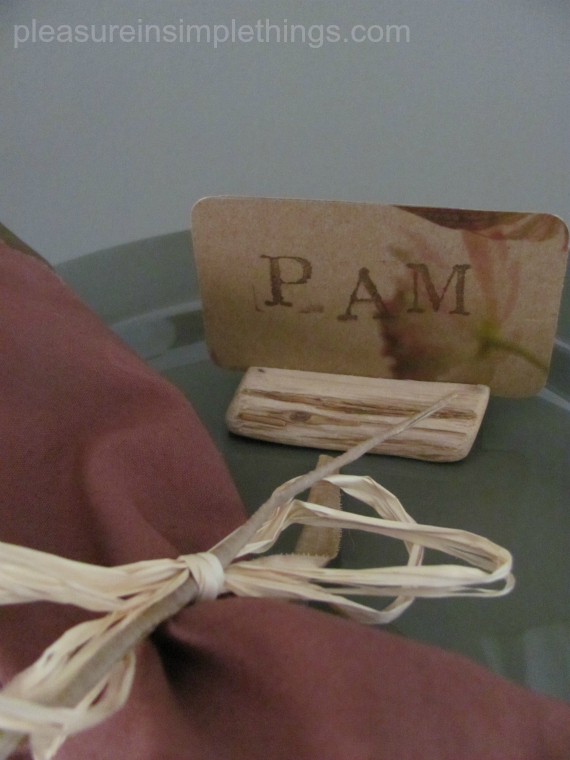
This first item I made is a place card.  I used a piece of cardboard from the bottom of the bag and glued some of the bag onto the front and back.  Then, I rounded the corners and stamped a name onto the front of the card.  Anchoring it into a piece of driftwood gave it the perfect finishing touch!

place card from Terrain bag

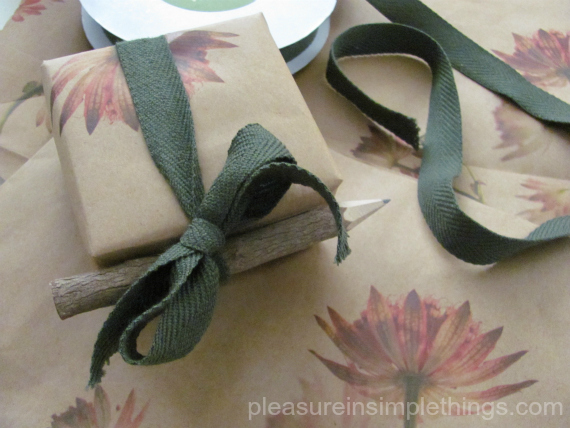
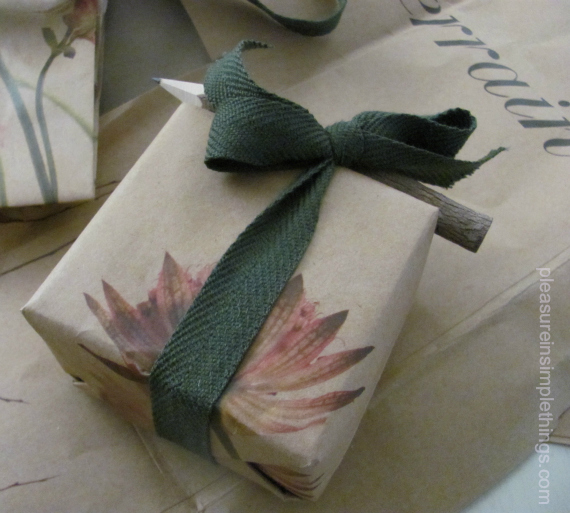
Wrapping paper is an obvious use for the bags and here I used a bag as wrapping… in combination with some pretty forest green ribbon and a natural twig pencil (both from Terrain):

wrapping paper crafted from a Terrain bag

wrapping paper from a Terrain bag

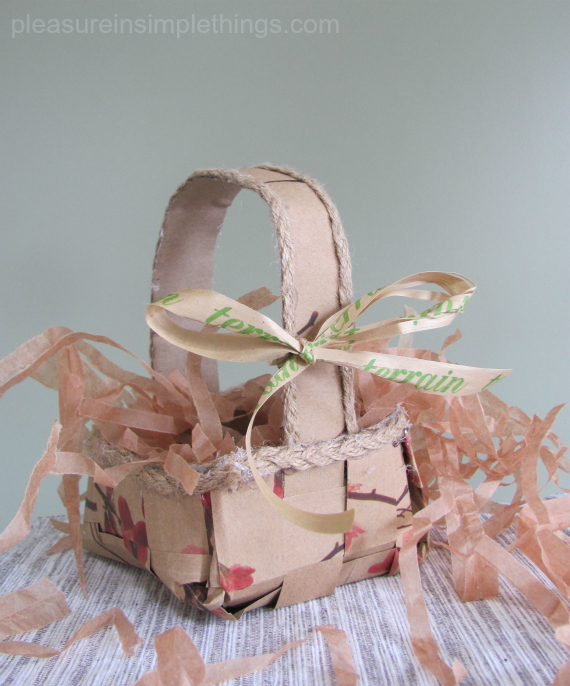
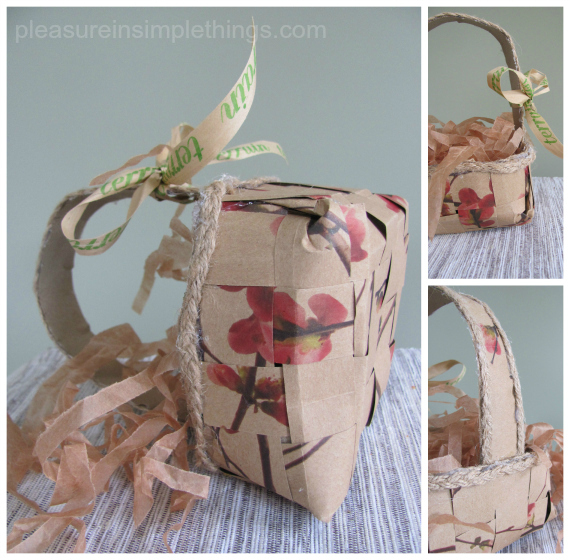
Cutting a bag into strips and weaving the strips together suggests a wealth of possible items…here, I created a basket with some woven strips.  I also used the handle of the Terrain bag as an accent on the edges and shredded (in my home shredder) some of the tissue to create the filling.  I was even able to utilize a piece of Terrain ribbon that was used on one of the bags I received from the store.

basket woven from a Terrain bag

basket crafted from a Terrain shopping bag

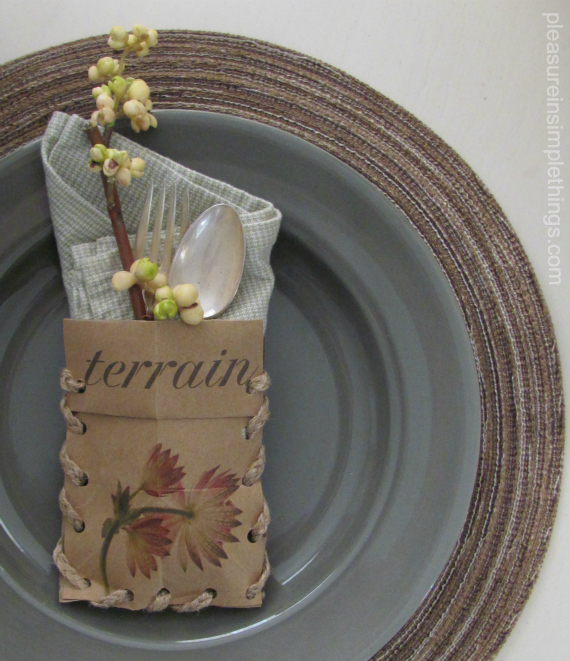
For the next use, I created a pretty utensil holder using a bag, a bag handle, and a paper punch:

cutlery holder fashioned from a Terrain bag

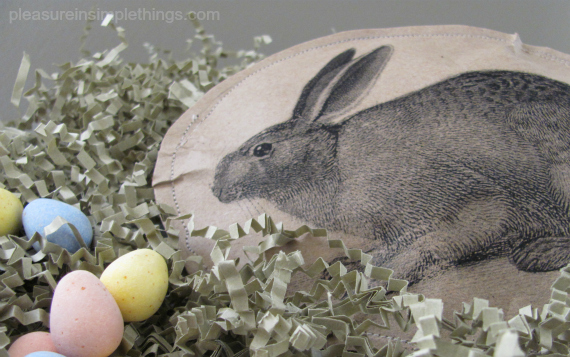
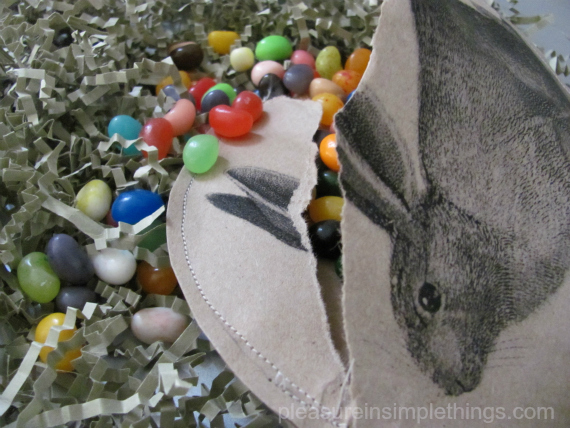
If you read my Valentine post, you know I made Valentine treat containers…I love to make treat containers for any occasion.  Here, I printed this beautiful vintage rabbit image I found on The Graphics Fairy onto the bag…I cut a piece of the bag and fed it through my home printer.  Then, I used my sewing machine to create a beautiful treat container.  This one contains jelly beans…the container needs to be ripped open to discover the contents!  Fun, right?

Treat sack from a Terrain bag

treat sack from a Terrain bag

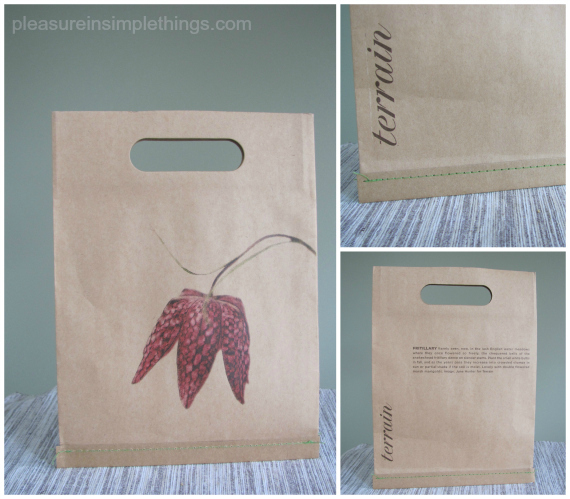
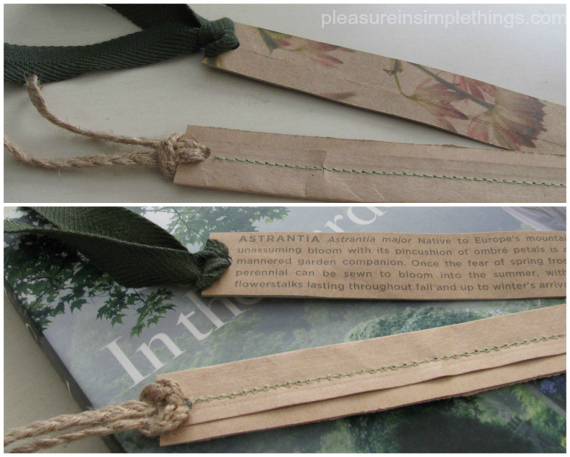
Here is another Terrain bag…notice the green stitching on the bottom of the bag and the cut out handle…

Terrain shopping bag

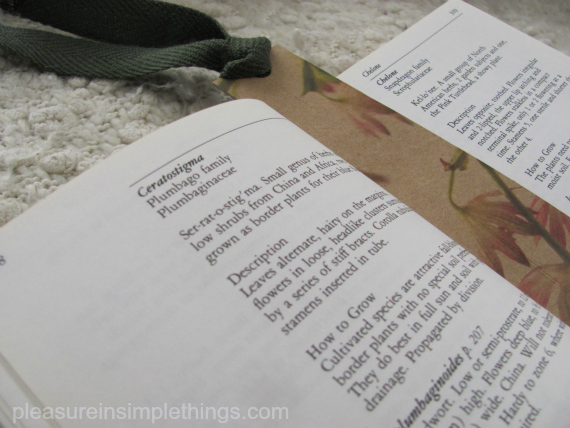
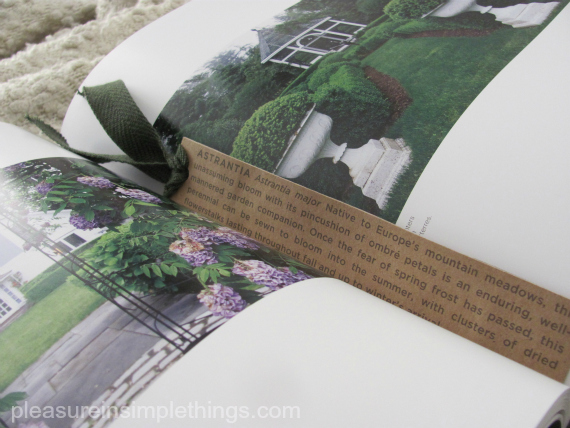
I was able to utilize the stitching and the flower description on the back of the bag in creating a couple different variations of a bookmark.  The one with the stitching also utilized the handle from another bag:

Bookmark from a Terrain bag

bookmarks made from Terrain bags

Bookmark from Terrain bags

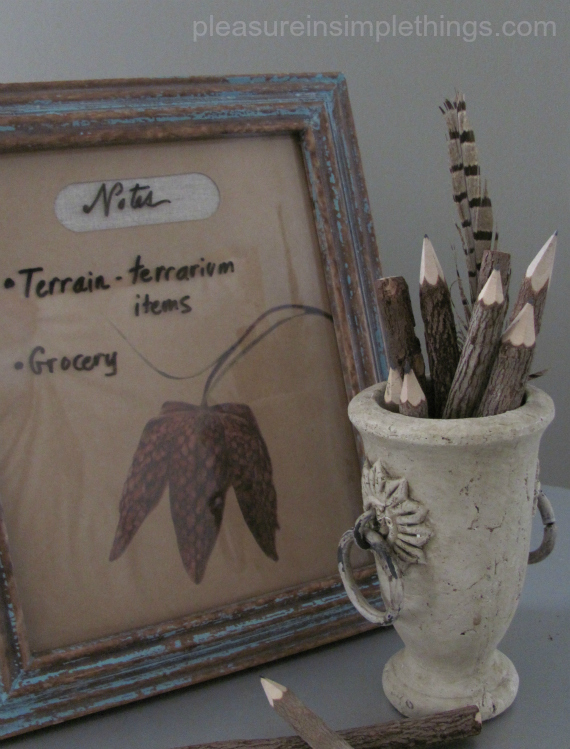
I embraced the style of bag for the dry erase board I created.  I simply framed the bag.  I love how the opening for the handle serves as a place to write ‘notes.’

dry erase board from a Terrain bag

So, these are some of my creations made from repurposed brown bags…a great way to serve the environment.  I hope you will be inspired to create some repurposed projects of your own :)

Thanks for visiting!

Remember to take pleasure in simple things, Jackie

I am sharing at Little Red House, Pinch of Joy, Craftberry Bush, Common Ground,  The Shabby Nest, and Coastal Charm.

12 comments

transforming terracotta pots

April 12, 2013

Spring flowers

We won’t be going very far for Friday field trip today…just outdoors!  The weather this week in Connecticut has been amazing, and any free time I had this week was spent on planting preparations… It didn’t help that I had a garden club meeting this week…during the lecture portion of our meeting, I was furiously writing notes of all the things I want need for my garden.  My thoughts have been consumed with plants!

Planting isn’t done around ‘these parts’ until Mother’s Day (my traditional planting day), but that hasn’t stopped me from planning and dreaming.  It is going to be a particularly tough year to make the yard look nice since we had a couple really bad storms this year that destroyed much of the garden – particularly large shrubs and trees.

painted terracotta pot

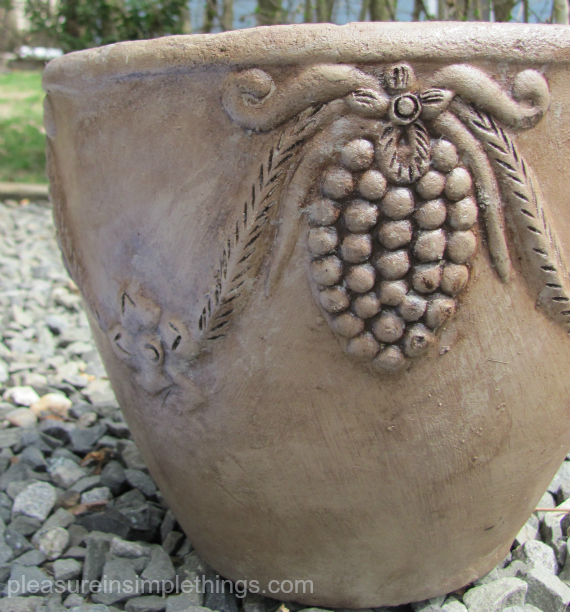
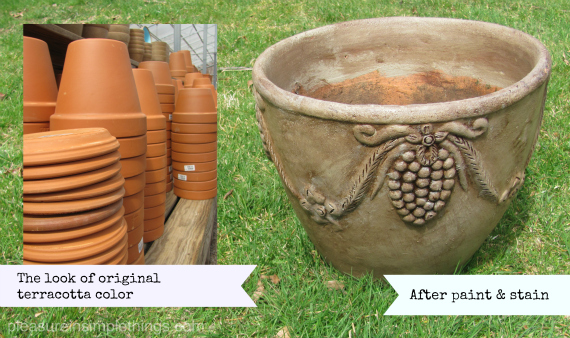
The beautiful results of my terracotta pot transformation using house paint and gel stain.

Because of this, there is so much more I want  need than my budget will allow.  One thing I was determined to replace this year was the ugly terracotta pots that we use to plant some of the herbs.  I say ‘ugly’ because I really dislike that new terracotta orange (you know how I feel about orange) look.  For me, they are an eyesore.  I thought they may ‘accidently’ break in the garage before planting season this year, but I want to use my garden budget to buy more living things, not to replace pots.

terracotta pot transformation

So, I decided to see what I could do to transform the terracotta pots I already have into something I could enjoy looking at!  I found it was a really easy fix and I wanted to share the process with you in case there are others out there that are cringing over the look of their terracotta!

Certainly there are plenty of methods to ‘weather’ terracotta or to create moss, etc.  I did not do that.  I went on a ‘hunt’ around the house to find things I could  use for the transformation without making a purchase.

upgrading a terracota pot

And, I found I needed very little.  Some leftover house paint, stain, and a rag did the trick!

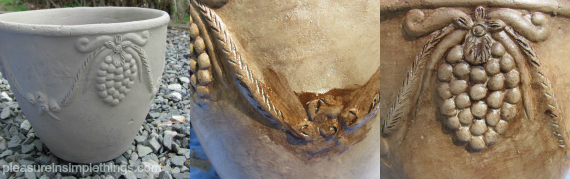
First, I simply painted the (bright terracotta) pot with some house paint (it happened to be Benjamin Moore Kingsport Gray).  This color will coordinate nicely with the exterior of my house which is sided in cedar and stained with ‘driftwood’ (of course my house is painted a color with a ‘beachy’ name…what did you expect lol).

After that dried (I left it overnight), I used some gel stain (Minwax in Hickory that I had left in the basement) on a rag to give some dimension to the look.  I rubbed some on, and using the rag, rubbed it off…pretty easy, right?  My pot had a design on it and I made sure to get a lot of stain on the design part so that I could have it settle into the crevices.  Although my pot had a bright, new look, it was a few years old which made it even better for this process since any cracks or scratches looked great when the stain settled in.  You can do this same process repeatedly if you want more color or depth.  After I was done, I dabbed a little of the paint onto the highest part of the design…just as a highlight.

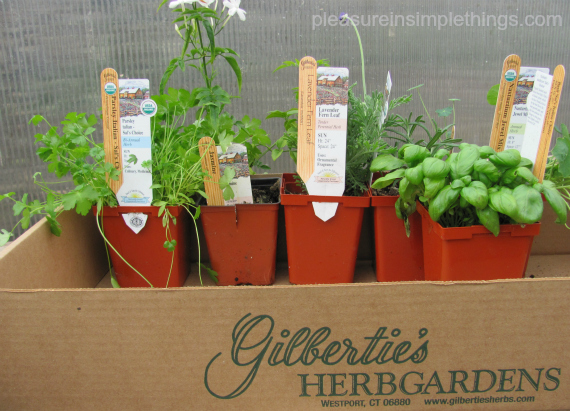
Fresh herbs

My first purchase of the season…some herbs from Gilbertie’s.

What an easy way to give terracotta pots a little more interest without making any purchases!  If you don’t have these items in your house, you can do a simple whitewash.  Everyone has some white paint left somewhere…just thin it down a little bit and paint it over your pot to get rid of the new orange look.  These pots may be the least expensive, but they don’t have to look that way!  You can easily transform them with some leftover paint and/or stain.  Have fun with it!  I can’t wait to add some plants to my new creation :)

Have a wonderful weekend!

Remember to take pleasure in simple things, Jackie

Sharing at Crafts a la ModeCraftionary, and  The Well Crafted Home.

1 comment

zip code catch-all tray

April 9, 2013

diy mercury glass zip code tray

I have been wanting to make something using a zip code for quite some time.  I don’t think 90210 is the only zip code worth embracing…the zip code from wherever you call home is the perfect one to display!  Or, a place you dream about visiting (should I look up the zips from the locales with the best beaches?…)  Anyway, this time I am using the zip code from my daughter’s home away from home…aka school.

mercury glass zip code tray

It is an easy DIY project…I will guide you through the steps…

diy zip code mercury glass tray

If you follow my procedure, you will need the following items:

  • a clear glass plate (I purchased mine at Target)
  • Con-Tact adhesive paper in clear
  • Krylon looking glass spray paint
  • a clear coat of some type (I used a spray)
  • a clean spray bottle
  • a computer printer

The first thing I did was to figure out how I would get the zip code onto the glass.  I decided to print it onto clear Con-Tact adhesive paper so that I could easily adhere it to the glass.  I picked out a font called Stohr Numbers on www.dafont.com.  Once you have the image you want to use, you will need to print it out in reverse image…to do this, either indicate the proper setting on the print settings of your printer or, you can use a graphics software.  You need to do this so that the sticky part of the Con-Tact paper is on the front of the numbers because you will be adhering it to the underside of the glass.

To accomplish this, I used clear Con-Tact paper (I love this product – I use it for so many things!).  I simply cut a piece of the Con-Tact adhesive paper and hand-fed it through my computer printer.  I used a scissors to trim closely around the numbers.  You can cut out the numbers individually, but I chose not to because I wanted to keep the spacing between the numbers exact.

I peeled off the backing of the Con-Tact paper and positioned the numbers where I wanted them, affixing them to the underside of the glass by rubbing firmly.  I scratched up the letters a little bit…just so they looked a little distressed.

Now, I just needed to create the mercury glass effect.  You have probably seen items created with the Krylon looking glass spray paint – it seems to be one of the hot craft items right now…with good reason!  It is so cool!  It creates a mirror effect on glass.  This is created by spraying five thin coats of spray on the underside of the glass.

But, I did not just want a mirror effect…I wanted a mercury glass look…that is where the spray bottle comes in.

Put a little bit of clean tap water into the spray bottle and adjust the nozzle to a fine mist.  Then, read the instructions on the Krylon paint.

Before you start your spray painting, spray a fine mist of water on the underside of the piece.  Immediately spray your first coat of looking glass spray paint, following the directions on the can.  I sprayed a fine mist of water onto the paint after each coat for the first three coats.  After three coats were completed, I blotted (not rubbed) the back of the piece to absorb the water so that the mottling would receive two fine coats of the paint.  I guess everyone develops their own technique after trying this product, but I like the depth created by this method.

After the paint was dry, I sprayed a clear coat on the underside of the piece to protect the paint from scratching.

mercury glass zip code tray

That was it!  I finally got my zip code tray and I think it is a perfect place to drop off car keys!

I hope you enjoyed this DIY for a zip code mercury glass tray…what zip code will you choose to display?

Thanks so much for visiting, Jackie

I am sharing at Coastal Charm,  The Shabby Nest, Craftberry Bush, A Pinch of JoyCraftionary, and Common Ground.

6 comments

Back to top