Subscribe to Pleasure in Simple Things via RSS ReaderFollow Pleasure in Simple Things on InstagramFollow @InSimpleThings on TwitterLike Pleasure In Simple Things on FacebookFollow Pleasure In Simple Things on PinterestEmail Jackie

summertime diy napkin rings

May 13, 2014

diy summer napkin rings

What flower suggests the summertime to you?  Queen Anne’s lace screams summer to me.  Even though some people may consider it a weed…I see it as a sweet and nostalgic symbol of the summertime!  Combining this flower with a napkin ring creates the perfect summer accessory for outdoor dinners on the sand. :)

diy napkin ring with mason jar

I recently saw a photo in a magazine of a napkin ring with a bloom of Queen Anne’s lace and I fell in love with it!

diy napkin rings on the beach

The napkin ring was listed as available from Crate & Barrel.  Normally, I would have run right out to Crate & Barrel and scooped some up – they were so reasonably priced!  (And I love any excuse to visit the store!)  But, since I already had all the materials needed to create them at home, I was able to make them up at basically no cost!  Besides, I had been eager to upscale the old napkin rings my friend Terry gave me months ago…she knew I would find a great use for them!  (Thank you Terry!)

summer napkin ring diy

I had picked up a solitary stem of artificial Queen Anne’s lace last summer in the bargain bin at the craft store – not really sure what I’d do with it.  Conveniently, it contained four blooms on the one stem – perfect to create a set of napkin rings!

sea glass

Adding in some scrap twine, I made all four napkin rings for the cost of the flower stem ($1. plus tax).  These napkin rings will serve as the perfect accessory for some of my many nautical napkins to use with meals on the beach this summer.

diy twine napkin rings

I wrapped each napkin ring with twine – using my trusty glue gun to hold the twine in place.  After completely covering the old napkin ring, I removed a bloom from the stem of the artificial flower and affixed it to the top of the twine covered ring using the glue gun.

instructions for diy napkin rings

Easy!  This technique can be used for any artificial flower you may have…or, one you have crafted from paper.  This is also a great and inexpensive way to add a theme color or favorite flower to a bridal shower… or any celebration!  Recycle old napkin rings, curtain rings, or shower rings using this technique to create some beautiful new napkin rings!

diy napkin rings with anchor napkins

diy napkin ring on the sand

I love my new napkin rings…and, the Queen Anne’s lace reminds me that summer is ahead!
photo of beach grass

A nostalgic summertime song to set the mood for meals on the beach.  :)

Thanks so much for stopping by!  Remember to take pleasure in simple things, Jackie

P.S.  You can click here for a tutorial on making the anchor napkins shown here…and click here for some great ways to use seaglass Enjoy!

Sharing at Sand & Sisal, Finding Silver Pennies, and Savvy Southern Style.

no comments

vintage handkerchief lavender sachets

May 9, 2014

vintage handkerchief sachet diy

Back in my grandmother’s time, handkerchiefs were an art form.  There were so many beautiful handkerchief designs – many embroidered – and every lady carried one.

I remember my grandmother always having one tucked up her sleeve.  Everything was made to last in my grandmother’s time, and this included handkerchiefs.  They were always fashioned of cloth, not the disposable variety of today.
vintage materials for sachets

Because of this, there are still many lovely old handkerchiefs around today.  I saved many from both my grandmothers because of the sentimental value, but over time I have found some great ways to transform these heirlooms into items that are practical as well as beautiful.

For Friday field trip today, I am sharing my favorite way as we travel back to a time of beautiful cloth handkerchiefs and fashion them into lavender sachets.  With Mother’s Day approaching, a sweet sachet made from a family heirloom can make a special gift for mom.

vintage handkerchief sachet

Inevitably, a gift like this may be too pretty to scent a drawer…and, instead…may end up displayed on top of a dresser or nightstand.

If you are not lucky enough to have a family heirloom to use in creating this sachet, vintage handkerchiefs are easily found for only a couple dollars each at yard sales or antique shops.

vintage lace for sachets

Very little lavender is needed to create a sachet, and because it is such a light material, a cup and a half of lavender weighs less than an ounce…be mindful of this when you are deciding how much to purchase.

vintage handkerchief sachets

To create the sachet, cut a square of cheesecloth (about a 7” square) to hold the lavender.  I use the cheesecloth so the lavender won’t directly touch the hanky, but the scent will still come through.  You will only need one quarter to one half cup of lavender.  You can adjust the size of the cheesecloth and the amount of the lavender depending on the size of the handkerchief you use.

vintage hankies

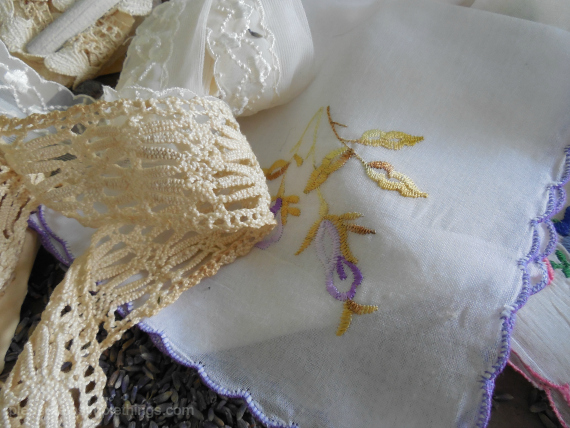
Tie the cheesecloth with a piece of twine and position the ball of lavender in the center of the handkerchief – enclosing the lavender ball in the handkerchief with a piece of ribbon or lace.  I chose some vintage lace.  That’s it!  Beautiful…and, what a heavenly smell!

vintage handkerchief sachet

Handkerchief sachets also make wonderful bridal shower or wedding favors.  They can even be personalized with an embroidered initial, name, or date.

quote with vintage lace

Have a wonderful weekend and a blessed Mother’s Day!

Remember to take pleasure in simple things, Jackie

Sharing at Crafts a la Mode, Craftberry Bush, and Timewashed.

6 comments

vintage teacup earl grey crème brûlée

May 6, 2014

earl grey creme brulee

Serving crème brûlée from vintage teacups is sure to make a family bridal shower, tea party, or Mother’s Day a special one!  What could be better than serving dessert from your grandmother’s teacups?  I think individual desserts add a special quality to a meal all on their own, but to add the sentiment of serving it in a special piece of history makes it all the sweeter!

basket of roses

Everyone thinks of  crème brûlée as a special occasion dessert, but it is not a hard one to create.  Traditionally, it is cooked in the oven, but I have found that good results are possible with a no-bake method.  You can use any no-bake recipe or the one I found online and, by using my simple variation, can create Earl Grey crème brûlée!

creme brulee in teacups

Most teacups are not oven safe and I would not advise putting family heirlooms in a hot oven…a vintage piece with sentimental value is not something to experiment with!  This is the reason I went with a no-bake method for my Earl Grey crème brûlée…I think it is the perfect flavor profile to combine with vintage teacups!  If Earl Grey is not your thing, just don’t add it to the recipe.

earl grey creme brulee

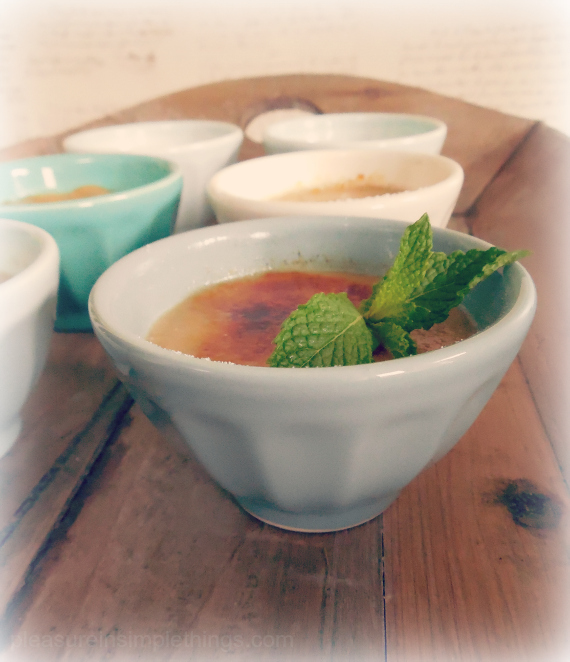
If you prefer a more contemporary choice of vessel, I recommend the mini latte bowls from Anthropologie…the perfect size to hold 3 ounces for a small, individual portion.

earl grey creme brulee in Anthropologie bowls

I found the no-bake recipe I used from Completely Delicious during an internet search – it is easy and makes the perfect amount of custard for a special dessert for a mom (and maybe a couple of grandmas)…it will fill 3 or 4 teacups or 4 mini latte bowls.  Following this recipe (click here), make these changes to create Earl Grey crème brûlée:

After completing step 1, place 4 Earl Grey teabags into the hot mixture and let it sit for 10 minutes.  After 10 minutes, dunk the teabags a couple of times and then gently squeeze the liquid out of the teabags and into the pan (being mindful that the mixture will be hot.)

Continue with the recipe, substituting 1 teaspoon of vanilla for the 1 Tablespoon listed.

Be sure to strain the mixture.  I found while testing no-bake recipes that this is extremely important for a smooth texture – don’t skip this step!  (As a special note – I was very cautious with my kitchen torch – I didn’t venture near the edges of my special cups!)

earl grey creme brulee in teacups

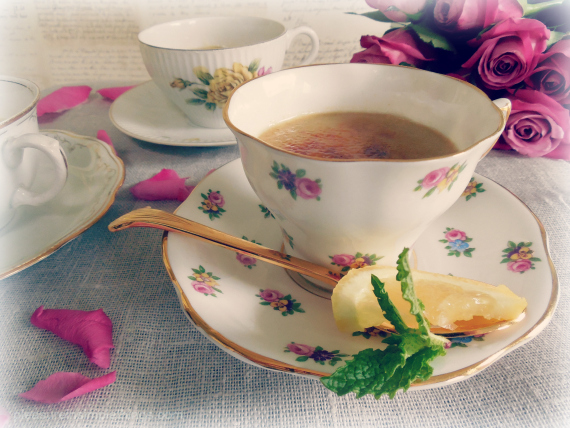
To play up the tea theme, add lemon and mint as garnish. :)

tea quote with roses

If you are an Earl Grey lover as I am, you may enjoy trying these Earl Grey cream puffs.  I also love adding the flavor to shortbreads…I still have Earl Grey ice cream on my list of experiments…maybe this summer. ;)

teacup creme brulee

I hope I have inspired you to think of ways to use your own heirlooms to create some special memories.  We will continue the family heirloom theme on Friday when I show you how to create a special diy gift using an old family treasure.

Thank you for stopping by and remember to take pleasure in simple things, Jackie

Sharing at Coastal Charm, Sand & Sisal, and Silver Pennies.

1 comment

april showers bring may flowers

May 2, 2014

White's Flower Farm

Who visits a flower nursery on a cold and rainy day?  Apparently, I do!

pansies in the rain

Although I usually plan my visits for the summertime, I recently decided to make a trip to White Flower Farm on an April day.

garden wagons

I expected a different seasonal view, but certainly did not expect a day that turned out so cold that I dreamed of wearing mittens!

White's Flower Farm

You, my friends, are a wee bit luckier than I; since you can visit White Flower Farm from the comfort of your own home on today’s Friday field trip…no mittens required!

flower collage

White Flower Farm, both a working nursery and a private residence, is located in Litchfield, Connecticut and is an awesome place!  If you are an avid gardener, you may be familiar with the nursery, even if you live outside the area, since they do a huge mail order business.  I ordered from them long before I decided to make my first location trip.

White's Flower Farm

The visit turned out to be an inspiring one as I discovered the beauty in the preseason garden.  My typical visit is in July when the trees are filled with leaves and all the perennials are in bloom.  This quiet, somber day gave a special quietness and sense of promise to the gardens.  And, the trees looked so majestic in their bare state!

White's Flower Farm

Unfortunately, I was forced to take ‘rest stops’ in the heated gift shop to thaw out my frigid fingers!  Of course I would not have dropped in; if not for the cold hands! ;)

gift shop at White's Flower Farm

gift shop at White's Flower Farm

Landscape at White's Flower Farm

Garden Bench

Collage of photos from WHite's Flower Farm

White's Flower Farm

I hope you enjoyed sharing some of White Flower Farm in Litchfield, Connecticut for today’s Friday field trip…definitely worth a trip if you are in the area!  By the way, White Flower Farm takes its name from their first perennial border, the all-white garden (and my favorite) called the Moon Garden because the white flowers gleam even by moonlight!  Have a fantastic weekend!

And, thank you so very much for stopping by!  Remember to take pleasure in simple things, Jackie

Sharing at Craftberry Bush, Mona’s Picturesque, Fridays Unfolded, and Crafts a la Mode.

3 comments

book giveaway for may!

April 29, 2014

Beekman dessert cookbook

April is already coming to a close and that means it is time to announce the winner of the April book and to let you know the book selection for May!  I am happy to announce that Lindsay from Pennsylvania is the winner of a copy of Ecobeauty by Lauren Cox with Janice Cox.  Congratulations!  This book is sure to come in handy to create some Mother’s Day surprises!  I will be sharing a couple of the natural beauty product recipes from the book in the days ahead to help all my friends create some beautiful gifts!

beekman boys book photo

I am excited about May’s book selection!  Have you heard of the Beekman Boys?  You may have seen them on the Cooking Channel.  I had the opportunity to see them in person recently when I attended the Philadelphia Flower Show.  At the show, I picked up a copy of their book  The Beekman 1802 Heirloom Dessert Cookbook.  I love this book!  I am so excited by it, that I had to pick up another copy to include as a monthly giveaway to send to one lucky follower!

The book is so beautifully put together and the photos are truly inspiring.  Since I am a ‘farm to table’ kind of gal, I love the way the recipes are organized by season.  The most recent recipe I tried from the book was one using fresh mint – one of the first spring selections from the garden.  The mint bars were so yummy and fresh tasting!

Beekman boys mint bars

Trying a spring recipe for mint bars from The Beekman 1802 Heirloom Dessert Cookbook.

I know you will enjoy this marvelous dessert recipe book.  Just leave a comment here or on Facebook, Twitter, or Instagram or send me an email message during the month of May for a chance to win a free copy of this month’s selection.  The winner will be announced at the end of the month.  Good luck!

Thank you so much for stopping by!  Remember to take pleasure in simple things, Jackie

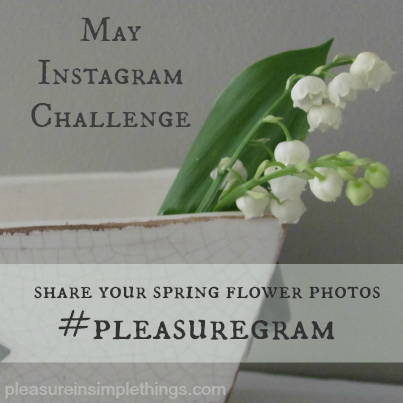
Instagram users, please read on for the pleasure in simple things May Instagram Challenge!

For May, we are sharing our flower photos…it can be a flower from your garden, from a garden you visit, or even a patch of beautiful wildflowers you spot along the side of the road!  Please share your inspiring flower photos for the whole month of May using the hashtag #pleasuregram.  Enjoy!

May Instagram Challenge


6 comments

may day flowers

April 25, 2014

may day flowers

For Friday field trip this week, we are stepping back in time to honor an old tradition that celebrates the start of spring.   Up until the end of the 20th century, part of the May Day tradition included leaving flowers anonymously on neighbor’s doorsteps on May 1st as a signal to the start of spring.

may day tradition

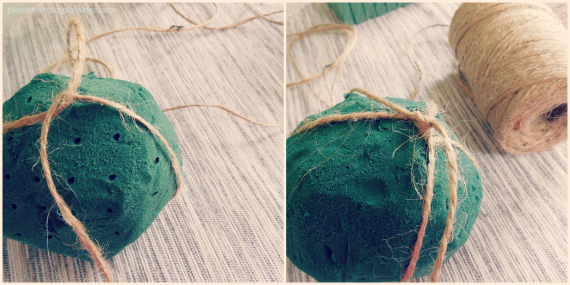
Last year I had some fun making hanging flower containers with driftwood, shells, and repurposed glass tubes.  This year, I am creating some gifts of floral spheres that are easy to create using flower oasis and grocery store flowers.

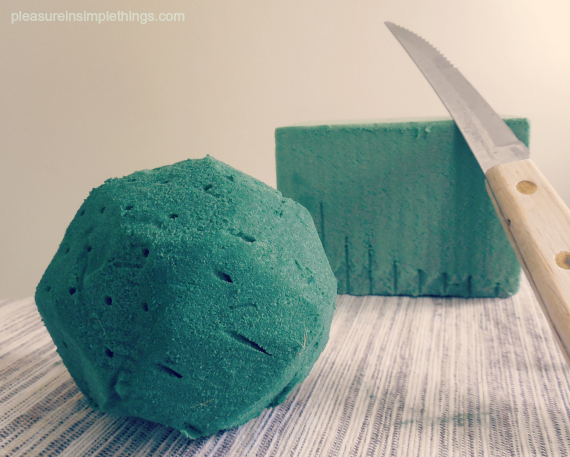
oasis ballI am starting by cutting a block of oasis material into a four inch square.  (Oasis is available at any dollar store, craft store, or flower shop.)

The material is very easy to cut with a serrated knife, but can be messy – be sure to cover your work surface with newspaper before starting this process.

After cutting a square cube, sculpt the material into a sphere shape using your knife.

Once the shape is created, let the material soak up water by submerging it in a container of room temperature tap water.

Next, add flowers.  Pins or fasteners will not be required to attach the flowers if flowers with stiff stems are chosen – like the ones I have used here.  Just leave some length on the stems so they can be poked into the material.

Place the flower heads in close enough to each other to prevent seeing glimpses of the surface (to avoid needing any additional filler flowers).

A 4″ cube can easily be filled with a small bouquet from the grocery store florist…or flowers from your garden – if you are lucky enough to be in a part of the country that makes this possible!

may day purple flower

Now you have created a beautiful sphere shaped flower arrangement that can be displayed in any small container that accommodates the size of the sphere.  I have used a sugar bowl and a small flower pot.

No fear, if you want to continue the May Day tradition of hanging your arrangement, this is easy to accomplish.  Before adding the flowers, attach some twine around the sphere and you can easily hang your May Day arrangement.

may day flowers in a sugar bowl

Take note that hanging is possible because of the small size of the sphere.  Because the added water adds weight to the sphere, this would not work with a larger size sphere – the twine would cut through the material.  And be sure to use twine – moisture from the water would stain a ribbon.

preparing circular oasis

I much prefer the sphere displayed in a container, but if you need to follow the tradition to the letter, your arrangement can be hung on a nearby doorknob. ;)

circle of hanging flowers

Happy May Day!

may day yellow flowers

Thank you so much for stopping by.  Have a wonderful weekend!

Remember to take pleasure in simple things, Jackie

Sharing with Craftberry Bush, The Shabby Nest, and Common Ground.

1 comment

homage to earth day

April 22, 2014

earth day quote

Pretty much every item you can think of on this earth (pun intended) has been covered with chalkboard paint, hasn’t it?  So, I am pretty certain someone has already thought to paint a globe with chalkboard paint.

earth day quote

I think it is a great way to revamp an outdated globe and to honor our dear Mother Earth on Earth Day!  I just couldn’t convince myself to throw it out during the purging of all the old ‘stuff’ I cleared from the ‘new’ guest room…I have a particular fondness for globes – outdated or not – since one of my children was born on Earth Day!

chalkboard globe

So, now the old globe sits proudly in the new guest room.

And, since the globe is an accessory (my second!)  in the room where guests will be staying, my idea was to decorate the chalkboard in one of two ways:

1.  To write Welcome!  in an outline shape of my state (Connecticut),  or

chalkboard globe

2.  Draw two states – mine and the one the visiting guests hail from!

Earth Day quote

In light of the occasion, you may also enjoy this post on repurposing brown bags…Happy Earth Day!

Thanks for stopping by!

P.S. I took the butterfly photos in this post used with the quotes last summer – we haven’t had any weather yet this year that warrants butterflies!

Remember to take pleasure in simple things, Jackie

Sharing with Finding Silver Pennies, Sand & Sisal, and Coastal Charm.

no comments

happy easter!

April 18, 2014

easter quote

Today is Good Friday and I want to wish all my friends who celebrate, a blessed Easter!  I am excited that my family will all be together for the holiday and I hope that you too are surrounded by the ones you love this weekend.

For Friday field trip today, I have assembled some Easter posts in one place in case you need some last minute Easter inspiration…links from past posts…Enjoy!

favorite ways to decorate eggs

a vintage egg cup collection

eggs from natural dyes

a recipe for Easter butter cookies

some Easter nostalgia

Easter basket ideas for the college set

growing eggs in eggshells

diy easy paper egg holders/place cards & (grass heads for the kids!)

dyed eggs for coastal décor

dye for creating eggs in shades of gray

Thank you so much for visiting! 

Have a wonderful weekend and remember to take pleasure in simple things, Jackie

no comments

shades of gray…and purple

April 15, 2014

gray easter eggs

Here comes the egg lady!  I joked around this week that the late night cashier at the grocery store’s ’10 items or less’ aisle must call me that!  It is probably true…I have stopped in late night at the grocery store so often lately – each time for just a carton of white eggs!

easter eggs

I already admitted I have an egg dyeing obsession…but it looks like I am now down to my last batch for the year.  It’s Easter week and, since I’m making all the desserts for Easter dinner, I have no more time to dye eggs!

gray easter egg

Any free time I have this week will now be spent planning and making the Easter desserts!

easter eggs in purple glass

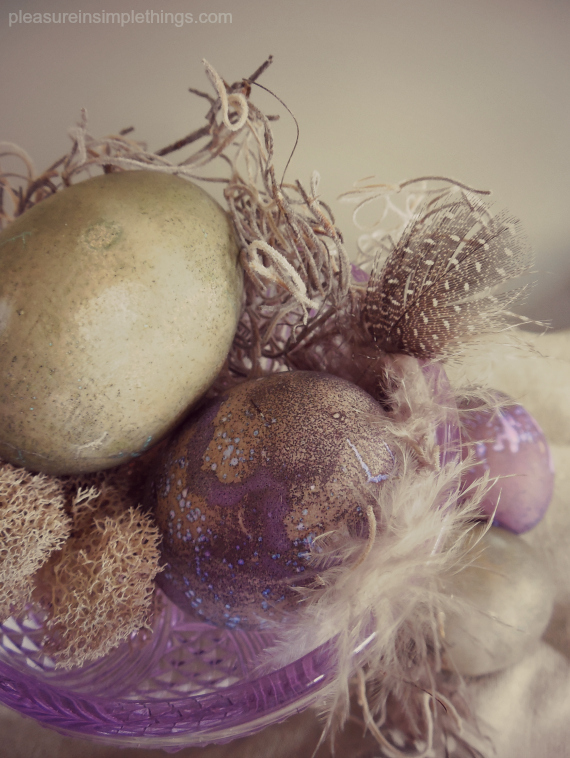
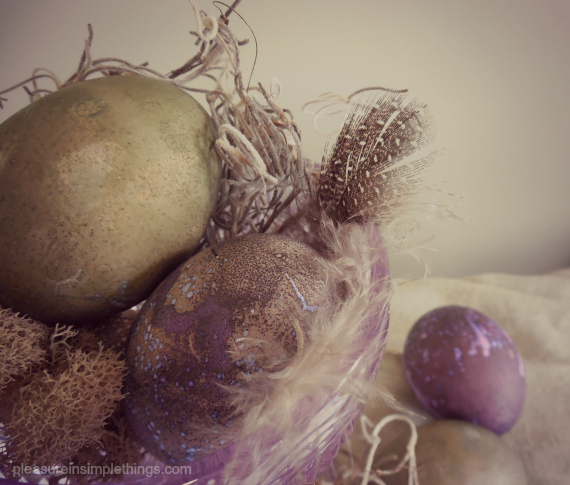
I dyed my last batch of eggs in shades of gray.  I love neutral shades for egg dyeing, but gray dyed eggs are particularly beautiful.  The best way to make gray dye is to simply mix 1/2 cup of room temperature water, 1 tablespoon of white vinegar, and some black paste food coloring.

gray easter eggs

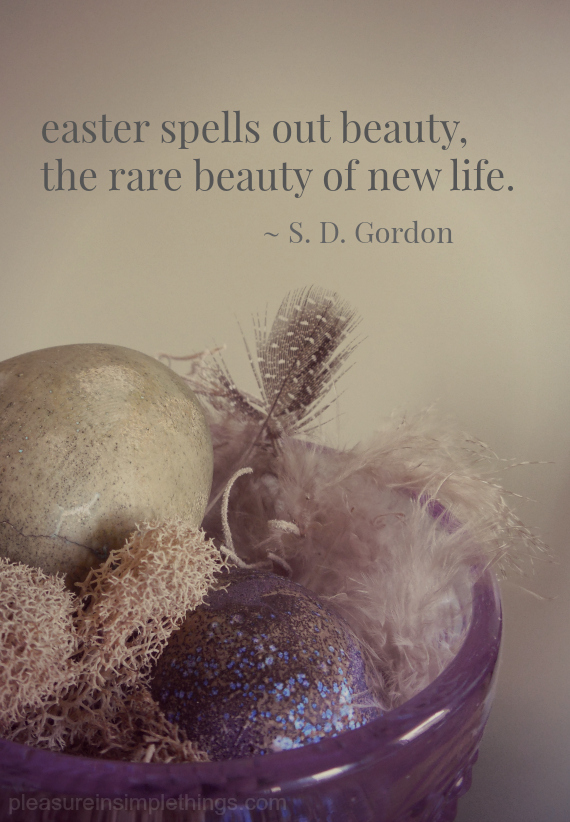
Because I put together a vignette with a pretty iridescent purple glass I picked up in the clearance section at Anthropologie, I decided to dye a couple of my last dozen of eggs purple before putting them into the gray dye.

easter eggs

I made various shades of gray eggs by varying the time in the dye.  I also rubbed off some of the color on the eggs so the wouldn’t look “too perfect.”

easter eggs in purple glass

The irregular shading gives them so much character!

purple and gray eggs

So that is it…the last of this year’s egg dyeing! :(  I hope you will try dyeing some gray eggs, if you haven’t already! :)

gray and purple eggs

Thanks so much for stopping by!  Remember to take pleasure in simple things, Jackie

Sharing with StoneGableSand & Sisal, Coastal Charm

no comments

coastal egg decorating

April 11, 2014

coastal easter egg designs

Today for Friday field trip, I’m kicking it back to kindergarten.  I’m adapting some old school techniques to egg decorating to create some Easter eggs to use in my coastal décor.

Coastal decor Easter eggs

I am using two easy techniques that you – like me – probably used in grade school, but may not have thought about using in creating your Easter egg designs!

blue ball jar and coastal eggs

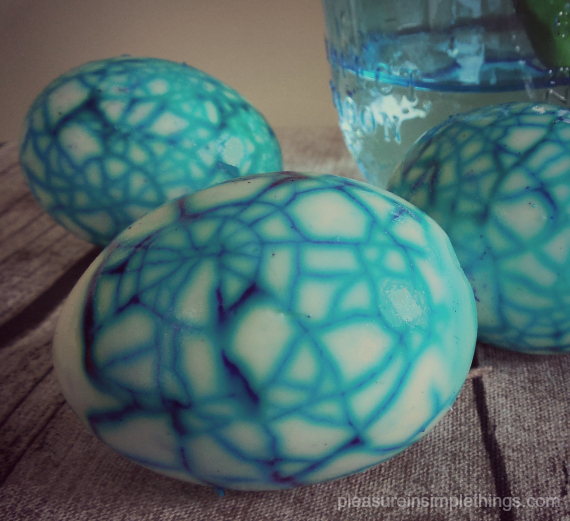
It was probably earlier than kindergarten when my siblings and I discovered this first technique. ..purely by accident.  During our egg dyeing sessions, inevitably, the hard boiled eggs we were preparing to dye were constantly being dropped by our young, clumsy hands during our egg dyeing frenzy.

dyed easter eggs and tray

We would soon learn that the many cracks these drops created in the shells would cause the eggs inside to take on the dye.  When it came time to eat the eggs, no one wanted to eat the ones that had been cracked and dyed with the spider web-like effect.  Of course, as we got older, this became a cool effect that we would purposely emulate and enhance – learning by experience (the obvious) that the longer the egg remained in the dye, the more pronounced the design would appear.

beachy easter egg designs

It made me smile this month when I saw a full page in the current Real Simple magazine giving instructions to create this very same effect on an Easter egg.  The instructions said to crack the egg with a spoon…or, (not mentioned in the magazine) drop egg continually on a table while excitedly anticipating the Easter bunny’s arrival!

coastal easter eggs

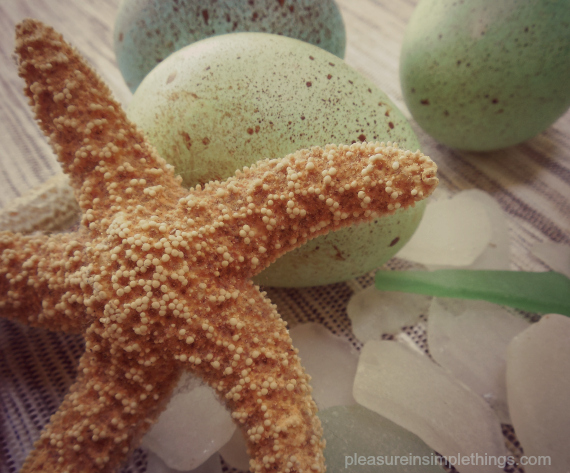
The second old school technique I use on eggs wasn’t used on eggs at all back in kindergarten.  We used it to create a leaf painting.  Various shaped leaves were placed on a paper and paint, in fall colors, was splattered over the leaves.  When the leaves were removed, their shapes would appear, like magic, against the splattered background.

Coastal decor Easter eggs

The splattering was done with an old toothbrush and a Popsicle stick.  Rubbing the Popsicle stick across a paint filled toothbrush created a beautiful splattered effect.  I used this very same technique to create the eggs shown here – using brown paint on eggs dyed in sea glass colors.

coastal decor easter eggs

What was it that Robert Fulghum said?  “All I really need to know I learned in kindergarten?”

splattered easter eggs

Have a great weekend and remember to take pleasure in simple things, Jackie

Sharing with Common Ground, Shabby Nest, Fridays UnfoldedCraftberry Bush, and Crafts a la Mode.

3 comments

Back to top