Subscribe to Pleasure in Simple Things via RSS ReaderFollow Pleasure in Simple Things on InstagramFollow @InSimpleThings on TwitterLike Pleasure In Simple Things on FacebookFollow Pleasure In Simple Things on PinterestEmail Jackie

ice, ice baby!

February 17, 2015

too cold for seagulls pleasure in simple things blog

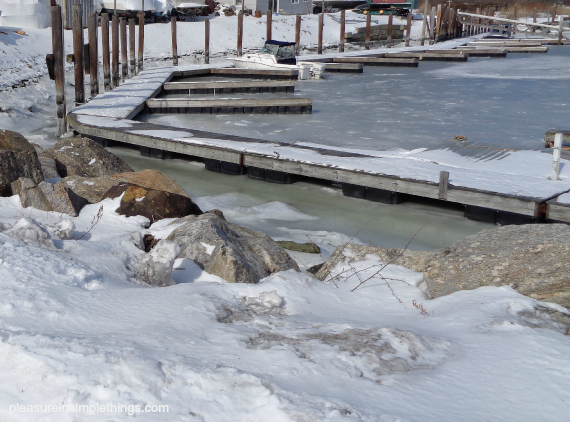
With temperatures below freezing and blizzard conditions, here in Connecticut we are experiencing a crazy winter.

the dock at blizzard in ct pleasure in simple things blog

And, like all of New England, we have had plenty of snow this year.

sunny and below freezing pleasure in simple things blog

But, this winter, it is not the snow that has taken center stage…

one dock at blizzard pleasure in simple things blog

connecticut coast pleasure in simple things blog

This year, the star of the show is the ice!

sunny and negative temps pleasure in simple things blog

And with temperatures below zero (without the wind chill), there is plenty of it – even in places it is not usually seen!

docks during blizzard pleasure in simple things blog

blizzard conditions pleasure in simple things blog

So today, I am sharing some of the beauty I am seeing in all this ice…

blizzard on ct coast 2015 pleasure in simple things

A beauty only Mother Nature can provide.

snowy beach pleasure in simple things blog

Thanks so much for stopping by.

quote bench in winter pleasure in simple things blog

Remember to take pleasure in simple things, Jackie

Sharing with Finding Silver Pennies, Coastal CharmSand & Sisal, Homework, and Elizabeth & Co.

1 comment

love letter heart tags diy

February 13, 2015

love letter heart gift tag pleasure in simple things blog

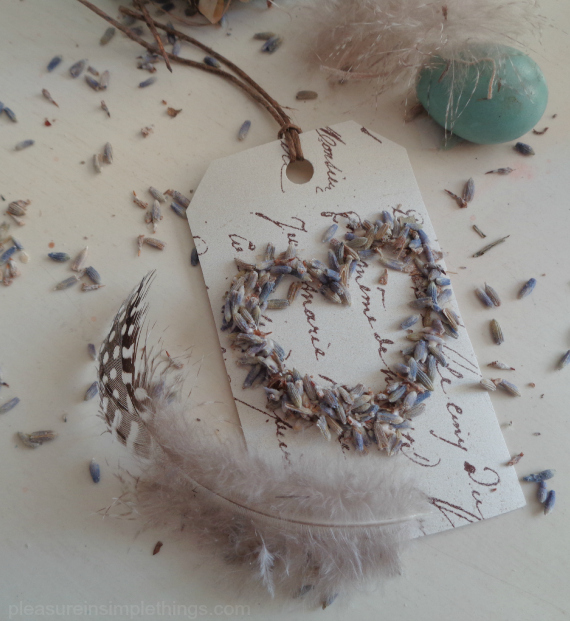
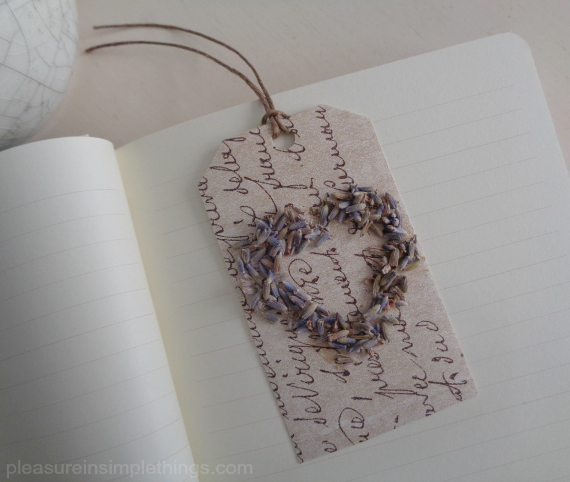
For Friday field trip today, I am sharing one last Valentine’s Day idea before the weekend. These are really sweet, easy to make love letter tags made with hearts of dried lavender. I have been on a lavender kick lately – adding lavender to my shortbread cookies, making lavender heart shaped linen sachets, and now…using lavender on gift tags!

heart love letter gift tag pleasure in simple things blog

Just follow the easy steps pictured and you can have some romantic tags put together in no time flat! There are plenty of options for the ‘love letter’ part… you can use printed paper from the craft store, paper from an old book – an old poetry book is perfect – or, print something from your computer printer.

diy love letter heart tag pleasure in simple things blog(1.) Cut a piece of cardstock to size and (2.) glue ‘love letter’ paper to the front of it. (3.) Draw a heart shaped bead of glue onto the front of the card. (4.) Sprinkle dried lavender over the glue and press lightly. ( 5.) Let dry before shaking off excess lavender. (6.) Trim the top corners of the cardstock and use a paper punch to add a hole. Add some twine or cord.

love letter lavender heart gift tag pleasure in simple things blog

That is all it takes to create a romantic little tag with a wonderful hint of lavender fragrance!  Enjoy!

lavender heart diy gift tag pleasure in simple things blog

Thanks for stopping by! Have a wonderful weekend!

love letter lavender heart gift tag from pleasure in simple things blog

Remember to take pleasure in simple things, Jackie xo

Sharing with Nancherrow, House of Hipsters,  Craftberry Bush, Crafts a la Mode, The Shabby Nest, and French Country Cottage.

10 comments

easy lavender heart sachets

February 10, 2015

easy diy linen heart sachets pleasure in simple things blog

Who wouldn’t want to receive a heart on Valentine’s Day? A great way to give one is to gift a homemade heart-shaped sachet.

pink linen heart sachets pleasure in simple things blog
Today I am sharing some really easy ones I made up using lavender. These sachets are created with just a basic straight sewing stitch and do not require any measuring at all. I used a sewing machine, but they can also be sewn by hand if need be.  (If you would rather try a sachet with a no-sew method, click here for a great option.)

pretty diy heart sachet pleasure in simple things blog
I made a template using a piece of scrap paper by folding it in half and cutting out the squatty heart shape I wanted…approximately 6 1/2 “ across – making it palm size and the perfect little heart to tuck into a drawer. I purchased a small piece of pale pink linen and pulled out a scrap of white linen I had at home in my pile of fabric scraps. Muslin would also work.

lavender heart shortbread cookies pleasure in simple things blog

Another great way to use lavender for Valentine’s Day…add some to your heart shaped shortbreads! (Be sure to use culinary grade lavender.)

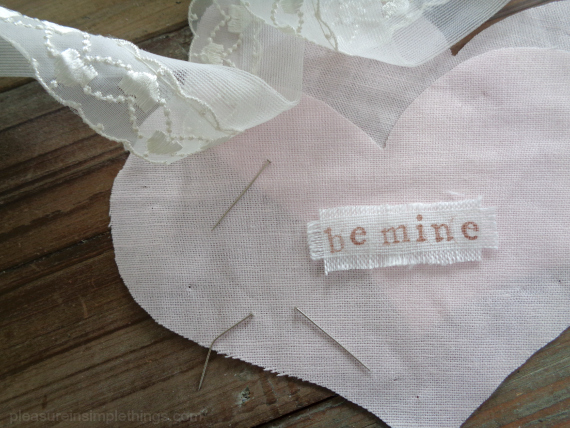
I stamped a message on a small piece of the white linen and pulled threads to fray the edges on all four sides. Using the heart template I made, I cut two heart pieces from the pink linen. On the right side of the fabric on one of the pink linen hearts, I positioned the white message piece and attached it with one short running stitch up the middle.

making a lavender heart sachet pleasure in simple things blog
Then, I positioned the two heart pieces – right sides out – together and stitched around the border, roughly 1/4 “ from the edge. Remember – I did no measuring! About 1” before reaching around the heart with the stitching, I stopped to add in the lavender. I spooned in enough lavender to get the look I wanted. Then I went back and finished the stitching.making lavender heart sachets pleasure in simple things blog

I think these sachets are so sweet…and, the lavender smells so lovely!

Because I wanted the look of the raw edges on my heart, it really simplified the sewing and made this a super easy project for any skill level! There is still plenty of time to make some up before the weekend!

lavender heart sachet diy pleasure in simple things blog (2)
Thanks for stopping by! Remember to take pleasure in simple things, Jackie

Sharing with Sand & Sisal, Homework, and Elizabeth & Co.

no comments

rosewater lemonade for valentine’s day

February 6, 2015

rosewater lemonade pleasure in simple things blog

Since a rose is one of the most enduring symbols of love and appreciation, what better way to add something special to a Valentine’s Day table than to serve a beverage enhanced by a rose?  For Friday field trip today, we are adding rose essence to served lemonade to add a subtle suggestion of friendship or romance to the table.

Lemonade is always a great soft drink option – particularly fresh squeezed – and adding raspberries, strawberries, and/or basil is always a nice way to ‘fancy it up.’ But, for a romantic option, an even nicer addition is a little rosewater.

rosewater for lemonade pleasure in simple things blog
The essence of roses is a lovely way to add a little romance to an ordinary beverage…Perfect when a nonalcoholic drink is in order. I add a single tablespoon of rosewater to a quart of lemonade. Obviously, this amount can be adjusted to your taste.

serving a romantic lemonade for Valentine's Day pleasure in simple things blog

Rosewater lemonade is the perfect beverage to serve to friends at a lunch, as a garden club meeting refreshment, or at a Valentine’s Day brunch. I always have a bottle of rosewater in my kitchen because I frequently use it in my baking. If you don’t happen to have any on hand, you can pick it up at a specialty food store or Middle Eastern market.

rosewater lemonade on pleasure in simple things blog

serving rosewater lemonade pleasure in simple things blogNow that you have some rosewater on hand, you may want to try using it in other ways. Click here to see my recipe for rosewater meringues.

Thank you so much for stopping by. Remember to take pleasure in simple things, Jackie

This post is dedicated to someone very special…welcome to the world, Rose Catherine!  In little Rose’s honor, and as a special Valentine’s Day gift to you for sharing pleasure in simple things, I am giving you a gift of a pretty recipe card for rosewater meringues – just send me an email with your address and I will mail one right off to you – in plenty of time for Valentine’s Day!  Happy Valentine’s Day sweet friends. xo :)

Sharing with House of HipstersShabby Nest, French Country Cottage, Craftberry Bush, and Kim Klassen.

8 comments

polka dot fringed pencils diy

February 3, 2015

diy tissue paper pencils and heart tag pleasure in simple things blog

I think most of us that love creating are collectors – often collecting beautiful scraps to recycle for imagined future projects. Today, I am sharing one way I use my salvaged tissue paper by providing a tutorial for creating pretty fringed pencils. How earth friendly to use recycled tissue paper and old pencils that have been in the junk drawer, for who knows how long, to make these cute pencils!

fringed pencil diy pleasure in simple things blog

Because Valentine’s Day is so close, I have chosen to use tissue paper that coordinates with a Valentine’s Day theme in one of my favorite patterns…polka dots! Join me as I channel my inner Kate Spade! (Am I the only one that has a polka dot Pinterest board?)

Supplies Needed
Pencils (round)
Spray adhesive
Decorative tissue paper – one 6” x 12” piece for each pencil

Start by deciding how many pencils you will create, and cut the appropriate number of tissue paper pieces. A tissue paper with a little more weight is preferred over a super thin variety.

(You can also use a paper cocktail napkin – by separating the top layer and using that in place of the tissue paper. The fringe will not be as long if you choose to use a napkin, since they are not the full 12” specified. Also, I find the cocktail napkin does not hold up as well as the tissue paper when sharpening the pencil. The beige with white polka dot pencil shown here was made with paper from a cocktail napkin.)

Kate Spade inspired polka dot pencil diy tutorial from pleasure in simple things blog

kate spade inspired pencil tutorial pleasure in simple things blogSpray the wrong side of the tissue with the adhesive, being sure to plan for overspray (protect the area), leaving a section without spray (use a piece of paper to mask the area from spray). The reason for the non-adhesive section is because you don’t want adhesive on the area that will be the fringe. With care, lay the piece of tissue paper on a clean, flat surface – adhesive side up. Carefully line up the pencil in the corner of the tissue paper remembering that the adhesive is in place and put it directly on the right spot the first time. The eraser side will be on the inside, and the writing side on the outside edge, of the tissue paper. Roll the pencil tightly down the length of the tissue paper.

Cut the end of the tissue paper to make the fringe, stopping within a 1/2” of the eraser end of the pencil. You will want to make cuts approximately 1/4” spaces apart – this does not need to be exact – by placing the bottom of your scissors inside the tube you created at the pencil end. As the final step, twist the fringed end of the pencil…because there is a little adhesive on this end, it will keep the twist in place. Trim the fringe to desired length, if needed.

polka dot pencils inspired by Kate Spade tutorial pleasure in simple things blog

That’s it! Cute, right? I made a tag from a round cut from a pink paint swatch and added a gold leaf heart. If you are giving your pencil(s) as a Valentine to a youngster (or someone young at heart), you may want to add a gift tag with a corny Valentine saying like:
• You’ve got the right stuff!
• You are just write for me!
• Write on!
• You’re all write with me!

I hope you enjoyed today’s fringed pencil craft. Maybe I have inspired you to make up a batch to match your office décor, or… to match your kitchen where you keep the grocery list?

polka dot pencil craft pleasure in simple things blog

Thanks for stopping by! Remember to take pleasure in simple things, Jackie

Sharing with NancherrowCraftberrry BushThoughts from Alice, Sand & Sisal, Homework, and Elizabeth & Co.

2 comments

february book giveaway!

January 30, 2015

sample from Feb giveaway book pleasure in simple things

As usual for me at this time of year, my mind wanders towards thoughts of warmer weather, gardening, and spending a lot more time outdoors. Even though I can appreciate some aspects of winter, it is most definitely not my favorite of the seasons.

With this in mind, you will understand why I chose The House Gardener by Isabelle Palmer as the book for the February giveaway selection. This book provides tons of ideas and inspiration for indoor gardens…a great way to brighten up cold winter days and to inspire thoughts of the next (warmer!) season ahead.

giveaway book for feb 15 on pleasure in simple things blogThrough this delightful book, Ms. Palmer will show you how to choose, grow, and decorate with houseplants, as well as guide you through the different techniques needed to care for your new “green guests.”

Included in this book are instructions for drying and pressing flowers, suggestions for specific plant types based on conditions, caring for orchids, creating terrariums, and much more!

Just leave a comment during the month of February to be entered into the random drawing at the end of the month.

And, a big congratulations to Carol at Art & Sand for being selected randomly from everyone that commented during the month of January!  Carol, you have won the January giveaway selection, The Kinfolk Table: Recipes for Small Gatherings by Nathan Williams.  This is a beautiful book and I know you will enjoy it!

For those that use Instagram, February’s challenge will be to share heart photos. At this time of year, hearts seem to appear everywhere! Be creative and share a photo of a heart you spot in an unexpected place using the hashtag #pleasuregram! Can’t wait to see what you find! ;)

Instagram challenge Feb 2015 pleasure in simple things blog

Thank you so much for stopping by! Have a wonderful weekend, Jackie xo

P.S.  If you want some inspiration to get started on some indoor gardening, click here for some terrarium inspiration!

3 comments

super for the super bowl asian nachos

January 27, 2015

how to Asian nachos pleasure in simple things blog

This snack was 10 years in the making. Sound crazy? Let me explain.

About 10 years ago, my daughter worked in a restaurant that served Asian nachos. I wasn’t a big fan of Asian flavors at the time, but I was in love with the Asian nachos served at this particular restaurant. I never failed to order this each time I visited. That restaurant is no longer in business, but I have often thought of that favorite appetizer of mine and wished I knew how to make it.

restaurant Asian nachos pleasure in simple things blog

Recently, two people (one being my daughter) that once worked at the now non-existent, Asian nachos serving, Connecticut restaurant put their heads together and came up with the recipe for this fabulous appetizer. I am SO excited to share it with you because it tastes pretty spot-on to my favorite from years ago!

Ingredients (makes 16)

ingredients for Asian nachos pleasure in simple things blog

  • Package of wonton wrappers (in refrigerated in the produce section)
  • Wasabi cream sauce (I bought Kikkoman sandwich and dipping sauce)
  • 1 bottle peanut sauce (I used an 11.5 oz. bottle sold as a dipping sauce)
  • 1 cup shredded cooked chicken or approximately 12 oz. uncooked (I used 4 tenderloins)
  • 1 ½ cups shredded Mexican mix cheese
  • Scallions, chopped (for garnish)

close up photo of Asian nachos pleasure in simple things blog

Here is how I made the Asian nachos based on what I learned from the former restaurant employees!

First, I baked 4 chicken tenders in some of the peanut sauce. After the chicken was cooked, I shredded it and added the rest of the bottle of peanut sauce to it. (I made this ahead and stored in the fridge.)

Next, I used a frying pan and canola oil to fry 16 wonton wrappers. I made sure the oil was really hot and fried each side – this is a fast process – probably 20 seconds for each side. The wontons will puff up and become stiffer, but I didn’t keep them in the oil long enough to become brown. I flipped them with a fork and put them on a paper towel when I removed them from the oil.

recipe for Asian nachos pleasure in simple things blog

I made sure I had 16 nicely done wontons before starting to assemble the appetizer. (On my first attempt I had some wontons I needed to discard – they were either too brown or that I put them in the oil before it was hot enough. I got the hang of it after a few tries.)

To assemble, I lined up the wontons on an oven safe dish. (You can use a cooking sheet and transfer to a serving tray when out of the oven.) I put a heaping tablespoon of the chicken mixture – after warming it from the fridge first – onto the center of each wonton. Then, I sprinkled the shredded cheese on top of the chicken on each wonton and them under the broiler – just long enough to melt the cheese.

After taking the wontons out of the oven (transfer to serving tray if needed), I added the wasabi cream sauce (add a dot or more, depending on your taste).  As the final touch, I garnished with chopped scallions.

asian nachos pleasure in simple things blog

Here you go! A super Super Bowl – or, anytime – snack! So yummy!  Enjoy!

P.S. You will have wonton wrappers leftover – the perfect opportunity to experiment by using them with some homemade ravioli fillings or to create some filled desserts!

Thanks for stopping by! Remember to take pleasure in simple things, Jackie

Sharing at Craftberry Bush, The Shabby NestSand & Sisal, Elizabeth & Co, and Coastal Charm.

no comments

special date valentine skewer

January 23, 2015

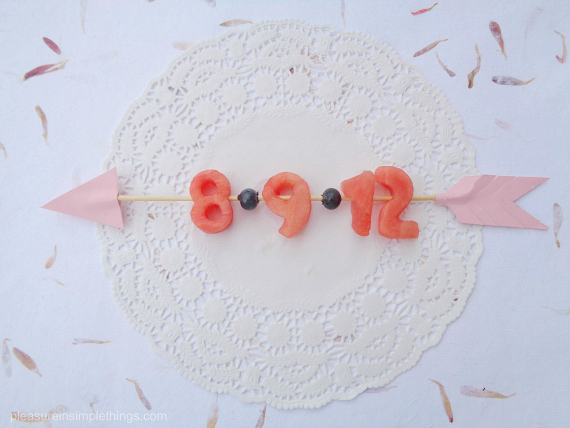
special date fruit skewers pleasure in simple things blog

What better way to commemorate a date with significance than to just spell it out…with food! I guess my ‘playing with food’ theme from earlier this week is still going strong! Once I get started with something, it is hard to stop! So, for Friday field trip today, come into my kitchen where I will share an easy and fun idea for Valentine’s Day…or, any day!

valentine fruit date skewers pleasure in simple things

I am using fruit (any melon works great) on a skewer for a Valentine meal to evoke memories of a special day.  Mini cookie cutters are perfect to cut numbers from fruit!  Do you have a date with special significance? Maybe a first meeting? Or, the date you were engaged? Maybe it is a future date – like the due date of your first baby (a great reveal!) or the closing on your first house.  Whatever the significance may be, putting it right out there on the plate is a fun way to include past or future memories to your Valentine’s Day table.

cookie cutters for Valentine fruit kabobs

Can’t think of any date appropriate to serve up? That is okay…just make x’s and o’s…or, hearts. :)  Or, at a family meal, spell out the names of your children (just monitor the sticks!)

making fruit numbers from cookie cutters pleasure in simple things blog

The fruit can be served as an appetizer or as a dessert…served with a spiced yogurt dipping sauce, melted chocolate – fondue style, or alongside a scoop of sorbet (you guessed it – I am thinking of my favorite, coconut lemongrass!).

fruit kabobs for Valentine's Day pleasure in simple things blog

I prefer a simple skewer, but if you want to get fancy, you can simulate an arrow with a few strategically placed pieces of pink paper!

making Valentine arrows from skewers pleasure in simple things

Have you thought of a day you would like to use?  Have fun with it!

Thanks for stopping by!  Have a wonderful weekend, Jackie

Sharing at NancherrowCrafts a la ModeCraftberry BushThe Shabby Nest  and French Country Cottage.

3 comments

homage to squirrels on their day

January 20, 2015

Squirrel pound cake pleasure in simple things blog

I often wonder why I even like squirrels – they are just rodents, after all. And, in my yard, the pesky things are forever digging up all the bulbs I plant in my garden!

But, admittedly, I do like them…I have fed them nuts by hand from my backdoor, I have been in awe of a white one that hangs out in my yard and, I even have a squirrel feeder in a backyard tree!

Well, tomorrow is National Squirrel Appreciation Day. And, even though I don’t know exactly what it is I appreciate about squirrels, I am paying homage to them on their special day!

using a squirrel cookie cutter pleasure in simple things

In the past, I have used a squirrel cookie cutter to make cookies, pancakes, and toast embellished with a squirrel shape – what I am saying is that my homage is pretty much playing with food! And this year is no different since I have created a squirrel pound cake!

You may have tried this technique before – using a shape baked into a pound cake. If not, it is not too hard to do, but two pound cakes need to be baked. First, I made a pound cake, adding cocoa to get a dark color. (You could use food coloring if you wanted to do a different motif….say green for a Christmas tree shape, for example.) Anyway, after the pound cake was done, I cut out a bunch of shapes – in this case – squirrels. I lined up the squirrels – one after the other – down the middle of a loaf pan – until they stood from one end of the loaf pan to the other, flat against each other. Then, I made a second pound cake and spooned the batter all around and on top of the squirrels standing in the pan. After the second cake is baked and cut – Voila! Squirrels!

If you have never tried to make a pound cake with a shape baked into it, it is a fun way to add a motif to a theme party.

squirrel cake with walnut sauce pleasure in simple things blog

Because the squirrel part of the cake is actually cooked twice, I thought that part of the cake may turn out a little dry…so here is the sauce I came up with to spoon over the cake. (Of course, it had to be a nut sauce!)

Walnut Sauce
1 cup maple syrup
2 Tablespoons honey
Pinch of cinnamon
Pinch of salt
3 Tablespoons unsalted butter, chopped into small pieces
¾ cup coarsely chopped walnuts
1 teaspoon vanilla extract

Lightly toast walnuts (optional) and set walnuts and vanilla aside. Combine remainder of ingredients in a saucepan and cook on low heat, stirring occasionally, until butter is melted (about 10 minutes). Remove from heat. Serve warm…when ready to use, stir in walnuts and vanilla before serving with the pound cake.
squirrel appreciation day pleasure in simple things blog

Thanks for stopping by! Remember to take pleasure in simple things, Jackie

P.S. If you are a squirrel lover, be sure to check out all the cute photos of squirrels in the squirrel photo album on my Facebook page.

Sharing with Elizabeth & Co, Coastal Charm, Cookin’ and Craftin’ and Sand & Sisal.

4 comments

birch bark diy bookmark valentines

January 16, 2015

white birch heart bookmark pleasure in simple things blog

Today on Friday field trip, I am sharing how I used some decorating leftovers from the holidays to create some cute Valentine bookmarks.

My outdoors theme left me with some rustic looking leftovers and I thought birch bark would be perfect to design a bookmark. I looked through my stash of white birch bark to find some flat, but sturdy, thin pieces to make my bookmarks. Using a craft knife, I cut a rectangle approximately 1 1/2″ x 5 1/2 ” from the bark for each bookmark.

Initial heart birch bark bookmark pleasure in simpel things blog

If you haven’t collected your own bark, you may be able to find some at a high-end garden store.  (I know I have seen it sold at Terrain.)  You won’t be needing very much – depending on how many bookmarks you plan to make, of course.

Next, to embellish the bark, I used a basic wood burning tool (Girl Scouts 101) and burned a heart pattern into the bark. On some of the bookmarks, I also added an initial. You can get as create as you like with this step – add an arrow, 2 sets of initials, etc. If you don’t have the basic wood burning tool, it is a handy thing to have and you can probably find one online for $10 to $15. Don’t get an entire set – just the simple, basic tool is all you need.

birch bark bookmarks with initials pleasure in simple things blog

I used a nail and a hammer to put a hole into the top of each rectangle so I could add a ribbon to the top of each bookmark. For the ribbon, I recycled the handles from my holiday shopping bags. Does the cream color ribbon with red accents look familiar? It is from the handles of an Anthropologie shopping bag! The jute looking one is from the handle of a Terrain shopping bag! I always save the handles for projects just like this!

heart bookmarks from birch bark pleasure in simple things blog

And, that’s it! Simple, right?

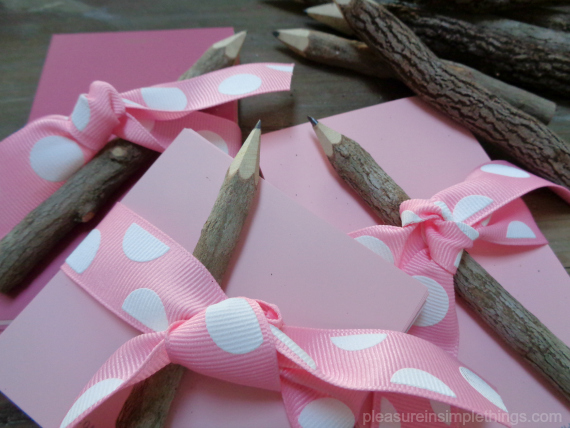
I also had some cute pencils left from my holiday wrapping that I transformed for Valentine’s Day. Twig pencils that served as package tie-ons at the holidays are now packaged with ribbon scraps and paint swatches – my favorite note paper – as Valentine memo packs! (Is it just me that enjoys memorizing the names of current paint colors?! I know…I am definitely color obsessed!)

paint swatch note packs pleasure in simple things blog

What holiday decorating leftovers can you transform into Valentines?  I hope I have inspired you to create some!

Note: You can use some sandpaper to soften up any rough spots you may find on your bark. You can also attach some felt or cardstock to the back of a piece of bark if it seems too thin or is not rigid enough for a bookmark.  Most importantly, be sure to follow the safety guidelines on the wood burning tool!

Thank you so much for stopping by!

Have a wonderful weekend and remember to take pleasure in simple things, Jackie

Sharing at Homework,  Thoughts of Alice, House of Hipsters, Nancherrow, and The Shabby Nest.

6 comments

Back to top