Subscribe to Pleasure in Simple Things via RSS ReaderFollow Pleasure in Simple Things on InstagramFollow @InSimpleThings on TwitterLike Pleasure In Simple Things on FacebookFollow Pleasure In Simple Things on PinterestEmail Jackie

plaster of paris leaves

September 15, 2015

basket of plaster of paris leaves pleasure in simple things blog

Last week I talked about ‘neutralizing’ fall and I demonstrated how to get started with some pine cones and bleach. This week, I am continuing on my quest to ‘neutralize’ natural elements for my fall décor.

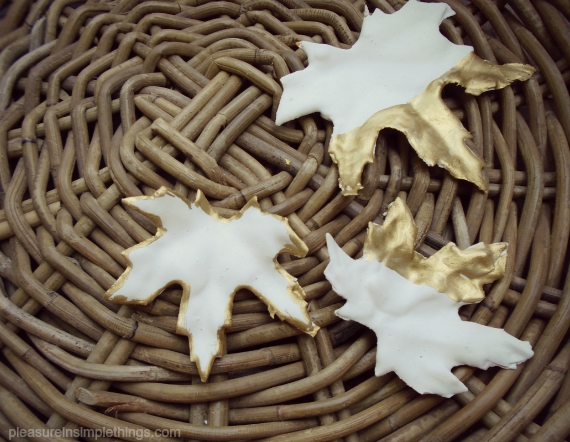
plaster of paris leaves with gold pleasure in simple things blog

Today, I am ‘neutralizing’ leaves! Actually, in this instance, the leaves are not natural elements – I am using super inexpensive fabric leaves. The way I ‘neutralize’ them is super easy and super messy! I use plaster of Paris to add a porcelain-like look to the leaves.

Plaster of Paris is one of those things every crafter should have in their workshop. There are so many uses for it and it is very inexpensive. Plaster of Paris is a dry powder that is mixed with water to create a mixture that hardens. It can also be mixed with paint to create homemade chalk paint.before and after plaster of paris leaves pleasure in simple things blog

To make the leaves, I simply mix up some of the plaster (2 parts plaster of Paris to 1 part water) and use it to cover the leaves. I use a disposable plastic cup as a measure and stir the mixture with a paint stirrer or plastic spoon in a disposable container. Believe me, you don’t want to keep any utensils you use for this project – it gets very messy! The plaster gets thick pretty quickly, so I don’t waste a lot of time as I dip each leaf to coat, one at a time, into the mixture. I also keep an inexpensive paint brush handy to add extra plaster as needed.

plaster of paris gilded leaves pleasure in simple things blog

Once the leaves are covered, they are left on wax paper or parchment paper overnight to harden completely. A leaf can be draped over a plastic cup to dry with a curve, if desired.

forming a plaster of paris leaf pleasure in simple things blog

The plaster leaves, once dry, can be enhanced with paint or glitter. I like to use metallic gold paint to paint the edges or create a ‘dipped in paint’ look.

These plaster leaves look great on a table, in a bowl, or as part of a fall display. Adding a name to a single leaf with a paint pen turns it into a great looking and unique place card! I use gold thread to make a garland of leaves for a window. (A hole can be added for hanging the leaf, but this must be done as a first step – before the plaster is added! )

add gold thread to hang a plaster of paris leaf pleasure in simple things blog

I hope I have inspired you to ‘neutralize’ some leaves!  Have fun with it!

Thanks for stopping by!  Remember to take pleasure in simple things, Jackie

Sharing at Shabby Nest.

no comments

neutralizing fall

September 11, 2015

a bleached pine cone with glitter pleasure in simple things blog

It seems everyone is bleaching pine cones these days – and rightly so! For those of us with a passion for neutrals, pine cones can now be happily included in our fall decorating mix!

For Friday field trip today, I am demonstrating the start of how I ‘neutralize’ fall! Since I was in the woods last weekend, it was the perfect time to collect and bleach some pine cones.

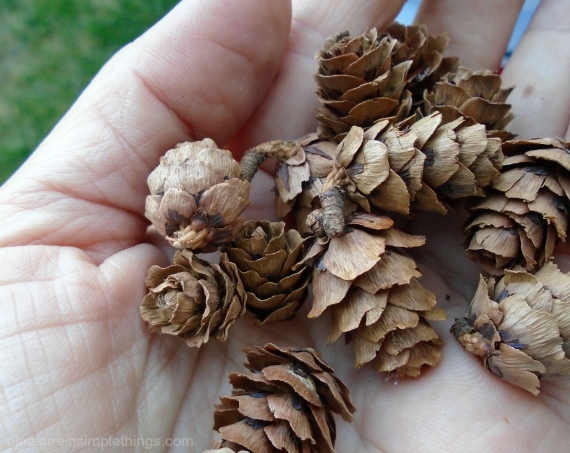
pine cones before bleach pleasure in simple things blog

I prefer a 50/50 bleach and water mix in a plastic bucket; keeping the pine cones in the solution 24 hours and drying them outdoors in the sun. If you haven’t bleached pine cones before, be warned that they close up when wet. It gets a little scary when you see them this way, but they open up as they dry.

bleaching pine cones in the woods pleasure in simple things blog

Since the pine cones will float in the bleach solution, I put some paper plates on top of the pine cones and added a few rocks to be sure they were covered completely in the liquid.

That’s all there is to it! Those dark brown pine cones are transformed in a beautiful neutral hue!

a bleached pine cone pleasure in simple things blog
I like to dip the tips of the bleached pine cones into some white or off-white paint or to add a little glitter (like I did with this batch) for some added sparkle!

I hope I have inspired you to do some ‘neutralizing’ of your own! Stop back next week and I will demonstrate how I ’neutralize’ acorns and leaves!

Have a wonderful weekend! Remember to take pleasure in simple things, Jackie

no comments

watermelon ice cream push pops

September 8, 2015

 watermelon ice cream pop pleasure in simple things blog

There are two big things wrong with Labor Day in my book. First, that it is called Labor Day…it is actually ‘No Labor Day’, isn’t it? Well, that’s what my friends and I celebrate each year. We get together and celebrate a day of no work. Over the years we have always joked about our celebration of ‘No Labor Day.’

But, the biggest problem with Labor Day is not its name. The biggest problem with Labor Day is that it signals the end of my favorite season! With Halloween décor in the stores and school back in session, it is hard to ignore the hints of the upcoming season. Fall is ready to pounce and I hate to think of summer as a thing of the past!

Maybe that is why I am still hanging on to all things summer. I know that ignoring fall (bite my tongue for saying the word!) will not make it go away, but I continue to try my best to do so.

 watermelon ice cream push pops pleasure in simple things blog

Watermelon ice cream push pops are a great example of some last minute summer fun! They are super easy to make and just scream summer. I made some for my ‘No Labor Day’ weekend, but they are fun to make anytime!

Now that these plastic push up containers are readily available in stores, you can easily create your own push up ice cream treats. I love these containers for homemade ice cream because soft, newly churned ice cream slips into them so easily.  But, no need to make homemade ice cream for these treats – softened store bought ice cream works just as well!

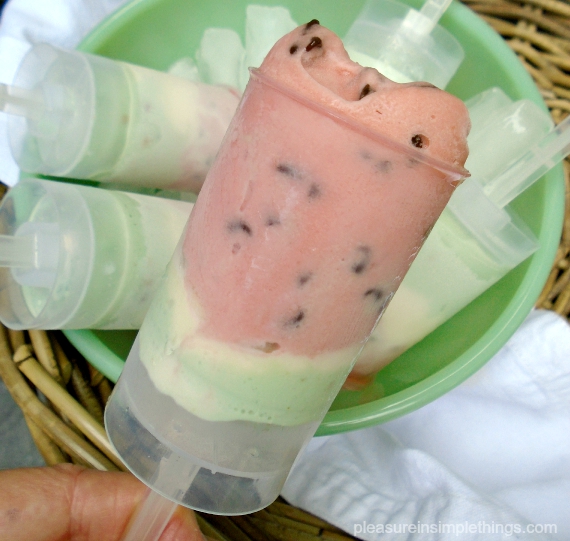
 close up of a watermelon ice cream pop pleasure in simple things blog

For a watermelon looking treat, use three flavors of ice cream. Pick something green, something white, and something red. For mine, I chose raspberry sherbet, pistachio ice cream, and vanilla ice cream.

I put each flavor in its own bowl and soften each up a little bit using a spoon. For the red flavor, I added some mini chocolate chips while softening, to act as my ‘seeds.’ The ice cream should be a little soft, but not runny. If it gets too soupy, it will start leaking out of the bottom of the plastic container. (I first learned this lesson when I tried to make Jell-O shots in these containers by pouring in the liquid mixture before set – epic fail!)

 ice cream mix ins for push pops pleasure in simple things blog

Holding the plunger all the way down (open) while doing so, I put in a small amount of vanilla – enough to create a thin layer – then a thin layer of the softened pistachio, and, finally, I filled the rest of the container with the raspberry sherbet I had mixed with mini chocolate chips.

Into the freezer they go to harden up, and that is it!

bowl of ice cream pops pleasure in simple things blog

These are easy to decorate for a party.  Add a ribbon to coordinate with your decor.  They also look great with a round sticker – either purchase stickers or print some on your home computer – round ones look great!  I hope I have inspired you to make some ice cream push pops.  You can find the empty containers in any store that sells cake decorating supplies – usually sold in a pack of six.

Thank you for stopping by. Remember to take pleasure in simple things, Jackie

Sharing at Craftberry Bush.

no comments

summer sculpture showcase

September 4, 2015

sculpture garden decor pleasure in simple things blog

Today we are visiting a sculpture garden in the historic district of Old Lyme, Connecticut. Sculptures placed over the 4.5 acres of property of artist Gilbert Boro make up the Summer Sculpture Showcase available for viewing by the public.

flowers in sculpture garden pleasure in simple things

namaste sculpture pleasure in simple things blogOver 90 large-scale, abstract sculptural works, inspired by nature and created by a number of artists – including Boro – make up the showcase, located adjacent to the Lyme Academy of Fine Art.

sculpture garden Old Lyme pleasure in simple things blog

2 parts of spoon like sculpture pleasure in simple things blogI was lucky enough to meet Boro, his private residence located amid the landscaped garden, on the afternoon I took a leisurely stroll through the exhibit. Speaking with him, it was clear art was his passion.

orange sculpture pleasure in simple things blog

sculpture garden pleasure in simple things blogThere is certainly something for everyone in the garden –an interesting assortment of sculpture created in a number of different styles and materials.

hand sculpture pleasure in simple things blog

head sculpture pleasure in simple things blog

Easily accessible off Exit 70 of Interstate 95, the Showcase is a great summer stop. It is open to the public without charge from 9:00 am to 5:00 pm, through September 13th.

two part sculpture pleasure in simple things blog

I hope you enjoyed today’s Friday field trip.

sculpture garden entrance pleasure in simple things blog

Have a wonderful holiday weekend and remember to take pleasure in simple things, Jackie

no comments

september book giveaway!

September 1, 2015

pleasure in simple things giveaway book for september

September always seems so far away when summer begins. Of course, before you know it, September creeps up and with it comes the threat of the end to the best season of the year!

I don’t know about you, but I am still cramming every last bit of summer into my days – and, that includes the monthly book giveaway!

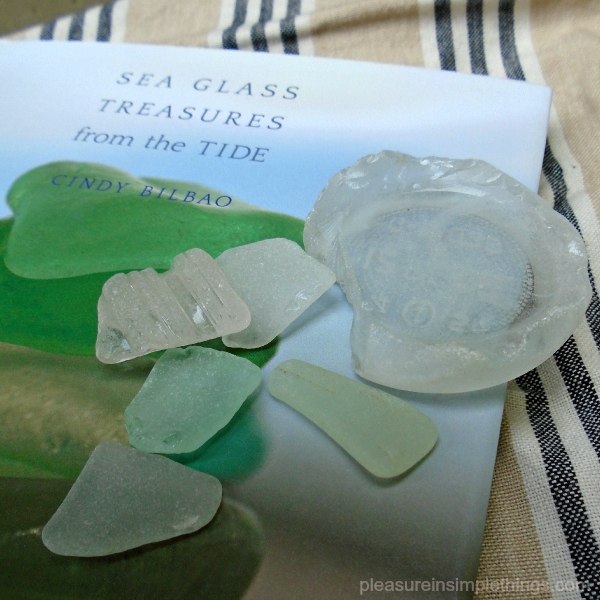
Since it is technically still summer, I have chosen a book that makes me think of summer and all I love about it.  The book is called Sea Glass Treasures from the Tide.  As a sea glass collector for my entire life, I can appreciate the wonderfully photographed pieces Cindy has captured in her first book.  Even those of you who may not live near the water or, have the opportunity to hunt for sea glass will enjoy this beautiful selection!

giveaway book pleasure in simple things blog

Photographer Cindy Bilbao shares with us the vibrancy, magic, and beauty in sea glass that comes from the tides of her favorite beaches. Her book shares treasured trips and helps keep summer alive all year long!

Leave a comment on this post to let me know you’d like to win this book.  A winner will be chosen at random from the comments I receive.

Congratulations to Deborah, winner of last month’s giveaway selection Irresistible Ice Pops by Sunil Vijayakar.  I know you will enjoy this wonderful collection of recipes for many summers to come!

In attempt to celebrate the last days of my favorite season, this month’s Instagram Challenge is to share photos from the last days of summer. Use hashtag #pleasuregram to share your best shots!

September Instagram ChallengeThank you so much for stopping by! Remember to take pleasure in simple things, Jackie

3 comments

epitome of summer

August 28, 2015

basic sand castle pleasure in simple things blog

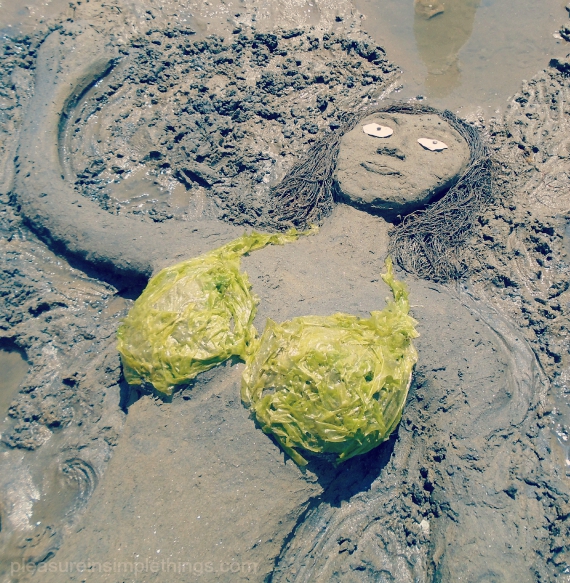
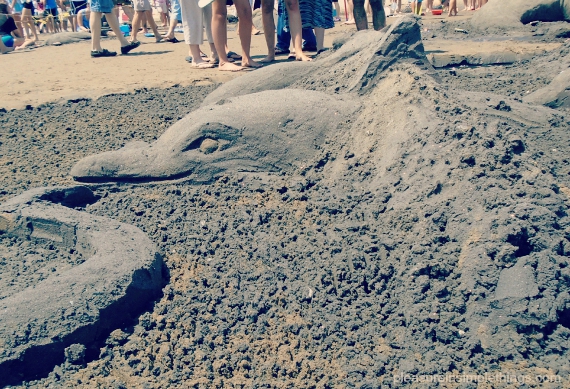
Most every coastal town in Fairfield County schedules a sand castle building contest during the summer and each year I try to attend at least one. For Friday field trip this week, I am sharing a few photos from the contest I attended this year.

sand castles mermaid pleasure in simple things blog

sand castles pleasure in simple things blog

sand castles bear pleasure in simple things blog

sand castles contest pleasure in simple things blog

sand castle fish pleasure in simple things blog

turtle sand castle pleasure in simple things blog

minion sand castle pleasure in simple things blog

dead duck sand castle pleasure in simple things blog

Which is your favorite?

Have a wonderful weekend and remember to take pleasure in simple things, Jackie

no comments

old window into necklace display

August 25, 2015

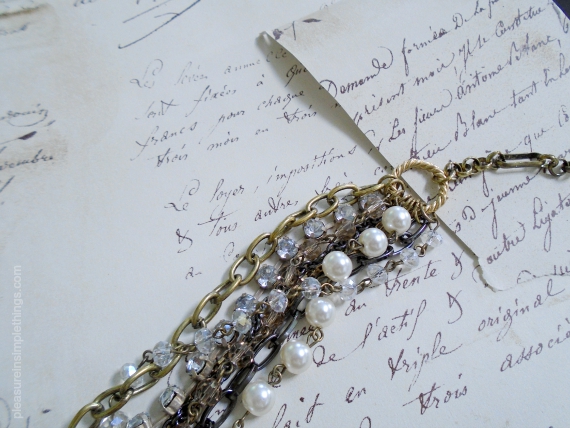
building a necklace holder pleasure in simple things blog

In a recent post, I demonstrated how I updated an old necklace holder.  Today, I am demonstrating how to turn an old piece that was never intended for displaying accessories, into a display piece for necklaces!  I started with an old window.

a creating a necklace stand pleasure in  simple things blog

The first order of business was to find a way to make it stand up.  I wanted it to stand at an angle in the horizontal position.  I achieved this by using an old broom stick handle!  Cutting two pieces from the handle and screwing them into the back of the window was perfect for holding the window at an angle for display.  (It did take a couple tries to find the perfect angle for the cut.)

 adding legs to a jewlery stand pleasure in simple things blogThe window itself had a nice distress to it and I did not paint it at all.  But, to give a nice contrast to the pieces I would be displaying, I knew I needed to do something with the glass panes.  My decision was to use paper.  I used two different ones – one had a script design on it and the other was a natural textured paper.

 making a necklace stand pleasure in simple things blog

Although I liked the natural paper, it didn’t looked aged enough for this project.  So, before I started adding it to the window, I ‘aged’ it by soaking it in some strong coffee.

 drying coffee stained paper pleasure in simple things blog

After it was dry, I ripped pieces of both papers and positioned them on the inside of the glass panes.

 creating a necklace stand pleasure in simple things blog

Now all I needed was a way to hang the necklaces.  For this, I just hammered some nails into the top wood of the window frame.  I could use one nail or several to hang a necklace, depending on its length. adding nails to a jewelry stand pleasure in simple things blogI think the piece came out perfect for necklace display!  This project can take on many variations.  The first that comes to mind is to display old black and white photos on the glass.  I am sure you can come up with your own ideas!  I hope I have inspired you!

necklace holder pleasure in simple things blog

Thanks so much for stopping by!

Remember to take pleasure in simple things, Jackie

1 comment

two tons of white legos®

August 21, 2015

building in process pleasure in simple things blog

What would happen if someone dumped two tons of LEGOS® into a city park and told the public to ‘have at it?’  You can find out this summer on the High Line in New York City with The collectivity project!

lego time pleasure in simple things blog

art installation at the high line pleasure in simple things blog

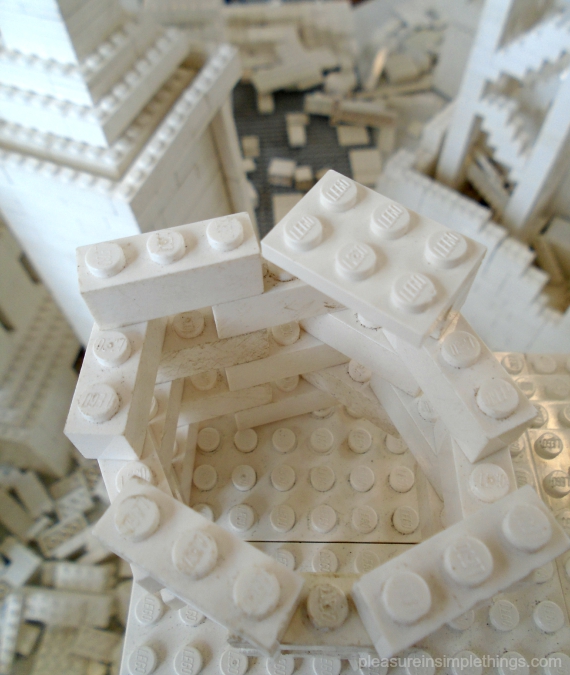
The collectivity project, an installation of white LEGO® bricks, features an imaginary cityscape conceived and designed by the public.  The ever-evolving shape of the installation is at the mercy of those visiting the High Line who are welcome to play with the installation – building and rebuilding the structures over time.

building legos at the high line pleasure in simple things

The project stimulates tons of creative energy and provides a darn good time in the process!  The idea was driven by Danish-Icelandic artist Olafur Eliasson, demonstrating his desire to make the concerns of art relevant to society at large; not limited to the confines of a museum or gallery.

high line legos pleasure in simple things

Visitors are a mix – from super serious architect types to those who are just passersby and add a single brick or two.  Me? I found myself somewhere in the middle.  I wanted to make my mark on the project – to be a contributor – but, I didn’t feel the need to impress anyone with my superior LEGO® building skills!

lego sky scrapers pleasure in simple things blog

If you should visit, you may not see what is pictured here since the piece is constantly being reconfigured by those who visit and contribute to its ever-progressing contour.

building legos in nyc pleasure in simple things blog

lego tower at the high line pleasure in simple things blog

Visit the High Line now through September 30th and you will get the chance to make your mark on two tons of white LEGOS® at no charge!  How cool is that?!  Thanks for stopping by for Friday field trip!  I will post some additional photos from this great installation on Facebook this weekend.

white legos pleasure in simple things blog
Have a wonderful weekend and remember to take pleasure in simple things, Jackie

legos left at the high line pleasure in simple things
P.S.  Click here to read more about The High Line.

no comments

diy garden wrapping paper

August 18, 2015

making garden wrapping paper pleasure in simple things blog

I very often create my own wrapping paper; particularly when I have a vision of something specific in my mind. This was the case with the tomato wrapping paper I made recently for a thank you gift I was giving a friend.

finished home made wrapping pleasure in simple things blog

The gift was a book on heirloom tomatoes and I had a vision of a graphic of a tomato on brown paper. I knew I needed to make it! I decided on a classic potato print and set to work. I cut a couple notches into one half of a potato – that would be the main part of the tomato. I used the other half of the potato to make some greens for the top. Simple!

making potato print wrapping diy pleasure in simple things blog

I printed it in two parts. First, the red in a random pattern on brown paper large enough to accommodate the book I was wrapping. After that was dry, I printed the second part – the green. Great! Exactly what I had hoped for! And, I would add tie it up with some natural raffia for my final touch!

diy wrapping pleasure in simple things blog

I hope I have inspired you to create some fun wrapping paper this summer! ;)

simple home made wrapping paper pleasure in simple things blog

Thanks for stopping by! Remember to take pleasure in simple things, Jackie

Sharing with Sand & Sisal.

2 comments

jewelry holder redo with annie sloan

August 14, 2015

after of a jewlery stand redo pleasure in simple things blog

Today’s redo may seem a little unusual… Maybe not if you remember that I once turned a plastic drink container into a beautiful flower vase using Annie Sloan paint!  Today, I am again using Annie Sloan paint for a transformation.  For today’s Friday field trip, come see how I used paint, an old poetry book, a few shells, and some scraps of ribbon to turn a black metal jewelry stand into something much more ‘poetic.’

before and after jewlery stand

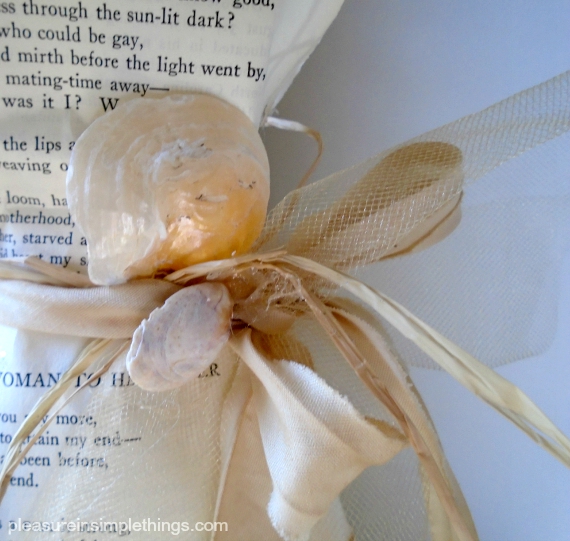
First, I used Annie Sloan paint in Old White to cover the entire jewelry stand.  I really did not like the grid pattern on the metal piece so, I decided to tone it down by attaching some pages I ripped out of an old poetry book.  After I liked the way the pages were arranged, I added a ‘belt.’

closeup of jewlery stand redo pleasure in simple things blog
For this, I used a glue gun to add some raffia, some seam tape (I aged using some strong coffee), a few shells, and some tulle.

jewlery stand redo on pleasure in simple things blog

I finished by adding a little bit of sparkle to the pages and a few gold accents to the Old White paint.  A much different look than the old black metal grid, don’t you think?

jewelry holder with necklace pleasure in simple things blog

The piece now looks really great to display jewelry or to display on its own!

Thanks for stopping by!  I hope I have inspired you to update your own flea market find!

redo of a jewlery stand
Have a wonderful weekend and remember to take pleasure in simple things, Jackie

Sharing with Elizabeth & Co., Coastal Charm, and Thoughts from Alice.

2 comments

Back to top