Subscribe to Pleasure in Simple Things via RSS ReaderFollow Pleasure in Simple Things on InstagramFollow @InSimpleThings on TwitterLike Pleasure In Simple Things on FacebookFollow Pleasure In Simple Things on PinterestEmail Jackie

easy plastic bottle vase

August 12, 2014

diy plastic flower vase pleasure in simple things

Did you ever need a large quantity of centerpieces for your outdoor party tables? An easy DIY is to create vases from plastic bottles and add a few garden or meadow flowers!

The only materials you need are some bottles from your recycling bin…they don’t even need to match…some flowers or greens, and some leftover Annie Sloan Chalk Paint and wax.

diy plastic flower vase pleasure in simple things

Flowers are great to add to any occasion…or, even to no occasion at all!  My choice for vases gets a little more casual when I entertain outdoors, because I don’t like the thought of breaking any of my favorites at an outdoor party. So, when the entertaining gets more relaxed, so do the vases.

I like using old tea tins or oatmeal tins for flowers when entertaining outdoors, but sometimes rummaging through the recycling bin can be inspiration for a DIY vase!

diy upcycled flower vase pleasure in simple things

A plastic bottle can easily be upgraded to a fun flower vase to use for flower centerpieces at an outdoor party…no worries about breakage and so easy to make up large quantities!

upscale plastic bottle vase pleasure in simple things

I like the leaf detail imprinted in the plastic on this plastic tea bottle and I happened to have a case of empty ones in my recycling bin…perfect for my project!

Queen Anne's Lace in a diy vase pleasure in simple things

I simply painted the bottles with Annie Sloan Old White Chalk Paint! One of the great things about this paint is that you can virtually cover any surface! I added a coat of clear wax to protect it and it is good to go! Because I wanted my pattern to stand out, I did add a little dark wax in the patterned areas of the plastic. The amount of materials for one vase is very minimal. If you don’t have leftover paint, you can purchase a small sample size and have plenty to create some vases!

easy diy flower vase from a plastic bottle pleasure in simple things

Not bad for a plastic throwaway, right?! And, no worries about it breaking. I just added some wildflowers that were growing as ‘weeds’ and tied a piece of twine on the neck of the bottle and my centerpieces are complete! Fresh herbs are also a great option in place of flowers…there is so much mint, basil, and parsley in the garden at this time of year and they all make a great (and fragrant) addition to a vase.

Thanks for stopping by!

Remember to take pleasure in simple things, Jackie

Sharing at Sand & Sisal, Coastal Charm, and Crafts a la Mode.

no comments

oyster shell place cards

August 5, 2014

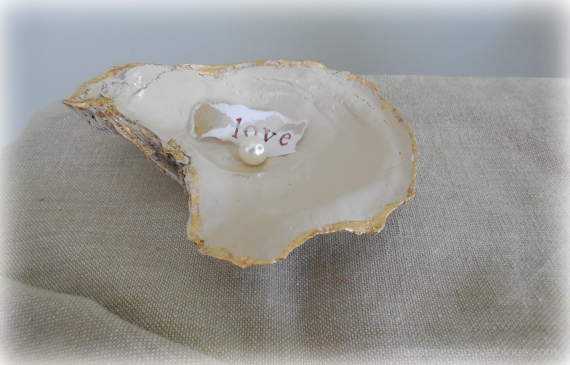
pleasure in simple things diy oyster shell place card

Today, I am sharing a diy on painting oyster shells to use as place cards.

Growing up in Connecticut, crafts using materials from the beach started at an early age. Making necklaces out of small golden shells was more common than the macaroni variety and, constructing items from rocks or driftwood… or any items found on the sand…occurred regularly.

Fishing trips with my dad when I was really young were more often about creating adventures and finding ‘treasures’ than actually fishing. Remember back when playing with the worms was more fun that catching the fish?!

My crafts got more involved as I got older. In my high school crafts class, I once made clay tiles that were imprinted from found shells. Painting the smooth rocks found on the shore was always a fun activity. As I got older, creating wreaths or mirrors from shells seemed more in order…my favorites always made from oyster or mussel shells. I even created the paint palette for my home using the delicate colors from the inside of an oyster shell.

oyster shell place card

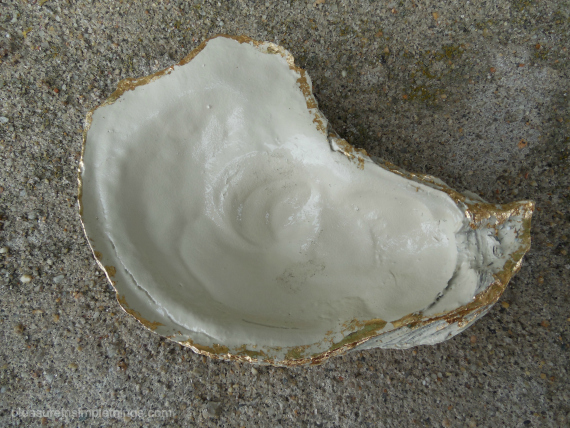
So, for me, painting shells is nothing new. But, sometimes details are perfected over time. I feel this way about oyster shells. I love using them as place cards and today, I am sharing a feminine way to paint an oyster shell to use as a place card…perfect for a bridal shower or luncheon.

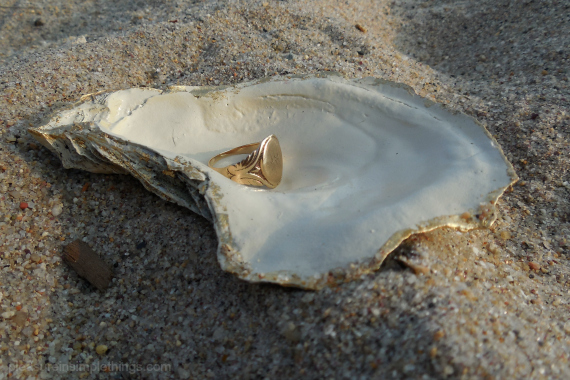
oyster shell ring holder pleasure in simple things

Everyone has their own cleaning system for shells. My method is to boil found shells in a pot on the stove first and then soak them in white vinegar. After rinsing them in cold water, I let them air dry.

There are so many ways to paint oyster shells and you can experiment to fit the occasion…I think the inside of an oyster shell is so beautiful and I often just paint the outside of the shell, leaving the inside natural…try Krylon blue ocean breeze as an outside color!

For this project, I spray painted (insides only) of the shells with two coats of an off white (using Rust-oleum gloss navajo white). Then, I used a little gold leaf around the edges in an irregular fashion to add a little sparkle and to create a more formal look. (If you don’t have any gold leaf, you can purchase a small gold leaf kit online or in a craft store that includes the gold leaf sheets, an adhesive, and a protective coat.)

pleasure  in simple things a diy shell place card

As a place card, just use a small piece of decorative paper to hand write or stamp a name or table number and lay inside the shell…easy! Add a ‘pearl’ or pretty piece of sea glass. So pretty and so coastal!

Because this shell can be used as a ring holder, it makes a wonderful gift for a newly engaged friend. It also makes a great soap dish or salt cellar. For a bridal shower, a handmade beaded bracelet could be a pretty favor to include in the shell. Or, add a small square soap or sea glass shaped soap pieces. :)

pleasure in simple things oyster cell ring holder

Thank you so much for stopping by!

Remember to take pleasure in simple things, Jackie

P.S. You may also enjoy monogrammed shell gift tie-on, beachy bridal shower, nautical gift wrap, shell candles, or beachy shower gift.

Sharing with Finding Silver Pennies, Craftberry Bush, Coastal Charm, and Sand & Sisal.

no comments

s’mores ice cream cake

July 22, 2014

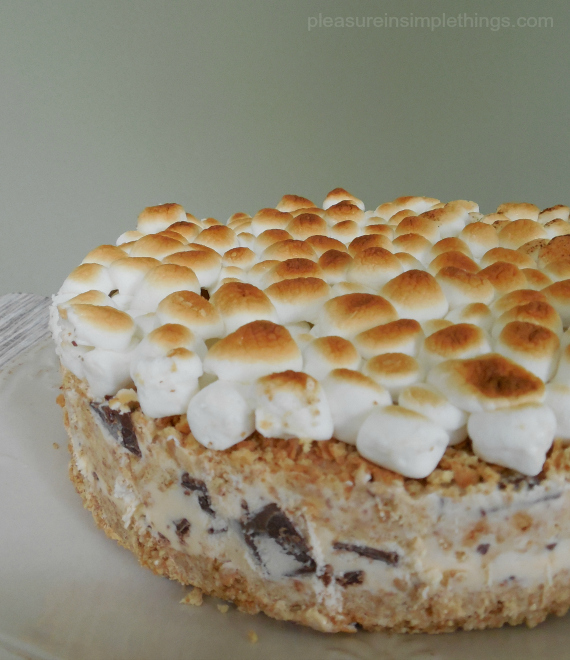
s'mores ice cream cake pleasure in simple things

It was National Ice Cream Day this past weekend and I was ‘jonesing’ for an ice cream cake!  I couldn’t let the day go by without celebrating!  Looking around the house, I had some s’more leftovers and decided to utilize them in an ice cream creation!

s'mores ice cream cake pleasure in simple things

In my house, ice cream desserts are always a big hit in the summer. This one is based on a favorite summer dessert and was inspired by the leftovers from our Fourth of July beach party.

s'mores ice cream cake pleasure in simple things

Unlike baking, the procedure for making ice cream cakes is totally forgiving and precision is not required – so feel free to alter the recipe based on the size of your pan or the ingredients you have on hand. I made a no-bake crust for this one, since I didn’t want to heat up the house with the oven on a hot summer day.

S’more Ice Cream Cake Recipe

  • 4 Hershey chocolate bars (1.55 oz. each), chopped into pieces
  • 1 qt. softened vanilla ice cream (made or purchased)
  • 2 packages (20 long) graham crackers, divided
  • 5 Tab unsalted butter
  • 2 Tab sugar, divided
  • Bag of miniature marshmallows

I know, this one is not for the faint of heart – although, in my defense, I did use low fat graham crackers and low fat ice cream! :)  (Come on, I nixed my original idea of putting a layer of melted Hershey bars over the graham cracker crust!)

Start by making graham cracker crumbs. (I put the graham crackers in a plastic zip-lock bag and used a rolling pin to crush the crackers and make the crumbs.) One package of the crackers will be used for a crust, and the other package for a ‘filling.’

Combine one package of the graham cracker crumbs (half your total) and a tablespoon of sugar with 5 tablespoons of melted unsalted butter. Pat this into the bottom of an 81/2” springform pan and pop this into the freezer while you prepare the ice cream.

Add the chopped chocolate bar pieces into the softened ice cream, mixing to combine. Take out the prepared crust and spread ½ of the ice cream mixture over the crust.

making s'mores ice cream cake pleausre in simple things

Mix the other half of the graham cracker crumbs with 1 tablespoon of sugar and reserve ½ cup of the mixture. Sprinkle all but the half cup over the ice cream mixture. Carefully spread the rest of the ice cream mixture over the graham cracker middle. Use the remaining ½ cup of graham cracker crumbs to sprinkle on top.

Cover the entire top of the cake with miniature marshmallows and freeze until very firm.

Adjust the oven rack on your broiler so that the cake can be as close to the element as possible and preheat the broiler. Put the cake under the broiler to brown the marshmallows as quickly as possible and then put back into the freezer. Even after being frozen, the marshmallows are gooey when you eat the cake!

melted s'mores ice cream cake pleasure in simple things
Let the cake sit awhile out of the freezer before eating – I think it tastes best just like s’mores – a little on the melty side!

Enjoy!  Hope you will experiment with your own ice cream creations!  Thank you for stopping by!

s'mores ice cream cake pleasure in simple things
Remember to take pleasure in simple things, Jackie

P.S.  If you are a s’more lover, you may also enjoy gourmet s’mores and s’more shooters!

Sharing with Crafts a la Mode and  Craftberry Bush.

no comments

lucky enough

July 18, 2014

flower at the beach

The beach is a special place. I always say, even on a bad weather day, it is beautiful at the beach…and, I pretty much feel the same way about summer in general.

umbrella at the beach pleasure in simple things

For Friday field trip today, I am sharing a few photos from a random day at the beach. On this particular day, a day when everyone at work was complaining about the weather, this is what it looked like at the beach throughout that day…

every day is good at the beach pleasure in simple things

rocks at the beach pleasure in simple things

My appreciation for the beach starting young…some of my best childhood memories revolve around the beach and water activities. When I reflect on these memories, it is no wonder the beach holds such a special place in my heart. Just the thought of an old-school orange life preserver puts a smile on my face! Some of these memories include:

  • Learning to swim (in the salt water)
  • Eating fresh caught shark brought home from my Dad’s fishing trip
  • Going clamming with my grandfather
  • A lifetime of collecting sea glass & other ocean treasures
  • Fishing on the boat with my siblings
  • Steering the boat for the very first time
  • Bringing home sea creatures in a plastic bucket
  • Buying a cardboard box of scary sand worms for bait
  • And, yes, even cleaning barnacles off the bottom of the boat with my dad!

Do you have some favorite beach memories from your childhood?

beach pleasure in simple things

After all, if you are lucky enough to be at the beach, you are lucky enough. :)

aaOcean House 010


Visiting the beach pleasure in simple things

Thanks so much for stopping by!  Remember to take pleasure in simple things, Jackie

P.S. I am so thrilled one of my summer photos was included in Martha Stewart’s My American Summer gallery posted on her website! Check out all the wonderful summer photos in the gallery by clicking here. If you are an Instagram user, please follow me and be sure to share your summer photos with the hashtag #pleasuregram.

Sharing at Craftberry Bush, Shabby Nest, and Coastal Charm.

1 comment

country living magazine fair 2014

June 13, 2014

country living fair 2014 pleasure in simple things

With picture perfect weather and inspiration around every corner, The 2014 Country Living Magazine Fair in Rhinebeck, NY was awesome!

Birdhouse pleasure in simple things

Visiting Rhinebeck, NY is always great…getting together with good friends is the best, but in the beautiful surroundings of Rhinebeck, this feeling is intensified.  My last trip to Rhinebeck (to my friend’s awesome woodland retreat) also included a special treat – The Country Living Magazine Fair!

country living house of the year 2014

Visiting the 2014 Country Living Magazine House of the Year was awesome! Here are some photos of the outside…check out the September 2014 issue for more photos of all the decor!

The beauty of this three day event is that each visitor has a unique experience.  No two people are inspired in the same way or by the same things.  What can visitors experience at this fair on the lovely Dutchess County Fairgrounds?  Tons of vendors, craft and decorating demonstrations, lectures, celebrity meetings, samplings, book signings, and a visit to the 2014 Country Living House of the Year!  (Not to mention, plenty of clean bathrooms, a great food court with lots of seating and free parking!)

country living magazine fair 2014

It is a busy few weeks for me with very few free moments, but I had to share some photos from the fair on Friday field trip this week – a small sampling of my personal experience…enjoy a glimpse of The Country Living Fair 2014 through my eyes!  If you went to the fair, I would love to hear about your favorites!

Country Living Fair 2014

The beach themed fairy garden really caught my eye…and, aren’t the toolboxes adorable for Father’s Day?!

Jan Blough pleasure in simple things

The silhouettes by Jan Blough were one of my favorites…especially the garden themed designs!

whale painted rock pleasure in simple things

The Beekman Boys (I am a huge fan!) were my favorite of the many fun people to meet at the Country Living Magazine Fair 2014.

pleasure in simple things Beekman Boys

The photo below shows a few of the many demonstrations offered during the three days at The Country Living Magazine Fair 2014. Michael Devine, author of Flowers by Design creates a vegetable topiary, Libbie Summers offers 15 Fun & Festive cake decorating ideas (like this PEZ covered cake), and Cari Cucksey of HGTV’s Cash & Cari offers painting and repurposing tips.

demonstrations at the Country Living Magazine Fair2014

Thanks for stopping by!  Have a wonderful weekend…I have an exciting one planned!!

Rachel Hardage Barrett

Country Living Magazine’s Editor-in-Chief Rachel Hardage Barrett.

Remember to take pleasure in simple things, Jackie

Sharing at Little Red House and Coastal Charm.

4 comments

7 ways to use spring blooms

June 3, 2014

flower petals as garnish pleasure in simple things

Here in Connecticut, we had a loooooong winter and spring was very hesitant in getting started.  As a result, gardens were a little behind in blooming this year…the usual ‘planting on Mother’s Day’ was stalled big time!  So, when the spring blooms finally started to emerge, it created a sense of celebration like no other year I can remember!

Today, I am sharing my appreciation for the first blooms of the season.  Because, after all, the best part of gardening is appreciating the results!

Here are seven ways I used the first of my garden flowers.

As a garnish.

Pansies are a pretty garnish for a dessert.  I press petals from organic pansies overnight in a book and then wet them with water and add sugar.  (I  know egg whites are usually used for this, but they scare me a little, and I can usually get the sugar to adhere with just water.)

 To make a pretty ice cube.

flower petals in ice cubes pleasure in simple things

flower petals in ice cubes pleasure in simple things

I have always loved adding unexpected items to ice cubes…here, I added flower petals.  They look so pretty at a garden party, bridal shower, or brunch.  I am careful to use flowers that are safe and edible.

 Add to a placesetting.

flowers in a place setting pleasure in simple things

flowers in a place setting pleasure in simple things

What better way to add some springtime to a place setting than to adorn napkins with a bloom from the garden?  Even a tiny garden can spare a few stems for a spring table.

Give to a friend.

flowers to give away

Sharing flowers from the garden is always fun.  I had a neighbor that recently moved into a retirement facility.  I decided to grab some of the lilacs off the bush that bordered her yard when I last went to visit, intending to put them in one of her vases when I got there.  I casually wrapped them in some old sheet music to transport them, knowing the nostalgia would make her smile when she received them.  .

 Bring the garden indoors.

flowers around the house pleasure in simple things

flowers in the house pleasure in simple things

Arguably, the best way to use flowers from the garden is to put small vases everywhere in the house.  A taste of the garden in every room is a great way to experience the season.  Just a sprig or two of a bloom can add beauty and a scent to any corner!

Create an arrangement.

spring flowers in an arrangement pleasure in simple things

Creating an arrangement is a big statement in using garden flowers.  This was a quick and casual arrangement I put together with garden flowers and a clearance vase from Anthropologie for the refreshment table at a monthly garden club meeting…a great way to share my spring garden with friends who love flowers!

As an ingredient.

using spring herbs in the kitchen pleasure in simple things

Not exactly a flower, but the herbs from the garden have already been in use.  I have already made one dessert from some of the mint and, the basil has been utilized for appetizers as well as used as a garnish many times.

What are some ways you used your first flowers of the season?

Thanks for stopping by.  Remember to take pleasure in simple things, Jackie

Sharing at Sand & Sisal.

1 comment

annie sloan virgin

May 27, 2014

vanity redo with annie sloan paint pleasure in simple things

I have been intending to try Annie Sloan paint for a long time…honest!

I once even tried to convince a local store to carry it.  I just never found the time to actually use it on a project.

Well, thanks to a talented group of ladies that put together ‘Inspire Me DIY’, I was motivated to get working on a piece of furniture given to me by a friend over a year ago, when I found out about the project on Lucy’s (Craftberry Bush) Instagram feed.

pleasure in simple things vanity redo before photo

Enter Annie Sloan!  So, I refinished my first piece using Annie Sloan chalkboard paint and, of course, I am obsessed with the product!  Maybe in the back of my mind I thought this might happen and that is the reason why I put off my first project for so long!

This was my process:

  • 2 coats of Annie Sloan Paint in Paris Grey
  • 1 coat of clear wax
  • Some sanding/distressing
  • 2nd coat of clear wax
  • Coat of dark wax
  • I lined (all but one) drawer in an Anna Rifle paper design.  One of the top drawers is lined in felt (for jewelry).

After some late night work sessions into the wee hours of the morning, my results:

pleasure in simple things vanity redo after photo

I am thrilled!  It’s great to get my first project under my belt (yes, there will be more!)  since it takes a while to feel comfortable using any product for the first time.  I did have a few panic moments and I thank Danielle at Finding Silver Pennies for the encouragement I needed to keep me going.

pleasure in simple things vanity redo

I am not too sure about the knob choice.  What do you think?  I bought the knobs at Anthropologie before I started the project because I loved them and because the color was almost the same color as the walls (Martha Stewart paint in shortbread) in the room where I plan to park my new creation.

pleasure in simple things vanity redo

pleasure in simple things vanity redo

I thank Mary so much for the vanity…I wanted it because it reminded me of my grandmother – working on this project made me wish it was my grandmother’s vanity I was redoing  – her vanity held so many special memories of my childhood.  But, a great part about this project was it brought to mind some many special moments between me and my grandmother…and, I love that looking at this vanity will always remind me of her.  I can’t wait to see how it looks in my guest room!

pleasure in simple things vanity redo

Anyone have any seating ideas?

Thanks for stopping by and thanks to all the great ladies that organized Inspire Me DIY…because of you, this stalled project got up and running!

Remember to take pleasure in simple things, Jackie

P.S.  I have my eye on a piece for my next project…I wonder if my son will notice if I sneak out a side table from his apartment?  For those in my part of the world (Fairfield County, Connecticut), Annie Sloan paint is available at Junktique Recycling in Norwalk.

Sharing at Craftberry BushFinding Silver Pennies, Sand & Sisal, and Coastal Charm.

13 comments

vintage teacup earl grey crème brûlée

May 6, 2014

earl grey creme brulee

Serving crème brûlée from vintage teacups is sure to make a family bridal shower, tea party, or Mother’s Day a special one!  What could be better than serving dessert from your grandmother’s teacups?  I think individual desserts add a special quality to a meal all on their own, but to add the sentiment of serving it in a special piece of history makes it all the sweeter!

basket of roses

Everyone thinks of  crème brûlée as a special occasion dessert, but it is not a hard one to create.  Traditionally, it is cooked in the oven, but I have found that good results are possible with a no-bake method.  You can use any no-bake recipe or the one I found online and, by using my simple variation, can create Earl Grey crème brûlée!

creme brulee in teacups

Most teacups are not oven safe and I would not advise putting family heirlooms in a hot oven…a vintage piece with sentimental value is not something to experiment with!  This is the reason I went with a no-bake method for my Earl Grey crème brûlée…I think it is the perfect flavor profile to combine with vintage teacups!  If Earl Grey is not your thing, just don’t add it to the recipe.

earl grey creme brulee

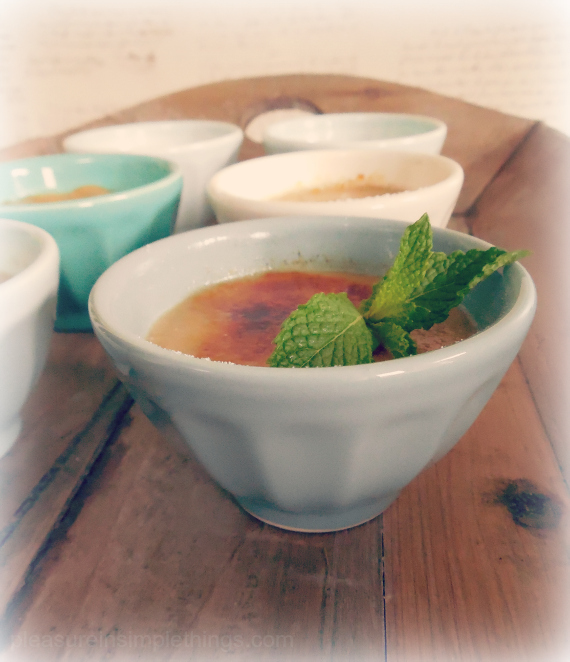
If you prefer a more contemporary choice of vessel, I recommend the mini latte bowls from Anthropologie…the perfect size to hold 3 ounces for a small, individual portion.

earl grey creme brulee in Anthropologie bowls

I found the no-bake recipe I used from Completely Delicious during an internet search – it is easy and makes the perfect amount of custard for a special dessert for a mom (and maybe a couple of grandmas)…it will fill 3 or 4 teacups or 4 mini latte bowls.  Following this recipe (click here), make these changes to create Earl Grey crème brûlée:

After completing step 1, place 4 Earl Grey teabags into the hot mixture and let it sit for 10 minutes.  After 10 minutes, dunk the teabags a couple of times and then gently squeeze the liquid out of the teabags and into the pan (being mindful that the mixture will be hot.)

Continue with the recipe, substituting 1 teaspoon of vanilla for the 1 Tablespoon listed.

Be sure to strain the mixture.  I found while testing no-bake recipes that this is extremely important for a smooth texture – don’t skip this step!  (As a special note – I was very cautious with my kitchen torch – I didn’t venture near the edges of my special cups!)

earl grey creme brulee in teacups

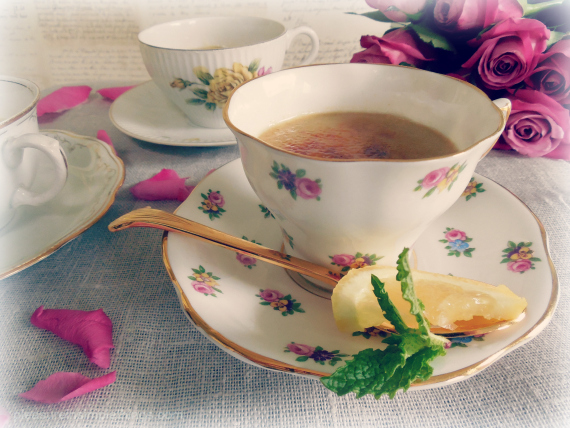
To play up the tea theme, add lemon and mint as garnish. :)

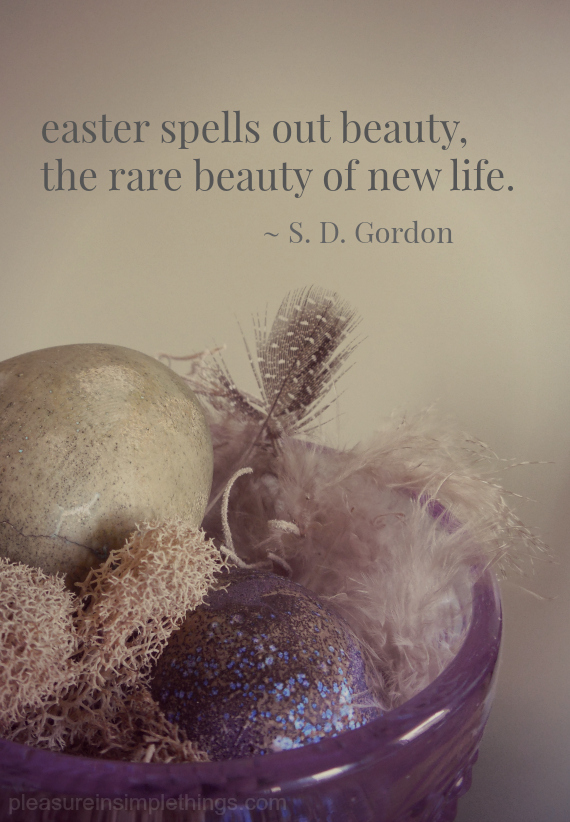
tea quote with roses

If you are an Earl Grey lover as I am, you may enjoy trying these Earl Grey cream puffs.  I also love adding the flavor to shortbreads…I still have Earl Grey ice cream on my list of experiments…maybe this summer. ;)

teacup creme brulee

I hope I have inspired you to think of ways to use your own heirlooms to create some special memories.  We will continue the family heirloom theme on Friday when I show you how to create a special diy gift using an old family treasure.

Thank you for stopping by and remember to take pleasure in simple things, Jackie

Sharing at Coastal Charm, Sand & Sisal, and Silver Pennies.

1 comment

homage to earth day

April 22, 2014

earth day quote

Pretty much every item you can think of on this earth (pun intended) has been covered with chalkboard paint, hasn’t it?  So, I am pretty certain someone has already thought to paint a globe with chalkboard paint.

earth day quote

I think it is a great way to revamp an outdated globe and to honor our dear Mother Earth on Earth Day!  I just couldn’t convince myself to throw it out during the purging of all the old ‘stuff’ I cleared from the ‘new’ guest room…I have a particular fondness for globes – outdated or not – since one of my children was born on Earth Day!

chalkboard globe

So, now the old globe sits proudly in the new guest room.

And, since the globe is an accessory (my second!)  in the room where guests will be staying, my idea was to decorate the chalkboard in one of two ways:

1.  To write Welcome!  in an outline shape of my state (Connecticut),  or

chalkboard globe

2.  Draw two states – mine and the one the visiting guests hail from!

Earth Day quote

In light of the occasion, you may also enjoy this post on repurposing brown bags…Happy Earth Day!

Thanks for stopping by!

P.S. I took the butterfly photos in this post used with the quotes last summer – we haven’t had any weather yet this year that warrants butterflies!

Remember to take pleasure in simple things, Jackie

Sharing with Finding Silver Pennies, Sand & Sisal, and Coastal Charm.

no comments

happy easter!

April 18, 2014

easter quote

Today is Good Friday and I want to wish all my friends who celebrate, a blessed Easter!  I am excited that my family will all be together for the holiday and I hope that you too are surrounded by the ones you love this weekend.

For Friday field trip today, I have assembled some Easter posts in one place in case you need some last minute Easter inspiration…links from past posts…Enjoy!

favorite ways to decorate eggs

a vintage egg cup collection

eggs from natural dyes

a recipe for Easter butter cookies

some Easter nostalgia

Easter basket ideas for the college set

growing eggs in eggshells

diy easy paper egg holders/place cards & (grass heads for the kids!)

dyed eggs for coastal décor

dye for creating eggs in shades of gray

Thank you so much for visiting! 

Have a wonderful weekend and remember to take pleasure in simple things, Jackie

no comments

« Previous Entries     Next Entries »