Subscribe to Pleasure in Simple Things via RSS ReaderFollow Pleasure in Simple Things on InstagramFollow @InSimpleThings on TwitterLike Pleasure In Simple Things on FacebookFollow Pleasure In Simple Things on PinterestEmail Jackie

coastal party favors

May 10, 2016

anchor bag favors pleasure in simple things blog

Friends, you know how much I embrace a good theme – particularly a coastal one!  SO, you can really appreciate today’s post!

I was recently challenged to create Mother’s Day favors for a party celebrating a group of moms on the California coast.  Exciting!  This is the type of project I love!  I am super excited to show you the results of this project!

First, I got a Connecticut artisan to create my vision of a coastal themed, zippered, canvas bag.  I wanted to have a really great bag and find something related to my theme to tuck inside to make it extra special.

completed coastal theme favor pleasure in simple things blog

I had imagined a metallic anchor on the front of the bags, and I got just that!  How perfect are these?!  And, the anchor printed lining couldn’t be any cuter!

ct artisan zippered pouch pleasure in simple things blog

What did I choose to tuck inside these custom creations?  I first decided on some candy beach stones and packaged them in round glass-topped tins.

beach stone candies pleasure in simple things blog

Next, I added an anchor shaped bookmark – a great item to have for beach reads!

anchor bookmark for favor pleasure in simple things blog

As a way to utilize the new bookmarks, large baskets of gently used paperbacks in various notable titles were part of the party décor for moms to grab on their way to the beach.  Fun!

completed coastal theme favor pleasure in simple things blog

I hope I have inspired you to create some themed favors of your own for your next celebration.

If you have a vision for your own design and want to contact the artisan I used, check out Ralph & Martha on Facebook!

Thanks for stopping by!  Remember to take pleasure in simple things, Jackie

no comments

happy mother’s day

May 6, 2016

happy mothers day pleasure in simple things blog

It’s Mother’s Day weekend.  I was in a gift shop yesterday and I was amazed at those that buy something for their mom just to buy something.  That is so not in the spirit of Mother’s Day!  Mother’s Day is about recognizing a very special person. There is nothing wrong with buying a gift to give to that special person.  But, not knowing what your mom might like as a gift leads me to believe a better gift would be time spent with mom!

For Friday field trip today, I thought I would share three previous projects that might help you come up with a more personal gift for mom this Mother’s Day.

handkerchief diy pleasure in simple things blog

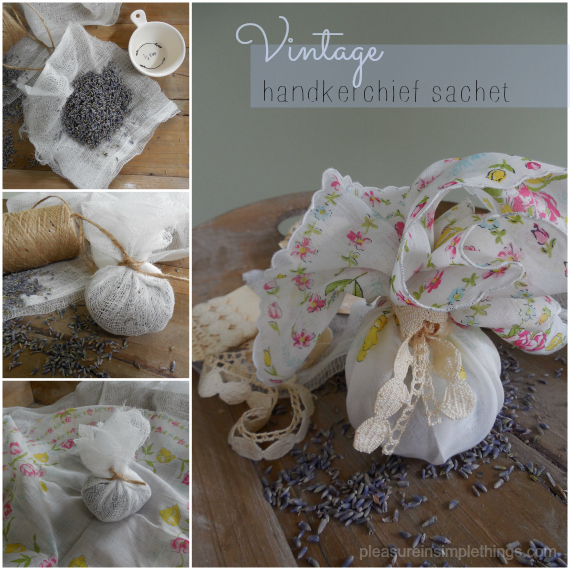
First, a cool sentimental gift.  Make a sachet using a family heirloom!  See the full post by clicking here.

Second, a fun recipe that can be served in a teacup.  A great way to spend time with Mom is to avoid the crowded restaurants, and serve up something homemade.  Click here for the recipe for this crème brulee.

teacup creme brulee mothers day pleasure in simple things blog

And, third…the old stand-by…flowers!  IF your mom is into flowers – after all, you should know!  But, skip the overpriced cliché roses and give a potted plant personalized to your mom’s taste.  It’s so much more fun to receive something that can be planted in the ground and enjoyed all season!

mothers day flowers pleasure in simple things blog

Have a wonderful Mother’s Day surrounded by those you love.  Thanks for stopping by.  Love you mom! :)

Remember to take pleasure in simple things, Jackie

2 comments

wine cork magnets diy

May 3, 2016

diy cork magnet pleasure in simple things blog

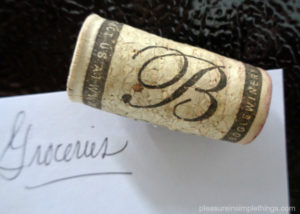
A quick and easy DIY today.  A great way to repurpose wine corks is to turn them into refrigerator magnets!

You have probably seen me do this before if you follow me on Facebook, but since there are so many special occasions coming up soon, I thought this easy project was worth mentioning again today.

starting a cork magnet pleasure in simple things blog

Do you sometimes save a cork from a special occasion bottle of wine?  Well, here is a practical use for it.  Instead of putting it in a jar, make a magnet!  You can even make a notation on the back of the cork with a fine point permanent marker to remember a particular occasion associated with the corresponding cork.

glueing magnet onto a wine cork pleasure in simple things blog

And, if you like all the magnets on your refrigerator to coordinate – which I am sure you do (!) – you should be able to salvage plenty!  Each cork makes two magnets.  Just cut each cork in half and use a glue gun to attach a strong magnet on the back of each.

diy cork magnet pleasure in simple things blog

I particularly liked the cork I pictured here because it had an initial on it.  I gave it to someone who had a name starting with the letter B!  Enjoy!

Thanks for stopping by.  Remember to take pleasure in simple things, Jackie

1 comment

‘beachify’ your bottles

April 22, 2016

diy shells for wine bottles pleasure in simple things blog

The weather has finally turned here in Connecticut and I am loving every warm, sunny second of it!

For Friday field trip today, I am taking you into my wine cellar. (Not really, I don’t have a wine cellar – although I do keep a bottle of wine in my cellar!) But, I am showing you a bottle of wine!

shells for wine bottles pleasure in simple things blog

Warm weather not only makes me smile, but encourages me to find summer enhancements that also make me smile. A super simple one is to add a shell garland to your summer wine! A glue gun and a couple of shells (or beach glass) glued to a piece of twine create some easy summer décor! Just glue a shell – preferably found at the beach – onto each end of a length of twine and wrap it around a bottle!

shells on twine for wine bottles pleasure in simple things blog

These make great warm weather napkin rings as well!

If you are giving a bottle of wine as a gift, you can even roll a cute summer dishtowel (maybe a lobster or crab motif) around the bottle and tie it on with the shell enhanced twine!

beachify wine bottles pleasure in simple things blog

An easy way to add a feeling of summer and a smile! :)

Happy sunshine! Thank you for stopping by!

Remember to take pleasure in simple things, Jackie

no comments

diy journal

March 8, 2016

putting together a diy journal pleasure in simple things blog

You can make a great journal with a basic computer and some office supplies. Professional binding is not needed for great DIY journal results!

I made this hiking journal using regular copy paper. To add a little style, I printed the cover page on a slightly heavier stock I found in brown at a craft store.

journal project pleasure in simple things blog

To make empty journal pages, I just decided how many pages I wanted my final product to be. My journal was made by using standard 8 1/2” x 11” copy paper, used horizontally. When the journal is stapled and folded, it is a convenient size to carry on a hike!

journal cover pleasure in simple things blog

The beauty of making a journal yourself is that you can use any design or color you may want. I chose a compass design printed on the cover of mine to coordinate with a hiking theme. Set up the cover you’d like on your home computer, selecting landscape or your page orientation. If you set the layout into two columns, it is pretty easy to figure out how the page will look when it is folded. Once you have created and printed out a cover page the way you like it, you can use a copy machine to copy the page onto the colored stock.

twig pencils for a hiking journal pleasure in simple things blog

If you decide to include some print on your inside pages, it can get a little trickier – you will probably want to make up a sample book to be sure the pages are laid out properly and you may need double-sided copy on some or all of the pages. Once the pages are stacked the way you like, use a long-arm stapler to add two staples (the good side facing the outside of your journal). Then, just fold.

embelllished pencils diy pleasure in simple things blog

This same method is great for creating a DIY wedding program. For this, you can add a cord or ribbon to the binding.

I hope I have inspired you to create a DIY journal!

Thanks for stopping by! Remember to take pleasure in simple things, Jackie

no comments

pencil love

February 12, 2016

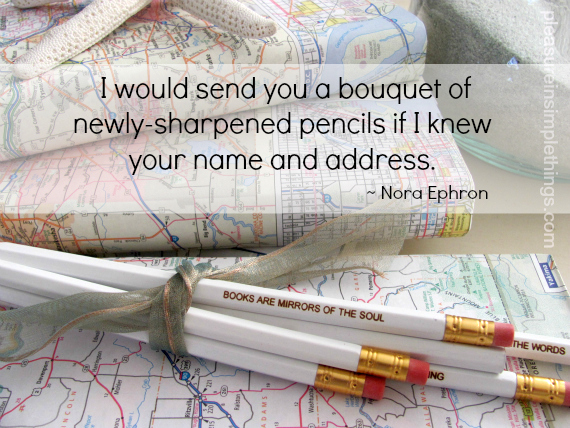
Nora Ephron quote pleasure in simple things blog

I have a love for pencils. I can’t help it. I prefer old school notebook and pencil over a keyboard any day. And, I certainly wouldn’t give up my beautiful Kate Spade organizer for the electronic phone version! I love the aesthetics and the feel of a good organizer and I would never reduce all my painstakingly made plans to lifeless little boxes on the calendar of my android!

The pencil by Allan Ahlberg

Pencil inspiration for the next generation! The wonderful children’s book by Allan Ahlberg.

For today’s Friday field trip, I am sharing a little pencil love!

cool erasers from CW Pencil Enterprise in NYC

Some really cool erasers from CW Pencil Enterprise in New York City. A ‘must visit’ for any pencil lover!

I enjoy both using pencils and giving pencils! Some of my past pencil gifts have included some DIY fringed pencils that are perfect for Valentine’s Day (click here for the link),

fringed pencil diy pleasure in simple things blog

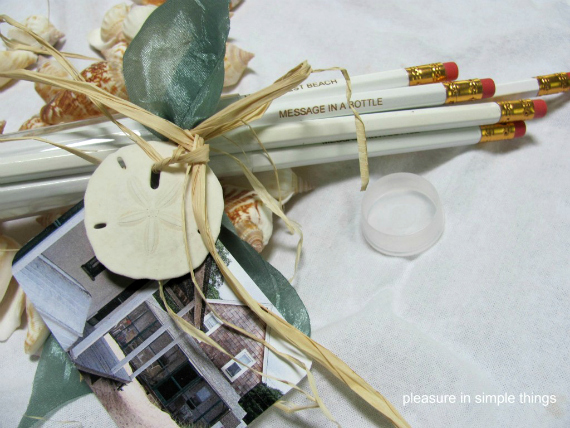
customized ‘beachy’ pencils (click here for diy),

beachy pencil gift pleasure in simple things blog

and personalized pencils for book lovers (click here for diy).

Book pencils pleasure in simple things blog

I love giving pencils with customized printing. They are so fun to create and it is a fun challenge to contain a message to a limited number of letters!

I hope I have inspired a little pencil love today! :)

Dalton Ghetti's pencil sculptures

Check out my Facebook page today to read more about these amazing carved pencil tip sculptures by artist Dalton Ghetti!

Thanks for stopping by!  Have a wonderful weekend!

Remember to take pleasure in simple things, Jackie

no comments

valentine’s day gift diy

February 9, 2016

stamping for Valentines Day pleasure in simple things

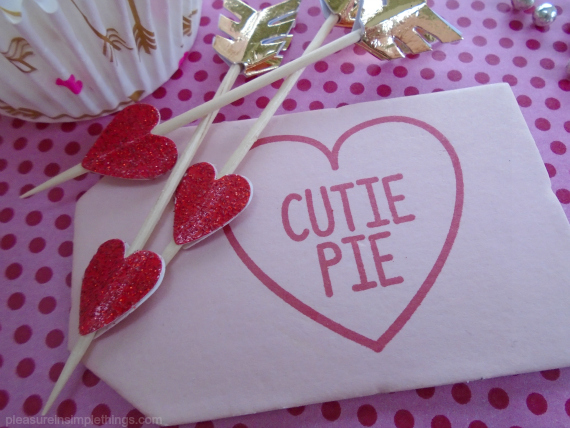
A rubber stamp is a great accessory for some Valentine’s Day fun!

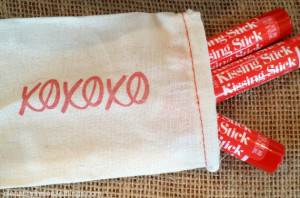
A simple tag, brown paper, or muslin bag can transform a little something into a special valentine for someone you care about – all you need is a Valentine’s Day themed rubber stamp.

stamping fun for Valentines Day diy pleasure in simple things blog

If you don’t already own them, pick up a Valentine’s Day rubber stamp and a red ink pad in the dollar section of Target or in a local craft store. Choose a stamp with a simple line design – they work the best for this type of application.

valentine tags pleasure in simple things blog

A stamped muslin bag can be used to tuck some treats into a lunch box or to gift a ‘cup of tea’ (slip in a teabag) to a friend. I often find packages of these muslin bags, priced very inexpensively, at HomeGoods in the home utensil section – they are sold to make herb sachets. They can also be purchased at a craft or paper store.

using a valentine stamp for wrapping pleasure in simple things blog

Many other household materials can be used as Valentine’s Day wrapping. Brown bags are perfect to stamp and can be used as gift bags or wrapping paper. Tissue paper, fabric scraps, and dishtowels also work well.

diy valentine stamping pleasure in simple things blog

Any scrap cardboard can be cut, stamped, and used as a gift tag. I like making tags cut from paint sample swatches to stamp on as well. Wrap up a single cupcake or cookie and add a cute homemade tag!

a xo pleasure in simple things blog

I hope I have inspired you to have a little stamping fun this Valentine’s Day!

Thanks for stopping by! Remember to take pleasure in simple things, Jackie

no comments

olive you valentine

February 2, 2016

olive you valentine with martini glass pleasure in simple things blog

Aaah, yes. I still have a little more ‘pun’ up my sleeve for Valentine’s Day! Today, a valentine that appeals to the over 21 crowd!

My idea for ‘olive you’ was to incorporate a martini – seems logical when talking olives, right? I knew I wanted almonds coated in white chocolate, tinted green, with a red accent for the ‘pimento.’ I actually pitched the idea to a small, local candy store and they created some at my suggestion! So perfect for my valentine idea!

olive you candy valentine pleasure in simple things blog

Next, I created a topper with a martini glass and the ‘olive you.’ I love it!

olive you valentine packet gift pleasure in  simple things blog

There are certainly more ways to incorporate the martini theme using this idea. The completed candy almond packet could be tied onto a miniature (‘nip’) bottle of vodka! Or, the almonds could be wrapped in a martini glass with an ‘olive you’ card tied to the stem!

I hope you are inspired to use the ‘olive you’ theme for your valentine!

olive you martini glass valentine pleasure in simple things blog

Thanks for stopping by! Remember to take pleasure in simple things, Jackie

no comments

abc valentine magnet gift

January 22, 2016

gum magnet valentine gift pleasure in simple things blog

For today’s Friday field trip, we are taking a trip into the archives to make gum magnets! They look just like pieces of chewed gum, but are actually magnets!

abc gum magnets pleasure in simple things blog

I originally came up with this idea as an April Fools’ Day gift, but they make a wonderful Valentine’s Day gift with a ‘stuck on you’ card attached! A cute, wrapped up set of gum magnets makes a great gift for a child or anyone with a good sense of humor! If you use these for messages, you may see some double takes when anyone walks past the refrigerator!

Click here for the original instructions to make gum magnets.

valentine gift pleasure in simple things blog

Have a wonderful weekend! Here in Connecticut, it looks like we may get our first significant snowfall…I am kind of looking forward to it!

Thanks for stopping by. Remember to take pleasure in simple things, Jackie
P.S. What is abc?  Already been chewed, of course!

no comments

valentine pillow box diy

January 12, 2016

You rock valentine diy candy box

Yes, I am still making ‘punny’ valentines!  Today, I want to show you how easily you can make a pillow box to use for some Valentine’s Day treat boxes.  All you need is a cardboard tube and a paper cocktail napkin!  For my treat box, I am using napkins that have a graphic of river rocks that is very appropriate considering what I plan to put into the container – candy rocks!

napkin for gift box diy pleasure in simple things blog

If you don’t have a napkin with a pattern you like, you can use any wrapping paper or decorative paper you choose. By using a cardboard tube and a paper napkin I already had, I am creating my pillow box at no cost.

The first step is to cut a piece of napkin that will cover the tube.  Use spray adhesive to spray the wrong side of the napkin.  Roll the tube over the paper napkin to cover.  Once the cardboard is covered, flatten the tube.  At one end of the tube, push each side into the middle of the tube, one side at a time. (See photo below – bottom right.)  Fill the tube with your desired treats.  Fold the open end of the tube in the same manner you did for the closed end.  Simple, right?

pillow box diy pleasure in simple things blog

Such a fast and easy way to create a Valentine treat container!  You can decorate your container like I did with a chalkboard sticker and ribbon, or in any way you choose.  Now, you just need to come up with the corny pun to go with your treat! :)

pillow box with bow pleasure in simple things blog
Thanks so much for stopping by!

Remember to take pleasure in simple things, Jackie

no comments

« Previous Entries     Next Entries »