Subscribe to Pleasure in Simple Things via RSS ReaderFollow Pleasure in Simple Things on InstagramFollow @InSimpleThings on TwitterLike Pleasure In Simple Things on FacebookFollow Pleasure In Simple Things on PinterestEmail Jackie

vintage handkerchief lavender sachets

May 9, 2014

vintage handkerchief sachet diy

Back in my grandmother’s time, handkerchiefs were an art form.  There were so many beautiful handkerchief designs – many embroidered – and every lady carried one.

I remember my grandmother always having one tucked up her sleeve.  Everything was made to last in my grandmother’s time, and this included handkerchiefs.  They were always fashioned of cloth, not the disposable variety of today.

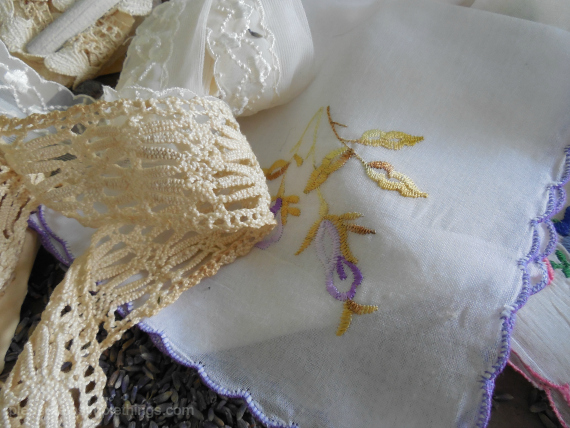
vintage materials for sachets

Because of this, there are still many lovely old handkerchiefs around today.  I saved many from both my grandmothers because of the sentimental value, but over time I have found some great ways to transform these heirlooms into items that are practical as well as beautiful.

For Friday field trip today, I am sharing my favorite way as we travel back to a time of beautiful cloth handkerchiefs and fashion them into lavender sachets.  With Mother’s Day approaching, a sweet sachet made from a family heirloom can make a special gift for mom.

vintage handkerchief sachet

Inevitably, a gift like this may be too pretty to scent a drawer…and, instead…may end up displayed on top of a dresser or nightstand.

If you are not lucky enough to have a family heirloom to use in creating this sachet, vintage handkerchiefs are easily found for only a couple dollars each at yard sales or antique shops.

vintage lace for sachets

Very little lavender is needed to create a sachet, and because it is such a light material, a cup and a half of lavender weighs less than an ounce…be mindful of this when you are deciding how much to purchase.

vintage handkerchief sachets

To create the sachet, cut a square of cheesecloth (about a 7” square) to hold the lavender.  I use the cheesecloth so the lavender won’t directly touch the hanky, but the scent will still come through.  You will only need one quarter to one half cup of lavender.  You can adjust the size of the cheesecloth and the amount of the lavender depending on the size of the handkerchief you use.

vintage hankies

Tie the cheesecloth with a piece of twine and position the ball of lavender in the center of the handkerchief – enclosing the lavender ball in the handkerchief with a piece of ribbon or lace.  I chose some vintage lace.  That’s it!  Beautiful…and, what a heavenly smell!

vintage handkerchief sachet

Handkerchief sachets also make wonderful bridal shower or wedding favors.  They can even be personalized with an embroidered initial, name, or date.

quote with vintage lace

Have a wonderful weekend and a blessed Mother’s Day!

Remember to take pleasure in simple things, Jackie

Sharing at Crafts a la Mode, Craftberry Bush, and Timewashed.

6 comments

may day flowers

April 25, 2014

may day flowers

For Friday field trip this week, we are stepping back in time to honor an old tradition that celebrates the start of spring.   Up until the end of the 20th century, part of the May Day tradition included leaving flowers anonymously on neighbor’s doorsteps on May 1st as a signal to the start of spring.

may day tradition

Last year I had some fun making hanging flower containers with driftwood, shells, and repurposed glass tubes.  This year, I am creating some gifts of floral spheres that are easy to create using flower oasis and grocery store flowers.

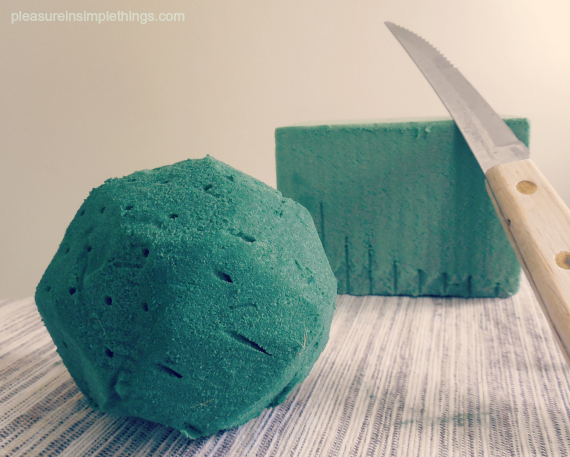
oasis ballI am starting by cutting a block of oasis material into a four inch square.  (Oasis is available at any dollar store, craft store, or flower shop.)

The material is very easy to cut with a serrated knife, but can be messy – be sure to cover your work surface with newspaper before starting this process.

After cutting a square cube, sculpt the material into a sphere shape using your knife.

Once the shape is created, let the material soak up water by submerging it in a container of room temperature tap water.

Next, add flowers.  Pins or fasteners will not be required to attach the flowers if flowers with stiff stems are chosen – like the ones I have used here.  Just leave some length on the stems so they can be poked into the material.

Place the flower heads in close enough to each other to prevent seeing glimpses of the surface (to avoid needing any additional filler flowers).

A 4″ cube can easily be filled with a small bouquet from the grocery store florist…or flowers from your garden – if you are lucky enough to be in a part of the country that makes this possible!

may day purple flower

Now you have created a beautiful sphere shaped flower arrangement that can be displayed in any small container that accommodates the size of the sphere.  I have used a sugar bowl and a small flower pot.

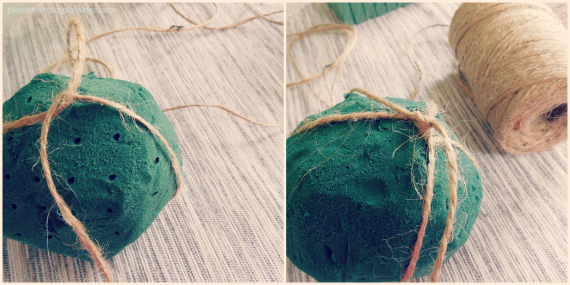
No fear, if you want to continue the May Day tradition of hanging your arrangement, this is easy to accomplish.  Before adding the flowers, attach some twine around the sphere and you can easily hang your May Day arrangement.

may day flowers in a sugar bowl

Take note that hanging is possible because of the small size of the sphere.  Because the added water adds weight to the sphere, this would not work with a larger size sphere – the twine would cut through the material.  And be sure to use twine – moisture from the water would stain a ribbon.

preparing circular oasis

I much prefer the sphere displayed in a container, but if you need to follow the tradition to the letter, your arrangement can be hung on a nearby doorknob. ;)

circle of hanging flowers

Happy May Day!

may day yellow flowers

Thank you so much for stopping by.  Have a wonderful weekend!

Remember to take pleasure in simple things, Jackie

Sharing with Craftberry Bush, The Shabby Nest, and Common Ground.

1 comment

homage to earth day

April 22, 2014

earth day quote

Pretty much every item you can think of on this earth (pun intended) has been covered with chalkboard paint, hasn’t it?  So, I am pretty certain someone has already thought to paint a globe with chalkboard paint.

earth day quote

I think it is a great way to revamp an outdated globe and to honor our dear Mother Earth on Earth Day!  I just couldn’t convince myself to throw it out during the purging of all the old ‘stuff’ I cleared from the ‘new’ guest room…I have a particular fondness for globes – outdated or not – since one of my children was born on Earth Day!

chalkboard globe

So, now the old globe sits proudly in the new guest room.

And, since the globe is an accessory (my second!)  in the room where guests will be staying, my idea was to decorate the chalkboard in one of two ways:

1.  To write Welcome!  in an outline shape of my state (Connecticut),  or

chalkboard globe

2.  Draw two states – mine and the one the visiting guests hail from!

Earth Day quote

In light of the occasion, you may also enjoy this post on repurposing brown bags…Happy Earth Day!

Thanks for stopping by!

P.S. I took the butterfly photos in this post used with the quotes last summer – we haven’t had any weather yet this year that warrants butterflies!

Remember to take pleasure in simple things, Jackie

Sharing with Finding Silver Pennies, Sand & Sisal, and Coastal Charm.

no comments

coastal egg decorating

April 11, 2014

coastal easter egg designs

Today for Friday field trip, I’m kicking it back to kindergarten.  I’m adapting some old school techniques to egg decorating to create some Easter eggs to use in my coastal décor.

Coastal decor Easter eggs

I am using two easy techniques that you – like me – probably used in grade school, but may not have thought about using in creating your Easter egg designs!

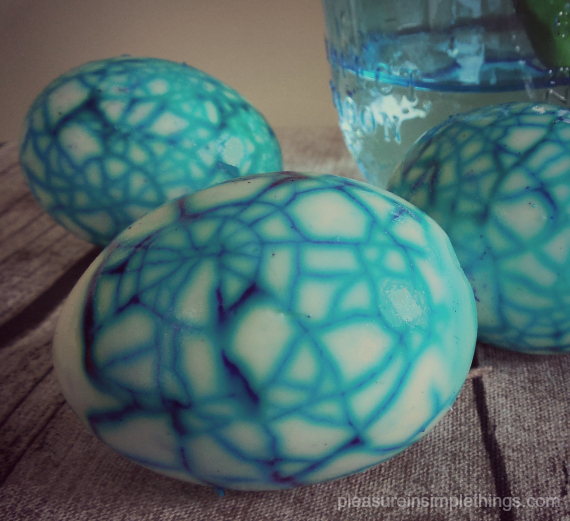
blue ball jar and coastal eggs

It was probably earlier than kindergarten when my siblings and I discovered this first technique. ..purely by accident.  During our egg dyeing sessions, inevitably, the hard boiled eggs we were preparing to dye were constantly being dropped by our young, clumsy hands during our egg dyeing frenzy.

dyed easter eggs and tray

We would soon learn that the many cracks these drops created in the shells would cause the eggs inside to take on the dye.  When it came time to eat the eggs, no one wanted to eat the ones that had been cracked and dyed with the spider web-like effect.  Of course, as we got older, this became a cool effect that we would purposely emulate and enhance – learning by experience (the obvious) that the longer the egg remained in the dye, the more pronounced the design would appear.

beachy easter egg designs

It made me smile this month when I saw a full page in the current Real Simple magazine giving instructions to create this very same effect on an Easter egg.  The instructions said to crack the egg with a spoon…or, (not mentioned in the magazine) drop egg continually on a table while excitedly anticipating the Easter bunny’s arrival!

coastal easter eggs

The second old school technique I use on eggs wasn’t used on eggs at all back in kindergarten.  We used it to create a leaf painting.  Various shaped leaves were placed on a paper and paint, in fall colors, was splattered over the leaves.  When the leaves were removed, their shapes would appear, like magic, against the splattered background.

Coastal decor Easter eggs

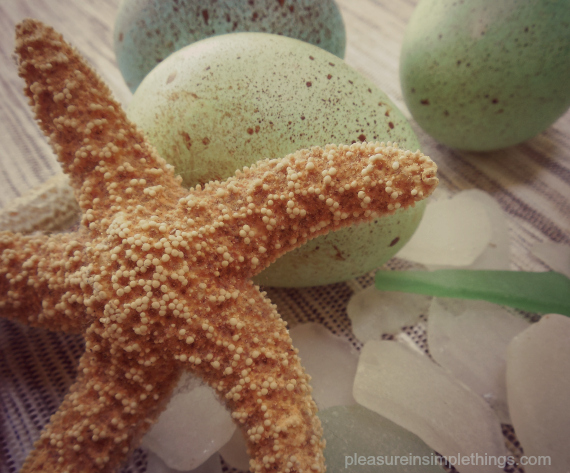
The splattering was done with an old toothbrush and a Popsicle stick.  Rubbing the Popsicle stick across a paint filled toothbrush created a beautiful splattered effect.  I used this very same technique to create the eggs shown here – using brown paint on eggs dyed in sea glass colors.

coastal decor easter eggs

What was it that Robert Fulghum said?  “All I really need to know I learned in kindergarten?”

splattered easter eggs

Have a great weekend and remember to take pleasure in simple things, Jackie

Sharing with Common Ground, Shabby Nest, Fridays UnfoldedCraftberry Bush, and Crafts a la Mode.

3 comments

easter place cards

April 8, 2014

grass in eggshell placecard

I promised to show you how to use the grass-filled eggshells from an earlier post.  One of the ways I use them is as Easter place cards.  Making a simple paper holder, the eggs help serve as part of pretty place cards on an Easter table.

grass in eggshell placesetting

grass in eggshell easter placecards

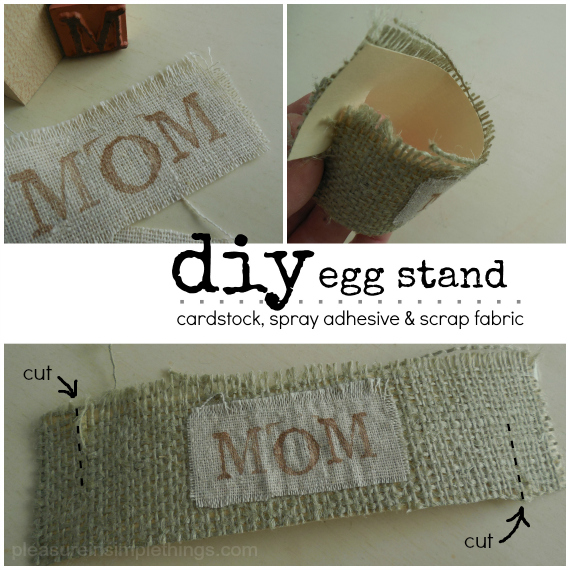
To make the egg holder, use any scrap of fabric or paper you may find attractive that fits well with your table top color scheme.

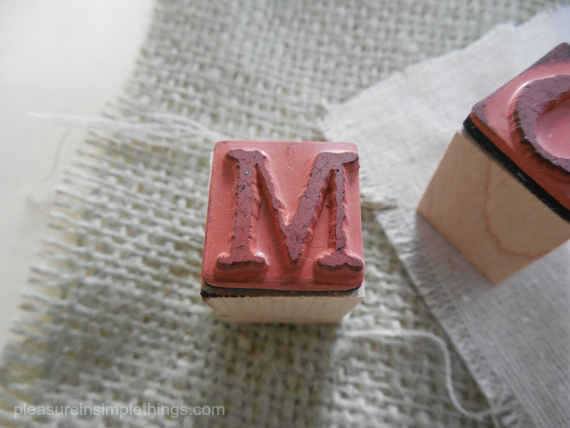
letter stamp for diy placecards

Options can include:  a pretty paper cocktail napkin, magazine page, newspaper, scrapbook or wrapping paper, wall paper, brown paper, empty seed packets, paint chips…even birch bark.

diy paper egg stands
Just add an egg you have planted with grass…or, any decorated egg and you are good to go!

There is another way go…if you have kids, you may have seen this coming…grass heads!  Instead of adding names to the placeholders, have the children draw the person’s likeness on the egg with a marker.  Guests can be asked to find ‘their egg’ to locate their seat…sure to get the young artists giggling!

kids grasshead placecards
There is still plenty of time to plant some grass heads before Easter!

Join me Friday for more egg fun!  Friday field trip this week is kickin’ it back to kindergarten by using some easy techniques from my childhood to make some great egg designs…see you then!

Thanks for stopping by. 

Remember to take pleasure in simple things, Jackie

Sharing with Finding Silver Pennies, Little Red House, and Crafts a la Mode.

no comments

outside the color palette?

April 4, 2014

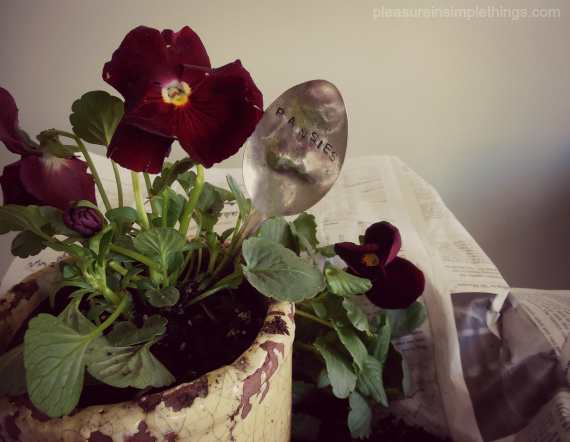
pansies

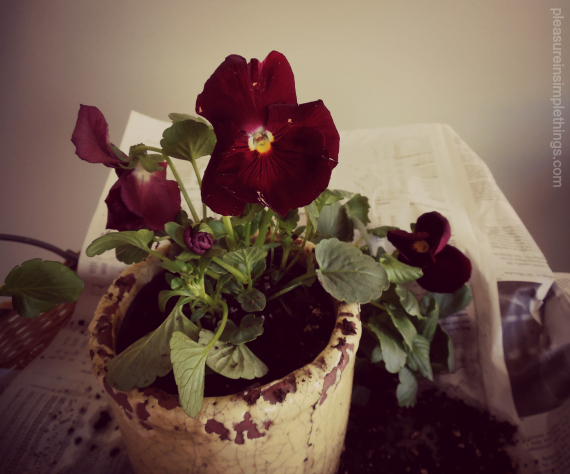
For Friday field trip today, I am adding the first accessory to my newly decorated painted guest room.

pansy planting supplies

I hadn’t really planned to redo any rooms upstairs.  Honest.  But, one of the bedrooms desperately needed painting and that (of course) started the whole ball rolling!  That, my friends, is not the surprising part since it doesn’t usually take much to get me going in the redecorating direction!  The surprising part?  My new room color isn’t part of my usual color palette!

The color palette I created for my downstairs rooms from a photo I took of an oyster shell.  I color matched my paint colors to the colors I took from the photo.

The color palette I created for my downstairs rooms from a photo I took of an oyster shell. I color matched my paint colors to the colors I took from the photo.

I agonized over paint swatches for a good month – finally deciding on a color called ‘shortbread’ from the Martha Stewart Living paint line at Home Depot.

As a yellow/gold tone – it was a departure from my usual coastal colors. Once the room was cleaned and painted (even though my free time should really have been devoted to tax preparation!) I decided to use my limited funds on a bed frame and bedding so the room could be utilized as a guest room right away.  The rest I can complete a little at a time when the mood (or funds) are right.

guest room collage
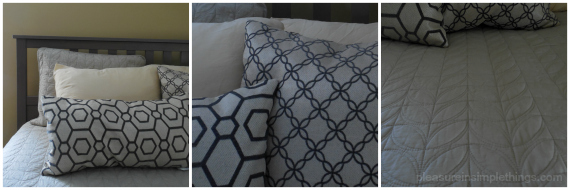
I chose a bed frame in a gray/brown (driftwood looking) color from Ikea and proceeded to stalk all the home stores for bedding.  I decided on a gray textured spread at Home Goods and picked out some contrasting pillows – limiting myself to just two.  I also picked up a sheet set in a color that looked surprisingly similar to the color of the shortbread paint.  Basics completed!  Ready for guests!

pansy spoon

Now, for my first official accessory for the new room, I am planting some pansies in a beautiful gold tone chippy planter that I found at Anthropologie.  The pot cost me $8 and I picked up some pansies at Home Depot – my first accessory cost under $15 and I love it!

pansies in anthro pot

spring time pansies

You know – now that I really look at that room – the shortbread paint could easily be called marsh grass or coastal twilight…don’t you think?  ;)

Thanks for stopping by!  Have a wonderful weekend!

Remember to take pleasure in simple things, Jackie

Sharing at Little Red House, Craftberry Bush, Coastal Charm, and Mona’s Picturesque.

no comments

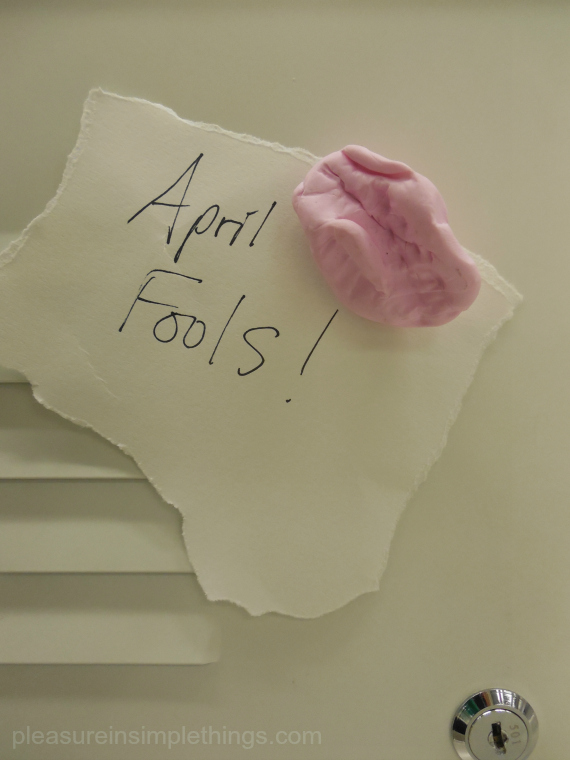
april fools’ day gum magnets

March 25, 2014

April Fools' Day gum magnets

This April Fools’ Day, I am creating some fun fake gum magnets!

Years ago, I found similar magnets in a novelty shop and gave them as a gift.  They were such a hit!  I knew I could come up with a way to make some on my own and I quickly found they were super easy and very inexpensive to recreate.

Because these are great magnets for school lockers, they are perfect to slip into your child’s lunch bag on April Fools’ Day.

Fake gum magnets in two colors

To make these you will need:

  • modeling clay
  • ¾ inch round magnets
  • glue (I used Gorilla Glue)
  • rubber bands
  • your oven

That is it!  Other than some protective covering for your teeth and hands (yes, I did say teeth – read on)…

In the interest of safety, I was extremely cautious in handling the modeling material.  I used protective gloves when handling it and never let it come in contact with my body.  I encourage you to do the same.  My teeth marks may have not come out as prominent as they could have, because I had several layers of plastic between me and the modeling material!  I didn’t want to risk having any of it touch my mouth!

fake gum magnet collage

I used round ¾ inch diameter magnets.  Remember, the magnet will determine the size of the ‘gum’ since the modeling material will need to be large enough to conceal the magnet.

Gum comes in all colors these days, but I ‘stuck’ to the more traditional colors – white and bubblegum pink.  As an added bit of fun – the white modeling material I used was also glow-in-the-dark!

So, just pinch a gum-sized piece (wads) of the modeling clay and shape it into a rough oval shape.  You know what chewed gum looks like and that is the look you are trying to simulate.  Look at a real piece of chewed gum if that helps!  I may have exaggerated the size of my pieces a little bit, but I thought that made it fun!

The only thing you have to do, is to put a couple bite marks into the material…like I said, I did this with several layers of plastic over my teeth.  Then, use a magnet to mold the spot where it will later be attached – you will be gluing this on after you set your ‘gum’ pieces in the oven.

Fake gum magnet for April Fools Day

After I got the pieces looking the way I wanted, I followed the directions on the modeling material and put my pieces of ‘gum’ in the oven for half an hour to make the shapes permanent.  I put them directly on the oven rack on a piece of parchment paper.

After the pieces were cooled, I used glue (just a bead or two of Gorilla Glue) to attach the magnets – holding them snug with elastic bands since the glue swells as it dries – and let them dry overnight.

Cool, right?

I think they make a great April Fools’ Day surprise…very practical and sure to leave a smile on the recipient’s face!

Thank you so much for stopping by.  Remember to take pleasure in simple things, Jackie

Sharing at Crafts a la Mode, Craftberry Bush, and  Silver Pennies.

2 comments

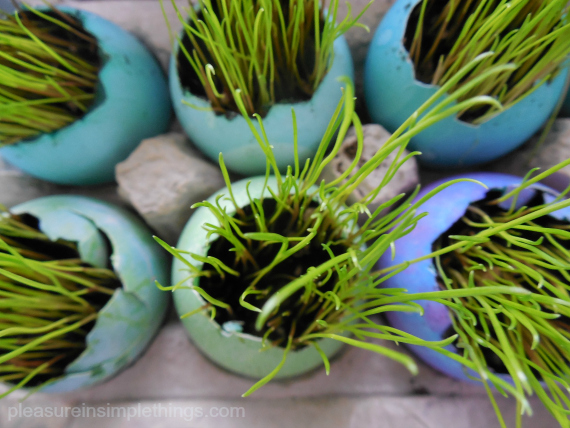
growing grass in an eggshell

March 18, 2014

growing grass in eggshells

The best place to plant Easter grass?  In an eggshell of course!

Planting grass in preparation of Easter has become a tradition in my house.  Containers of many types and varieties have been hijacked over the years for the annual planting, but eggshells remain the favorite vessel of choice!

It is easy to get beautiful results with just a little preparation.   First, decide how many eggs you want to use as planters.  Buy the number of extra-large white eggs you wish to plant.  Obviously, extra-large eggs give you the most room to plant, but you can use any size.  I prefer to use white eggs since I dye them in various colors before I plant in them.

To prepare the egg, use a sharp pointed knife to pierce the pointy end of the egg – this works best with a quick, sharp jab to make a hole.  Once the shell is broken, use your fingers to carefully remove some of the shell to make room for the planting.   (If you prefer, you can turn the egg horizontally, making a hole in the side and planting the grass the long way in the egg.)

growing grass in eggshells for Easter

Empty the contents of the egg.  You can also carefully remove the thin white membrane inside the shell (optional).  Treat the shell gently.  Next, dye the egg as you would any Easter egg.  It is easy to match any décor based on the way the egg is dyed/decorated.  Put the egg in the dye very gently – filling the inside of the egg with the dye so it will sink down and completely submerge into the dye.  (You can dye the eggs before you empty them if you find it easier…I don’t – in case I should ruin one in the emptying process, I haven’t wasted the time dyeing it!)

There is no need to go out and purchase a dye kit…dye is easily created at home with food color.  I like to use paste food color, because it comes in a wide variety of colors and is very vibrant, but liquid food coloring works just as well.  This is the dye I used:

Recipe for Easter egg dye

Once the eggs are dyed and dry, you can start the planting process.  You will need potting soil, grass seed, and a spoon.  If you need to purchase grass seed, go to Home Depot and purchase the smallest bag you can find.  Pick the fast growing seed that is sold for repairing existing lawns – it really does grow fast!
Spoon potting soil carefully into each prepared egg.  I put the eggs in the original carton for the growing process…it is an easy way to keep them in position and it makes for an easy clean up.  Next, spoon grass seed to cover the dirt surface in each egg.  Then, spoon a little more potting soil on top.

grass seed and potting soil

For your first watering, use about 4 teaspoons of water in each egg.  This will give your soil the initial moistness it requires.  For every day forward, add one teaspoon of water each day and keep the carton(s) in the sunniest spot in the house you can find.

grass in eggshells day 1

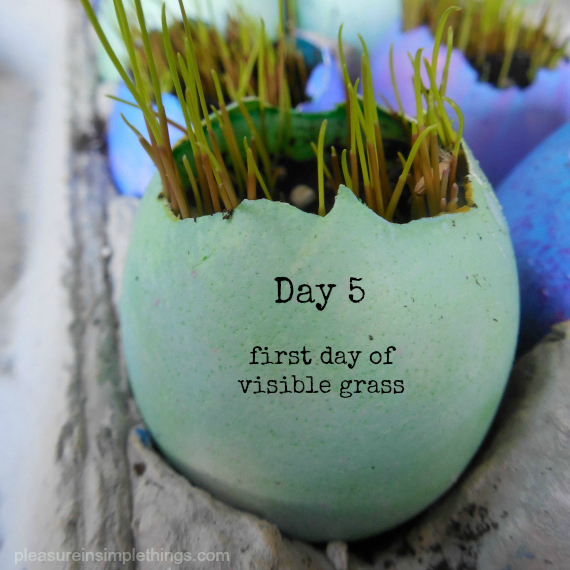
It is amazing how fast the grass will grow once it is sprouted.  The day grass begins to show, it will gain quite a bit of length.  The photos I am showing here were taken the first and second day the grass started to show.  The grass will be visible in less than a week, so plan accordingly.

day 6 grass in eggshells

Like any grass outside, this grass can be trimmed – just use scissors.

The same planting process can be used for any container…just be sure to protect any surfaces that are not waterproof…I line containers with a plastic sandwich bag if needed.

And that is it!  Very satisfying results in under a week!  What am I planning for these cuties?  I will share that with you in an upcoming post.  Meanwhile…give it a try!

Thank you so much for stopping by!

Remember to take pleasure in simple things, Jackie

Sharing at Craftberry BushCrafts a la ModeCoastal Charm and  We Call it Junkin.

15 comments

‘eggs’traordinary

March 7, 2014

molded hard boiled egg
Inspired by the playful works of art in Japanese character bento boxes, Williams-Sonoma sells a product that changes the shape of a hard-boiled egg!  I was fascinated with the idea of this product when I spotted it at the store…and, with Easter quickly approaching, I knew I had to try it out!  I am sharing the adorable results with you on today’s Friday field trip.

Following the easy directions on the box of the Egg-Design Molds, I set out to create a heart, a star, a rabbit, and a bear from some hard boiled eggs.

molding a hard boiled egg
My true interest was in the rabbit (for Easter), but I also wanted to test the star to use for deviled eggs later this summer – very patriotic for our 4th of July party on the beach!

star shaped molded eggs
Creating these eggs was really easy.  I just followed the simple directions on the box.  Basically:

  1. Cook 4 extra-large eggs
  2. Dip one egg in a bowl of ice water, then peel off the shell
  3. Place egg in a mold
  4. Set in ice water
  5. Repeat for the other 3 eggs
  6. After 10 minutes, remove from molds

Egg Design Molds

Aren’t these sure to be a hit at the ‘kids’ table on Easter?

molded bunny egg

These molds can be purchased on sale online here.  Three sets would make a dozen eggs at a time – or, a half dozen star shaped deviled (half) eggs.

Since I tested my deviled eggs, I included the recipe.  I am not a big mayo fan, so my version cuts the mayo with sour cream.  Enjoy!

deviled eggs recipe

Thanks so much for stopping by.  Have a wonderful weekend.

Remember to take pleasure in simple things, Jackie

Sharing with Silver Pennies, Little Red House, and Crafts a la Mode.

5 comments

showing of the green

March 4, 2014

packaged St. Pat's cookies
St. Patrick’s Day is coming up…how do I celebrate?

I usually plant some shamrocks in an unexpected container…or make some homemade Irish Cream…this year, in addition, I am adding a little green to my baking.

Irish Blessing

I think anything green goes over well on St. Patrick’s Day…what other holiday could possibly make green bagels or green beer seem like a good idea?

This year, I am adding some green swirls to my cookies!  If you haven’t used this technique in your cookie making, it is relatively easy to do – it just requires a little bit of patience.

making swirl cookies
I have used this technique to create ‘wave’ cookies for a beach themed party (by adding blue paste food coloring) or to create mocha swirl cookies (by adding cocoa and espresso powder).  As you can imagine, it is easily adaptable to a number of different themes/flavors…so keep it in mind for future entertaining!

steps in making swirl cookies
Divide your cookie dough in half, dyeing one half with paste food coloring.  In addition, I added some lime juice and lime zest – just so the green color made some sense!  You can use your favorite butter or sugar cookie dough…I have never tried this with the packages of sugar cookie dough that is sold in the refrigerator section of the grocery store, but I bet they would work out just as well.

Just pat each half of (chilled) dough into a rectangle on a piece of wax paper…measure each piece – so they are the same size.  Wrap each piece separately in wax paper and put into the refrigerator until firm.  Invert the plain piece of dough onto a large, clean piece of wax paper and peel off the top layer of wax paper.  Invert the green rectangle of dough on top of the plain dough so that the edges are aligned.  Peel off the top layer of paper.  With floured hands, pat the dough so that the layers adhere.

Working from a longer side, roll the dough into a cylinder.  If the dough becomes too soft to work with, refrigerate briefly, then continue rolling.  Wrap the cylinder in wax paper and refrigerate until firm or overnight.  Slice and bake the cookies as usual.

daisy for St. Patrick's Day

I added some clear sprinkles before baking to give the cookies a little sparkle. :)

I packaged each cookie I was giving to a friend in a CD envelope – tying it with raffia and a fresh daisy and adding the message ‘Erin go Bragh’ – translation is “Ireland Forever.”

daisy

Do you have unexpected ways to add green to your St. Patrick’s Day?

Thank you so much for stopping by.

Remember to take pleasure in simple things, Jackie

Sharing at Coastal Charm,  Craftberry Bush, and Finding Silver Pennies.

no comments

« Previous Entries     Next Entries »