Subscribe to Pleasure in Simple Things via RSS ReaderFollow Pleasure in Simple Things on InstagramFollow @InSimpleThings on TwitterLike Pleasure In Simple Things on FacebookFollow Pleasure In Simple Things on PinterestEmail Jackie

Tag: vintage


vintage dresser before & after

20
August

top of dresser after

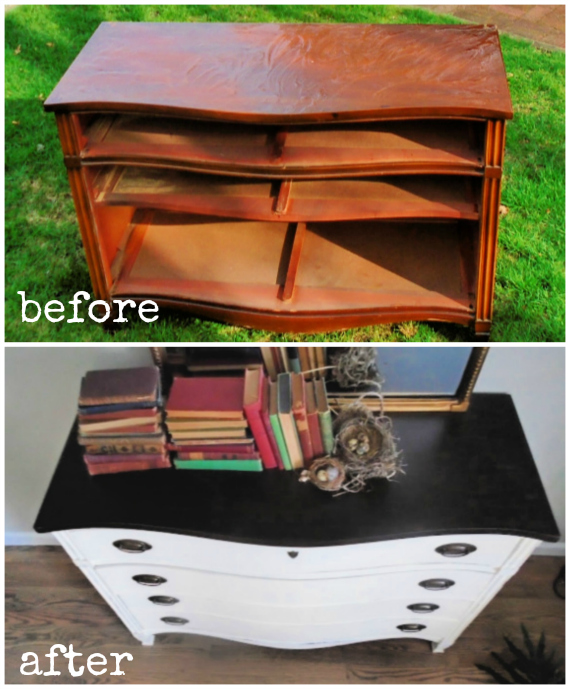
Do you remember the vintage dresser I was refinishing?  I finally took a few photos of the ‘after’ to share with you.  It is an old mahogany piece – I’m sure you’ve seen similar pieces.

before and after dresser

Most of the furniture I refinish is for others, but this piece is staying with me!

left corner close up

Here are the steps I took to transform the piece:

  • Stripped the finish off the top
  • Sanded the top with fine grade sandpaper
  • Stained the top (in ebony) – I used 2 coats
  • Sealed the top – I used 4 coats
  • Painted a sealer over the rest of the dresser (to prevent the stain from bleeding through the light color paint)
  • Painted the dresser in Annie Sloan Chalk Paint in Old White – 2 coats
  • Waxed with Annie Sloan clear wax (all but the top)
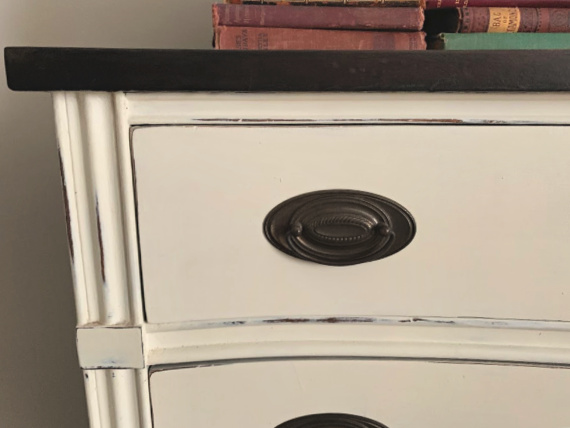
  • Lightly distressed
  • Waxed with second coat of Annie Sloan wax in clear (all but the top)

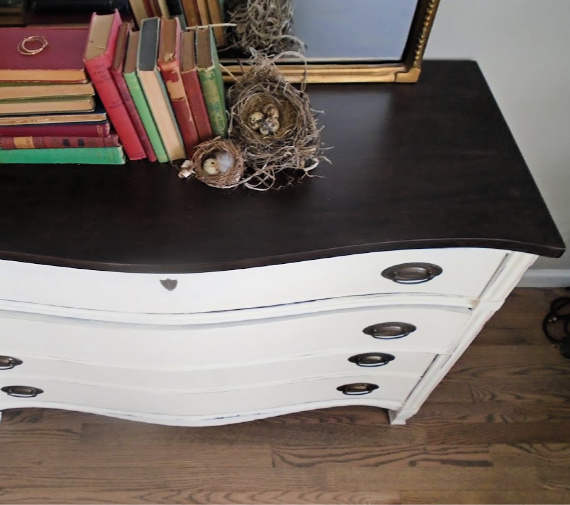
I retained the original hardware without altering it since I love the dark color in combination with the ebony stain on the top of the piece.

birds eye view after

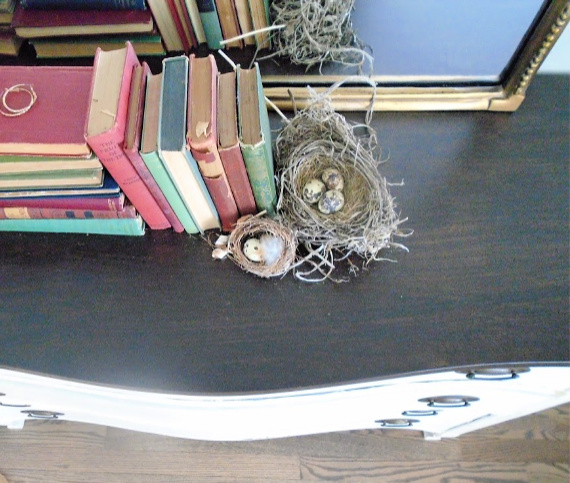
Isn’t it beautiful!?  I love it.  I ended up styling my entire bedroom around this piece.

nest collection

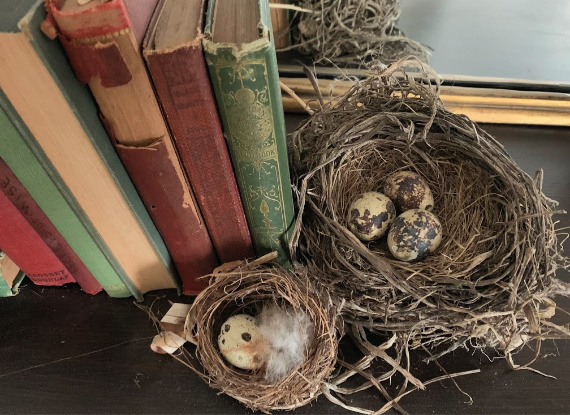
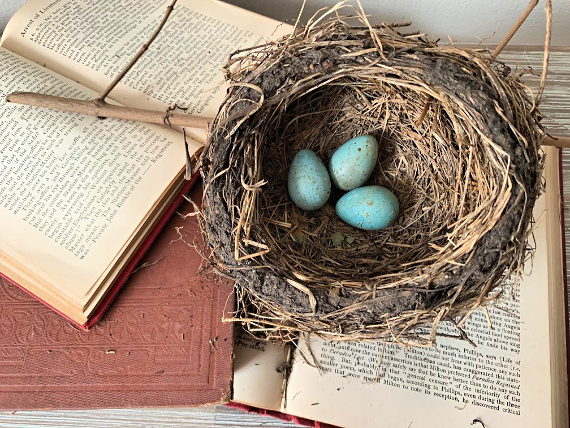
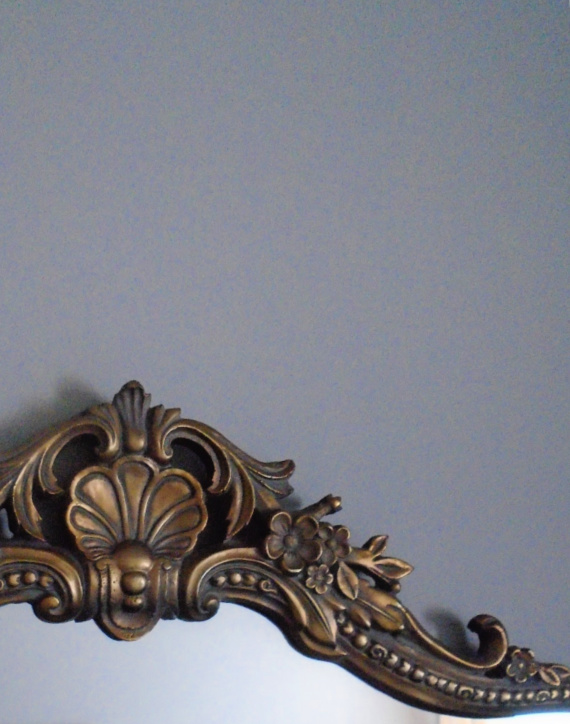
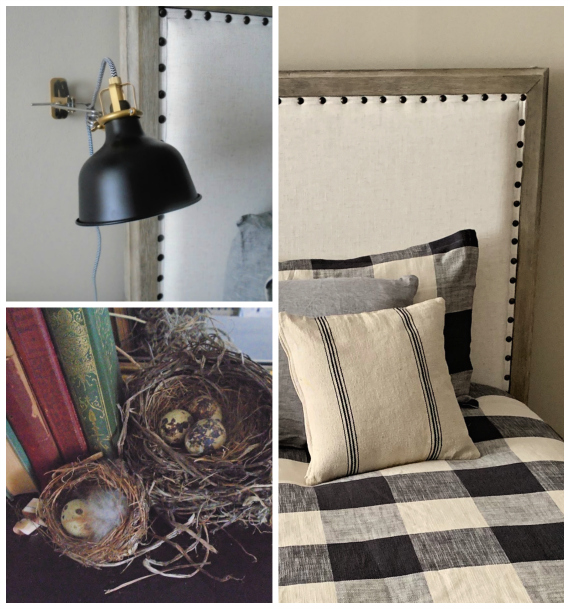
I put a buffalo plaid duvet on the bed and combined a couple of my favorite motifs (with my collections – old books and bird nests) to style this vintage dresser.  The crowning jewel was to add a mirror.  I thought the mirror that originally went with the piece was too ‘matchy matchy’ for my taste.  I originally thought I would just go without a mirror, but I soon found out I really liked having a mirror in the bedroom, so I set out to find a vintage looking piece.

old books and nest

I didn’t really expect to find anything I liked to fit my budget until Ballard Designs had a 40% off sale with free shipping and I was able to purchase the perfect piece!

mirror

My biggest bargain in the room was the bedside wall lamp.  Every one I liked had a price tag over $100.  And I had all but given up on the idea of including a lamp in my room until I came across the perfect one for $19.99 at IKEA!  Score!

bedroom details

The dresser ends up being my favorite piece of furniture!  I hope you enjoyed seeing how I transformed this old dresser!  Thanks for stopping by!

dresser side view

Remember to take pleasure in simple things, Jackie

P.S. Click here to see how I refinished the mahogany side table that matched this dresser.

Comments Off on vintage dresser before & after | diy, furniture redo, inspiration, style

country living rhinebeck 2018

8
June

wagon with flowers

My very favorite fair is the Country Living Fair.  I love it.  And, I have to say that Rhinebeck, NY – which happens to be the closest location of the fair to where I live – is also my favorite location.  The Dutchess Country Fairgrounds provide a fabulous event location.  The grounds are lush and green and, in addition to all the fabulous vendors, seminars, and demonstrations, the fairgrounds provides great food, free parking, and well-maintained restrooms.

buttons

Country Living jewels

still life

I thought you might like to see a glimpse of this year’s fair offerings, so I am sharing some photos today on Friday field trip.  My favorite booth was the one put together by South Porch Antiques.  They not only provided a great selection of antiques, but (as always) they also did so in a stunningly visual way.

wall of bird houses

Country Living Collage

windows

Enjoy the photos!

frames etc

flowers in a bucket

angel vines

P.S.  Something really fabulous happened to me in Rhinebeck at the fair and it made me so happy I chose not to skip the fair this year!  I met one of my idols!  Not only did I meet her, but we shared a hug and I got a chance to talk a little paint with her!  You may have guessed by the word ‘paint’ that the person who I met was Annie Sloan!  What a thrill!   (Thanks to my sweet friend for capturing it on film! xo)

fair entrance

Have a wonderful weekend!  Remember to take pleasure in simple things, Jackie

Comments Off on country living rhinebeck 2018 | field trips, inspiration, nostalgia

vintage handkerchief lavender sachets

9
May

vintage handkerchief sachet diy

Back in my grandmother’s time, handkerchiefs were an art form.  There were so many beautiful handkerchief designs – many embroidered – and every lady carried one.

I remember my grandmother always having one tucked up her sleeve.  Everything was made to last in my grandmother’s time, and this included handkerchiefs.  They were always fashioned of cloth, not the disposable variety of today.

vintage materials for sachets

Because of this, there are still many lovely old handkerchiefs around today.  I saved many from both my grandmothers because of the sentimental value, but over time I have found some great ways to transform these heirlooms into items that are practical as well as beautiful.

For Friday field trip today, I am sharing my favorite way as we travel back to a time of beautiful cloth handkerchiefs and fashion them into lavender sachets.  With Mother’s Day approaching, a sweet sachet made from a family heirloom can make a special gift for mom.

vintage handkerchief sachet

Inevitably, a gift like this may be too pretty to scent a drawer…and, instead…may end up displayed on top of a dresser or nightstand.

If you are not lucky enough to have a family heirloom to use in creating this sachet, vintage handkerchiefs are easily found for only a couple dollars each at yard sales or antique shops.

vintage lace for sachets

Very little lavender is needed to create a sachet, and because it is such a light material, a cup and a half of lavender weighs less than an ounce…be mindful of this when you are deciding how much to purchase.

vintage handkerchief sachets

To create the sachet, cut a square of cheesecloth (about a 7” square) to hold the lavender.  I use the cheesecloth so the lavender won’t directly touch the hanky, but the scent will still come through.  You will only need one quarter to one half cup of lavender.  You can adjust the size of the cheesecloth and the amount of the lavender depending on the size of the handkerchief you use.

vintage hankies

Tie the cheesecloth with a piece of twine and position the ball of lavender in the center of the handkerchief – enclosing the lavender ball in the handkerchief with a piece of ribbon or lace.  I chose some vintage lace.  That’s it!  Beautiful…and, what a heavenly smell!

vintage handkerchief sachet

Handkerchief sachets also make wonderful bridal shower or wedding favors.  They can even be personalized with an embroidered initial, name, or date.

quote with vintage lace

Have a wonderful weekend and a blessed Mother’s Day!

Remember to take pleasure in simple things, Jackie

Sharing at Crafts a la Mode, Craftberry Bush, and Timewashed.

6 comments » | diy, gift ideas, nostalgia

vintage teacup earl grey crème brûlée

6
May

earl grey creme brulee

Serving crème brûlée from vintage teacups is sure to make a family bridal shower, tea party, or Mother’s Day a special one!  What could be better than serving dessert from your grandmother’s teacups?  I think individual desserts add a special quality to a meal all on their own, but to add the sentiment of serving it in a special piece of history makes it all the sweeter!

basket of roses

Everyone thinks of  crème brûlée as a special occasion dessert, but it is not a hard one to create.  Traditionally, it is cooked in the oven, but I have found that good results are possible with a no-bake method.  You can use any no-bake recipe or the one I found online and, by using my simple variation, can create Earl Grey crème brûlée!

creme brulee in teacups

Most teacups are not oven safe and I would not advise putting family heirlooms in a hot oven…a vintage piece with sentimental value is not something to experiment with!  This is the reason I went with a no-bake method for my Earl Grey crème brûlée…I think it is the perfect flavor profile to combine with vintage teacups!  If Earl Grey is not your thing, just don’t add it to the recipe.

earl grey creme brulee

If you prefer a more contemporary choice of vessel, I recommend the mini latte bowls from Anthropologie…the perfect size to hold 3 ounces for a small, individual portion.

earl grey creme brulee in Anthropologie bowls

I found the no-bake recipe I used from Completely Delicious during an internet search – it is easy and makes the perfect amount of custard for a special dessert for a mom (and maybe a couple of grandmas)…it will fill 3 or 4 teacups or 4 mini latte bowls.  Following this recipe (click here), make these changes to create Earl Grey crème brûlée:

After completing step 1, place 4 Earl Grey teabags into the hot mixture and let it sit for 10 minutes.  After 10 minutes, dunk the teabags a couple of times and then gently squeeze the liquid out of the teabags and into the pan (being mindful that the mixture will be hot.)

Continue with the recipe, substituting 1 teaspoon of vanilla for the 1 Tablespoon listed.

Be sure to strain the mixture.  I found while testing no-bake recipes that this is extremely important for a smooth texture – don’t skip this step!  (As a special note – I was very cautious with my kitchen torch – I didn’t venture near the edges of my special cups!)

earl grey creme brulee in teacups

To play up the tea theme, add lemon and mint as garnish. :)

tea quote with roses

If you are an Earl Grey lover as I am, you may enjoy trying these Earl Grey cream puffs.  I also love adding the flavor to shortbreads…I still have Earl Grey ice cream on my list of experiments…maybe this summer. ;)

teacup creme brulee

I hope I have inspired you to think of ways to use your own heirlooms to create some special memories.  We will continue the family heirloom theme on Friday when I show you how to create a special diy gift using an old family treasure.

Thank you for stopping by and remember to take pleasure in simple things, Jackie

Sharing at Coastal Charm, Sand & Sisal, and Silver Pennies.

1 comment » | food & festivities, inspiration, nostalgia

a vintage egg cup collection

22
February

vintage egg cup

For Friday field trip this week, I am taking you with me for a cup of tea to the home of a friend.  She collects vintage egg cups and I thought with the Easter holiday approaching, it would be a fun thing to share with you.  The vintage egg cups are scattered throughout my friend’s beautiful old home located in a historic district.  I have always been fascinated with her collection and had fun examining it once again while we chatted over tea.

vintage egg cup

My favorite piece is definitely the sweet little chick egg cup in the opening photo.  The egg cup below holds some incense, but most of the egg cups throughout the house are empty.  How fun would it be to fill them with colored Easter eggs?

vintage egg cup


vintage egg cup with rooster

vintage egg cup

This piece was really unique to the collection because it was the only one of clear glass…

vintage egg cup

Some of the pieces looked extremely old, like the striped one in the photo below…

vintage egg cups

This piece proudly displays the owner’s heritage…

vintage egg cups

The collection displayed on the stove held wishbones from Thanksgivings gone by…

vintage egg cups

vintage egg cup

vintage egg cup

Roosters seem to be a popular egg cup motif…I love these with the pink interiors…

vintage egg cups with roosters

orange vintage egg cup

vintage egg cups

vintage egg cup

I hope you enjoyed sharing this vintage egg cup collection with me.  I don’t have photos of every egg cup I saw, but I do have additional photos I will post to my facebook in case you are interested in seeing more from the collection.  I am also sharing at the Inspiration Gallery, Crafts a la Mode, Common Ground, The Charm of Home, and Craftionary.

Thanks for sharing.  Have a wonderful weekend and remember to take pleasure in simple things, Jackie 

7 comments » | field trips

Back to top