Subscribe to Pleasure in Simple Things via RSS ReaderFollow Pleasure in Simple Things on InstagramFollow @InSimpleThings on TwitterLike Pleasure In Simple Things on FacebookFollow Pleasure In Simple Things on PinterestEmail Jackie

Tag: recipe


signature creation

30
August

D & P Signature Cocktail

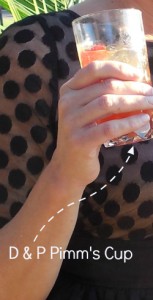
I attended a very special wedding this summer when my nephew married a wonderful girl from New Jersey.  At the wedding, I drank more than my fair share of the couple’s signature cocktail…D & P Pimm’s Cup.  aphils wedding 277

For today’s Friday field trip, we are taking a trip to Fiddler’s Elbow Country Club in Bedminster, New Jersey  (the magnificent wedding venue) where the bartender graciously shared the recipe for this addicting concoction!  (All except the recipe for the club’s house made lemonade…I improvised my own on this!) 

Pimm’s Cup is a gin based British liqueur, and with its subtle spice and citrus flavor, it is a perfect summer (or, anytime) drink component. 

It was the first time I had tasted Pimm’s Cup, but based on the D & P Pimm’s Cup sightings in the wedding photos, I made up for it at the event!  Well, I had to properly honor the couple, didn’t I ? ;)

Fiddlers Elbow

Before I put the drink together for myself at home, I made up my own batch of strawberry basil lemonade.

strawberry basil lemonade

Pimm's cocktail sightingTo make my own, I started by making a simple syrup.  I used 1 cup of water and 1 cup of sugar combined in a saucepan and heated, while stirring constantly, until the sugar dissolved.  I put this aside to cool.

I then pureed a cup of strawberries and 2 oz. of fresh lemon juice in a blender on high until smooth, straining it into a pitcher.

To the pitcher, I added 6 oz. of fresh lemon juice, simple syrup to taste (about 1/2 cup), 3 cups cold water, and a cup of fresh basil leaves.  I also added a lemon I had leftover – washed it and sliced it up.  I stirred this together and refrigerated before using.

This gave me plenty of lemonade to use for making my D & P’s!

For a quicker version, you can always add some strawberry puree and basil leaves to purchased lemonade.

D & P Pimm's Cup Recipe

Make up a batch of D & P’s for your end of the summer bash!  The recipe is easily adjusted for those under 21 (by eliminating the Pimm’s), so it is a wonderfully refreshing addition to any gathering!

Since I am still soooo excited about the wedding and all my new family, I am sending out official D & P Pimm’s Cup recipe cards to anyone that requests one – simply email or inbox me your address!  Enjoy!

D & P Pimms Cup

Have a wonderful holiday weekend and remember to take pleasure in simple things, Jackie

Sharing at The Tablescaper, Craftberry Bush, and The Shabby Nest.

5 comments » | field trips, food & festivities, recipe

easter butter cookies

19
March

easter butter cookies

I always loved the butter cookies my friend Kim would bring to bridal showers…rich, buttery cookies that looked so sweet and tasted wonderful.  They were small round sandwich style cookies, with a pastel tinted filling.  At one point I finally asked her if I could have the recipe and I started calling them “Kim’s shower cookies” whenever I would make them.

easter butter cookies

For Easter, I decided to make “Kim’s shower cookies” but cut them in egg shapes rather than circles.  I chose to tint the filling a lavender color.

easter butter cookies

Easter butter cookies


Don’t they make a great “Kim’s Easter cookies?”

easter butter cookies

easter milk and cookies


Easter Butter Cookies Recipe

Cookies

  • 1 cup softened unsalted butter
  • 1/3 cup heavy cream
  • 2 cups flour

Filling

  • 1/4 cup softened unsalted butter
  • 3/4 cup confectioner’s sugar
  • 1 egg yolk
  • 1 tsp vanilla
  • food coloring

Combine the cookie ingredients and chill for 1 to 2 hours.  Roll dough out to 1/8″ and use a cookie cutter to cut out cookies, putting on an ungreased baking sheet.


easter butter cookies

Sprinkle with granulated sugar and pierce each cookie 3 times with a fork.  Bake in a 375 degree pre-heated oven for 7 to 9 minutes.  Cool cookies.

Combine filling ingredients and mix well.  Tint the filling to desired color with food coloring.

Assemble the cookies, sandwich style, spreading the filling on one cookie and placing a second cookie on top.

The number of cookies will vary depending on the size of your cookie cutter.  I made two dozen completed cookies using a 2 1/2″ egg shaped cookie cutter.

These cookies can be made ahead and stored in your fridge to make your holiday a little less hectic :)


easter butter cookies

pink tulip

I hope you enjoyed sharing my Easter butter cookie recipe.  Thanks Kim ;)

Thanks so much for visiting, Jackie

I am sharing this post at Coastal Charm, Timewashed,  The Well Crafted Home, Craftberry Bush, The Shabby NestA Pinch of Joy, and Craftionary.

5 comments » | food & festivities, holiday

valentine raspberry stuffed french toast

8
January

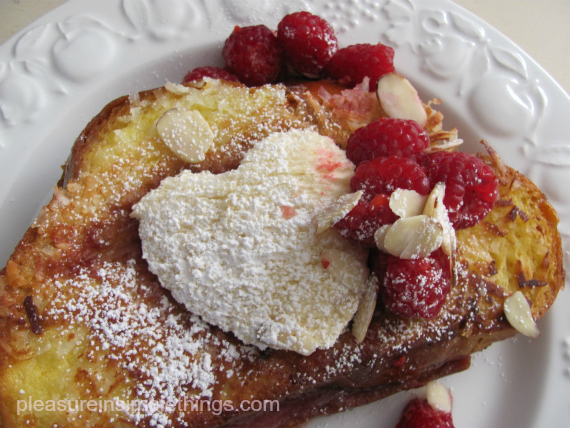
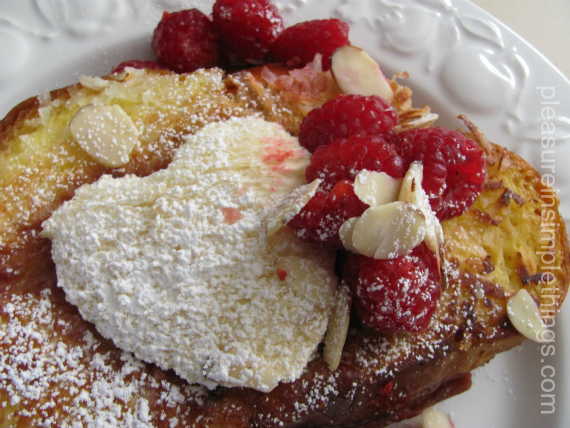
Yes, I have already started thinking about Valentine’s Day…the sweet part anyway!  Valentine’s Day is about all things sweet.  Even those that shy away from sweets give it a shot on February 14th!  I always think of an indulgent breakfast or bunch as the ultimate way to celebrate Valentine’s Day.  As a lover of all french toast, particularly the stuffed variety, I came up with a combo fit for a sweetheart…raspberry and mascarpone cheese make up the inside and combine perfectly with a hint of almond and some coconut on the outside. With the ingredients ready ahead of time, this decadent Valentine meal won’t take much longer to prepare than your standard breakfast, but will prove so much more appropriate!  If time is super short on the 14th,  you can always postpone preparing this dish until the weekend.  The recipe is for two, but it would be easy enough to increase the ingredients accordingly if you are making a family meal.

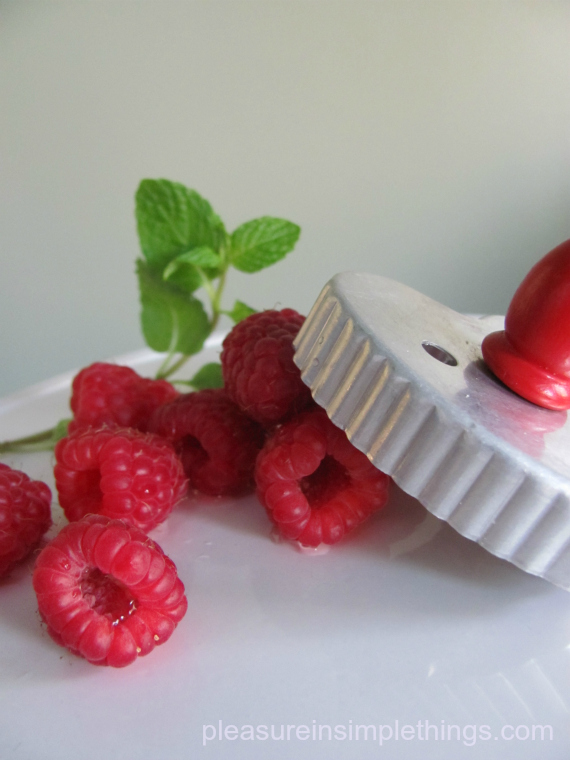
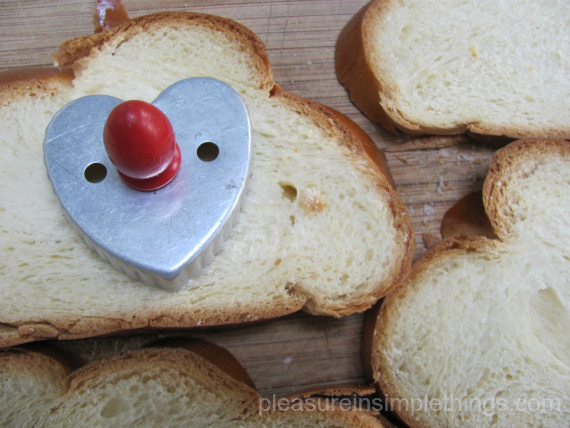
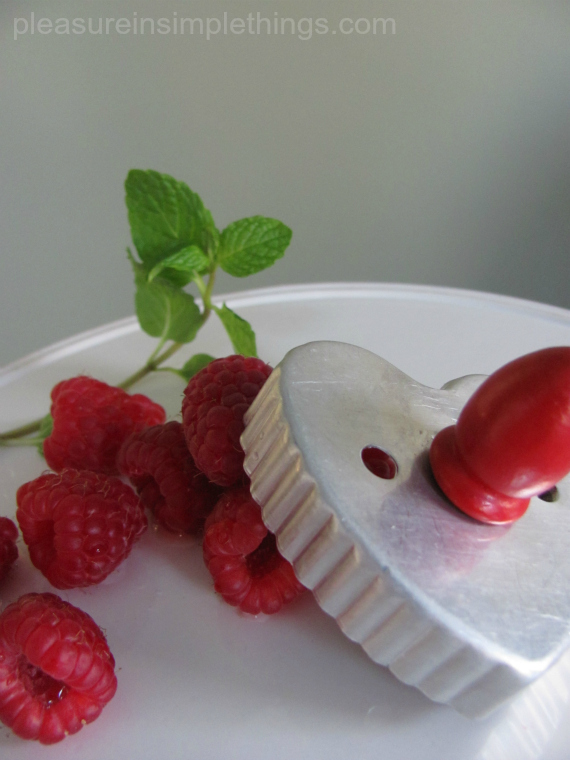
For an added show of affection, I cut a heart shape into the bread with a cookie cutter :)

Recipe for Valentine’s Day Raspberry Stuffed French Toast for Two

Ingredients

  • 4 slices challah bread, cut to ¾” thickness
  • ½ cup mascarpone cheese
  • ¼ cup seedless red raspberry jam
  • Approx.  ¼ cup sweetened flaked coconut
  • 2 eggs, whisked
  • ¼ cup milk
  • 1/8 tsp almond extract
  • Oil as needed
  • Butter
  • Sliced almonds for garnish
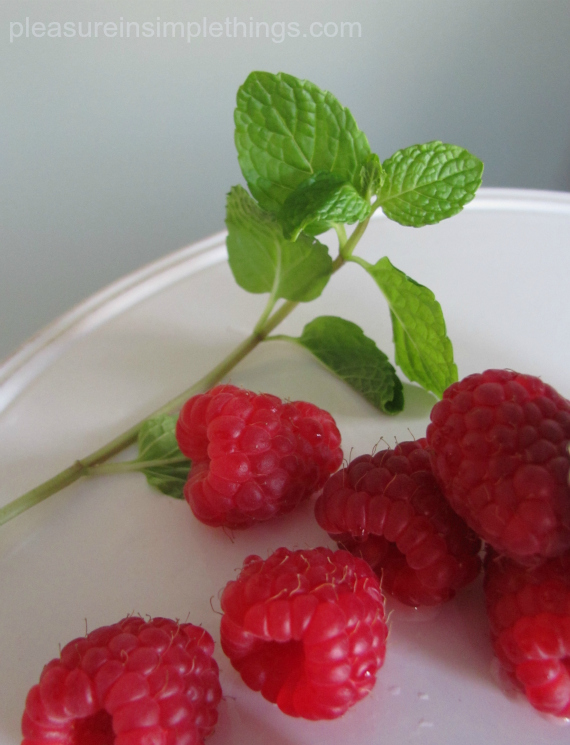
  • Fresh raspberries for garnish
  • Fresh mint for garnish
  • Confectioner’s sugar for garnish

Directions

  1. Mix cheese and jam in a small bowl.
  2. In a separate shallow dish, beat eggs and stir in milk and almond extract.
  3. Spread coconut on a plate.
  4. Lightly brown both sides of the bread in the oven.
  5. If desired, cut a heart shape with a cookie cutter in two slices of the bread, reserving the hearts.
  6. Spread the cheese filling thickly over the solid pieces of the bread and top with the heart cut piece.
  7. Heat oil at medium high heat in a frying pan large enough to accommodate the two sandwiches.
  8. Dip each sandwich in the egg mixture (let sit in the mixture a few seconds to absorb), coating both sides.  Then coat both sides in the flaked coconut.
  9. When oil is hot, add a pat of butter to the pan and fry the sandwich, cooking till hot and lightly brown on both sides – flipping once.
  10. Put onto a serving plate and add the reserved heart cutouts, sift with confectioner’s sugar.
  11. Garnish as desired with fresh raspberries, sliced almonds, and sprigs of mint.


Serve with champagne and a chocolate?  Just as special served with juice in a ‘fancy’ glass if you are serving to the sweeties under 21!

A photo of valentine raspberry stuffed french toast. Challah bread is filled with mascarpone cheese and raspberries and a hint of almond and coconut is added in this creation fit for a sweetheart.

I hope you will enjoy this valentine raspberry stuffed french toast…on Valentine’s Day…or, any day!

Thank you so much for visiting.

Remember to enjoy the pleasure in simple things, Jackie

3 comments » | food & festivities

individual brownie mousse tortes

20
November

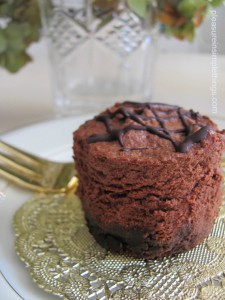
Don’t you think desserts look so much more elegant as single servings?  I think so.  That is the reason I purchased a cheesecake pan (with removable bottoms) that bakes up a dozen mini cheesecakes at a time.  I was thrilled the first time I used it and created a dozen salted caramel cheesecakes.  Yes, the pan was a pain to clean…especially the twelve little removable bottoms!…but, I thought so worth it!  I decided recently to try out the pan again.  This time, I adapted a favorite brownie torte recipe my friend Tracy gave me over (I guess I won’t say how many) years ago!

I was able to perfect a recipe after a couple tries and the results were fantastic.  With the holidays upon us, it is the perfect decadent dessert to impress your guests.

The tricky part is definitely the baking time.  Obviously, the baking time is reduced for a small single serving dessert when the original recipe is for a full-sized torte.  In this instance, there are two layers.  The bottom layer is basically a brownie and the top layer is a chocolate mousse.

brownie mousse torte

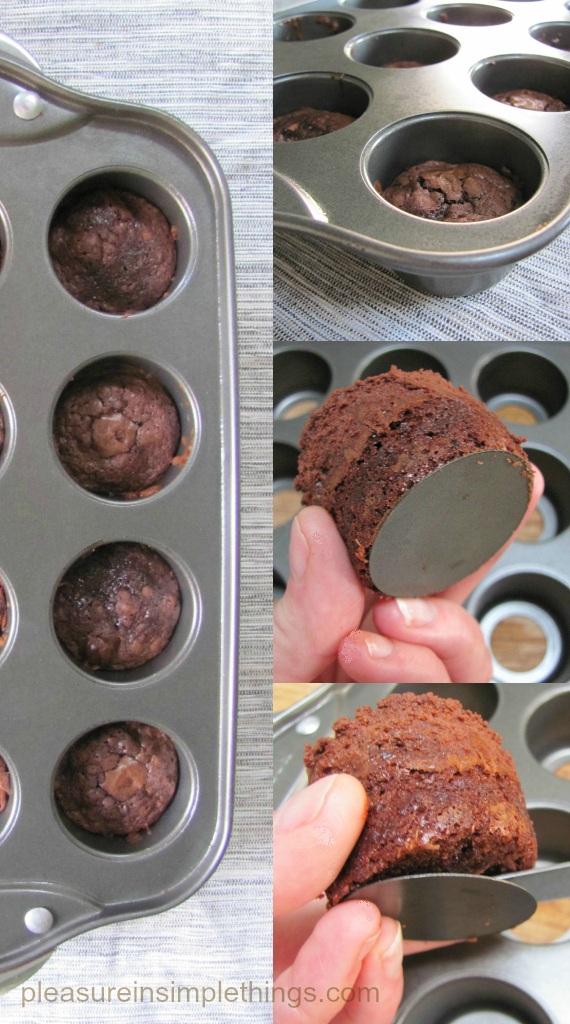
First, prepare a brownie recipe – either your own or a box.  I like to prepare mine from scratch, but sometimes it is so much less expensive to buy a boxed mix, it is hard to resist!  The only thing I changed was to add two teaspoons of instant espresso and a few mini chocolate chips into the batter.  I filled each compartment a little less than half with brownie mix.  It ended up being about half the usual cooking time – a total of 18 minutes.  You will have to watch carefully.  The first batch I made, I filled the compartments half way and found after they cooked there was not enough space left for the mousse.  This was easily corrected (but time consuming) by taking each torte out and slicing it to create a thinner bottom layer.  The second batch, I knew not to put very much batter in each section.  I had quite a bit of batter left, so I cooked the remainder in a muffin tin to cook and eat as brownies.

browniemoussetorte

A photo of individual brownie mousse torte.

After the brownies cooled completely, I made a mousse and filled over each brownie to the top of the compartment with the mousse.  After this step, I garnished each dessert, by melting 1/2 oz. of baking chocolate and drizzling over the top of each torte.  Then, the pan was put into the fridge to set.

Chocolate Mousse Recipe (for top layer)

  • 1 & 1/2 cups semi-sweet chocolate chips
  • 1 oz. unsweetened baking chocolate
  • 1 tsp. instant coffee or espresso powder
  • 1/4 cup water
  • 2 Tbsp. butter
  • 1 cup whipping cream

In a small saucepan, combine chocolate chips, 1 oz. unsweetened chocolate, 1 tsp. instant coffee, 1/4 cup water and 2 Tbsp. butter.  Cook over low heat, stirring constantly, until mixture is smooth.  In small bowl, beat whipping cream until soft peaks form.  Fold warm chocolate mixture gently into whipped cream. 

When you are ready to plate the desserts, carefully remove each one by pushing from the bottom carefully….if there is any sticking, you may need to loosen the outer edge with a dull knife.  My pan is made of a nonstick surface and I didn’t have any trouble getting the desserts out of the pan.  The bottom ring of each compartment of the pan needs to be removed by slipping a knife carefully underneath each one.

It may take a little extra work to make the torte in individual portions, but I think it is well worth the result.

I hope you will try these indivdual brownie mousse tortes for your holiday table.

Thanks for visiting.  Have a blessed Thanksgiving… and, remember to take pleasure in simple things, Jackie

3 comments » | food & festivities

easy caramel corn

30
October

This time of year is a natural for popcorn.  Caramel corn?  Even better!  Very seasonal and very yummy. For a long time I was intimidated just thinking of trying to make it.  Plus, all the recipes always called for popping popcorn the old fashioned way – on the stove.  These days, I would never think of doing that – it creates such a mess!  Microwave popcorn is so much easier and neater!  So, I would like to share the instructions for making this delicious treat using the ‘conventional’  bag of microwave popcorn!

I love it because I always have the few ingredients needed to make it in my house, so if I decide to turn the usual popcorn up a notch…I am ready!  Of course, you wouldn’t want to buy a butter flavored popcorn…pick something unflavored or, a natural flavor.  I buy the grocery store brand  organic ‘natural’ flavor.  It has a little salt in it, but that’s it.  I don’t add any salt of my own since I don’t normally use much salt.  You may decide you want to add some.

One batch (or 3 oz. microwave bag) fits great on a cookie sheet, so if you decide to make more than one batch, just plan for one cookie sheet per bag.  You might fit two bags on one sheet if you have a really large baking sheet.

This is a great snack for the sports fans in the house…a sweet departure from the usual nachos while watching the big game.  If you are making this for the kids,  you can toss in peanuts (aka Cracker Jacks) and/or candy corn as fun additions.

Because I planned on serving this batch of the caramel corn I made to ‘the guys’, I got a little ‘corny’ (pun intended) with the presentation and served it in a tin that announced it as “the best ever caramel corn.”

A photo of caramel corn made using microwave popcorn and served in a chalkboard tin.

Tins are a great way to store and present the caramel corn.  This tin was spray painted completely with chalkboard spray paint – making it easy to change up the message, depending on its use.  An easy way to repurpose an ugly tin!  This one has been used many times over and will later serve as storage for holiday treats and  be adorned with some fun red and green chalk.

Easy Caramel Corn Recipe

  • 3 oz. bag of microwave popcorn, popped  (I use the natural flavor – it just has a little bit of salt)
  • 6 tablespoons unsalted butter
  • 1/3 cup packed light brown sugar
  • 3 tablespoons light corn syrup
  • 1 teaspoon pure vanilla extract

Heat oven to 300 degrees.

In a medium saucepan, combine the butter, sugar, and corn syrup.  Cooking over medium heat, stir constantly until the mixture bubbles and lightens in color, 4 or 5 minutes.

Remove from heat.  Stir in the vanilla.

Pour over the cooked, cooled popcorn in a large bowl and toss to coat with a rubber spatula.

Spread the popcorn mixture on a lipped baking sheet and bake 30 to 35 minutes, when the color will deepen, tossing once halfway through cooking time.

Remove from oven and toss before letting cool on the baking sheet.  Wait until completely cool to serve.

Store in a tin or other airtight container at room temperature.  You can keep it for up to a week…if it lasts that long!

Hope you enjoy this easy caramel corn recipe.  You might want to spray paint a tin of your own to store it in…you can later use it for holiday cookies!

Thanks for visiting, Jackie

5 comments » | food & festivities

cheese & herb fondue in a pumpkin

16
October

I love using pumpkins for serving containers and flower vases at this time of year.  When I saw this idea about cooking a fondue in the oven right inside a pumpkin, I thought it was great!  I soon found out that it also tastes great!  I’d like to share the recipe…a great one for seasonal entertaining.  A great appetizer or first course served right from the pumpkin!  Here is the recipe I used, taken from one published by the Fig Cooking School in New Haven, CT.

 Ingredients:

  • 1/4 cup chopped shallots
  • 1/4 pound stale bread, cut into small cubes
  • 1/4 pound cheese, such as gruyere, emmentahal, cheddar, smoked gouda, asiago, parmesan, or any combination, cut into 1/2 inch cubes
  • 3 cloves of garlic pressed or minced
  • 1/4 cup fresh scallions, chopped
  • 2 teaspoons or more of fresh herbs (i.e., parsley, rosemary, thyme)
  • 1/2 cup dried cranberries
  • 1 sugar or Cinderella pumpkin, weighing about 3 pounds
  • 1/3 up or more of heavy cream

Preparation:

  1. Preheat oven to 350 degrees.
  2. Sautee shallots until they are crispy and set aside.
  3. Combine chunks of bread and cheese along with cranberries.  Season with salt and pepper.
  4. Add shallots to the bread and cheese mixture.  Combine well.
  5. Add any herbs you choose, along with the scallions and the garlic.  Toss well.
  6. Using a very sturdy knife, cut off the cap of the pumpkin, just as you would a jack-o-lantern.
  7. Scoop out the stringy pumpkin and the seeds and generously salt the inside of the pumpkin.
  8. Pack the filling tightly into the pumpkin (there shouldn’t be any air pockets.)
  9. Pour in cream until the bread mixture is moistened and there is a bit of liquid on top (do not have the bread “swimming” in heavy cream).
  10. Put the cap back on and bake until the ingredients are bubbling and the meat of the pumpkin is tender enough to be pierced with a fork.  Do not let it burn; the pumpkin will turn black and collapse as it cools.


A photo of the fondue prepared and put inside the pumpkin – ready for the oven.

Place a large spatula under your creation and move it gently to a beautiful platter.

Serve as a side dish or an appetizer on small plates.

A photo of the completed fondue from the oven – ready to serve on small plates.


I hope you enjoy this creamy pumpkin fondue at one of your seasonal gatherings!

Thanks for visiting, Jackie

Comments Off on cheese & herb fondue in a pumpkin | food & festivities

healthful eating with claire’s corner copia

21
September

friday field trip

I developed a renewed enthusiasm towards healthful eating after listening to Claire Criscuolo when I attended a presentation she gave recently at the Trumbull, CT library.  Claire is definitely a Connecticut icon.  Her restaurant, Claire’s Corner Copia, has provided a healthy eating location in New Haven for 37 years – starting long before healthy and organic eating became trendy.  Her philosophy of “flavor first with a healthy edge” dismisses any preconceived notions about healthy food not tasting good.  The “flavor first” is evident when trying the first bite at Corner Copia.  Not surprisingly, the restaurant was named one of the top 10 heart-healthy restaurants in the U.S. by MSN.  Although I have eaten at her restaurant many times, I had never before heard Claire speak about her passion for healthy eating and I sure have been missing something!

Claire grew up in a family of Italian heritage with a mom that served a selection of fresh vegetables every day, many from her own garden…It seems she bypassed the whole “Betty Crocker” era of casseroles and Shake ‘n Bake.  Instead, the Criscuolo family ate the way many of us aspire to eat – fresh and healthy with no processed foods and plenty of fruits and vegetables.  When people tell Claire she is forward thinking, she responds by saying that she is backward thinking – eating the way her parents did – like “the old days.”

Claire’s Italian mom told her not to “cheat her stomach” and Claire has definitely taken those words to heart.  Her continuing commitment to educating herself about healthy eating is demonstrated in many ways…most recently by her meetings with researchers to address how food preparation can aid with eliminating cancers.

The session at the library contained a cooking demonstration* for a healthful and tasty salad and was packed with tips for incorporating great foods into daily eating.

*If you want to try one of the recipes from Claire’s newest book, I have included the recipe for the salad she prepared for us at the end of this post.

Probably the #1 tip I took away from the session was to BE PREPARED.  Things seemed to click into perspective for me when Claire asked the attendees why it is that everyone can spend so much time researching the latest iphone, but not the food they put in their bodies?  The key to  being prepared is to always have great food choices available in your home.

Claire has a smoothie for breakfast most days – something I have quickly adopted since I always seem to be too busy to think of a sit-down breakfast.  She always has organic fruit in her freezer and organic spinach in her fridge (part of that ‘being prepared’ thing!).  Unsweetened coconut milk or herb tea can serve as the liquid.  Cinnamon and honey are healthy additions.  I may need to put a juicer on my Christmas list!
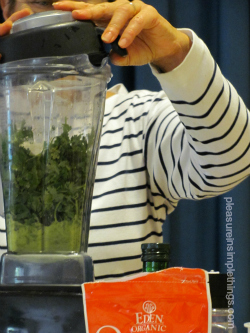
Claire is a big proponent of making soups; suggesting this is a wonderful way to add extra fruits and/or vegetables to a meal.  Her idea of hosting a soup exchange will definitely replace the cookie swap on my holiday calendar!

Claire’s store even makes their own cleaning supplies, which you can easily replicate by following the directions on the store’s website (www.clairescornercopia.com  click on recipes and scroll down to household cleaning).

If you haven’t yet been to Claire’s Corner Copia and happen to be in the New Haven area, the restaurant is located on the edge of the Yale campus, right on Chapel Street.  And, if you are genuinely trying to incorporate more healthful eating into your life, I would definitely recommend checking out Clarie’s books – the most recent title is  Welcome to Claire’s.  At the very least, I hope this post motivates you to spend a few extra moments thinking about your food choices…the time I spent with Claire certainly did that for me!

Chimichurri Quinoa and Bean Salad

  • salt
  • 1 cup quinoa
  • 2 cloves garlic
  • 1 bunch cilantro
  • 1 bunch Italian flat-leaf parsley
  • 3 tablespoons fresh oregano, or 1 tablespoon dried
  • 1/4 – 1/2 teaspoon crushed red pepper flakes
  • 1 small jalapeno pepper, coarsely chopped
  • 1 tablespoon white vinegar
  • 2 tablespoons freshly squeezed lemon juice (from about 1/2 lemon)
  • 3 tablespoons freshly squeezed orange juice (from about 1/2 orange)
  • 1 cup grapeseed oil, dairy-free mayonnaise, or other mayonnaise
  • pepper, to taste
  • 1, 12 ounce can organic black beans, drained
  • 1 medium carrot, peeled and diced
  • 1 small sweet organic onion, diced
  • 12 sweet grape tomatoes, halved
  • 1 large broccoli crown, florets separated into small pieces

Bring 2 cups of lightly salted water to a boil in a medium covered pot over high heat.  Reduce the heat to low-medium and add the quinoa.  Cover and cook at a simmer for about 25 minutes, until the water is absorbed and the quinoa is just tender.

Turn the quinoa into a large bowl, and using two forks, toss the quinoa to fluff it and to separate the grains.  Set aside to cool, occasionally tossing the quinoa to facilitate cooling.

Meanwhile, prepare the chimichurri.  Place the garlic, cilantro, parsley, oregano, pepper flakes, jalapeno, vinegar, lemon and orange juices, oil or mayonnaise, salt, and pepper in the bowl of a food processor fitted with a metal blade.  cover and process for about 30 seconds until well blended.  Taste for seasonings.

When the quinoa is cooled to room temperature, add the beans, carrot, onion, tomatoes, and broccoli.  Using two wooden spoons, toss to combine.  Add the chimichurri and toss well to coat.  Taste for seasonings.  Serve at room temperature or refigerate for up to 2 days.  Toss again before serving.

Hope you enjoyed this visit with Claire from Claire’s Corner Copia!

Thanks for visiting!  Have a wonderful weekend, Jackie
2 comments » | food & festivities

fresh tomatoes with penne, feta & dill

4
September

Best of the season.

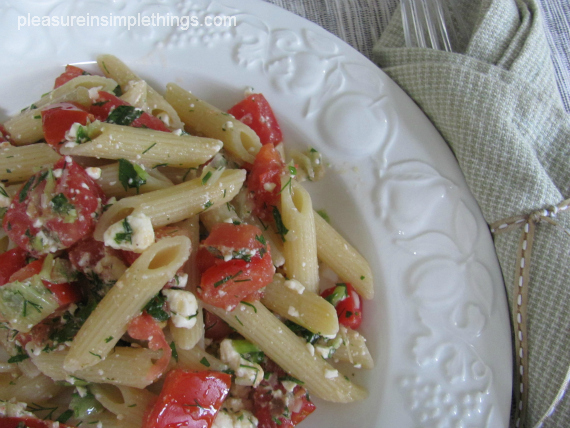
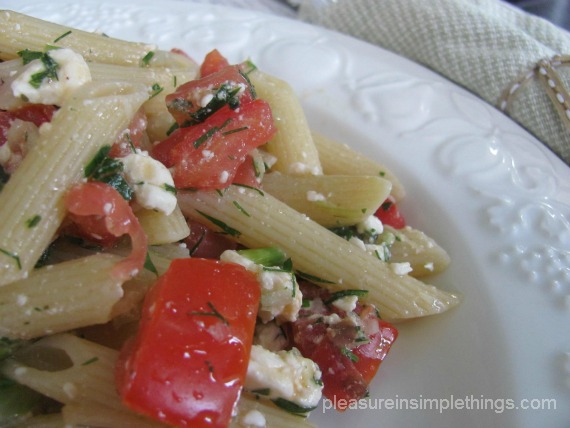
You already know I am a feta fan from my watermelon post   https://pleasureinsimplethings.com/3-best-ways-to-serve-watermelon/.  This time I am adding it to pasta and boy, it is fabulous.  This is my all-time favorite pasta recipe for the summer.  Not only is it wonderfully fresh and delicious just made, but leftovers can be eaten as a cold salad.

This pasta is served with an uncooked sauce made with fresh garden ingredients.  This is the best when tomatoes are at their ripest..use some from your garden or purchase some at a farmers market.  I only make this at the end of the summer when I can get the best tomatoes…usually from a friend’s garden.

I make the sauce in the afternoon and keep in the fridge until ready to use so that all my chopping is done and everything is cleaned up…I just need to cook the pasta to have dinner ready.  (Bring the sauce to room temperature before mixing with the pasta.)

Summertime Pasta with Tomatoes, Feta & Dill

  • 2 pounds tomatoes, halved, seeded, chopped
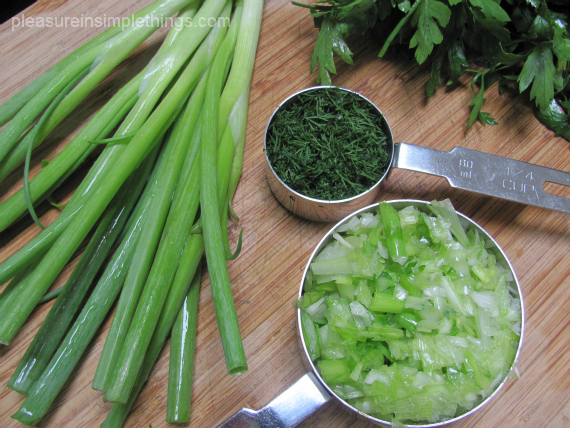
  • 1 cup chopped green onions (white and green parts only) approx. 2 bunches
  • 7 ounces feta cheese, crumbled (if they have the tomato and basil flavored feta, I buy that – adds that much more flavor)
  • 6 tablespoons chopped fresh parsley
  • ¼ cup chopped fresh dill
  • ¼ cup extra-virgin olive oil
  • 16 ounces penne pasta

Mix first 6 ingredients in a bowl.  Set tomato mixture aside.

Cook pasta in large pot of boiling, salted water until just tender but still firm to bite (al dente).  Add hot pasta to tomato mixture and toss to coat.  Season to taste with salt and pepper and serve at once.

A photo of fresh tomatoes served with penne, feta, and dill…the perfect way to showcase end-of-the-summer garden ripe tomatoes.

Hope you will give this recipe a try…remember to use the ripest, freshest garden tomatoes you can find!

Thanks for visiting, Jackie


3 comments » | food & festivities

squash blossoms…farm to table

2
September

An easy do-it-yourself pictorial.

For the first time this year, I picked my own squash blossoms when I visited Lyman Orchards in Middlefield, CT.  I happened to overhear someone asking directions to the appropriate field to pick them.  I immediately got excited about the prospect of picking some myself.  I have had fried squash blossoms in restaurants and really enjoyed them – even though I am not a big fried food lover.  I decided to take the opportunity to try and cook some up myself.

I originally posted these photos on my facebook page, but have had many requests to put them on a blog post for those that don’t use facebook.  So, here is how I prepared the squash blossoms…it was very easy and they were very delicious!


Easy!  Hope you enjoyed these photos on preparing squash blossoms…farm to table!

Thanks for visiting!  Enjoy your holiday weekend, Jackie

Comments Off on squash blossoms…farm to table | garden

dessert shooters

17
August

friday field trip

Target trips are very different with my daughter away and settled in her own apartment.  It had become a weekly routine when she was living at home for her and I to make a Sunday trip to Target.  Sometimes we would have a specific item in mind to purchase…most times, not.

So today I had a little gap between work and an appointment and decided to look around in Target without my daughter …and it wasn’t even a Sunday.

Walking through Target at this time of year is sad for me…no school supply lists to purchase from or dorm room items to choose.  Of course, most of the aisles are flooded with back to school items – I avoided all these aisles like the plague.  Instead, l looked at stationary products (love)…home items…then  finished up in the food section.

As I walked through the dairy aisle on this particular Target excursion, I was shocked to see a product I apparently totally overlooked – chocolate cream cheese!  What a great idea!  I know the stores carry many chocolate spreads now (thanks Nutella!), but I did not know about Philadelphia Indulgence chocolate cream cheese spread!

Target had a package of four individual tubs for $1.70…they had milk or dark chocolate.  I immediately thought of the strawberries back at home in my refrigerator.  What a quick and easy last minute dessert…to be able to just fill some fresh strawberries with this product.  Could I be this excited for a purchase that didn’t even amount to $2.!

I got home and immediately filled some strawberries with the chocolate cream cheese.  They needed more…I wanted to dip them in chocolate…well, wouldn’t adding that step ruin the whole point of being quick and easy?  Chocolate cream cheese on chocolate chip bagels….pretzels dipped into chocolate cream cheese…my mind wonders…okay, back to the task at hand!  Quick…simple.

Then, I had the perfect idea…’shooters’…I would make little shot glass-sized indivdual desserts.

A photo of  s’mores shooters.  A great single serving dessert made with Philadelphia Indulgence chocolate cream cheese spread.

As it turns out, this is the PERFECT way to use the package I bought since it comes in little cups that are the optimum size (1.25 oz. cups) to make this dessert.  It is a great way to indulge in a dessert without going crazy…a great dessert that is easy to create variations with little fuss.

I started with a s’more shooter – a nod to the Girl Scout’s  100th anniversary this year.  After that, I just couldn’t stop with the variations.  And, I went back and picked up the other two flavors.  Using the milk chocolate, dark chocolate, and white chocolate product there really are infinite possibilities.

I started with a graham cracker crust.  I mixed a cup and a quarter of graham cracker crumbs with 3 tablespoons of unsalted butter.  (This will make about 12 desserts.)   I used this as my base and put 2 tablespoons in the bottom of a straight–sided clear glass shot/cordial glass.  Use a 2 ounce or 2 1/2 ounce size.  If you want disposable (Labor Day picnic?), 2 ounce clear plastic cups are inexpensive and readily available (this is the size used for jello shots).

The s’more one was layered as:  1 tablespoon of the graham cracker mixture, 1 tablespoon of fluff,  1, 1.25 oz tub of milk chocolate Philadelphia Indulgence chocolate cream cheese spread.  I garnished the top with a marshmallow that was cut in half and toasted.  (You can toast this quickly under your broiler.  Don’t put the shot glass under the broiler if it is not oven safe – toast the marshmallow by itself and then add to the top of the dessert.)

A photo of a s’more shooter…a dessert made with Philadelphia Indulgence chocolate cream cheese spread, graham cracker crumbs, and marshmallow fluff.

 Some of my favorite combinations:

  • 2 tablespoons of crumbs, 1 tablespoon of coconut, 1 tub of milk chocolate Indulgence, almond garnish
  • 2 tablespoons of crumbs, 1 tablespoon of peanut butter, 1 tub of milk chocolate Indulgence, peanut butter cup garnish
  • 2 tablespoons of crumbs, 4 or 5 raspberries, 1 tub of dark chocolate or white chocolate Indulgence, raspberry & mint garnish
  • 2 tablespoons of crumbs, 4 or 5 blueberries, 1 tub of white chocolate Indulgence,  blueberry & mint garnish
  • 2 tablespoons of crumbs,  2 or 3 banana slices, 1 tub of milk chocolate Indulgence, banana slice garnish

It is very easy to gauge how much cream cheese you need to purchase since each indivdual tub makes one serving or  ‘shooter’.

A quick, easy, and fun dessert…mission accomplished!

Enjoy!

Thanks for visiting, Jackie


3 comments » | food & festivities

Back to top