I love culinary lavender.
A subtle taste of lavender in a drink or a baked item is delicious! So, I was very excited when I heard Starbucks added lavender drinks to its menu. An iced coffee with a hint of lavender sounded very appealing to me! That is, until I actually visited my local Starbucks and found out the only way to get a lavender drink was with the addition of a lavender sugar syrup! “Is there any way to add the lavender to a drink without adding the sugar?” I asked the barista. “The lavender is part of a sugar syrup. That is the only lavender we have” was the response I received. Yuck! Determined to enjoy a lavender iced coffee without sugar, I set out to make my own.
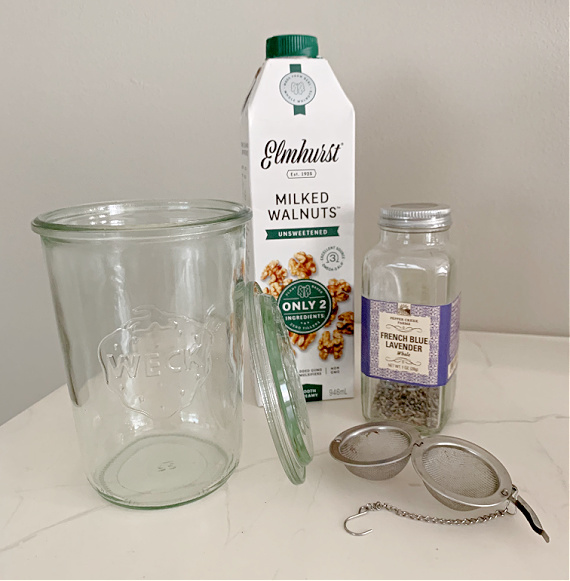
The usual iced coffee I make at home is made from organic coffee. I combine brewed coffee I keep in the fridge with walnut ‘milk’. The walnut ‘milk’ I buy is from Elmhurst and has two ingredients – water, walnuts – that’s it! (These ingredients make my everyday coffee very clean!) Using my usual iced coffee ingredients, I was determined to create a lavender iced coffee. I came up with a very simple way to accomplish this!
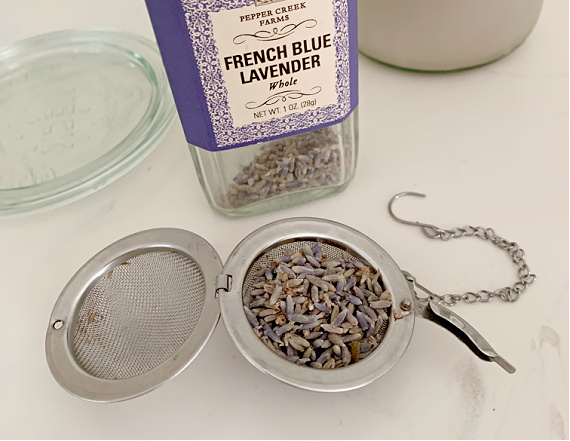
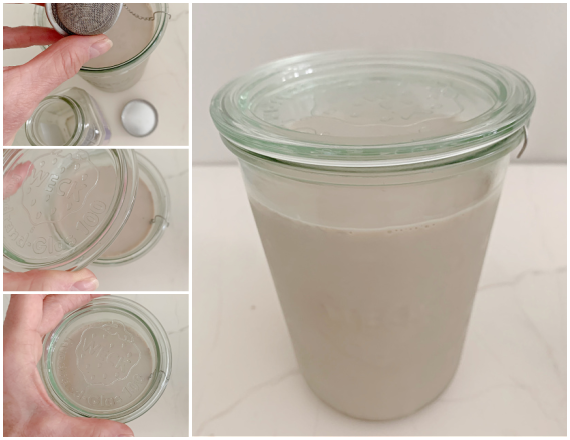
I filled a tea infusion ball with culinary lavender and dropped it into a glass jar filled with my walnut ‘milk’. (Use whatever nut ‘milk’ you prefer.) I left this jar in the fridge overnight and by the next morning the milk was infused with a lovely, subtle lavender flavor!
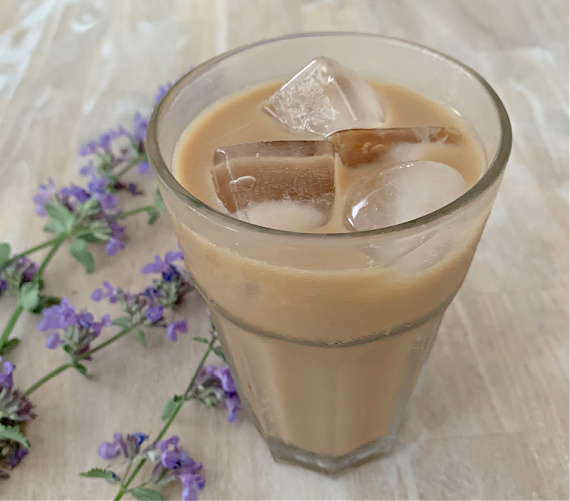
I combined my infused ‘milk’ with some of my cold, pre-brewed coffee and voila! I had a lavender iced coffee with no sugar or other unwanted added ingredients!
The taste of my lavender iced coffee was perfect! (Of course, the longer the lavender remains in the ‘milk’, the stronger the flavor. Overnight was just the right subtle flavor for me.) Mission accomplished!
I hope you will try your own iced coffee creation by creating your favorite flavor(s) in a clean way!
Thanks for stopping by!
Have a fabulous weekend and remember to take pleasure in simple things, Jackie
P.S. Be sure to use culinary grade lavender – lavender that is intended for ingesting! It will be marked accordingly. I usually can find it at a bargain at Home Goods or TJ Maxx – in the food aisle. Try it in your scones!