Subscribe to Pleasure in Simple Things via RSS ReaderFollow Pleasure in Simple Things on InstagramFollow @InSimpleThings on TwitterLike Pleasure In Simple Things on FacebookFollow Pleasure In Simple Things on PinterestEmail Jackie

Tag: Plasti Dip


diy rubber bottomed tote bag

21
July

tote bag diy with flowers pleasure in simple things

Don’t you love those rubber bottomed tote bags? I do! I have been meaning to make myself one for quite some time. I decided to give it a shot when I saw the Ikea straw totes on sale for $2.99! How could I go wrong?

My original plan for a rubber bottomed tote was to create one on a canvas bag and include a monogram. Once I got the bottom on my new straw tote, I changed my mind about the monogram. I preferred the look without it. I will wait until I find a good deal on a canvas tote, then I will make one with a rubber bottom and include a monogram.

a finished tote bag with flowers pleasure in simple things blog

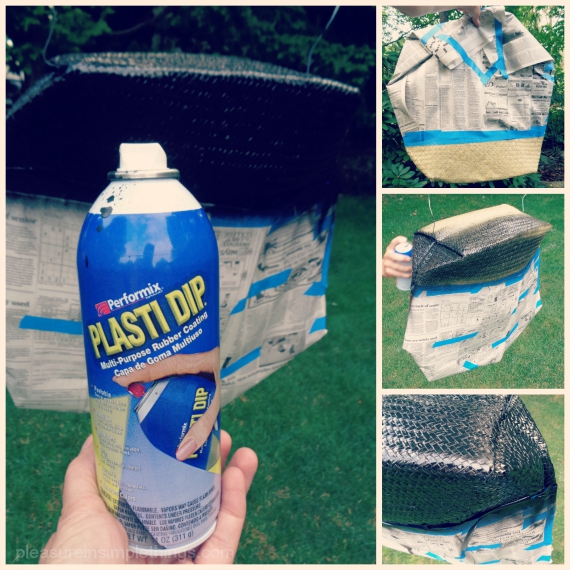
This is a super easy project. The only supplies you need are; the tote you plan to use, some tape and paper for masking, and a can of Plasti Dip. You have seen me use Plasti Dip quite a bit if you follow this blog. I really love the product. (I will include some links to other DIY projects using Plasti Dip at the end of this post.) This product was once confined to the garage – but not once I got a hold of it! I adore repurposing products that are carried at a building supply store – Plasti Dip is one of these products!

diy rubber bottomed tote pleasure in simple things blog

Rather than the liquid form you have seen me use in the past, I am using the spray version of Plasti Dip for this project. Any spray paint has an overspray, so it is necessary to thoroughly mask any areas that will not be painted. To prepare, I used painter’s tape and newspaper to mask off these areas and I hung the bag upside down on the clothesline. This made it easy to paint. I chose a black paint and sprayed it in two light coats. The natural material of the tote is very porous, so it definitely requires 2 coats.  (The texture of the tote will prevent a perfectly sharp line like you would get on fabric.)

tote bag with flowers diy pleasure in simple things blog

That’s it! Just be sure to position the tote as you would use it – you don’t want it folded when you spray it since the rubber material dries hard.

Isn’t it great? I love it! I hope I have inspired you to try this fun and easy project!

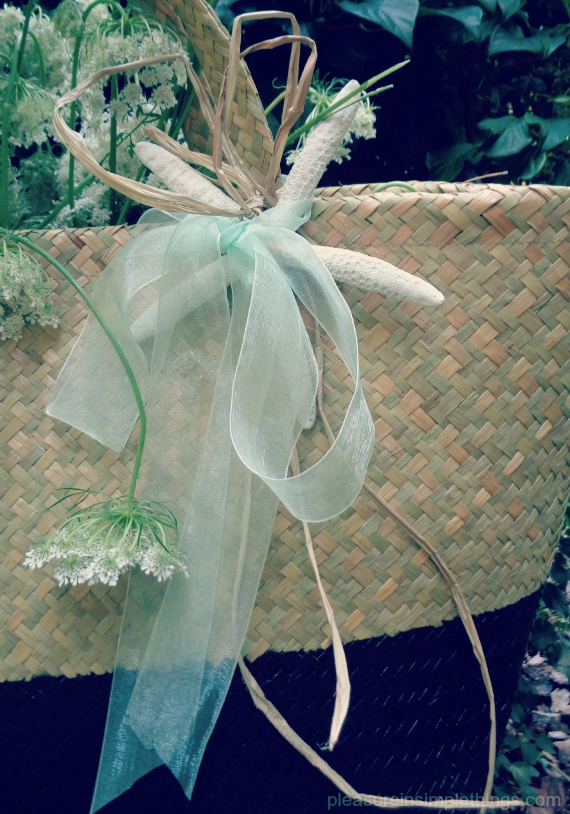
diy tote bag with starfish pleasure in simple things blog

Links to 5 other DIY projects using Plasti Dip:  Color dipped wooden spoons, On pumpkins, Napkin Rings, Nautical necklace, Seafood swag

Thanks so much for stopping by! Remember to take pleasure in simple things, Jackie

Sharing with The Shabby Nest, French Country CottageSand & Sisal, Coastal Charm.

Comments Off on diy rubber bottomed tote bag | diy, gift ideas, inspiration

seafood swag

2
July

diy seafood forks

You may already know that I am a big Plasti Dip fan from my wooden spoon tutorial.  Today, I am going to show you how I used Plasti Dip to give an old set of seafood forks new life by putting a colorful plastic coating on the handles. 

'before' seafood forks for Plasti DipI was lucky enough to be the recipient of an old set of seafood forks from my friend Terry…thanks again T ;)  If you don’t have a friend like mine to give you good stuff to recycle, you can head to a thrift store.  The forks don’t need to match since the color you choose for the Plasti Dip will tie the set together.

I wanted my seafood fork set for eating shellfish on the beach and decided on royal blue for my Plasti Dip color.  Following the directions on the ‘Make Your Own Color Kit’, I used blue and a little bit of black to mix the color I wanted. 

eating shellfish at the beach

DIY seafood forks

Plasti Dip is very easy to use.  You can follow my spoon tutorial if you need some instruction.  In the same way that I dipped the wooden spoons, I dipped each seafood fork into the Plasti Dip.  Easy! 

revamped seafood forks

After allowing for drying time, my forks are ready to use!

seafood fork DIY

Now I have a colorful supply of seafood forks that I love!  Mussels anyone?

shellfish on the sand

Thanks so much for visiting!

Remember to take pleasure in simple things, Jackie  Be sure to ‘like’ my facebook page and follow on Instagram to share more summer photos!

Sharing at Coastal Charm.

6 comments » | diy, food & festivities, sand & sea

Back to top