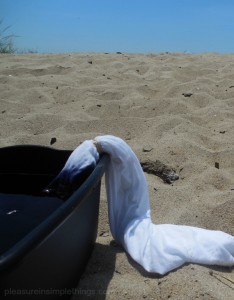
Happy Fourth my friends! For Friday field trip today, I am taking you to the beach to show you my summer shirt creations made to wear to today’s neighborhood parade and party on the beach!
Tie-dye is the perfect beach craft – not only because it is fun, but because as a beach activity, there is very little mess or clean up.
Both experienced and first-time tie-dyers enjoy making their own patriotic creations!
If you want to hold your own patriotic tie-dye session, not much is needed to have a really fun time that produces some great results!
Patriotic Tie-Dye Supplies
- 1 bottle Rit Liquid Dye (8 oz.) in navy blue
- 1 bottle Rit Liquid Dye (8 oz.) in cherry red
- Rubber bands
- 2 cups salt
- All cotton tee shirts
- 2 plastic dish pails (each large enough to accommodate 3 gallons of water)
- Rubber gloves to protect hands from dye (optional, but recommended)
The most economical way to purchase shirts is to choose (all cotton) shirts in multiple packs at a discount store. But, you don’t necessarily need to purchase shirts – you can use some shirts or other articles you already own! (It is fine to use a white shirt with writing…maybe a tie-dyed version of a shirt from your alma mater!) Another option, if purchasing shirts is not in your budget, is to simply ask your guests to bring their own!
As everyone gets wrapped up in the excitement of the activity, it is inevitable at our house that one of the kids raids their sock or underwear drawer to add some extra articles of clothing to the mix…old pillowcases and sheets are also fair game!
First, be sure to wet the articles of clothing you intend to dye and wring out excess water in preparation for dyeing…this produces the best results.
The next step is to add  the elastics. The elastics prevent the dye from getting to the part of the shirt they are attached to, so be sure to make them tight! There are so many variations of designs that can be created. Even experienced tie-dyers come up with new designs… If you are at a loss for ideas, you can use an online resource to find suggestions for applying elastics for specific designs. We like to just wing it and see what results!
After the shirts are prepared with the elastics, prepare the dye baths. I prefer liquid dye and I use it double strength. For each color, first dissolve 1 cup of salt (it helps better set the dye) in 3 gallons of hot water before mixing in an 8 oz. bottle of liquid dye.
As far as the actual dyeing, like Easter eggs, everyone comes up with their own favorite technique. That may be leaving the entire piece in one color…it may be dipping various parts of the shirt in each color, etc. Dip or submerge your shirt into the desired color(s) and have fun! The longer the piece remains in the dye, the stronger the color.
When you are done, squeeze the excess dye from the finished product and rinse with cold water from the hose until the runoff runs clear. Cold saltwater helps set the color, so we end the process by throwing the item into the ocean!
Now to remove the elastics…this is the best part! Everyone loves pulling off the elastics after the dyeing process to proudly admire the final results! And, every shirt looks so good…it is impossible to mess up a shirt – every one looks super!
You now have a tee in patriotic colors! Enjoy!
After the shirt is dry, you can further embellish it with fabric paint – In the past, I have used silver metallic puffy fabric paint to add stars to a 4th of July tee.
Thanks for stopping by and I hope today’s field trip will inspire you to hold a tie-dying session of your own!
Have a wonderful weekend! Remember to take pleasure in simple things, Jackie
Sharing with Silver Pennies, Coastal Charm, and Sand & Sisal.


