Subscribe to Pleasure in Simple Things via RSS ReaderFollow Pleasure in Simple Things on InstagramFollow @InSimpleThings on TwitterLike Pleasure In Simple Things on FacebookFollow Pleasure In Simple Things on PinterestEmail Jackie

Tag: ikea


my ‘punny’ valentine diy

3
February

candy pun diy pleasure in simple things blog

The valentine season is not complete for me without at least one ‘punny’ candy gift!

I am sharing one from this year on today’s Friday field trip!

Here is my package candy topper for some gummy eggs!  The candy came from Ikea’s candy bins…they have some cute, pun-worthy selections!

Egg Candy valentine pleasure in simple things blog

I created my topper, sizing the image 1200 x 1800 pixels.  Then, I printed it four times on a sheet of 8 ½” x 11” card stock.  Next, I attached the topper to a plastic bag of candy.  For fun, I packaged some up in a mini frying pan…so cute, right?

candy egg pun diy pleasure in simple things blog

I hope I have inspired you to create a ‘punny’ candy topper or tag of your own!

candy valentine diy pleasure in simple things blog

If you’d like my egg topper image, just shoot me an email and I will email it to you.  This candy also works well with ‘don’t yolk with me’ or anything about being ‘egg-static!’

candy pun valentine diy pleasure in simple things blog

For more detailed assembly instructions for toppers or some additional ideas for puns, you may like:

  • To use with candy chalk, click here (printable included).
  • To use with candy lips, click here (printable included).
  • To use with candy olives, click here.
  • To use with candy sharks, click here (printable included).

Have a wonderful weekend!  Remember to take pleasure in simple things…like a good pun!  xo Jackie

Comments Off on my ‘punny’ valentine diy | diy, food & festivities, holiday, inspiration

free candy valentine printables

26
January

valentine candy toppers pleasure in simple things blog

I promised some free valentine printables and I always follow through on my promises! Today, I am sharing two cute toppers I created for Valentine’s Day treats.

Printed on card stock, they can be cut out (four to a page), folded, and stapled to a cellophane bag filled with Valentine’s Day candy for a fun surprise gift!

free valentine printables pleasure in simple things blog

I created two designs. Both of my designs were inspired by the candy bar at Ikea! Have you seen the candy by the pound at your local store? I fell in love with the look (and taste) of the licorice candies that looked exactly like a piece of chalk – to me anyway! How perfect for a cute pun! So, I came up with these chalkboard looking toppers…

valentine candy packs with printables pleasure in simple things blog

Aren’t they perfect?  Click here to download the printable.

My second design inspiration came from the gummy lips at the Ikea candy bar. Of course, candy gummy lips just scream Valentine’s Day! For these, I used a “kisses” topper. With this topper, if you can’t find gummy lips, you can always use candy kisses.  Click here to download the printable. (As I often do, ir you prefer, you can substitute the staples for two punched holes and ribbon.)

candy lips printable pleasure in simple things blog

On both designs, I left room on the back to write a “to” and “from.”

front and back of lips print valentine pleasure in simple things blogI plan on creating one more design for a candy topper that is a little more “adult” ;) in theme – I will share that one next Tuesday.

I hope I have inspired you to create some candy Valentine’s Day gifts!

Thanks for stopping by. Remember to take pleasure in simple things, Jackie

Comments Off on free candy valentine printables | diy, holiday, inspiration

driftwood trinket dish diy

24
February

diy trinket dish for $3.99 pleasure in simple things blog

I will let you in on a little secret. Well, I don’t know if it is actually a secret since I am sure many others have discovered this wonderful little tidbit. Are you ready?

IKEA sells a 6” x 6” candle tray for $3.99. It is a beautifully simple, white ceramic square tray and has four protective rubber feet on the bottom. Why is this a wonderful tidbit?

easy to make trinket dish pleasure in simple things blogThis candle tray makes the best trinket dish ever! At only $3.99, it is perfect to create a beautiful – yet quick, easy and inexpensive – trinket dish!

ikea candle tray to trinket dish pleasure in simple things blog

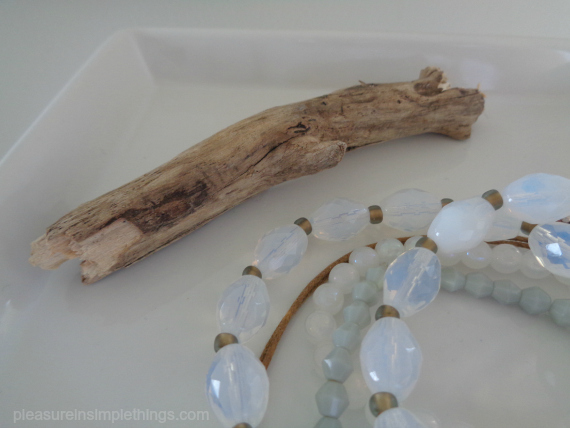
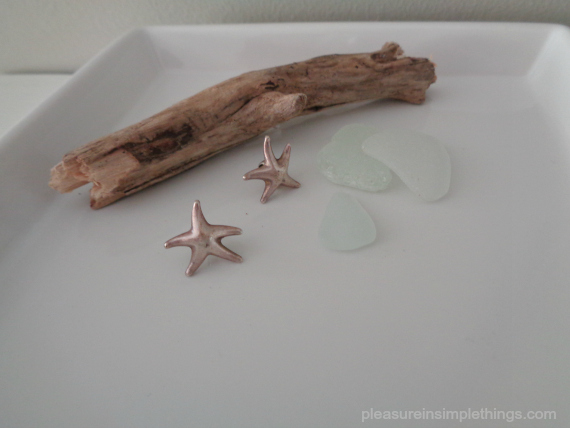
As a decorative addition to my dish, I chose an interesting piece of driftwood, approximately 4” long, from my collection of driftwood pieces. Because of the porous nature of the driftwood, I chose to use caulk as an adhesive to mount the driftwood to the tray. If you use a decorative addition made of a different material, be sure to consider the item you are adding when choosing a glue. For the most part, E6000 glue or Gorilla glue is probably the best choice of adhesive. (Be sure to follow directions carefully.)

driftwood trinket tray diy from pleasure in simple things blog

Why driftwood? I have something of a collection of trinket dishes with a nautical theme and a piece of driftwood coordinates great with my bedroom décor. I love the simple white dish with an interesting (aren’t they all?) piece of driftwood from my favorite beach!

driftwood diy trinket dish pleasure in simple things blog
The driftwood can easily be substituted for something that coordinates with your décor or the décor of the recipient – if the dish is a gift. You can pretty much add any embellishment that hits your fancy…just glue it down with good, strong glue and you are good to go!

diy trinket dish from ikea candle tray pleasure in simple things blog

I have made so many different variations of this trinket dish! Ideas include spray painted animals or figures, cars (think Father’s Day), or natural elements. If you are stumped, shoot me an email and I will help with ideas! Have fun with it!

diy trinket dish from IKEA tray pleasure in simple things blog

Thanks so much for stopping by!

Remember to take pleasure in simple things, Jackie

Sharing at Sand & Sisal, Shabby Nest, House of Hipsters, Nancherrow, and Thoughts from Alice.

1 comment » | diy, gift ideas, sand & sea

diy ornament from ikea heart

13
November

diy ornament

I found this three pack of glass heart ornaments at IKEA for $5.99.  Boy, did that get my holiday spirit in full swing!  It was tough to limit myself to one package…but,  I did.  My initial intent was to monogram an initial on the front…very simple, very elegant.  But, I ended up changing my mind as I got going.

ikea ornament

First off, I removed the ribbons – red and white gingham is just not my thing… I decided to use some scraps of paper I had with some (French?) writing…it seemed romantic and the perfect thing to combine with a heart.  I cut the paper to the size of the heart.  I then brushed Mod Podge on the right side of the paper and adhered it to the glass.  When it dried, I wrote my (romantic) message on the back with a super fine permanent marker and brushed Mod Podge over it to protect it.

diy ornament

Next, I embellished the heart with a little key and some sparkle.  There are many ways to go with decorative touches, but I thought the key went so well with the heart and the romantic theme.  I used old twine to tie the key onto the ornament and used my glue gun to add a little piece of glittery twig.

diy ornament

A photo of my completed ornament crafted from an IKEA glass heart ornament.

Lastly, I tied on my own piece of ribbon to replace the gingham.  I have plenty of various ribbons, but I really liked the look of the seam binding…it is actually white seam binding that I had coffee stained to look less white and more ‘antiquey’.  That’s it!

diy ornament

For the second heart, I also decided to use paper with script writing.  For the third, I used an old book page that I first rubber stamped with a crown.

diy ornament


diy ornament

There are so many ways to adorn these beautiful (and affordable!) glass hearts, and making ornaments is a great way to use scraps of paper and ribbon you may have left over from other projects.  Nostalgic black and white photographs would also work really well.  Wouldn’t these ornaments also make great shower or wedding favors?  Or, to give as a great ‘first home’ or ‘first holiday together’ ornament?

diy ornament

This is just one of the many ways to use this item…and there are many more great items for holiday gift creations at IKEA.  I have a few more IKEA projects in mind.  If you live near an IKEA, I suggest a trip…it will definitely spark some creative ideas!  I hope you enjoyed this ornament diy.  This is my first official ornament creation for 2012!

diy ornament

Thanks so much for visiting!  Take pleasure in simple things, Jackie

3 comments » | diy

Back to top