Subscribe to Pleasure in Simple Things via RSS ReaderFollow Pleasure in Simple Things on InstagramFollow @InSimpleThings on TwitterLike Pleasure In Simple Things on FacebookFollow Pleasure In Simple Things on PinterestEmail Jackie

Tag: holiday


diy feather ornaments

16
December

white feather glitter ornament pleasure in simple things blog

It is hard to believe Christmas is only a little over a week away! But, there is still some time to make some ornaments as gifts. I am sharing two easy DIY ideas on making feather ornaments. A woodland holiday theme needs to include feathers, nests, and birds – don’t you think?

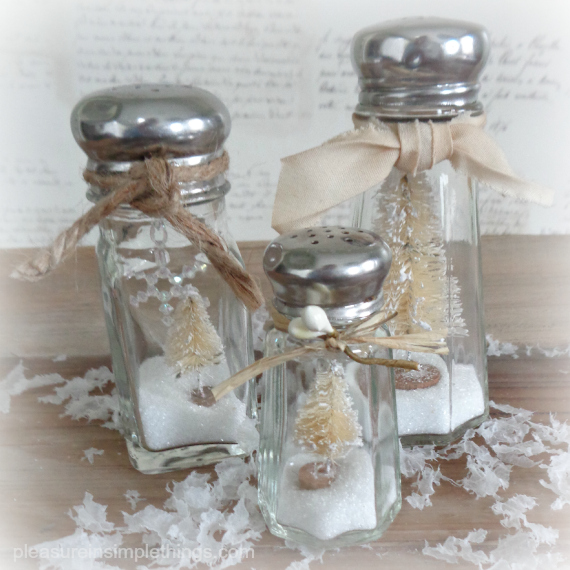
One way is to put a feather or feathers into a clear hollow glass ornament. I did this in three different variations this year:

1.  I used a clear drying glue to add silver glass glitter to the outside bottom of the glass globe and added a spotted feather inside the globe.

dotted feather ornament pleasure in simple things blog

2.  I used a cotton swab to add dots of clear drying glue and glued white glass glitter to the dots. When dry, I added a white feather and a pinch of silver glitter inside the globe.

white dot and feather ornament pleausre in simple things blog

3.  I dipped two feathers into some silver glass glitter before placing them into the globe. To keep them positioned correctly, I used a glue gun to glue the tops of the feathers near the top of the ornament. This doesn’t show, because the place where the feathers are glued is covered when the metal piece for hanging the ornament is repositioned on the ornament top.

close ups of glitter feather ornaments pleasure in simple things blog

The second way isn’t using an actual feather, but rather… using heavyweight cardboard to create a feather design. Simply draw or trace a feather onto cardboard (I made mine black for purposes of demonstration – it is best to use the same color as your glitter so a different color will not show through). Cut out the feather shape using a craft knife and cut a hole for adding a string or ribbon. Use clear drying glue to cover the cardboard with glass glitter – one side at a time.

process of making a feather glitter ornament pleasure in simple things blog

Add a ribbon or string for hanging. I used black and white baker’s twine because I am giving my feather ornament as a gift, and the black and white color scheme best reflects the taste of the recipient.

packaged feather ornament pleasure in simple things blog

I decided to package it with a favorite Emily Dickinson quote. I used my computer printer to print the quote onto a clear label and used the label to seal the ornament in a clear cellophane bag. I think it makes a thoughtful gift.

emily dickinson quote pleasure in simple things blog

I hope these ideas have inspired you to create some ornaments using feathers.  Have fun with it!

Thanks for stopping by!  Remember to take pleasure in simple things, Jackie

Sharing at Elizabeth & Co., Sand & Sisal, and Coastal Charm.

Comments Off on diy feather ornaments | diy, gift ideas, holiday

salt shaker snow globes

12
December

Salt Shaker Snow Globes pleasure in simple things blog

With the current bottle and jar love I have going on for my holiday décor, this post should not surprise you!

Remember a few years ago when Anthropologie carried salt shakers with little trees in them?  Many crafters were inspired by this cute idea and I saw a number of versions created soon after the little beauties hit the Anthro stores.

Salt Shaker Snow Globes pleasure in simple things blog

I didn’t hop on that bandwagon and create a batch of salt shaker inspired items back then. That changed recently when I inherited quite an extensive salt shaker collection…(don’t ask – that interesting story is for another post!)

So, now in possession of so many salt shakers, I was prompted to create some salt shaker ‘snow globes’ and I am sharing some of my creations on Friday field trip today.  (Okay, so technically they are not snow globes since I haven’t added water.)

Salt Shaker Snow Globes pleasure in simple things blog

And, because of my preference for neutrals, I made my salt shaker snow globes with natural bottle brush trees.  I just added a little ‘snow’ and a tree to make a wonderful little favor or piece of holiday décor. (My recent inheritance gives me enough salt shakers to fill a mantle a couple of times over!)

Salt shakers are easily found at thrift stores or can be purchased very inexpensively at restaurant supply stores. Cute, aren’t they?

Salt Shaker Snow Globe with snowflake  pleasure in simple things blog

The best thing about them is that each creator can add a personal touch by choosing a favorite tree and ribbon or embellishment. For example, in one of my creations, I hung a little snowflake from a piece of thread. The variations are obviously endless!  Create something that matches your decor.  The stainless tops to the shakers can easily be spray painted with an oiled bronze or rusty look finish if that is your preference…or, spray in a glossy red or green!  You can also tie on a rusty jingle bell or other favorite item around the top of the shaker.  Or, glue a little ornament to the tree like I did with the Santa ornament my friend Phyllis gave me below. ;)  Group a bunch together and add some lights for a wonderful glow! :)

Salt Shaker Snow Globes and light pleasure in simple things blog

I hope I inspired you to create some salt shaker snow globes that coordinate with your individual taste and décor.  You don’t even have to ‘hold the salt’ – you can use it for the ‘snow!’

santa salt shaker snow globe pleasure in simple things blog

Thanks so much for stopping by. Remember to take pleasure in simple things, Jackie

Sharing at Thoughts from Alice, Finding Silver PenniesHouse of HipstersCoastal Charm, Crafts a la Mode, Shabby Nest, French Country Cottage, and Craftberry Bush.

10 comments » | diy, holiday, inspiration

shop hop 2014

5
December

putting together lunch for Shop Hop 2014 pleasure in simple things blog

Planning a shopping day filled with holiday inspiration with friends – what could be better?  Today’s Friday field trip is a special seasonal road trip to visit shops across Connecticut.

holiday shop hop 2014 pleasure in simple things blog

I made a holiday music CD for the car (actually my son made it, but hey –it was my idea!), decided on a box lunch menu (don’t want a restaurant lunch to slow us down!), and planned an itinerary for Shop Hop 2014!  The destinations?  Well, these are a surprise…but, I will share them with you in this post!

photos of Grace in Niantic pleasure in simple things blog

Shop Hop invitations are sent out in advance – promising a day of friendship and inspiration touring favorite shops in Connecticut. My 2014 ‘south central’ edition is spanning four counties in Connecticut – all easily accessible by highway I95. (I am including my hop locations in this post in the event you live in Connecticut and would like to replicate my hop.) Be sure to like my Facebook page by clicking here, so you can see a gallery of photos from each of the hop locations and share some of the inspiration – even if you don’t live in Connecticut!

photos from Taken for Granite pleasure in simple things blog

This is how our day goes… I pick up the gals at a designated location in the morning. They are not informed of our predetermined shop locations. ..makes it so much more fun this way! (For the most part, Shop Hop locations are best as isolated areas…save your clusters of stores in a town or a favorite local spot, for a day all on its own.)

Christmas at Terrain pleasure in simple things blog

A Christmas CD sets the holiday mood…this year, it was definitely a very eclectic mix! Click the three links below to hear three of this year’s selections:

This is my very favorite Christmas song by my very favorite entertainer.
Do you remember which recent fun holiday movie featured a version of this song?
Got to love my son’s sense of humor on this one!

2014 shop hop no 299 pleasure in simple things blog

A box lunch is the best way to avoid schedule interruptions. Believe me, this is for the best! A restaurant lunch wastes far too much precious time better devoted to inspirational adventures! Just be sure to use a cooler if you pack anything perishable!  I packed mine in take out containers and added a label on the outside that I cut from chalkboard contact paper.  A selection of flavored waters and ice tea rounded out the refreshments.  We can always pick up a hot tea or coffee on the road to go with our rosemary shortbread cookies. :)

boxed lunch for shop hop 2014 pleasure in simple things blog

For 2014, these are the five locations I chose for our hop:

Grace, 46 Pennsylvania Avenue, Niantic
Maynard Gardens Holiday Shop, 87 Ingham Hill Road, Old Saybrook
Taken for Granite, 409 Leetes Island Road, Branford
No. 299 Fairfield, 318 Villa Avenue, Fairfield
Terrain, 561 Post Road East, Westport

favors for Shop Hop 2014 pleasure in simple things blog


Lastly, I like to leave my friends with favors – what fun is a special event without favors!


We visited some beautiful shops, but spending the day with my friends was the special part of the day! :)

I hope you are inspired to plan your own Shop Hop! Feel free to send me an email if you have any questions or need suggestions. Have fun with it!

car at Grace in Niantic pleasure in simple things blog

Have a fabulous weekend filled with holiday inspiration, Jackie

P.S.  The movie was Elf.

Sharing with City Farmhouse, Coastal Charm, Crafts a la Mode, The Shabby Nest, and Craftberry Bush.

Comments Off on shop hop 2014 | field trips, holiday, inspiration

tiny houses diy advent calendar

18
November

advent calendar with birch log pleasure in simple things blog

I love Advent calendars!  Every year I end up making a least a couple!  I’m not one to make a hanging calendar…I much prefer the 3D variety.  The first one I am sharing with you this year uses a collection of simple paper houses.  (Last year I shared one made from baby food jars, remember?  Click here to see.)

advent calendar house plesure in simple things

I used white card stock to cut out a two piece house.  I had planned on using gray card stock for the roofs, to create a nice contrast against the white ‘snow,’ but since the copy center was out of gray, I ended up painting the white card stock gray for my roofs.  I used rubber stamps to add the numbers to the front of each house (and added a little glitter).  I then added glass glitter ‘snow’ to the roofs…

making an advent calendar with paper houses pleasure in simple things blog

You don’t need a mantel to display an Advent village…here is the village on a birch bark lined tray…

advent calendar houses on birch bark lined tray pleasure in simple things blog

Or – you can use any shelf, table, or little corner in your home to add these tiny houses.  To make them really magical, they need some snow and lights…don’t you think?

advent calendar village pleasure in simple things blog

I am keeping mine pretty simple…just the houses with some snow – and, to go with my woodland theme, I added a white birch log…

small house advent calendar pleasure in simple things blog

So easy and so pretty!  This is a wonderful project to create with children.  I have another Advent calendar in the works to share soon!

Thanks so much for stopping by!

Remember to take pleasure in simple things, Jackie

Sharing at Craftberry Bush,  Sand & Sisal, Thoughts From Alice, and Finding Silver Pennies.

4 comments » | diy, holiday, inspiration

diy tree in a bottle xmas ornament

11
November

 tree in a bottle ornament pleasure in simple things

Yes, I have admitted I am going through a little bit of a bottle obsession phase of late…creating holiday décor with little bottles has been really fun! Today, I am sharing a really easy DIY ‘tree in bottle’ Christmas ornament.

supplies for making a tree in the bottle ornament plesure in simple things blog

Like these Thanksgiving place card holders I shared, I used miniature bottles to create these tree ornaments. I have added a little ‘snow,’ and a miniature tree inside the corked bottle to create the cutest ornament!

supplies for a DIY tree in a bottle ornament pleasure in simple things blog

The little bottles and trees are easy to find in a craft or dollar store. I chose a natural colored bottle brush tree for my creation since I have a passion for neutrals. For the ‘snow,’ use your favorite glitter, salt, or artificial snow.

DIY holiday ornament pleasure in simple things blog

To be able to hang the ornament, I screwed a tiny screw eye into the cork and added a length of brown and white baker’s twine. (The screw eyes are easy to find in the hardware section of your local Home Depot – you can buy a package and will have enough to make several ornaments.)

tree in a bottle ornament pleasure in simple things blog

That, my friends, is it! Easy, right? And, so cute!

pleasure in simple things blog tree in a bottle ornament

I hope you enjoyed today’s easy Christmas ornament DIY.

Thanks so much for stopping by and remember to take pleasure in simple things, Jackie

Sharing with The Shabby Nest, Sand & Sisal, and Thoughts from Alice.

Comments Off on diy tree in a bottle xmas ornament | diy, holiday, inspiration

thanksgiving diy place card holders

4
November

DIY place card holder for your Thanksgiving table pleasure in simple things

So many things look so much cuter in miniature, don’t they? Today, I am showing you how to use a miniature bottle to create an easy DIY place card holder for your Thanksgiving table. Reminiscent of a fairy garden, these mushroom place card holders are refreshingly different than the standard turkey motif! A small piece of moss, a tiny faux mushroom, and some bendable wire are the only other supplies needed to create a little mushroom in a bottle…so small, and so adorable!

mushroom in a bottle place card holder pleasure in simple things

Small corked bottles are easy to find at a craft or dollar store. I found a great selection in the jewelry supply section of my local craft store. (They are also great for displaying small pieces of sea glass and hanging from a chain!)

making a Thanksgiving place card holder pleasure in simple things

Any little piece of moss will do inside the bottle…you may be able to find some outdoors. You won’t need much! Then, add your mushroom. If you have any trouble manipulating the mushroom into the bottle, try using a pair of tweezers.

DIY mushroom place card holder pleasure in simple thingsUse a small length of bendable wire – these come in many different finishes in the craft store – and shape a couple circles to use to position the place cards. Leave a little piece of the wire at the bottom to push into the cork stopper.

Now, just repeat the process for the number of place card holders you wish to make! They don’t all need to be the same exact size or shape.

Aren’t they adorable?

DIY thanksgiving place card holder pleasure in simple things

I hope you enjoyed this easy DIY for Thanksgiving place card holders. I can’t wait to share my Christmas version! I’ve been busy making holiday items using bottles and jar/containers…so much fun!

mushroom in a jar place card holder for Thanksgiving pleasure in simple things

Thanks for stopping by! Remember to take pleasure in simple things, Jackie

P.S. If you can’t give up on the turkey motif, you may also enjoy this cutie for your Thanksgiving table!

Sharing with Sand & Sisal, Elizabeth & Co., Coastal Charm, Finding Silver Pennies, Craftberry Bush, City Farmhouse, and Thoughts from Alice.

5 comments » | diy, food & festivities, holiday

christmas in october

24
October

brush trees terrain pleasure in simple things

Hi friends!  Earlier this week I shared my first Christmas post of the season with a gift tag tutorial.  Today, I am continuing the holiday spirit with a shopping trip!  Who doesn’t love a shopping trip, right!  For today’s Friday field trip, I am sharing some of the items I’ve seen on an early shopping trip and am excited about for the upcoming holiday season.  So, grab a cup of cocoa or tea on this cold, windy day and enjoy!

The first photo is one of some bottle trees at Terrain.  You probably already know of my love for Terrain.  This season, they are carrying bottle brush trees in many shades – including aqua and teal (did you see the photo on my Instagram?)…so exciting!  Another really cool item I saw in the Westport store, was a candleholder in the shape of a house and made of cinnamon bark…can’t you just imagine the smell when the candle is lit!?  I wish you had a scratch and sniff screen!

cinnamon bark house terrain pleasure in simple things

I also loved these cocktail napkins..so natural yet elegant!  Since there are only two Terrain stores in the country, you may not have the opportunity to shop this fabulous home and garden resource.  If not, take some time to check the website for some great holiday inspiration.

cocktail napkins terrain pleasure in simple things

Talking about inspiration…what about this chalkboard wrapping paper at Paper Source!  Definitely 50 feet of fun!

chalkboard wrapping paper source pleasure in simple things

Christmas always involves ornaments and I love looking at the variety of ornaments offered at each of my favorite stores throughout the holidays.  With my passion for typography, I could not ignore this stunner from Pottery Barn!  I want to hang them up in many word combinations…like fa la la and ho ho ho!

Initial Ornament pottery barn pleasure in simple things

I have been enarmored with this mistletoe ornament at Crate & Barrel for a couple of years now…so happy they are still offering it!  I love to put them on packages of bridal shower or engagement gifts…so lovely!

silver-mistletoe-ornament crate and barrel pleasure in simple things

I LOVE this Terrain ornament!  Any favorite dried flower can be added…from your own garden or from a special bouquet!  Even a lock of hair or small photo would be a great addition!

terrain ornament pleasure in simple things

Mercury glass votives are always a lovely way to add some sparkle during the holidays.  This year, Crate & Barrel not only offers some really inexpensive options, but has colors that remind me of the sea.  At only $4.95 each, you can create a pretty cluster at a reasonable price for a beautiful sea inspired glow.  :)  Also, be sure to check out their snowflake hurricanes.

mercury-turquoise-tealight-candleholder crate and barrel pleasure in simple things

Fresh flowers are great all the time, but at the holidays they are always a requirement.  Anthropologie has not yet put out their holiday merchandise, but I love these pinched vases as an artistic way to display a few beautiful blooms.

pinched glass vase anthro pleasure in simple things

Ballard Designs always offers some beautiful holiday items, and this year is no exception.  These gray and white antler totes really appeal to my neutral color passion!  The Suzanne Kasler collection this year also features bears in a gray tone.

Tote bag ballard designs pleasure in simple things

Christmas is always so very exciting for the children and it is wonderful to find great items for the kids (or the kids in us!) :)  This cookie stamp from Crate & Barrel is sure to leave a smile on the faces of the kids during a Christmas Eve cookie making session for Santa!

cat-baked-for-santa-cookie-stamp crate and barrel pleasure in simple things

Decorating the children’s rooms in a special way during the holiday is a great way to add to the excitement to the season.  This year, Garnet Hill  has a pattern called “North Pole” that is cheery and seasonal…

north pole sheets garnet hill pleasure in simple things

And, for the cutest little night light, how about this flameless squirrel candle from West Elm that can be used all year long!

west elm squirrel light pleasure in simple things

With all the shopping and decorating, a relaxing cup of tea is always in order during the holidays…even better in a pretty mug.  This monogrammed vine mug is from Terrain and oh, so pretty!  It would also make a great holiday gift for that special teacher!

vine mug terrain pleasure in simple things

The last item I am going to share is also from Terrain.  I love this inexpensive hanging zinc bucket as an alternative to a front door wreath!  Filled with greens or holly, it makes for a really interesting addition to the outdoor decor!  Don’t you love the dots!  It would also make a great indoor organizer for wrapping supplies.

zinc wall bucket terrain pleasure in simple things

So that is it for today’s Friday field trip!  I hope you enjoyed our little preseason holiday shopping trip!  There is so much more to explore as the stores start stocking up…let me know some of your favorites!!

Please note that none of the photos in this post were taken by me…they came from the respective store websites.

Have a wonderful weekend and remember to take pleasure in simple things, Jackie

Sharing at Shabby Nest.

1 comment » | field trips, gift ideas, holiday, inspiration

halloween treat boo box care package

17
October

a halloween care package ingredients for treats pleasure in simple things

Do you send Halloween care packages? For today’s Friday field trip, I am taking you into my kitchen to share a fun idea for your favorite college student or friend – a ‘boo box’ containing a kit to make pumpkin spice Rice Krispies treats! The box contains all the premeasured ingredients needed to create this favorite treat with my seasonal spin!

With all the ingredients to make pumpkin spice Rice Krispies treats measured out and ready to go, this kit is sure to be a hit! Once this package is received, a pan and a few tablespoons of butter is all that is required to make up a batch of tasty Halloween treats. Students can be very resourceful and will probably score the butter from the campus cafeteria …include a disposable foil pan in your kit if you think your student might not already have an appropriate pan.

a packaged marshmallow for a halloween care package pleasure in simple things

The ingredients are easily packaged right inside a cardboard mailing box. I line the inside of the box with bubble wrap before adding the bags of ingredients. Adding some extra Halloween fun to your mailing box is easy. Before packing up your kit, think about spray painting the entire inside of the mailing box black, gluing some spiders or creepy things inside, or adding some glow-in-the-dark paint! Some fake spider webs from the dollar store are also a nice touch!

care package for Halloween treats pleasure in simple things

Choosing a box that has a little extra space can provide the opportunity to include a few other Halloween surprises before mailing. (I noticed they make Solo cups in black or orange lol!) In my box I added some fun Halloween straws and some candy corn treat bags.

halloween fun pleasure in simple things

For my recipe, I used pumpkin spice Oreo cookies to add a seasonal taste to the treats. Oreos now come in so many flavors, it is easy to choose one that your recipient would enjoy. If you would rather not use the pumpkin spice flavored variety…maybe candy corn flavored cookies? If you prefer, you can substitute the cookie ingredient for a favorite candy of the recipient. (When the holidays approach, use this same recipe, switching up the cookie flavor to gingerbread or candy cane! )

halloween care package treat bags pleasure in simple things

As an option, add an additional ingredient bag(s) of chocolate chips for melting – a chocolate drizzle or zebra drizzle (regular and white chocolate) can be added to the top of the bars.

Be sure to include instructions and a personal note!

writing directions for a halloween care package pleasure in simple things

FOR YOUR BOX. Package the following ingredients, each in separate cellophane bags: 5 cups Rice Krispies cereal, 16 (crushed into crumbs) pumpkin spice flavored Oreos, and 10 oz. mini marshmallows. Note: you can choose to separate the cookie crumbs into 2 bags since some are for the bars and some are for garnish.

FOR YOUR WRITTEN DIRECTIONS FOR MAKING PUMPKIN SPICE TREATS. Melt 3 tablespoons of butter (not included in this package) over low heat. Add marshmallows and stir until completely melted. Remove from heat. Add cereal and 1 cup of cookie crumbs and stir to coat well. Press into 13 x 9 x 2 –inch pan coated with cooking spray or butter. Sprinkle remaining cookie crumbs on top. Cool. Cut into squares. ENJOY!

pumpkin spice rice krispie treat pleasure in simple things

Of course, you don’t need to send a ‘boo box’ to try the recipe! :)

Have a wonderful weekend! Remember to take pleasure in simple things, Jackie

Please note that I used Kellogg’s Rice Krispies and Nabisco Pumpkin Spice Oreos in this recipe.

Sharing with Finding Silver Pennies,  Craftberry Bush, Crafts a la Mode, and The Shabby Nest.

Comments Off on halloween treat boo box care package | diy, food & festivities, recipe

patriotic tie-dye on the beach

4
July

patriotic tees pleasure in simple things diy

Happy Fourth my friends!  For Friday field trip today, I am taking you to the beach to show you my summer shirt creations made to wear to today’s neighborhood parade and party on the beach!

Tie-dye is the perfect beach craft – not only because it is fun, but because as a beach activity, there is very little mess or clean up.

Both experienced and first-time tie-dyers enjoy making their own patriotic creations!

If you want to hold your own patriotic tie-dye session, not much is needed to have a really fun time that produces some great results!

patriotic tie=dye pleasure in simple things

Patriotic Tie-Dye Supplies

  • 1 bottle Rit Liquid Dye (8 oz.) in navy blue
  • 1 bottle Rit Liquid Dye (8 oz.) in cherry red
  • Rubber bands
  • 2 cups salt
  • All cotton tee shirts
  • 2 plastic dish pails (each large enough to accommodate 3 gallons of water)
  • Rubber gloves to protect hands from dye (optional, but recommended)

The most economical way to purchase shirts is to choose (all cotton) shirts in multiple packs at a discount store.  But, you don’t necessarily need to purchase shirts – you can use some shirts or other articles you already own!  (It is fine to use a white shirt with writing…maybe a tie-dyed version of a shirt from your alma mater!)  Another option, if purchasing shirts is not in your budget, is to simply ask your guests to bring their own!

tie-dye on the beach pleasure in simple things

As everyone gets wrapped up in the excitement of the activity, it is inevitable at our house that one of the kids raids their sock or underwear drawer to add some extra articles of clothing to the mix…old pillowcases and sheets are also fair game!

beach tie-dye pleasure in simple things

First, be sure to wet the articles of clothing you intend to dye and wring out excess water in preparation for dyeing…this produces the best results.

The next step is to add tie-dyeing at the beach pleasure in simple thingsthe elastics.   The elastics prevent the dye from getting to the part of the shirt they are attached to, so be sure to make them tight!  There are so many variations of designs that can be created.  Even experienced tie-dyers come up with new designs… If you are at a loss for ideas, you can use an online resource to find suggestions for applying elastics for specific designs.  We like to just wing it and see what results!

After the shirts are prepared with the elastics, prepare the dye baths.  I prefer liquid dye and I use it double strength.  For each color, first dissolve 1 cup of salt (it helps better set the dye) in 3 gallons of hot water before mixing in an 8 oz. bottle of liquid dye.

tie-dye on the beach pleasure in simple things

As far as the actual dyeing, like Easter eggs, everyone comes up with their own favorite technique.  That may be leaving the entire piece in one color…it may be dipping various parts of the shirt in each color, etc.  Dip or submerge your shirt into the desired color(s) and have fun!  The longer the piece remains in the dye, the stronger the color.

patriotic tie-dye on the sand pleasure in simple things

When you are done, squeeze the excess dye from the finished product and rinse with cold water from the hose until the runoff runs clear.  Cold saltwater helps set the color, so we end the process by throwing the item into the ocean!

tie-dye at the beach pleasure in simple things

Now to remove the elastics…this is the best part!  Everyone loves pulling off the elastics after the dyeing process to proudly admire the final results!  And, every shirt looks so good…it is impossible to mess up a shirt – every one looks super!

You now have a tee in patriotic colors!  Enjoy!

After the shirt is dry, you can further embellish it with fabric paint – In the past, I have used silver metallic puffy fabric paint to add stars to a 4th of July tee.

tie-dye at the beach pleasure in simple things

Thanks for stopping by and I hope today’s field trip will inspire you to hold a tie-dying session of your own!

Have a wonderful weekend!  Remember to take pleasure in simple things, Jackie

Sharing with Silver Pennies, Coastal Charm, and Sand & Sisal.

Comments Off on patriotic tie-dye on the beach | diy, field trips, holiday, sand & sea

patriotic mason jars

17
June

patriotic mason jars pleasure in simple things

Annie Sloan Chalk Paint can be very dangerous.  Once you have some in the house, you can think of so many ways to use it!

patriotic mason jar with peony pleasure in simple things

Painting mason jars is nothing new, but since I had some leftover paint from my last furniture project, I thought I would share how I decided to paint some blue Ball jars to use at my 4th of July celebration at the beach.

patriotic mason jars pleasure in simple things

I liked the idea of using blue jars so that it would be possible to catch glimpses of the inside blue hues even after the jars were painted.

patriotic mason jars pleasure in simple things

I started by painting the outside of the jars with two coats of Paris Grey.  Then, after cutting a kitchen sponge into a star shape, sponged stars onto the jars using Primer Red.  I used some sandpaper to distress them a little bit and then gave them a coat of clear wax.

pleasure in simple things patriotic mason jars

For the one jar I wanted to use as a candleholder, I masked off a star shape (a little smaller than the size of the sponge star) before I started the painting process (also leaving the metal top ring screwed into place).  By masking off the star, the clear blue jar stayed clear in the masked area, enabling light from a candle to shine through.

patriotic mason jar candleholders

I finished them off by tying some twine around the tops of the jars.

patriotic mason jars

Fun and patriotic!  I will use them on the 4th to hold picnic utensils, but they will also be great all summer for flowers, candles, etc.

pleasure in simple things sparklers in a patriotic ball jar

Thanks for stopping by and remember to take pleasure in simple things, Jackie

Sharing at Shabby Nest, Craftberry Bush, and Finding Silver Pennies.

1 comment » | diy, food & festivities, holiday

Back to top