Subscribe to Pleasure in Simple Things via RSS ReaderFollow Pleasure in Simple Things on InstagramFollow @InSimpleThings on TwitterLike Pleasure In Simple Things on FacebookFollow Pleasure In Simple Things on PinterestEmail Jackie

Tag: Halloween


halloween fun 2024

25
October

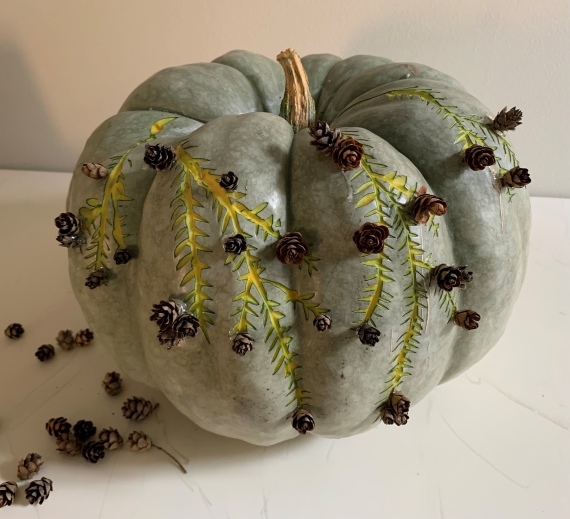
carved blue pumpkin

Although I’m not a big Halloween fan, I usually will carve a pumpkin or two – or, create something in the Halloween spirit.

evergreen

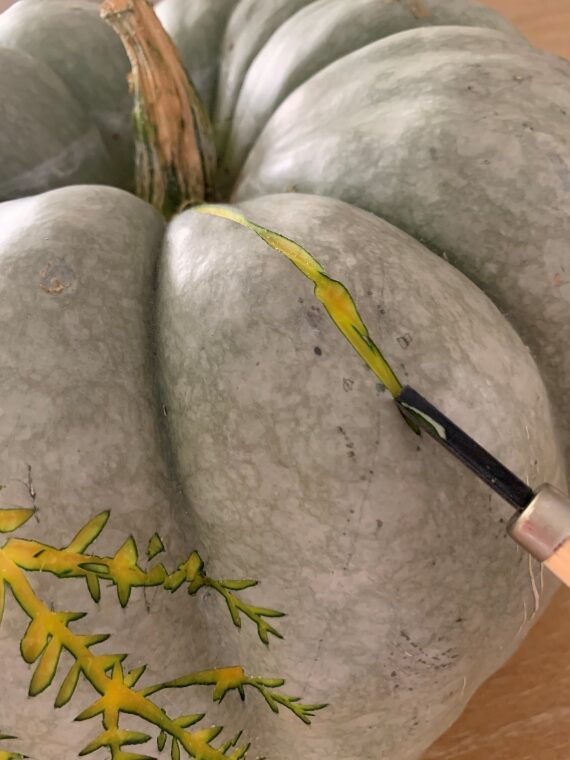
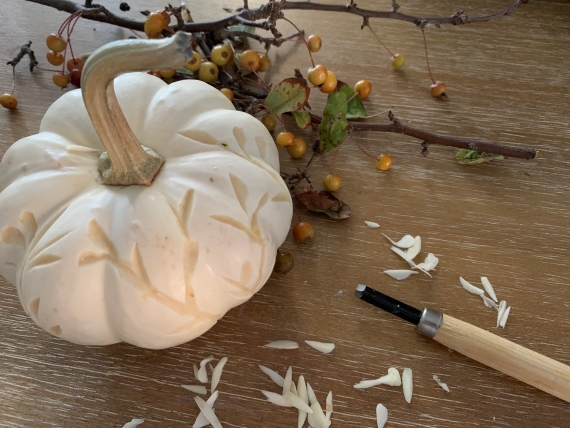
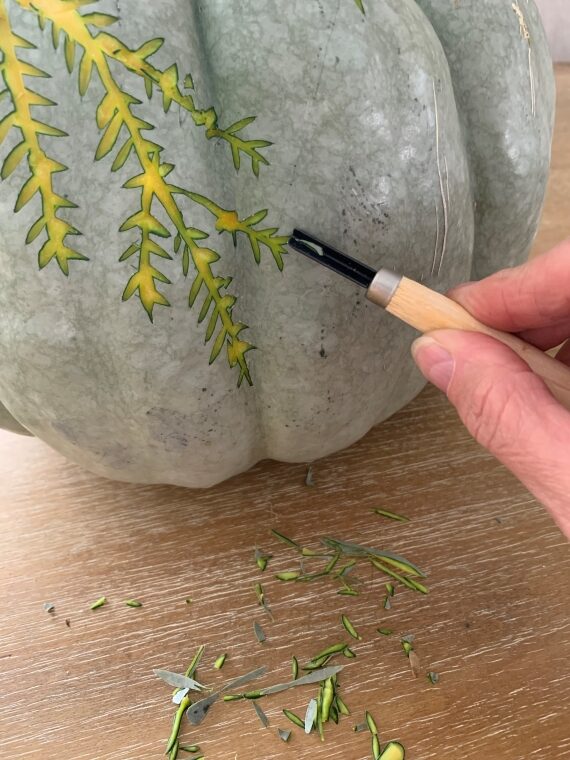
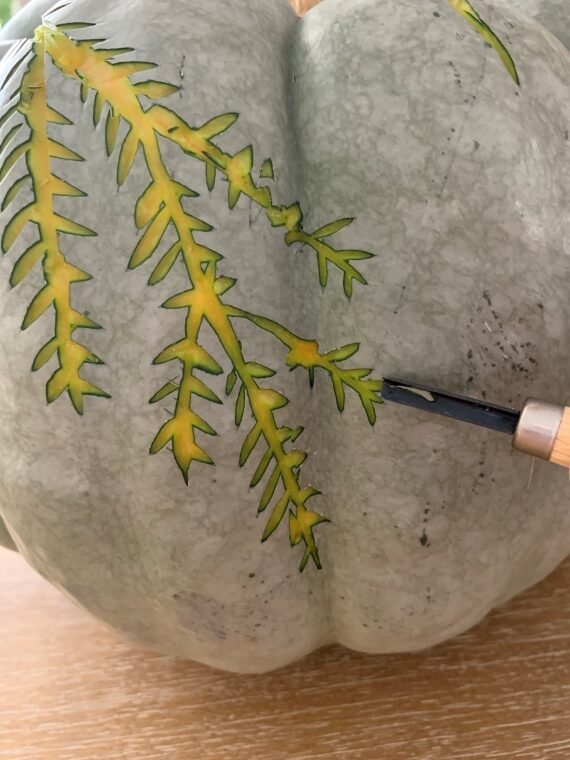
This year, my pumpkin was carved in a little less than traditional manner.  I used wood carving tools rather than a knife.  Carving in this manner is much easier and, I think, can be more interesting.

carving blue pumpkin

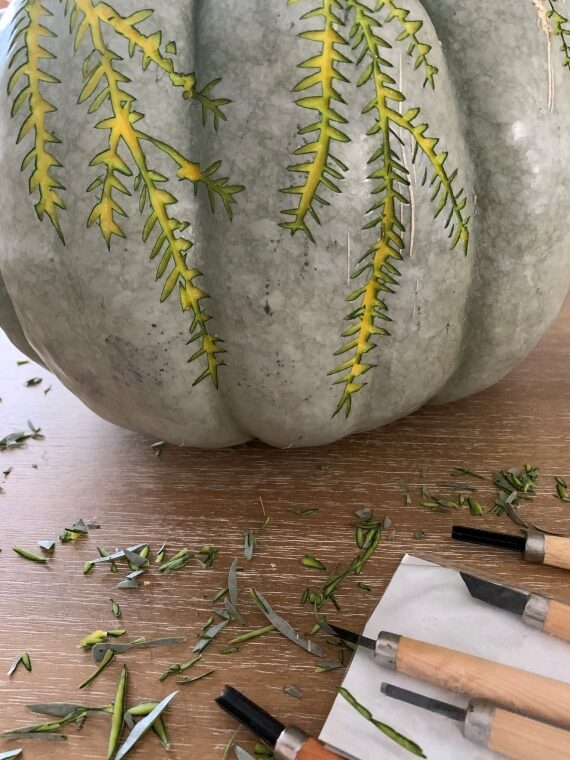
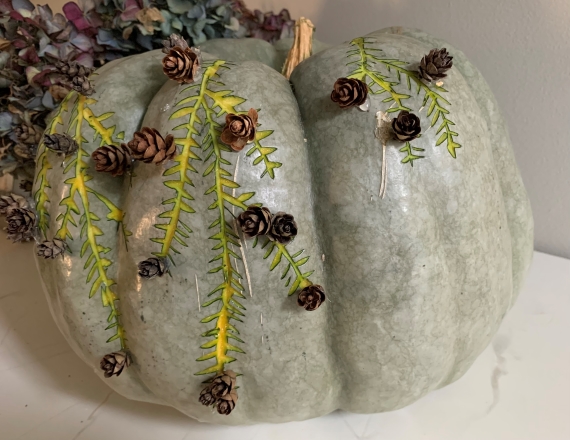
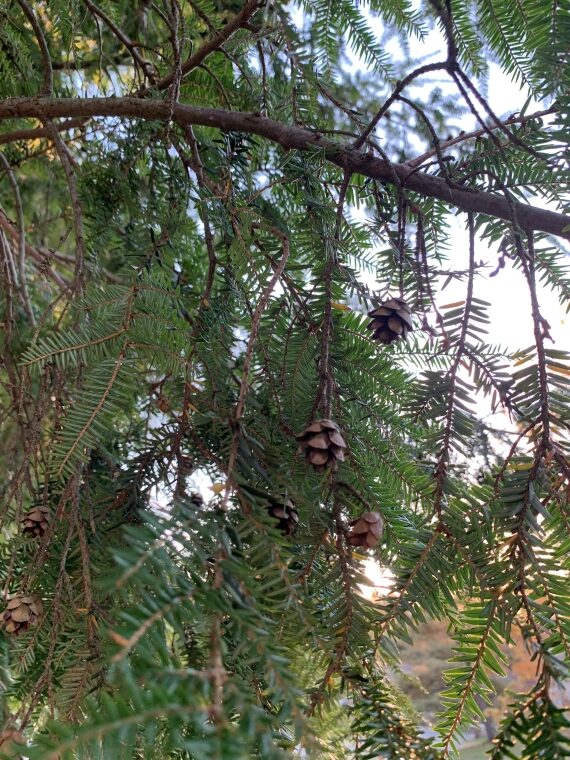
I was inspired by an evergreen tree in my yard.  The tree has the traditional needles and tons of little mini pine cones.  My idea was to carve the pumpkin with ‘needles’ and then add some of the pine cones from my tree.

carving pumpkin

I purchased what is called a blue pumpkin, rather than an orange one, to complete the task.  Because the blue heirloom pumpkin looked almost green, I thought it would work well as my ‘evergreen’ pumpkin.

pumpkin carving

blue pumpkin carving

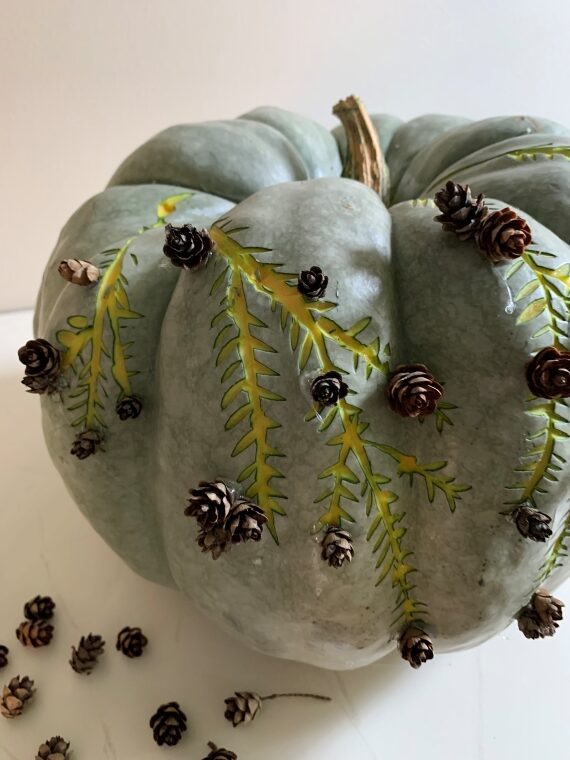
I used woodworking tools to carve the needles.  I had planned on adding the pine cones with straight pins, but I began to wonder if the pumpkin would not live as long with holes punched in it!  With this in mind, after I finished carving, I ended up using my glue gun to add the pine cones.

evergreen pumpkin

I have to say, using the woodworking tools is much easier on the hands than the traditional method of carving through the pumpkin with a knife!

pumpkin with pinecones

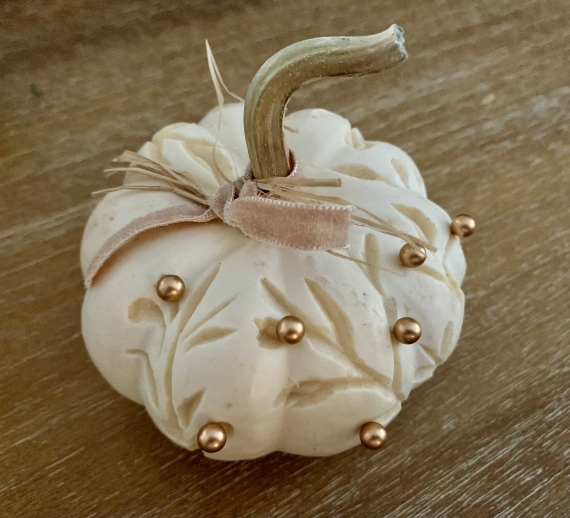
After I completed my pumpkin, I carved a few baby boos to use at place settings for an upcoming brunch.  I love little white baby boos!  I did a little bit of carving and added a ribbon.  I did end up adding some pins on these little guys – some pretty gold ones!

baby boo white carved

white baby boo

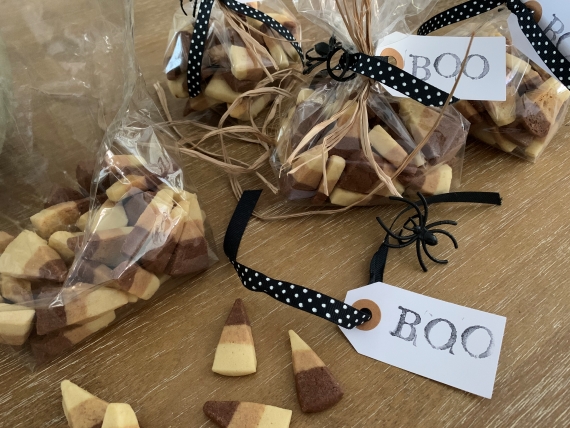
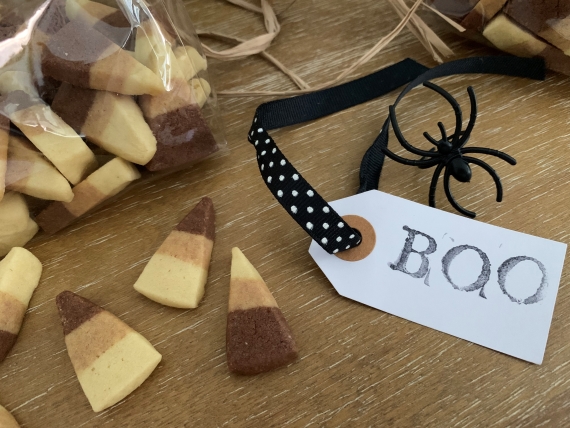
In the Halloween spirit, I also created some favors for my brunch.  I made some butter cookies in the shape of candy corn and packaged them in the holiday theme!  Why are they not the traditional yellow and orange?  Well, I made them totally organic – so I couldn’t use red dye!  I used organic cocoa to create color variations.

packaging candy corn

So, that’s the extent of my Halloween preparations!  I hope you are also creating something fun!

candy corn cookies

Thanks for stopping by!

Have a fabulous weekend and remember to take pleasure in simple things, Jackie

Comment » | diy, holiday

squash whisperer

30
October

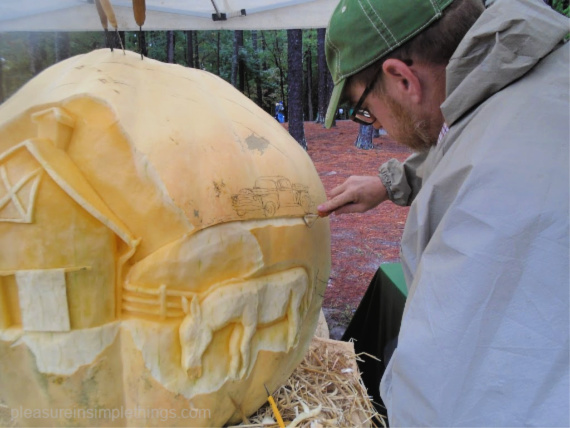
carving large squash

I am a little bit of a Food Network junkie.  There, I said it!  I admit it…when my TV is on for background noise, I have it tuned in to either HGTV or Food Network.

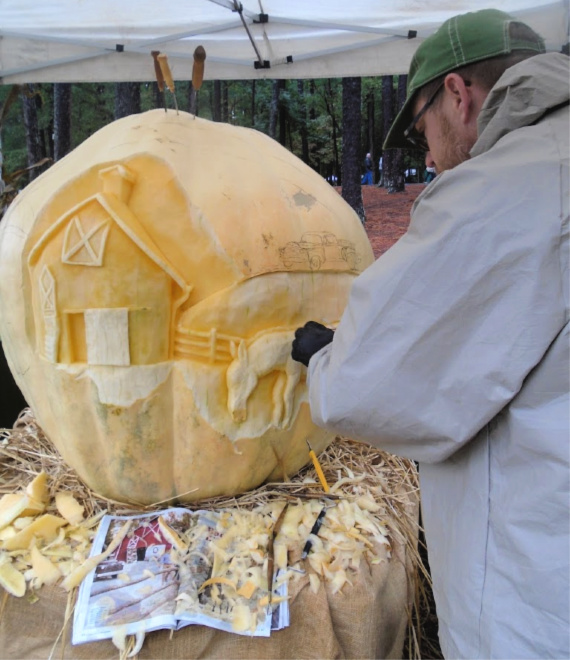
barn detail pumpkin

So, squash carver Gus Smithhisler is someone I have admired in the past.  His squash creations are pretty amazing and I love watching him carve.

gus master pumpkin carver

The process of creating a design in squash is really fun to watch and I was thrilled to get a chance to watch Gus in action!

Gus in squash process

Since it is Halloween week, in the spirit of the holiday, I’d like to share  photos of the pumpkin I watched Gus create.  He carved this design into a 600+ lb. pumpkin, not on “Halloween Wars,” but at this year’s Country Living Fair in Atlanta, Georgia.

final pumpkin

I hope Gus inspires you to step up your pumpkin carving game!

Thanks for stopping by!  Remember to take pleasure in simple things, Jackie
Comments Off on squash whisperer | garden

marbleizing baby boos

24
October

diy marbleizing pumpkins

The best part of October is getting creative with pumpkin decorating!  And, there are so many ways to do so!

Today, I just wanted to take a moment to share the simple technique for creating a marbleized pumpkin.  I thought most people had tried this technique by now, but if you haven’t – you need to!

A marbleized pumpkin is super easy to create.

baby boo and diy green marble

The only materials needed are some warm water, a bottle of nail polish, and a disposable container large enough to accommodate the pumpkin you are planning to marbleize.

I use a disposable container to make clean-up quick and easy and to avoid damage to a regular dish or bowl.  For mini pumpkins, a disposable foil lasagna pan is perfect.

Fill the container with warm water.  Drizzle some of the nail polish over the surface of the water by pouring it in a thin stream in an irregular pattern.  Not much is needed.

marbleizing pumpkin processHold a pumpkin by the stem and dip it into the water.  The nail polish will adhere to the pumpkin in an irregular pattern.  Twist the pumpkin while in the water to create varying patterns.  If you are not understanding how this could work, don’t worry!  After trying it with one pumpkin, you will experience an ‘aha’ moment.  After that one try, you may well be addicted to the process and its many possible outcomes!

some diy marbleized pumpkins

I like to use white pumpkins with a nail polish that coordinates with my décor.  The green I used on these pumpkins creates a look that looks great in my dining room amid my ferns!

Of course, dark colors look the most dramatic.  And, you can use more than one color on a single pumpkin if you’d like.

I hope I have inspired you to try marbleizing a pumpkin!

white baby boo green marbleizing

P.S.  There is a video in my Instagram feed and on my Facebook page if you’d like to see the green marbleized pumpkin creating in process!

Thanks for stopping by!

Remember to take pleasure in simple things, Jackie
Comments Off on marbleizing baby boos | diy, holiday, inspiration

halloween treat boo box care package

17
October

a halloween care package ingredients for treats pleasure in simple things

Do you send Halloween care packages? For today’s Friday field trip, I am taking you into my kitchen to share a fun idea for your favorite college student or friend – a ‘boo box’ containing a kit to make pumpkin spice Rice Krispies treats! The box contains all the premeasured ingredients needed to create this favorite treat with my seasonal spin!

With all the ingredients to make pumpkin spice Rice Krispies treats measured out and ready to go, this kit is sure to be a hit! Once this package is received, a pan and a few tablespoons of butter is all that is required to make up a batch of tasty Halloween treats. Students can be very resourceful and will probably score the butter from the campus cafeteria …include a disposable foil pan in your kit if you think your student might not already have an appropriate pan.

a packaged marshmallow for a halloween care package pleasure in simple things

The ingredients are easily packaged right inside a cardboard mailing box. I line the inside of the box with bubble wrap before adding the bags of ingredients. Adding some extra Halloween fun to your mailing box is easy. Before packing up your kit, think about spray painting the entire inside of the mailing box black, gluing some spiders or creepy things inside, or adding some glow-in-the-dark paint! Some fake spider webs from the dollar store are also a nice touch!

care package for Halloween treats pleasure in simple things

Choosing a box that has a little extra space can provide the opportunity to include a few other Halloween surprises before mailing. (I noticed they make Solo cups in black or orange lol!) In my box I added some fun Halloween straws and some candy corn treat bags.

halloween fun pleasure in simple things

For my recipe, I used pumpkin spice Oreo cookies to add a seasonal taste to the treats. Oreos now come in so many flavors, it is easy to choose one that your recipient would enjoy. If you would rather not use the pumpkin spice flavored variety…maybe candy corn flavored cookies? If you prefer, you can substitute the cookie ingredient for a favorite candy of the recipient. (When the holidays approach, use this same recipe, switching up the cookie flavor to gingerbread or candy cane! )

halloween care package treat bags pleasure in simple things

As an option, add an additional ingredient bag(s) of chocolate chips for melting – a chocolate drizzle or zebra drizzle (regular and white chocolate) can be added to the top of the bars.

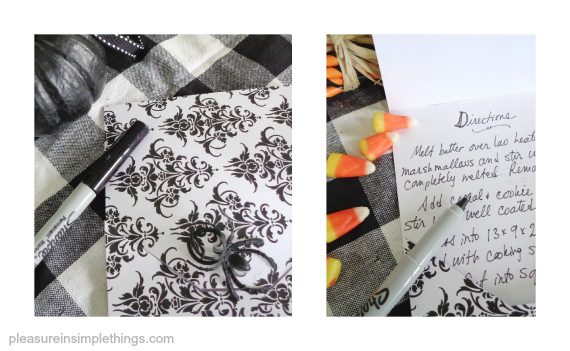
Be sure to include instructions and a personal note!

writing directions for a halloween care package pleasure in simple things

FOR YOUR BOX. Package the following ingredients, each in separate cellophane bags: 5 cups Rice Krispies cereal, 16 (crushed into crumbs) pumpkin spice flavored Oreos, and 10 oz. mini marshmallows. Note: you can choose to separate the cookie crumbs into 2 bags since some are for the bars and some are for garnish.

FOR YOUR WRITTEN DIRECTIONS FOR MAKING PUMPKIN SPICE TREATS. Melt 3 tablespoons of butter (not included in this package) over low heat. Add marshmallows and stir until completely melted. Remove from heat. Add cereal and 1 cup of cookie crumbs and stir to coat well. Press into 13 x 9 x 2 –inch pan coated with cooking spray or butter. Sprinkle remaining cookie crumbs on top. Cool. Cut into squares. ENJOY!

pumpkin spice rice krispie treat pleasure in simple things

Of course, you don’t need to send a ‘boo box’ to try the recipe! :)

Have a wonderful weekend! Remember to take pleasure in simple things, Jackie
Please note that I used Kellogg’s Rice Krispies and Nabisco Pumpkin Spice Oreos in this recipe.

Sharing with Finding Silver Pennies,  Craftberry Bush, Crafts a la Mode, and The Shabby Nest.

Comments Off on halloween treat boo box care package | diy, food & festivities, recipe

let’s give them pumpkin to talk about

3
October

candy corn white pumpkin pleasure in simple things

I am not big on Halloween decorations. As a rule, I don’t decorate with traditional Halloween colors because I love all things neutral. I gave you a taste of this last year when I shared with you some of my white Halloween decorations.

That doesn’t mean I don’t occasionally use other colors in my pumpkins…just to change things up a little. The velvet pumpkins I make each year have been created in most all colors.  Here is a recent batch from this year…

a cluster of green velvet pumpkins pleasure in simple things

But, for Friday field trip today, I am sharing a few pumpkins I created for my home that were inspired by Halloween candy…maybe it will spark some ideas for some pumpkins for your own home!

Even though I don’t normally decorate with black and orange, there is one Halloween color combination I do enjoy! I have used the iconic white, orange, and yellow colors of candy corn on everything and anything from treat bags to Jell-O! It is an instantly recognizable color combination that screams (pun intended) Halloween almost as much as a pumpkin!  Using orange and yellow paint, it is easy to create a mini ‘candy corn’ white pumpkin.

pumpkin fun with black and candy corn spoons pleasure in simple things

This year, the colors of candy corn also made it onto some disposable wooden spoons to make quick and easy fun dessert spoons.  I just added a little bit of paint and some dollar store spiders to create a whole lot of Halloween fun!

The other candy that inspired some pumpkin fun for me this year was black licorice. Inspired by this black treat, I created a few black pumpkins to use in vignettes throughout my home.

a black plasti dip pumpkin pleasure in simple things

My first, the one that really took on the look of licorice for me was painted with Plasti Dip. If you follow the blog, you know that I love Plasti Dip and use it in many different ways. (On wooden spoons or seafood forks to name two favorites!)  For my black ‘licorice’ pumpkin, I used the Plasti Dip in a spray can to create a shiny black finish…spooky!

 odd man out black plasti dip pumpkin pleasure in simple things

After creating that pumpkin, I started playing with some different textures in black.

a  black onyx sparkle pumpkin pleasure in simple things

For a glittering, sparkly pumpkin, I used Martha Stewart’s glitter in onyx…I think this little vignette using an Anthropologie planter and some black amaranthus creates a great Halloween feel.

While crafting some of my velvet pumpkins this year, I created some in black to add another texture to my collection of black pumpkins.

black velvet pumpkins pleasure in simple things

It is always so fun to try different ways to decorate pumpkins! I hope you enjoyed seeing a few of my candy inspired pumpkins for Halloween on Friday field trip today…I can’t wait for next week when I share some of this year’s neutral themed pumpkin designs!

fun with  pumpkins small black plastidip pumpkin pleasure in simple things

Thanks so much for stopping by! Have a fabulous weekend!

Remember to take pleasure in simple things, Jackie
Sharing at The Shabby NestCraftberry Bush, Crafts a la Mode, Nancherrow

4 comments » | diy, field trips, food & festivities

Back to top