Subscribe to Pleasure in Simple Things via RSS ReaderFollow Pleasure in Simple Things on InstagramFollow @InSimpleThings on TwitterLike Pleasure In Simple Things on FacebookFollow Pleasure In Simple Things on PinterestEmail Jackie

Tag: gift wrap


easy diy gingerbread gift wrap

2
December

gingerbread giftwrap diy

Hi!  I know it has been a minute…but, I’m happy today to have some time to show you a really simple, very low-cost way to wrap your holiday packages!  These DIY gingerbread gift tags are made from discarded cardboard and a marker!  So easy!

diy gingerbread giftwrap

If you don’t already have a white, oil-based marker or a white permanent chalkboard marker, purchase one from the craft store to complete this project.  If you want to make coordinating wrapping paper, purchasing kraft paper is not necessary – brown bags work just as well!  (Note:  Trader Joe’s holiday shopping bags work great since they already have a gingerbread house design on brown paper bags!)

neutral christmas

A pencil can be used to draw some basic shapes onto corrugated cardboard.  (There is certainly plenty of this around with all the holiday deliveries rolling in!)  Then, draw the shapes onto the cardboard using a white, oil-based marker and decorate them as you would gingerbread – except use a marker instead of royal icing!

easy diy holiday tags

When the drawings are completed, cut out the shapes and add a hole in the top for hanging.  Simple!

gingerbread house gift tag

To coordinate gift bags, just use the same white marker to add a blizzard of ‘snowflake’ dots.

Isn’t this a great project to do with children?  All their original drawings can easily be transformed into gingerbread gift tags!

holiday giftbag diy

Thanks for stopping by!  Have a great weekend!

Remember to take pleasure in simple things, Jackie

1 comment » | diy, holiday

putting it all together

22
December

packages for coastal christmas pleasure in simple things blog

I have started to wrap gifts and I am having some real fun – using beach totes, wicker baskets, and wooden trays to package and display gifts for my sea glass themed holiday!  I thought I would take a few quick minutes to show you how I am incorporating the things I have been making and sharing with you.

using feathers in wrapping pleasure in simple things blog

Remember the crab on the gift tag from this post?  He is looking good with my sea glass colored dotted wrapping paper. :)  And, the feather I made in this post is looking great with it as well!

relabeling bottles pleasure in simple things blog

The bottle labels I shared in this post are exactly what I needed to make the wine bottles for my table – as well as the ones I am giving as gifts – look right on theme!

coastal bottle wrapping pleasure in simple things blog

You can see that the sea glass tags I shared in this post look great as well!

feather wrapping pleasure in simple things blog

That is how I used some of my creations!  I so do love a good theme – and, it is so fun when everything starts coming together!  I have plenty more to do as I continue with my wrapping!  I will try and share more photos to Instagram and Facebook as I continue.  How are you doing with your wrapping?

sea glass christmas pleasure in simple things blog

Thanks for stopping by!  Remember to take pleasure in simple things, Jackie

Comments Off on putting it all together | diy, holiday, inspiration

a few more gift tags

15
December

making a crab gift tag pleasure in simple things blog

It is time to start wrapping gifts! I am way behind on my planned Thanksgiving weekend wrapping session!

I have all the supplies together. I made the sea glass gift tags and the painted metallic feathers to adorn my packages…But, wait…shouldn’t I have a couple sea creatures to add to the mix?

sparkly crab gift tag pleasure in simple things blog

I decided to make a couple more quick gift tags and they are super simple to create in no time flat!

For the crab, I used a teeny, tiny rubber stamp I found at the craft store. The size alone makes it super cute! I added it to card stock using an aqua colored ink stamp pad. To add the holiday sparkle, I just used a cotton swab to add a few dabs of aqua sparkle craft paint. Super easy and super cute!

crab gift tag supplies pleasure in simple things blog

The starfish gift tag took even less supplies to create than the crab gift tag. I used a light gray watercolor marker to draw a quick, free hand outline of a starfish. To this too, I added a few dabs of acrylic metallic craft paint to give it a little more bling!

starfish gift tag pleasure in simple things blog

Now I am content with my collection of gift tags for my sea glass holiday themed packages!

crab gift tag pleasure in simple things blog

Thanks for stopping by! Remember to take pleasure in simple things, Jackie

1 comment » | diy, inspiration, sand & sea

sea glass diy gift tags

11
December

sea glass gift tags pleasure in simple things blog

For Friday field trip today, we are visiting ‘gift wrap central’ where I designed some gift tags to go along with my sea glass holiday theme.

diy sea glass gift tags pleasure in simple things blog

I decided the perfect detail for my gift tags was grommets. Not only are they currently a big fashion trend, but they add a nice ‘beachy’ vibe to my tags!

grommets on gift tags pleasure in simple things blog

Since I was designing these gift tags myself, I wanted to make them unique. That was part of the reason I decided to make them a little different shape than a typical gift tag. I decided on long rectangles – cutting card stock into 1“ x 4 1/4“ strips.

holiday gift tags diy sea glass pleasure in simple things blog

After I cut the tags, I added the grommet detail. If you decide to make these – don’t be intimidated by the grommets! They come in 2 pieces and are easily applied using a simple 2-piece metal tool and a hammer. The grommets and tool are inexpensive and are available at any craft store. Believe me; once you apply your first grommet, you will come up with tons of applications!

making sea glass gift tags pleasure in simple things blog

I used twine on my tags to stay consistent with my theme. Lastly, I used a big dab of strong glue, careful not to let the glue show, to attach a small piece of sea glass to each tag. Pretty easy, right?

final sea glass gift tags pleasure in simple things blog

I love the way these tags came out! It makes me eager to get wrapping!

Thanks for stopping by! Remember to take pleasure in simple things, Jackie

1 comment » | diy, inspiration, sand & sea

anthro inspired holiday gift tag

21
October

finished holiday gift tag pleasure in simple things Anthro inspired

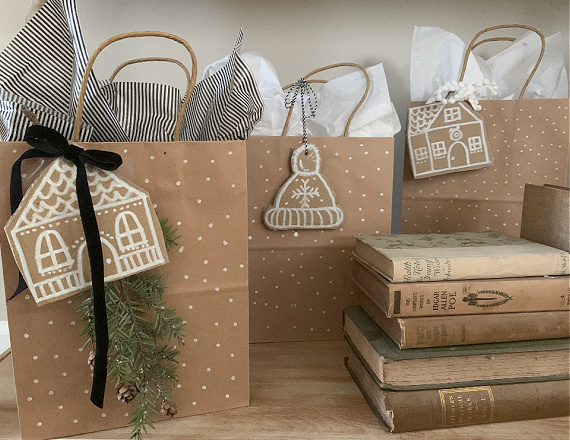
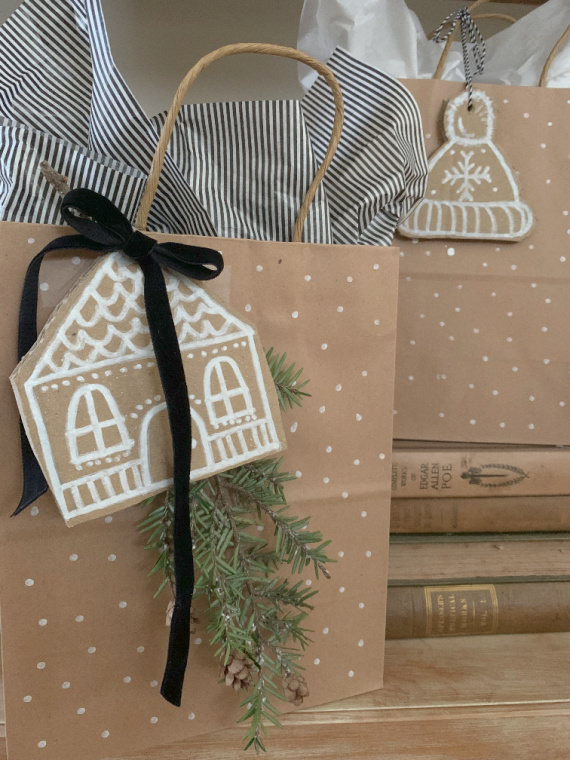
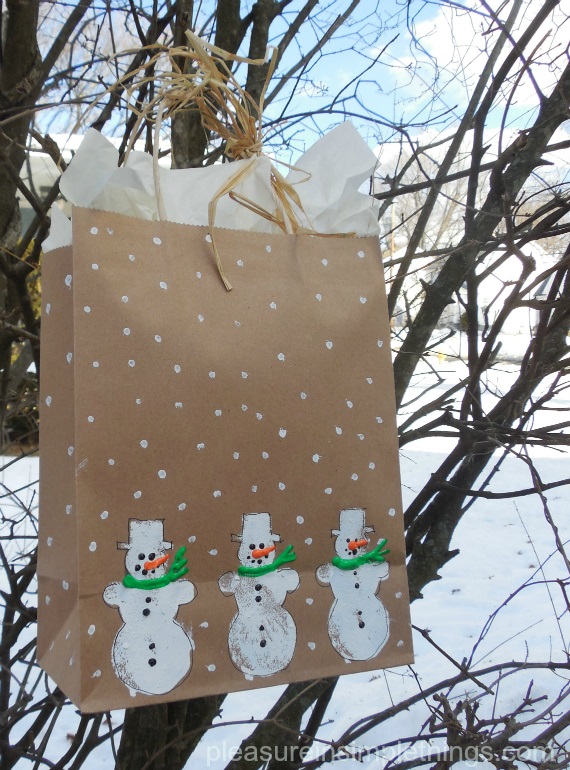
It is not even Halloween…why am I sharing a Christmas craft?  Well, we had a rainy weekend last weekend and I decided to make some gift tags for the holidays. Having some items prepared in advance definitely takes some of the pressure off come December! (Although, traditionally I have done my Christmas wrapping the day after Thanksgiving! I know – cringe worthy for any last minute types out there!)

supplies for holiday gift tag tutorial pleasure in simple things

Anthropologie always has such cute tie-ons as part of their holiday wrapping each year. This year, one of the designs reminded me of a hand painted Christmas card I had made many years ago. It had been an easy design using watercolors – I had done an abstract tree by just making a few horizontal lines on some watercolor paper. Anthro has done the same type of design as a holiday package tie-on, adding an embellishment that I think is so cool – a twig wrapped in green string as a tree trunk!

Their design inspired me to create some gift tags reminiscent of the design I had used on my cards so many Christmases ago. Today, I am sharing a tutorial.

make watercolor lines for xmas gift tag pleasure in simple things

If you don’t have watercolor experience, don’t be intimidated! And, you don’t need any fancy supplies. When I made those tree Christmas cards years ago, I used paint from a dollar store children’s watercolor set! That is all you need to create this card! You can pick up a kit (that includes a brush) at a dollar store or children’s craft section of a bargain store. Watercolor paper (don’t use regular paper) is available in craft or hobby stores. The amount you need will depend on the number of cards you intend to make.

Think about the shape of a tree and picture a triangle shape on the watercolor paper. For purposes of this tutorial, I made pencil marks to better guide you (my triangle is 3” high). If you need to make your own pencil marks, you will want to make them much lighter than this so they will not be visible on your finished card.

Using a brush dipped in water, brush the water onto the paper in the triangle shape. Don’t saturate the paper; just give it a light wash of water in the triangle shape.

finishing watercolor lines for holiday gift tag pleasure in simple things

Next, mixing water with the green paint, paint random horizontal lines across the paper using the triangle as your guide. Some of the lines may stay within your imagined/pencil triangle shape and some may be a little longer. Make one or two lines at a little bit of an angle rather than perfectly straight across. Once you are happy with the look, leave the tree to dry.

using a twig embellishment for holiday gift tag pleasure in simple things

Next, load a little bit of paint on the brush. Hold the brush over the tree and lightly tap the middle of the brush handle…this will give you some speckling on your paper. See the green dots on my card?

You may want to experiment and try a few trees to get a better feel for the paint and the paper before you create a final tree.

completing twig embellishment on holiday gift tag pleasure in simple things

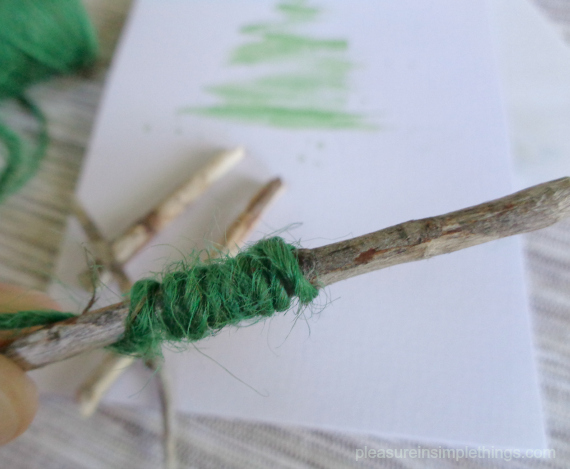
Next, find a thin twig to use as the trunk of your tree (mine is 4 ¼” high). Using green thread, string, yarn, or twine; wrap a length around the middle section of your twig – securing with dots of glue. Use a glue gun to attach the completed trunk onto the painted tree.

 attaching embellishment on holiday gift tag pleasure in simple things

Cut or rip (for deckled edge) the tag to desired size (mine is 5” x 6”).

If you want a little bling – add some optional glitter. I finished up my card by brushing on a little glitter paint in random spots using a cotton swab.

That’s it! You have a beautiful, hand painted gift tag for your holiday wrapping!

 finished Anthro inspired holiday gift tag on package pleasure in simple things

I am using my creations as flat gift tags, but they can easily be adapted to a folded card or a tie-on (by adding two small holes – one on each side of the twig, and using some green thread to tie onto a package) if that is your preference.

I don’t like writing names on my gifts…I always identify packages by the wrapping theme/color or by writing an identifying letter or initial somewhere on the package where not readily visible. If you would rather have names on your tags, simply add the words ‘to’ and ‘from’ with a thin permanent marker.

writing on gift tag pleasure in simple  things

If you make your tag into a folded card, include a few holiday words inside – like: Oh, what fun! Jingle all the way! Making it Merry!

Rather not make your own tree gift tags? You can always get some similar ones, gratis, at Anthropologie when you make holiday purchases!

Thanks so much for stopping by!  Remember to take pleasure in simple things, Jackie

Sharing with NancherrowCraftberry Bush, Crafts a la ModeLiz Marie, and Elizabeth & Co.

3 comments » | diy, holiday

diy snowman gift bag

25
February

diy snowman gift bag

Today, I am creating an easy hand painted snowman gift bag.  I know snowmen are usually associated with Christmas decor, but based on the frequency of snowfall here in Connecticut this winter, a snowman certainly seems an appropriate motif for any project…so, it is with tongue in cheek that I use a snowman design for my gift bag.

If a snowman is strictly holiday for you, make up a batch of these gift bags to store away with your holiday wrappings for next Christmas…a fun activity to do with the children on the next snow day. ;)

snowman gift bag supplies

With just a few craft supplies, it is an easy item to create using a brown paper handled bag.  These bags are very inexpensive at the dollar store or paper supply store.

I like to use puff paint in squeeze bottles for the details on the snowman because it creates some dimension.  You can just as easily use paint and a paint brush.  If you don’t have a sponge shaped like a snowman, just cut your own from a household sponge…I happen to have a snowman shaped sponge, but I very often cut my own shapes from a sponge for my gift wrap designs.

This project is super easy…it just requires some drying time in between steps.

painting a diy gift bag

First, dip your sponge into some white paint, adding a thin coat on the entire sponge surface, and press onto the bag to add your snowmen.  Then, using a cotton swab, add the ‘snow.’  A cotton swab is the perfect tool for creating a snow storm!  (Opening the bag and standing it up will enable you to add additional ‘snow’ to the two sides of the bag.)

When this is dry, use the puff paint to add a scarf, buttons, eyes, mouth, and – of course – an orange carrot nose!  If preferred, paint and a brush or markers can be substituted for the puff paint to add the details to the snowmen.

When all the paint is dry, add an outline to the snowmen with a thin marker.

snowmen on diy gift bag

Repeat the same design on the other side of the bag, or, if preferred – just add ‘snow’ to the back of the bag.

And, that’s it!  Just add tissue paper and raffia to complete the look.  In addition, (for a little snow overkill) I plan to cut a snowflake from white felt to tie onto my package!

snowman giftbag tutorial

Hope you enjoyed this easy tutorial for making a snowman gift bag…a fun hand painted bag to add to your gift giving!

Here in Connecticut, we may just have to consider adding a snowman to our state flag!

Thank you so much for stopping by.

Remember to take pleasure in simple things, Jackie

Comments Off on diy snowman gift bag | diy, gift ideas

Back to top