Subscribe to Pleasure in Simple Things via RSS ReaderFollow Pleasure in Simple Things on InstagramFollow @InSimpleThings on TwitterLike Pleasure In Simple Things on FacebookFollow Pleasure In Simple Things on PinterestEmail Jackie

Tag: diy


ferns in urns diy

13
June

boston fern

I have a really easy DIY I’d like to share today.

When I found that florists charged hundreds of dollars for a simple urn with ferns (plus delivery!), I decided there had to be a less expensive way to have create the same result.

Well, I turned hundreds of dollars into less than $40!

fern diy

First, I went to my go-to home store, HomeGoods, to find an appropriate urn.  They had plenty of low priced urns in stoneware, ceramic, or acrylic choices.  I opted for the acrylic since I wanted to create something as inexpensive as possible that would be easy to transport to a special event.

All the acrylic choices were in dark colors, so I would have to give my urns a coat of spray paint!  I took the two urns I purchased into the yard and sprayed them to coat – a very quick process.

urn diy

I had purchased two large hanging Boston Fern plants from Lowe’s when they were on sale for $9.99.  My plan was to plant them in the urns until one of my friends suggested it would be easier to transport them if they weren’t planted!  Of course!  So, I stuffed the bottoms of the two urns with some Styrofoam left from some packaging and now I plan to just drop the plants on top of the Styrofoam when I am ready for my event!  The planters weigh next to nothing – even filled with the material – and the plants are very light as well.

Ferns in urns

What a savings…and, so easy!  And the urns really look like stoneware.  When I get to the event, I will simply add the plants to the urns and remove the plastic hangers!  (I am leaving them on for now because it is easier to move the plants with the hangers as handles.)

ferns in urns diy

I hope you I have inspired you in some way for planning the décor for your next special event!

Thanks for stopping by!

Remember to take pleasure in simple things, Jackie

Comments Off on ferns in urns diy | diy, garden, inspiration

jewelry display diy

18
April

display ideas for jewelry

Today I was styling some jewelry.  I was being resourceful and using anything I could find that was readily available – household items, found items from outdoors, etc.

It occurred to me what a great item a clipboard can be to showcase jewelry.  For such a ridiculously inexpensive, utilitarian object – it can really show a whole lot of style!

If you are putting together a display of your jewelry on your dresser or in a walk-in closet, consider using one or more clipboards.  One clipboard can be displayed on a stand on it’s own or several can be displayed this way in a group.  Or, several clipboards can be hung on a wall for a display of multiple pieces.

ways to display jewelry

I created this super easy display piece in about 3 minutes.  I grabbed some paint and sprayed the metal of the clipboard.  There was only one can of spray paint handy and it happened to be off-white…if I had my choice, I would have used something more reminiscent of rust, but I used what I had.  I rubbed a little metallic paint I found hanging around onto the cream paint – just so it wouldn’t look too perfect.  Then, I used a page from an old book as the background for the display of the jewelry piece  – first ripping the edges of the paper to give it a little character.

necklace displays

Super easy – right?  A series of statement necklaces on clipboards would make cool wall decor.  And, there are so many different ways to provide a background.  Think about fabrics, book pages, wrapping paper, old photos, etc.

I hope I have inspired you to use a clipboard as a display piece.  Have fun experimenting!

Thanks for stopping by!  Remember to take pleasure in simple things, Jackie

Comments Off on jewelry display diy | diy, inspiration, style

diy easter bird nests

21
March

forsythia and nest pleasure in simple things blog

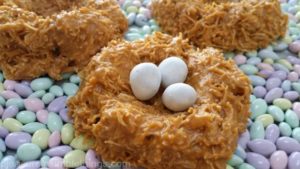
In the spirit of spring, today I am sharing an easy DIY for one of the many nests I make out of edible materials.  This one is simply shredded wheat and chocolate chips.

candy easter nest by pleasure in simple things blog

The shredded wheat is the original unsweetened variety that comes in the big ‘logs’…I think you must know what I am referring to.  For the chips, I have used butterscotch flavored chips – chosen because of the color.  You can use the chocolate ones if you prefer a dark brown color for your nests.  White chips are also an option and can be used as white or can be tinted with food coloring in any color you choose.

nests for Easter pleasure in simple things blog

To make:  For 4 small nests, you will need 2 shredded wheat ‘logs’ and about 6 ounces of butterscotch pieces.  First, separate the wheat logs as shown below and set aside.

candy nest collage

nests pleasure in simple things blogMelt the butterscotch pieces slowly over a double boiler just until melted.  Remove from heat and gently fold in the prepared shredded wheat until coated.  Form four nests on waxed paper and leave to harden.  Use jellybeans or small candy eggs to decorate.

These nests make great table decor and are perfect on an Easter table.

nest place card pleasure in simple things blog

I hope I have inspired you to create some of your own nests!

rabbits and nest pleasure in simple things blog

Thanks for stopping by!  Remember to take pleasure in simple things, Jackie

Comments Off on diy easter bird nests | diy, food & festivities, holiday

before & after bedside table

7
March

Bedroom table after photos pleasure in simple things blog

Today, I am sharing the ‘after’ photos of the little mahogany side table I shared last post.  The piece belonged to the owner’s great grandmother and I was determined to redo the table to  fit nicely  into her new home.

before and after side table with Annie Sloan ochreDid you guess what neutral I chose to paint the piece?  I decided on Annie Sloan old ochre.  It is a nice neutral that has a warm tone and will combine well with both white and gold tones.  The piece will be used as a bedside table and, since I’ve seen the bedding in the room, I decided to find accessories to combine with the piece to look great in its new location!

Bedroom side table after photo pleasure in simple things blog

I started with a coat of shellac since the mahogany was sure to show through a light color paint.  Next,  I painted the piece with two coats of Annie Sloan chalk paint in old ochre.  Then, I added a coat of clear wax.  In keeping with the tastes of the owner of the piece, I didn’t do any distressing, but I did add a coat of dark wax in some spots.  This accented some of the details and added a little depth  of color.

Bedroom side table after photos wax pleasure in simple things blog

For the hardware, I used the original pull and just added a little metallic to brighten up the old finish.

Bedroom side table after hardware pleasure in simple things blog

Lastly, I added some fun accessories to coordinate with the bedroom where the little table will be residing.  The tea leaves scented candle, lamp, print, and plant all came from Target.  The cute succulent paper I used for the drawer liner came from Paper Source.

Bedroom side table after photo drawer pleasure in simple things blog

For such a straight forward paint job, it created quite an update, don’t you think?

Can’t wait to see the table with the new accessories in its new home!

Thank you so much for stopping by!  Remember to take pleasure in simple things, Jackie

Comments Off on before & after bedside table | diy, furniture redo, style

valentine coffee sleeve diy

7
February

easy DIY Coffee Sleeves pleasure in simple things blog

Today, I am sharing a really easy Valentine DIY that is sure to make someone smile!   For no cost at all, it is easy to upgrade those sleeves you get on your cup of morning Joe!

Why not make one to slip on your loved one’s coffee before delivering it on Valentine’s Day!  Or, add a special message or photo to your child’s hot cocoa!

DIY Coffee Sleeves on pleasure in simple things blog
The supplies needed are easy:  decorative paper, a knife or scissors, a used coffee sleeve (you don’t throw these out, do you?), spray adhesive, and a glue gun.  Just cover a used coffee sleeve with a decorative paper!

steps in making a recycled coffee sleeve pleasure in simple things blog

If you want to get fancy, you can use fabric.  Here I used some scrap felt.  I cut a heart shape in the felt; adding a piece of decorative paper behind the opening before adhering the felt piece to the coffee sleeve.

DIY Coffee Sleeves pleasure in simple things blog
For this one I used a birch bark looking paper.  I drew on the heart and initials with a marker and rubbed it off some so the writing wouldn’t be as sharp.

DIY valentine Coffee Sleeves pleasure in simple things blog

Here I used a paper with some script writing…you may want to use some sheet music of a special song or an old book page with a special poem.

DIY Coffee Sleeves reuse pleasure in simple things blog

Think of the possibilities!  The paper I used in the second photo was actually a recycled Terrain bag!  (Click here for more Terrain bag uses!)

I hope I have inspired you to create a coffee sleeve for a special Valentine!

Thank you so much for stopping by!  Remember to take pleasure in simple things, Jackie

Comments Off on valentine coffee sleeve diy | diy, food & festivities, holiday, inspiration

bird feeder diy valentine gift

17
January

making diy bird feeders pleasure in simple things blog

A bird feeder is a great gift you can make yourself.  Who doesn’t enjoy watching a free nature show from their window?

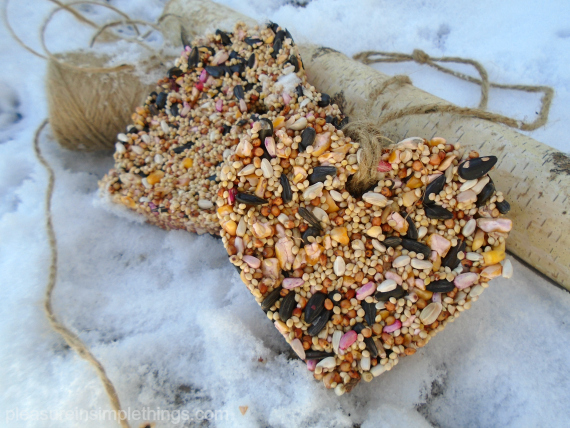
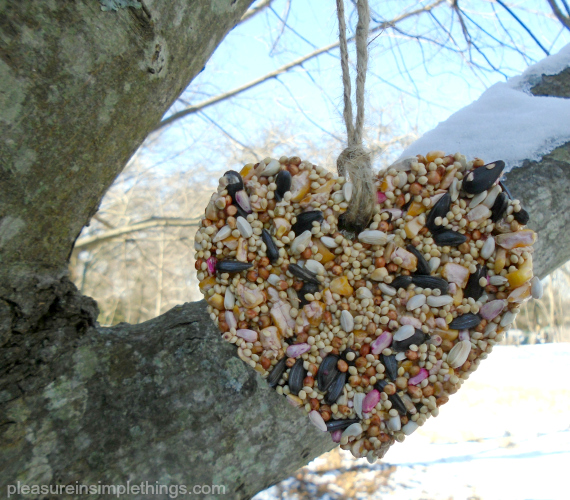
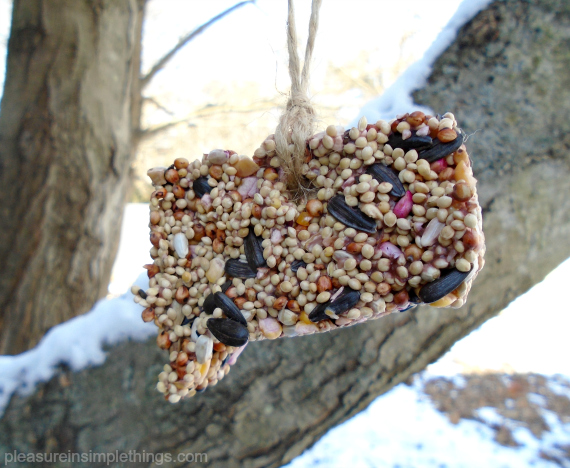
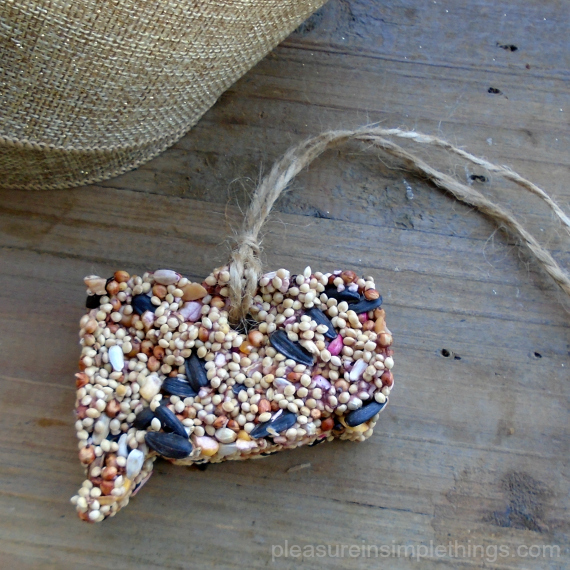
Hanging bird feeders made from bird seed are really simple and inexpensive to make.  A simple DIY, the bird seed is held together with clear gelatin and hangs from a tree branch with a piece of twine.

diy bird feeders pleasure in simple things blog heart

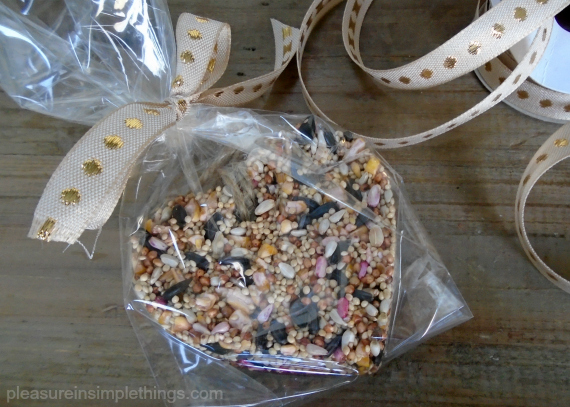
As a Valentine, a feeder can be packaged up really cute with a corny Valentine saying!  I love  “Valentine, you are so very tweet!”  So appropriate for a bird themed gift!  And, a small bird from a craft store is the perfect addition to the wrapping!

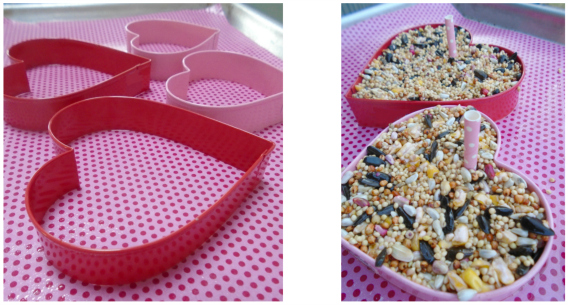
Choose an appropriate shaped cookie cutter to use as a mold.  I chose a heart to go along with a Valentine theme, but also chose a state-shaped mold to make a ‘state pride’ feeder to gift to an out-of-state relative.  Cookie cutters are available in virtually any shape so, have fun with it!

diy state pride bird feeders pleasure in simple things blog

Supplies Needed:

  • 2/3 cup water
  • 2 envelopes unflavored Knox gelatin
  • 2 cups bird seed
  • Large baking sheet
  • Parchment or wax paper
  • Cookie cutters
  • Cooking spray
  • Drinking straw
  • Twine

Place a piece of parchment or wax paper on a flat baking sheet.  Set out desired cookie cutters onto the sheet.  Use cooking spray to spray the surface/cutters.  Cut the straw into 2” pieces and set aside.

a collage diy bird feeders valentines gifts
Heat 2/3 cup water in a medium saucepan; removing from the heat just before it starts to boil.  Sprinkle the contents of 2 envelopes (4 come in a package) of Knox unflavored gelatin on top of the water and let dissolve, stirring as necessary.  After the gelatin is fully incorporated, let the mixture stand 5 minutes – enough to cool down, but not enough to completely set.  Stir in 2 cups of bird seed, mixing thoroughly.  I used the seed for small birds – small seed pieces best stick together.

Place the bird seed mixture into the cutter molds; pressing firmly in place.  Insert a piece of straw into each piece to create a hole for hanging.

Place the sheet in fridge to set.  After an hour or two, remove each feeder from its cookie cutter and lay flat to dry overnight.

Remove straw pieces and let dry a couple days before adding twine to each feeder for hanging.

diy CT state bird feeders pleasure in simple things blog

Package as desired.  Makes approximately 2-4 feeders, depending on the size of the cookie cutters.  (For example, one batch could fill one 5” cookie cutter, one 4” cookie cutter and one 3” inch cookie cutter.)

gifting diy bird feeders pleasure in simple things blog
Thanks for stopping by.  I hope you are inspired to make and gift a bird seed feeder for Valentine’s Day!

Remember to take pleasure in simple things, Jackie

Comments Off on bird feeder diy valentine gift | diy, garden, gift ideas

target bargain bin diy

6
December

diy-felt-bag-pleasure-in-simple-things-blog

I love the section at Target with all the low-priced items!  It is so much fun to find a great item for $1. or $3. in those magical bins at the front of the store!  Sometimes, a little DIY is the perfect thing to make something from the bin simply fabulous!

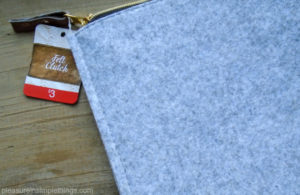
before-felt-clutch-pleasure-in-simple-things-blog-Recently, I ‘felt’ that way about a marvelous felt clutch I found in the $3. bin!  Though great on its own, a little enhancement would make it special!

I had a few ideas for a modification right from the start, but I knew I wanted to do an initial.  I was thinking I would use a plaid fabric that would make a nice contrast against the gray and would scream holiday.   To make it easy, I could use fabric bonding to adhere the initial.  Then, if I had any embroidery thread in an appropriate color, I would use a blanket stitch on the edges to finish it off.

felt-clutch-close-up-pleasure-in-simple-things-blog

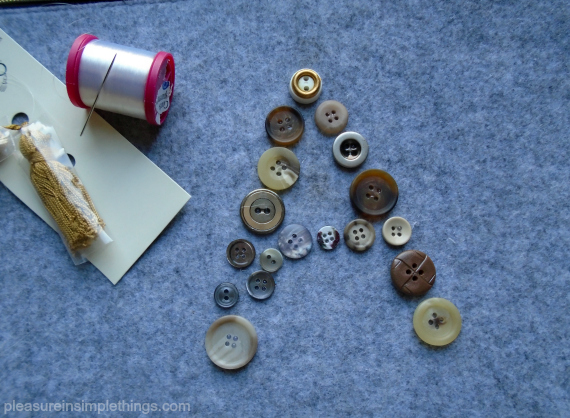
When I got home, I looked at the random buttons I had left in my button box and some of the button colors were perfect against the gray felt of the clutch.  I changed my plaid idea to an initial formed from  buttons!  Based on the colors I was using, I would make a mustard colored tassel to add a finishing touch!

I used a small bead of glue from my glue gun on each button to hold it into place before I sewed each one onto the clutch.

sewing-a-felt-clutch-pleasure-in-simple-things-blog

When I went to the craft store to buy some yarn to make a tassel, I found a premade one in the color I wanted for less than the price of the material to make one!  Perfect!

initial bag diy pleasure in simple things

The pouch makes a great gift on its own or it can be used as a pretty item to tuck some presents into!

If you’d rather not use a needle and thread, another way to add an initial to the clutch could be to use a metallic iron-on initial from the fabric or craft store.

wrapped-gift-pleasure-in-simple-things-blog

A beautiful gift for under $5!  Thank you Target for the bargain bins – they are a wealth of (inexpensive) inspiration!

Thanks for stopping by!  Remember to take pleasure in simple things, Jackie
Comments Off on target bargain bin diy | diy, gift ideas, holiday, style

diy candle advent calendar

25
November

advent-calendar-diy-pleasure-in-simple-things

I hope you had a wonderful Thanksgiving!  Now that we have officially started the holiday season, today’s Friday field trip is a visit to my holiday workshop to create a super quick and easy Advent calendar!

This year’s Advent calendar was inspired by one for sale at Terrain.

styling-a-terrain-advent-calendar-pleasure-in-simple-things-blog

The Advent calendar from Terrain that inspired my DIY – styled by me on my holiday table in a glass container with ‘snow.’

Basically, all that is needed for this DIY is a single candle… isn’t a candle the perfect vehicle for an advent calendar?  Who doesn’t use a candle during the holiday season?

make-a-candle-advent-calendar-pleasure-in-simple-things

My favorite candle as a DIY Advent calendar!

Utilize a favorite candle you already own (or treat yourself to a new one) and affix (I used rubber cement) an appropriate sized piece of paper printed with a December calendar…so simple and so cute!

a-finished-advent-calendar-diy-pleasure-in-simple-things

I simply typed the word ‘December’ and the numbers 1 to 25 using a simple typestyle and printed it out on regular computer paper.  I made mine 3” x 3” to fit nicely on a favorite woodland scented candle.  Use a favorite typestyle and vary the finished size of the calendar to best fit the candle you choose to use.

If you want to make one up to give as a gift; tie a red, green, or metalllic marker with a piece of twine to the finished candle!

styling-a-terrain-advent-calendar-pleasure-in-simple-things

Thanks for stopping by!

Remember to take pleasure in simple things,  Jackie

Comments Off on diy candle advent calendar | diy, gift ideas, holiday, inspiration

holiday reading

18
November

diy-making-a-book-a-day-advent-calendar-pleasure-in-simple-things-blog

It’s been a crazy week – next week will be even more hectic!  I barely had time to turn on the computer today, but you know I could never miss a Friday post!

So, for today, Friday field trip is a throwback from a couple of years ago.  I shared a DIY project that deserves repeating!  I thought I would remind you about the cool ‘book a day” idea so you can prepare to put one together for yourself before December starts!

Click here for the full DIY!

Have fun with it!

Thanks for stopping by!  Remember to take pleasure in simple things, Jackie

Comments Off on holiday reading | diy, gift ideas, good reads

easy salt cellar diy

20
September

weck-jars-with-flowers-pleasure-in-simple-things-blog

Yes, I do have a Weck jar addiction.  I can’t help it.  I see the Weck jar as the sophisticated cousin of the Mason jar…so much design sense…so much class!

weck-jars-at-terrain-pleasure-in-simple-things

You have seen me use the Weck jar in many ways in the past. Today, I am sharing my latest use for the beloved Weck jar!

weck-jar-uses-pleasure-in-simple-things-blog

When I recently found an unidentified small insect in my salt cellar, I decided it was time to find one with a lid!  I know insects are probably not attracted to salt…and, it may have been a one-time incident, but it was an occurrence that needed to be avoided in the future!  Yuck!

salt-cellar-from-a-weck-pleasure-in-simple-things-blog

Shopping around for a replacement salt cellar, I happened upon a life-changing item… a wooden top for a Weck jar!  OMG!  How is it possible I have never seen these before?  I instantly grabbed one to fit one of my small Weck jars – the perfect size for a new covered salt cellar!

wooden-top-for-a-weck-pleasure-in-simple-things-blog

How simple, yet how exciting!  Love it!

I hope I have inspired you to come up with your own use for a Weck jar with a lid!  I can already imagine some cool Halloween applications!

diy-salt-cellar-pleasure-in-simple-things-blog

Thanks for stopping by!  Remember to take pleasure in simple things, Jackie

Comments Off on easy salt cellar diy | diy, food & festivities, inspiration

Back to top