Subscribe to Pleasure in Simple Things via RSS ReaderFollow Pleasure in Simple Things on InstagramFollow @InSimpleThings on TwitterLike Pleasure In Simple Things on FacebookFollow Pleasure In Simple Things on PinterestEmail Jackie

Tag: diy


valentine candy craft diy

26
January

making candy pops for Valentines Day

In the same way gingerbread houses are decorated for Christmas, or eggs for Easter, why not create candy skewers for Valentine’s Day?  In my last post, I showed you some elegant Valentine’s Day skewers I created as gifts.  Today, for Friday field trip, I am using the same idea as a fun children’s activity!

cookie skewers

candy pinwheel on a stick

Just assemble a table full of Valentine’s themed candy and/or cookies, and add the children!

candy snake sticks

Just be cautious when using skewers with children – safety first!  Consider the age of the children you are with, and be sure to supervise appropriately!  (You can even cut off the sharp ends of the skewers if necessary.)

valentine candy fun

You may just find that the finished skewers never make it to a recipient!  But, the children will have a blast creating (and eating) them!

Thanks for stopping by!  Have a fabulous weekend!

read my lips valentine

Remember to take pleasure in simple things, Jackie 

Comments Off on valentine candy craft diy | diy, food & festivities, holiday

valentine, read my lips

23
January

gummy mouth pops

Doesn’t everything taste better on a stick?  Think about cake pops – a bunch of cake crumbs instantly become chic when placed on a stick!  Why not do the same thing for Valentine’s Day…elevating candy or cookies to a new level by simply adding a stick!

making candy hearts on a stick

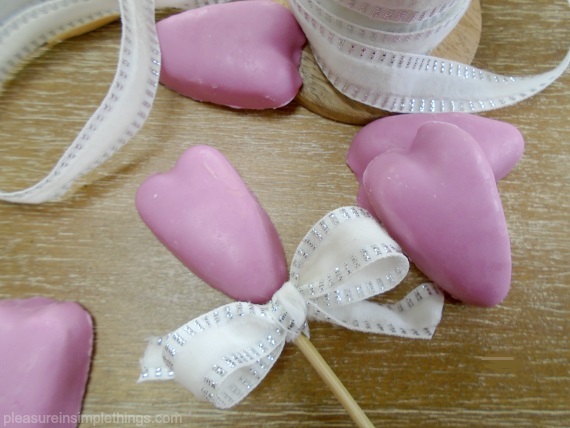
Using Reese’s peanut butter hearts to make these pretty skewers.

It is easy to transform treats into chic Valentine’s Day candy skewers to gift to loved ones.

heart on a skewer

One skewer can be a perfectly elegant gift (and very affordable!)

Valentine Cookie pop

Or, create a whole bouquet of skewers!

lip pops for Valentines

I hope you are inspired to create your own Valentine’s Day skewers!  If you want, package your creation in cellophane and add a Valentine’s Day note with a witty pun.  For my lip bouquet, I added a note that said “Valentine, read my lips.”  Leftover pieces of ribbons from holiday packages are perfect to tie to your finished skewers.

Reeses candy heart on a stick

Thanks for stopping by!

heart shaped cookies

Remember to take pleasure in simple things, Jackie

Comments Off on valentine, read my lips | diy, food & festivities, gift ideas, holiday

homemade chai spice

9
January

scooping homemade chai spice

I really enjoy the flavor of chai.  At least, what we here in the U.S. call chai.

In India, chai is tea.  Although there are some variations, the basic components are the same – usually a black tea base, whole milk, spices, and a sweetener of white sugar.  Cardamom is the most common ingredient used as a spice, but every family has a blend to suit its tastes.  In the same way, here in the U.S., spices can be adjusted in a homemade chai spice to suit individual tastes.

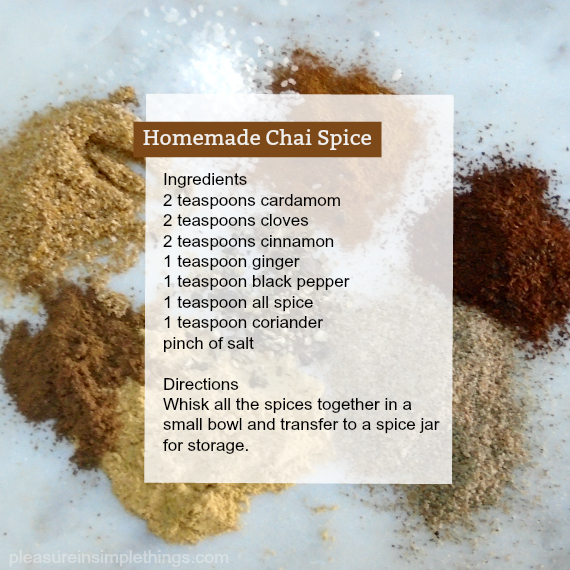
Home Made Chai Spice Recipe

That is what I decided to do.  It took me quick a bit of experimentation on a recent snow day to come up with my own favorite combination of spices.  I used Penzeys brand spices to make my mix because they are so very flavorful, but you can use whatever you have in your cabinet.

Since I try my best not to eat processed foods (especially with the beginning of a new year), my motivation was to come up with a chai spice to use as a change up for my almond milk.  I will use this in warm almond milk, adding a small amount of honey as a sweetener –  if I am in a really decadent mood!  For a mug of heated milk, I use ½ teaspoon of my homemade spice.

spices for chai spice

This spice can be used to flavor tea, quick breads, smoothies, etc.

I hope I have inspired you to come up with your own chai spice mix.  You can try my combination and adjust the ingredients to your own taste!

Thanks for stopping by!  Remember to take pleasure in simple things, Jackie

Comments Off on homemade chai spice | diy, food & festivities, recipe

bottle brush tree salt shakers

12
December

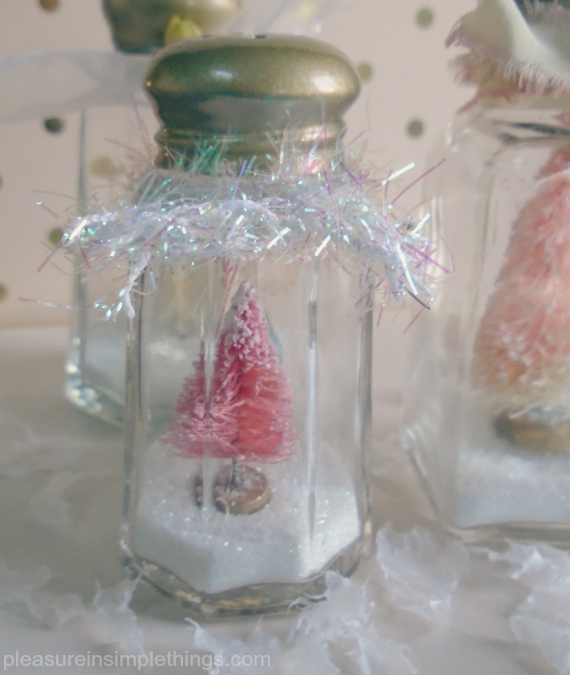
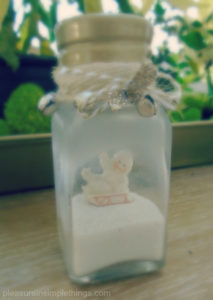
pink bottle brush tree in salt shaker

Everyone loves a salt shaker with a bottle brush tree for the holidays!  How do I know?  One of the most pinned holiday item of mine is of the salt shaker snow globes I made some years back.

holiday salt shaker diy

Because of its popularity, I am sharing a few new ones I made this year. The last ones you saw were all done in neutrals. (Click here to see.)  Today, the shakers were created to complement a pink and gold theme.

This is such an easy DIY.  For my pink and gold theme, I started by first spraying the tops of all the shakers with a matte gold metallic spray paint.

pink and gold xmas

To create a shaker, put the bottle brush tree you have chosen into the shaker.  I use a glue gun to put a bead of glue on the base to hold the tree securely in place.  (Sometimes I find it easier to use tweezers to put the tree in place.)  Then added some sparkly ‘snow’ – some pretty glitter – inside the shaker.

pink bottle brush in a salt shaker

Decorating with ribbon, beads, jingle bells, etc. personalizes the shakers.  This is a great way to use those little scraps of ribbon you haven’t been able to throw out!

An easy and fun DIY!  You may want to add names to each and use as place cards for a holiday meal.

white bottle brush in salt shakers

Look at this little one I made with a vintage snow baby in place of the tree!  I used some sea glass spray paint to frost the glass of the shaker.

salt shaker snow baby

I hope I have inspired you to make some bottle brush tree salt shakers!

Thanks for stopping by!

Remember to take pleasure in simple things, Jackie

Comments Off on bottle brush tree salt shakers | diy, holiday

advent calendar diy 2017

5
December

tablescape calendar diy for advent

For those of you that follow this blog regularly, you know I don’t create hanging Advent calendars.  I prefer a tablescape or mantlescape when coming up with my annual creation!

Advent Calendar diy tablescape

This year, I am using small pillow boxes to put together a very simple calendar.  If you want to make one, this is what you will need:

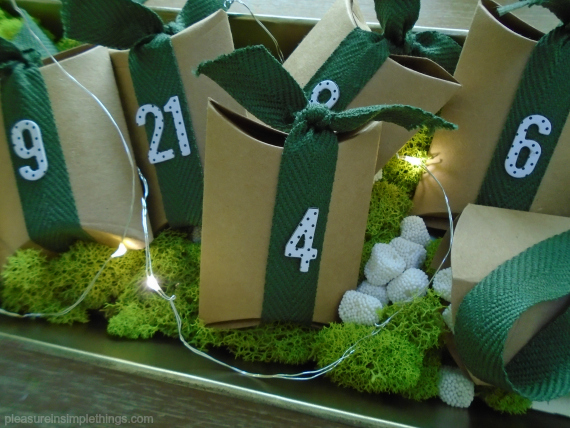
24, 3 1/2” brown paper pillow boxes; 26 feet of 3/4” ribbon of your choice, cut into 13” pieces; 1” adhesive numbers (be sure to have enough numbers for 1 through 24); small candies of your choice.

candies for Advent calendar

I often use champagne bubble candies when styling since I not only love the color white, but I love the way the candies look.  Champagne flavored candies also seem right for a special occasion like Christmas.  You may choose to substitute one of your favorite candies, something homemade, or a candy in a color that coordinates with your own holiday colors.

diy advent calendar supplies

The calendar is easy to assemble.  Fill each box with some of the candy you chose and close.  Tie a piece of ribbon, lengthwise, onto each box.  Use the adhesive letters to add the numbers 1 through 24 to the front of the boxes.

I found my adhesive numbers at a craft store– I thought the dot pattern played well with the candies I chose to use in the boxes.

Lastly, arrange the boxes in a grouping.

creating a diy Advent Calendar

For a mantel, an arrangement using some loose white birch logs would work nice.  For a tablescape, any favorite tray or bowl would work well.  For my Advent calendar tablescape, I am using plants, moss, and tiny lights in a long tray down the middle of my wooden dining room table.

Easy and fun!  I hope I have inspired you to create an Advent calendar for your home!

Advent calendar diy with lights

Thanks for stopping by!

Remember to take pleasure in simple things, Jackie

Comments Off on advent calendar diy 2017 | diy, holiday

marbleizing baby boos

24
October

diy marbleizing pumpkins

The best part of October is getting creative with pumpkin decorating!  And, there are so many ways to do so!

Today, I just wanted to take a moment to share the simple technique for creating a marbleized pumpkin.  I thought most people had tried this technique by now, but if you haven’t – you need to!

A marbleized pumpkin is super easy to create.

baby boo and diy green marble

The only materials needed are some warm water, a bottle of nail polish, and a disposable container large enough to accommodate the pumpkin you are planning to marbleize.

I use a disposable container to make clean-up quick and easy and to avoid damage to a regular dish or bowl.  For mini pumpkins, a disposable foil lasagna pan is perfect.

Fill the container with warm water.  Drizzle some of the nail polish over the surface of the water by pouring it in a thin stream in an irregular pattern.  Not much is needed.

marbleizing pumpkin processHold a pumpkin by the stem and dip it into the water.  The nail polish will adhere to the pumpkin in an irregular pattern.  Twist the pumpkin while in the water to create varying patterns.  If you are not understanding how this could work, don’t worry!  After trying it with one pumpkin, you will experience an ‘aha’ moment.  After that one try, you may well be addicted to the process and its many possible outcomes!

some diy marbleized pumpkins

I like to use white pumpkins with a nail polish that coordinates with my décor.  The green I used on these pumpkins creates a look that looks great in my dining room amid my ferns!

Of course, dark colors look the most dramatic.  And, you can use more than one color on a single pumpkin if you’d like.

I hope I have inspired you to try marbleizing a pumpkin!

white baby boo green marbleizing

P.S.  There is a video in my Instagram feed and on my Facebook page if you’d like to see the green marbleized pumpkin creating in process!

Thanks for stopping by!

Remember to take pleasure in simple things, Jackie

Comments Off on marbleizing baby boos | diy, holiday, inspiration

velvet and cashmere pumpkins

6
October

gray with gold dot pumpkin

Making velvet pumpkins is an annual activity for me. Each year, I save pumpkin stems (the stems are everything!) and use them the following year on my newest pumpkin creations.

gray cashmere pumpkins

Finding new fabrics keeps my pumpkin making interesting each year.

velvet pumpkin on books

This year, I added some gray cashmeres to the mix!

cashmere pumpkin

If you follow the blog, you may remember I shared instructions to make these pumpkins some years back. If you want to try your hand at making some, click here for the post with the tutorial on how to create them.

velvet and cashmere pumpkins

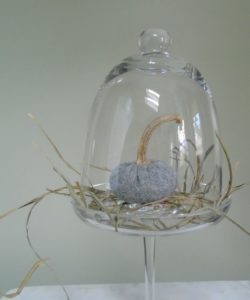
velvet pumpkin under cloche


Thank you for sharing my newest pumpkin creations on this week’s Friday field trip. My first few are as a gift to celebrate a friend’s new home. I hope I have inspired you to try making some yourself!


Have a wonderful weekend and remember to take pleasure in simple things, Jackie

Sharing at Craftberry Bush.

Comments Off on velvet and cashmere pumpkins | diy, inspiration, style

from ferns to fall

29
August

fall planter with Home Depot plants

Remember the DIY of the ferns in urns?  Look how easily one of the wedding décor urns can be transformed for fall!

The couple who walked down the aisle decorated with the urns of ferns are now enjoying one of the same urns, from their wedding day, with a fall planting on the front porch of their first home!a planter two waysAll it took was a quick trip to Home Depot and under $30. to change the whole look of the urn and its planting.  I was determined to get everything I needed in one trip, so even though I couldn’t find the charcoal gray spray paint I wanted, I settled for a lighter gray and I chose plants that were available at Home Depot.  My purchase included a can of spray paint, a tall burgundy grass (millet), 4 small white mums, and 2 small vines.

ferns to fall plants

I started by spray painting the planter – a quick and easy color change!  And, the simple arrangement of plants was easy enough to plant in the urn.

I placed the completed planting on the front porch and watered it thoroughly…it will look even better when it gets established!

I hope I have inspired you to change up a planting for fall!

fall diy planter

What’s next for this urn?  Maybe some black spray paint, white lights, and an evergreen for the holidays?

Thanks for stopping by!

Remember to take pleasure in simple things, Jackie

Comments Off on from ferns to fall | diy, garden, inspiration

repurposed calendar diy

18
July

pleasure in simple things calendar repurpose

Do you have a calendar that is just too pretty to throw away?  This is the perfect DIY to repurpose it and to create something beautiful in the process!

Let me share how I repurposed pages from a calendar to create some special mementos!

The calendar I am using in this example is my Anna Rifle calendar.  This beautiful calendar was actually one of my previous giveaways – if you were the one to win it, you already have the start to create some wonderful gifts!

Calendar diy Anna Rifle calendar

All you need to do is to use the page of the month from the date you have chosen, circle the date, and frame to your liking!  So pretty and so easy!

My calendar choice has metallic gold accents, so I circled my chosen date with a gold metallic marker.   Use any permanent marker that coordinates with the page you have chosen.  Gold leaf, calligraphy ink, or watercolor paint can also be used, based on your taste and the style of the calendar you are using.

calendar diy repurpose Anna Rifle

Here, rather than using a frame, I have clipped the calendar page to a clipboard I covered with a metallic dot wrapping paper.

repurposed calendar diy with clipboard

What special date do you want to remember?  A baby’s birth date, a special anniversary, the arrival of a new pet – many possibilities – any date you may want to commemorate is fair game!

If you plan on framing the page, remember to think about the frame size when you purchase the calendar since the cost of your project will be much less if the calendar fits a stock mat/frame.   Of course, you have the option to have the piece professionally framed, if you prefer.  You may also come up with other ideas –using a clipboard as a frame or slipping the page under a piece of glass on a serving tray.

calendar repurpose diy

Think about gifts for showers, anniversaries, or wedding dates – if you don’t have a calendar to reuse, buy a beautiful calendar after the year begins, when they are drastically marked down in price!

I hope I have inspired you to create a special gift for yourself or for someone special!

Thanks for stopping by and remember to take pleasure in simple things, Jackie

Comments Off on repurposed calendar diy | diy, garden, gift ideas, inspiration

diy home office on a budget

14
July

office drawer

Change can be sad.  As much as I enjoy a good redo, I was hesitant to change my daughter’s childhood bedroom.  When she was young, I had put together a Polynesian themed bedroom for her that was filled with mahogany furniture and burgundy and gold bedding colors – all reminiscent of her favorite family trip to Florida.

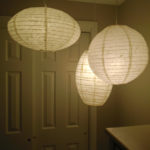
When the room became empty, I decided to make it my home office.  I started with an empty room, a soiled wall-to-wall carpet and some old dusty paper lantern light fixtures.

diy home office from a bedroom

For Friday field trip today, a peek at the beginning of this new home office!

I painted the two-toned gold walls with a greige color neutral.  I used a Behr custom mix from Home Depot – very close to their color Aged Beige. The ceiling was painted white as well as all the trim.  What a great fresh start…except for the soiled rug, of course.

memo board in office

From there, I chose a desk first.  I found a nice, simple writing desk at Target and purchased it during one of their huge sales when they offered free shipping.  The desk has nice lines and would fit my computer comfortably.  After assembling it, the only change I made was to the knobs – I replaced the ones provided with a pair in brushed gold.  The desk chair was a previous diy…click here to see the before and after.

new office desk chair

home office lightingDuring the same Target sale when I acquired the desk, I also ordered a simple, gold toned floor lamp.  The room already has a trio of paper lanterns (that required a heavy cleaning – I just couldn’t bear to get rid of them!).


home office desk detail HomeGoods accessories

I also added a second piece of renovated furniture I refinished years ago – a standing piece I use to store my photograph albums – the nondigital variety.

home office diy

I covered the one window in the room with a $17. Roman shade that I ordered from JC Penney.  How do they even sell them that cheap!?

Since the carpet in that room was SO trashed – my daughter did a number on it – and ignoring it didn’t seem to help, I opted to cover it.  My budget did not allow for a complete floor renovation and since the room is so small, it wasn’t hard to find an area rug to cover most of it.  I chose a circle shaped, natural fiber rug in a driftwood color from Ballard Designs.  They were having a 25% off sale with free shipping – perfect!

bedroom to office redo

Now the fun part of adding the accessories!  I purchased all the decorative items at HomeGoods, including a gorgeous canvas that is a world map in greiges and metallic gold!  I love this piece!

HomeGoods canvas detail

I still have work to do in the room – in scraps of free time I have a gallery wall to complete – I am in the midst of framing some favorite old photographs as well as hanging a white board calendar and an old doily made by my grandmother.

HomeGoods mail holder

It does give me satisfaction to know there is still some of the old bedroom when you look hard enough – like the telltale signs of an old pet hamster gnawing on the carpet or pieces of memorabilia that haven’t been removed from the walk-in closet!  In an odd way, this helps make the room that much more comforting…a perfect new office!

HomeGoods waste can

Thanks for stopping by!  I hope I may have inspired you to think about redoing or updating a room!
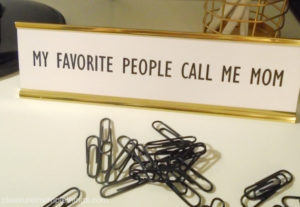
HomeGoods desk plate home office

Have a fabulous weekend and remember to take pleasure in simple things, Jackie

Comments Off on diy home office on a budget | diy, furniture redo, inspiration, style

Back to top