Subscribe to Pleasure in Simple Things via RSS ReaderFollow Pleasure in Simple Things on InstagramFollow @InSimpleThings on TwitterLike Pleasure In Simple Things on FacebookFollow Pleasure In Simple Things on PinterestEmail Jackie

Tag: diy


easy lavender heart sachets

10
February

easy diy linen heart sachets pleasure in simple things blog

Who wouldn’t want to receive a heart on Valentine’s Day? A great way to give one is to gift a homemade heart-shaped sachet.

pink linen heart sachets pleasure in simple things blog
Today I am sharing some really easy ones I made up using lavender. These sachets are created with just a basic straight sewing stitch and do not require any measuring at all. I used a sewing machine, but they can also be sewn by hand if need be.  (If you would rather try a sachet with a no-sew method, click here for a great option.)

pretty diy heart sachet pleasure in simple things blog
I made a template using a piece of scrap paper by folding it in half and cutting out the squatty heart shape I wanted…approximately 6 1/2 “ across – making it palm size and the perfect little heart to tuck into a drawer. I purchased a small piece of pale pink linen and pulled out a scrap of white linen I had at home in my pile of fabric scraps. Muslin would also work.

lavender heart shortbread cookies pleasure in simple things blog

Another great way to use lavender for Valentine’s Day…add some to your heart shaped shortbreads! (Be sure to use culinary grade lavender.)

I stamped a message on a small piece of the white linen and pulled threads to fray the edges on all four sides. Using the heart template I made, I cut two heart pieces from the pink linen. On the right side of the fabric on one of the pink linen hearts, I positioned the white message piece and attached it with one short running stitch up the middle.
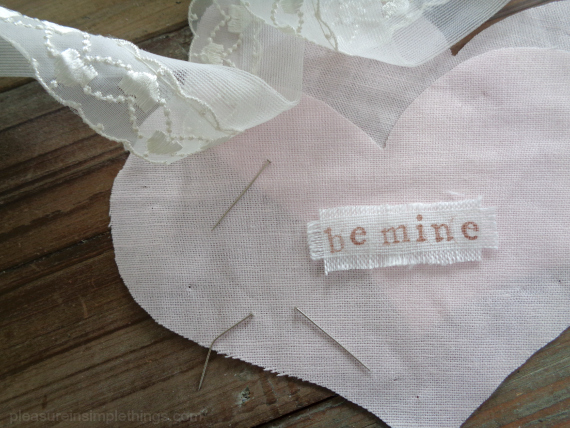
making a lavender heart sachet pleasure in simple things blog
Then, I positioned the two heart pieces – right sides out – together and stitched around the border, roughly 1/4 “ from the edge. Remember – I did no measuring! About 1” before reaching around the heart with the stitching, I stopped to add in the lavender. I spooned in enough lavender to get the look I wanted. Then I went back and finished the stitching.making lavender heart sachets pleasure in simple things blog

I think these sachets are so sweet…and, the lavender smells so lovely!

Because I wanted the look of the raw edges on my heart, it really simplified the sewing and made this a super easy project for any skill level! There is still plenty of time to make some up before the weekend!

lavender heart sachet diy pleasure in simple things blog (2)
Thanks for stopping by! Remember to take pleasure in simple things, Jackie

Sharing with Sand & Sisal, Homework, and Elizabeth & Co.

Comments Off on easy lavender heart sachets | diy, gift ideas, inspiration

polka dot fringed pencils diy

3
February

diy tissue paper pencils and heart tag pleasure in simple things blog

I think most of us that love creating are collectors – often collecting beautiful scraps to recycle for imagined future projects. Today, I am sharing one way I use my salvaged tissue paper by providing a tutorial for creating pretty fringed pencils. How earth friendly to use recycled tissue paper and old pencils that have been in the junk drawer, for who knows how long, to make these cute pencils!

fringed pencil diy pleasure in simple things blog

Because Valentine’s Day is so close, I have chosen to use tissue paper that coordinates with a Valentine’s Day theme in one of my favorite patterns…polka dots! Join me as I channel my inner Kate Spade! (Am I the only one that has a polka dot Pinterest board?)

Supplies Needed
Pencils (round)
Spray adhesive
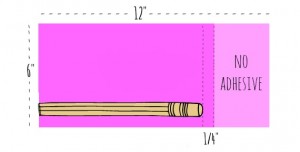
Decorative tissue paper – one 6” x 12” piece for each pencil

Start by deciding how many pencils you will create, and cut the appropriate number of tissue paper pieces. A tissue paper with a little more weight is preferred over a super thin variety.

(You can also use a paper cocktail napkin – by separating the top layer and using that in place of the tissue paper. The fringe will not be as long if you choose to use a napkin, since they are not the full 12” specified. Also, I find the cocktail napkin does not hold up as well as the tissue paper when sharpening the pencil. The beige with white polka dot pencil shown here was made with paper from a cocktail napkin.)

Kate Spade inspired polka dot pencil diy tutorial from pleasure in simple things blog

kate spade inspired pencil tutorial pleasure in simple things blogSpray the wrong side of the tissue with the adhesive, being sure to plan for overspray (protect the area), leaving a section without spray (use a piece of paper to mask the area from spray). The reason for the non-adhesive section is because you don’t want adhesive on the area that will be the fringe. With care, lay the piece of tissue paper on a clean, flat surface – adhesive side up. Carefully line up the pencil in the corner of the tissue paper remembering that the adhesive is in place and put it directly on the right spot the first time. The eraser side will be on the inside, and the writing side on the outside edge, of the tissue paper. Roll the pencil tightly down the length of the tissue paper.

Cut the end of the tissue paper to make the fringe, stopping within a 1/2” of the eraser end of the pencil. You will want to make cuts approximately 1/4” spaces apart – this does not need to be exact – by placing the bottom of your scissors inside the tube you created at the pencil end. As the final step, twist the fringed end of the pencil…because there is a little adhesive on this end, it will keep the twist in place. Trim the fringe to desired length, if needed.

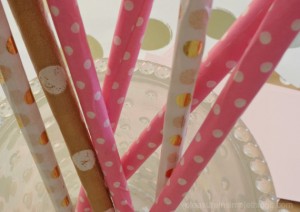
polka dot pencils inspired by Kate Spade tutorial pleasure in simple things blog

That’s it! Cute, right? I made a tag from a round cut from a pink paint swatch and added a gold leaf heart. If you are giving your pencil(s) as a Valentine to a youngster (or someone young at heart), you may want to add a gift tag with a corny Valentine saying like:
• You’ve got the right stuff!
• You are just write for me!
• Write on!
• You’re all write with me!

I hope you enjoyed today’s fringed pencil craft. Maybe I have inspired you to make up a batch to match your office décor, or… to match your kitchen where you keep the grocery list?

polka dot pencil craft pleasure in simple things blog

Thanks for stopping by! Remember to take pleasure in simple things, Jackie

Sharing with NancherrowCraftberrry BushThoughts from Alice, Sand & Sisal, Homework, and Elizabeth & Co.

2 comments » | diy, gift ideas, inspiration

special date valentine skewer

23
January

special date fruit skewers pleasure in simple things blog

What better way to commemorate a date with significance than to just spell it out…with food! I guess my ‘playing with food’ theme from earlier this week is still going strong! Once I get started with something, it is hard to stop! So, for Friday field trip today, come into my kitchen where I will share an easy and fun idea for Valentine’s Day…or, any day!

valentine fruit date skewers pleasure in simple things

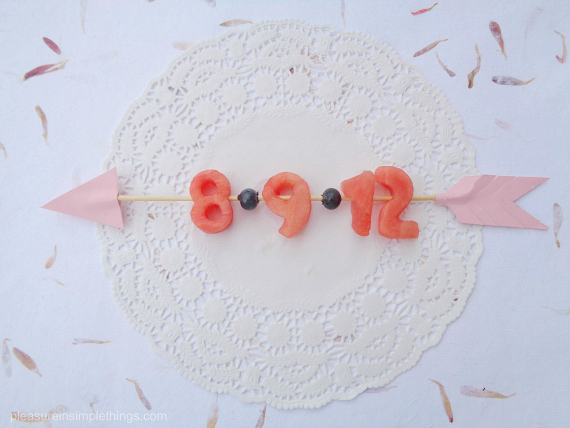
I am using fruit (any melon works great) on a skewer for a Valentine meal to evoke memories of a special day.  Mini cookie cutters are perfect to cut numbers from fruit!  Do you have a date with special significance? Maybe a first meeting? Or, the date you were engaged? Maybe it is a future date – like the due date of your first baby (a great reveal!) or the closing on your first house.  Whatever the significance may be, putting it right out there on the plate is a fun way to include past or future memories to your Valentine’s Day table.

cookie cutters for Valentine fruit kabobs

Can’t think of any date appropriate to serve up? That is okay…just make x’s and o’s…or, hearts. :)  Or, at a family meal, spell out the names of your children (just monitor the sticks!)

making fruit numbers from cookie cutters pleasure in simple things blog

The fruit can be served as an appetizer or as a dessert…served with a spiced yogurt dipping sauce, melted chocolate – fondue style, or alongside a scoop of sorbet (you guessed it – I am thinking of my favorite, coconut lemongrass!).

fruit kabobs for Valentine's Day pleasure in simple things blog

I prefer a simple skewer, but if you want to get fancy, you can simulate an arrow with a few strategically placed pieces of pink paper!

making Valentine arrows from skewers pleasure in simple things

Have you thought of a day you would like to use?  Have fun with it!

Thanks for stopping by!  Have a wonderful weekend, Jackie

Sharing at NancherrowCrafts a la ModeCraftberry BushThe Shabby Nest  and French Country Cottage.

3 comments » | diy, food & festivities, inspiration

birch bark diy bookmark valentines

16
January

white birch heart bookmark pleasure in simple things blog

Today on Friday field trip, I am sharing how I used some decorating leftovers from the holidays to create some cute Valentine bookmarks.

My outdoors theme left me with some rustic looking leftovers and I thought birch bark would be perfect to design a bookmark. I looked through my stash of white birch bark to find some flat, but sturdy, thin pieces to make my bookmarks. Using a craft knife, I cut a rectangle approximately 1 1/2″ x 5 1/2 ” from the bark for each bookmark.

Initial heart birch bark bookmark pleasure in simpel things blog

If you haven’t collected your own bark, you may be able to find some at a high-end garden store.  (I know I have seen it sold at Terrain.)  You won’t be needing very much – depending on how many bookmarks you plan to make, of course.

Next, to embellish the bark, I used a basic wood burning tool (Girl Scouts 101) and burned a heart pattern into the bark. On some of the bookmarks, I also added an initial. You can get as create as you like with this step – add an arrow, 2 sets of initials, etc. If you don’t have the basic wood burning tool, it is a handy thing to have and you can probably find one online for $10 to $15. Don’t get an entire set – just the simple, basic tool is all you need.

birch bark bookmarks with initials pleasure in simple things blog

I used a nail and a hammer to put a hole into the top of each rectangle so I could add a ribbon to the top of each bookmark. For the ribbon, I recycled the handles from my holiday shopping bags. Does the cream color ribbon with red accents look familiar? It is from the handles of an Anthropologie shopping bag! The jute looking one is from the handle of a Terrain shopping bag! I always save the handles for projects just like this!

heart bookmarks from birch bark pleasure in simple things blog

And, that’s it! Simple, right?

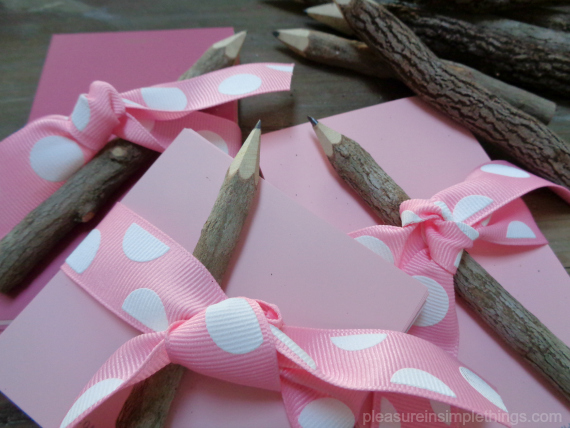
I also had some cute pencils left from my holiday wrapping that I transformed for Valentine’s Day. Twig pencils that served as package tie-ons at the holidays are now packaged with ribbon scraps and paint swatches – my favorite note paper – as Valentine memo packs! (Is it just me that enjoys memorizing the names of current paint colors?! I know…I am definitely color obsessed!)

paint swatch note packs pleasure in simple things blog

What holiday decorating leftovers can you transform into Valentines?  I hope I have inspired you to create some!

Note: You can use some sandpaper to soften up any rough spots you may find on your bark. You can also attach some felt or cardstock to the back of a piece of bark if it seems too thin or is not rigid enough for a bookmark.  Most importantly, be sure to follow the safety guidelines on the wood burning tool!

Thank you so much for stopping by!

Have a wonderful weekend and remember to take pleasure in simple things, Jackie

Sharing at Homework,  Thoughts of Alice, House of Hipsters, Nancherrow, and The Shabby Nest.

6 comments » | diy, gift ideas, inspiration

personalizing homemade party crackers

26
December

personalized party crackers for 2015 pleasure in simple things blog

Party crackers are nothing new. But, last year when a family member used them as wedding favors, I started giving them a little more thought. Why not make my own personalized version of a party cracker? So, I had been thinking about them for a while…I even saved all my empty toilet paper rolls (for over a year!) to use in creating some of my own.

For my research, I spoke to my friend from London. Julie filled me in on proper party cracker etiquette. The three required items that must be contained in the cracker – per tradition – are: a toy, a paper crown, and a joke. I planned on following tradition, but for my version, I decided to substitute a treat for the toy.

candy for new year's party crackers pleasure in simple things blog

I had the design aspect in my head and I was pretty sure I could come up with a good looking cracker as well as the right combination of contents…but, what about the noise the cracker makes when it is opened?! That was the part I wasn’t sure about! After looking around online, I found the ‘crack’ was actually a thin strip of paper that contained a little bit of gun powder called a cracker snap.  I purchased the cracker snaps from Olde English Crackers and found a video they posted on the assembly steps to create the crackers. Click here for the instructions. (Note: I did not use the rollers shown on the video and had no trouble making the party crackers without them. I did find it was very useful to make a center line with a pencil on both the toilet paper roll and the wrong side of the decorative paper to use as guides. )

papers for party crackers pleasure in simple things blog

Since my first set of party crackers were being created for New Year’s Eve, I decided the outside of the crackers would be black (with an added hint of green for an accent color) to coordinate with a set of black dishes I planned to use for New Year’s Eve dinner. If you decide to make some crackers, think about what color(s)/pattern(s) would look best on your dinner table!

I bought sheets of decorative paper at Jo-Ann Fabric and Craft Store (on sale) for just pennies a sheet. I chose coordinating black patterns with stripes, stars, and script writing. I personalized some circle gift tag stickers with ‘2015!’ from Tiny Prints (click here for website) in my black and green color theme and I used a green sparkle ribbon to tie the ends of the crackers.

contents of personalized party crackers pleasure in simple things blog

For the inside contents of the crackers, I decided on a neutral color scheme. I printed jokes on my home computer that I found online – adding a little embellishment with a gold marker. I crafted the paper crowns from a pretty taupe and white patterned tissue paper. And, for the treat, I made up little bags of champagne flavored candy that I found at Williams-Sonoma…so elegant and so appropriate! A little handful of homemade confetti added a little extra touch of gold to the contents!

making jokes for party crackers pleasure in simple things blog

Party crackers are so much fun to create – personalizing them is the best part! The only limitation is keeping your contents within the confines of the inside space of an empty toilet paper roll!

making personalized party crackers pleasure in simple things blog

I hope I have inspired you to try your hand at creating some party crackers on today’s Friday field trip! I already have some in mind for my 4th of July party this summer! If you need help with some ideas or have questions, send me an email and I’d be happy to help!

Thanks so much for stopping by! Remember to take pleasure in simple things, Jackie

Sharing with The Shabby Nest and Elizabeth & Co.

Comments Off on personalizing homemade party crackers | diy, food & festivities, holiday, inspiration

forest in a jar centerpiece

19
December

forest in a jar pleasure in simple things blog

Originally, holiday 2014 in my house was intended to have a sea glass theme using aqua as an accent color. But, as you know if you read my blog, I was so wrapped up in last year’s outdoor theme that I had to continue it for one more year…I just had too many ideas left to use! The sea glass theme is being pushed out to 2015…can’t wait!

easy to make  forest in a jar pleasure in simple things blog

You may also know, one of my fascinations this year has been with jars, bottles, (even salt shakers) …any type of glass container. I just can’t seem to get enough! Putting some favorite items in a jar can really elevate them to the status they deserve and it puts a smile on your face in the process!

DIY forest in a jar pleasure in simple things blog

Case in point – my favorite trees from Terrain this year. The trees are just so beautiful, I wanted to highlight them in some way. I decided to make a very simple forest in a jar! Rather than use the typical snow for the bottom of the jar, I used white beans. I love the simplicity of the design!

outdoor theme holiday decor pleasure in simple things blog

The jar? I bought it at Target. In fact, I bought quite a few. They come in 3 sizes and are very reasonably priced – ranging in price from $3.99 to $14.99.

easy forest in a jar pleasure in simple things blog

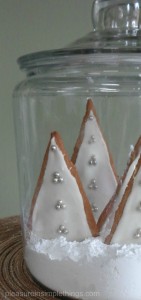
neutral tree cookies pleasure in simple things blogThen, I got so stuck on the forest in a jar idea, I made one out of cookies also! On this one I used sugar ‘snow.’ I made gingerbread cookies and let them sit around for a while so they got really rigid before I used them – better for standing!  The cookies can easily be decorated to match your decor!

Happy planting! What will you use to make your forest in a jar?

Thank you so much for stopping by.  I hope you enjoyed Friday field trip’s quick and easy way to create a holiday centerpiece!  Have a fabulous weekend and remember to take pleasure in simple things, Jackie

Sharing at House of HipstersThe Shabby Nest, Crafts a la Mode, and Craftberry Bush.


2 comments » | diy, food & festivities, holiday, inspiration

salt shaker snow globes

12
December

Salt Shaker Snow Globes pleasure in simple things blog

With the current bottle and jar love I have going on for my holiday décor, this post should not surprise you!

Remember a few years ago when Anthropologie carried salt shakers with little trees in them?  Many crafters were inspired by this cute idea and I saw a number of versions created soon after the little beauties hit the Anthro stores.

Salt Shaker Snow Globes pleasure in simple things blog

I didn’t hop on that bandwagon and create a batch of salt shaker inspired items back then. That changed recently when I inherited quite an extensive salt shaker collection…(don’t ask – that interesting story is for another post!)

So, now in possession of so many salt shakers, I was prompted to create some salt shaker ‘snow globes’ and I am sharing some of my creations on Friday field trip today.  (Okay, so technically they are not snow globes since I haven’t added water.)

Salt Shaker Snow Globes pleasure in simple things blog

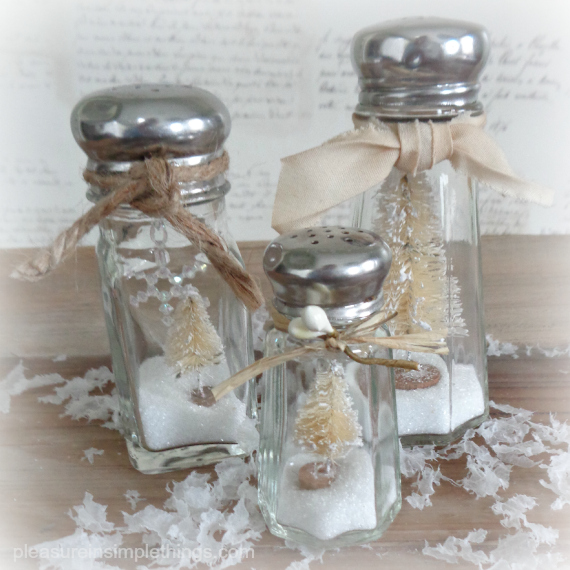
And, because of my preference for neutrals, I made my salt shaker snow globes with natural bottle brush trees.  I just added a little ‘snow’ and a tree to make a wonderful little favor or piece of holiday décor. (My recent inheritance gives me enough salt shakers to fill a mantle a couple of times over!)

Salt shakers are easily found at thrift stores or can be purchased very inexpensively at restaurant supply stores. Cute, aren’t they?

Salt Shaker Snow Globe with snowflake  pleasure in simple things blog

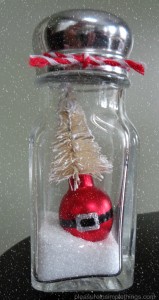
The best thing about them is that each creator can add a personal touch by choosing a favorite tree and ribbon or embellishment. For example, in one of my creations, I hung a little snowflake from a piece of thread. The variations are obviously endless!  Create something that matches your decor.  The stainless tops to the shakers can easily be spray painted with an oiled bronze or rusty look finish if that is your preference…or, spray in a glossy red or green!  You can also tie on a rusty jingle bell or other favorite item around the top of the shaker.  Or, glue a little ornament to the tree like I did with the Santa ornament my friend Phyllis gave me below. ;)  Group a bunch together and add some lights for a wonderful glow! :)

Salt Shaker Snow Globes and light pleasure in simple things blog

I hope I inspired you to create some salt shaker snow globes that coordinate with your individual taste and décor.  You don’t even have to ‘hold the salt’ – you can use it for the ‘snow!’

santa salt shaker snow globe pleasure in simple things blog

Thanks so much for stopping by. Remember to take pleasure in simple things, Jackie

Sharing at Thoughts from Alice, Finding Silver PenniesHouse of HipstersCoastal Charm, Crafts a la Mode, Shabby Nest, French Country Cottage, and Craftberry Bush.

10 comments » | diy, holiday, inspiration

zip code pillow gift

9
December

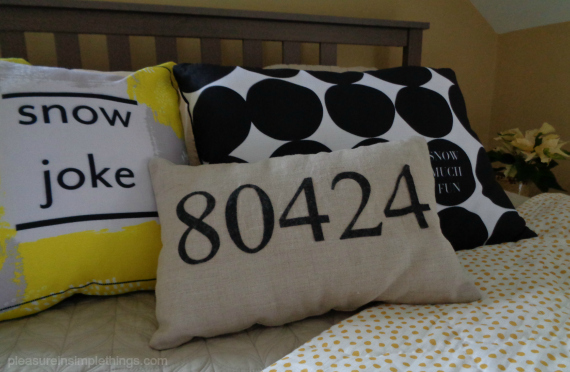
adding a zip code to a pillow gift pleasure in simple things blog

I love using zip codes in gifts! Giving a gift with the zip code from a special place – a hometown, the location of a new home, a vacation or honeymoon spot, or a college town – is such a thoughtful way to recognize a favorite or significant place of the gift recipient.

You may remember the decorative zip code tray I made a while back. (Click here for instructions to make a zip code tray.) Today, I am sharing instructions on how to add a (no sew) zip code to a homemade pillow!

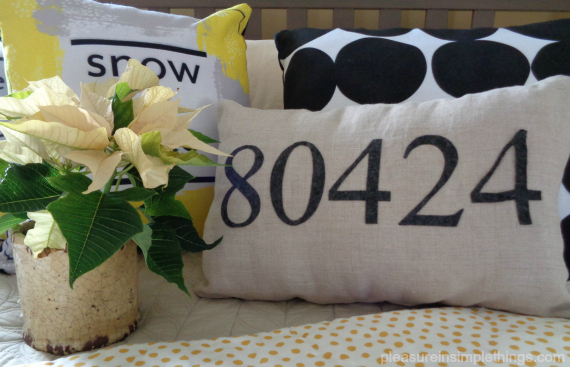
I made a pillow with the zip code for Breckenridge – one of my son’s favorite snowboarding places in Colorado – to add to a group of snow themed pillows I had made for his apartment.

pillows for snow boarders pleasure in simple things blog

I had planned on using an iron-on fabric adhesive to keep the zip code numbers in place and then to add decorative stitching around the edges of the numbers. As it turned out, the instructions on the adhesive I choose said “do not sew” on the instructions so, I ended up not including the decorative stitching to my design.

I chose linen for the pillow and gray felt for the zip code numbers. I used a product I purchased at a fabric store called HeatnBond Ultrahold to adhere the numbers.

zip code pillow on a bed pleasure in simple things blog

I decided on a 12” x 16” finish size for my pillow and cut the fabric appropriately. (If you decide to use a pillow form for your pillow, be sure to create a size that will accommodate it. If you are using polyfill to fill your pillow, you obviously do not need to be exact in your measurements.)

So, before proceeding to make the pillow, the desired zip code needed to be added to one of the pillow pieces. This was not hard to do, but took a little time and patience.

zip code pillow collage of instruction photos pleasure in simple things blog

First, I printed out numbers from my computer in a size and type style that looked appropriate for the finished pillow size. I cut out the five numbers from the computer paper.  (Cut only one paper number for a duplicate number.) I cut a piece of felt in an appropriate size to accommodate the five numbers I cut out. Following the instructions on the fabric adhesive, I used an iron to adhere the fabric adhesive to the BACK of the felt. Then, I flipped the numbers and traced them onto the paper of the adhesive. BE SURE to trace the numbers BACKWARDS (flipped on reverse side) so that they will come out the appropriate way when cut! I carefully cut out each number from the tracings. I removed the adhesive backing from the felt numbers and positioned them onto the right side of the linen piece I was using for the front of the pillow. Following the instructions on the adhesive, I ironed and bonded the numbers to the fabric.

Zip code complete! I then proceeded to finish sewing and stuffing the pillow. It is perfect for the snow themed holiday gift for my son…the perfect addition to a snowboarder’s apartment!  Now I am thinking I should make more – so many snowboarding states, so little time!  I also made one for a new home owner.  (For my own home I am thinking zip codes from favorite beach towns in neutral and sea glass hues!)

Love a themed gift! It’s snow much fun! ;) I can’t wait to coordinate the wrapping!

snow themed pillows pleasure in simple things blog

Note: The snow pun pillows in this post were ordered from Tiny Prints. Every year when I order my Christmas cards, I go a little crazy ordering other products I see on their site…this year; I couldn’t resist all the wonderful pillows that were available to personalize. If you want a zip code pillow and would rather not sew it yourself, you can easily personalize one using this website (click here for website)…or, even add a photo to a pillow. If I had a photo of my friend’s new home, I could have made a pillow with a photo of the home on the front! Next, I may order a pillow with a photo of my son snowboarding to add to his gift!  Another option to create a zip code pillow is to buy a pre-made pillow cover (Ikea has some nice ones) and follow the instructions I’ve provided to add a zip code.  I hope I have inspired you to create a themed gift for someone special!

Thanks for stopping by! Remember to take pleasure in simple things, Jackie

Sharing with Thoughts from Alice, Elizabeth & Co., House of Hipsters, and Sand & Sisal.

7 comments » | diy, gift ideas, style

diy book a day advent calendar

25
November

DIY making a book a day advent calendar pleasure in simple things blog

I love to read.

So, I guess it won’t come as a surprise to you when I tell you that books have always had a place as part of my holiday celebration.

In my home, reading holiday books is as much a part of preparing for Christmas as leaving cookies for Santa or trimming the tree.  Every November, the stack of holiday picture books packed away with the rest of the holiday trimmings, makes its way downstairs.

A great tradition I am sharing with you today is to create a more formal celebration of holiday books by making them into an Advent calendar. Wrap up 25 holiday books to stack by the fireplace or a cozy couch and have the children open one to read each evening during Advent.

using books for an advent calendar pleasure in simple things blog

stack of books advent calendar pleasure in simple things

The books don’t need to be about the holidays in the literal sense. You can choose stories of love, family, friendship, travel…or, even cooking –all appropriate themes relating to the holiday season.  There are so many great books – you don’t need to limit yourself to How the Grinch Stole Christmas or  ‘Twas the Night Before Christmas.  If you need some suggestions, here are a few titles we have enjoyed to get you started:

Santa Calls by William Joyce
Christmas in New York City by Roxie Munroe
The Finest Tree by John and Anne Hassett
Penquin and Pinecone: A Friendship Story by Salina Yoon
The Giving Tree by Shel Silverstein
The Tree that Came to Stay by Anna Quindlen
Love You Forever by Robert Munsch

diy book a day advent calendar pleasure in simple things blog

Be sure to include some titles with beautiful illustrations:

Old Turtle by Douglas Wood
Santa’s Favorite Story by Hisako Aoki and Ivan Gantscher
Simon and the Snowflakes by Gilles Tibo
The Snowman by Raymond Briggs
Polar Express by Chris Van Allsburg

Also, it is fun to include titles that promote activities:

I Spy Christmas by Walter Wick and Jean Marzollo
Snowmen by Peter Cole, Frankie Frankeny, Leslie Jonath
Recipe for Adventure Series by Giada deLaurentiis and Francesca Gambatesa
Kids in the Holiday Kitchen: Making, Baking, Giving by Jessica Strand

book advent calendar pleasure in simple things blog

When wrapping the books, you can choose a color theme to match your décor, holiday theme, or favorite color of the child(ren). I used kraft paper this year to wrap the books and added stickers I personalized with ‘book a day advent’ at Tiny Prints (click here for the website).  Their stickers are great – so many cute designs to choose from, they can be personalized as you wish, and a set is very inexpensive. I added numbers to my personalized stickers using rubber stamps and added one to each wrapped book.

When adding the numbers, be conscious that you can be strategic by coordinating number placement with book selection. Number an activity book for the weekend, time a relative’s visit with an appropriate theme/title, or read  ‘Twas The Night Before Christmas on the appropriate evening.

book a day advent diy calendar pleasure in simple things blog

You can use books you already own and/or library books for this activity…no need for it to be an expensive project!  Your local children’s librarian can help with your title selection if you need it.  And, if you own the books, when opening your gifts this year, use the discarded wrapping paper to wrap up the books for next year’s book calendar!

I hope you are inspired to create a book Advent calendar this year! Have fun with it!  I would love to hear your favorite titles!  The children will love this activity  – and, what better tradition than one that promotes a love for reading? :)

Thanks for stopping by. Remember to take pleasure in simple things, Jackie

Sharing with Finding Silver PenniesHouse of Hipsters, Thoughts from Alice, Crafts a la Mode, and Sand & Sisal.

8 comments » | diy, gift ideas, holiday, inspiration

tiny houses diy advent calendar

18
November

advent calendar with birch log pleasure in simple things blog

I love Advent calendars!  Every year I end up making a least a couple!  I’m not one to make a hanging calendar…I much prefer the 3D variety.  The first one I am sharing with you this year uses a collection of simple paper houses.  (Last year I shared one made from baby food jars, remember?  Click here to see.)

advent calendar house plesure in simple things

I used white card stock to cut out a two piece house.  I had planned on using gray card stock for the roofs, to create a nice contrast against the white ‘snow,’ but since the copy center was out of gray, I ended up painting the white card stock gray for my roofs.  I used rubber stamps to add the numbers to the front of each house (and added a little glitter).  I then added glass glitter ‘snow’ to the roofs…

making an advent calendar with paper houses pleasure in simple things blog

You don’t need a mantel to display an Advent village…here is the village on a birch bark lined tray…

advent calendar houses on birch bark lined tray pleasure in simple things blog

Or – you can use any shelf, table, or little corner in your home to add these tiny houses.  To make them really magical, they need some snow and lights…don’t you think?

advent calendar village pleasure in simple things blog

I am keeping mine pretty simple…just the houses with some snow – and, to go with my woodland theme, I added a white birch log…

small house advent calendar pleasure in simple things blog

So easy and so pretty!  This is a wonderful project to create with children.  I have another Advent calendar in the works to share soon!

Thanks so much for stopping by!

Remember to take pleasure in simple things, Jackie

Sharing at Craftberry Bush,  Sand & Sisal, Thoughts From Alice, and Finding Silver Pennies.

4 comments » | diy, holiday, inspiration

Back to top