Subscribe to Pleasure in Simple Things via RSS ReaderFollow Pleasure in Simple Things on InstagramFollow @InSimpleThings on TwitterLike Pleasure In Simple Things on FacebookFollow Pleasure In Simple Things on PinterestEmail Jackie

Tag: diy


watermelon ice cream push pops

8
September

 watermelon ice cream pop pleasure in simple things blog

There are two big things wrong with Labor Day in my book. First, that it is called Labor Day…it is actually ‘No Labor Day’, isn’t it? Well, that’s what my friends and I celebrate each year. We get together and celebrate a day of no work. Over the years we have always joked about our celebration of ‘No Labor Day.’

But, the biggest problem with Labor Day is not its name. The biggest problem with Labor Day is that it signals the end of my favorite season! With Halloween décor in the stores and school back in session, it is hard to ignore the hints of the upcoming season. Fall is ready to pounce and I hate to think of summer as a thing of the past!

Maybe that is why I am still hanging on to all things summer. I know that ignoring fall (bite my tongue for saying the word!) will not make it go away, but I continue to try my best to do so.

 watermelon ice cream push pops pleasure in simple things blog

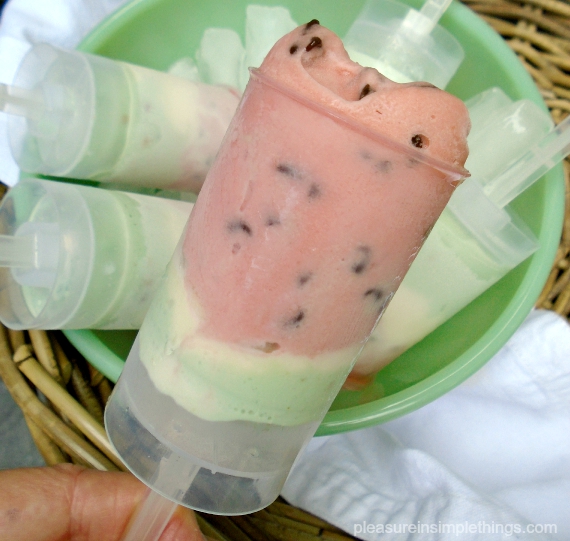
Watermelon ice cream push pops are a great example of some last minute summer fun! They are super easy to make and just scream summer. I made some for my ‘No Labor Day’ weekend, but they are fun to make anytime!

Now that these plastic push up containers are readily available in stores, you can easily create your own push up ice cream treats. I love these containers for homemade ice cream because soft, newly churned ice cream slips into them so easily.  But, no need to make homemade ice cream for these treats – softened store bought ice cream works just as well!

 close up of a watermelon ice cream pop pleasure in simple things blog

For a watermelon looking treat, use three flavors of ice cream. Pick something green, something white, and something red. For mine, I chose raspberry sherbet, pistachio ice cream, and vanilla ice cream.

I put each flavor in its own bowl and soften each up a little bit using a spoon. For the red flavor, I added some mini chocolate chips while softening, to act as my ‘seeds.’ The ice cream should be a little soft, but not runny. If it gets too soupy, it will start leaking out of the bottom of the plastic container. (I first learned this lesson when I tried to make Jell-O shots in these containers by pouring in the liquid mixture before set – epic fail!)

 ice cream mix ins for push pops pleasure in simple things blog

Holding the plunger all the way down (open) while doing so, I put in a small amount of vanilla – enough to create a thin layer – then a thin layer of the softened pistachio, and, finally, I filled the rest of the container with the raspberry sherbet I had mixed with mini chocolate chips.

Into the freezer they go to harden up, and that is it!

bowl of ice cream pops pleasure in simple things blog

These are easy to decorate for a party.  Add a ribbon to coordinate with your decor.  They also look great with a round sticker – either purchase stickers or print some on your home computer – round ones look great!  I hope I have inspired you to make some ice cream push pops.  You can find the empty containers in any store that sells cake decorating supplies – usually sold in a pack of six.

Thank you for stopping by. Remember to take pleasure in simple things, Jackie

Sharing at Craftberry Bush.

Comments Off on watermelon ice cream push pops | diy, food & festivities, recipe

old window into necklace display

25
August

building a necklace holder pleasure in simple things blog

In a recent post, I demonstrated how I updated an old necklace holder.  Today, I am demonstrating how to turn an old piece that was never intended for displaying accessories, into a display piece for necklaces!  I started with an old window.

a creating a necklace stand pleasure in  simple things blog

The first order of business was to find a way to make it stand up.  I wanted it to stand at an angle in the horizontal position.  I achieved this by using an old broom stick handle!  Cutting two pieces from the handle and screwing them into the back of the window was perfect for holding the window at an angle for display.  (It did take a couple tries to find the perfect angle for the cut.)

 adding legs to a jewlery stand pleasure in simple things blogThe window itself had a nice distress to it and I did not paint it at all.  But, to give a nice contrast to the pieces I would be displaying, I knew I needed to do something with the glass panes.  My decision was to use paper.  I used two different ones – one had a script design on it and the other was a natural textured paper.

 making a necklace stand pleasure in simple things blog

Although I liked the natural paper, it didn’t looked aged enough for this project.  So, before I started adding it to the window, I ‘aged’ it by soaking it in some strong coffee.

 drying coffee stained paper pleasure in simple things blog

After it was dry, I ripped pieces of both papers and positioned them on the inside of the glass panes.

 creating a necklace stand pleasure in simple things blog

Now all I needed was a way to hang the necklaces.  For this, I just hammered some nails into the top wood of the window frame.  I could use one nail or several to hang a necklace, depending on its length. adding nails to a jewelry stand pleasure in simple things blogI think the piece came out perfect for necklace display!  This project can take on many variations.  The first that comes to mind is to display old black and white photos on the glass.  I am sure you can come up with your own ideas!  I hope I have inspired you!

necklace holder pleasure in simple things blog

Thanks so much for stopping by!

Remember to take pleasure in simple things, Jackie

1 comment » | diy, style

diy garden wrapping paper

18
August

making garden wrapping paper pleasure in simple things blog

I very often create my own wrapping paper; particularly when I have a vision of something specific in my mind. This was the case with the tomato wrapping paper I made recently for a thank you gift I was giving a friend.

finished home made wrapping pleasure in simple things blog

The gift was a book on heirloom tomatoes and I had a vision of a graphic of a tomato on brown paper. I knew I needed to make it! I decided on a classic potato print and set to work. I cut a couple notches into one half of a potato – that would be the main part of the tomato. I used the other half of the potato to make some greens for the top. Simple!

making potato print wrapping diy pleasure in simple things blog

I printed it in two parts. First, the red in a random pattern on brown paper large enough to accommodate the book I was wrapping. After that was dry, I printed the second part – the green. Great! Exactly what I had hoped for! And, I would add tie it up with some natural raffia for my final touch!

diy wrapping pleasure in simple things blog

I hope I have inspired you to create some fun wrapping paper this summer! ;)

simple home made wrapping paper pleasure in simple things blog

Thanks for stopping by! Remember to take pleasure in simple things, Jackie

Sharing with Sand & Sisal.

2 comments » | diy, garden, gift ideas

jewelry holder redo with annie sloan

14
August

after of a jewlery stand redo pleasure in simple things blog

Today’s redo may seem a little unusual… Maybe not if you remember that I once turned a plastic drink container into a beautiful flower vase using Annie Sloan paint!  Today, I am again using Annie Sloan paint for a transformation.  For today’s Friday field trip, come see how I used paint, an old poetry book, a few shells, and some scraps of ribbon to turn a black metal jewelry stand into something much more ‘poetic.’

before and after jewlery stand

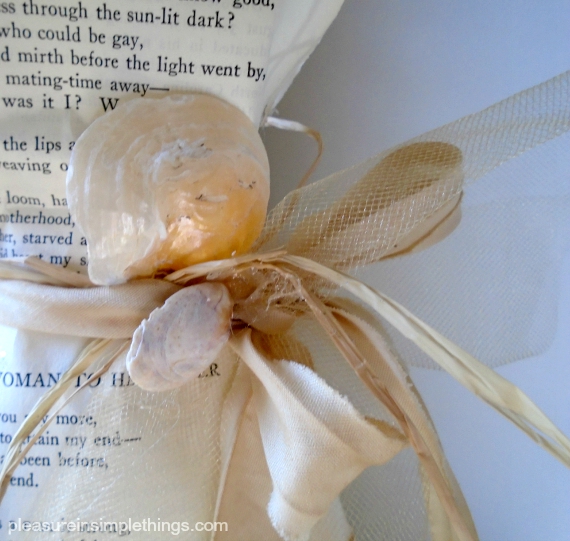
First, I used Annie Sloan paint in Old White to cover the entire jewelry stand.  I really did not like the grid pattern on the metal piece so, I decided to tone it down by attaching some pages I ripped out of an old poetry book.  After I liked the way the pages were arranged, I added a ‘belt.’

closeup of jewlery stand redo pleasure in simple things blog
For this, I used a glue gun to add some raffia, some seam tape (I aged using some strong coffee), a few shells, and some tulle.

jewlery stand redo on pleasure in simple things blog

I finished by adding a little bit of sparkle to the pages and a few gold accents to the Old White paint.  A much different look than the old black metal grid, don’t you think?

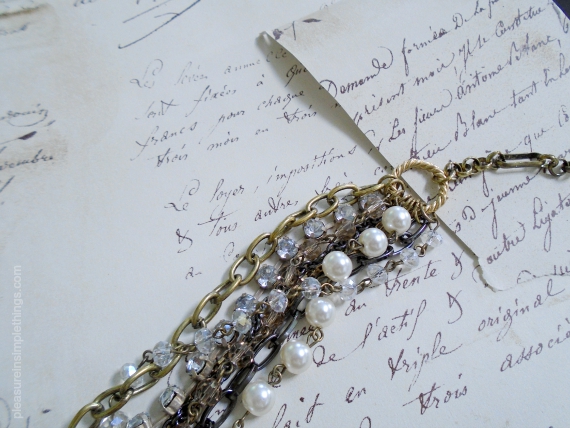
jewelry holder with necklace pleasure in simple things blog

The piece now looks really great to display jewelry or to display on its own!

Thanks for stopping by!  I hope I have inspired you to update your own flea market find!

redo of a jewlery stand
Have a wonderful weekend and remember to take pleasure in simple things, Jackie

Sharing with Elizabeth & Co., Coastal Charm, and Thoughts from Alice.

2 comments » | diy, inspiration, swag

diy nautical flag garden stones

11
August

signal flag rock diy pleasure in simple things blog

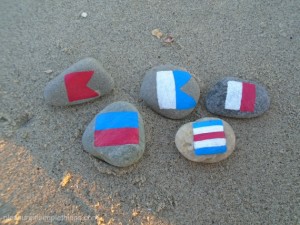
I think we have all painted garden stones in our day. If not, you should have! They are so fun to make and look so cute in the garden or as a paperweight. Today, I am showing you how to create some stones for your garden that have more of a ‘beach’ vibe than the typically decorated stones – a batch of nautical plant markers boasting the shapes of signal flags!

painting nautical rocks

They are so simple, yet so fun to make! The only thing you will need to make up some of these marine inspired cuties are some paint markers and some smooth stones! I used Sharpie brand medium point oil based paint markers. I love these markers because they totally eliminate the mess of paint and brushes but create the same result. And, the best part is that they come in a set that contains the exact colors needed for nautical flags! They should call it ‘signal flag set’ or ‘nautical color set.’ Thanks for that Sharpie!

supplies for nautical rock painting

maritime signal flags

These flags are used internationally as signals for ships at sea. Each flag represents a letter.

Stones painted with nautical flags also make great table markers at a beach wedding or a really nice addition to a gift of potted sea grass or beach roses. Make up the recipients initials in signal flags and add them to the potted plant!

nautical rocks pleasure in simple things

I am sure you have said to yourself by now “This is a super activity for kids.” It sure is! Not only can children learn some basic seamanship with this craft, but it is pretty easy to incorporate a math lesson as well!

nautical flag rock painting pleasure in simple things

Another fun idea for the kids, is to have them make up some nautical ‘x’s’ and ‘o’s’ with some small rocks; using them for a game of tic-tac-toe in the sand! Fun!

nautical tic tac toe diy pleasure in simple things

I hope I have inspired you to make some nautical flag stones for your own garden or as a way to add some ‘beachyness’ to your décor…make up the name of your boat or the name of your favorite beach! Have fun with it!

spelling words with nautical rocks pleasure in simple things

Thanks so much for stopping by!

Remember to take pleasure in simple things, Jackie

Sharing with Sand & Sisal and Coastal Charm.

Comments Off on diy nautical flag garden stones | diy, garden, sand & sea

adding a spigot to a watermelon

4
August

watermelon beverage container pleasure in simple things blog

It wasn’t until recently that I heard people were using watermelons as beverage holders. Since yesterday was National Watermelon Day, it seemed the perfect excuse to try my hand at creating one!

I have made many a watermelon basket in my day! Even as a teenager, I loved carving out a watermelon to fill with a fruit salad for a party or get together. The older I got, the more ornate my baskets would become!

national watermelon day using a spigot pleasure in simple things blog

Using a watermelon to create a vessel for a beverage seemed pretty similar to making a watermelon basket. It is an easy concept: Hollow out a watermelon; cut a hole and add a spigot; fill it with a beverage!

To try your hand at making one, first examine your watermelon and decide which way you want it to stand. When you have the top and bottom picked out, make a very thin slice in the ‘bottom’ so it will stand up nice and straight without rolling over. Be careful not to cut too much off, or you could spring a leak in the bottom!

making awatermelon beverage holder pleasure in simple things blog

The spigot is easy to install. Cut a small hole the diameter of the spigot. Then add the spigot – a washer will hug each side of the watermelon; the nut will cap off the inside.

Then, cut off a slice from the top. Use a large, strong metal spoon to scoop out all the good watermelon and reserve it in a big bowl. (I also saved the juice from the watermelon by pouring it into a pitcher.)

Cut a hole for the spigot and position it near the bottom of the watermelon. (Remember that the section of liquid below the level of the spigot will not flow out.)

watermelon spigot on stand pleasure in simple things blog

Now you are ready to fill your beverage container with whatever beverage hits your fancy! I decided to make something of a jazzed up watermelon water. I had enough melon to make the water and still had leftovers for snacking!

watermelon spigot with pleasure in simple things blog

Watermelon Water
6 cups of watermelon, pulverized in a blender (you can count the liquid from the watermelon as part of the 6 cups.)
Juice of one lime (or to taste)
. . . . . . . . . . . . . . . . . . . . . . . . . . . . .
Mix ingredients. Strain. Chill. Garnish with basil or mint leaves from garden. ;)

You may decide to fill your watermelon with a punch or some type of alcoholic drink (for those over 21) for your next party. My only advice is to be sure to strain any fruit drinks prior to putting them into the watermelon container. This ensures no pulp will clog up the spigot.

a watermelon spigot instructions pleasure in simple things blog

I know there are spigots marketed now as “watermelon spigots,” but you really don’t need anything special for a watermelon. My spigot cost $4.99. The only adjustment that may be needed is if the spigot is not long enough for the width of your fruit. I needed to shave mine down a little to be sure the washer fit on the back. I probably could have found a longer spigot, but it was easier just to make the width of the watermelon a little thinner in the spot where the spigot attached.

carving a watermelon beverage container pleasure in simple things blog

Now that I know it works, I can try some variations! Just like my watermelon baskets, I can see my beverage holders will also get ‘fancier’ over time! How about a row of fish carved around the top rim? Such possibilities! And, there are so many cute ways to set up a beverage station! Give it a try!

Thanks so much for stopping by!  Remember to take pleasure in simple things, Jackie

Sharing with Shabby Nest, Craftberry Bush,  House of Hipsters,  Sand & Sisal and Coastal Charm.

2 comments » | diy, food & festivities, recipe

diy rubber bottomed tote bag

21
July

tote bag diy with flowers pleasure in simple things

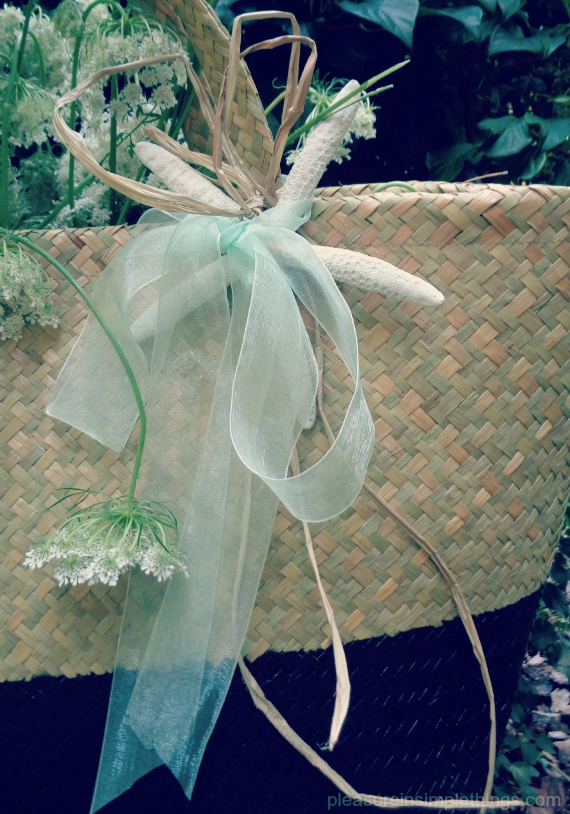
Don’t you love those rubber bottomed tote bags? I do! I have been meaning to make myself one for quite some time. I decided to give it a shot when I saw the Ikea straw totes on sale for $2.99! How could I go wrong?

My original plan for a rubber bottomed tote was to create one on a canvas bag and include a monogram. Once I got the bottom on my new straw tote, I changed my mind about the monogram. I preferred the look without it. I will wait until I find a good deal on a canvas tote, then I will make one with a rubber bottom and include a monogram.

a finished tote bag with flowers pleasure in simple things blog

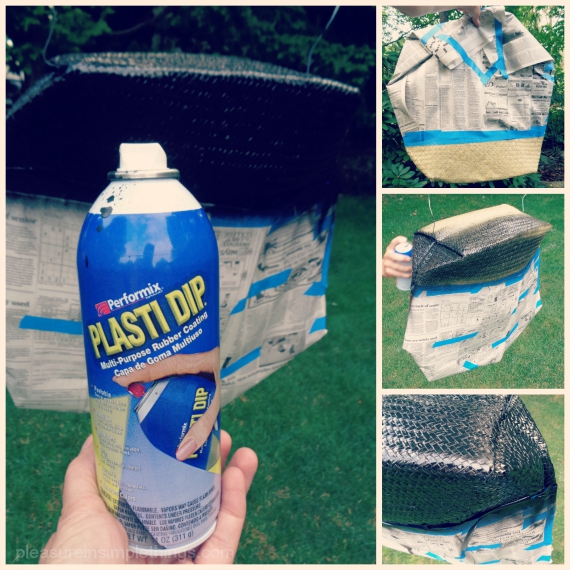
This is a super easy project. The only supplies you need are; the tote you plan to use, some tape and paper for masking, and a can of Plasti Dip. You have seen me use Plasti Dip quite a bit if you follow this blog. I really love the product. (I will include some links to other DIY projects using Plasti Dip at the end of this post.) This product was once confined to the garage – but not once I got a hold of it! I adore repurposing products that are carried at a building supply store – Plasti Dip is one of these products!

diy rubber bottomed tote pleasure in simple things blog

Rather than the liquid form you have seen me use in the past, I am using the spray version of Plasti Dip for this project. Any spray paint has an overspray, so it is necessary to thoroughly mask any areas that will not be painted. To prepare, I used painter’s tape and newspaper to mask off these areas and I hung the bag upside down on the clothesline. This made it easy to paint. I chose a black paint and sprayed it in two light coats. The natural material of the tote is very porous, so it definitely requires 2 coats.  (The texture of the tote will prevent a perfectly sharp line like you would get on fabric.)

tote bag with flowers diy pleasure in simple things blog

That’s it! Just be sure to position the tote as you would use it – you don’t want it folded when you spray it since the rubber material dries hard.

Isn’t it great? I love it! I hope I have inspired you to try this fun and easy project!

diy tote bag with starfish pleasure in simple things blog

Links to 5 other DIY projects using Plasti Dip:  Color dipped wooden spoons, On pumpkins, Napkin Rings, Nautical necklace, Seafood swag

Thanks so much for stopping by! Remember to take pleasure in simple things, Jackie

Sharing with The Shabby Nest, French Country CottageSand & Sisal, Coastal Charm.

Comments Off on diy rubber bottomed tote bag | diy, gift ideas, inspiration

patriotic driftwood bubble wands

26
June

patriotic bubble wand pleasure in simple things blog

The Fourth of July at the beach is great! And, just like in the rest of the nation, some serious red, white, and blue action is going down! It starts early in the day with the kick-off red, white, and blue parade. The kiddies dress themselves, their bikes, their dogs – and just about anything else you can think of – in the colors of the day!  Once the evening arrives, a magnificent display of fireworks is the crowning glory of these patriotic hues.

diy patriotic driftwood bubble wands pleasure in simple things blog

The relaxed vibe at the beach makes it easy to create – most times using items found on the beach. A classic example is the crab catcher. This handy item is crafted from an old wooden clothespin and some string. When baited with whatever scrap of meat or meat related product can be salvaged, it works its magic!

making bubbles with homemade wands pleasure in simple things blog

Another handy item for the beach is a bubble maker aka bubble wand.  For the holiday, this can be a fun patriotic craft!  Using some dish detergent (1 patriotic driftwood bubble wands pleasure in simple things blogtablespoon dish liquid per 1 cup water) and some homemade bubble wands, it is super simple to create some fun in the sand. Running along the beach after bubbles can keep the young (or young at heart) occupied for hours!

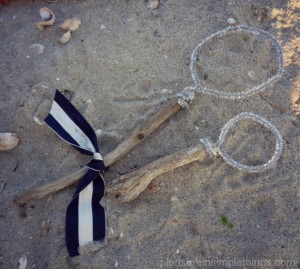
Bubble wands are easy to make using pipe cleaners and driftwood.  They can be decorated with shells, scraps of ribbon, or any other number of items washed up on shore.  Some crafters take time for elaborate decorations. while others work fast; anxious to get to the bubble part!  (Yes, the star shapes do work to make bubbles, but are much more complicated for young fingers to create.)

For today’s Friday field trip, I wanted to show you some of the wands I made at the beach. You can use wire or stiff ribbon – anything that will hold its shape. I used items I already had. The smaller ones here are made with a sparkly wired ribbon and the others are made with metallic pipe cleaners.

patriotic beach day pleasure in simple things

I like to make the bubbles by dipping the wands into a shallow container of the bubble liquid; especially for the larger bubble wands. This makes it easy to dip the wand and the shallow container helps avoid knocking over the solution.  Remember, the larger the wand, the larger the bubble!

loading bubbles onto a homemade bubble wand pleasure in simple things blog

And, for some extra night time fun, break open a glow stick to add to your bubble solution for some glow-in-the-dark bubbles!

I hope I have inspired you to create some bubble wands of your own!

4th of July pleasure in simple things blog

Thanks for stopping by. Remember to take pleasure in simple things, Jackie

Sharing with House of Hipsters, Thoughts From AliceCraftberry Bush, Nancherrow, and The Shabby Nest.

Comments Off on patriotic driftwood bubble wands | diy, field trips, holiday, inspiration, sand & sea

9 special diy ideas for father’s day

16
June

seafood forks pleasure in simple things blog

It’s a cold, miserable day today.  After arriving home from work, I should really be outside painting furniture or finishing my current read.  Instead, the weather has kept me inside.  Yes, I could be binge watching the third season of Orange is the New Black, but instead I am looking through some old posts to find some fun things to make for Father’s Day.

I put together nine favorites from my archives to help inspire you to make something special for Dad this year on his day!

beverage gifts for Fathers Day pleasure in simple things blog

Edible gifts are popular with any Dad.  Here are a couple ‘over 21’ beverages that are sure to be a hit.  Click here for a recipe to make homemade Bailey’s Irish Cream and click here to learn how to make some great jelly shots shaped like fish!

zip code tray pleasure in simple things blog

This zip code tray is a stylish and super practical place for Dad to leave his keys.  It also is a great way for Dad to remember where he left his keys!  Click here for instructions.

tie dye pleasure in simple things blog

A tie dye shirt is as much fun to make as it is to give!  The whole family can enjoy making Dad a piece of clothing dyed personally for him!  Click here for easy instructions!

nautical coasters pleasure in simple things blog

Making coasters for Dad is easy and fun. Click here for several great ideas.  Old cardboard, jar tops, and discarded six-pack packaging are a few of the items that make creative coasters!

gift wrap ideas for Fathers Day pleasure in simple things blog

Any gift is more special when it is presented in a special way!  Click here to learn how to make your own gift wrap and click here to see how easily you can create a unique paint can gift package!

entertaining gifts for Fathers Day pleasure in simple things blog

If your Dad is more the entertaining type, here are two great gift ideas.  Click here for ideas for creating your own napkin designs.  Another great idea is to make a set of forks for seafood dinners…the fun part about this gift is that it is created using something from Dad’s garage!  Click here to find out more!

I hope you enjoyed these few DIY ideas from the archives to help make Father’s Day a little more special!

Thank you for stopping by!  Remember to take pleasure in simple things, Jackie

Sharing with Coastal Charm and Elizabeth & Co.

Comments Off on 9 special diy ideas for father’s day | diy, gift ideas, holiday

annie sloan chair redo (before & after)

2
June

chair seat Annie Sloan redo pleasure in simple things blog

It’s baaaack…painting season, that is!  Once the weather gets warm, I love being outdoors and transforming some old furniture with a little paint!  This season started with an old chair.  When I saw the detail on the back of this chair, I was hooked!  I needed to paint it!

chair before pleasure in simple things chair redo

I had some great fabric left from a chair project I completed last summer, so that spearheaded the color choice for this chair.  I started by putting a sealing coat, since the type of finish on this chair often bleeds through paint.

After Chair Annie Sloan pleasure in simple things blog

Then, I painted the entire chair with a coat of Annie Sloan Paris Grey.

detail Annie Sloan chair redo pleasure in simple things blog

The next coat I painted was Annie Sloan Old White.  Using those two paint colors and, also, some Duck Egg, I mixed the paint to add a design to the back of the chair.  Because the chair fabric had an abstract kind of a look, I went with the same type of feel for the back of the chair, using soft, loose strokes.

Annie Sloan paints pleasure in simple things blog

Once that was complete, I added a coat of Annie Sloan clear wax to the entire piece.  I then did some distressing of the piece before adding a second coat of wax.

painted detail Annie Sloan chair redo pleasure in simple things blog

What do you think?

Annie Sloan paint chair pleasure in simple things blog

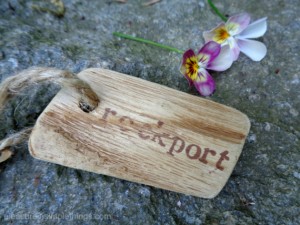
I am calling my first piece of the season Rockport.  :)

Rockport chair pleasure in simple things blog chair redo

Thanks for stopping by.  Remember to take pleasure in simple things, Jackie

Sharing with House of Hipsters, Sand & Sisal, Thoughts From Alice, and Finding Silver Pennies.

Comments Off on annie sloan chair redo (before & after) | diy, inspiration, style

Back to top