Subscribe to Pleasure in Simple Things via RSS ReaderFollow Pleasure in Simple Things on InstagramFollow @InSimpleThings on TwitterLike Pleasure In Simple Things on FacebookFollow Pleasure In Simple Things on PinterestEmail Jackie

Tag: dessert


getting your just desserts

16
July

lunch at terrain cafe

Isn’t it feeling great that things are starting to get a little bit back to normal?  Getting together with the people we love, of course, is the best part!  When getting together at a fabulous place – all the better!

That was my luck recently when I was treated to lunch at one of my favorite places – Terrain.

white lavendar

There is so much to love about Terrain Café…the bread baked in a flower pot and served with herbed butter, seasonal salad selections like grilled peach and strawberry spinach, or the inventive summer beverage selection.

And, of course, a special dessert because having lunch at Terrain Café always calls for a dessert splurge!

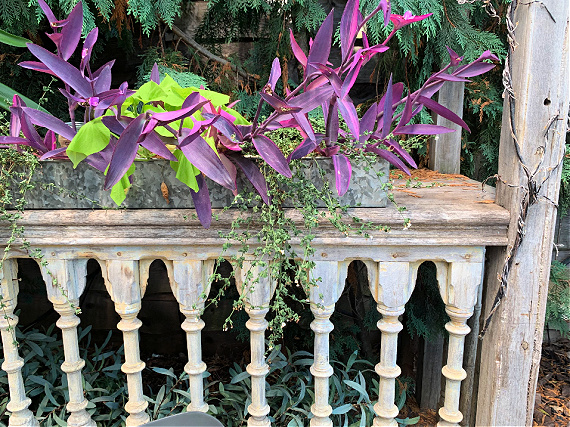
cafe at Terrain

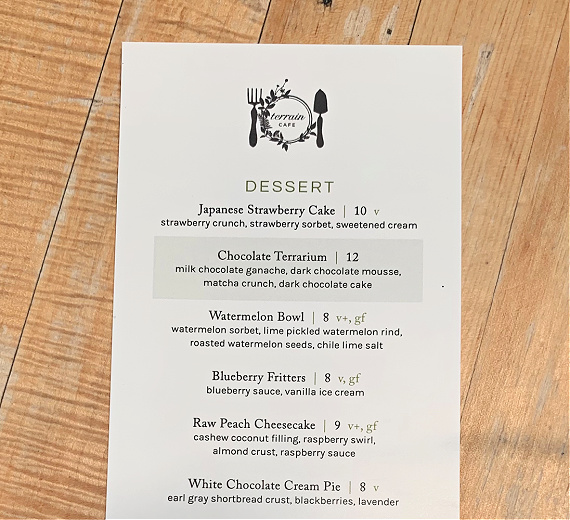
For desserts, like everything else on the menu, a seasonal selection is offered.

terrain dessert menu

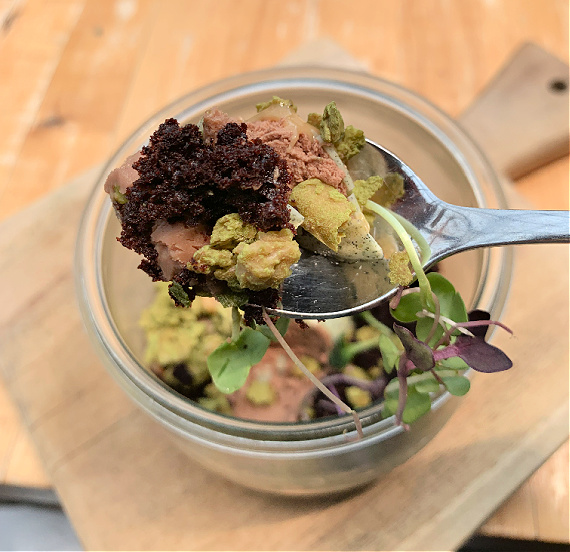
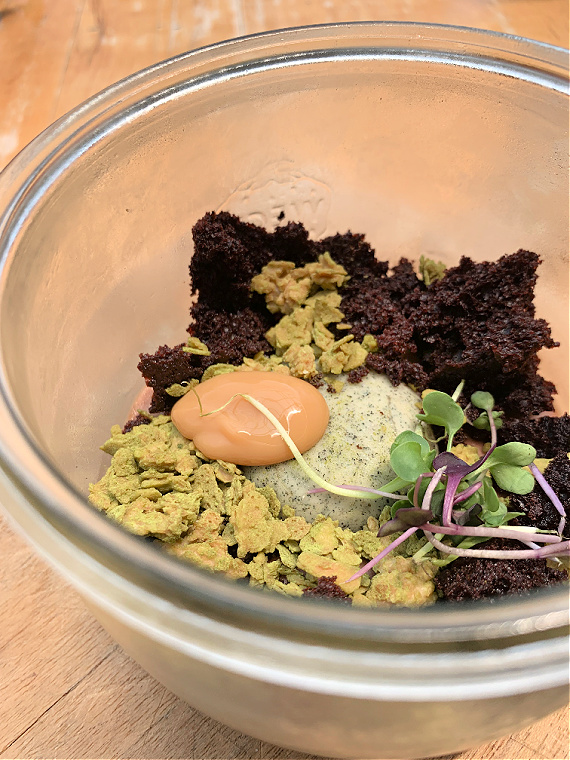
Wouldn’t you like to try every single one?!  My favorite dessert is the terrarium dessert created by Terrain Café and served in a Weck jar.  Not only is it on point in theme, but it tastes absolutely delectable!

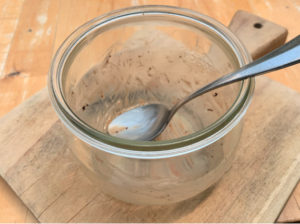
spoonful of goodness

Sadly, not everyone has a Terrain Café nearby, but everyone can take some special time with special people to enjoy their ‘just desserts.’

terrarium close up

I hope I am inspiring you to do just that!

Thanks for stopping by!  Have a fabulous weekend!

finished dessert

Remember to take pleasure in simple things…like eating a fabulous dessert al fresco with your besties!  xo Jackie

Comments Off on getting your just desserts | food & festivities, garden

making old school ice cream sandwiches

25
April

old school ice cream sandwiches

Not since Alton Brown made his candy corn recipe public, have I been so excited about trying out an old school recipe! And, even more important than the recipe, I found a pan that bakes the cookie layers with the appropriate design of imprinted holes! (It is just not the same without the holes!)

The recipe and the baking pan (a genius 3 piece creation) come together in a set. The set makes baking the cookie pieces, as well as assembling the sandwiches, super easy.

Halo Top ice cream sandwiches

Since I wanted to make some special ice-cream sandwiches for my daughter’s birthday as my first use of the set, I chose to use her favorite ice-cream – Halo Top. My plan was to use birthday cake ice-cream and garnish the sides of the sandwiches with multi-colored sprinkles! Adorable, right?

When I got to the grocery store, I couldn’t find Halo Top in birthday cake flavor, so I purchased two alternate flavors, and decided to make two ice-cream sandwiches in each flavor. The ice cream sandwiches might look old school, but I have replaced the standard vanilla ice cream with mint chip and peanut butter cup – I don’t ever remember these flavors as options back in the day. ;)

ice cream sandwich making set

The instructions provided with the pan were very easy to follow. The only part of the process that took a little time was smoothing out the batter for the cookies in the pan, but even that was pretty painless. Measuring out an exact 1 tablespoon of batter for each mold created a perfect result!

I was happy with the ice cream sandwiches I made on my first attempt! I can’t wait to try making some using home churned ice-cream this summer!

making old school ice cream sandwiches

If you are interested in making your own, I found the ice cream sandwich making set at Sur La Table. You can purchase one through their website. Currently, the set to make 4 sandwiches is on sale for under $10!

ice cream sandwich collageA word of advice: The set makes 4 ice cream sandwiches. If you choose to make only four, do not make the entire recipe of cookie batter. You will only use 8 tablespoons of batter to create the cookies for 4 sandwiches and the batter from the recipe provided probably makes enough for 50! Cut the recipe way down if you only plan to make four! Enjoy!

making old fashion ice cream sandwiches

Thanks for stopping by! Remember to take pleasure in simple things – like enjoying an old school ice-cream sandwich on a warm afternoon!
xo Jackie

2 comments » | diy, food & festivities, inspiration

gluten & dairy free pumpkin dessert

2
October

easy gluten free pumpkin recipe pleasure in simple things blog

It is important to have a recipe or two in the repertoire that can accommodate dietary restrictions. Having a couple of recipes for gluten-free desserts that taste good is important to me. I came across a recipe over Labor Day weekend, while flipping through some magazines, that used bananas as a base for a frozen pumpkin dessert. I was intrigued. My favorite gluten-free dessert thus far is an amazing chocolate pudding made from an avocado base. (If you want to look back on it, click here.)

pumpkin dessert for gluten free pleasure in simple things blog

Having a frozen selection – particularly a seasonal one – seemed ideal! So, I gave it a try.  I was not disappointed. I just wish I could remember from which magazine I discovered it! Part of the attraction was the few simple ingredients and easy instructions.

gluten free pumpkin ice cream recipe pleasure in simple things

So, for today’s Friday field trip; a quick and easy gluten-free pumpkin ice cream recipe.

gluten and dairy free pumpkin ice cream recipe pleasure in simple things blog

I made it a couple of times. The first time I mixed all the ingredients together, froze them, and then thawed the mixture slightly and whipped in the blender when ready to serve. The second time, I added all the ingredients to the blender, expect the bananas, and then tossed in some frozen bananas I had in the freezer. This worked also – although I think the ingredients mixed more thoroughly using the first method.

making gluten free pumpkin dessert pleasure in simple things blog

A nice surprise dessert for those who can’t have gluten or dairy…and, a healthy dessert for anyone!

Thanks for visiting!  Have a wonderful weekend and remember to take pleasure in simple things, Jackie

Comments Off on gluten & dairy free pumpkin dessert | food & festivities, recipe

3 ingredient lemon mousse shooters

19
May

easy to make lemon mousse shooters pleasure in simple things blog

Dessert shooters are always fun– a nice little bit of sweetness without the heaviness of a traditional sized dessert.

This three ingredient shooter is super easy to create. Great for a party, these lemon mousse shooters can be made ahead, and if you use little disposable decorative cups, are clean-up free!

lemon mousse shooter pleasure in simple things blog
The lemon flavor for these shooters comes from lemon curd. I love lemon curd and very often use it in tarts – it packs so much flavor. For today’s dessert, I used store bought lemon curd (a 10 oz. jar is approximately 2/3 cup) and lightened it up by folding it into some whipped cream. With this mousse mixture and some gingersnap cookie crumbs, the shooter is complete!

recipe for lemon mousse shooters pleasure in simple things blog

Raspberries, mint, or lemon slice candies make great garnishes, but if you want to stay strict to three ingredients, top the shooter off with a piece of gingersnap cookie instead.

3 ingredient lemon mousse shooters pleasure in simple things blog

The hard store bought gingersnaps work best to make crumbs. If you are not a gingersnap fan, you can easily change the gingersnap crumbs for some shortbread cookie crumbs.

making a lemon mousse shooter pleasure in simple things blog

I hope you enjoy these little lemon mousse shooters!

Thanks for stopping by! Remember to take pleasure in simple things, Jackie

Boat Sailing vintage book pleasure in simple things blog
P.S. The napkins and the mini baking cups I used here are from Home Goods.

Sharing at Craftberry Bush, Thoughts From Alice, House of Hipsters, Nancherrow, and Sand & Sisal.

4 comments » | food & festivities, recipe, sand & sea

gluten-free, dairy-free, sugar-free pudding

10
April

delicious chocolate pudding pleasure in simple things blog

Sometimes we are better off not knowing. This philosophy applies in so many instances – but, never as appropriately as knowing the ingredients in a ‘healthy’ dessert.  And, somehow, just knowing a dessert is classified as gluten-free, dairy-free, and sugar-free makes it instantly less appealing. Don’t you agree?

chocolate pudding pleasure in simple things blog

Recently, I needed a gluten-free, dairy-free dessert for a dinner guest and found the options in grocery stores were pretty sad. Creators of these ‘special’ desserts seem to think the missing gluten and dairy can be made up for with tons of sugar! Yuck!

healthy chocolate pudding pleasure in simple things blog

Luckily, living in Fairfield County, I have plenty of options for healthy eating and I just needed to do a little bit of investigative research! I ended up finding my answer at the Catch a Healthy Habit Café in Fairfield with their tasty chocolate pudding made from…avocados!   (The recipe was published in the book Fairfield County Chef’s Table: Extraordinary Recipes from Connecticut’s Gold Coast by Amy Kundrat.) I was so amazed and delighted by this chocolate pudding, I have to share the recipe with you today on Friday field trip.

chocolate pudding recipe pleasure in simple things blog

I am not saying this is a good tasting dessert by gluten-free and dairy-free standards. What I am saying is that this is a good tasting dessert, period. I made it to have in my repertoire for when a guest could not have gluten and/or dairy, but ended up liking it so well, I now make it for myself! Give it a try!  Your guests may just be better off ‘not knowing’ the main ingredient of the smooth and yummy chocolate pudding you serve at your next get together! ;)

gluten free dairy free chocolate pudding pleasure in simple things blog

Thanks for stopping by!

Have a wonderful weekend and remember to take pleasure in simple things, Jackie

Sharing at House of Hipsters, Thoughts from AliceCraftberry Bush and The Shabby Nest.

1 comment » | food & festivities, recipe

s’mores ice cream cake

22
July

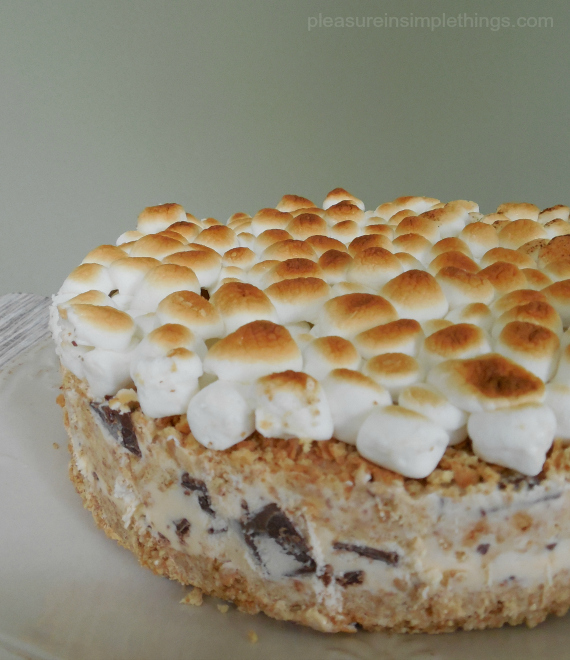
s'mores ice cream cake pleasure in simple things

It was National Ice Cream Day this past weekend and I was ‘jonesing’ for an ice cream cake!  I couldn’t let the day go by without celebrating!  Looking around the house, I had some s’more leftovers and decided to utilize them in an ice cream creation!

s'mores ice cream cake pleasure in simple things

In my house, ice cream desserts are always a big hit in the summer. This one is based on a favorite summer dessert and was inspired by the leftovers from our Fourth of July beach party.

s'mores ice cream cake pleasure in simple things

Unlike baking, the procedure for making ice cream cakes is totally forgiving and precision is not required – so feel free to alter the recipe based on the size of your pan or the ingredients you have on hand. I made a no-bake crust for this one, since I didn’t want to heat up the house with the oven on a hot summer day.

S’more Ice Cream Cake Recipe

  • 4 Hershey chocolate bars (1.55 oz. each), chopped into pieces
  • 1 qt. softened vanilla ice cream (made or purchased)
  • 2 packages (20 long) graham crackers, divided
  • 5 Tab unsalted butter
  • 2 Tab sugar, divided
  • Bag of miniature marshmallows

I know, this one is not for the faint of heart – although, in my defense, I did use low fat graham crackers and low fat ice cream! :)  (Come on, I nixed my original idea of putting a layer of melted Hershey bars over the graham cracker crust!)

Start by making graham cracker crumbs. (I put the graham crackers in a plastic zip-lock bag and used a rolling pin to crush the crackers and make the crumbs.) One package of the crackers will be used for a crust, and the other package for a ‘filling.’

Combine one package of the graham cracker crumbs (half your total) and a tablespoon of sugar with 5 tablespoons of melted unsalted butter. Pat this into the bottom of an 81/2” springform pan and pop this into the freezer while you prepare the ice cream.

Add the chopped chocolate bar pieces into the softened ice cream, mixing to combine. Take out the prepared crust and spread ½ of the ice cream mixture over the crust.

making s'mores ice cream cake pleausre in simple things

Mix the other half of the graham cracker crumbs with 1 tablespoon of sugar and reserve ½ cup of the mixture. Sprinkle all but the half cup over the ice cream mixture. Carefully spread the rest of the ice cream mixture over the graham cracker middle. Use the remaining ½ cup of graham cracker crumbs to sprinkle on top.

Cover the entire top of the cake with miniature marshmallows and freeze until very firm.

Adjust the oven rack on your broiler so that the cake can be as close to the element as possible and preheat the broiler. Put the cake under the broiler to brown the marshmallows as quickly as possible and then put back into the freezer. Even after being frozen, the marshmallows are gooey when you eat the cake!

melted s'mores ice cream cake pleasure in simple things
Let the cake sit awhile out of the freezer before eating – I think it tastes best just like s’mores – a little on the melty side!

Enjoy!  Hope you will experiment with your own ice cream creations!  Thank you for stopping by!

s'mores ice cream cake pleasure in simple things
Remember to take pleasure in simple things, Jackie

P.S.  If you are a s’more lover, you may also enjoy gourmet s’mores and s’more shooters!

Sharing with Crafts a la Mode and  Craftberry Bush.

Comments Off on s’mores ice cream cake | food & festivities, inspiration, recipe

coconut lime rice pudding

8
July

coconut lime rice pudding recipe pleasure in simple things

Isn’t rice pudding a winter dessert?

I love to eat it warm and I find it very satisfying as a cold weather treat, but I was given a sample of Carolina Jasmine rice at the Country Living Magazine Fair this year and it motivated me to try a recipe for coconut lime rice pudding.

coconut lime rice pudding pleasure in simple things

Two big surprises here!  1. It is not winter… and,  2. I am making rice pudding and not using my grandmother’s recipe!

I love the subtle jasmine flavor of the rice combined with the coconut and lime flavors.  As always, when I find a great recipe…and a super easy one at that…I need to share!

coconut lime rice pudding pleasure in simple things

Coconut Lime Rice Pudding Recipe

  • 1 cup Carolina Jasmine Rice
  • 2 cans (13 to 14 oz. each) light unsweetened coconut milk
  • 2 ½ cups whole milk
  • 1 cup sugar
  • 2 ½ tsp fresh lime zest (buy 2 limes – I also added a squeeze of fresh lime juice)
  • Toasted flaked coconut and lime peel, for garnish
  • 6 gingersnaps crushed with a rolling pin, for garnish

In a bowl, soak rice in water for 20 minutes.  Drain.

In a 3-quart heavy saucepan, bring coconut milk, milk, sugar and rice to a gentle boil.  Reduce heat and simmer, uncovered for 25 minutes, stirring occasionally.

Remove from heat and add lime zest (and a squeeze of fresh lime juice if desired).  Serve chilled.  Sprinkle with toasted coconut, crushed gingersnaps, and lime peel, if desired.  Serves 8.

Based on a recipe from Carolina Rice.

Carolina jasmine rice and coconut lime rice pudding

Because I love making small plated portions of desserts, I used my mini latte bowls from Anthropologie to serve up the recipe and got 14 individual servings.  In these small portions, served chilled right from the fridge, coconut lime rice pudding is a refreshing summer dessert.

coconut lime rice pudding pleasure in simple things

I hope you enjoy coconut lime rice pudding as much as I do!

Thanks for stopping by.  Remember to take pleasure in simple things, Jackie

Comments Off on coconut lime rice pudding | food & festivities, recipe

a special birthday cake

21
January

birthday candle

Part of being a great hostess is to know your guests.  Today, so many people have dietary restrictions and part of good entertaining is taking the special needs of your guests into consideration. 

Recently, I needed to come up with a birthday cake for a special birthday dinner where the guest of honor had some dietary concerns.  The solution I came up with was quick, easy, and delicious.

Angel food cake recipe

I served an angel food cake with a fresh berry topping and a Nutella filling.  All the items were purchased in the grocery store and the dessert took very little time to prepare.  I chose not to make my own angel food cake since our local grocery store offered one in the bakery section that cost less than the price of the tube pan I would need to purchase to bake my own.

Made with just sugar, flour, and egg whites;  angel food cake is a great alternative to a traditional birthday cake for many special diets.  As an optional filling, I sliced the cake horizontally with a serrated knife and spread one side with Nutella.  For the strawberry topping, I hulled and halved a pound of strawberries  – heated them up slightly in a pan on the stove with a tablespoon of sugar and a squeeze of fresh lemon juice.  Easy, tasty, and all ready for a birthday candle! 

caramel walnut biscotti

And, so quick…I had time to bake up some biscotti.  With an impending snowstorm, what is better than biscotti by a fire?  This batch is caramel walnut…

biscotti by a fire

Thanks for visiting.  Hope you enjoyed sharing my ‘special’ birthday cake recipe. 

Remember to take pleasure in simple things, Jackie

1 comment » | food & festivities, recipe

pastry bites two ways

23
July

lemon raspberry pastry bites

I love bite-sized desserts.  People feel less guilty about eating a wonderful dessert when it is small. After all, there are less calories in a lot of little desserts, right?  Plus, an individual size is so pretty and easy to serve.

I am going to show you how easy it is to make these pastry bites two ways…lemon raspberry and cannoli.  Both use the same individual sized pastry shell.

Because the individual shells for these desserts can be made ahead on the morning you will be using them, it is a great dessert for serving a crowd. 

 lemon raspberry bites

For lemon raspberry pastry bites, the shells are filled with lemon curd and topped with a raspberry.  Lemon curd is really tart and gives a great big zing to this little bite.

There is some really great quality lemon curd that you can buy premade…often it is less expensive than buying the ingredients to make it yourself.  Trader Joe’s has a good one (since you only use 1 tsp. per bite, you can make 90 pieces with the one 10.5 oz. jar). If you would rather make it yourself, Ina Garten’s recipe is my favorite.

Just before serving time, carefully fill each shell with lemon curd, top with a raspberry, garnish with a little piece of mint, and dust with confectioner’s sugar.

 cannoli pastry bites

Cannoli pastry bites are filled with cannoli cream.  I love cannoli cream, but I am not a big fan of cannoli shells.  The reason could be because I am not a big fan of fried foods.  In any case, I much prefer cannoli cream with puff pastry and that is the why I decided to create a dessert with that combination. 

Use your favorite cannoli filling recipe.  Mine is by Alex Guaranschelli.  Click here for the recipe. 

Fill the shells just before serving.  Garnish with mini chocolate chips and drizzle with melted chocolate if desired.  Dust with confectioner’s sugar. 

If you use Alex’s recipe, it makes a lot.  Because you only need 1 tsp. for each pastry bite, you will have plenty left over. You can reduce the recipe, or use the extra, as I do, for deconstructed cannolis as a special treat for your family or guests.  I get the broken cannoli shells from an Italian bakery and serve the delicious cannoli filling with a garnish of mini chocolate chips…a sweet version of a chip & dip. :)

deconstructed cannolis

“Deconstructed’ cannolis are a great way to use leftover cannoli filling. Serve a bowl of cannoli cream with broken cannoli shells. Garnish with some mini chocolate chips. A sweet & stylish ‘chip & dip!’

Making the Shells

To make individual shells, use pastry sheets purchased at the grocery store.  I have used phyllo dough many times in my life…I can’t even count the number of times I have made baklava…but it is a little tricky if you haven’t worked with it.  I am going to give you instructions using the store bought sheets…I did a test before I put this post together and you can get a great result using the store bought sheets.  They are called puff pastry, pastry dough sheets and are located in the freezer section of your grocery store.  The box is 17.65 oz. and contains two sheets of pastry dough. 

The key to making a successful shell is in the cutting.  The dough needs to be really, really cold when you cut the shape so that the edges don’t seal.  Sealing the edges would prevent the pastry dough from rising.  This is the reason you should not wait for the dough to defrost, cut it as soon as you are able.  For the same reason, do not add an egg wash or brush with milk…if any of the wash gets onto the sides of the shell, the edges will seal. 

making individual pastry shells

You will need two different sized cookie cutters…I used one that measures 1 3/8” in diameter and one that is 2 3/8“ diameter.  I bought a set of graduated cookie cutters in a flower shape at Home Goods…5 cutters in various sizes came in the package for a price of $2.99.

Using the larger cutter, cut the shape from the dough.  Put it onto a parchment lined cookie sheet.  Using the smaller cutter, cut a center in the first shape, but do not cut all the way through…pierce the dough, but do not make a cut.  This will create the hole for your filling.  Each sheet will make 12 pieces if you use a similar sized cookie cutter as mine, so the box of two sheets will make 24.

Bake on parchment paper at 400 degrees for 10 to 13 minutes. 

individual pastry shell

After the shells are completely cool, use the point of a knife to remove the inner shape.  You can push it down if you are having trouble removing it.  After you have done this to each shell, they can be saved for later to fill.

lemon raspberry pastry bite

You can have your filling ready ahead of time and can make the shells in the morning.  All you need to do is to assemble when ready to serve!  Now that you know how to make the individual pastry shells, you can come up with your own versions using your favorite fillings!  Enjoy!

Thank you so much for visiting!  Remember to take pleasure in simple things, Jackie

Sharing at The Shabby Nest and Craftberry Bush.

1 comment » | food & festivities, recipe

individual brownie mousse tortes

20
November

Don’t you think desserts look so much more elegant as single servings?  I think so.  That is the reason I purchased a cheesecake pan (with removable bottoms) that bakes up a dozen mini cheesecakes at a time.  I was thrilled the first time I used it and created a dozen salted caramel cheesecakes.  Yes, the pan was a pain to clean…especially the twelve little removable bottoms!…but, I thought so worth it!  I decided recently to try out the pan again.  This time, I adapted a favorite brownie torte recipe my friend Tracy gave me over (I guess I won’t say how many) years ago!

I was able to perfect a recipe after a couple tries and the results were fantastic.  With the holidays upon us, it is the perfect decadent dessert to impress your guests.

The tricky part is definitely the baking time.  Obviously, the baking time is reduced for a small single serving dessert when the original recipe is for a full-sized torte.  In this instance, there are two layers.  The bottom layer is basically a brownie and the top layer is a chocolate mousse.

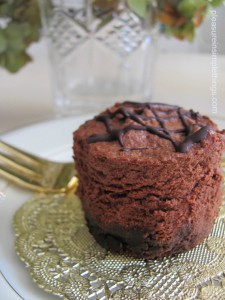
brownie mousse torte

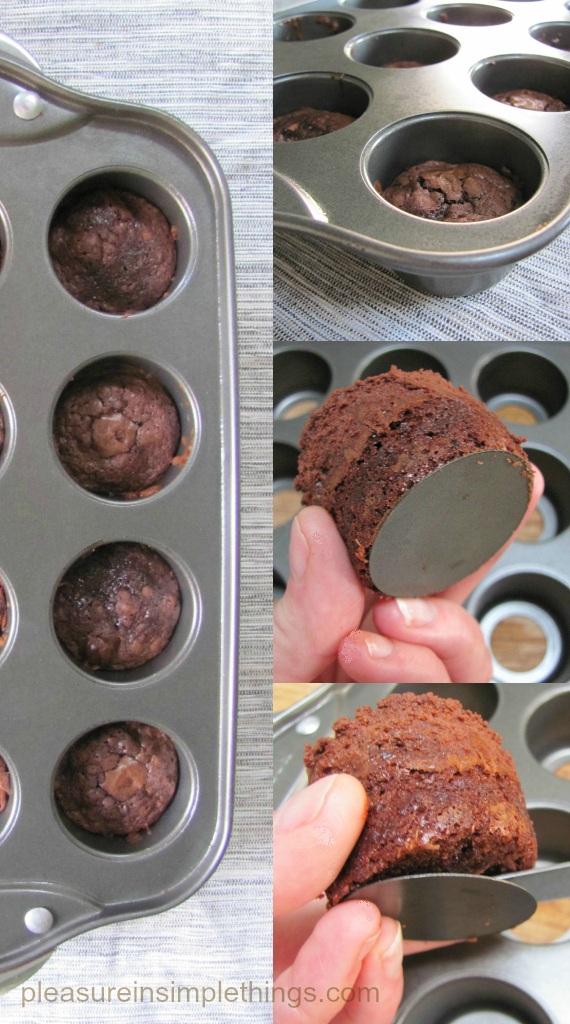
First, prepare a brownie recipe – either your own or a box.  I like to prepare mine from scratch, but sometimes it is so much less expensive to buy a boxed mix, it is hard to resist!  The only thing I changed was to add two teaspoons of instant espresso and a few mini chocolate chips into the batter.  I filled each compartment a little less than half with brownie mix.  It ended up being about half the usual cooking time – a total of 18 minutes.  You will have to watch carefully.  The first batch I made, I filled the compartments half way and found after they cooked there was not enough space left for the mousse.  This was easily corrected (but time consuming) by taking each torte out and slicing it to create a thinner bottom layer.  The second batch, I knew not to put very much batter in each section.  I had quite a bit of batter left, so I cooked the remainder in a muffin tin to cook and eat as brownies.

browniemoussetorte

A photo of individual brownie mousse torte.

After the brownies cooled completely, I made a mousse and filled over each brownie to the top of the compartment with the mousse.  After this step, I garnished each dessert, by melting 1/2 oz. of baking chocolate and drizzling over the top of each torte.  Then, the pan was put into the fridge to set.

Chocolate Mousse Recipe (for top layer)

  • 1 & 1/2 cups semi-sweet chocolate chips
  • 1 oz. unsweetened baking chocolate
  • 1 tsp. instant coffee or espresso powder
  • 1/4 cup water
  • 2 Tbsp. butter
  • 1 cup whipping cream

In a small saucepan, combine chocolate chips, 1 oz. unsweetened chocolate, 1 tsp. instant coffee, 1/4 cup water and 2 Tbsp. butter.  Cook over low heat, stirring constantly, until mixture is smooth.  In small bowl, beat whipping cream until soft peaks form.  Fold warm chocolate mixture gently into whipped cream. 

When you are ready to plate the desserts, carefully remove each one by pushing from the bottom carefully….if there is any sticking, you may need to loosen the outer edge with a dull knife.  My pan is made of a nonstick surface and I didn’t have any trouble getting the desserts out of the pan.  The bottom ring of each compartment of the pan needs to be removed by slipping a knife carefully underneath each one.

It may take a little extra work to make the torte in individual portions, but I think it is well worth the result.

I hope you will try these indivdual brownie mousse tortes for your holiday table.

Thanks for visiting.  Have a blessed Thanksgiving… and, remember to take pleasure in simple things, Jackie

3 comments » | food & festivities

Back to top