Subscribe to Pleasure in Simple Things via RSS ReaderFollow Pleasure in Simple Things on InstagramFollow @InSimpleThings on TwitterLike Pleasure In Simple Things on FacebookFollow Pleasure In Simple Things on PinterestEmail Jackie

Tag: Annie Sloan


plenty of eat

23
August

eat sign

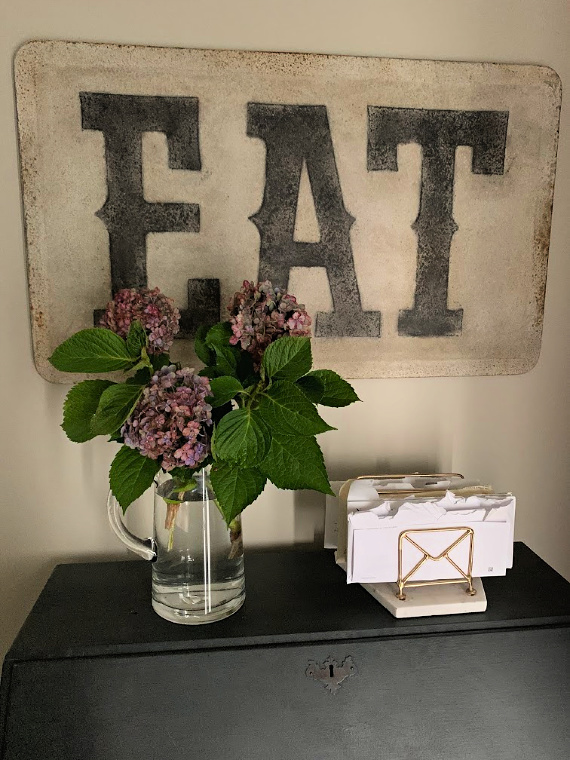
What do you think of my new metal eat sign?  I thought it was perfect for my kitchen!  The colors, size, and texture are super!

It certainly makes a statement – don’t you think?

There is another reason I am sharing this photo with you besides showing you my sign…this photo gives a hint of the next furniture redo project I am working on.  It is in Annie Sloan charcoal gray and I can’t wait to finish so I can give you the full reveal!

Have a wonderful weekend and remember to take pleasure in simple things, Jackie

Comments Off on plenty of eat | diy, furniture redo, style

vintage dresser before & after

20
August

top of dresser after

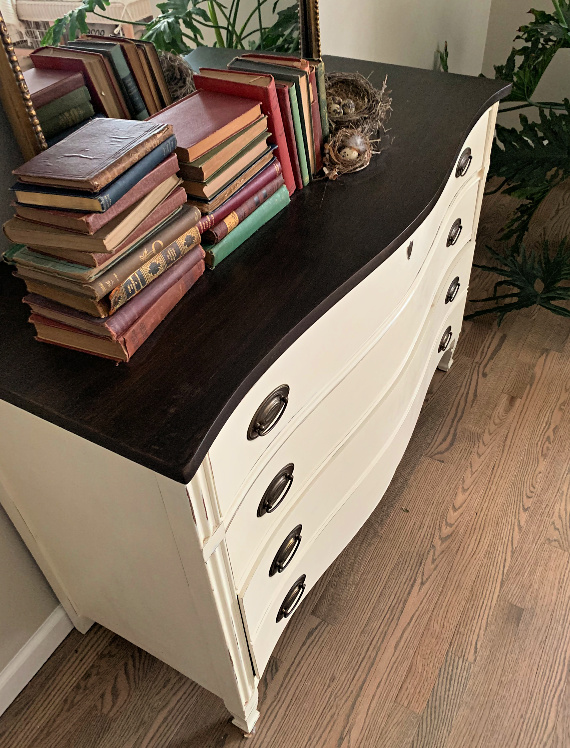
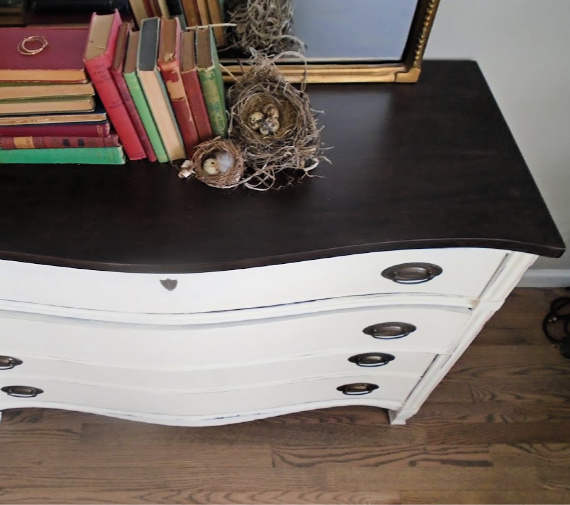
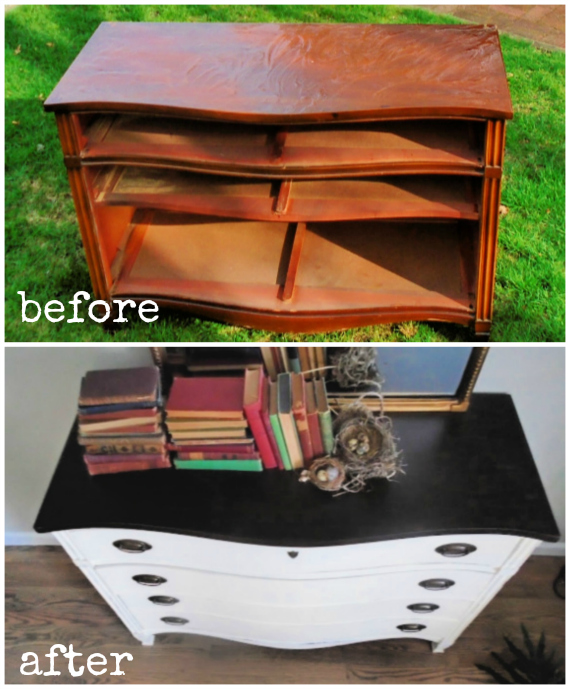
Do you remember the vintage dresser I was refinishing?  I finally took a few photos of the ‘after’ to share with you.  It is an old mahogany piece – I’m sure you’ve seen similar pieces.

before and after dresser

Most of the furniture I refinish is for others, but this piece is staying with me!

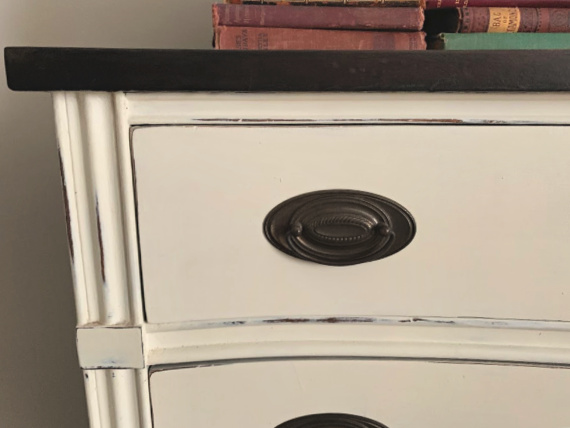
left corner close up

Here are the steps I took to transform the piece:

  • Stripped the finish off the top
  • Sanded the top with fine grade sandpaper
  • Stained the top (in ebony) – I used 2 coats
  • Sealed the top – I used 4 coats
  • Painted a sealer over the rest of the dresser (to prevent the stain from bleeding through the light color paint)
  • Painted the dresser in Annie Sloan Chalk Paint in Old White – 2 coats
  • Waxed with Annie Sloan clear wax (all but the top)
  • Lightly distressed
  • Waxed with second coat of Annie Sloan wax in clear (all but the top)

I retained the original hardware without altering it since I love the dark color in combination with the ebony stain on the top of the piece.

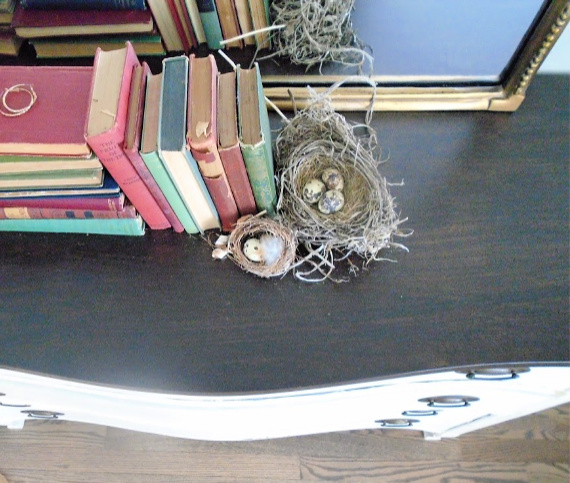
birds eye view after

Isn’t it beautiful!?  I love it.  I ended up styling my entire bedroom around this piece.

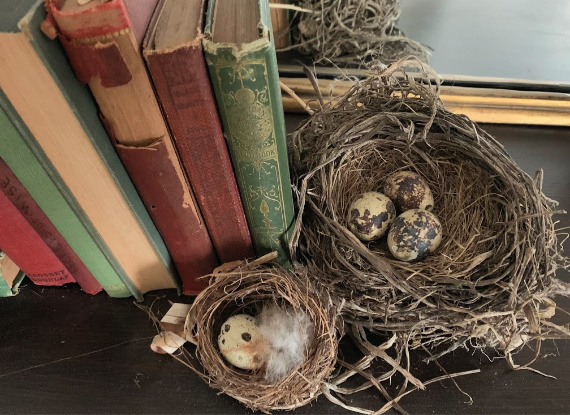
nest collection

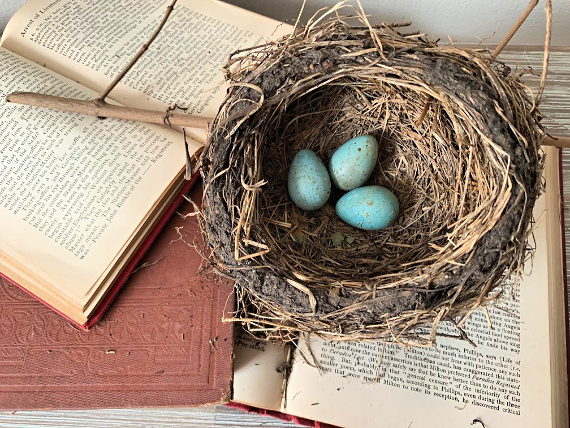
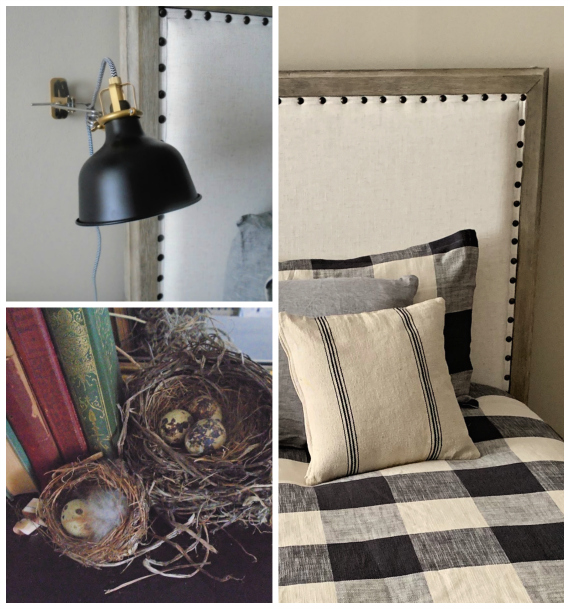
I put a buffalo plaid duvet on the bed and combined a couple of my favorite motifs (with my collections – old books and bird nests) to style this vintage dresser.  The crowning jewel was to add a mirror.  I thought the mirror that originally went with the piece was too ‘matchy matchy’ for my taste.  I originally thought I would just go without a mirror, but I soon found out I really liked having a mirror in the bedroom, so I set out to find a vintage looking piece.

old books and nest

I didn’t really expect to find anything I liked to fit my budget until Ballard Designs had a 40% off sale with free shipping and I was able to purchase the perfect piece!

mirror

My biggest bargain in the room was the bedside wall lamp.  Every one I liked had a price tag over $100.  And I had all but given up on the idea of including a lamp in my room until I came across the perfect one for $19.99 at IKEA!  Score!

bedroom details

The dresser ends up being my favorite piece of furniture!  I hope you enjoyed seeing how I transformed this old dresser!  Thanks for stopping by!

dresser side view

Remember to take pleasure in simple things, Jackie

P.S. Click here to see how I refinished the mahogany side table that matched this dresser.

Comments Off on vintage dresser before & after | diy, furniture redo, inspiration, style

before and after bench redo

17
April

after photo of bench fabric

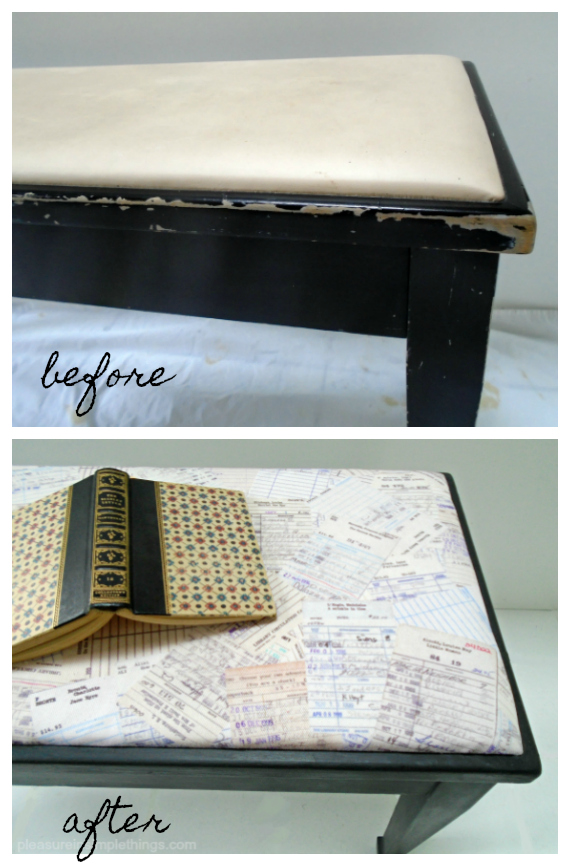
This bench was just crying out for a little loving, don’t you think?

before photo of library bench

I just couldn’t resist updating this bench with some Annie Sloan Chalk Paint and some Spoonflower fabric!

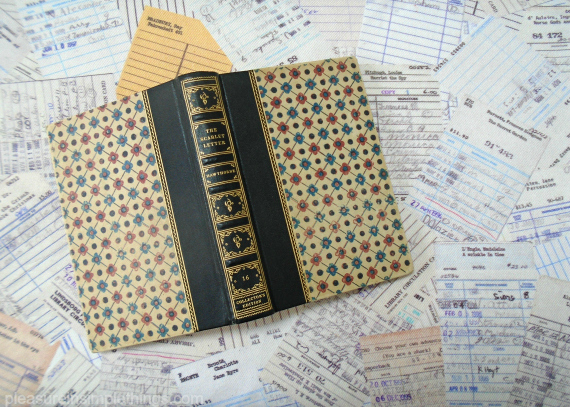
First, I chose a library themed fabric from Spoonflower and put in my online order for one yard of a cotton canvas.  If you haven’t checked out Spoonflower before, I highly recommend it.  You know how you may have an idea for a fabric you want and when you go to the fabric store to find it, you are really disappointed when they don’t anything close to what you imagined?  Well, with Spoonflower it is possible to find a fabric in most any theme you may imagine!

I prepped the bench by taking off the cushion and I prepped the fabric by washing, drying, and ironing it.

spoonflower fabric

The original color of the paint on the bench was black.  I chose to paint it with Annie Sloan Chalk Paint in graphite.  (I was a little bit tempted to choose a red paint, but if I bought a can in red, I knew I would never use the rest of the can!)  Because I chose such a dark color paint, I had no worries about color showing through from the old finish.  I simply painted the bench with two coats of graphite and waxed it with Annie Sloan clear wax.  I let the first coat set and applied a second coat of clear wax.

starting upholsteryI removed the old fabric from the top of the bench using a screwdriver and pliers.  I was happy to find the padding in good shape since, beyond my labor, I really couldn’t spend more than the cost of the paint, wax, and fabric for this update.   Using a staple gun, I carefully reupholstered the top of the bench in the super cool fabric I found at Spoonflower and reattached it to the bench.

before and after annie sloan redo bench

The second coat of wax wasn’t totally dry when I took these photos.  When it was, I buffed the piece with a soft cloth.  Project complete!

overview top of bench finished

Thanks for stopping by!

Remember to take pleasure in simple things, Jackie

Comments Off on before and after bench redo | diy, furniture redo, style

before & after bedside table

7
March

Bedroom table after photos pleasure in simple things blog

Today, I am sharing the ‘after’ photos of the little mahogany side table I shared last post.  The piece belonged to the owner’s great grandmother and I was determined to redo the table to  fit nicely  into her new home.

before and after side table with Annie Sloan ochreDid you guess what neutral I chose to paint the piece?  I decided on Annie Sloan old ochre.  It is a nice neutral that has a warm tone and will combine well with both white and gold tones.  The piece will be used as a bedside table and, since I’ve seen the bedding in the room, I decided to find accessories to combine with the piece to look great in its new location!

Bedroom side table after photo pleasure in simple things blog

I started with a coat of shellac since the mahogany was sure to show through a light color paint.  Next,  I painted the piece with two coats of Annie Sloan chalk paint in old ochre.  Then, I added a coat of clear wax.  In keeping with the tastes of the owner of the piece, I didn’t do any distressing, but I did add a coat of dark wax in some spots.  This accented some of the details and added a little depth  of color.

Bedroom side table after photos wax pleasure in simple things blog

For the hardware, I used the original pull and just added a little metallic to brighten up the old finish.

Bedroom side table after hardware pleasure in simple things blog

Lastly, I added some fun accessories to coordinate with the bedroom where the little table will be residing.  The tea leaves scented candle, lamp, print, and plant all came from Target.  The cute succulent paper I used for the drawer liner came from Paper Source.

Bedroom side table after photo drawer pleasure in simple things blog

For such a straight forward paint job, it created quite an update, don’t you think?

Can’t wait to see the table with the new accessories in its new home!

Thank you so much for stopping by!  Remember to take pleasure in simple things, Jackie

Comments Off on before & after bedside table | diy, furniture redo, style

family heirloom before & after

21
June

new finish and paint pleasure in simple things redo

I am excited to show you a finished piece I have been working on for quite some time.  You may have seen a little sneak peek of my progress a little while back, but today I am showing the completion of the project.  The piece is a special one because it is the only piece of furniture my friend Tracy kept from her mom’s home after she passed away.before & after with Annie Sloan Old Ochre pleasure in simple things blogI wanted to transform this old buffet into something a little more current for Tracy’s home.  First, I did some cleaning of the piece. Then, since the piece had been exposed to a lot of smoke and I was afraid the paint may not adhere properly, I took an extra step of starting with a coat of shellac.  Then, I painted the piece with two coats of Annie Sloan Chalk Paint in Old Ochre, making sure to use visible brush strokes – I think that adds some character for an aged look.

new Annie Sloan redo pleasure in simple things blog

After I had the entire piece painted, I decided I should have kept the top of the piece in a natural wood!  So, I stripped off the paint I had already put on and gave it a really good sanding with an electric sander.  From there, I added three coats of stain and a clear sealer.  I had made the right choice…I loved the way the top came out!

furniture redo finish with Annie Sloan pleasure in simple things blog

For the rest of the piece, I highlighted some areas with Annie Sloan Country Grey.  I love the subtle contrast between the Old Ochre and the Country Grey paint.  I also added a wash of Country Grey and water to add some depth of color.  Next, I added a coat of Annie Sloan clear wax. I did some light distressing before adding a second coat of wax and added some dark wax in areas.  I think the piece has a great aged look without being overly distressed.

old and new pulls and knobs pleasure in simple things blog

Next, I needed to update the furniture’s hardware.  The original knobs were very simple.  I decided to use something a little more ornate and found some knobs I loved for the piece at Anthropologie.  The pulls were a little harder to figure out.  You can see one of the old pulls above.  I wanted a more updated look, but nothing was available that appealed to me in the width of the old pull.  I ended up making a special order from Klaffs – a large bath and kitchen store in my area.  I would have to fill in the holes from the old pulls and drill new ones to accommodate a newer sized pull.  It took me a couple hours to look through a large selection of pulls before I made a decision, but ordering the new hardware was definitely the right decision…the new pulls are great for the piece!

new knobs on furniture redo pleasure in simple things blog

I think the new hardware is perfect!

new knobs pleasure in simple things furniture redo

Don’t you agree?

new stained top on furniture redo pleasure in simple things blog

And, I think the decision to stain the top of the piece was a great one as well!  The piece is ready for its new home!  I hope it serves Tracy’s mom’s memory proud!

finished furniture redo pleasure in simple things blog

Thanks for stopping by!

Remember to take pleasure in simple things, Jackie

2 comments » | diy, inspiration

family heirloom redo

13
May

pulls and knobs for redo pleasure in simple things blog

I’m usually not one to post a painting project until I can share both the before and after photos.

I am breaking that practice today by showing you a couple ‘in process’ photos of a current project for today’s Friday field trip.before and after buffet pleasure in simple things blogFor a friend, I am painting the only piece of furniture she kept from her childhood home after her mom passed away.

The old buffet gave me some issues right from the start…take my advice, and don’t ever paint a piece that sustained constant smoke for 60+ years!  Anyway, I am getting down to the home stretch with this project .  Here is a little peek.  The photo below is the old and new hardware.  I special ordered new pulls.  Aren’t they nice?  And, I think the knobs I bought look great as well!

pulls and knobs pleasure in simple things blog

The base color of the piece is Annie Sloan Old Ochre. After I had already painted a first coat on the entire piece, I decided I needed to strip and sand down the top of the piece.  Here is a peek of it with the new finish.  It felt great to get rid of that old orangey yellow finish!

top refinshed pleasure in simple things blog

I will share all the ‘after’ photos soon – once I have the piece completely finished!

Thanks for stopping by!  I hope I have inspired you to look at an old piece of furniture in a new  way!

Have a great weekend and remember to take pleasure in simple things, Jackie

Comments Off on family heirloom redo | diy, inspiration

bathroom vanity annie sloan redo

22
March

bunny pleasure in simple things blog

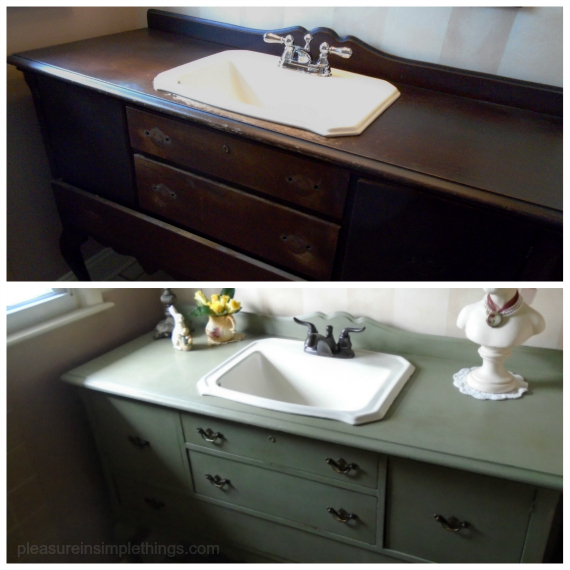
My friend Wendy recently decided she needed a change for her bathroom vanity and asked me if I would like to paint it. Of course, I jumped at the chance! She had looked at the Annie Sloan chalk paint colors and thought she would like Chateau Grey.
annie sloan bathroom vanity redo pleasure in simple things blog

Chateau Grey was one of the few colors I hadn’t yet used for a painting project and I was eager to paint with it. The green tones in the paint were perfect for the accessories Wendy had in her bathroom and I knew she made the perfect choice in paint color.

The vanity was wood and very dark. We both knew that the chalk paint would lighten up the entire look of the room.  The great part about painting the piece was that it would highlight some of the detail that really went unnoticed.

distressing detail on vanity pleasure in simple things blog

I started by painting the piece with two coats of Chateau Grey. Over that, I applied a wash of approximately 50/50 water and Annie Sloan Country Grey by painting, then wiping with a soft, clean cloth. I like adding a wash over a solid paint color because it gives more dimension to the paint.

detail annie sloan chateu grey redo pleasure in simple things blog

Next, I added a coat of clear wax. Then, I gave the piece a light distressing before adding some dark wax. After the piece was completed, I added an extra coat of clear wax to the top of the piece since it is in the bathroom and I wanted to give the top a little added protection.

annie sloan chateau grey redo pleasure in simple things blog

Wendy decided to keep the original hardware on the vanity and it looked great on the finished piece. She did change out the faucet in her sink.

a new faucet on vanity redo pleasure in simple things

The before faucet is pictured in the photo on the lower right. You can see the difference switching out the faucet made to the overall look of the vanity. The strawberry water? Well, that is one of the perks of doing a job for a friend!

The little decorating touches and glimpse of Easter Wendy added to the room made it just perfect!

finished Chateau grey bathroom vanity pleasure in simple things blog

The only thing better than helping a friend with a painting project? Helping a friend with a painting project that involves a family heirloom! That is the case with the next project I have almost completed and will be sharing soon!

yellow roses pleasure in simple things blog

Thanks so much for stopping by. Remember to take pleasure in simple things, Jackie

2 comments » | diy, inspiration, style

jewelry holder redo with annie sloan

14
August

after of a jewlery stand redo pleasure in simple things blog

Today’s redo may seem a little unusual… Maybe not if you remember that I once turned a plastic drink container into a beautiful flower vase using Annie Sloan paint!  Today, I am again using Annie Sloan paint for a transformation.  For today’s Friday field trip, come see how I used paint, an old poetry book, a few shells, and some scraps of ribbon to turn a black metal jewelry stand into something much more ‘poetic.’

before and after jewlery stand

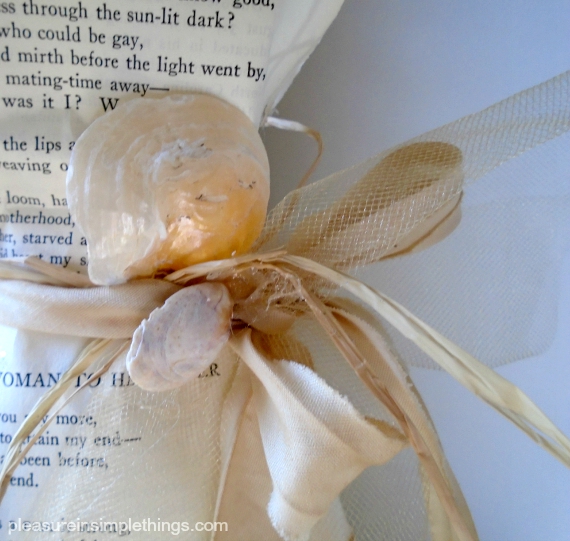
First, I used Annie Sloan paint in Old White to cover the entire jewelry stand.  I really did not like the grid pattern on the metal piece so, I decided to tone it down by attaching some pages I ripped out of an old poetry book.  After I liked the way the pages were arranged, I added a ‘belt.’

closeup of jewlery stand redo pleasure in simple things blog
For this, I used a glue gun to add some raffia, some seam tape (I aged using some strong coffee), a few shells, and some tulle.

jewlery stand redo on pleasure in simple things blog

I finished by adding a little bit of sparkle to the pages and a few gold accents to the Old White paint.  A much different look than the old black metal grid, don’t you think?

jewelry holder with necklace pleasure in simple things blog

The piece now looks really great to display jewelry or to display on its own!

Thanks for stopping by!  I hope I have inspired you to update your own flea market find!

redo of a jewlery stand
Have a wonderful weekend and remember to take pleasure in simple things, Jackie
Sharing with Elizabeth & Co., Coastal Charm, and Thoughts from Alice.

2 comments » | diy, inspiration, swag

antique chair in the garden

7
August

antique chair redo pleasure in simple things blog

My furniture redos can usually be placed in the coastal decor category, don’t you think? I love anything beachy and my furniture creations usually reflect my taste. Well, today I am taking a little departure from the beach inspired look and going with more of an antique vibe.

The reason for this departure is that I found an old, antique child’s chair and I wanted to keep it true to form.antique childs chair before pleasure in simple things blogBecause the seat was in perfect shape, I started by cleaning it up and leaving it in tact. Next,  I did a few repairs.  Then, I began to paint the piece pink, thinking I would create something for a child’s room. After thinking about it for a while, I decided the chair was much better suited to be a garden ornament. Wouldn’t it look great holding some potted plants? So, I changed my direction and decided to paint it a dark neutral to play as a backdrop for some pretty garden flowers.

childs antique chair redo Annie Sloan pleasure in simple things

I chose Annie Sloan Graphite for the chair and painted it in two coats. I did some light distressing and then added a coat of Annie Sloan Dark Wax.

Annie Sloan graphite pleasure in simple things blog

I happened to be visiting my friend Phyllis (you know Phyllis, the one with the ‘park’ yard?) and she ‘styled’ it using some of her plants so I could get some ‘after’ photos. (I plan on giving the chair to a friend who also has a gorgeous yard – maybe she will let me take a photo when it settles into its new home!)

final antique chair redo pleasure in simple things

Thanks for joining me on Friday field trip to check out my antique chair find. Have a marvelous weekend!

Remember to take pleasure in simple things, Jackie
Sharing with French Country Cottage.

Comments Off on antique chair in the garden | diy, garden, inspiration

poetic chest before and after

24
July

after Duck Egg drawer pleasure in simple things blog

This piece was part of a larger piece that was left out on the curb at a beachfront home. I instantly fell in love with it, because I knew the details would look awesome as a painted piece. It was a really large piece and I wasn’t sure I wanted to spend the time on it that it needed. It ended up I couldn’t resist it. After having a heck of a time getting it home, I ended up taking the top piece to the dump and started working on the bottom piece.

before photo pleasure in simple things blog

First, I used a sealer on it because I feared some of the stain may bleed through the paint. I decided Old White and Duck Egg would look really great on this piece, even though I was very tempted to use my favorite French Linen.

Duck egg door pleasure in simplet things

This piece would find its home in a commercial retail space that had something of a poetry theme, so I had the idea to paint the inside of the drawers and add some pages of a poetry book; roughing them up some to make them look vintage. And, because of the poetry theme, I departed from my standard coastal town name and named the piece T.S.

inside cabinet drawer pleasure in simple things blog

This redo had to be one of my toughest ever because so much of the work was done on the hottest, muggiest days we have had this summer. And, believe me; I am not exaggerating…the weather was so bad that the drawers had swollen and wouldn’t fit back into the piece when it was completed! It wasn’t until T.S. was in its new home, in air conditioning for 24 hours, that I was able to put the piece back together – and, even then, I didn’t want anyone to touch it for a while because I feared the wax wasn’t set. (The reason there are no great after photos! That and the fact that the retail space hadn’t opened yet!)

cabinet detail pleasure in simple things blog

I ended up really happy with the result and I think the details are just lovely. Here is how T.S. came to be:

• 2 coats of Annie Sloan Old White on the main part of the piece
• 2 coats of Annie Sloan Duck Egg on the doors and drawers
• 1 coat of Annie Sloan Old White and water wash (50/50) on the doors and drawers – applied with a cloth
• 1 coat of Annie Sloan clear wax over everything
• Some distressing
• 1 coat Annie Sloan dark wax

cabinet redo pleasure in simple things blog duck egg and old white

Thanks so much for stopping by!

Have a wonderful weekend and remember to take pleasure in simple things, Jackie
2 comments » | field trips, inspiration, style

Back to top