I had never tried making cookie cereal when it became such a sensation. I started thinking about it again recently while watching the Kids Baking Championship on Food Network. As a weekly challenge, these young competitors featured on the show were creating some fabulous cookie cereals as well as some companion mousses to go with them. These children were so talented – truly amazing to watch!
Inspired by these fabulous children on the show, I decided to create some of my own cookie cereal.
I knew I wanted to use my favorite shortbread recipe as the cookie, but I was torn on how to change it up to modify it for a breakfast cereal – I got it down to two choices.

My first idea was a rosewater shortbread. I thought the subtlety of the rosewater would make a great shortbread and I could add some chopped pistachios to the cookie and the cereal bowl for some added crunch. It sounded like a really good flavor idea, but maybe more like a dinner party cookie than a breakfast choice!
So, I went with my second flavor idea…cinnamon! I love cinnamon. I buy Penzey’s brand spices which are super flavorful and the cinnamon is wonderful. Cinnamon seemed a much more appropriate flavor for my breakfast cereal. Plus, my “go to” nut milk is walnut (I drink Elmhurst brand – made with just filtered water and walnuts) and that would make a great pairing with the cinnamon shortbread! I did add a little bit of instant coffee powder to my modified recipe as well – it is a breakfast cereal after all! If it seemed the cereal needed a little extra crunch, I could throw in some chopped walnuts!
I modified and halved my usual shortbread recipe. I didn’t want to have too many extra cookies around to eat!
I whisked together 1 ¼ cups flour, 1 ½ tsp cinnamon, ½ tsp instant coffee grounds and a dash of salt. In a separate bowl, I beat 1 stick of softened butter with 1/3 cup confectioners’ sugar on medium speed with a hand mixer until well blended. Then, I slowly added the flour mixture. Once it was all incorporated and resembled coarse crumbs, I gathered the dough into a ball using my hands, wrapped it in plastic wrap, and popped it into the refrigerator for a half of an hour.
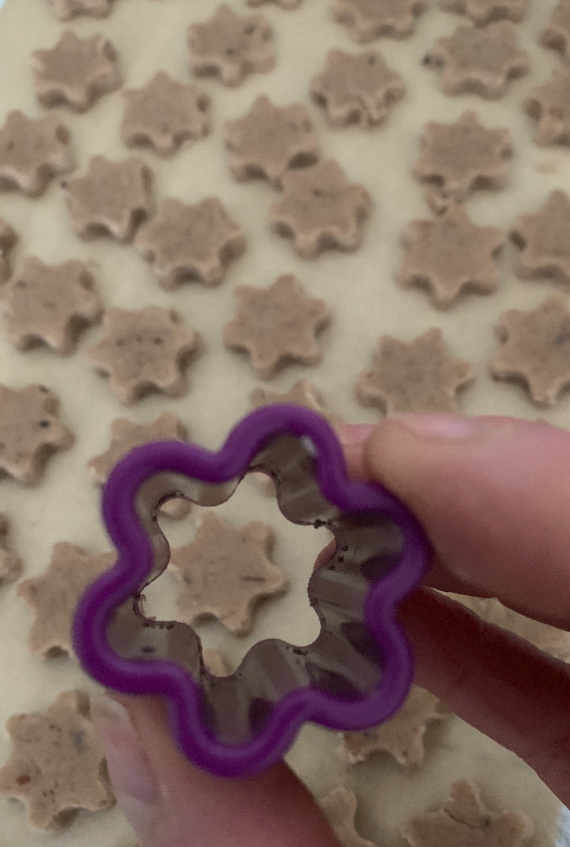
Next, I rolled out the cold dough on a piece of parchment paper to ¼” and cut small cookie shapes. (I used a little flower shape, but of course at this time of year, a heart would make a great choice as well!) I put the cut dough shapes on parchment set on a baking sheet and set the baking sheet into the fridge for 15 minutes to firm before baking in a preheated 350-degree oven.
I baked them for about 11 minutes, watching them carefully. Shortbread should never get brown, but these needed to be cooked completely to hold up as cereal.
I used a 1 ¼” cookie cutter, and got over 9 dozen cookies – plenty for a couple bowls of cereal!
After they were baked and cooled, they could be put into an airtight container until ready to use – maybe for a Valentine’s Day breakfast!
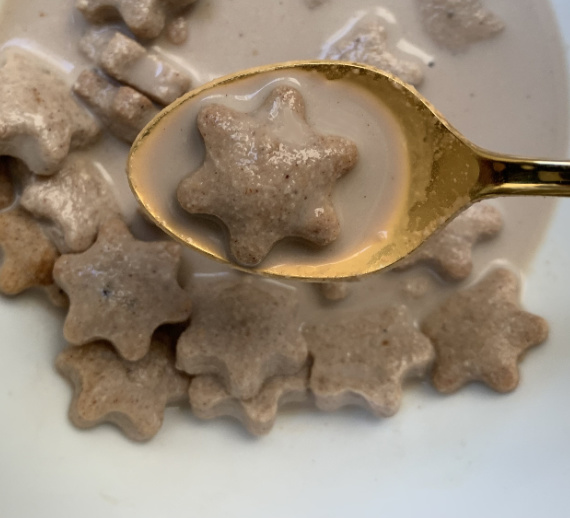
When I tasted them, I wondered why I never made cinnamon shortbread before – they were delicious! And, in a bowl of milk? Scrumptious! I may never make cookie cereal again, but I will definitely make cinnamon shortbread cookies again – I am adding them to my holiday cookie list!
Make mini cookie cereal – check! That was a fun experiment!
Do you ever get inspired by watching a cooking show on television?
Thanks for stopping by!
Remember to take pleasure in simple things, Jackie