Subscribe to Pleasure in Simple Things via RSS ReaderFollow Pleasure in Simple Things on InstagramFollow @InSimpleThings on TwitterLike Pleasure In Simple Things on FacebookFollow Pleasure In Simple Things on PinterestEmail Jackie

how to pickleball wardrobe

August 4, 2023

amazon pickleball shirt

New to the sport of pickleball, putting together my pickleball wardrobe became an obsession.  Determined to put health and safety first, my first mission was to find an appropriate paddle and footwear.  I talked to some orthopedics to decide how to choose the best paddle for long-term wear and tear on my body.  I found out that weight and grip size of a paddle are important in this regard.  Instructed not to go over a weight of 7.8 or a grip size over 4”, I chose an appropriate paddle that didn’t break the bank!

Next was footwear.  I decided to focus on tennis shoes since there is quite a variety available and it seemed to me the shoes designed for both pickleball and tennis would be similar.  My daughter bought me On Clouds for Christmas and I absolutely LOVE them.  For this reason, I looked on their website to see if there were any options for tennis shoes.  Sure enough, they had designed a tennis shoe named after Roger Federer.  Though expensive, I thought it was important to get the right pair of shoes.  It ended up my daughter bought me the pair I was admiring for Mother’s Day so I was set in the shoe department.  My new tennis shoes are just as comfy as the shoes I received as a Christmas gift!

marika pickleball outfitTo go along with the shoes, I needed the right pair of socks.  These too were a little pricey, but I waited till they were on sale and bought some Bombas brand tennis ankle socks.  Worth the price!  (I heard they have a lifetime warranty but I haven’t yet confirmed this fact!)

outdoor voices pickleball

The one other necessity, since I play outdoors, is the sunscreen.  So, I stocked up on a mineral sunscreen (recommended by my Dermatologist since mineral sunscreen is not absorbed into the skin) and I had my basics covered.  I just need to mention that eye protection is an important base to cover when playing any sport – I always keep my eyes protected!

Now, for the clothing.  Much to my dismay, since COVID, I really don’t wear many of my clothes.  And, although I wear many more athletic clothes than I do regular clothes (especially in the summer), you would never guess that by looking at my closet – barely any athletic attire.  I decided I would put together an affordable wardrobe of clothes appropriate for pickleball.  I started by surfing the internet for every source of athletic clothes.  I found the most options by looking for golf and tennis clothes.  I like to wear leggings and shirts, but in the extremely hot and humid weather, skirts and dresses are much more comfortable.  Being tall makes it tough to find a good fit in a dress, but I was able to find a couple good ones that were on sale.  Many of my sale items were purchased on or near the 4th of July when many stores had sales and/or sale codes for purchases.  There continues to be many summer items on sale, so it is a good time to plan ahead and purchase for next year!

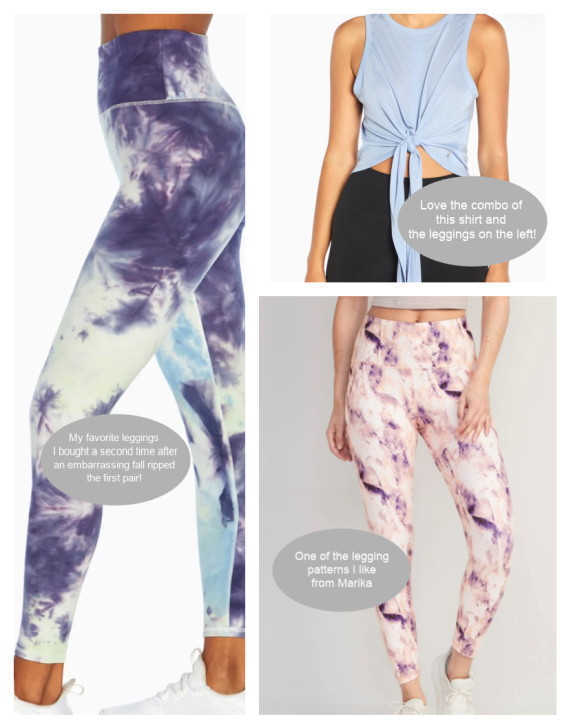
Since I use leggings for yoga and other exercise classes as well, they are a multi-purpose item that is a good investment for me!  Other than TJ Maxx, one of my favorite places for leggings is www.marika.com.  I found some of my favorite leggings on this site and they often have great sales.  They recently had a 3 pair for $39 and I loved some of the patterns offered.  In fact, I rebought a favorite pair that I ripped during a recent fall trying to make a tough return shot!  Of course, I stop by my local TJ Maxx and Marshalls regularly to check on current, affordable offerings.  And, this season, I was able to score a great pair of leggings from the Old Navy clearance rack for $9.99!

scallop pickleball dress

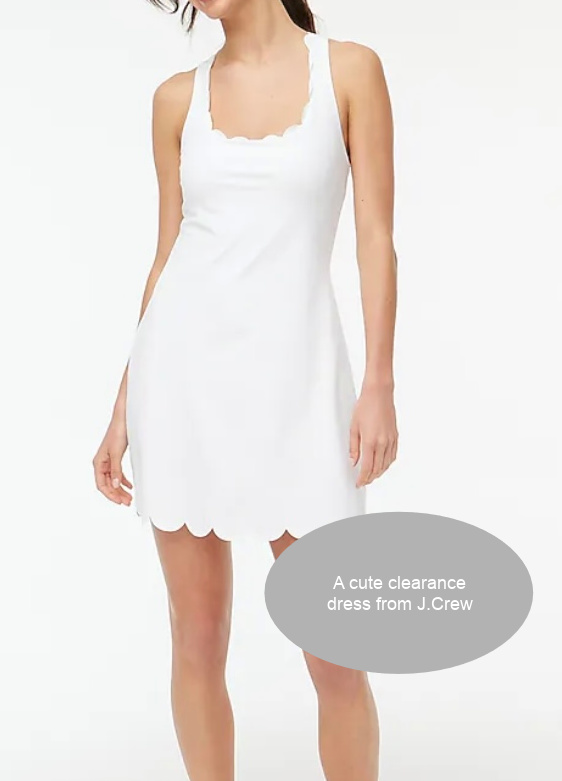
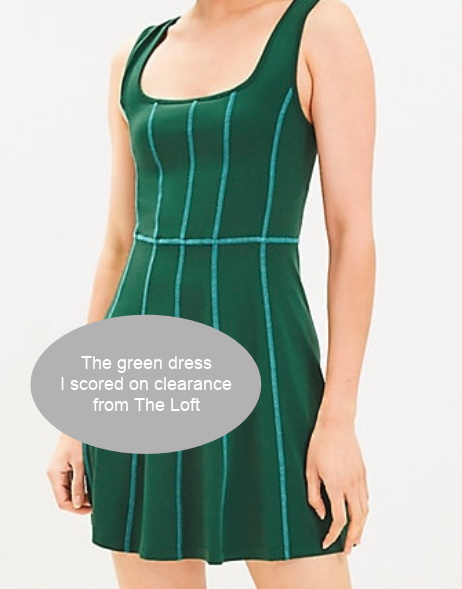
Places that aren’t necessarily sports stores sometimes offer a piece or two of athletic wear and seem to have really great sales since people probably aren’t looking there for these type of items.  Examples of this are a pretty green dress I ended up scoring for $16 at the www.loft.com.  It’s so cute, and has the attached shorts underneath.  The same happened with www.jcrew.com.  I found a really pretty scalloped edge sports dress on clearance.

favorite skirted leggings

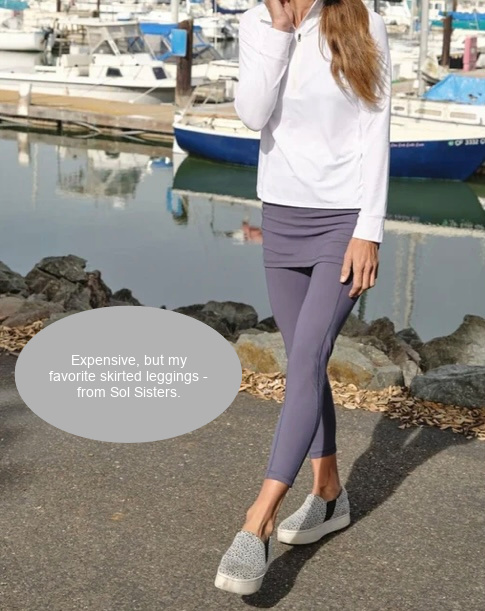
Tennis or golf skirts are best purchased at Marshalls or TJ Maxx, but I found a couple of superior sources.  Though pricier, they are worth purchasing on sale or requesting as a birthday or holiday gift.  The best source I’ve found was recommended to me by my friend Angela who plays pickleball outside all year.  It is www.donajobrand.com.  The skirts come in a variety of fun prints and in many styles.  Most importantly, they come in a variety of lengths.  Because I am tall, I often feel the length of skirts are obscene on me – showing way too much.  With Dona Jo, it is easy to get a more modest fit.  The other great source I found – and the best for skirted leggings is www.solsisters.com.  A really attractive and well-made product!

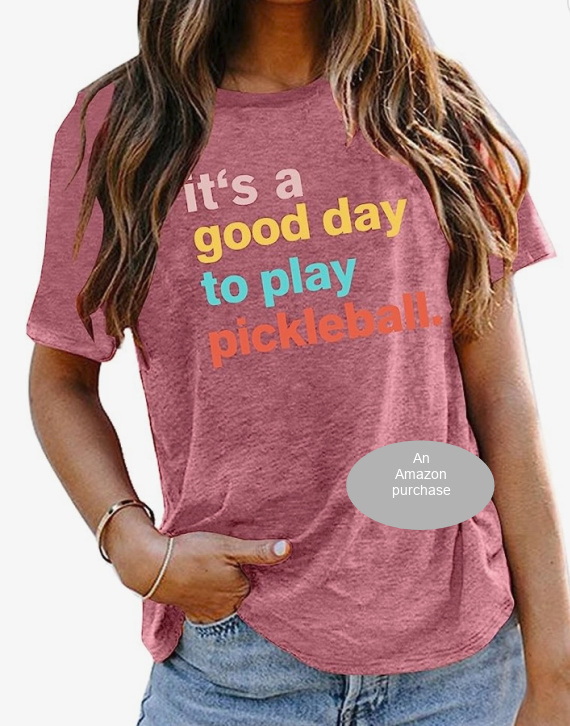
Now to throw in a little fun!  I’m not a big fan of t-shirts and I’ve never owned a shirt with writing on the front, but I found myself purchasing a couple of fun novelty shirts for pickleball.  One I found on Amazon and the other on Etsy. (I also liked one that said “I’d hit that,” but thought maybe that went a little too far and decided against it!)

big dink energy

So, I have a great pickleball wardrobe put together for a very affordable price!  Now if I can just figure out how to avoid the tan lines around my ankles!

Thanks for stopping by.  Dink on!

Have a fabulous weekend!  Remember to take pleasure in simple things, Jackie

P.S.  Still on the lookout for some old school tennis socks with the pom-poms on the back!

Safety Tip:  Although many athletic skirts and leggings offer pockets – don’t use them to hold extra balls…this can cause injuries in the event of falling on a non-forgiving plastic ball!

1 comment

coat closet to pantry diy

April 14, 2023

pantry shelf

I have a small coat closet off my kitchen that I hadn’t opened all winter.  Not because I don’t have coats.  Believe me, I have tons of coats!  But I wore the same warmest, longest winter parka I have for the entire winter and there had been no room for switching it up!

before pantry conversion

Every time I looked at the closet, I thought about what a waste of space it was.  One day I was just fed up with that closet and I took out every last coat and piled them up on my couch.  I looked at the empty closet and got so excited about the possibilities!  The only thing left in the closet was a single shelf and the bar where the coats had hung.  My first inclination was to remove the bar and fill the closet with shelves.  But, when I started thinking about what would be most convenient to store in the closet, I changed my mind.

What would be great to have in that closet?  My lunch bag and a couple other bags I use on a regular basis for starters.  Well, those things would be great to hang on the existing bar!  I decided to use S hooks (Which I happen to LOVE for organizing – it’s how I hang all my jeans in my closet!) to hang these items on the bar.

closet redo

pantry conversion

What else would be handy?  Definitely some cleaning products – mops and my Dyson.  So, I added mop holders first off and also mounted my Dyson to the inside of the door.  After mounting the Dyson, I examined the inside of the door and I saw more available space.  Next, I added a really cool rack I found on Amazon to store a couple pair of exercise shoes that usually lived on my kitchen floor.

closet door shoe storage

This closet already felt like heaven!  Next, I needed a place to put returnable cans.  Presently, I was hanging a plastic bag on the closet door handle for this purpose and it just had to go!  I bought a waste bin that fit nicely inside the closet to throw my empty cans and water bottles until I returned them to the store.

new pantry floor

This closet was everything already!  And, I still had some room!  I put a large basket on the floor and decided to keep the shelf that existed in the closet; adding two more.  I used my favorite IKEA baskets (Byholma) on the shelves to store some health books and cleaning products.

My son cut some wood for my two added shelves and I painted them the same as the rest of the closet (BM Simply White).

I added a hook for that one coat I wear all winter and a couple of bins to the inside of the door – I wanted to utilize every bit of space.

closet door makeover

Point is – the coat closet wasn’t working for me so I needed to find something that would!  Moral of the story is not to accept what is there just because it is there lol!

Now this closet makes me SO happy!  I use it ALL the time and it is so much more practical as a pantry type closet rather than a coat closet.

What, you ask, happened to all the coats?  I purchased two wardrobes (Brimnes) from IKEA for storing the coats and that is where they stay until the rare occasions they are needed!

I hope I have inspired you to rethink/rework some of your space!

Thanks for stopping by!

Have a great weekend and remember to take pleasure in simple things, Jackie

no comments

driftwood whale love

March 24, 2023

my driftwood whale

I have been wanting an Andy Teran whale for quite some time.  What is an Andy Teran whale?  A whale made by Andy Teran from driftwood collected from Connecticut shores!

Recently, I found myself near Andy’s Clinton, CT workshop and, of course, had to stop by!  The fabulous thing about Andy’s creations – besides being created from driftwood found on Connecticut shores – is that they can be made in any size!  I told Andy the exact size I wanted for my whale and he created it!  Because I had a particular spot in mind near my back entrance to hang my creation, I had an exact measurement I wanted for my whale…and, I got it!

workshop 2

The piece of driftwood my piece was created from came from Branford – Stony Creek.

driftwood whale front

driftwood whale back

You can see by my photos of Andy’s workshop that he has many whales already created and he is constantly creating more.  He harvests driftwood all year long!

workshop 1

I was excited to finally get my own piece and my guy will be hanging outside soon – once my Easter wreath comes down!

workshop 3

I hope you enjoyed this little glimpse into Andy’s workshop!

Thanks for stopping by!

Have a great weekend.  Remember to take pleasure in simple things, Jackie

P.S.  If you want to see more of Andy’s designs, check out his Instagram @andy.teran8

no comments

diy floral egg cups

March 10, 2023

diy flower egg cup

Using egg cups as part of your spring décor is super simple.  Egg cups are very easy to come by this time of year and are very inexpensive.  I think most of mine came from the bargain bin at Target, but I have found vintage ones at thrift stores as well.  Sometimes I add my own embellishments – like the white egg cup in these photos where I added a painted gold metallic rim.

daffodil egg cup

In addition to displaying painted or decorated eggs in egg cups, they also come in handy as vessels for flowers.  Adding fresh flowers to an egg cup is an easy DIY and can serve as a wonderful addition to any Easter table!

diy pussy willow egg cup

To make a floral egg cup; first, cut a piece of floral foam to fit into the chosen egg cup.  (If working with fresh flowers, be sure to use an egg cup that can hold water!)  Decide on the flowers you will be using and bundle them together. Pick a flower with a stiff stem and use a small piece of floral wire to tie the stems together.  The wire will also be helpful when sticking the flowers into the floral foam – making it easier to push the stems into the foam.  Add water if you are using fresh flowers.  Finish your arrangement with some moss to cover the floral foam.

collage diy egg cupsAren’t these sweet?  Make a bunch to use as place cards on your Easter table and/or as a cute takeaway for each guest.  If you have snowdrops blooming in your yard, they would be perfect to use for this project.  If not, you can find small fresh flowers in plants from your local grocery store or Trader Joe’s.  (I was able to make 4 egg cups from one $3.99 plant from the grocery store.)

diy spring egg cup

I hope I have inspired you to create some egg cup floral arrangements!

daffodil diy egg cup

pussywillow egg cup


Thanks for stopping by!

Have a fabulous weekend and remember to take pleasure in simple things, Jackie


no comments

boycotting egg painting

March 4, 2023

Wow!   This is my first post of 2023!  Since I started this blog in 2012, never before have I had such a lapse in posts!  It is very sad to think I haven’t been using my creative side in quite some time!

The good news is that I have been busy organizing myself in finances, work, and wellness and making great progress!

I’m happy to say, I do now, have a couple projects in the works!

One is a coffee table and the second is the transformation of a coat closet into a pantry. (More on these projects as they develop!)

Normally, at this time of year, I would already be working on Easter eggs…coming up with a theme and painting them appropriately.  This year, in a kind of personal protest against grocery prices, I decided not to paint eggs.  I don’t normally buy eggs, except at Easter time, and I decided I am not going to purchase them to paint this year.

For the purposes of this post, I am including photos of one of my favorite past Easter egg themes – topiary.  (Cactus, picnic, and constellation were also some of my most favorite themes).

topiary easter egg handpainted

I enjoy having some of the topiary eggs out in a bowl – I don’t think skipping a year of painting eggs will bother me!  I did put out a little bit of Easter/Spring décor – have you?  Remember to bring in some cut branches (magnolia, forsythia, etc.) – it’s the perfect time to force blooming!

fireplace decor easter

I’m counting down the days when the clocks will change because I really dislike leaving for work in the dark and coming home from work in the dark!

Have a fabulous weekend!

Remember to take pleasure in simple things, Jackie

no comments

easy diy gingerbread gift wrap

December 2, 2022

gingerbread giftwrap diy

Hi!  I know it has been a minute…but, I’m happy today to have some time to show you a really simple, very low-cost way to wrap your holiday packages!  These DIY gingerbread gift tags are made from discarded cardboard and a marker!  So easy!

diy gingerbread giftwrap

If you don’t already have a white, oil-based marker or a white permanent chalkboard marker, purchase one from the craft store to complete this project.  If you want to make coordinating wrapping paper, purchasing kraft paper is not necessary – brown bags work just as well!  (Note:  Trader Joe’s holiday shopping bags work great since they already have a gingerbread house design on brown paper bags!)

neutral christmas

A pencil can be used to draw some basic shapes onto corrugated cardboard.  (There is certainly plenty of this around with all the holiday deliveries rolling in!)  Then, draw the shapes onto the cardboard using a white, oil-based marker and decorate them as you would gingerbread – except use a marker instead of royal icing!

easy diy holiday tags

When the drawings are completed, cut out the shapes and add a hole in the top for hanging.  Simple!

gingerbread house gift tag

To coordinate gift bags, just use the same white marker to add a blizzard of ‘snowflake’ dots.

Isn’t this a great project to do with children?  All their original drawings can easily be transformed into gingerbread gift tags!

holiday giftbag diy

Thanks for stopping by!  Have a great weekend!

Remember to take pleasure in simple things, Jackie

1 comment

mini pumpkins and faded blooms

October 14, 2022

mini pumpkin hydrangea

As the garden starts to fade and all things pumpkin are amped-up, it seems a no-brainer to combine the two!

decorated white boo

I collected some faded garden blooms and some sweet little pine cones from a tree out front to use as baby boo embellishments.

pinecones and mini pumpkin

Little white baby boos are my favorite pumpkins and combining them with items from my yard is a really easy, no-cost way to create some fall decor!

faded blooms mini pumpkin

I hope you are inspired to use some of the items in your yard to create some pretty fall décor for your home or to gift.

boo on blanket

Thanks for stopping by!  Have a great weekend!

Remember to find pleasure in simple things, Jackie

1 comment

pumpkin play

September 30, 2022

striped mini pumpkin

Planting inside a pumpkin –  whether real or artificial – has been going on for quite a few years now.  Certainly, new colors and types of pumpkins pop up every year, but there are also some ways to make this season’s pumpkin – whether planted, or part of a planting –  look fresh for the current year!

Let’s look at four easy ways to update your planted pumpkin creations this year!

Add a decorative non-living item to your planting.  There are infinite ways to make a pumpkin planting look updated, simply by adding a decorative item to your arrangement.  In the examples here, decorative metal items are used.  Shop your local garden store gift shop or find something unique at a vintage store or thrift shop.

pumpkin with metal flower

pumpkin with metal acorn

A great way to make your arrangement look super current, is to add an item currently trending – in this case, a mushroom!

pumpkin with mushroom

Glue dried items to the outside of your pumpkin.  You have seen me glue dried items to pumpkins in years past and this is a great idea for anyone that feels they don’t possess a green thumb!  A glue gun and some found (or purchased) dried items from nature are all that are required!  And, although this is not exactly a planted pumpkin, it creates the same appeal as one!  Small pumpkins are especially great for this because very little material is needed to add some instant drama!

dried flowers on pumpkin

pumpkin with burgandy dried

Incorporate a nest into your pumpkin arrangement.  You know I have a passion for nests and why not use them with your pumpkins!  Items from nature are always favorites of mine and nests can mix really well with pumpkins!  You probably already have some nests, packed away with your Easter or spring décor, that can do double duty!

white nest pumpkin

nest with pumpkin

pumpkin in nest

Add a pumpkin to an already fabulous living arrangement.  Any arrangement you already have can look seasonal with an added pumpkin!  Nobody does this better than Terrain – look at the examples here!  Choose a pumpkin(s) that coordinates in color and/or style to your current planting!  Have fun with it!

orchids and pumpkin

pumpkin in black urn

pumpkin and ferns

I hope you are inspired to add some seasonal décor to your home!  The photos I used as examples here were all taken by me at Terrain in Westport.  If you live local, be sure to visit Terrain for The Autumn Bounty Festival on October 1st, 11:00 am to 4:00 pm.

Thanks for stopping by!

Have a great weekend and remember to take pleasure in simple things, Jackie


no comments

unexpected fall colors

September 16, 2022

green pumpkin in chair

I don’t like orange as a basic fall décor color.  I’m mostly about neutrals, as you probably know.  And, I do love black.

black fall accents

So, it makes sense that I would like a black and white fall palette.  Let me show you what I mean!

stacked white pumpkins

On a recent trip one sunny afternoon to Terrain in Westport, Connecticut – my favorite garden store – I come upon some pairings of white pumpkins with some really dark colored plants that basically read like black.

pumpkins with black

I really love color choices that aren’t orange for fall and I particularly loved this unexpected pairing of black and white as an outdoor landscape color scheme.  What do you think?

white pumpkins

I hope you are inspired to change up your fall décor colors this season!

terrain westport

Thanks for stopping by!

Have a great weekend and remember to take pleasure in simple things, Jackie

no comments

easy mango chamoy paletas

August 19, 2022

palentas mango chamoy

I was only recently turned on to paletas.  They look like ordinary ice pops, but they pack a much greater punch!  Paletas are a Mexican frozen treat made from fresh, natural fruits and sometimes with added milk or condensed milk.  Typically, they seem to be fruit-based but there are some milk-based, creamy flavors as well.  An ice pop made from natural ingredients – what’s not to love!

ice pops mango chamoy

My first taste of a paleta was a mango one.  I chose the mango because it was a fruit-based rather than a milk-based pop and because I love mangos!  When I tasted it, I was pleasantly surprised by a spicy flavor undertone that I could not identify.  Turns out the flavor was something called ’chamoy.’  The sweet, spicy flavor combined with the mango was really fantastic!

I had heard of the chili/lime spice called tajin (often seeing it rimming the glass of a cocktail), but I was unfamiliar with chamoy.  After some research, I figured out chamoy is a variety of savory sauces and condiments in Mexican cuisine made from pickled fruit.  It can range from a liquid to a paste consistency, and typically its flavor is salty, sweet, sour, and spiced with chilis.

chamoy mango ice popsI decided to try making my own mango paletas with this fabulous taste combination of mango and chamoy.  On my next trip to Trader Joes, I picked up some organic frozen mangos and looked for chamoy in the spice section.  No go!  I ended up sourcing the chamoy through Amazon.

I discovered two important lessons during the process of creating these ice pops:  1.  I am a wimp about spice, and, 2. Chamoy is stronger than you might think!

ingredients mango ice pops

My first batch of pops used about a teaspoon and a half of chamoy in each pop – that was way too much for my taste!  For my second batch, I used a squirt bottle I use to decorate sugar cookies and squirted a much smaller amount into each mold before I added the mango mixture.  You will need to decide how much heat you can take!

squirt bottle

To make 6 paletas, I combined these 4 ingredients in a blender and blended until smooth:

  • 1, 1lb. bag of organic frozen mango chunks, defrosted
  • 1/8 cup of honey (alter to sweeten to your individual taste)
  • 1/8 cup water
  • Squeeze of fresh lime juice

I prepared the ice pop molds by drizzling chamoy into each one – letting the chamoy drip down the sides.  I filled each mold half way with the mango mixture.  Then, I added more chamoy into each mold (I eliminated this step in my second batch of pops – wimp!).  After that, I filled each mold to the top with the mango mixture, put on the tops and sticks, and popped them into the freezer.

mango chamoy palenta

I recently switched from plastic ice pop molds to stainless ones and I adore them!  I have replaced all the plastic utensils in my kitchen over time and the ice pop molds were the last to be converted.  Not only are the stainless ones simple to use, but they are easier to wash than plastic and are much easier to unmold as well!  I highly recommend them – I found them on Amazon.

mango chamoy palentas

That, my friends, is how I recreated a mango chamoy paleta!  I am sure I will be trying to create some additional flavors before summer slips away…I hope I have inspired you to try making them as well!  If you prefer a creamy pop, just add some nonfat yogurt!

Thanks for stopping by!

Have a fabulous weekend and remember to take pleasure in simple things, Jackie

no comments

Back to top