Subscribe to Pleasure in Simple Things via RSS ReaderFollow Pleasure in Simple Things on InstagramFollow @InSimpleThings on TwitterLike Pleasure In Simple Things on FacebookFollow Pleasure In Simple Things on PinterestEmail Jackie

its always half full

August 13, 2013

diy beach sign

Talk about pleasure in simple things…I can‘t believe how excited I got recently about a piece of garbage that ended up in my yard! 

When pieces of a neighbor’s rickety fence started falling into my backyard, I got a little irritated…until…one day, I went out to cut the lawn and found the most beautiful piece of old fence out in the grass.  It was one of the pickets from the old fence and it looked like a wonderful old weathered piece of driftwood.

photo of the shore

Such a simple thing…but repurposing that piece of fence gave me so much pleasure :)

I put that lovely piece of fence into my freezer for a few days…I always figure if there are any bugs or insect eggs inside the wood, they would not be able to survive the freezer!  Hope that is a correct assumption! 

beach sign from a fence picket

When I was sufficiently satisfied the piece of fence was bug free, I wrote “beach” on it with a white Sharpie oil based paint pen.  I had planned on sanding it after that to make the writing look worn.  But, as it turned out, the pen soaked into the wood in spots and created something of a worn look all on its own.

I love my beach sign!

I think I was meant to learn a lesson from that old piece of fence.

John Wooden quote

Thanks so much for stopping by!  Remember to take pleasure in simple things, Jackie

1 comment

diy nautical necklace

July 30, 2013

diy nautical necklace

I have never made any jewelry.  When I see some of the beautiful beads in the craft store, I am tempted to make something.  The thing is, it seems when you add the price of all the items needed to make a piece, it can be much less expensive to buy something already made!  Some day I plan on experimenting with jewelry making with my sea glass collection, but today I want to tell you about a necklace I created for less than $5!

A while back, I ripped a photo of a necklace I really liked from a magazine…it had a nautical feel to it since it was made from rope.  But, at $215., it was way beyond my accessories budget…actually, I don’t even have an accessories budget!  So, $215. more than my budget!

diy necklace collage

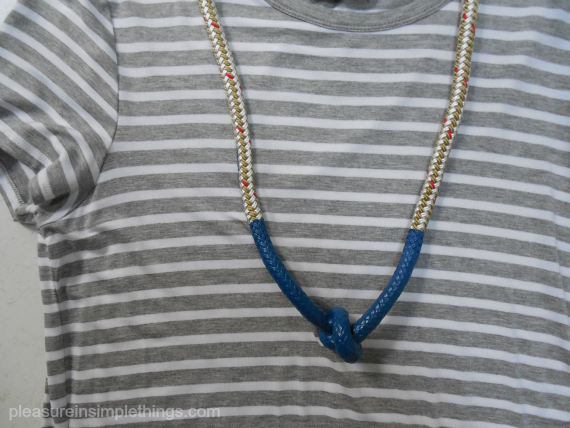
I was able to create the same look as the necklace in the magazine with a piece of rope from the marine store (less than $2.) and some Plasti Dip I had left over from my seafood fork project.  I got a little fancy and bought a bracelet clasp and some wire to use as an attachment and the total for supplies still came out under $5.

The best part is that I love the necklace!  I thought I would wear it with t-shirts, but I really like the way it looks with my gray and white striped long t-shirt dress…so perfect!  All I did was to knot the rope and dip it in Plasti Dip.  The necklace I saw had a red accent, but I decided to use blue since I had some blue Plasti Dip on hand.  I liked the look of two coats of Plasti Dip, but you can easily add more coats if you want the colored area to have a thicker look.

diy necklace

When you buy the rope at the marine store, it is best to get the exact length you want, because they will burn the edges for you to prevent it from unraveling.  There are plenty of different rope options to choose from and the cost is calculated per yard.  I thought the craft store would have some type of clamp to use as a fastener, but I couldn’t find one large enough to fit the diameter of the rope so I crafted a fastener out of a bracelet fastener.  Maybe a jewelry supply store would have something different or, another fastening option would be to tie or fuse the two ends together – slipping the necklace over your head.

So, that is a simple way to create a nautical feel necklace!  I think knotted napkin rings dipped in Plasti Dip would be another great variation on this project.  Plasti Dip can be tinted any color, so there are plenty of color options…have fun with it!

Thanks so much for stopping by.  Remember to take pleasure in simple things, Jackie

Sharing at Elizabeth & Co. and Silver Pennies.

1 comment

beachy shower gift

July 9, 2013

Mr. & Mrs. beach towels

Need a gift idea for a bridal shower?

On previous posts we shared creating a beach themed gift wrap, beach theme decorations, and a beach themed shell tote bag tie-on.Since I have gotten some emails asking what was actually inside the tote bag gift, today I am sharing a beach themed gift idea for a bridal shower.

This year, my go-to bridal shower gift was his and her beach towels.A nice beach towel is a necessity for all beach lovers and a natural gift choice for a summer shower!I chose some really large, bright striped, heavyweight matching beach towels and had them monogrammed ‘MR.’ and ‘MRS.’ So cute!A great item to pack for a honeymoon. :)

beachy gift idea

(I love monogrammed towels – I always had my kids’ towels monogrammed with their names to hang in the ‘kids’ bathroom; avoiding any question of towel ownership!Even a college student can appreciate a way to help safeguard a towel that may be left in a laundry or shower room.Note:Monogramming a small child’s name on a beach towel for use on a public beach is not recommended! )

beachy bridal shower gift

You can package the towels in a beach tote or basket.Try to include items special or unique to the couple…maybe something symbolic to where they met or a special interest.The couple receiving this gift tote were wine lovers… so a bottle of wine, acrylic wine glasses, and cocktail napkins were included in the tote.Of course, the bottle of wine tucked inside needed to fit the theme!Also, a holiday ornament inscribed with the town where the couple met was tucked into one of the glasses.

beachy bridal shower gift

A gift tag attached to the pull of the tote was made using an old beach photo of the groom’s mom that was photocopied onto a piece of cardstock.

DIY gift tag

Personalizing your gift for the couple is the fun part!If you don’t know the couple very well, you can usually get a good sense of their interests and color preferences by reviewing their gift registries.

I hope this bridal shower gift idea will inspire you to create a gift tote to give to a special couple in your life.

Thanks for visiting, Jackie

Sharing at The Shabby Nest and Craftberry Bush.

no comments

making candles in the sand

July 5, 2013

candles in scallop shells

For a long time I have wanted to make a sand candle like the ones I made as a kid.  Recently I came across a rock I painted back in junior high school and it got me thinking once again about making a sand candle.   So, today’s Friday field trip is a nostalgic trip back to my childhood to make some sand candles.

rock painted with owl

Back in junior high, our candle making was very basic – we melted candle wax in a tin can over a hot plate.  Rather than spoil the nostalgia, I decided to make my sand candle from memory and forgo any formal candle making research.

Candle makers probably use thermometers, scents, colors and other ‘fancy’ equipment for accuracy and safety.  My equipment is some wax and an old pan.  I did purchase a package of votive candle wicks from the craft store that I happen to notice when I stopped in to pick up a 1 lb. block of wax.  I think in junior high we just used twine dipped in wax.  So, I am going a little bit ‘high tech’ with this project. ;)

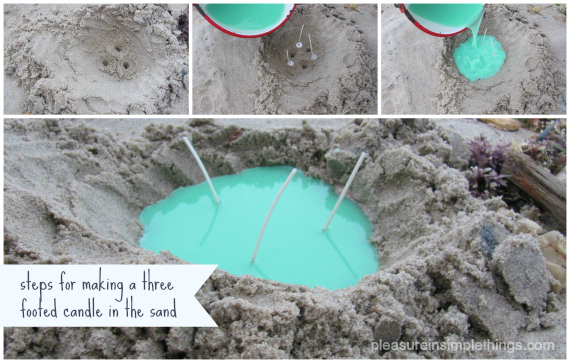
steps to making a footed candle in the sand

To make a sand candle, sand is used as the mold for the candle.  At low tide, the candle ‘mold’ is made in the sand.  I made an oval shape in the sand and then poked a stick into the bottom in three places to make three ‘legs’ for the candle to stand on.  It’s a very simple premise.  And then, before the tide comes up again and the wax has hardened, I dig the candle out of the sand.  Sand adheres to the hot wax, creating a sandy outside to the candle.

I really didn’t want to keep the wax its natural white color.  Thinking a light lavender color may be pretty against the sand, I checked to see if I had a lavender crayon to add a little tint…nope.  I chose a ‘sea green’ crayon from the colors I had and threw it into the pot with the wax.

making scallop shells in the sand

I used an old pot that I keep specifically for various craft projects –like tie dyeing, or other projects where I don’t want to ruin my good pans.  I melted the wax using a double boiler method, melting it slowly since I wasn’t sure about the safety of melting wax and wanted to be as cautious as possible.

candle made in the sand

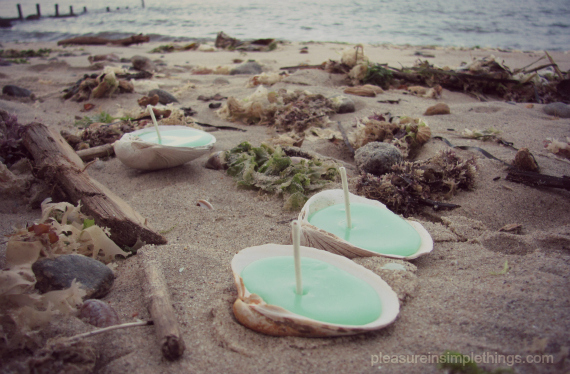
Once the wax melted, I used a pot holder to carry the pot out to the mold in the sand.  After I poured in the wax I needed, I poured the remaining wax into shells I found on the beach after adding wicks from the bag I had purchased.

sea green shell candles and flowers

candle in a scallop shell

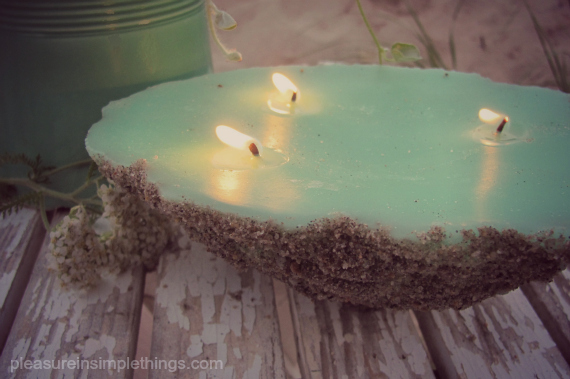
And, that is it!  The hardest part is timing the tide!  If you don’t have a beach, you can certainly use this method with a bucket of sand…and then you don’t have to worry about the high tide coming in and taking your candle out to sea! ;)  I was so excited about my nostalgic creations, the next day I couldn’t wait for it to get dark so I could light them!

candles in scallop shells

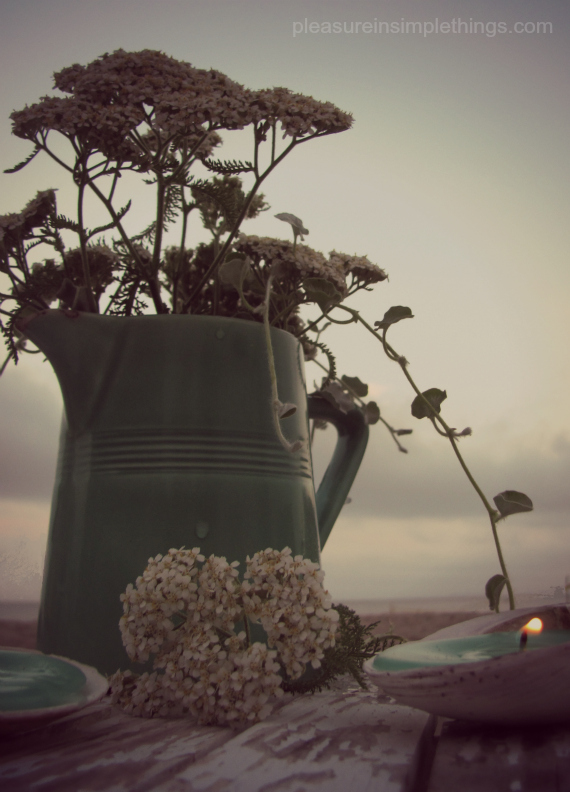
dusk at the beach with shell candles

Now that I got that out of my system, I wonder what other crafts from my past I can recreate…

flowers at nightfall at the beach

Until next time…

Thanks for visiting.  Remember to take pleasure in simple things, Jackie

Sharing at The Shabby Nest.

4 comments

seafood swag

July 2, 2013

diy seafood forks

You may already know that I am a big Plasti Dip fan from my wooden spoon tutorial.  Today, I am going to show you how I used Plasti Dip to give an old set of seafood forks new life by putting a colorful plastic coating on the handles. 

'before' seafood forks for Plasti DipI was lucky enough to be the recipient of an old set of seafood forks from my friend Terry…thanks again T ;)  If you don’t have a friend like mine to give you good stuff to recycle, you can head to a thrift store.  The forks don’t need to match since the color you choose for the Plasti Dip will tie the set together.

I wanted my seafood fork set for eating shellfish on the beach and decided on royal blue for my Plasti Dip color.  Following the directions on the ‘Make Your Own Color Kit’, I used blue and a little bit of black to mix the color I wanted. 

eating shellfish at the beach

DIY seafood forks

Plasti Dip is very easy to use.  You can follow my spoon tutorial if you need some instruction.  In the same way that I dipped the wooden spoons, I dipped each seafood fork into the Plasti Dip.  Easy! 

revamped seafood forks

After allowing for drying time, my forks are ready to use!

seafood fork DIY

Now I have a colorful supply of seafood forks that I love!  Mussels anyone?

shellfish on the sand

Thanks so much for visiting!

Remember to take pleasure in simple things, Jackie  Be sure to ‘like’ my facebook page and follow on Instagram to share more summer photos!

Sharing at Coastal Charm.

6 comments

beachy bridal shower

June 28, 2013

beach themed decorations

A visit to a bridal shower is today’s Friday field trip.  I am sharing some of the decorations I created for a beach themed bridal shower, hoping it may provide inspiration for some of your own party planning.

beach theme invitations

The first impression for any party is created by the invitation.  So, for this party we needed something really ‘beachy.’  What better than a message in a bottle for an invite?!  I created the message on my home computer and printed out copies on a color printer.  The messages were rolled and inserted into glass bottles and mailed off in boxes the size of the bottles (with a little extra room to protect them with some bubble wrap).

Not only does the invitation create the mood, but gives guests the opportunity to wrap their gifts in the theme and also to dress the part!

beach themed bridal shower

Welcoming guests into the party also creates a great opportunity to set the mood.  I used a skim board chalkboard with the future couple’s initials at the entryway to welcome guests to the party.  And, don’t forget that summertime playlist…Beach Boys and Jimmy Buffett need to be included!

The labels for the takeaway favors were also created on a home computer and printed on label sheets using a color printer.  Inside each ‘beach pail’ were some realistic looking candy rocks, salt water taffy, and homemade decorated sugar cookies cut in the shapes of shells and fish.

bloody mary at a bridal shower

Beach themed wines or frozen drinks are great for a beach themed party, but for a bridal shower, including the future bride’s favorite drink is a must!  All the fixings for this guest of honor’s favorite were included at the drink bar.

beach themed bridal shower decorations

This shower was held at the future groom’s parent’s house.  ‘Beachy’ photos of the future groom as a child were collected and printed out in black and white on a home copier.  I ripped the photos rather than cutting them to create a ragged edge.  The photos were used in old jars and placed down the center of the tables.

beach themed bridal shower decorations

I used a burlap runner down each table and decorated with old jars, lanterns, twine, raffia, shells, sea glass, driftwood, and rocks to set the mood.

beach themed bridal shower decorations

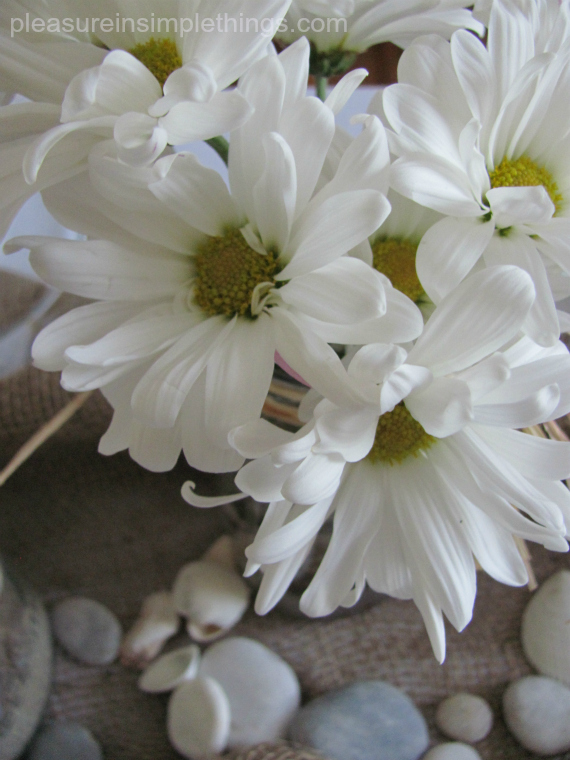
Some of the jars were filled with sea glass and water to fill with daisies…always a great symbol of summer.

daisies at a beach themed bridal shower

The same decor was carried through to decorate the bathrooms and the area where everyone gathered to watch the future bride open gifts – where a large white washed anchor set the tone.

beach themed bridal shower

“Beachyness” was included in every detail.  The dessert bar included cupcakes topped with graham cracker crumb ‘sand’ and garnished with variegated chocolate shells, seahorses, and starfish that were made by the future groom’s mom.

beach themed bridal shower decorations

Those are some of the decorations…I didn’t have enough space to show you every detail, but feel free to send me an email if you are having a beach themed party of your own and I would be happy to give you some more ‘beachy’ ideas ;)  I hope you enjoyed today’s Friday field trip to check out the decorations at a beach themed bridal shower.

beach themed bridal shower decorations

Thank you so much for visiting.  Please be sure to click ‘like’ on my facebook page so you won’t miss any of my beach photos this summer.  Have a wonderful weekend!!

Sending saltwater kisses, Jackie

Sharing at The Shabby Nest, Craftberry Bush, and The Tablescaper.

6 comments

monogrammed shell package tie-on

June 4, 2013

monogrammed shell package tie

‘Tis the season for gift giving.  I know it is not December, but I find this time of year requires more presents than the holidays!  There are so many showers, weddings, and other festive occasions.

I have the uncanny ability to turn any gift-giving opportunity into a ‘beachy’ moment.  This summer I am truly in my element since I am invited to several beach-themed bridal showers.  For one of the showers, I created a simple, diy package tie-on using a couple of shells, a little bling, and some twine…easy and elegant!

monogrammed shells for gift wrap

Find or purchase two shells that you like and coordinate well with the item you are using them with.  The first thing to do is to put a couple holes in the top of each shell.  You may want to have a couple extra shells on hand in case this part of the process should offer up any complications…aka break the shell.  I am lucky enough to have a friend that has a dremel tool that can help me out with projects like this.  Using a dremel with water is the optimum way to go if you make holes in alot of beach finds!  If you don’t have this type of tool or can’t borrow one, you can use a nail, but there is a higher chance of cracking or breaking the shell.  You can get by with one hole in each shell…for my application, I found that the shells hung better with the two holes.

creating monogrammed seashells

diy monogrammed seashell package tie-on

You have seen me use chalkboard paint to write on the inside of shells…this time I wanted something more elegant, so I am using self-adhesive rhinestones that I bought at a craft store.  It is really easy.  Using tweezers, I just attached the rhinestones one at a time onto the inside of the shells in the shape of the the initials of the future bride and groom.  The rhinestones are inexpensive and go a long way…I still have some left from my Easter egg decorating!

monogrammed shell package tie-on

I am using my tie-on on a tote bag, so I used twine to tie a shell on each end and placed it around the handle of the bag as an alternative to monogramming the tote.  (The rest of the gift will be shared on a future post.)  So sweet!  A wonderful way to make a gift for a special couple truly special!

I hope you can use this idea and make some monogrammed seashells for one of your special bridal shower gifts this summer!

Thanks so much for visiting!  Please take a moment to click ‘like’ on my Facebook page and if you use Instagram, please click ‘follow.’  for more sharing!

Remember to take pleasure in simple things, Jackie

Sharing at Craftberry Bush, City Farmhouse,   A Pinch of Joy and Coastal Charm.

5 comments

homemade nautical gift wrap

May 28, 2013

diy nautical giftwrap

Do you want to create some gift wrap?  A nautical design?  A certain color scheme?   Done, done, and…done!  All easily accomplished with kraft paper.

I have a thing for brown kraft paper…I admit it.

I love the way it looks and it is just so versatile.  I actually have two commercial size rolls housed in my basement as you read this.

I recently created some gift wrap using kraft paper for a beach-themed shower coming up and thought I would show you how easy it is to create.

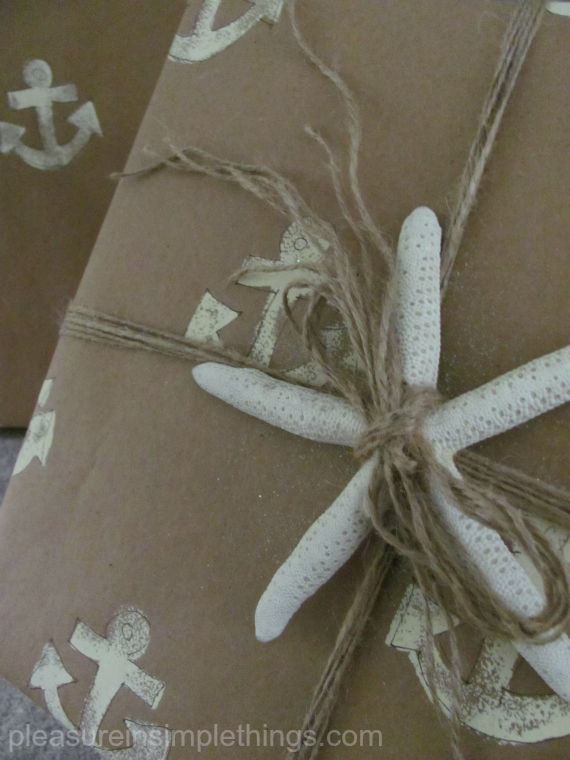
homemade giftwrap with anchors

The supplies needed to create this anchor patterned gift wrap:

  • kraft paper cut to the size(s) needed for the gift(s) you are wrapping
  • off-white (or desired color) acrylic paint
  • anchor (or desired motif) shaped sponge*
  • ultra fine point black permanent maker

visual tutorial diy nautical giftwrap

*Note:  You can use a precut sponge or cut one yourself.  Popular shapes are available precut at craft stores.  If you want an unusual shape, you may need to cut the sponge yourself.  (I once wanted one in the shape of the Tin Man for a Wizard of Oz party theme – needless to say, I had to cut it myself – I still have it though, if you should ever have the need to borrow it!)

diy nautical wrapping paper

diy nautical wrapping paper with anchors

Directions:  Cover one side of the (moistened) sponge with paint and blot onto a paper towel.  Press lightly onto the kraft paper to print the design.  Continue to print the motif in the pattern desired on the paper, filling the sponge with paint as needed.  After letting the paint dry thoroughly, outline (messily) each anchor design with the marker.

diy nautical gift wrap

You are ready to use your paper as gift wrap!  Just tie with some twine, rope, or raffia and you are good to go!  You can also add a starfish or some other ‘beachy’ item if you are so inclined.

homemade nautical gift wrap

Hope you enjoyed this simple kraft paper gift wrap tutorial.  One of the many great ways to use kraft paper!  Use the motif and color you desire and have fun with it!

Ahoy & happy giving!

Thanks for visiting, Jackie

Sharing at Coastal Charm,  Pinch of Joy, and Craftberry Bush.

6 comments

coastal nail colors

April 5, 2013

kayak at beach

This is an unusual Friday field trip.  It is a trip to the beach…we all need that right about now, don’t you think?  I know, a Friday field trip to the beach is not that unusual…especially for me.  But, the reason for the trip to the beach is a little unusual…the reason is to create a nail polish collection!

I have always wanted to create a nail polish collection and I have been inspired to do so from so many sources…I could create an entire collection just from the colors of my sea glass or, an entire collection of neutrals just from the white flowers in my garden.!  And, there definitely is plenty of color inspiration at the beach…many more colors than I wanted for just one collection.  I decided the collection would be six shades…the top six…and these shades would be the ones I most wanted to wear.    A versatile collection and, a realistic one.  Cutting it down to six was not easy!  This meant I had to eliminate watermelon slushie, beach donuts, gull, lavender sea glass, and ragosa – to name a few.

Connecticut coast photo

color of clouds

I think a beach collection has to contain some blue…there is so much blue at the beach.  Rather than go with the obvious…water…I decided to get inspired by the sky.

The beauty of the sky at the beach is that it is always changing.  Sometimes, when the weather is the most severe, the sky is the most beautiful.  A clear sunny day may be what a beach lover craves, but it certainly is not the most beautiful sky at the shore.  This photo illustrates this point perfectly… a clear, sunny day would not be as beautiful as the sky I captured  in this photo on a very cloudy day.  Because of this, the blue shade inspired from the sky is named cloud.

a photo of the water meeting the shore

color of a beach stone

Neutral colors are definitely my favorites and there are plenty to choose from at the beach.  Just as beautiful as a shell or a piece of sea glass, are the many stones at the beach.  They are sometimes speckled or striped…some are the most beautiful when wet with salt water.  The color inspired by one of these beauties is called beach stone.

photo of a beach house

color of a beach fence

Old whitewashed fences and posts are everywhere at the beach.  The old ones have so much more charm than anything new.  The age of the shore is part of the beauty contained in the wood.  This is the inspiration for the third color called old fence.

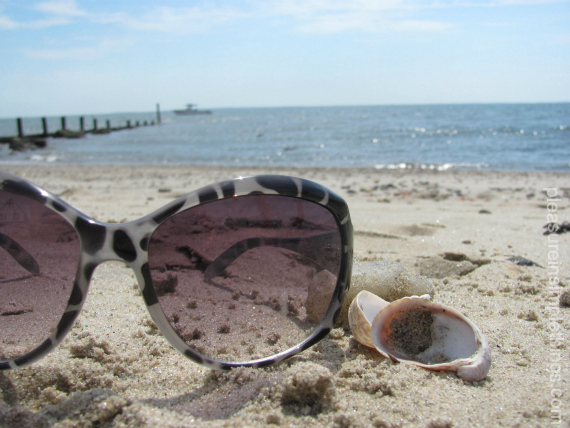
photo of sunglasses on the beach

color of sunglass reflection

Not all the color inspirations at the beach are natural objects…a beach umbrella, a horse on the carousel, or a striped beach towel can all prove to be color inspirations.  Here, I am inspired by the color of my sunglass lenses and I am naming this color reflection.

shell

color of the inside of a shell

An obvious choice for color inspiration is a shell.  The subtleties of color on some of the shells (both interiors and exteriors) on the beach are just so beautiful. Here it is the blush of mauve.  I’ve named the color shell.

photo of wet footprints at the beach

color of wet footprints at the beach

For the last color, it really needed to be a gray tone to round out the collection.  And gray is an easy color to come by at the beach.  For this shade, I was inspired by the wet footprints on the sun-bleached wooden path and named it footprint.  That makes six…

I present to you, the entire CONNECTICUT COAST NAIL COLOR COLLECTION 2013:

coastal nail polish collection

What do you think?  I would wear all of them!

I hope you enjoyed our Friday field trip to the beach to create a fantasy nail polish collection.

Dreaming of warm days and salty breezes :)

Thanks so much for visiting.  Have a wonderful weekend, Jackie

I am sharing at Boogieboard Cottage,  A Pinch of Joy, and Little Red House.

4 comments

terrarium love

March 22, 2013

terrarium elements

Today, Friday field trip is a visit to my friend’s house.  Her name is Phyllis, and we are getting together for what she affectionately refers to as “a playdate.”  On this occasion, we are making terrariums.  We had recently picked up some terrarium plants and supplies at Terrain and we were very anxious to start creating!  I am sure we will have future field trips to Phyllis’s home since it is amazing!  I have so much inspiration I could share with you…her decor, her gardens, her handcrafted jewelry…well, everything!  But, for today, I will limit my sharing to our terrarium creations.

terrarium

When I got to Phyllis’s house we started right in…covering her large kitchen island with newspaper and taking out all our various supplies.  In addition, her entire dining room table was covered with assorted containers and possible decorative terrarium items.  She showed me the terrarium she had already completed.  Wow!  It is so beautiful…a little watering can!…and a hanging plant!  Isn’t it great?

Completed Terrarium


close up Terrarium


close up Terrarium view

Because Phyllis already knew all the terrarium basics, I didn’t have to worry about doing alot of research.  She explained about the rocks for drainage on the bottom (I think I would have figured that out) and a layer of activated charcoal (I would not have figured that out) before the layer of soil.  So, after a quick lesson on how to proceed, I needed to decide exactly what I wanted to put into the terrarium.

plant for terrarium

I figured I had two ways to go.  I could do an Easter/spring theme and use eggs and nests OR I could do my standard (coastal/beach) theme.  I decided to go with a ‘beachy’ theme and got some possible items assembled.  The interesting thing about putting a terrarium together is that you don’t really need as many plants or decorative items as you may think.  Less is really more.  So, I decided my main decorative item would be a sand castle.

terrarium elements

From there, I would use some rocks, shells, sea glass, and moss that reminded me of the beach.  For the plant?  Phyllis and I had both fell in love with a plant called Breynia Snow Bush that we found at Terrain and that would serve as the highlighted plant in my creation.

terrarium elements

And…this is what I came up with…what do you think?  I love it!  Isn’t the little colored gravel so great?  I think it is sold as fish tank decor.  I had some old glass ‘bubbles’ that were used many years ago with floating candles that lent themselves perfectly to the ‘beachy’ terrarium.

photo of coastal theme terrarium

Adorable, don’t you think?

closeup beach terrarium

You are probably wondering what Phyllis was working on…wait until you see!  Phyllis and I had both been intrigued by the ‘pussy willow teepees’ we saw in some of the terrariums at Terrain…like the one on this bunny arrangement.  So, Phyllis decided to create one in a pretty metal container she had on hand.

bunny terrarium

This beautiful arrangement is what she came up with!  So gorgeous!

pussywillow tent planting

She created the “teepee” from stalks of pussy willow.  She attached them on top by putting an elastic band around a piece of moss she harvested from her yard.  So beautiful…and with the pussy willow and the addition of some real quail eggs from Terrain, the perfect Easter arrangement!  You can see in this closeup that the elastic is not even visible once it is put into the moss.

making a pussywillow tent

Playdate successful!

Consider ‘shopping’ your basement and garage for possible terrarium containers and decorative items…Terrain has some really cool terrarium items if you want to purchase some or supplement what you can find around your house.  Miniatures from train sets or Christmas villages can also be used.  The sand castle I used was actually a repurposed photo holder – I just trimmed off the wire stand.  Just remember to use soil appropriate to the plants you select.

I hope you enjoyed my Friday field trip to create terrariums.  Special thanks to my partner in crime!  I forgot to mention the homemade golden pea soup I had for lunch (so yummy!) or the eggplant and famous key lime pie (heaven!) from The Pantry in Fairfield…ahhh..the perks of the playdate!  Thank you so much for stopping by!

Have a fabulous weekend, Jackie

I am sharing at Little Red House, Serenity Saturday, The Inspiration Gallery, Craftionary, Common Ground, Give Me the Goods Monday, and The Well Crafted Home.

16 comments

« Previous Entries     Next Entries »