Subscribe to Pleasure in Simple Things via RSS ReaderFollow Pleasure in Simple Things on InstagramFollow @InSimpleThings on TwitterLike Pleasure In Simple Things on FacebookFollow Pleasure In Simple Things on PinterestEmail Jackie

beauty by the sea

July 11, 2014

Ocean House RI front view pleasure in simple things

Come visit an iconic New England seaside resort located on the bluffs of Watch Hill, Rhode Island…today on Friday field trip!

Ocen House, RI pleasure in simple things

If you are a beach lover, Ocean House is the definitive beachside luxury that inspires at every turn…the kind of place dreams of made of…I am excited to share some photos of this ‘must see’ location with you for today’s field trip – especially for my friends that have never been to this area of the country.

Ocean House croquet pleasure in simple things

Ocean House pleasure in simple things

It really is impossible to include enough photos to give an accurate sense of the beauty of this destination and the incredible attention to detail displayed throughout the property. (I will post additional photos on my Facebook page to help!).

Ocean House, RI pleasure in simple things

Ocean House, RI pleasure in simple things

The resort originally opened in 1868 and was a widely recognized summer destination back in the 1800s. After welcoming guests for more than 136 years (and surviving the Great Hurricane of 1938), Ocean House was rebuilt replicating the original exterior design.   Isn’t it amazing?

Ocean House, RI pleasure in simple things

Ocean House, RI pleasure in simple things

One of only seventy-six hotels in the world to hold a Forbes Five Star rating, the Ocean House offers 49 spacious guest rooms, 15 extraordinary suites, and 6 gourmet and casual al fresco dining options.

Ocean House, RI pleasure in simple things

Ocean House, RI pleasure in simple things

Boasting a 650-foot private white sand beach and world-class amenities, Ocean House is the ultimate New England resort destination.

Ocean House, RI pleasure in simple things

Ocean House, RI pleasure in simple things

Thank you for stopping by! I hope you enjoyed visiting this iconic New England spot with me today for Friday field trip. Have a fabulous weekend!

Ocean House, RI pleasure in simple thingsRemember to take pleasure in simple things, Jackie

Sharing at Finding Silver Pennies and  Coastal Charm.

2 comments

patriotic tie-dye on the beach

July 4, 2014

patriotic tees pleasure in simple things diy

Happy Fourth my friends!  For Friday field trip today, I am taking you to the beach to show you my summer shirt creations made to wear to today’s neighborhood parade and party on the beach!

Tie-dye is the perfect beach craft – not only because it is fun, but because as a beach activity, there is very little mess or clean up.

Both experienced and first-time tie-dyers enjoy making their own patriotic creations!

If you want to hold your own patriotic tie-dye session, not much is needed to have a really fun time that produces some great results!

patriotic tie=dye pleasure in simple things

Patriotic Tie-Dye Supplies

  • 1 bottle Rit Liquid Dye (8 oz.) in navy blue
  • 1 bottle Rit Liquid Dye (8 oz.) in cherry red
  • Rubber bands
  • 2 cups salt
  • All cotton tee shirts
  • 2 plastic dish pails (each large enough to accommodate 3 gallons of water)
  • Rubber gloves to protect hands from dye (optional, but recommended)

The most economical way to purchase shirts is to choose (all cotton) shirts in multiple packs at a discount store.  But, you don’t necessarily need to purchase shirts – you can use some shirts or other articles you already own!  (It is fine to use a white shirt with writing…maybe a tie-dyed version of a shirt from your alma mater!)  Another option, if purchasing shirts is not in your budget, is to simply ask your guests to bring their own!

tie-dye on the beach pleasure in simple things

As everyone gets wrapped up in the excitement of the activity, it is inevitable at our house that one of the kids raids their sock or underwear drawer to add some extra articles of clothing to the mix…old pillowcases and sheets are also fair game!

beach tie-dye pleasure in simple things

First, be sure to wet the articles of clothing you intend to dye and wring out excess water in preparation for dyeing…this produces the best results.

The next step is to add tie-dyeing at the beach pleasure in simple thingsthe elastics.   The elastics prevent the dye from getting to the part of the shirt they are attached to, so be sure to make them tight!  There are so many variations of designs that can be created.  Even experienced tie-dyers come up with new designs… If you are at a loss for ideas, you can use an online resource to find suggestions for applying elastics for specific designs.  We like to just wing it and see what results!
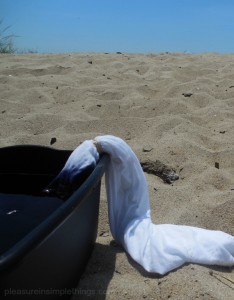
After the shirts are prepared with the elastics, prepare the dye baths.  I prefer liquid dye and I use it double strength.  For each color, first dissolve 1 cup of salt (it helps better set the dye) in 3 gallons of hot water before mixing in an 8 oz. bottle of liquid dye.

tie-dye on the beach pleasure in simple things

As far as the actual dyeing, like Easter eggs, everyone comes up with their own favorite technique.  That may be leaving the entire piece in one color…it may be dipping various parts of the shirt in each color, etc.  Dip or submerge your shirt into the desired color(s) and have fun!  The longer the piece remains in the dye, the stronger the color.

patriotic tie-dye on the sand pleasure in simple things

When you are done, squeeze the excess dye from the finished product and rinse with cold water from the hose until the runoff runs clear.  Cold saltwater helps set the color, so we end the process by throwing the item into the ocean!

tie-dye at the beach pleasure in simple things

Now to remove the elastics…this is the best part!  Everyone loves pulling off the elastics after the dyeing process to proudly admire the final results!  And, every shirt looks so good…it is impossible to mess up a shirt – every one looks super!

You now have a tee in patriotic colors!  Enjoy!

After the shirt is dry, you can further embellish it with fabric paint – In the past, I have used silver metallic puffy fabric paint to add stars to a 4th of July tee.

tie-dye at the beach pleasure in simple things

Thanks for stopping by and I hope today’s field trip will inspire you to hold a tie-dying session of your own!

Have a wonderful weekend!  Remember to take pleasure in simple things, Jackie

Sharing with Silver Pennies, Coastal Charm, and Sand & Sisal.

no comments

july book giveaway!

July 1, 2014

july book giveaway pleasure in simple things

Congratulations to Candice in Chicago, the winner of the June giveaway book, The Interestings by Meg Wolitzer!  Be sure to tuck this author-signed paperback into your beach bag for some great summer reading!

When I came across the book Summertime edited by Joanne Dugan, I knew it had to be the July giveaway book!  It is a marvelous collection of summer photos joined with some wonderful quotes.  Because I love so many of the images contained in this book and because so many of the quotes in this book are favorites of mine; it almost seems like I could have been the editor of Summertime!  The book is a wonderful tribute to this special (and my favorite) time of year!

summertime edited by joanne dugan

“Summertime,” edited by Joanne Dugan, is a wonderful tribute to my favorite time of year!

Summertime is the perfect hostess gift for when you spend the day at a friend’s beach house or a great book to flip through during the long winter months when summer seems so far away!  The images in Summertime will instantly transport you to a more relaxing time when the weather is warm and the living is easy!  :)

Simply leave a comment here on the blog (or Instagram, or Facebook) and let me know you would like to own this book and you will be entered to win.

Instagram users, please read on!  For the pleasure in simple things July Instagram challenge, please share your own summertime photos…what does summer mean to you?  Salt water breezes?  Eating a freeze pop?  Watching fireworks?  Share your photos during the month of July with hashtag #pleasuregram.

instagram challenge 2014 pleasure in simple things

Happy summer!  Thanks for stopping by, Jackie  

1 comment

visiting the st. augustine lighthouse

June 27, 2014

visiting the St. Augustine lighthouse pleasure in simple things

The latest issue of Coastal Living Magazine named St. Augustine, Florida in the top 5 for happiest seaside towns in America.

For today’s Friday field trip, I am taking you on a lighthouse visit – one of my happy places during a recent weekend visit to the “Nation’s Oldest City” in the Northeast part of Florida.

St. Augustine Lighthouse in Florida pleasure in simple things

Completed in 1874, after taking three years to build, the lighthouse is St. Augustine’s first and oldest surviving brick structure and rises 165 feet above sea level.

Staircase in St. Augustine lighthouse pleasure in simple things

Walking past the nine windows in the lighthouse provided beautiful panoramic views as I ascended the 8 flights of cast iron spiral stairs – a total of 219 steps.

St. Augustine lighthouse pleasure in simple things

This is what one of the windows looks like from the inside…now, check out some of the views to the outside!

view from lighthouse pleasure in simple things

A view of the keeper’s house from one of the St. Augustine lighthouse windows.

view from lighthouse window pleasure in simple things

view from St. Augustine lighthouse window pleasure in simple things

I was able to make it to the observation deck at the top of the lighthouse just before an impending lightning storm cut my visit short.

top of the St. Augustine lighthouse pleasure in simple things

Jackie at the top of the ST. Augustine lighthouse pleasure in simple things

The lightning storm was probably a good thing – no telling how many photos I would have taken if I was given the opportunity!

top of the St Augustine lighthouse pleasure in simple things

I hope you enjoyed sharing my visit to the St. Augustine lighthouse on today’s Friday field trip.  Thank you so much for stopping by and have a wonderful weekend!

Remember to take pleasure in simple things, Jackie

4 comments

nautical father’s day coasters

May 20, 2014

pleasure in simple things craft

Beverage coasters make great gifts, and with Father’s Day coming up soon, I have some quick and easy diy gift coasters that are sure to be a hit with the dads!  And, they are easy enough for the kids to create!

I made all the coasters in this post from repurposed items (and a little bit of chalkboard paint)…here are three different ways to create some great nautical themed drink holders!

JAR LIDS make great coasters.  I like to use  the tops of old canning jars.  There are so many ways to decorate a jar lid!  An old photo of dad is one great way…you can use a copier if you don’t want to compromise a favorite photo.  I like the old black and white photos!  If you would rather draw your own design, it is easy enough to create a design on a circular piece of cardstock to later glue to the lid.  For a new dad, a footprint of a newborn would be a sweet idea.

pleasure in simple things coaster

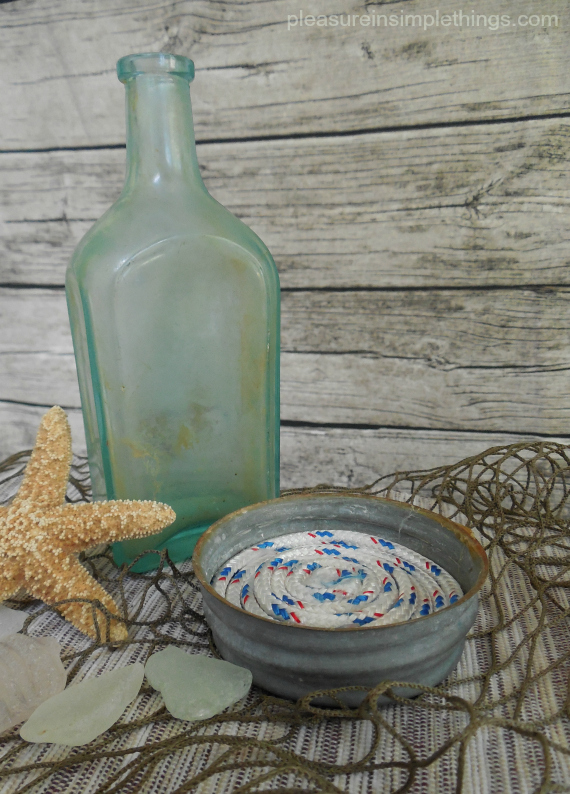
Here, I coiled a scrap piece of rope and used a glue gun to attach it to the lid.  If you don’t have any rope, it is very inexpensive to buy by the yard at a marine store (or, you can buy a jumprope at a dollar store).

Another way to embellish the lid is to add a piece of cork.  Here, I added cork and decorated it by simply adding a design with a permanent marker.

pleasure in simple things Father's Day coaster

A map of the recipient’s favorite vacation spot is another idea…here, I used a page from an old atlas.

pleasure in simple things nautical coaster

pleasure in simple things recycling a vegetable container


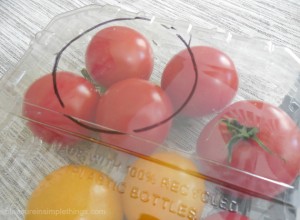
I found an easy way to protect the photo or map you use for your coaster – simply cut a circle of plastic from a fruit or vegetable container and lay it right on top!

For the next two designs, you will need to create a template…decide on the size and shape you want for the coaster and cut one out of cardboard.  I made mine a 3 ½” square with rounded corners.

CHALKBOARD coasters are easy to make and are so fun!  Using your template, cut coasters out of cardboard or chipboard.  For Father’s Day, you will probably want to create a set – decide how many you want, cut them out, and coat one side of each with chalkboard paint – I used chalkboard spray paint.

pleasure in simple things diy nautical coasters

For a nautical look, I tied a set of newly made coasters in twine and added a fish gift tag made from brown kraft paper.  Don’t forget to add a piece of chalk!  I also added a fishing bobber as a final touch!

pleasure in simple things diy coasters

Cardboard SIX PACK CARRIERS, that six packs of beer are sold in, are a great source for a fun coaster material.  Using your template, just trace and cut coasters!  I found some great six pack holders in recycling bins!

pleasure in simple things six pack diy coasters

Any summertime design is really fun to use (wish I found some Landshark!)…or, a design from a favorite beer of the recipient!

pleasure in simple things cardboard coasters

I hope you enjoyed these ideas for easy ways to make coasters as gifts this Father’s Day.  They are a super project to work on with the kids…enjoy!

Thanks so much for stopping by.  Remember to take pleasure in simple things, Jackie
Sharing at Liz Marie BlogCoastal Charm, Silver Pennies, City Farmhouse, and Sand & Sisal.

3 comments

summertime diy napkin rings

May 13, 2014

diy summer napkin rings

What flower suggests the summertime to you?  Queen Anne’s lace screams summer to me.  Even though some people may consider it a weed…I see it as a sweet and nostalgic symbol of the summertime!  Combining this flower with a napkin ring creates the perfect summer accessory for outdoor dinners on the sand. :)

diy napkin ring with mason jar

I recently saw a photo in a magazine of a napkin ring with a bloom of Queen Anne’s lace and I fell in love with it!

diy napkin rings on the beach

The napkin ring was listed as available from Crate & Barrel.  Normally, I would have run right out to Crate & Barrel and scooped some up – they were so reasonably priced!  (And I love any excuse to visit the store!)  But, since I already had all the materials needed to create them at home, I was able to make them up at basically no cost!  Besides, I had been eager to upscale the old napkin rings my friend Terry gave me months ago…she knew I would find a great use for them!  (Thank you Terry!)

summer napkin ring diy

I had picked up a solitary stem of artificial Queen Anne’s lace last summer in the bargain bin at the craft store – not really sure what I’d do with it.  Conveniently, it contained four blooms on the one stem – perfect to create a set of napkin rings!

sea glass

Adding in some scrap twine, I made all four napkin rings for the cost of the flower stem ($1. plus tax).  These napkin rings will serve as the perfect accessory for some of my many nautical napkins to use with meals on the beach this summer.

diy twine napkin rings

I wrapped each napkin ring with twine – using my trusty glue gun to hold the twine in place.  After completely covering the old napkin ring, I removed a bloom from the stem of the artificial flower and affixed it to the top of the twine covered ring using the glue gun.

instructions for diy napkin rings

Easy!  This technique can be used for any artificial flower you may have…or, one you have crafted from paper.  This is also a great and inexpensive way to add a theme color or favorite flower to a bridal shower… or any celebration!  Recycle old napkin rings, curtain rings, or shower rings using this technique to create some beautiful new napkin rings!

diy napkin rings with anchor napkins

diy napkin ring on the sand

I love my new napkin rings…and, the Queen Anne’s lace reminds me that summer is ahead!

photo of beach grass

A nostalgic summertime song to set the mood for meals on the beach.  :)

Thanks so much for stopping by!  Remember to take pleasure in simple things, Jackie

P.S.  You can click here for a tutorial on making the anchor napkins shown here…and click here for some great ways to use seaglass Enjoy!

Sharing at Sand & Sisal, Finding Silver Pennies, and Savvy Southern Style.

no comments

diy button anchor wall hanging

February 21, 2014

diy button anchor wall hanging

For today’s Friday field trip, I am turning an item from the past into something unexpected that can be permanently displayed and fondly admired.

While my children were growing up, our family vacations always involved water – even when we were away from our own beach, we were tent camping on a lake or visiting the ocean at a state park. 

diy anchor wall hanging

Shortly after my children were born… I don’t think my oldest was even a year old… I splurged and bought a couple of good quality staple items to be used for our family’s water time…a mesh bag to tote toys (there were always plenty) and a large cotton beach blanket – both purchased from L.L.Bean.  Every family trip to an ocean, lake, or pool was accompanied by the large mesh bag filled with water toys and the brightly colored cotton beach blanket.   

Over the years, the mesh bag disappeared as the mountain of plastic toys was replaced with sand chairs and Baggo.  But, the blanket always remained…that is, until this past summer…when I noticed (to my horror), that someone had decided this old beach blanket, now a shredded mess, should be put out of its misery.  I found it tossed in an outdoor garbage can! 

discarded beach blanket

What did I do?  I immediately took it OUT of the trash, of course – determined to save it and preserve all the memories associated with this sacred beach blanket.  I gave it a good washing and decided I would come up with some way to use some part of it to keep forever.  After all, this blanket was like part of the family!  I can’t even begin to explain all the wonderful moments that happened on and around this blanket!

So, I came up with a wall hanging that serves the battered old blanket perfectly and evokes memories of happy times with my children every time I see it!

If you want to create something similar, here are the steps I used:

preparing a diy wall hanging

  1. Stretch fabric (blanket) onto an embroidery hoop sized appropriately for the design you have chosen.
  2. Sew buttons onto the fabric in a desired pattern.  (First, work up your design on a flat surface to determine the buttons you want to use and the size of the design.  I was inspired to use the anchor by a photo of a tote bag I saw in Marie Claire.)
  3. Trim the fabric edges and glue them to the back of the hoop edges.
  4. For a decorative edge, attach a thin piece of twine around the edge of the hoop using a glue gun.
  5. Tie on a piece of twine for hanging.  (This is a decorative option since the hoop can be hung without it.)
  6. Use a glue gun to add on a ribbon accent.

wall hanging close up

Have you found unexpected ways to display items with special meanings?  I would love to hear about them…I still have blanket left. ;) 

Thank you for stopping by.

Have a wonderful weekend, Jackie

Sharing at Craftberry Bush and Common Ground.

no comments

fall at the beach

October 25, 2013

hand holding shell

Fall is not just about pretty leaves.  Nature provides the season with so much more…

Here in Connecticut, the fall brings a special kind of serenity to the beach…our destination for today’s Friday field trip.

life guard chair at beach

fall at the beach seagull

The frenzy of summer activity has disappeared and the shore has taken on a calm that enhances its beauty.

shell at beach in fall

All is quiet except for the occasional squawk of a gull and the subtle sound of the waves licking the shore.

fall at the beach

dusk at the beach in fall

I hope you enjoyed sharing these photos …If you live near the beach, make it a point to stop by for a fall visit. :)

Thanks so much for joining me for Friday field trip.

Have a wonderful weekend enjoying the beauty of the season,  Jackie

3 comments

better in threes

September 10, 2013

anchor triptych

Doesn’t putting any photo into a frame make it look better?  In the same way, I think putting a painting on canvas immediately ‘legitimizes’ it.  For this reason, I decided to create a quick ‘work of art’ on canvas for my daughter’s new apartment. 

While helping her move in, I noticed that there was an empty spot on the bathroom wall – a long, tall shape.  The bathroom was done in white and beige and had a hint of blue, so I thought a painting using beige and blue could tie everything together nicely.

What would fit the unusual space?  A triptych!  This is a painting divided into three sections.  I would choose three canvases that would fill the space appropriately…I decided an anchor would be my subject matter since the painting was going in a bathroom space and my daughter has a love for anchors. 

painting a triptych

I put three canvases together and drew a very rough sketch of an anchor with pencil.  I didn’t want to get too serious with it…just a very quick painting using the basic shapes and whatever acrylic craft paint I had left from previous projects…mixing beiges and blues.

Any basic pattern will work.  Just be sure the picture hits all three canvases.  If you don’t feel comfortable working with a pencil sketch, you can easily find something online to copy and trace.  You can even use your computer or a copier to adjust the size of the picture.  If that still seems intimidating to you, you can decoupage a picture onto the canvases – requiring no drawing or painting at all!

anchor triptych

The painting took about 10 minutes since I just did a ‘messy’ impressionistic view of an anchor and added very little detail. 

I was able to create a painting that used the appropriate color scheme and a favorite motif to add to my daughter’s newly decorated bathroom…fun!  I’m hoping my daughter will send me a photo of this new creation when she hangs it on the wall.  If so, I will share it with you on my Facebook page.

anchor triptych

I hope this has inspired you to create your own triptych!  Send me an email if you need some help or ideas.

Thanks so much for stopping by and remember to take pleasure in simple things, Jackie

Sharing on Shabby Nest.

2 comments

summer in the cape

August 16, 2013

cape cod

Cape Cod, Massachusetts is one of those places that holds many happy memories for me.  During my childhood, I enjoyed many family vacations in ‘the Cape.’  I had an opportunity to visit my old vacation spot recently, when I attended a service to honor the life of a special friend that had passed.

Wequassett Resort in Cape Cod

While there, I got the chance to reconnect with some friends that live in Chatham…not only did I enjoy spending some time catching up, but also enjoyed the beautiful view at the Wequassett Resort…

Visiting Wequassett Resort in Cape Cod

I thought I would share some of the beautiful view with you in today’s Friday field trip.  Now remember, this is just a brief point in time at the Cape…dinner with friends as sunset approaches…Can you even imagine the beauty when you live there full time?  Enjoy the photos!

Sunset at Wequassett Resort in Cape Cod

Sunset at Wequassett Resort in Cape Cod

Thanks so much Ed & Steph…for sharing…not only your friendship, but your special spot. :)

Sunset at Wequassett Resort in Cape Cod

Wequassett Resort in Cape Cod

Wequassett Resort in Cape Cod

Sunset in Cape Cod

Wequassett Resort in Cape Cod

Sunset in Cape Cod, MA

Wequassett Resort in Cape Cod

Reconnect with some old friends and enjoy the rest of your summer to the fullest!  Have a wonderful weekend, Jackie

2 comments

« Previous Entries     Next Entries »