Subscribe to Pleasure in Simple Things via RSS ReaderFollow Pleasure in Simple Things on InstagramFollow @InSimpleThings on TwitterLike Pleasure In Simple Things on FacebookFollow Pleasure In Simple Things on PinterestEmail Jackie

corn on the cob butter

July 19, 2016

Delicious flavored corn butter pleasure in simple things blog

From pizza to fruit – everything finds its way to the grill at this time of year!

Today, I am sharing a really easy way to add some extra flavor to your grilled corn. It is as simple as adding a few ingredients to your butter!  By picking a few basil leaves from the garden and adding a little cheese, the traditional butter condiment can be instantly upgraded!

Corn butter pleasure in simple things blog

It doesn’t get any easier!

Recipe for flavored corn butter pleasure in simple things blog

I included a recipe for you here, but using a little imagination, you can create your own flavor combinations based on your garden or leftover ingredients in your fridge.  (A little cayenne and lime juice is another great combo!)

Easy flavored corn butter pleasure in simple things blog

I hope I have inspired you to create a flavored butter for your next grilling session!

Thanks for stopping by!  Remember to take pleasure in simple things, Jackie

no comments

fancy watermelon salad

May 17, 2016

fancy watermelon salad by pleasure in simple things blog

I love watermelon.  If you read my blog, you also know I love watermelon salad.  I make it by cutting chunks of watermelon and cheese (usually Feta), drizzling it with some extra virgin olive oil and adding cracked black pepper and basil.  Yum!

Inspired by a local restaurant, today I am showing you how I give my watermelon salad an upgrade by turning it into a fancier  ‘watermelon sandwich.’

watermelon salad made by pleasure in simple things blog

I do this by cutting 2 ½” rounds from watermelon slices using a cookie cutter.  I use the same cutter to cut a circle of mozzarella.  I drizzle the ‘sandwich’ I have created with extra virgin olive oil and add some cracked black pepper.  As garnish, I sprinkle crumbled Feta cheese on top and add chopped basil and walnuts.  The finished ‘sandwich’ is just soooo tasty!

cutting watermelon for salad pleasure in simple things blog

The same great watermelon salad I always enjoy, but a much ‘fancier’ version!  It is the perfect size and presentation to use as a first course for your next dinner party!

watermelon salad pleasure in simple things blog

With the great weather ahead – the perfect time to enjoy watermelon – I hope you will consider serving this winning dish to your guests!

Thanks for stopping by!  Remember to take pleasure in simple things, Jackie

3 comments

chia seed pudding recipe

March 18, 2016

Chia seed pudding pleasure in simple things blog

For Friday field trip today, I am taking you into my kitchen to share a recipe for a dessert that has become a staple in my home. It came about when I was trying to find something without sugar to satisfy a need for dessert!

making chia seed pudding garnished with strawberries pleasure in simple things blog

I recently decided to give up processed sugar. It has been an interesting experience and most have found it hard to believe a dessert lover like me could eliminate sugar! After experiencing an insane headache for two weeks – what I believe was the result of sugar withdrawal – it was a pretty painless process.

making chia seed pudding pleasure in simple things blog

I once heard a habit is established after two weeks and it seems to be true by me. After the two weeks of headaches subsided, I had no withdrawal symptoms at all. In fact, after the two weeks, I never really wanted anything sweet again.

The chia seed pudding was a result of trying to find something to use as a dessert substitute without eating processed sugar. Now a batch of this pudding is always in my fridge! And, the funny thing is – I don’t crave sugar at all!

chia seed pudding recipe pleasure in simple things blog

If you like Greek yogurt, you will probably like this pudding as much as I do. The chia seeds give it a texture similar to that of tapioca pudding.  You may want to add a little salt – I never use salt, but you may want to add a little if you like it.

You may want to experiment with different recipes, like I did, to find the combination of ingredients that best appeals to your taste. I found getting the right amount of chia seeds as the most challenging part of perfecting the recipe. Since the chia seeds have a gelling quality, I found that adding too many chia seeds made the pudding pasty and not enough made it watery.

I have even made my own almond milk a few times to use in the recipe!

chia seeds to make pudding pleasure in simple things blog

If you want to feel really good about eating this pudding, google the benefits of eating chia seeds!

Thanks for stopping by. Have a wonderful weekend and remember to take pleasure in simple things, Jackie

no comments

holiday gingerbread fudge recipe

December 8, 2015

holiday gingerbread boy fudge pleasure in simple things blog

I am taking a little break today from my coastal holiday theme. I will be making sea glass candy soon enough, but today I am sharing the recipe for fudge with a taste of the holidays. What is the holiday flavor I am referring to? Gingerbread!

This is a very easy sweet to make and no special candy making supplies are required. For my dry spices, I always use Penzy brand spices. For those that use spices from the supermarket, you may want to double the ginger and cinnamon since I find Penzy spices to be more potent than supermarket brands.

holiday gingerbread fudge pleasure in simple things blog

Use the best white chocolate you can find – the grocery store usually carries Lindt or Ghirardelli brands. I always buy bars of white chocolate and never white chocolate chips. There are usually a lot more ingredients listed on the white chocolate chips compared to the ingredients on the bars of white chocolate and I prefer to eliminate them! I also choose not to add any brown food coloring, but you can add some if you want your fudge colored brown like gingerbread.

a gingerbread fudge recipe pleasure in simple things blog

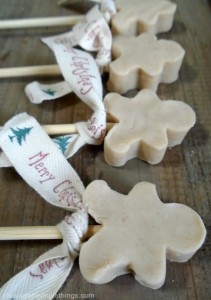
holiday gingerbread fudge cut into gingerbread boys pleasure in simple things blogI cut the fudge into tiny little gingerbread boys! I will be making them into pops and using them as a garnish on a cake for a friend’s party. On a stick, they make a great dessert favor!

Using a 1 ¾” gingerbread boy cookie cutter, I cut 17 pieces of fudge. (I rolled the leftover pieces into 14, 1” balls for another purpose.)

Whether on a stick or in a box, there are so many fun ways to package up these tasty little gingerbread boys…have fun with it!

Thanks for stopping by!

Remember to take pleasure in simple things, Jackie

no comments

gluten & dairy free pumpkin dessert

October 2, 2015

easy gluten free pumpkin recipe pleasure in simple things blog

It is important to have a recipe or two in the repertoire that can accommodate dietary restrictions. Having a couple of recipes for gluten-free desserts that taste good is important to me. I came across a recipe over Labor Day weekend, while flipping through some magazines, that used bananas as a base for a frozen pumpkin dessert. I was intrigued. My favorite gluten-free dessert thus far is an amazing chocolate pudding made from an avocado base. (If you want to look back on it, click here.)

pumpkin dessert for gluten free pleasure in simple things blog

Having a frozen selection – particularly a seasonal one – seemed ideal! So, I gave it a try.  I was not disappointed. I just wish I could remember from which magazine I discovered it! Part of the attraction was the few simple ingredients and easy instructions.

gluten free pumpkin ice cream recipe pleasure in simple things

So, for today’s Friday field trip; a quick and easy gluten-free pumpkin ice cream recipe.

gluten and dairy free pumpkin ice cream recipe pleasure in simple things blog

I made it a couple of times. The first time I mixed all the ingredients together, froze them, and then thawed the mixture slightly and whipped in the blender when ready to serve. The second time, I added all the ingredients to the blender, expect the bananas, and then tossed in some frozen bananas I had in the freezer. This worked also – although I think the ingredients mixed more thoroughly using the first method.

making gluten free pumpkin dessert pleasure in simple things blog

A nice surprise dessert for those who can’t have gluten or dairy…and, a healthy dessert for anyone!

Thanks for visiting!  Have a wonderful weekend and remember to take pleasure in simple things, Jackie

no comments

watermelon ice cream push pops

September 8, 2015

 watermelon ice cream pop pleasure in simple things blog

There are two big things wrong with Labor Day in my book. First, that it is called Labor Day…it is actually ‘No Labor Day’, isn’t it? Well, that’s what my friends and I celebrate each year. We get together and celebrate a day of no work. Over the years we have always joked about our celebration of ‘No Labor Day.’

But, the biggest problem with Labor Day is not its name. The biggest problem with Labor Day is that it signals the end of my favorite season! With Halloween décor in the stores and school back in session, it is hard to ignore the hints of the upcoming season. Fall is ready to pounce and I hate to think of summer as a thing of the past!

Maybe that is why I am still hanging on to all things summer. I know that ignoring fall (bite my tongue for saying the word!) will not make it go away, but I continue to try my best to do so.

 watermelon ice cream push pops pleasure in simple things blog

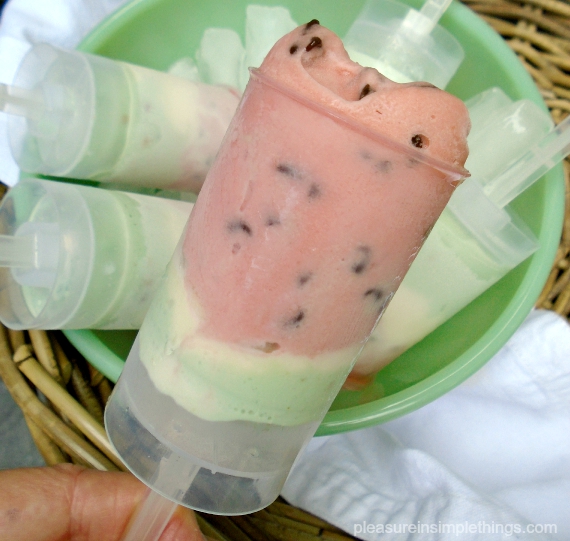
Watermelon ice cream push pops are a great example of some last minute summer fun! They are super easy to make and just scream summer. I made some for my ‘No Labor Day’ weekend, but they are fun to make anytime!

Now that these plastic push up containers are readily available in stores, you can easily create your own push up ice cream treats. I love these containers for homemade ice cream because soft, newly churned ice cream slips into them so easily.  But, no need to make homemade ice cream for these treats – softened store bought ice cream works just as well!

 close up of a watermelon ice cream pop pleasure in simple things blog

For a watermelon looking treat, use three flavors of ice cream. Pick something green, something white, and something red. For mine, I chose raspberry sherbet, pistachio ice cream, and vanilla ice cream.

I put each flavor in its own bowl and soften each up a little bit using a spoon. For the red flavor, I added some mini chocolate chips while softening, to act as my ‘seeds.’ The ice cream should be a little soft, but not runny. If it gets too soupy, it will start leaking out of the bottom of the plastic container. (I first learned this lesson when I tried to make Jell-O shots in these containers by pouring in the liquid mixture before set – epic fail!)

 ice cream mix ins for push pops pleasure in simple things blog

Holding the plunger all the way down (open) while doing so, I put in a small amount of vanilla – enough to create a thin layer – then a thin layer of the softened pistachio, and, finally, I filled the rest of the container with the raspberry sherbet I had mixed with mini chocolate chips.

Into the freezer they go to harden up, and that is it!

bowl of ice cream pops pleasure in simple things blog

These are easy to decorate for a party.  Add a ribbon to coordinate with your decor.  They also look great with a round sticker – either purchase stickers or print some on your home computer – round ones look great!  I hope I have inspired you to make some ice cream push pops.  You can find the empty containers in any store that sells cake decorating supplies – usually sold in a pack of six.

Thank you for stopping by. Remember to take pleasure in simple things, Jackie

Sharing at Craftberry Bush.

no comments

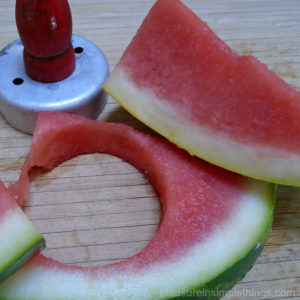
adding a spigot to a watermelon

August 4, 2015

watermelon beverage container pleasure in simple things blog

It wasn’t until recently that I heard people were using watermelons as beverage holders. Since yesterday was National Watermelon Day, it seemed the perfect excuse to try my hand at creating one!

I have made many a watermelon basket in my day! Even as a teenager, I loved carving out a watermelon to fill with a fruit salad for a party or get together. The older I got, the more ornate my baskets would become!

national watermelon day using a spigot pleasure in simple things blog

Using a watermelon to create a vessel for a beverage seemed pretty similar to making a watermelon basket. It is an easy concept: Hollow out a watermelon; cut a hole and add a spigot; fill it with a beverage!

To try your hand at making one, first examine your watermelon and decide which way you want it to stand. When you have the top and bottom picked out, make a very thin slice in the ‘bottom’ so it will stand up nice and straight without rolling over. Be careful not to cut too much off, or you could spring a leak in the bottom!

making awatermelon beverage holder pleasure in simple things blog

The spigot is easy to install. Cut a small hole the diameter of the spigot. Then add the spigot – a washer will hug each side of the watermelon; the nut will cap off the inside.

Then, cut off a slice from the top. Use a large, strong metal spoon to scoop out all the good watermelon and reserve it in a big bowl. (I also saved the juice from the watermelon by pouring it into a pitcher.)

Cut a hole for the spigot and position it near the bottom of the watermelon. (Remember that the section of liquid below the level of the spigot will not flow out.)

watermelon spigot on stand pleasure in simple things blog

Now you are ready to fill your beverage container with whatever beverage hits your fancy! I decided to make something of a jazzed up watermelon water. I had enough melon to make the water and still had leftovers for snacking!

watermelon spigot with pleasure in simple things blog

Watermelon Water
6 cups of watermelon, pulverized in a blender (you can count the liquid from the watermelon as part of the 6 cups.)
Juice of one lime (or to taste)
. . . . . . . . . . . . . . . . . . . . . . . . . . . . .
Mix ingredients. Strain. Chill. Garnish with basil or mint leaves from garden. ;)

You may decide to fill your watermelon with a punch or some type of alcoholic drink (for those over 21) for your next party. My only advice is to be sure to strain any fruit drinks prior to putting them into the watermelon container. This ensures no pulp will clog up the spigot.

a watermelon spigot instructions pleasure in simple things blog

I know there are spigots marketed now as “watermelon spigots,” but you really don’t need anything special for a watermelon. My spigot cost $4.99. The only adjustment that may be needed is if the spigot is not long enough for the width of your fruit. I needed to shave mine down a little to be sure the washer fit on the back. I probably could have found a longer spigot, but it was easier just to make the width of the watermelon a little thinner in the spot where the spigot attached.

carving a watermelon beverage container pleasure in simple things blog

Now that I know it works, I can try some variations! Just like my watermelon baskets, I can see my beverage holders will also get ‘fancier’ over time! How about a row of fish carved around the top rim? Such possibilities! And, there are so many cute ways to set up a beverage station! Give it a try!

Thanks so much for stopping by!  Remember to take pleasure in simple things, Jackie

Sharing with Shabby Nest, Craftberry Bush,  House of Hipsters,  Sand & Sisal and Coastal Charm.

2 comments

august book giveaway!

July 31, 2015

August giveaway for pleasure in simple things blog

I remember, as a kid, the first time I had the bright idea to make my own ice pop. I poured some juice into a paper cup and put it in the freezer overnight. The next day, I rushed to the freezer, peeled off some of the paper cup, and attempted to eat my creation.

To my total disappointment, my ‘ice pop’ was rock solid, like an ice cube. Yes, I could lick it, but it didn’t have that great texture of a store bought ice pop. Little did I know then; what was missing to accomplish the texture I craved, was the right balance of sugar.

August giveaway pleasure in simple things blog

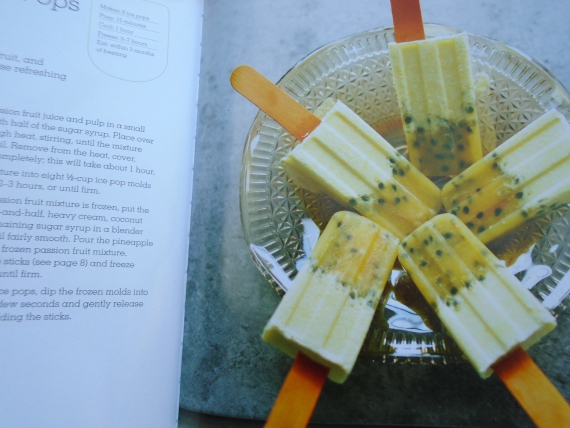
This and other important ice pop facts are explained in the book Irresistible Ice Pops by Sunil Vijayakar – the reason the book is a must have for all ice pop lovers! And, the reason it is the giveaway book for August!  Irresistible Ice Pops. includes all the basics to ice pop creation as well as a collection of some wonderful ice pop recipes. Leave me a comment and I will pick one lucky winner at random at the end of the month, from those that comment, to receive this great book. Good luck!

Congratulations to Emily for winning last month’s selection The Heirloom Tomato Cookbook.  Thank you also, Emily, for the heartfelt email.  A big thank you to everyone that entered to win!

August 2015 Instagram Challenge Icy Summer Treats

Instagram lovers, please read on! What’s your pleasure on a scorching hot summer day to help cool off? Is it a frozen drink? An ice pop? A slushie? Use hashtag #pleasuregram during the month of August to share photos of your favorite icy summer ice treat!

Thanks so much for stopping by! Have a fabulous weekend, Jackie

no comments

easy homemade fudge ice pops

July 28, 2015

homemade fudgesicles pleasure in simple things blog

When I was a kid, I grew up across the street from a farm. I spent a lot of my childhood hanging out at the farm – picking vegetables, playing with the animals, and working at the farm stand. There was a freezer in the porch of the old farm house that housed some ice cream treats and many times after helping on the farm, the reward would be something from that freezer. I always chose the same thing – a fudge pop.

yummy fudgesicles pleasure in simple things blog

Now as an adult, anytime I see a fudge pop, it puts an instant smile on my face as I remember my childhood days on the farm! Of course, it makes sense that I would be all about creating my own fudge pop!

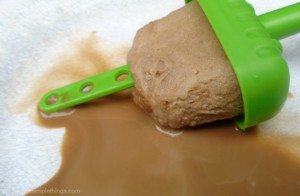
Today, I am sharing a recipe I use that is similar to the old time fudge pops that I enjoyed as a kid. My adult version is updated with the addition of some coffee – don’t you love chocolate and coffee together?

recipe for homemade fudgesicles on pleasure in simple things blog
There are so many great ice pop molds out there. If you don’t already own some, check out Home Goods or Ikea for some great, inexpensive ones. If you would rather not purchase anything, the old time ‘paper cup with a wooden stick’ still works great! Pour any extra mixture into ice cube trays to use in your iced coffee. ;)

fudgesicles pleasure in simple things blog

Thanks so much for stopping by!

Remember to take pleasure in simple things, Jackie

no comments

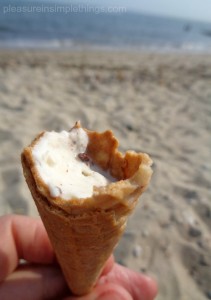
homemade ice cream on the beach

July 7, 2015

eating homemade ice cream on the sand pleasure in simple things blog

Did you enjoy your weekend? Mine was the best! So many of my family members were together and the fireworks were the best I’ve seen…all in all; a great holiday!

Today, I am trying to catch up with work and with household chores, but I am taking some time to share a recipe for the ice cream I made over the weekend.

Going into the weekend, I was having some trouble deciding what flavor ice cream to make. I thought I would try making s’mores flavor. It seemed like a challenge. Maybe roast some marshmallows first and add marshmallow, graham crackers, and chocolate chips. I still need to give that a try at some point!

cranking homemade ice cream pleasure in simple things blog

What I decided on for the Fourth of July was a ‘Ferris Acres inspired’ coconut chocolate chunk. You may remember Ferris Acres from this post (click here). I am not sure if it was the flavor or the work that went into the cranking that made it so good, but I thought it came out perfect! (I do need to give some credit to my daughter’s boyfriend – I had some helpers, but he did the lion’s share of the cranking!)

homemade coconut chocolate chunk pleasure in simple things blog

Coconut Chocolate Chunk Ice Cream Recipe (makes 5 quarts)
5 cups of milk (*see note below)
1 14 oz. can coconut milk, unsweetened
4 eggs
1 Tablespoon pure vanilla extract
2 ½ cups sugar
4 cups whipping cream
¼ teaspoon salt
1 14 oz. bag sweetened, flaked coconut, roughly chopped
3 1.5 ounce bars Ghirardelli Intense Dark Evening Dream 60% cacao bars, roughly chopped

*I substituted some of the 5 cups of milk with the coconut milk. I used the can of coconut milk first and then added enough milk to make 5 cups of liquid.

Beat eggs until foamy. Gradually add sugar, beating until thickened. Add cream, vanilla, and salt and mix thoroughly. Pour into ice cream maker canister. Add milk and stir well. (If your maker has a fill line, do not go over it.)

Put covered canister into fridge, as well as the prepared coconut and chocolate, until really cold.

pleasure in simple things ice cream makingPrepare in your ice cream maker. I use a hand crank using ice and pour salt over the ice. I used two bags of ice for this batch.

After the ice cream is done, stir in the cold chocolate and coconut and set the canister in the freezer overnight to set.

finishing a homemade ice cream pleasure in simple things blog

Eat plenty and often. ;)

Thanks for stopping by!  Remember to take pleasure in simple things, Jackie

Sharing with Sand & Sisal, Elizabeth & Co., and Coastal Charm.

2 comments

« Previous Entries     Next Entries »