Subscribe to Pleasure in Simple Things via RSS ReaderFollow Pleasure in Simple Things on InstagramFollow @InSimpleThings on TwitterLike Pleasure In Simple Things on FacebookFollow Pleasure In Simple Things on PinterestEmail Jackie

maple vinaigrette

February 21, 2017

maple vinaigrette with wheatberry salad pleasure in simple things blog

I normally don’t add salad dressing to my salads.  I figure, why add extra calories and chemicals (from commercial salad dressings) when it isn’t needed?  I like the taste of most salads on their own.  If I really think my salad needs a little something, I would probably squirt a little fresh lemon or orange juice onto the greens.

With that said, I did recently make and add this easy maple vinaigrette to a salad after seeing the recipe in a piece about maple syrup in Real Simple magazine!  I love maple syrup and I happened to have all the ingredients on hand when I saw the recipe in the magazine.

maple vinaigrette ingredients pleasure in simple things blog

I think it is worth sharing…easy, tasty, and healthful!  Thank you Real Simple (recipe credited to Julia Levy)!

Maple Vinaigrette

  • ¼ cup apple cider vinegar
  • ¼ cup extra virgin olive oil
  • 2 Tablespoons pure maple syrup
  • 1 ½ Tablespoons Dijon mustard
  • 1 ½ teaspoons fresh lemon juice
  • ½ teaspoon kosher salt

Combine all ingredients in a jar with a tight fitting lid.  Shake until well combined.  Toss with salad greens.

maple vinaigrette recipe pleasure in simple things blog

I have decided using a homemade salad dressing on my daily salad once in a while is a nice change!

a salad with maple vinaigrette pleasure in simple things blog

Thanks for stopping by!  Remember to take pleasure in simple things…like a homemade salad dressing!  Jackie xo

no comments

soup for a cold day

February 14, 2017

Onion Soup at Whole Foods

I know today is Valentine’s Day, but I don’t have any cute or romantic photos or projects…my valentine to you is a recipe for lentil soup!

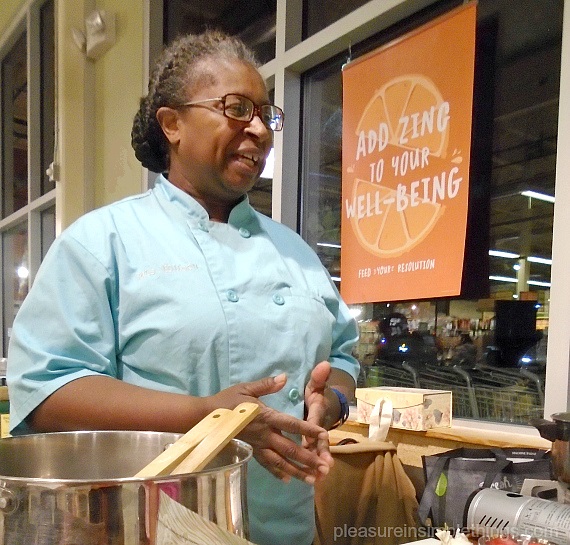
On a recent cold and wet evening, I attended a soup class at my local Whole Foods.  Of course, the best part of the class was trying the soups we learned to make!  We made three soups that evening – my favorite was the red lentil soup with lemon.  It is a super simple recipe shared with us by “Mrs. Wilson.”

Mrs Wilsons Soup class at Whole Foods

Since the class was held at Whole Foods, there is no styling for today’s post, just a few photos I snapped during class to include with the recipe.  Enjoy!

Making Soup at Whole Foods

Red Lentil Soup with Lemon

Yield:  4 servings

  • 3 Tablespoons olive oil
  • 1 large onion, chopped
  • 2 garlic cloves, minced
  • 1 teaspoon cumin
  • ¼ teaspoon kosher salt, more to taste
  • ¼ teaspoon ground black pepper
  • Pinch of cayenne, more to taste
  • 1 quart vegetable broth
  • 2 cups water
  • 1 cup red lentils
  • 1 large carrot, peeled and diced
  • Juice of ½ lemon, more to taste
  1. In a 6-quart sauce pot, heat 3 tablespoons olive oil until hot.  Add garlic and onions, saute until golden.
  2. Stir in cumin, salt, black pepper and cayenne, saute for 2 minutes.
  3. Add broth, 2 cups water, lentils and carrot. Bring to a simmer, then partially cover pot and turn heat to medium-low. Simmer until lentils are soft. Taste and adjust seasoning.
  4. Soup should be chunky for creamier consistency, puree half soup in blender, then add it back to pot.
  5. Stir in lemon juice just before serving. Garnish with cilantro and a drizzle of olive oil.

Soup Class at Whole Foods

Remember to take pleasure in simple things…like a good hot cup of soup on a cold day!

Happy Valentine’s Day, Jackie xo
no comments

trendy turmeric

January 24, 2017

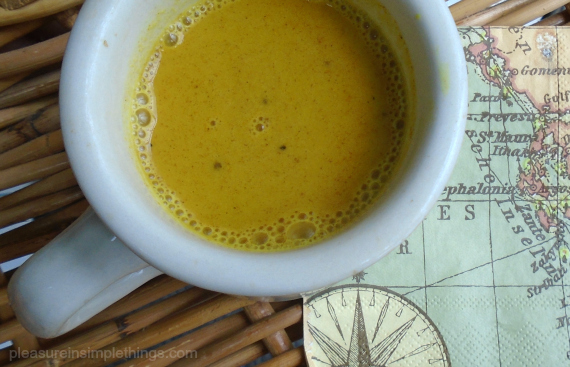
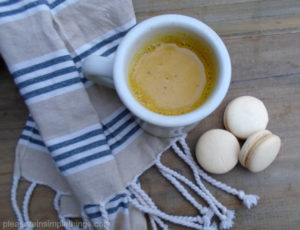
turmeric tea pleasure in simple things blog

Turmeric milk (also referred to as turmeric tea or golden milk) seems to be ‘a thing’ right now.  It is a hot drink patterned after something called haldi doodh in India.  Used as an immunity booster – along the lines of how chicken soup is used here in the states – Indian mothers used warm milk and turmeric as a cure-all for what ailed their young ones.

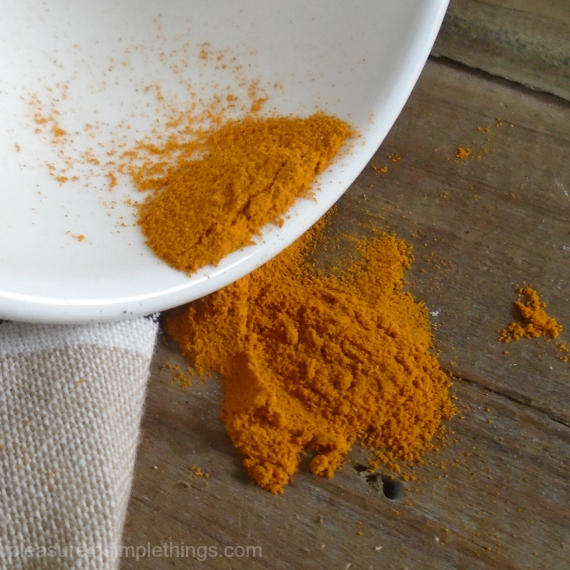
turmeric spice pleasure in simple things blog

Drinks reminiscent of haldi doodh are making a big appearance of late – so much so, I am surprised a turmeric latte has not shown up on the current Starbucks menu!  Maybe it has!  Though many combinations of ingredients have shown up and claimed themselves golden milk, I am assured by Indian friends that the inspiration drink contained only 2 ingredients – milk and turmeric.    So, like others before me, I am modifying the two basic ingredients to best fit my taste!

I am not sure everyone will enjoy the taste of turmeric.  Mixed with the ingredients here, it reminds me of something along the lines of a Chai tea.  Give it a try and see what you think!  Here is my version of warm turmeric or ‘golden’ milk:

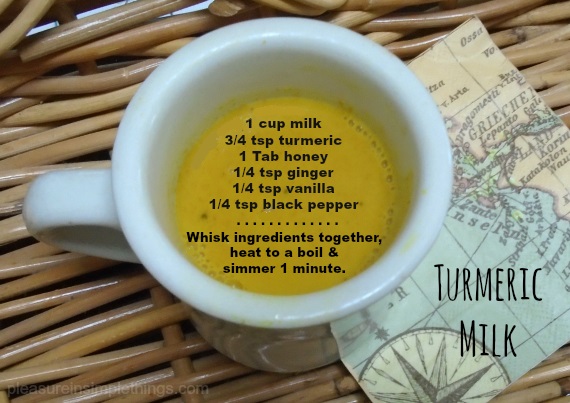
turmeric tea recipe pleasure in simple things blog

Garnish with a dash of cinnamon or nutmeg or a cinnamon stick.

Since the original intent of haldi doodh was to create a drink with health benefits, I tried to make my version as health conscious as possible.  For this reason, I used organic turmeric and ginger, raw honey, and unsweetened almond milk.

I find this drink is a nice alternative to coffee, tea, or hot cocoa, and since I normally drink a few glasses of almond milk during the day anyway, I am not adding to my daily calorie count by turning one of those glasses into a warm  ‘golden milk.’  And, the anti-inflammatory benefits of turmeric can’t hurt!

turmeric tea and snack pleasure in simple things blog

I hope I have inspired you to try turmeric in your milk – possibly to create your own version!  Enjoy!

Remember to take pleasure in simple things, Jackie

no comments

snow much fun!

January 10, 2017

snow treats pleasure in simple things

With this past weekend’s first big snow, I was taken back to thoughts of my childhood snow treats!  Growing up in the Northeast, snow has always been plentiful in the winters and, aside from using it for throwing, riding on, and building with, we also used it as an edible treat!

Eating snow off a mitten was a childhood rite of passage, but as you got a little older and a little more sophisticated, maple syrup or Zarex (a sweetened liquid fruit syrup that was added to water to make a flavored drink) was poured onto a fluffy mound of the white stuff in a bowl to create a sweet treat!

These memories prompted me to go outside and create some sweet treats using snow!  Of course, make these treats only on the coldest of days!

Now that I am doing my best to avoid white sugar completely, my sweeteners of choice are honey and maple syrup.  So, I used these two sweeteners to create my treats!

maple snow candy pleasure in simple things blog

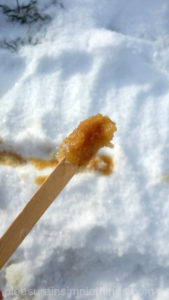
snow candy maple in snow pleasure in simple things blogFirst, a maple ‘taffy.’  I think in the U.S. this practice was adopted from a common one in Canada.  You simply boil up some maple syrup (boil it until it gets to the soft ball stage), pour it into a line in the snow, and collect it by rolling it onto a stick for a sweet pop-type maple treat!

I should mention that I only use 100% maple syrup in my house and that is the only thing I recommend you use with snow.  The corn syrup variety of ‘syrup’ sold in the grocery store for pancakes definitely does not qualify as maple syrup!

The second treat uses honey as a sweetener.  After mixing some vanilla extract into honey and pouring it into the snow, form little frozen balls with a spoon.  Yum!  You can vary the extract or flavor of honey to change up the flavor profile.

honey in the snow pleasure in simple things blog

I hope these two sweet treats have inspired you to create your own ‘snow much fun’ treats!  If you want to be ambitious, any homemade simple syrup can be used to create snow cones using snow…the flavor possibilities are endless!   I am thinking of trying a honey lavender!  Or, with Valentine’s Day approaching, maybe something using rosewater would be intriguing!

snow treats pleasure in simple things blog

Thanks for stopping by!

Remember to take pleasure in simple things…like eating some freshly fallen snow!  xo Jackie

no comments

a sundae for the new year

January 3, 2017

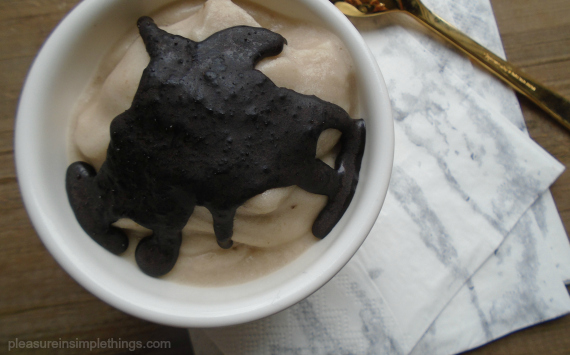
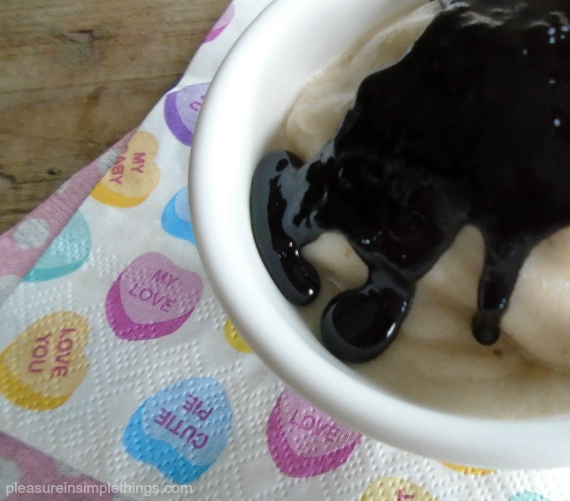
Chocolate shell on whipped bananas pleasure in simple things blog

Don’t you love the magic shell you can find in the grocery store in with all the ice cream sauces; near the ice cream cones?  It seems like a wonderful invention – until you take the time to read the ingredients!  Apparently, the way the ‘magic’ is created is with a bunch of preservatives!  Yuck!

Since I pretty much gave up processed foods, I wouldn’t consider eating something like magic shell – knowing it has so many artificial ingredients.  So, I am really excited about the easy recipe I found for a magic chocolate shell – using no processed ingredients!

chocolate shell starting to harden pleasure in simple things blog

You can see the chocolate shell starting to set – it takes only about 30 seconds!

The recipe is from a book called 100 Days of Real Food: Fast & Fabulous: The Easy and Delicious Way to Cut Out Processed Food by Lisa Leake.

This simple recipe is perfect as a first post for the new year because, although combined with Ms. Leake’s ‘ice cream’ suggestion it seems very decadent, it fits right in with most any healthful eating resolution!

Homemade Magic Chocolate Shell

Melt 2 Tablespoons coconut oil until just melted (a few seconds), in the microwave.  Add 2 Tablespoons honey and 4 teaspoons cocoa powder (I used ‘special dark’ 100% cacao).  Whisk until well combined.

Pour over cold ice cream – after about 30 seconds, it will turn into a hard shell!

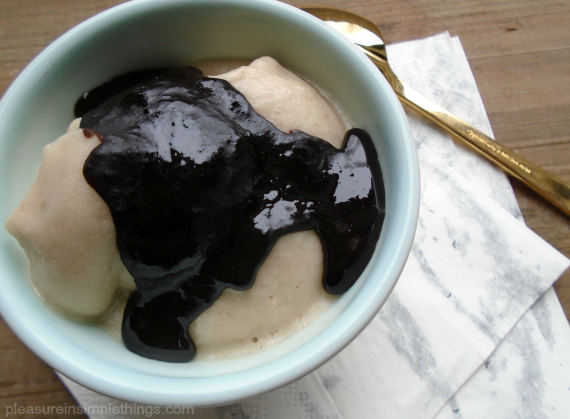
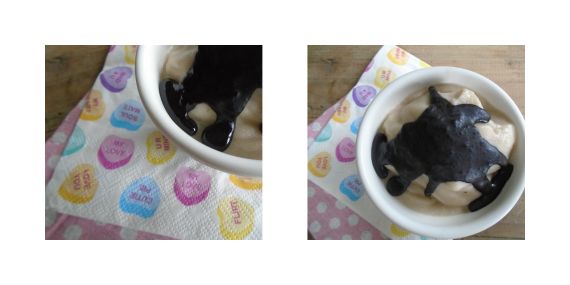
valentine sundae pleasure in simple things blog

Chocolate shell over whipped banana ‘ice cream’ is the perfect guilt-free Valentine’s Day treat!

If sauce should harden in the bowl before using, simply microwave to melt.  Store leftovers for up to 1 week in fridge and use microwave to melt as needed.

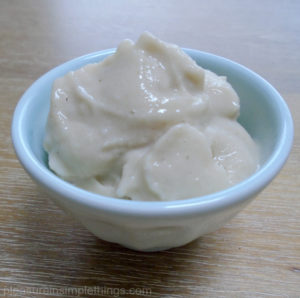
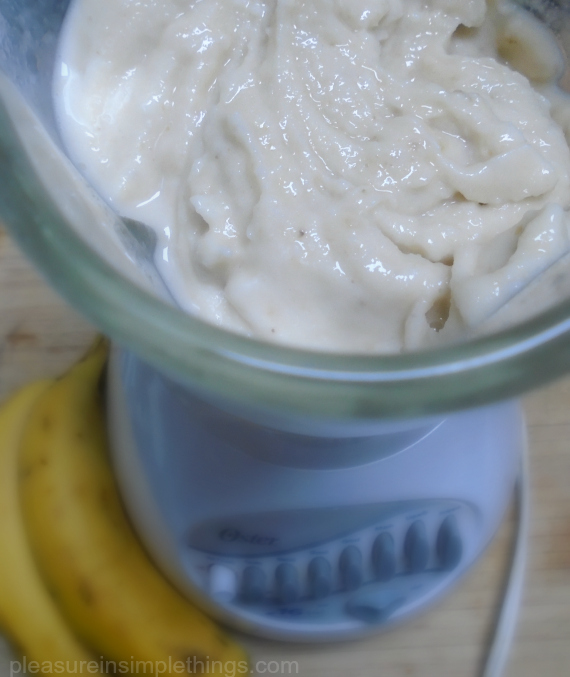
finished whipped bananas pleasure in simple things blogI enjoy my chocolate shell over Ms. Leake’s super easy-to-make alternative to traditional ice cream – frozen whipped bananas!  To make your own, simply cut 4 to 5 peeled bananas into 3 or 4 pieces each and freeze.  In a blender, combine the frozen bananas with ¼ cup milk (I use unsweetened almond milk and sometimes add a little organic peanut butter!)  Blend and keep adding small amounts of milk until the consistency resembles ice cream.


making banana ice cream pleasure in simple things blog

(Note:  I sometimes need to soften the frozen bananas up slightly in the microwave before blending if they are too rock solid – my blender can’t handle it!)

Banana ‘ice cream’ and homemade magic chocolate shell make for a guilt-free treat!  Enjoy!Thank you for stopping by!  Happy, happy 2017 – wishing you the very best year yet!

Remember to take pleasure in simple things, Jackie

no comments

easy candied pumpkin seeds

November 10, 2016

candied-pumpkin-seeds-pleasure-in-simple-things

For Friday field trip today, I am taking you into my kitchen to share a simple recipe for a sweet and crunchy snack that is ready in 20 minutes!

steps-for-candied-pumpkin-seeds-pleasure-in-simple-things-blogThese candied pumpkin seeds are super satisfying.  I make them without sugar – using honey and maple syrup to sweeten.  With a little sweetness and a little spice, these crunchy pieces are the perfect little snack!  This recipe is super easy…I pick up pumpkin seeds at Trader Joe’s, but the rest of the ingredients are items I always have on hand.  You can experiment and switch out the spices to your own preference.

bowl-of-candied-pumpkin-seeds

candied-pumpkin-seeds-pleasure-in-simple-things-blog

It is too bad that most people only think of pumpkin seeds around Halloween, because they are delicious any time of the year!  At Halloween, these pumpkin seed snacks serve as a great substitute for the traditional Halloween candy, but they are also fun and easy snack to package up as a Thanksgiving hostess gift.

bowl-of-candy-spice-pumpkin-seeds-pleasure-in-simple-things

In addition to serving as a great fix for a sweet craving, these pumpkin seed snacks are also a  great garnish for that homemade squash soup!

candied-pumpkin-seeds-as-gifts

Enjoy!

packaging-pumpkin-seeds-as-gifts

Have a wonderful weekend and remember to take pleasure in simple things, Jackie

no comments

roasted bell pepper walnut dip

September 13, 2016

making-healthful-red-pepper-walnut-dip-pleasure-in-simple-things-blog

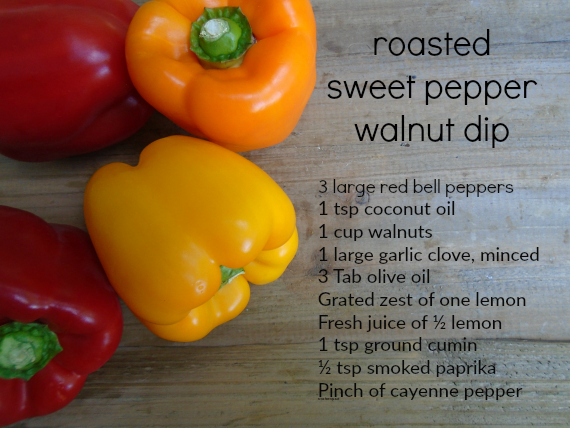
I love this dip!  I was inspired to create it by a recipe in last month’s giveaway book.  (Click here for more on the book.)  I had all the ingredients on hand and thought it sounded great to use as a veggie dip.

After making it and tasting it, I decided this dip is a ‘must make’ for fall.  When the sour cream and chips or cheesy nachos make an appearance during television football, I am enjoying this healthful dip with some veggies or some crisp whole wheat pita chips!

a-roasted-pepper-walnut-dip-pleasure-in-simple-things-blog

The recipe says red bell peppers, but any color sweet bell pepper will do – I have used yellow or orange as well.  I recommend serving this dip warm or at room temperature, and I think my flavorful Penzy’s smoked paprika makes it extra special!

ingredients-for-dip-pleasure-in-simple-things-blog

To make :

Preheat the oven to 400 degrees.

Rub the peppers with the coconut oil and put them onto a parchment lined baking sheet. Roast in the oven for 30 to 40 minutes, until blistered and blackened in a few places.  Transfer the peppers to a bowl and immediately cover it with plastic wrap.  Set the covered bowl aside for 10 minutes to give the steam the chance to make the skins remove easily.

Reduce the oven temperature to 325 degrees.

Spread the walnuts on a separate baking sheet and toast for 7 to 10 minutes, watching carefully that they do not burn.  Remove from the heat and set aside to cool.

Remove the peppers from the bowl, and after giving them a chance to cool, slip off their skins and discard them.  Remove and discard their stems as well.

Add all the ingredients to a food processor or blender and process to preferred consistency.  You may want to leave the dip a little chunky.  Season to taste – I used 1/2 tsp fine sea salt.

flowers-and-mini-pumpkin-pleasure-in-simple-things-blog

The end of summer farmer’s markets have some wonderful bell peppers right now!  I hope I have inspired you to try this healthful dip or to create one of your own!  Enjoy!

Thank you for stopping by!  Remember to take pleasure in simple things, Jackie

no comments

summer garden mint

September 2, 2016

apple mint pleasure in simple things blog

Now that summer is on its way out, you are probably thinking about all the ways you can use or preserve the remaining herbs in your garden.

For Friday field trip today, I am sharing a way to use your overwhelming crop of garden mint.

end of summer mint pleasure in simple things blog

If you grow mint, you know exactly what I am talking about!  Mint can easily take over a garden!  I learned years ago, the best way to plant mint in the garden is to first plant it in a terracotta pot and then plant the entire pot in the ground.  This contains the growing area and prevents the mint from taking over the entire garden!

pineapple mint pleasure in simple things blog

A great way to use your mint is to make some mint syrup!  I love to experiment with all types of simple syrups, but this easy, three ingredient recipe I am sharing today comes from The Beekman 1802 Heirloom Vegetable Cookbook by Brent Ridge and Josh Kilmer-Purcell.

Chocolate mint pleasure in simple things blog

Make up plenty, keeping some for yourself and package some up in pretty bottles to give as gifts.  It can be used in iced tea or seltzer or spooned over fresh fruit or ice cream.  Or, in my case, used on shaved ice or spooned over The Pantry’s sorbet!  Enjoy!

Fresh Mint Syrup

  • 1 ¼ cup packed, fresh mint leaves
  • 1 cup sugar
  • 1 cup water

In a medium saucepan of boiling water, cook the mint leaves for 10 seconds to set their color.  Drain, run under cold water, and drain again.  Transfer the mint to a food processor and puree.

In a small saucepan, combine the sugar and water and bring to a boil over medium heat, stirring to melt the sugar.  Stir in the mint, remove from the heat, cover, and let stand for 30 minutes at room temperature.

Strain the syrup thought a fine-mesh sieve set over a bowl, pushing on the solids to extract as much liquid as possible.  To store, transfer to a jar and refrigerate up to 1 month.

Gilberties herb farm pleasure in simple things blog

Remember, if you don’t have mint growing in your garden, you can always purchase some at your local farmer’s market or specialty store.  The photos here are from Gilbertie’s Herb Farm in Westport, Connecticut – a great source for fresh herbs.  As you can see, mint comes in many varieties at Gilbertie’s!   Chocolate mint, grapefruit mint, orange mint, ginger mint or any of the many varieties sold at the herb farm would be wonderful to create a syrup this year – and, when planted – many years to come!

Have a fabulous holiday weekend!

flowers at Gilberties pleasure in simple things blog

Thanks for stopping by!  Remember to take pleasure in simple things, Jackie

no comments

guilt-free birthday treats

August 26, 2016

Walnut fig bars pleasure in simple things blog

A birthday doesn’t have to be defined by a cake dripping in sugary icing, does it?

Because I gave up processed sugar at the start of 2016, I decided this year I would make my own birthday treats so I wouldn’t feel obligated to indulge in a sugary dessert that might not even be my favorite taste treat.

My two favorite tastes this time of year?  Watermelon and fig…not necessarily combined, of course.

making walnut fig bars pleasure in simple things blog

I looked through this month’s giveaway book, My New Roots by Sarah Britton, to get some recipe ideas!  I decided to make the Walnut Fig Bars.  My love for figs was the motivation for this choice, but it seemed a good recipe to try out for the upcoming fall season as well.  (For a chance to win your own copy of My New Roots, click here and leave a comment.)

birthday walnut fig bars pleasure in simple things blog

I also leafed through my go-to recipe book, Clean Slate from the editors of Martha Stewart Living for dessert ideas.  This book was given to me as a Christmas gift last year and it jump-started a whole new way of eating – an unprocessed foods way of eating!   I love frozen treats and this book included a few recipes for really simple frozen treat ideas.  I chose a watermelon-lime granita to add to my birthday dessert selection!

With just three ingredients – watermelon, honey, and lime juice – what could be easier, or tastier, for an icy birthday treat!  Watermelon and frozen – a great summer birthday combination!

making watermelon lime granita pleasure in simple things blog

To make:  Pulse 7 cups chopped seedless watermelon, ¼ cup honey and 2 Tablespoons fresh lime juice in a food processor until smooth.  Pour into an 8-inch square glass baking dish, cover tightly, and freeze overnight.  To serve, scrape with a fork into bowls.

birthday watermelon lime granita pleasure in simple things blog

My birthday present to myself – unprocessed, guilt-free treats!

Thanks for sharing my birthday treats with me today on Friday field trip!  Have a wonderful weekend!

Remember to take pleasure in simple things, Jackie

no comments

watermelon gazpacho

August 12, 2016

making watermelon gazpacho pleasure in simple things blog

Watermelon is a favorite of mine.  I have shared some of my standard watermelon recipe creations with you in the past, as well as crafts with a watermelon design.  Today, I would like to share someone else’s watermelon recipe!

close up of watermelon gazpacho pleasure in simple things blog

I came across Tyler Florence’s recipe for watermelon gazpacho and had to try it!  Love gazpacho.  Love watermelon.  What’s not to love?  I just had to give it a try!  A cold soup on a hot, humid day – what could be better?!  So, I gave it a try and I was not disappointed!

Tyler Florence watermelon gazpacho on pleasure in simple things blog

Here is the easy, make-in-the-blender recipe:

Tyler Florence’s Watermelon Gazpacho

  • 1 large tomato
  • ½ serrano chile
  • 2 cups cubed seedless watermelon
  • 1 teaspoon red wine vinegar
  • ¼ cup extra-virgin olive oil
  • 2 Tablespoons minced red onion
  • ½ English cucumber, seeded and chopped
  • 2 Tablespoons minced fresh dill, plus more for garnish
  • Kosher salt and freshly ground pepper
  • ¾ cup crumbled feta cheese

Puree the tomato, chile and 1 cup watermelon in a blender.  Add the vinegar and olive oil and pulse.  Add the red onion, cucumber and dill, season with salt and pepper and puree until smooth.  Chill at least 30 minutes.  Loosen with a few tablespoons of water, if needed.

Pour the gazpacho into chilled cups or bowls; top with dill, the feta and the remaining watermelon.

Serves 4

watermelon gazpacho in the blender pleasure in simple things blog

My gazpacho did not come out really red like the color of watermelon – as you can see.  I am thinking if the tomato I used was a darker red; it would have helped make a deeper shade of red for the soup.  But, no worries – it tasted wonderful!  What a great first course for company!

enjoying Tyler Florence's watermelon gazpacho recipe pleasure in simple things blog

I hope I have inspired you to try this gazpacho recipe or to experiment with a cold soup of your own!  Have a wonderful weekend!  Thanks so much for stopping by!

finishing up watermelon gazpacho Tyler Florence recipe

Remember to take pleasure in simple things, Jackie

2 comments

« Previous Entries     Next Entries »