Subscribe to Pleasure in Simple Things via RSS ReaderFollow Pleasure in Simple Things on InstagramFollow @InSimpleThings on TwitterLike Pleasure In Simple Things on FacebookFollow Pleasure In Simple Things on PinterestEmail Jackie

mint mojito ice pop

June 9, 2020

ice pops mojito

I very rarely drink alcohol, but I love a good virgin drink – especially a frozen one!  This pop is like combining the two!  Enjoy a refreshing Mojito with none of the calories of a cocktail!

one mojito ice pop

mojito ice pop recipe

Calorie Count

  • Mint Mojito:  over 200 calories
  • Mint Mojito ice pop:  under 30 calories

Cost

  • Mint Mojito: $10.+
  • Mint Mojito ice pop:  use your own garden ingredients and spend under $1.

holding a mojito ice pop

I hope you are inspired to try these pops or your own creation!  Thanks for stopping by!

Remember to take pleasure in simple things, Jackie

no comments

creamy fig ice pops

May 29, 2020

dish of fig ice pops

I am obsessed with fig jam.  Fig jam and manchego cheese crostini is a favorite snack of mine – such a fabulous flavor combination!

tasting a fig ice pop

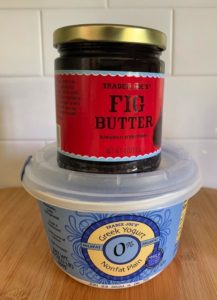
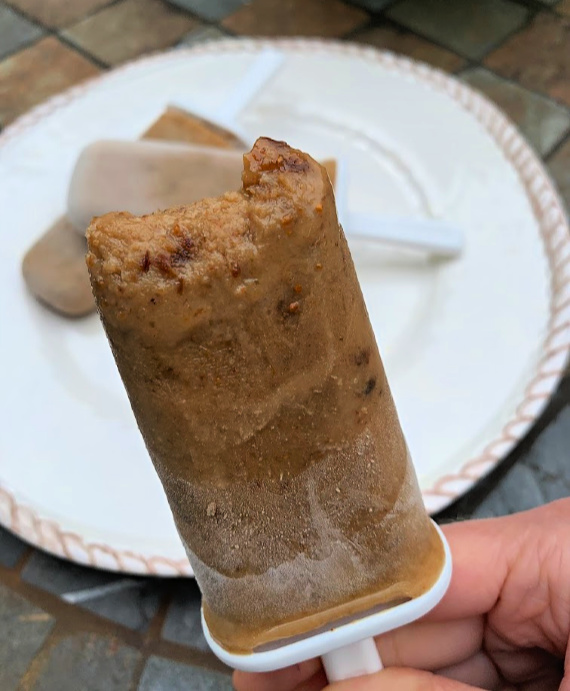
Recently I noticed that Trader Joe’s sells a fig butter and right away I knew I needed to use it to create a summer treat!  I decided to combine it with (no, not cheese!) yogurt – to create a fig flavored ice pop!

ice pops of figs

If you like figs as much as I do, this is a winner of a recipe!  So easy!  I love these pops!

fig ice pop recipe

Thanks for stopping by!  Have a great weekend!

fig ice pop ingredients

Remember to take pleasure in simple things, Jackie

no comments

apple pie fudge

September 24, 2019

make fudge apple pie flavor

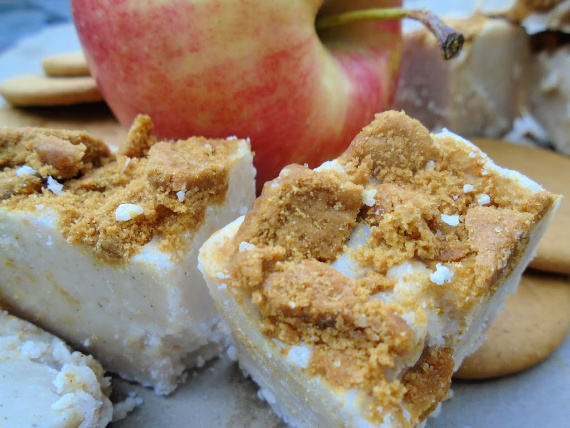
Recently, while in Mystic, CT, I bought some ‘flavor of the day’ fudge which happened to be the flavor of apple pie.   “Interesting.”  I thought.  I figured fudge is like cheesecake.  You start with a basic recipe and then alter it according to taste.  I can honestly say I never thought of making apple pie fudge, but it sure sounded very seasonal.  It tasted seasonal as well – very much like an apple pie!

About a week after I had tasted the apple pie fudge, I decided to try making some myself.  I knew mine would taste just as good based on seasoning alone.  I only use Penzy’s brand seasonings because no other brand is as flavorful!  (So, if you decide to make my recipe and you don’t use Penzy’s, you may have to adjust the seasoning!)

So, I looked at as many fudge recipes as I could and adjusted by adding apple pie spices and some apples.  I decided fresh apples would be too hard so opted for the apples from canned apple pie filling.
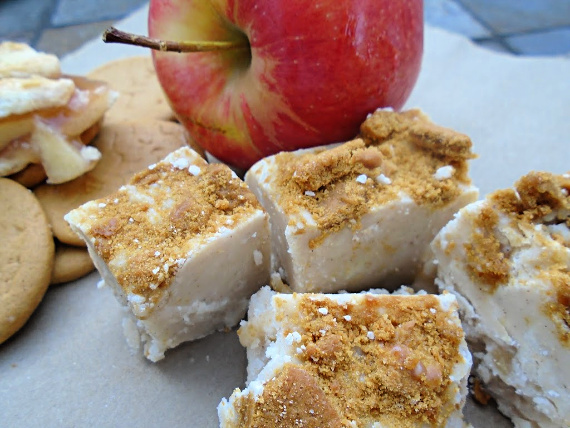
apple pie fudge recipe

I was planning on making a gingersnap base, but without any artificial color, the fudge was very light in color and that made me decide to put the gingersnaps on top instead to add a little variety in color.

I think my apple pie fudge came out better than the inspiration fudge!  Try it yourself or be inspired to come up with your own flavor!

Apple Pie Fudge

  • 3 cups sugar
  • ¾ cup unsalted butter
  • 1 cup heavy cream
  • 1 tsp cinnamon
  • ½ tsp nutmeg
  • ½ tsp allspice
  • ½ cup canned apple pie filling
  • 3 cups white chocolate – chips or broken into small pieces
  • 18 gingersnap cookies, crushed into small pieces with a rolling pin

Line an 8×8 baking dish with parchment paper and set aside.

Measure out ½ cup of apple pie filling.  Cut the apples into small pieces and remove most of the ‘liquid.’  Put into a heatproof bowl with the chocolate and set aside.

Heat butter, cream, sugar and spices in a large pan over medium heat while stirring often.

Bring mixture to a rolling boil and continue to cook, while stirring constantly, for 4 minutes.

Remove from heat and pour immediately over chocolate chips and apple pieces.  Stir until chocolate is melted.

Pour into the baking dish and spread evenly.  Sprinkle the gingersnap pieces over the top and press down lightly to set into mixture.
home made apple fudge

Refrigerate overnight.  Cut into small pieces to serve.  Tastes best when eaten at room temperature.  Store with a lid in fridge.

Thanks for stopping by.  Remember to take pleasure in simple things, Jackie

no comments

a valentine mug cake

February 12, 2019

mug cake ingredients

Have you ever made a mug cake?  They are great!  Essentially, it is a cake made in a mug.  Certainly, a single size serving of cake made in a mug (with no extra dishes to wash) is a great invention, don’t you think?

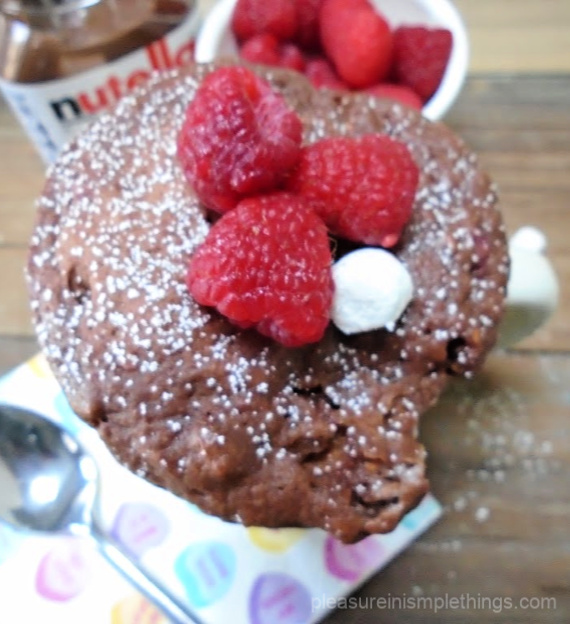
For Valentine’s Day, I am sharing a recipe for a mug cake using Nutella and raspberries.  You can change up the recipe a little to accommodate your own tastes if you’d like.  The nice thing about experimenting with mug cakes is that you aren’t using too many ingredients if you decide to scrap one and keep trying different variations.

mug cake for Vday

This recipe was created from all ingredients I had on-hand.  Something chocolate is a must on Valentine’s Day and, of course, I needed a little something red – hence, the raspberries!

Make one as a special Valentine treat to yourself!  Or, print up the recipe for it and attach it to a pretty mug as a Valentine gift!

Valentine Mug Cake Recipe

  • ½ cup minus 1 Tablespoon all-purpose flour
  • 2 teaspoons cocoa powder
  • 3 Tablespoons sugar
  • ¼ teaspoon baking powder
  • 3 Tablespoons milk
  • 2 ½ Tablespoons plain Greek yogurt
  • 1 Tablespoon Nutella (plus extra for spreading on top)
  • 1 Tablespoon crushed raspberries
  • 5 mini marshmallows
  • Extra marshmallows & raspberries for garnish

Combine the flour, cocoa powder, sugar and baking powder in a mug.  Add remaining ingredients to the mug and stir well to combine.  Cook in the microwave for 1 1/2 minutes on 80 percent power or just until a toothpick inserted comes out clean.  Cool 1 minute.  Spread the top with additional Nutella if desired and garnish with marshmallows and raspberries.

eating a mug cake

Enjoy!

Happy Valentine’s Day!  Remember to take pleasure in simple things, Jackie

no comments

riced cauliflower for dinner

January 18, 2019

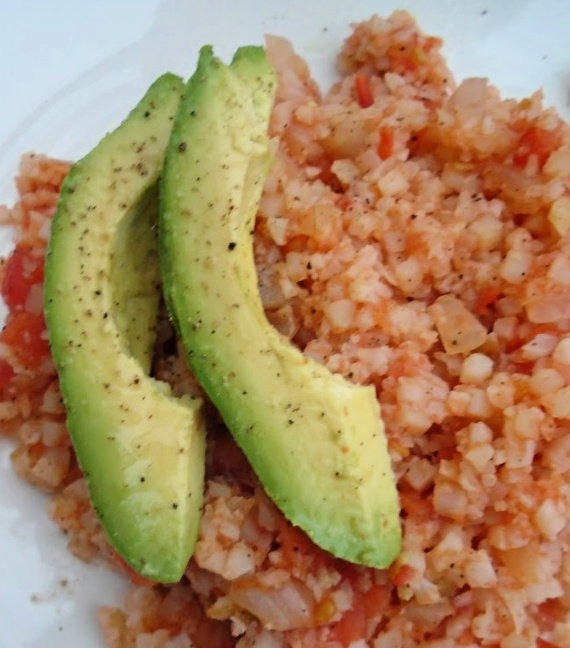
cauliflower rice for dinner

I recently discovered riced cauliflower and it has opened up a whole new cauliflower world for me!

Used as a base for a main dish, riced cauliflower is very versatile!  Because the best way to preserve its nutrients when cooking cauliflower is to gently sauté it on the stovetop – I use riced cauliflower straight from the freezer to the stovetop!

Add green peppers or whatever vegetables you have on hand or chicken or beans, etc.  And, switching up the spices can change the whole taste of the creation!  Use my basic recipe below and change it up to suit your own taste.

cauliflower rice dinner

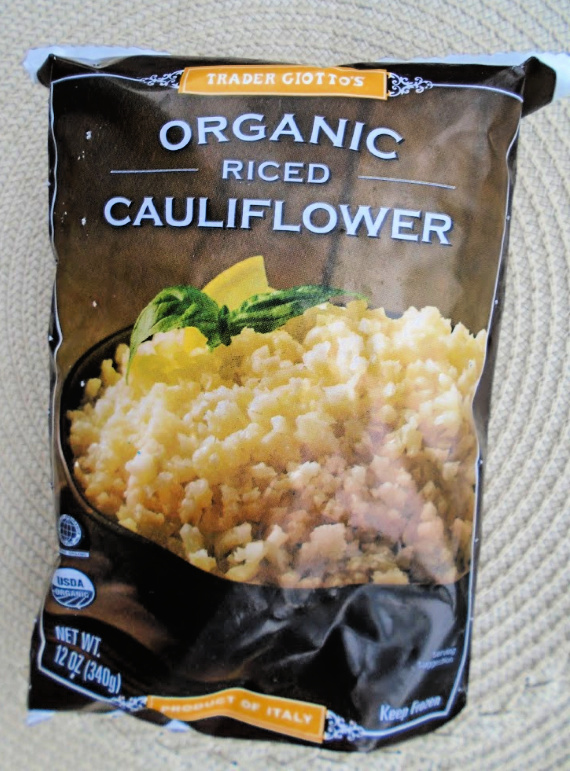
I think if you try riced cauliflower for a meal one night, you will want to stock up on some bags for your freezer.  I buy plenty at Trader Joes – they are inexpensive and so handy!  I use the entire bag when I make a dinner and have a little left over for lunch the next day.

Why am I so excited about adding more cauliflower to my diet?  After doing some research on eye health, I found diets richer in sulforaphane form a more preventative long-term approach to reducing macular degeneration and help protect eyesight.  And, cruciferous vegetables – like cauliflower, broccoli, and cabbage – are a good source of sulforaphane.  Since I have been doing whatever I can to find natural ways to encourage good eye health, I am stepping up my cruciferous vegetable intake!

Trader Joes cauliflower rice

(The only downside of these vegetables are for those that need to limit purines in their diet since they do contain purines – if this pertains to you, keep your intake to a modest level!)

Recipe:  Heat 1 Tablespoon olive oil in a pan.  Add 1 small finely chopped onion, 3 cloves minced garlic and 1 finely chopped jalapeno.  Cook for a few minutes until the onion is translucent.  Add 2 finely chopped tomatoes, 1 teaspoon cumin powder, ½ teaspoon paprika and a pinch of salt.  Cook for a few minutes until the tomatoes are softened.  Add a 12-ounce package of frozen riced cauliflower to the pan and mix well.  (I hit the package on my countertop a couple of times to break up any frozen clumps.)  Stir fry for about 5 minutes – just until hot – not mushy.  Garnish with cilantro, sliced avocado, and a squeeze of fresh lime!  (The dish pictured here definitely needed a little chopped cilantro on top to add more freshness!)

Thanks for stopping by!

Have a fabulous weekend…here in Connecticut, we are preparing for our first snowstorm of the winter!

Remember to take pleasure in simple things, Jackie

no comments

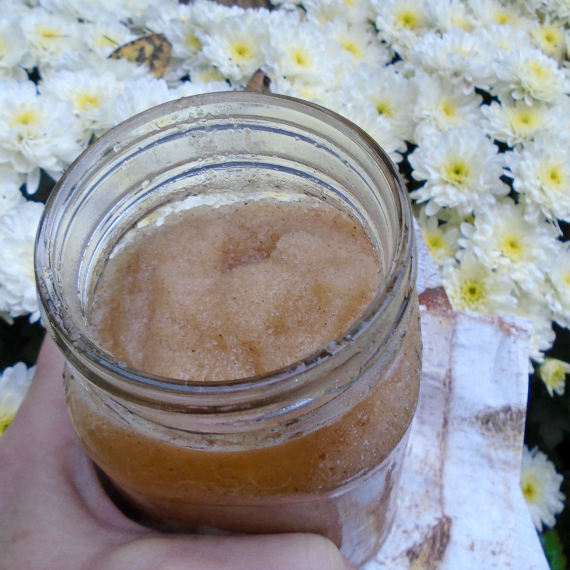
apple pie slushie

October 9, 2018

an apple slushie

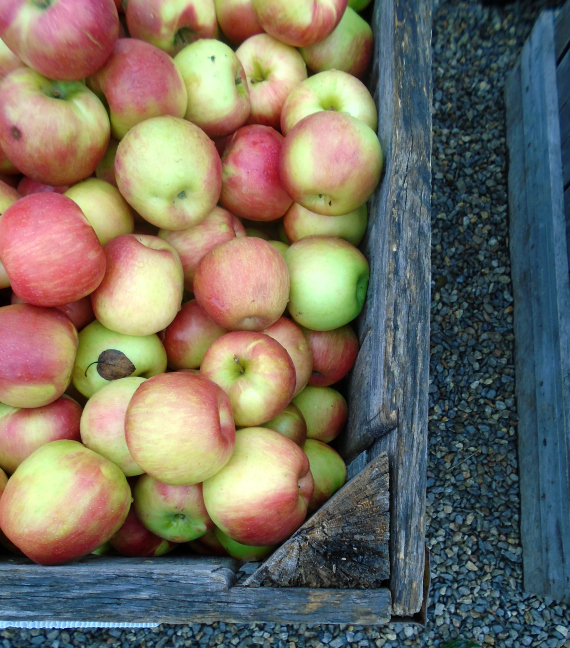
We have a lot of wonderful farms here in Connecticut.  This is the time of year when everyone makes an obligatory trip to an apple and/or pumpkin farm.  I stopped at a farm this past weekend to grab some freshly picked apples and some locally made apple cider.

apple crate

With the summer-like temperatures in Connecticut this past weekend, I wasn’t thinking of baking a hot apple pie!  Instead, I made an apple slushie from my farm fresh ingredients!

honeycrisp apples

Why not get creative with slushies?   (Have you seen the red wine slushies?)

Hot temp.  Cold slushie.  What’s not to like?  And, the fact that the slushie was apple made it totally seasonal!  It was delicious and refreshing ~ sort of like a chilly applesauce!

enjoying an apple slushie

I used a honeycrisp apple for my slushie since that was the variety of apple I purchased at the farm and I thought it had the perfect amount of sweetness.  A honeycrisp is a cross between a macoun and a honeygold.  Obviously, you can substitute any variety of apple you prefer.

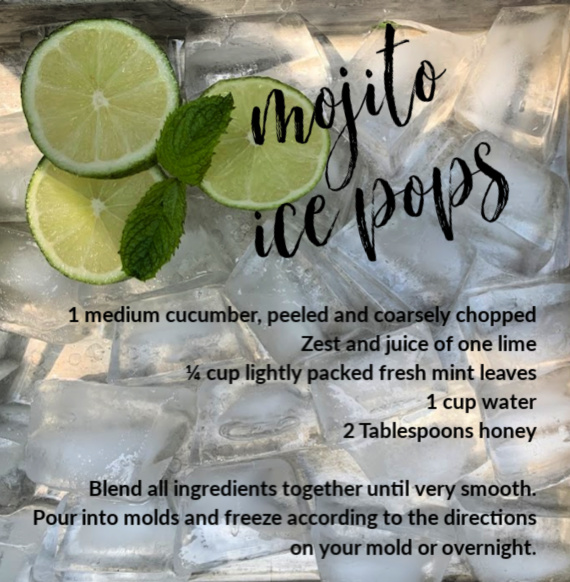
apple pie slushie recipe

If you give the recipe a try, be sure to adjust the spices to your own liking before adding the ice.

Thanks for stopping by!  Remember to take pleasure in simple things, Jackie
no comments

grilled cherry tomato skewers

September 4, 2018

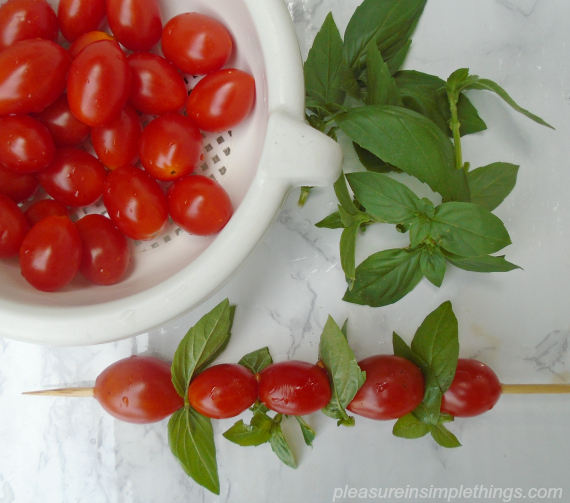
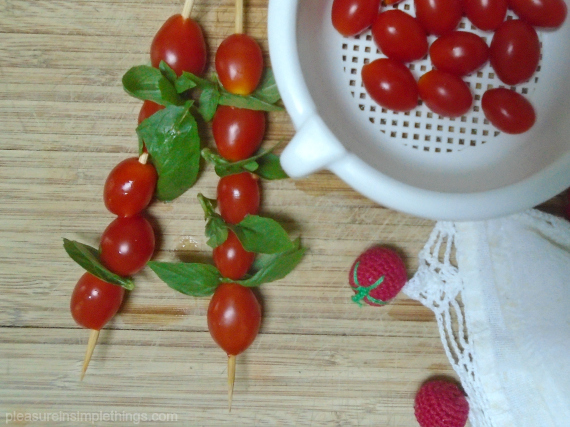
making cherry tomato skewers

As a kid, I would never even consider eating a tomato!  Not sure why, because, as an adult, I look forward to this time of year when local tomatoes are beautifully ripe and ready to enjoy!

There are so many wonderful ways to eat tomatoes.  You can’t beat a tomato tart when made with fresh, ripe produce!  (Click here for a great recipe.)

tomato skewers on the grill

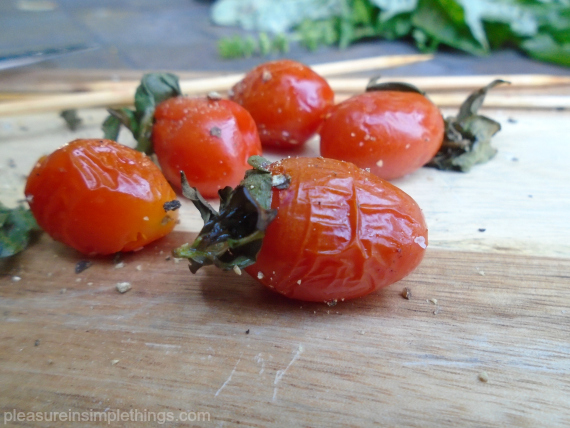
Another fabulous, but very simple way to eat a tomato is grilled.  And, skewers of cherry tomatoes, hot off the grill, are so very flavorful!  I love eating grilled cherry tomatoes on toast spread with goat cheese.  Or, just all on their own, sprinkled with salt!

cherry tomatoes cooked and ready from the grill

Grilling skewers of cherry tomatoes is simple enough.  If I am using them on toast, I just grill them, as is, on skewers.  I season them once they are on the bread.  If I am eating them plain, I first toss them in a little olive oil and season with salt and pepper before skewering and grilling.  Either way, they grill up fast and taste fabulous!  Heating them up makes their flavor explode!

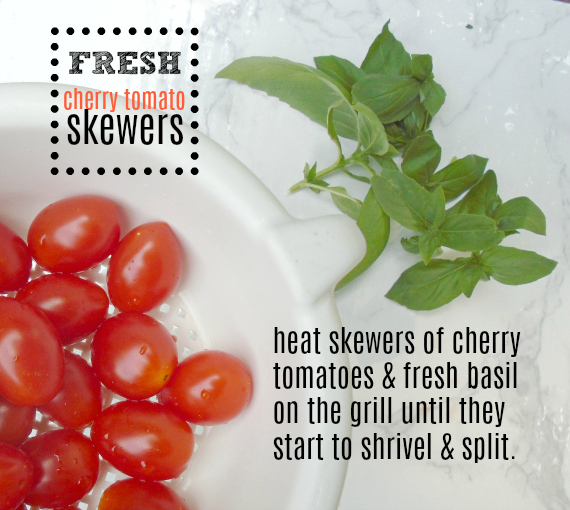
tomatoes and basil skewer recipe

So, if you have a bumper crop of cherry tomatoes…or, have just picked some up at your local farmers market, be sure to try some skewered and heated on the grill!  Tasty!

skewers for grill

Remember to take pleasure in simple things…like seasonally delicious tomatoes!

skewers on the grill

Thanks for stopping by, Jackie

no comments

cereal treat bowls

August 21, 2018

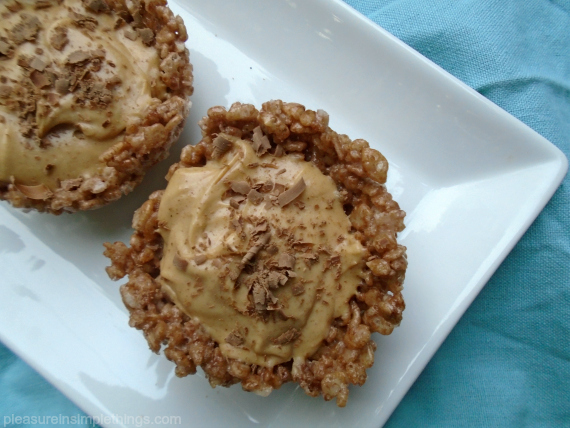
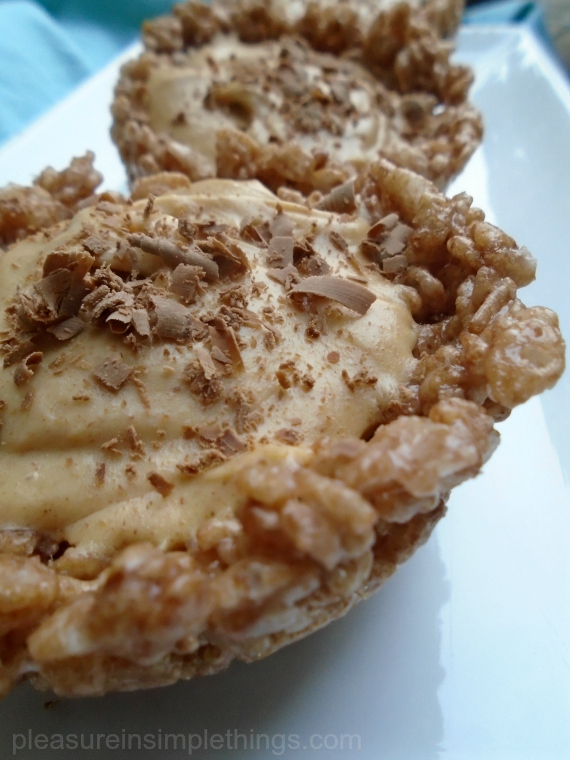
a pb mousse in choc cereal treat bowl

Cereal treat dessert bowls have been popular for a while now.  I thought I’d give it a try just once so I could put my own spin on it.

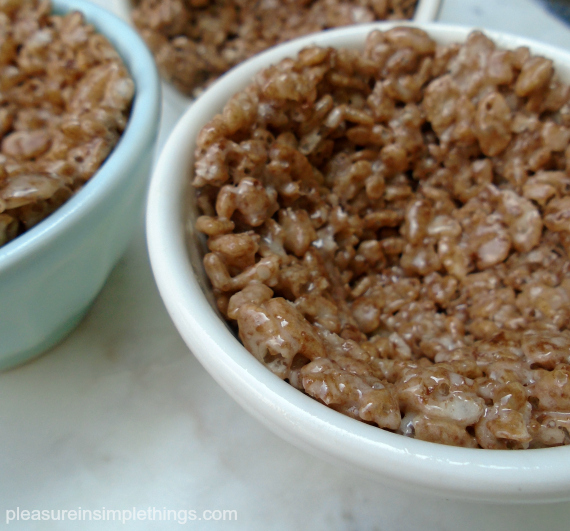
Since everything I’ve seen has been made with plain rice or fruit cereal, I decided to make some cereal treat bowls with a chocolate cereal.  And what flavor goes best with chocolate?  A darker chocolate?  Coffee?  Raspberry?  Peanut butter?  That’s it!  I decided on peanut butter.

Peanut butter mousse in a chocolate cereal bowl sounds like a good combination!

a chocolate cereal treat bowls by pleasure in simple things

I made the standard cereal treat recipe of 3 tablespoons of unsalted butter, 10 oz. of melted marshmallows, and 6 cups of cereal.  I lightly sprayed some small bowls with cooking spray (and sprayed a little on my hands as well).   Using my favorite little Anthro bowls as a guide, I spooned the mixture into them and used my fingers to form the mixture into a bowl shape.  Since I don’t have air-conditioning, I popped them into the fridge for a little bit to set them up.

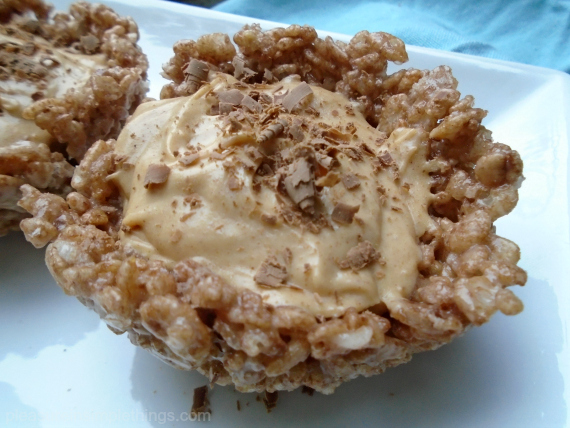
a choc cereal bowls with peanut butter mousse

I chose little bowls to make a nice sized individual serving, but you can make your bowls in any size you’d like!  Since I am making a mousse to put inside, I am leaving them as is.  If you plan on putting something more liquidy (I know this probably isn’t a word) than a mousse, I would suggest melting some chocolate and spreading a coat to harden on the bottom before adding anything so it will act as a seal and prevent any of your dessert from leaking out.

a filled choc treat shell with pb

For the peanut butter mixture – kind of a cross between a mousse and a cheesecake – I beat together 4 oz. cream cheese, 1/2 cup smooth peanut butter, 1/2 teaspoon vanilla extract, and 2/3 cup heavy cream till smooth and then beat on high speed for a minute or two.  I spooned this into the cups and garnished them with milk chocolate shavings.  I think peanut butter ice cream would have been a better choice than the mousse idea.  Whatever you spoon into the dessert bowls, be sure to do it just before serving so the bowls don’t get soggy.

Make a cereal treat bowl.  Check.  Have you tried making one?  What did you serve inside it?

Thanks for stopping by!  Have a great week!

Remember to take pleasure in simple things, Jackie

P.S. If you liked this, click here to see a similar treat I made recently…peanut butter cereal treat bites.

no comments

deviled eggs, hold the mayo

July 10, 2018

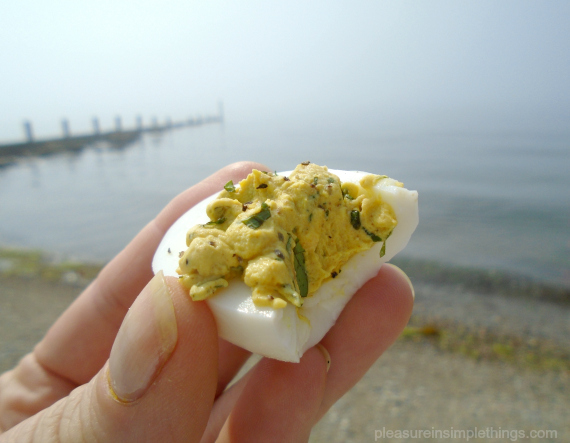
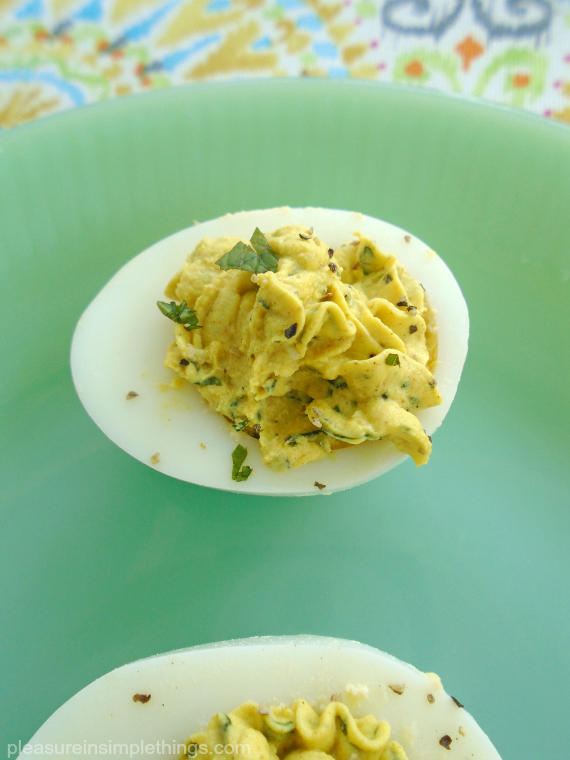
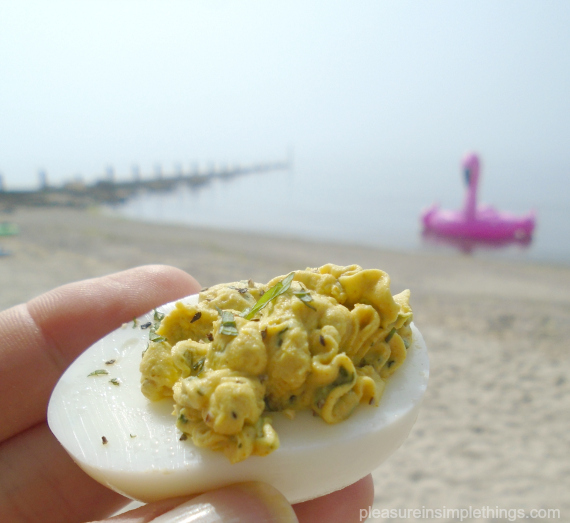
delicious no mayo deviled egg at the beach

People find it hard to believe I don’t like mayonnaise.  It’s true.

And, I think the reason I have never been crazy about deviled eggs is because of the mayonnaise in the filling.  I’ve always eaten the outside, white of the egg and left the filling!

I decided if the mayo could be eliminated from the filling of the egg, I could enjoy the entire deviled egg!

So, for this year’s 4th of July celebration, I made deviled eggs…minus the mayo!

no mayo deviled egg

My idea was to substitute yogurt – which I do like – for the mayo.  I always have plain nonfat Greek yogurt in my fridge.  I added that, as well as some fresh herbs from my garden, to the yolks of eggs for my deviled egg filling.

I boiled up a dozen organic eggs and got to work!

Here is what I ended up adding to a dozen egg yolks:

  • 1/3 cup plus 2 Tablespoons organic, plain, nonfat Greek yogurt (you can adjust to desired consistency)
  • 3 Tablespoons fresh chopped cilantro
  • 3 teaspoons fresh chopped mint (plus more for garnish)
  • 1 1/2 teaspoons curry powder
  • 3/4 teaspoon black pepper
  • 3/4 teaspoon turmeric
  • 3/4 teaspoon sea salt

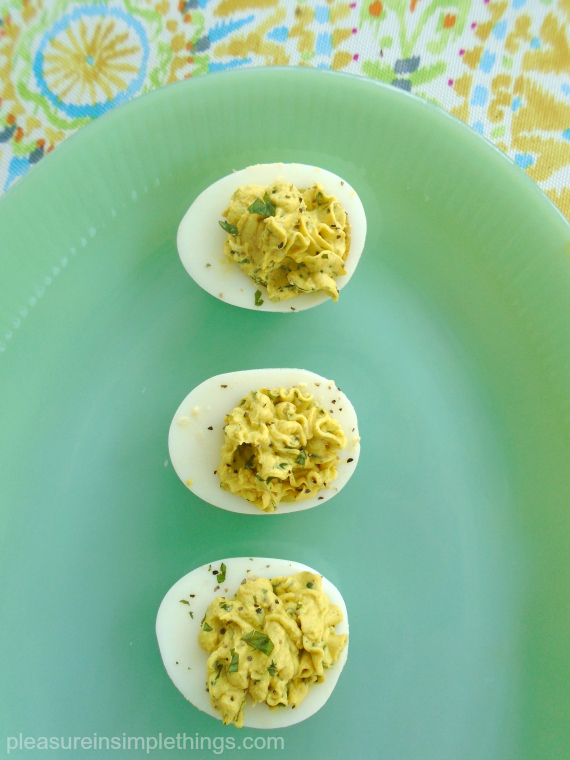
I cut the 12 eggs in half lengthwise.  The 12 egg yolks went into a bowl and were mixed with the ingredients above.  I mixed well with a fork.  (Maybe a mixer could be used here for more of a whipped consistency filling, but I didn’t have one available.)  After the filling was mixed well, I piped it (not very neatly, as you can see!) back into the egg white halves and finished with salt and pepper to taste and some chopped fresh mint from my garden to finish!

a trio of no mayo deviled eggs

My deviled egg creations came out really tasty!  Now that I have tried a nontraditional filling, I think next time I experiment with deviled eggs, I may just remove the yolks altogether!  Alter the spices to suit your taste.  (Try the Trader Joe’s everything bagel spice!)

deviled eggs at the beach

Thanks for stopping by!  Have a really fabulous and safe holiday!

Remember to take pleasure in simple things, Jackie

no comments

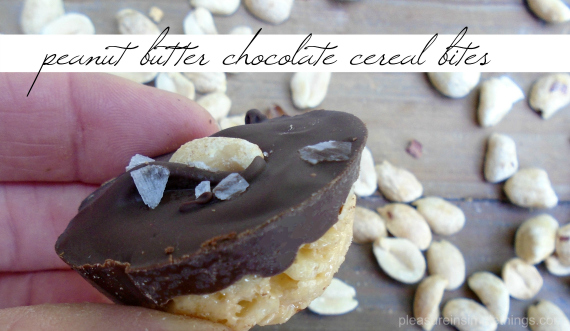
peanut butter chocolate cereal bites

June 26, 2018

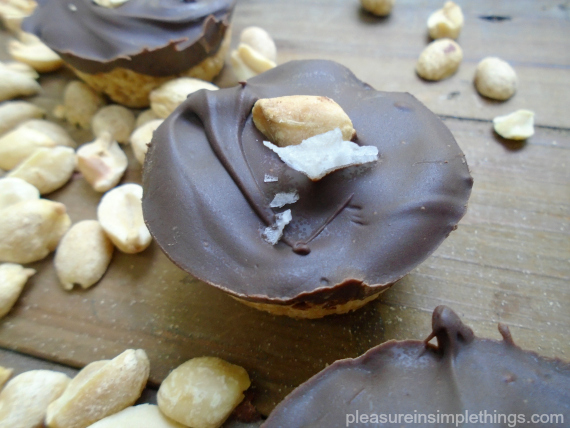
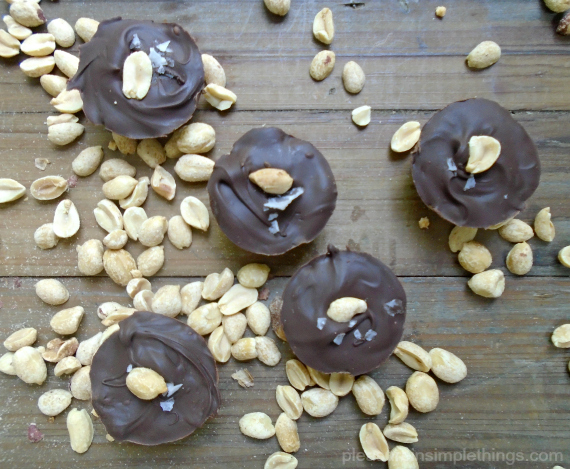
pb choc cereal bites

I recently wanted to make a dessert as a gift for a person celebrating a new job.  I know he likes peanut butter and chocolate candies and I know he likes cereal treats, so I decided to combine the two and come up with a special treat!  Making a bar like a cereal treat didn’t seem ‘fancy’ enough for the occasion though, so I made the sweet as individual little cups!

I simply varied the recipe I use for a basic cereal treat to come up with a yummy peanut butter/chocolate version.  They required a little more work than a bar, but I think you will agree the results were great!  If you’d like to try, I am sharing the recipe.  Enjoy!

pb choc cereal bite recipe

Peanut Butter Chocolate Cereal Bites

  • 3 Tablespoons unsalted butter
  • 1, 10 oz. package of marshmallows
  • ½ cup peanut butter
  • 6 cups crispy rice cereal
  • 1, 12 oz. package semi-sweet chocolate pieces
  • peanuts and sea salt flakes for garnish

pb chocolate cereal bites

Coat a mini muffin(s) pan with cooking spray.  (I used a pan for 24 and had extra ingredients that I used to make bars in a coated 8” x 8” baking pan.)

In a large saucepan, melt butter on the stove over low heat.  Add marshmallows and stir until completely melted.  Remove from heat.  Stir in peanut butter until melted.  Add cereal and stir until well coated and all ingredients are evenly incorporated.

Press about a Tablespoon of the cereal mixture into the bottom of each well.  There will be a little bit of room left to add some chocolate.

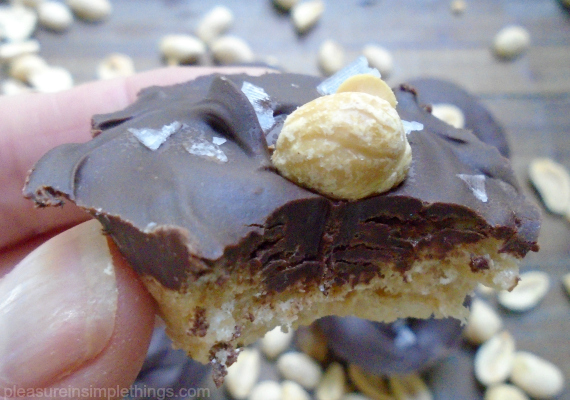
peanut butter choc crispy cereal treat

Melt the chocolate over low heat in a double boiler, stirring frequently.  Remove from heat when just melted.  Spoon about a teaspoon of chocolate into each well, smoothing the top with the spoon.

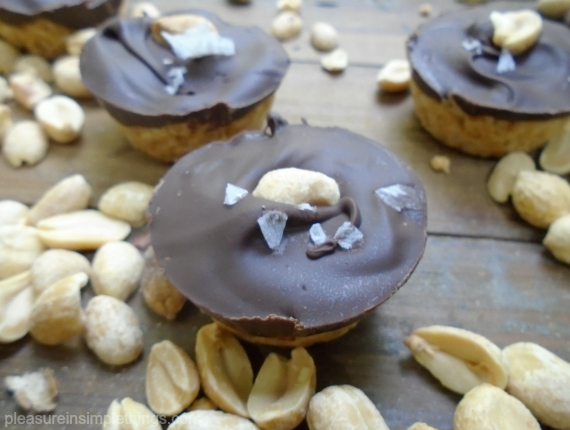
Finish with peanuts and flakes of sea salt.  Set in the fridge.  Store in an air tight container.  These are best fresh, but there shouldn’t be any problem with them hanging around too long!

yummy cereal treat bites

Thanks for stopping by!  Remember to take pleasure in simple things, Jackie
no comments

« Previous Entries     Next Entries »