Subscribe to Pleasure in Simple Things via RSS ReaderFollow Pleasure in Simple Things on InstagramFollow @InSimpleThings on TwitterLike Pleasure In Simple Things on FacebookFollow Pleasure In Simple Things on PinterestEmail Jackie

snow beautiful

February 12, 2021

pink sky with snow

There have been so many times I have wished snow could be saved for a single day…that it would just snow on December 25th and no other day.  It’s just that snow can be so annoying.  All the cancellations, delays, shoveling…not to mention it occurs during cold temperatures!

majestic tree in snow

Here, in Connecticut, we have had quite a bit of snow recently.

hanging branch in snow

snowy tree

Now that so many people are working from home and distance learning is a regular thing, I don’t think the snow has as much a negative impact on everyone’s daily lives as in the past.  The term ‘snow day’ definitely must have a different meaning for all the children in school – lessons are just done remotely instead of in school.  How sad to miss a day of no school because of heavy snow!

snow with pink sky

This past week there was one day when the snow came down most of the day.  In the late afternoon I decided to venture outside and start some snow clearing.  The views of the fresh fallen snow were so beautiful, I decided to take a walk around to admire it.  Snow much fun!  These photos were taken on that walk – all with my phone – no filters.

snow delight

It is times like these that I really appreciate the four seasons we have here in the East and could not imagine living anywhere else.

pink sky with snow

Thanks for stopping by!

tall tree in snow

Remember to take pleasure in simple things – like the beauty of a fresh fallen snow, Jackie

2 comments

diy bathroom before and after

February 5, 2021

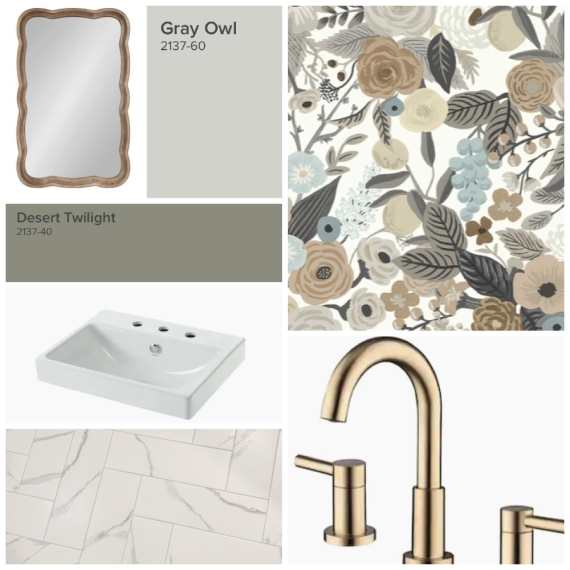
mood board bathroom

After posting a few photos of my bathroom remodel on Instagram stories, I was getting asked many questions about details of the redo – well, here is the story!   For those interested, I listed the resources at the bottom of the post.  (Some of the accessories are not new, so may be hard to find.)

It’s been a long haul redoing this bathroom.  When I moved into my place, the bathroom was not my taste at all!  Even before I moved in, I ripped everything out and cleared the walls to start with a clean slate.

The large white squares of tile on the floor just screamed ‘80s to me and I couldn’t wait to remove them!  After all the walls were repaired and painted, I had the floor tiled first thing.  I had planned on putting in a small marble herringbone, but quickly found out what I liked and wanted did not fit in with my very tiny budget.  I had the whole place to redo and, even though the bathroom was allocated a large percentage of my renovation budget, I couldn’t afford the tile I really wanted if I planned on redoing the entire room!  So, I opted for a larger tile in a faux marble to give the floor a little bit of the vibe I wanted.  (I still wish I could have gotten the small tiles!)  And, it killed me to have to spend a big chunk of the bathroom budget on the unsexy items like repairing broken plumbing, upgrading to LED lighting and replacing a broken fan!
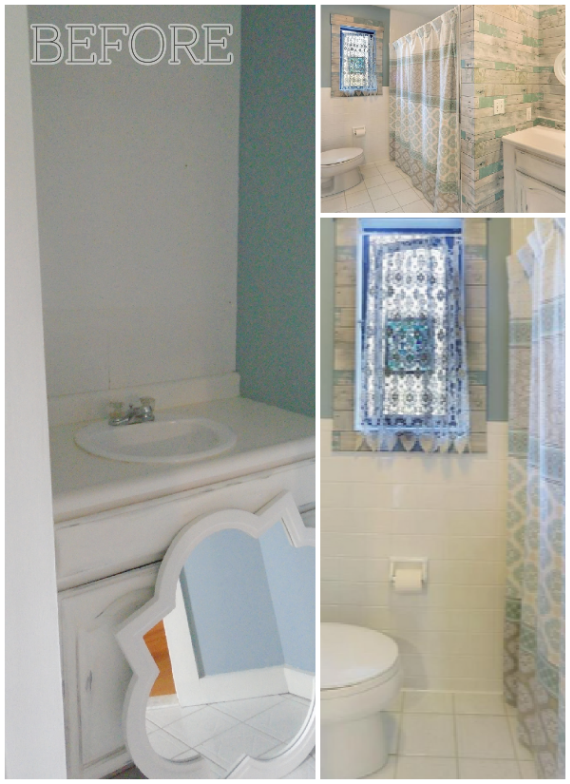
before collage

Because the bathroom is so small, has a sharp angle, and has an unusually small door opening, the hunt for a vanity was very discouraging!  (Also makes taking photos impossible – I think the realtor used some type of trick photography to get the room into the photos!)  And, the prices!  (My favorite Pottery Barn vanity costs more than my entire bathroom redo!)  The best deals were online and nothing I found online would fit through my bathroom door or swing the angle the room presented!  I looked at some dressers and vintage pieces to repurpose, but came across the same issue.  I figured the final assembly of any vanity would need to be completed in the room.  I asked a few contractors for a custom estimate and, after looking at my bathroom, none of them called me back.  I figure I probably could not have afforded them anyway!

So, how did I get the vanity made?  Well, it just so happened my son was recently visiting from California.  He asked about the bathroom when he was at my place and I explained my frustration with the vanity and my inability to move forward with the project.  He said “I’ll give it a try.”  I was surprised.  To my knowledge, he had never built any furniture and I didn’t think he had much experience in woodworking.  But, what did I have to lose?  I knew he was great at building cars and he pretty much excels in anything he does, so I put my confidence in his ability to finally get my bathroom done!  The thought of that bathroom finally finished and usable made me swoon!

mood board bathroom

I quickly put together a mood board of what I envisioned for the space and my son started planning the build.  As I watched his progress, I realized he didn’t just plan to build something to fill the space – he was planning a beautiful piece of furniture with some great added details.
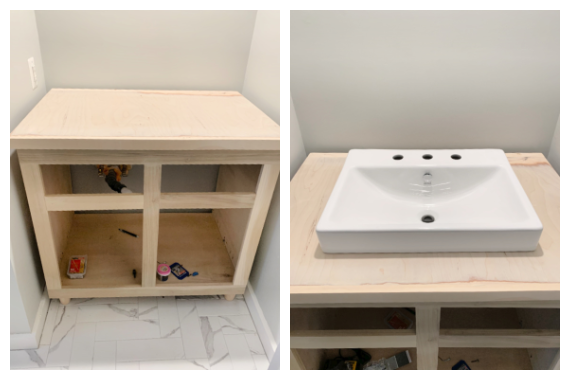
building custom vanity

As he built the pieces, I started painting – I had a lot to do.  The entire piece needed to be primed and painted.  It is constructed entirely of Poplar.  We discussed what would be best for the top of the piece.  I really liked the idea of keeping it wood and using a vessel sink.  He decided to add resin to the top after I painted it to protect the piece.  It was a genius idea since putting the resin on makes the top pretty indestructible and using a matte finish also makes it pretty undetectable.
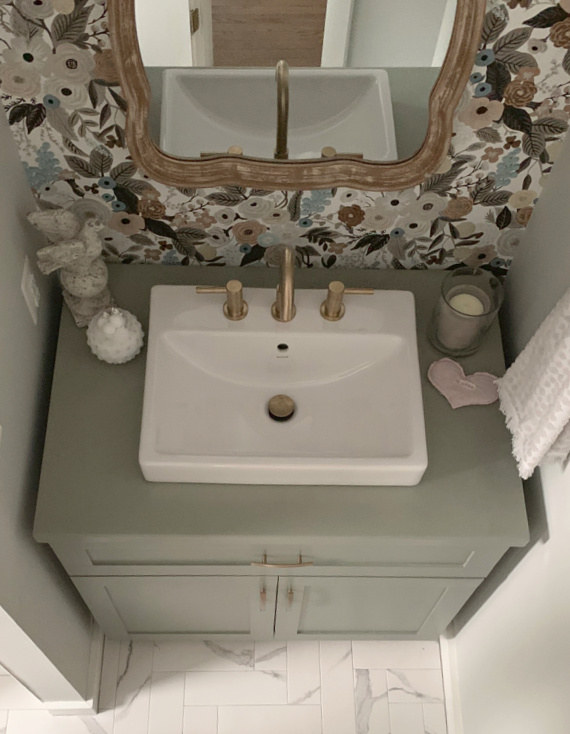
finished bathroom aerial view

By having a custom piece, I was able to have a vanity made a little taller than a stock piece – which I love!  There is plenty of storage inside.  My son added a little flip door and a pull-out drawer on the side which also makes it super practical.

I ended up with a piece nicer than I could have imagined.  Everything came together really great.
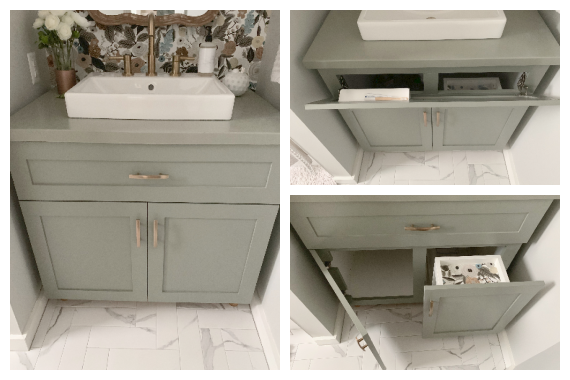
finished vanity

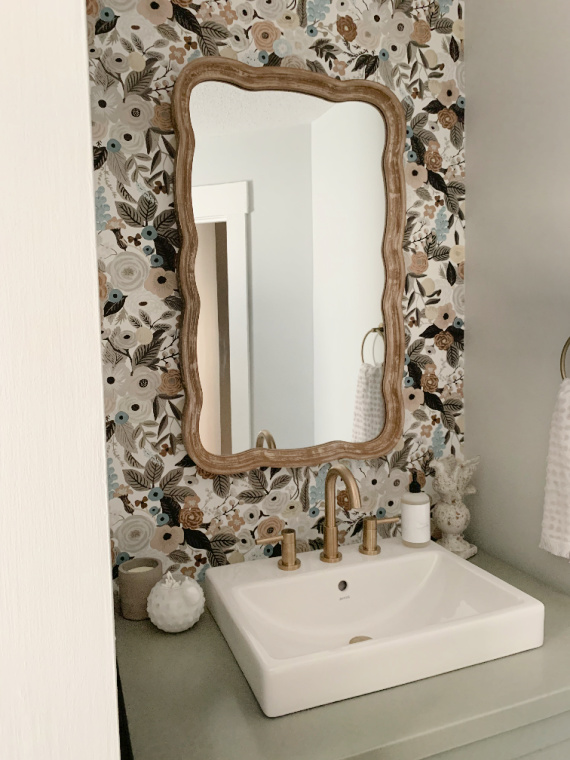
I am a big neutrals person and I always decorate with solids.  I find most patterns get on my nerves after a while.  The same thing with color.  Since I was a teenager and started collecting home pieces, this has always been the case.  I once painted a bathroom blue and instantly couldn’t wait to repaint it because it got on my nerves!  So, putting up some statement wallpaper in this bathroom was a huge move for me!  But, when I saw this Anna Rifle patterned paper, I instantly fell in love with it!  (I’ve have always loved Anna’s paper products – especially when I worked at Anthropologie – and I’ve been to her studio in Florida.)  I only papered the one wall behind the sink.  That is plenty for me.  The layout of my place makes this wall the first you see when walking down the hall and the wallpaper placement looks fabulous!
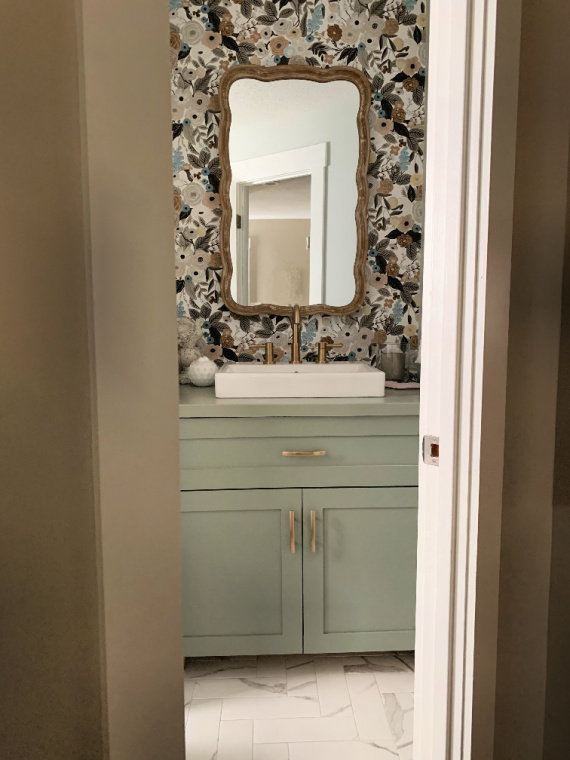
finished bathroom from hall

The vanity I thought would never happen is now the star of my bathroom.  It is amazing!  My son is a genius!  And, a master craftsman – who knew!
collage of spray painted items

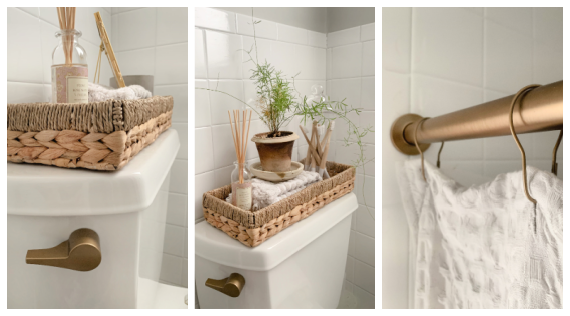
Adding all the details made the bathroom perfect.  I was hesitant to commit to the gold faucet since I’ve been there, done that (all through the ‘80’s).  I realize it probably won’t be fashionable for long, but I love the look of gray and gold for now.  If I ever decide to change it up, I will basically just need to get a new faucet.  I spray painted the items that didn’t match.  I found a perfect match to the faucet finish with a Rust-Oleum paint.  (Home Depot and Lowes are constantly out of stock on the color I chose…maybe many people are doing the same thing?)
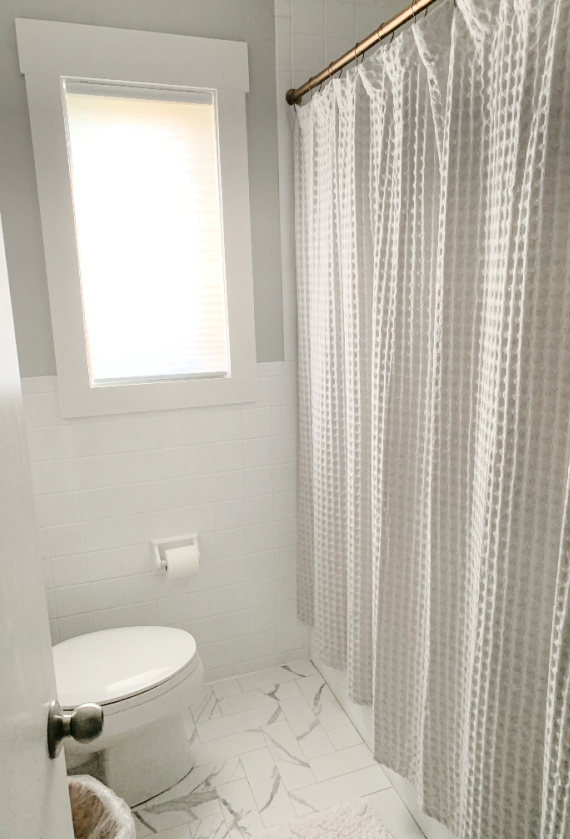
after photo shower

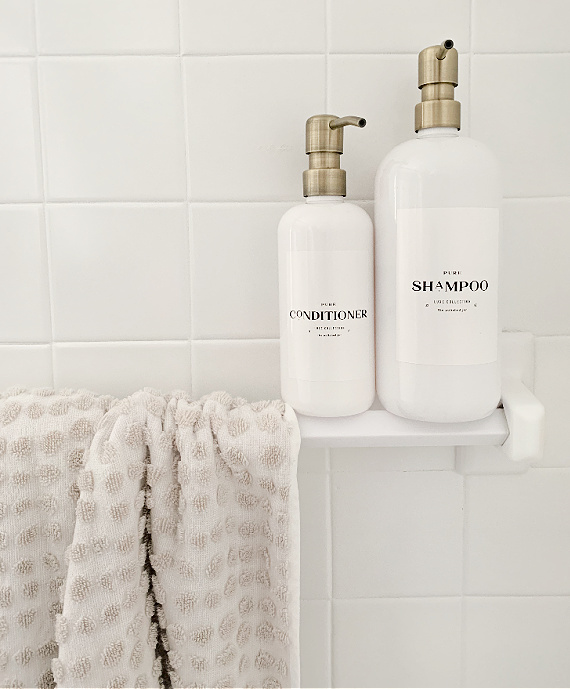
decorative bottles

To avoid any additional spending, I decided to paint a canvas (I reused one I already had) for the one empty wall – a quick acrylic that mimics the style of the wallpaper flowers.
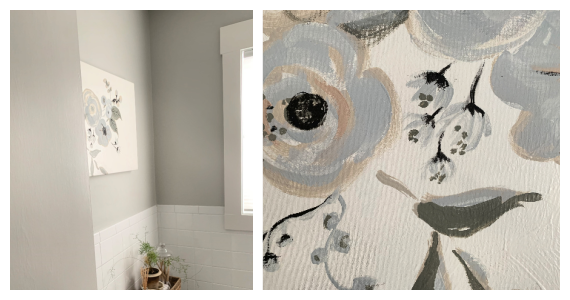
canvas on wall original

I ended up with a bathroom I really love, thanks to my talented son.  What do you think?
finished bathroom

Thanks for stopping by!

Remember to take pleasure in simple things, Jackie 

Resources:  vessel sink, faucet – Jacuzzi from Lowes; towel ring, door hook – allen + roth from Lowes; vanity door pulls – Lowes; wallpaper – Rifle Paper Co.; vanity – custom; wood to construct vanity – Poplar from Home Depot; metallic spray paint for shower hardware & toilet tank lever – Rust-Oleum in Satin Bronze; Mirror – Kate & Laurel from Target online; shampoo and conditioner bottles – The Polished Jar from Etsy; floral canvas: self-painted; wall paint – Benjamin Moore in Gray Owl; vanity paint – Benjamin Moore in Desert Twilight; bath towels – Project 62 from Target (past season); tile – Tile America in Fairfield, CT; flower pot – Ben Wolff Pottery Studio in Goshen, CT; Diffuser – Target; shower curtain, bathmat, baskets, glass jar – HomeGoods

Many thanks and much love xoxo to my son

8 comments

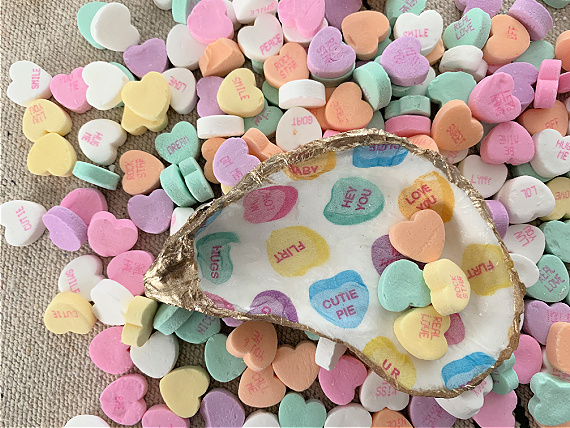
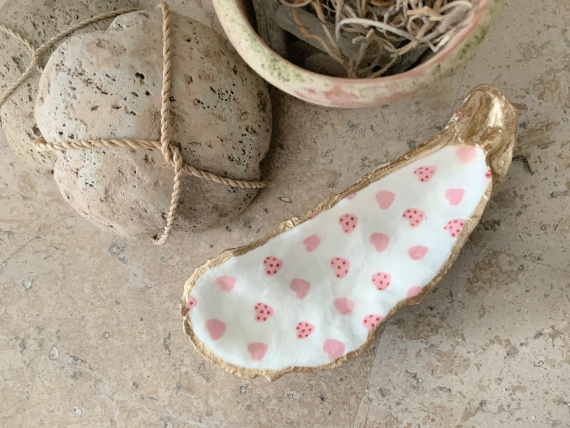
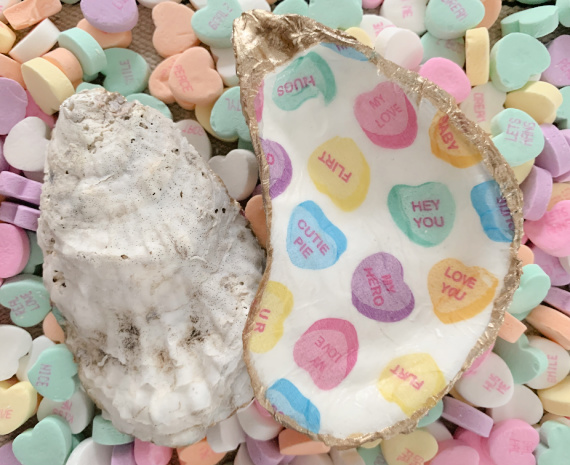
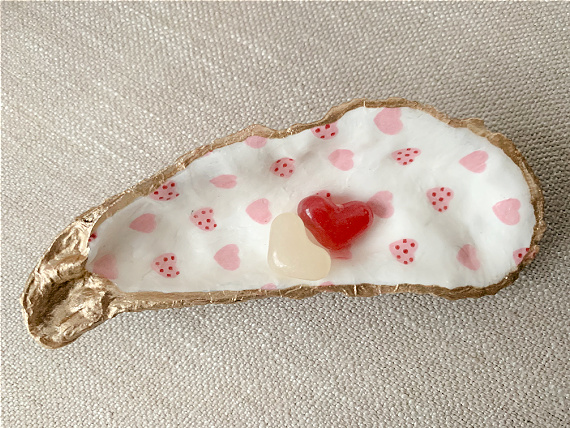
valentine diy oyster dishes

January 29, 2021

diy hearts conversation oyster
I started this blog to inspire creativity.  One post that I know did so for a lot of followers was the one on oyster shell trinket dishes.
I was thrilled that so many people tried (and succeeded!) to make some on their own.  I know this because of the many emails I received telling me so!  I also got many questions related to the procedure – which is fine.  I tried to make the instructions as clear as possible, but I’m also up to help you through the process!

heart oyster dish

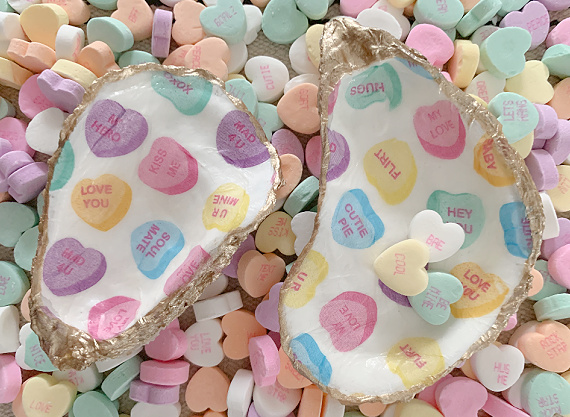
Because of the popularity of the decoupaged oyster shell process, I am posting Valentine oyster shells!  The same process I posted can be used to make some Valentine’s Day themed shells!

candy heart oyster dish

For the original DIY instructions, click here.

oyster dish with pink hearts

I haven’t made up any cards yet, but a Valentine isn’t complete without a corny pun included!  Here are some ideas:

  • You Shell Be My Valentine
  • The World Is Your Oyster
  • Life is Your Oyster, Shuck it
  • Hope Your Valentine’s Day Is A Splash

candy heart oyster shell dishes

If you haven’t yet tried to make a decoupaged shell, I hope I have inspired you!!

Thanks for stopping by!

Remember to take pleasure in simple things, Jackie

no comments

antique swan planter diy

January 22, 2021

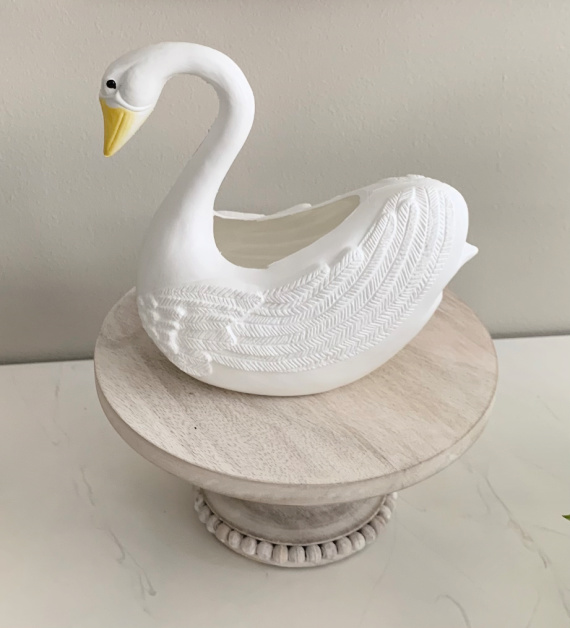
finished antique swan planter diy

I love Annie Sloan and Annie Sloan products and the proof is in my passion to paint everything with Annie Sloan paint!  Those of you who follow me have seen previous blog projects that have included furniture, painted planters and pots as well as vases from plastic bottles using paint and dark wax.  One thing I have not done is incorporate Plaster of Paris into a paint project.

That is exactly what one of my favorite Instagrammers, Kathy (@r.house_)  did on a project she posted to her Instagram stories.  She incorporated Plaster of Paris while painting a plastic planter from Christmas Tree Shops and I knew I needed to try the technique with my Annie Sloan!  She was simulating an antique cement piece and it came out fabulous!  I had planned to try it on a plastic trophy shaped planter, but I couldn’t find the container I had in mind.

While I was on a Christmas Tree Shops stop, (I go there occasionally to pick up Rao’s sauce.) I noticed the same plastic swan planters Kathy used for her project.  I picked up a small one (they come in two sizes) to use for my experiment.  I planned on just following along with Kathy’s instructions.  You can do the same thing by looking at Kathy’s highlights on her Instagram feed or you can follow the instructions here where I show my results using Kathy’s method.

original plastic swan

Original small swan planter.

The only difference with my process was that I used all Annie Sloan paints.  I used leftover paint colors I had from other projects so my colors aren’t the same as the one’s Kathy used, but I did use a gray and a white.

When I purchased the small swan, it did not have a drainage hole and since I planned on using it for a planter, I made a hole by driving a nail into the bottom.  A layer of small pebbles on the bottom of the container can be used as an alternative method for drainage.

gray base coat

Planter painted with gray base coat.

For this project, you will need flat gray paint, flat white paint, Plaster of Paris, (if you don’t have it, borrow it from a crafter – you won’t need much) and the plastic container you plan on painting – in this case, a plastic swan planter from Christmas Tree Shops.  I used a paper bowl for paint mixing, a wide paint brush, and a pair of plastic gloves.  For those of you who didn’t take any art classes, Plaster of Paris is a white powder that hardens when moistened and allowed to dry.  It can be used to make homemade chalk paint, but in this case, we are using it to add texture to our project.

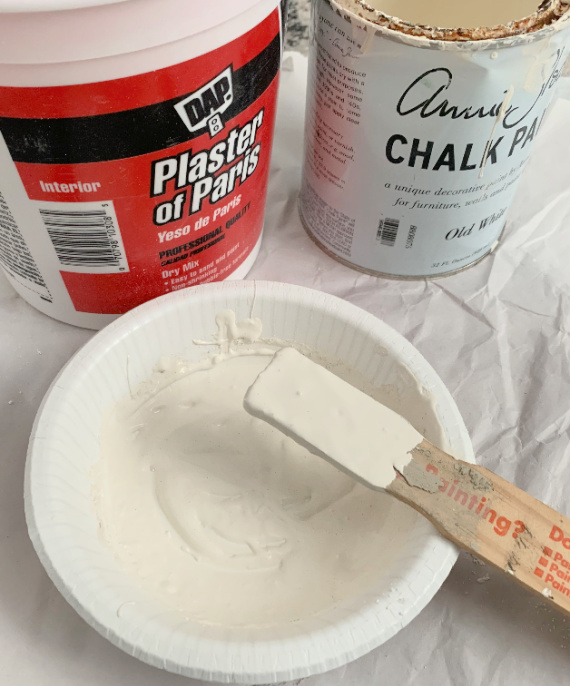
mixing white coat

Mixing white paint and Plaster of Paris.

Here are the steps to create a simulated aged cement swan planter:

  1. Paint the swan with a gray chalk paint base coat (or any flat gray paint) and let dry
  2. Mix Plaster of Paris liberally into white chalk paint (or any flat white paint) in a disposable bowl – it should be thick and lumpy
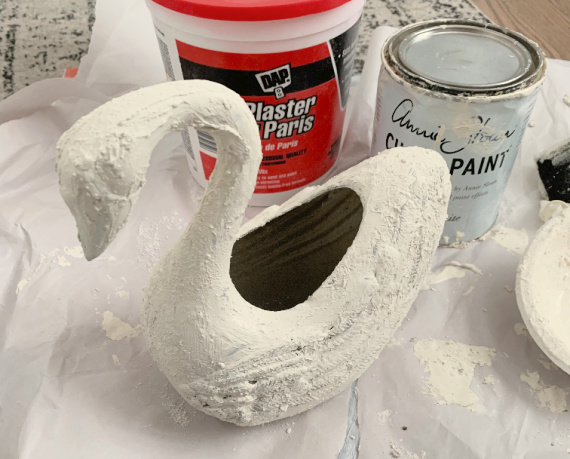
  3. Paint the white paint mixture onto the swan – it was more like rubbing it on for me
  4. Let dry completely
  5. Dab dark wax (I used Annie Sloan dark wax) on some of the raised areas
plaster on swan

White paint and plaster coat on the planter.

Doesn’t the Plaster of Paris add a great realism to the piece?  I love that it is a nice light weight plastic piece since I am using it as an indoor planter, but looks like cement.

finished antique swan planter diy

Final planter with dark wax added.

Thanks Kathy!

If you don’t already, be sure to follow Kathy on Instagram.  She has a fabulous home and wonderful taste and she is sure to inspire some creativity!

Thanks for stopping by!

Remember to take pleasure in simple things, Jackie

no comments

diy heart evergreen wreath

January 15, 2021

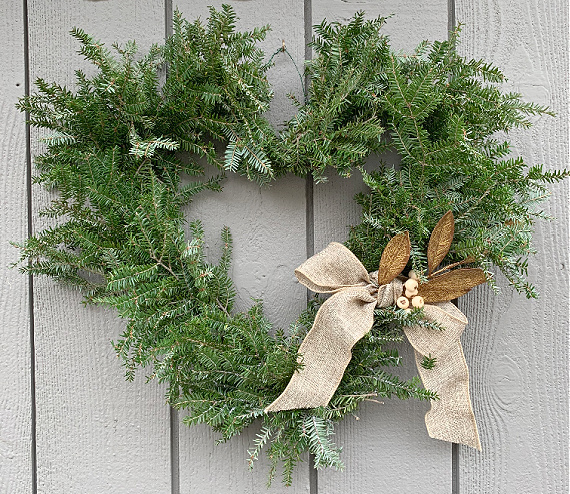
DIY evergreen heart wreath

Did you ever think of reusing your holiday greens?  You probably throw them out after the first of the year without much thought.  How about using them to make a Valentine wreath?

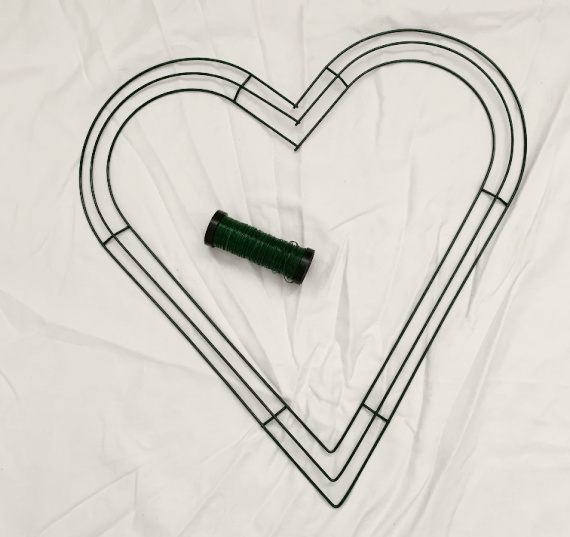
That is what I set out to do one of the warmer days this week.  I intended to replace my Christmas wreath with a heart shaped evergreen wreath.  This is an easy project and can be accomplished at no cost.  A wreath frame can be easily made by forming a wire hanger into the desired shape. Or, the wire frame can be purchased.  Either way, the same frame can be used to craft a wreath every year.

heart wreath frame

I thought I would make my wreath outdoors, but soon decided I did not want to stay outside – I know, I’m a wimp!  So, I set up a work space in the house.  This was made up of a sheet spread across the floor.  If you have ever made an evergreen wreath, you know it can get very messy – needles everywhere!

I piled up some greens onto the sheet and assembled my other supplies – garden shears, green wire, and my heart frame.

leftover holiday greens

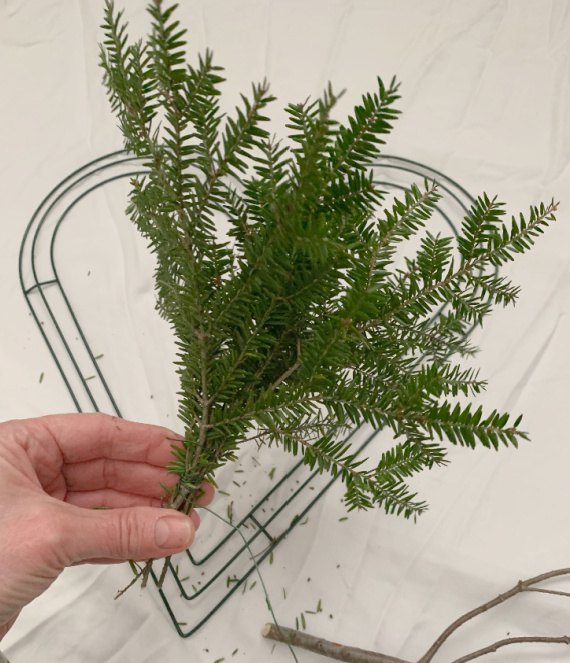
Making a heart wreath is just like making any wreath.  Small bundles of greens are clumped together and attached at the stems with wire.  Many bundles are made and are attached to the frame with the wire.  That really is all there is to it.  The quantity of greens used is purely a matter of personal taste.

crafting a heart wreath

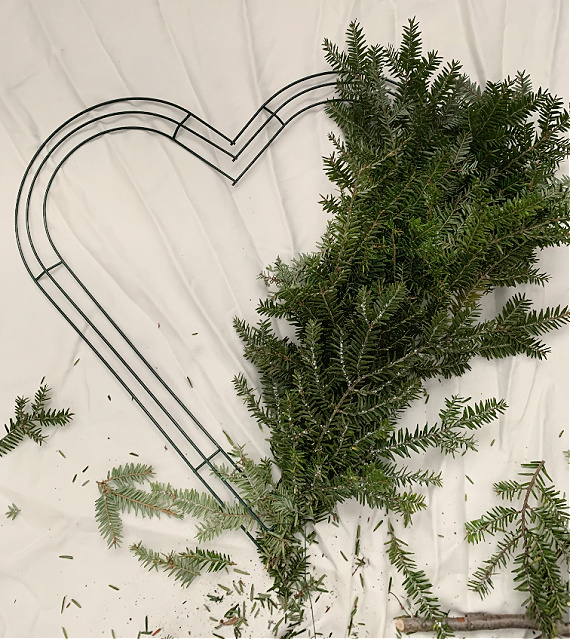
The one difference with a heart wreath rather than a traditional circle wreath, obviously, is the shape.  A little care needs to be taken at the top and bottom of the wreath so that the shape is defined.

When I make a traditional round wreath, there is no trimming involved.  With a heart wreath, there may be a snip or two to help accentuate the heart shape.

attaching greens to a heart wreath

After I covered the frame with greens, I just added a few leftover holiday gift wrap trimmings.

I put a piece of wire on the back to use for hanging.

When completed, the sheet I set up as a work station just gets picked up and taken outside for a good shake!

Easy, right?  Now I have a wreath to replace my Christmas wreath and it will stay until my Easter wreath goes up!

DIY evergreen heart wreath

Any type of greens can be used or several types can be mixed.  Roping or swags from the holiday can be used or pieces can be cut from a live tree before it hits the curb.

I hope you are inspired to create your own heart shaped wreath of greenery!

holiday greens

Thanks for stopping by!

Remember to take pleasure in simple things, Jackie

2 comments

target flower diy

January 8, 2021

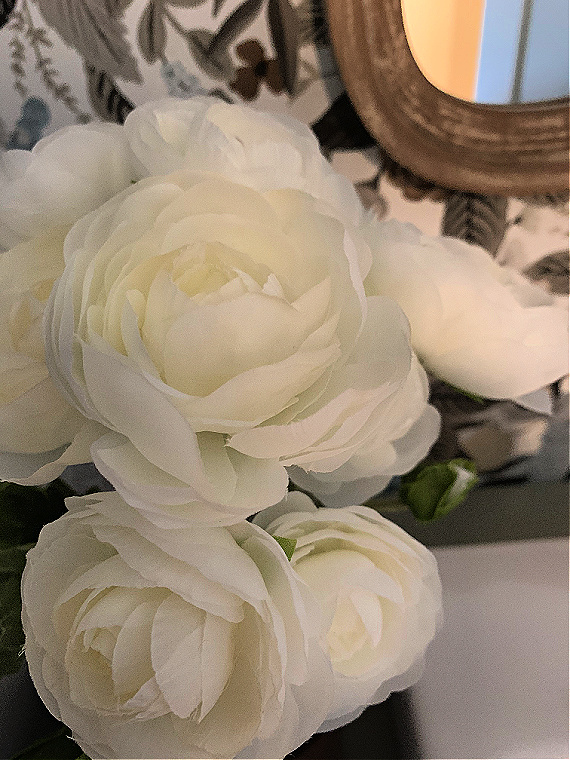
Who couldn’t use a little bit of spring about now?  I thought a touch of flowers would be the perfect addition to my newly renovated bathroom (yes, new bathroom post to come soon) to evoke a sense of spring and I set out to find some artificial ones.  (I would much prefer real flowers on a regular basis, but unfortunately, I don’t have the budget for that and there will be no garden flowers till spring!)

Of course, if you know me, it is no surprise that I wanted white flowers!  Any of the white artificial flowers I found at the craft stores that look at all realistic were way too expense!  And, when I checked to see what was available at the Dollar Store, I did not see any varieties of flowers I liked at all.

Target flower upgrade easy diyThen, unexpectedly, to my surprise on a regular trip to Target, I found artificial flowers in the low-price bins at the front of the store!  The white ranunculus was perfect for what I wanted and I certainly couldn’t beat the price!

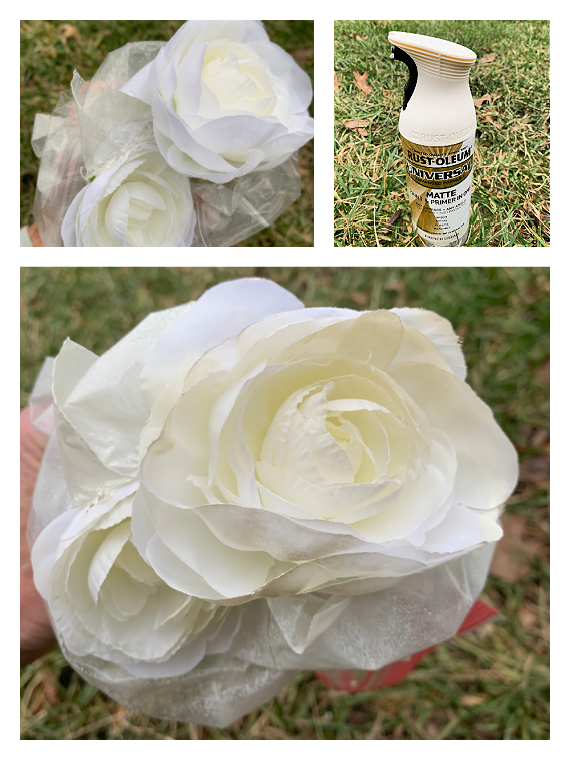
I changed them only in one slight way.  The flowers looked way too “one color” for me to look real.  They needed subtle variations of white to look true to nature.  So, all I did was to use a little spray paint and spray some of the edges of the petals.  I used a plastic bag taped around the stems and leaves to protect them from the spray paint.  Perfect!  Some subtle color variations!  I also got rid of a lot of the leaves since I don’t include many leaves when I put fresh ranunculus into a vase.That’s it!  That little upgrade made my great find perfect!

If you are at Target and want some artificial flowers, you can also check the ones in the Magnolia line – they are priced almost as good.  Not all the varieties look realistic, but I think the cosmos look really good!  (I put up photos of the two varieties I thought looked great on my Instagram stories today.)

Thanks for stopping by!

Remember to take pleasure in simple things, Jackie

no comments

diy abstract tree ornament

December 24, 2020

As you may know by now, as a fun holiday countdown, I am doing the final four days of DIY ornaments countdown!  Today is day four of the four days in a row of posts on how to create an ornament from a clear glass ball ornament.

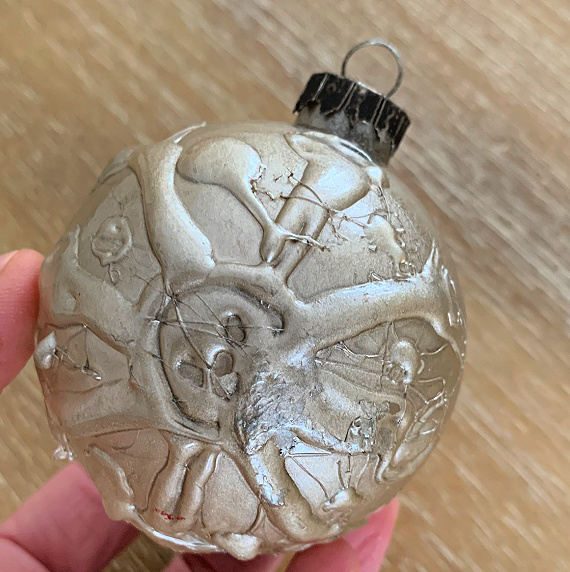
For the DIY on ornament number four, I started with an abstract design on the glass.  I created this design by using a glue gun!

glue gun ornament diy

After my glue gun design was set, I sprayed the ornament with gold spray paint.

spray paint on ornament

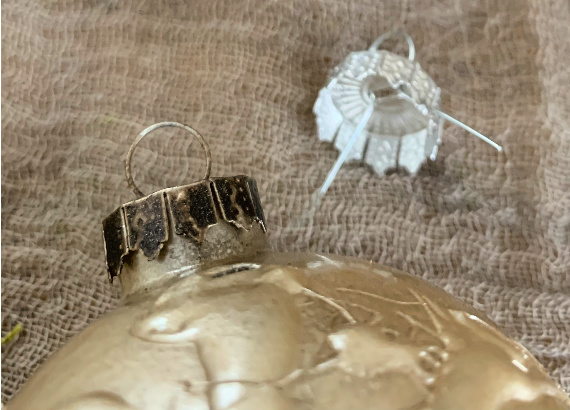
I sprayed the top silver fastener with an antique gold spray paint and replaced it when it was dry.  Spraying the metal top definitely makes a big improvement to the finished ornament!

painted ornament cap

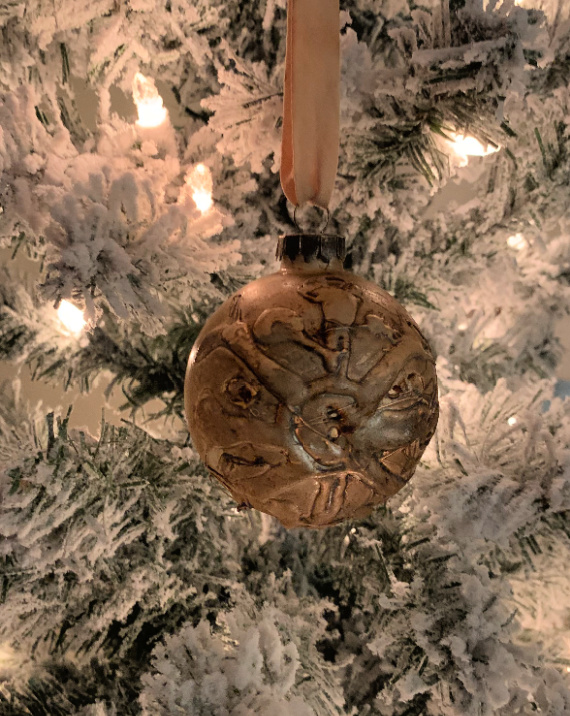
When the spray paint was completely dry, I accented the pattern with dark furniture wax. (I used Annie Sloan dark wax.) I just rubbed the wax randomly on areas of the pattern with a paper towel.  Complete!

That was the last of the four DIY posts for glass ball ornaments.  I hope you enjoyed this little mini-series and I hope you were inspired to create some new designs of your own!  Pick up some glass ball ornaments after the holidays on clearance to start making next year’s creations!

Thanks for stopping by!

I wish you good health and a most blessed holiday!

Remember to take pleasure in simple things, Jackie xo

no comments

diy initial glass tree ornament

December 23, 2020

DIY monogram ornament

As you may know, as a fun holiday countdown, I am doing the final four days of DIY ornaments countdown!  Today is day three of the four days in a row of posts on how to create an ornament from a plain clear glass ball ornament.

There certainly are an infinite number of ways to decorate homemade ornaments and the best thing about making your own is tailoring them to your own taste and décor.  If you follow my blog, you know I love topography and an initial ornament was pretty much a guarantee on one of the four designs.

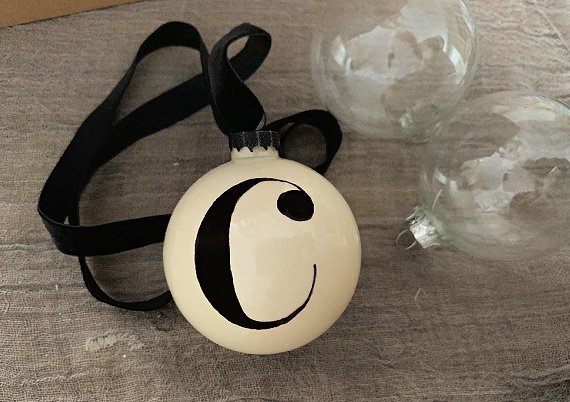
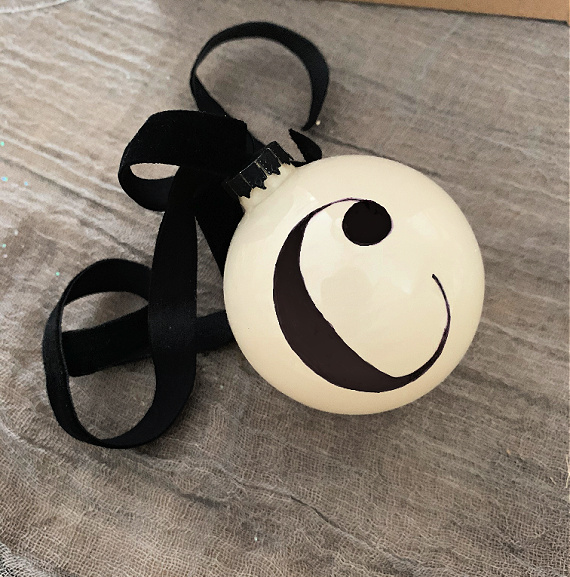
So, for ornament DIY number three, I crafted an initial ornament.  I chose a cream and black color scheme.

DIY monogram tree ornament

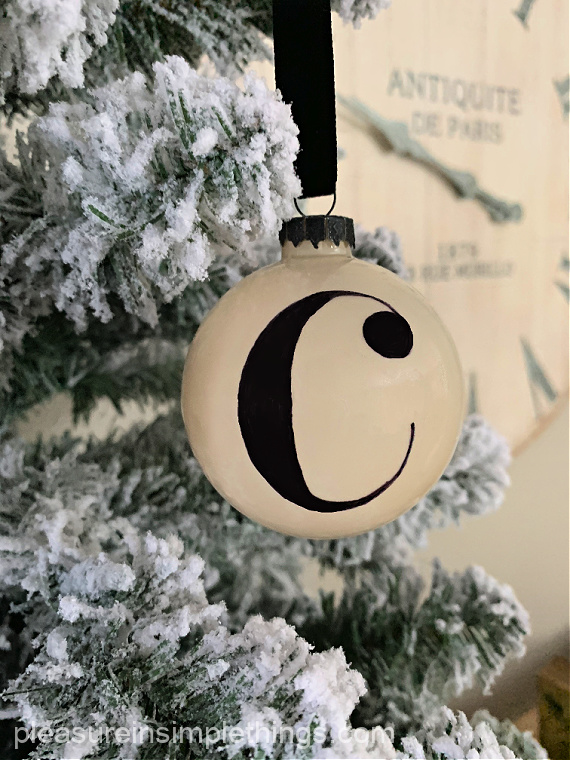
Since the glass ball was clear, I started by pouring a little bit of cream color acrylic paint inside the ball and swirled it around until the whole inside of the glass surface was covered.  I set it aside to dry.

I sprayed the metal fastener at the top of the ornament in a flat black to complement my design.

Next, I simply drew on an initial with a black permanent marker and added a black velvet ribbon to complete the elegant look of the ornament.

black and cream monogram ornament

That is it for ornament number three DIY!  Tomorrow’s post will be the final ornament DIY – number four!

Thanks for stopping by!

Remember to take pleasure in simple things, Jackie

no comments

diy golden feather tree ornament

December 22, 2020

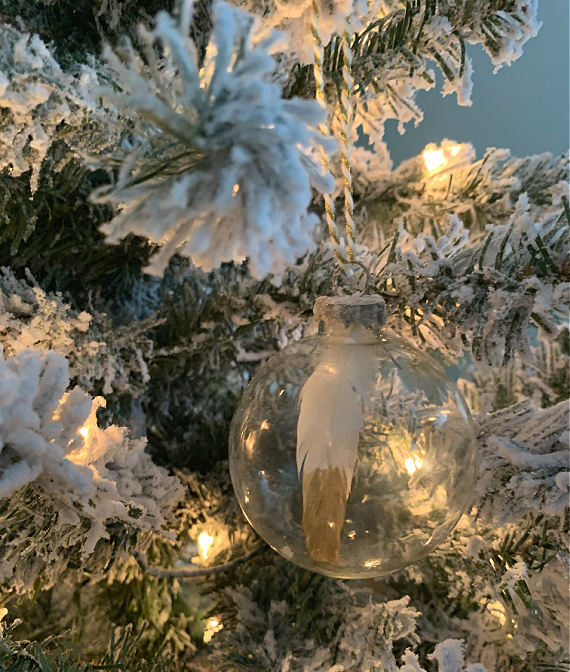
golden feather ornament

For a fun holiday countdown, I am posting a final four days of DIY glass ornament design countdown!  Today is day two of the four days of posts on how to create four different ornaments from plain clear glass ball ornaments.

For day two, I have a super simple design!

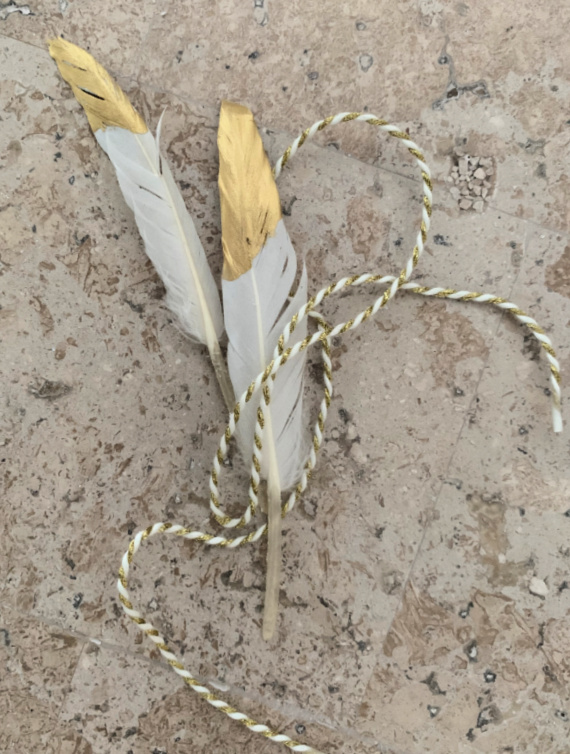
diy golden feathers

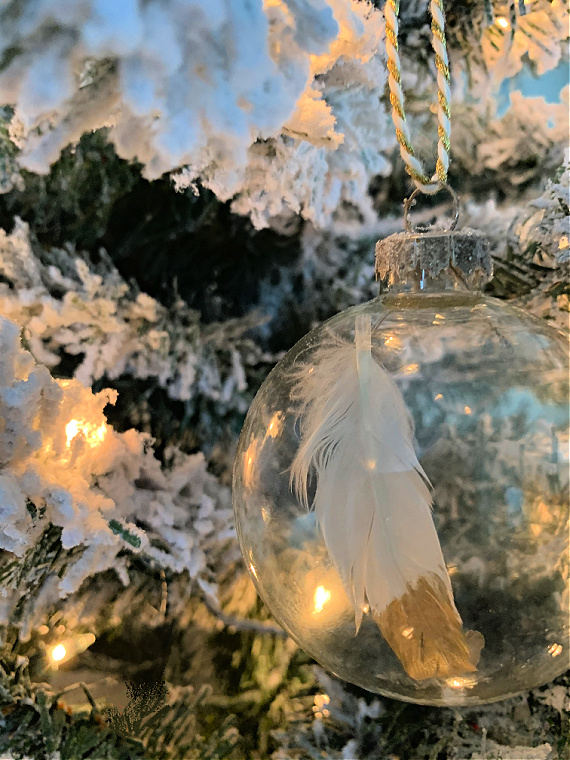
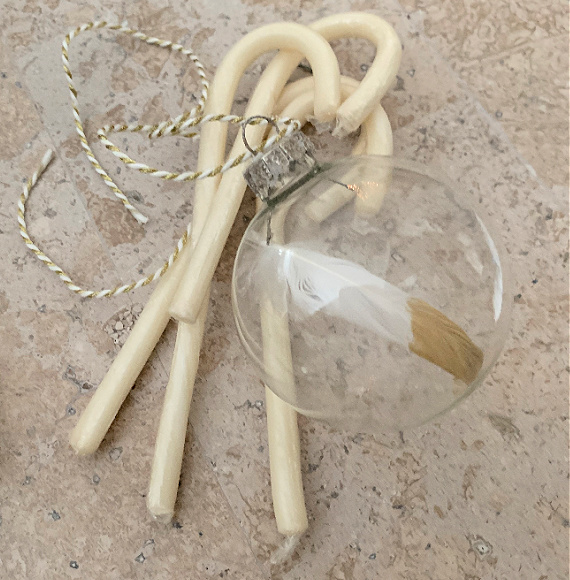
The only requirement is to dip a white feather in some gold acrylic metallic paint!  If you follow this blog, you know I love dipping white feathers in gold paint!  I find a lot of different ways to use them!

Once the feather is dry, it just gets placed inside the ornament.  So simple and elegant!  I love it!

feather ornament on tree

I had spray painted the top piece of metal on the ornament with champagne gold spray paint in advance to give it a more subtle look.  I removed it carefully – it comes off and on easily with care.  I also added some glitter to the metal top before replacing it.

white candy canes and ornament

That’s it!  An easy DIY!

Check back tomorrow for ornament DIY number three!

Thanks for stopping by!

Remember to take pleasure in simple things, Jackie

no comments

diy snowberry glass tree ornament

December 21, 2020

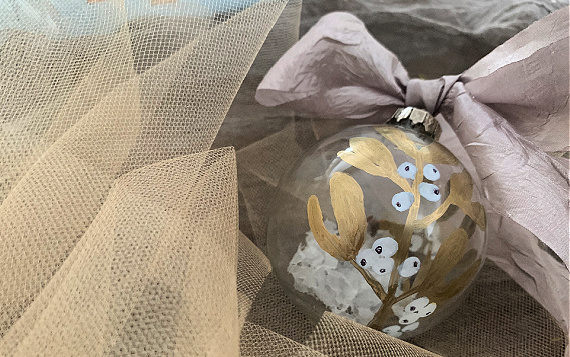
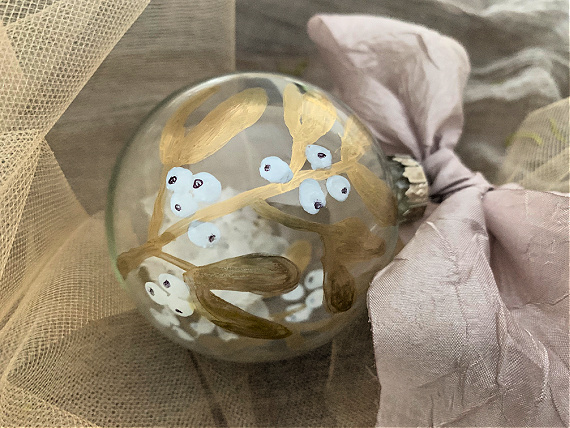
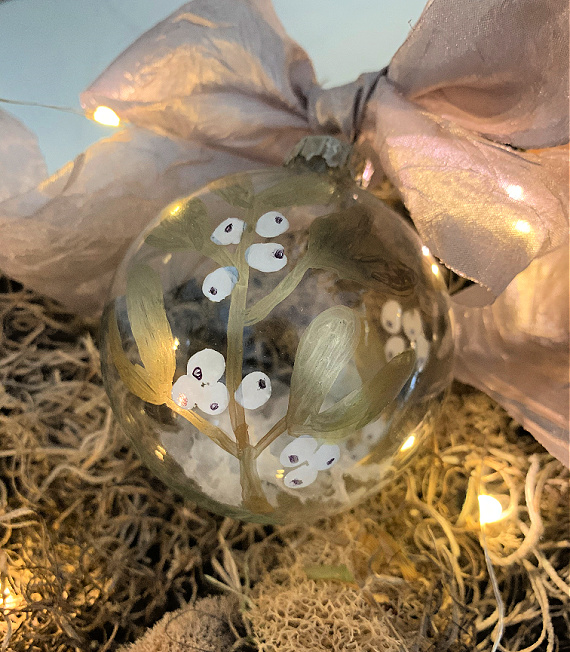
gold and gray snow berry ornament

There certainly are an infinite number of ways to decorate homemade tree ornaments.  The best thing about making some is tailoring them to individual taste and décor!

I recently saw a box of clear glass ornaments on clearance at the craft store and decorating them to my taste and décor was my exact plan.  Actually, the box of ornaments was the only holiday item left in the whole Christmas section of the store on the day I stopped in!  People definitely were shopping earlier this year!

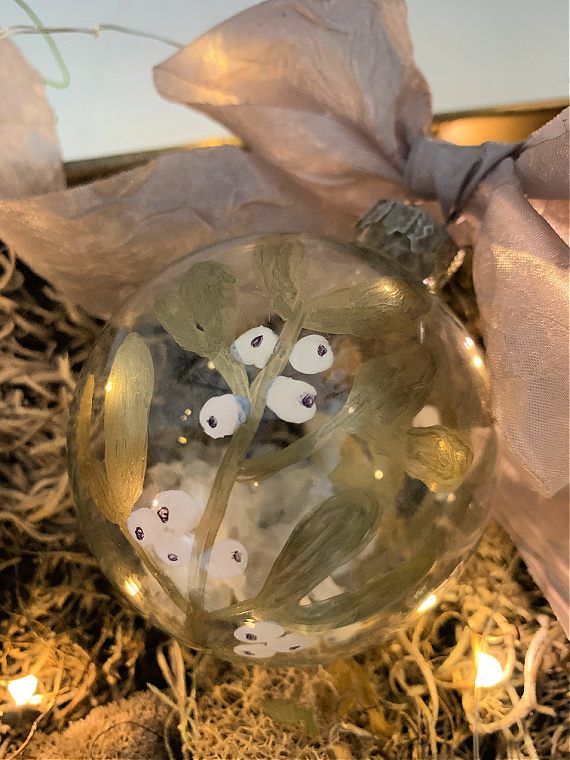
snowberry ornament gray ribbon

I had to purchase the box because it ended up costing less than $2. after the sale price and with a coupon!  Since a snow storm was predicted for Connecticut, I thought coming up with four ornament designs would be a good indoor project while housebound.

And, as a special fun holiday countdown, I am posting the four DIY ornament designs I came up with as a four- day countdown!  For today and the next three days, I will put up a post each day on how I created one of the four ornaments I designed from the plain glass balls!  Today marks day number one of four.

golden and gray clear snowberry ornament

The first design I created uses a paint marker to decorate one of the clear glass ornaments.  (Remember my pussy willow ornament from years ago?  Click here for easy DIY instructions.  That post also shared how to fill a glass ornament to create a cute book club themed ornament.)

I am calling the design I created for the first ornament ‘snowberries.’  I simply drew some ‘stems’ with a gold paint marker.  Then, I used a white paint marker to add white circles.  To make a suggestion of berries, I used a black permanent marker to add a little bit of definition to each white circle or ‘berry’.

To finish it off, I just put a little bit of ‘snow’ inside the ornament…just a little…keeping the clear look, but suggesting a little iciness with the added snow!

That’s it!  Pretty simple!

white berry ornament
One thing I did in advance was to spray the top of the ornament.  I didn’t like the look of the original silver top so I removed the top and sprayed it a champagne gold and let it dry before replacing it.

I hope you were inspired by ornament number one!  Check back tomorrow for ornament DIY number two!

Thanks for stopping by!

Remember to take pleasure in simple things, Jackie

no comments

« Previous Entries     Next Entries »