Subscribe to Pleasure in Simple Things via RSS ReaderFollow Pleasure in Simple Things on InstagramFollow @InSimpleThings on TwitterLike Pleasure In Simple Things on FacebookFollow Pleasure In Simple Things on PinterestEmail Jackie

easy lavender heart sachets

February 10, 2015

easy diy linen heart sachets pleasure in simple things blog

Who wouldn’t want to receive a heart on Valentine’s Day? A great way to give one is to gift a homemade heart-shaped sachet.

pink linen heart sachets pleasure in simple things blog
Today I am sharing some really easy ones I made up using lavender. These sachets are created with just a basic straight sewing stitch and do not require any measuring at all. I used a sewing machine, but they can also be sewn by hand if need be.  (If you would rather try a sachet with a no-sew method, click here for a great option.)

pretty diy heart sachet pleasure in simple things blog
I made a template using a piece of scrap paper by folding it in half and cutting out the squatty heart shape I wanted…approximately 6 1/2 “ across – making it palm size and the perfect little heart to tuck into a drawer. I purchased a small piece of pale pink linen and pulled out a scrap of white linen I had at home in my pile of fabric scraps. Muslin would also work.

lavender heart shortbread cookies pleasure in simple things blog

Another great way to use lavender for Valentine’s Day…add some to your heart shaped shortbreads! (Be sure to use culinary grade lavender.)

I stamped a message on a small piece of the white linen and pulled threads to fray the edges on all four sides. Using the heart template I made, I cut two heart pieces from the pink linen. On the right side of the fabric on one of the pink linen hearts, I positioned the white message piece and attached it with one short running stitch up the middle.
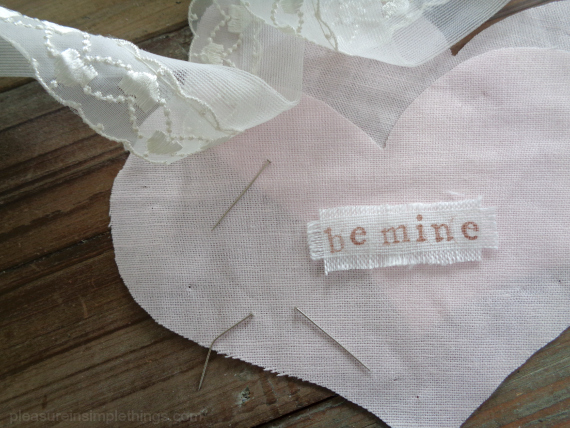
making a lavender heart sachet pleasure in simple things blog
Then, I positioned the two heart pieces – right sides out – together and stitched around the border, roughly 1/4 “ from the edge. Remember – I did no measuring! About 1” before reaching around the heart with the stitching, I stopped to add in the lavender. I spooned in enough lavender to get the look I wanted. Then I went back and finished the stitching.making lavender heart sachets pleasure in simple things blog

I think these sachets are so sweet…and, the lavender smells so lovely!

Because I wanted the look of the raw edges on my heart, it really simplified the sewing and made this a super easy project for any skill level! There is still plenty of time to make some up before the weekend!

lavender heart sachet diy pleasure in simple things blog (2)
Thanks for stopping by! Remember to take pleasure in simple things, Jackie

Sharing with Sand & Sisal, Homework, and Elizabeth & Co.

no comments

rosewater lemonade for valentine’s day

February 6, 2015

rosewater lemonade pleasure in simple things blog

Since a rose is one of the most enduring symbols of love and appreciation, what better way to add something special to a Valentine’s Day table than to serve a beverage enhanced by a rose?  For Friday field trip today, we are adding rose essence to served lemonade to add a subtle suggestion of friendship or romance to the table.

Lemonade is always a great soft drink option – particularly fresh squeezed – and adding raspberries, strawberries, and/or basil is always a nice way to ‘fancy it up.’ But, for a romantic option, an even nicer addition is a little rosewater.

rosewater for lemonade pleasure in simple things blog
The essence of roses is a lovely way to add a little romance to an ordinary beverage…Perfect when a nonalcoholic drink is in order. I add a single tablespoon of rosewater to a quart of lemonade. Obviously, this amount can be adjusted to your taste.

serving a romantic lemonade for Valentine's Day pleasure in simple things blog

Rosewater lemonade is the perfect beverage to serve to friends at a lunch, as a garden club meeting refreshment, or at a Valentine’s Day brunch. I always have a bottle of rosewater in my kitchen because I frequently use it in my baking. If you don’t happen to have any on hand, you can pick it up at a specialty food store or Middle Eastern market.

rosewater lemonade on pleasure in simple things blog

serving rosewater lemonade pleasure in simple things blogNow that you have some rosewater on hand, you may want to try using it in other ways. Click here to see my recipe for rosewater meringues.

Thank you so much for stopping by. Remember to take pleasure in simple things, Jackie

This post is dedicated to someone very special…welcome to the world, Rose Catherine!  In little Rose’s honor, and as a special Valentine’s Day gift to you for sharing pleasure in simple things, I am giving you a gift of a pretty recipe card for rosewater meringues – just send me an email with your address and I will mail one right off to you – in plenty of time for Valentine’s Day!  Happy Valentine’s Day sweet friends. xo :)

Sharing with House of HipstersShabby Nest, French Country Cottage, Craftberry Bush, and Kim Klassen.

8 comments

polka dot fringed pencils diy

February 3, 2015

diy tissue paper pencils and heart tag pleasure in simple things blog

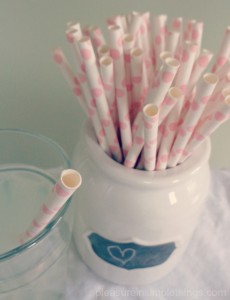
I think most of us that love creating are collectors – often collecting beautiful scraps to recycle for imagined future projects. Today, I am sharing one way I use my salvaged tissue paper by providing a tutorial for creating pretty fringed pencils. How earth friendly to use recycled tissue paper and old pencils that have been in the junk drawer, for who knows how long, to make these cute pencils!

fringed pencil diy pleasure in simple things blog

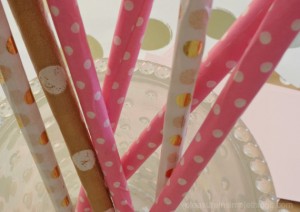
Because Valentine’s Day is so close, I have chosen to use tissue paper that coordinates with a Valentine’s Day theme in one of my favorite patterns…polka dots! Join me as I channel my inner Kate Spade! (Am I the only one that has a polka dot Pinterest board?)

Supplies Needed
Pencils (round)
Spray adhesive
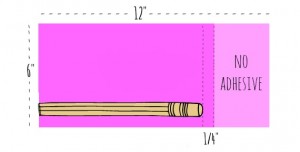
Decorative tissue paper – one 6” x 12” piece for each pencil

Start by deciding how many pencils you will create, and cut the appropriate number of tissue paper pieces. A tissue paper with a little more weight is preferred over a super thin variety.

(You can also use a paper cocktail napkin – by separating the top layer and using that in place of the tissue paper. The fringe will not be as long if you choose to use a napkin, since they are not the full 12” specified. Also, I find the cocktail napkin does not hold up as well as the tissue paper when sharpening the pencil. The beige with white polka dot pencil shown here was made with paper from a cocktail napkin.)

Kate Spade inspired polka dot pencil diy tutorial from pleasure in simple things blog

kate spade inspired pencil tutorial pleasure in simple things blogSpray the wrong side of the tissue with the adhesive, being sure to plan for overspray (protect the area), leaving a section without spray (use a piece of paper to mask the area from spray). The reason for the non-adhesive section is because you don’t want adhesive on the area that will be the fringe. With care, lay the piece of tissue paper on a clean, flat surface – adhesive side up. Carefully line up the pencil in the corner of the tissue paper remembering that the adhesive is in place and put it directly on the right spot the first time. The eraser side will be on the inside, and the writing side on the outside edge, of the tissue paper. Roll the pencil tightly down the length of the tissue paper.

Cut the end of the tissue paper to make the fringe, stopping within a 1/2” of the eraser end of the pencil. You will want to make cuts approximately 1/4” spaces apart – this does not need to be exact – by placing the bottom of your scissors inside the tube you created at the pencil end. As the final step, twist the fringed end of the pencil…because there is a little adhesive on this end, it will keep the twist in place. Trim the fringe to desired length, if needed.

polka dot pencils inspired by Kate Spade tutorial pleasure in simple things blog

That’s it! Cute, right? I made a tag from a round cut from a pink paint swatch and added a gold leaf heart. If you are giving your pencil(s) as a Valentine to a youngster (or someone young at heart), you may want to add a gift tag with a corny Valentine saying like:
• You’ve got the right stuff!
• You are just write for me!
• Write on!
• You’re all write with me!

I hope you enjoyed today’s fringed pencil craft. Maybe I have inspired you to make up a batch to match your office décor, or… to match your kitchen where you keep the grocery list?

polka dot pencil craft pleasure in simple things blog

Thanks for stopping by! Remember to take pleasure in simple things, Jackie

Sharing with NancherrowCraftberrry BushThoughts from Alice, Sand & Sisal, Homework, and Elizabeth & Co.

2 comments

february book giveaway!

January 30, 2015

sample from Feb giveaway book pleasure in simple things

As usual for me at this time of year, my mind wanders towards thoughts of warmer weather, gardening, and spending a lot more time outdoors. Even though I can appreciate some aspects of winter, it is most definitely not my favorite of the seasons.

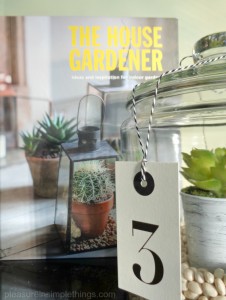
With this in mind, you will understand why I chose The House Gardener by Isabelle Palmer as the book for the February giveaway selection. This book provides tons of ideas and inspiration for indoor gardens…a great way to brighten up cold winter days and to inspire thoughts of the next (warmer!) season ahead.

giveaway book for feb 15 on pleasure in simple things blogThrough this delightful book, Ms. Palmer will show you how to choose, grow, and decorate with houseplants, as well as guide you through the different techniques needed to care for your new “green guests.”

Included in this book are instructions for drying and pressing flowers, suggestions for specific plant types based on conditions, caring for orchids, creating terrariums, and much more!

Just leave a comment during the month of February to be entered into the random drawing at the end of the month.

And, a big congratulations to Carol at Art & Sand for being selected randomly from everyone that commented during the month of January!  Carol, you have won the January giveaway selection, The Kinfolk Table: Recipes for Small Gatherings by Nathan Williams.  This is a beautiful book and I know you will enjoy it!

For those that use Instagram, February’s challenge will be to share heart photos. At this time of year, hearts seem to appear everywhere! Be creative and share a photo of a heart you spot in an unexpected place using the hashtag #pleasuregram! Can’t wait to see what you find! ;)

Instagram challenge Feb 2015 pleasure in simple things blog

Thank you so much for stopping by! Have a wonderful weekend, Jackie xo

P.S.  If you want some inspiration to get started on some indoor gardening, click here for some terrarium inspiration!

3 comments

special date valentine skewer

January 23, 2015

special date fruit skewers pleasure in simple things blog

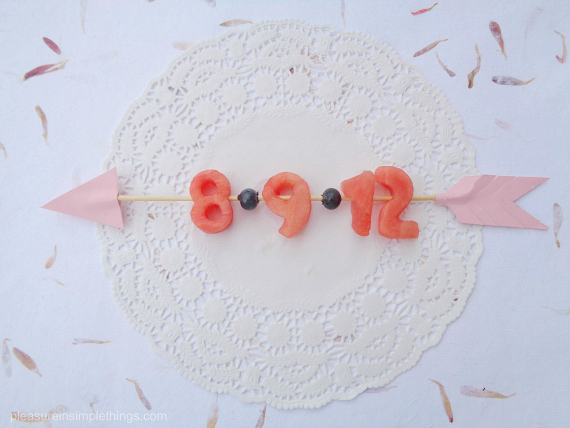
What better way to commemorate a date with significance than to just spell it out…with food! I guess my ‘playing with food’ theme from earlier this week is still going strong! Once I get started with something, it is hard to stop! So, for Friday field trip today, come into my kitchen where I will share an easy and fun idea for Valentine’s Day…or, any day!

valentine fruit date skewers pleasure in simple things

I am using fruit (any melon works great) on a skewer for a Valentine meal to evoke memories of a special day.  Mini cookie cutters are perfect to cut numbers from fruit!  Do you have a date with special significance? Maybe a first meeting? Or, the date you were engaged? Maybe it is a future date – like the due date of your first baby (a great reveal!) or the closing on your first house.  Whatever the significance may be, putting it right out there on the plate is a fun way to include past or future memories to your Valentine’s Day table.

cookie cutters for Valentine fruit kabobs

Can’t think of any date appropriate to serve up? That is okay…just make x’s and o’s…or, hearts. :)  Or, at a family meal, spell out the names of your children (just monitor the sticks!)

making fruit numbers from cookie cutters pleasure in simple things blog

The fruit can be served as an appetizer or as a dessert…served with a spiced yogurt dipping sauce, melted chocolate – fondue style, or alongside a scoop of sorbet (you guessed it – I am thinking of my favorite, coconut lemongrass!).

fruit kabobs for Valentine's Day pleasure in simple things blog

I prefer a simple skewer, but if you want to get fancy, you can simulate an arrow with a few strategically placed pieces of pink paper!

making Valentine arrows from skewers pleasure in simple things

Have you thought of a day you would like to use?  Have fun with it!

Thanks for stopping by!  Have a wonderful weekend, Jackie

Sharing at NancherrowCrafts a la ModeCraftberry BushThe Shabby Nest  and French Country Cottage.

3 comments

homage to squirrels on their day

January 20, 2015

Squirrel pound cake pleasure in simple things blog

I often wonder why I even like squirrels – they are just rodents, after all. And, in my yard, the pesky things are forever digging up all the bulbs I plant in my garden!

But, admittedly, I do like them…I have fed them nuts by hand from my backdoor, I have been in awe of a white one that hangs out in my yard and, I even have a squirrel feeder in a backyard tree!

Well, tomorrow is National Squirrel Appreciation Day. And, even though I don’t know exactly what it is I appreciate about squirrels, I am paying homage to them on their special day!

using a squirrel cookie cutter pleasure in simple things

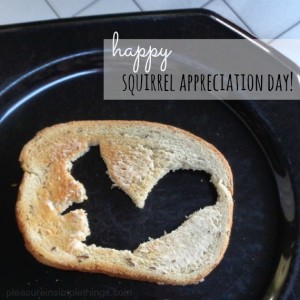
In the past, I have used a squirrel cookie cutter to make cookies, pancakes, and toast embellished with a squirrel shape – what I am saying is that my homage is pretty much playing with food! And this year is no different since I have created a squirrel pound cake!

You may have tried this technique before – using a shape baked into a pound cake. If not, it is not too hard to do, but two pound cakes need to be baked. First, I made a pound cake, adding cocoa to get a dark color. (You could use food coloring if you wanted to do a different motif….say green for a Christmas tree shape, for example.) Anyway, after the pound cake was done, I cut out a bunch of shapes – in this case – squirrels. I lined up the squirrels – one after the other – down the middle of a loaf pan – until they stood from one end of the loaf pan to the other, flat against each other. Then, I made a second pound cake and spooned the batter all around and on top of the squirrels standing in the pan. After the second cake is baked and cut – Voila! Squirrels!

If you have never tried to make a pound cake with a shape baked into it, it is a fun way to add a motif to a theme party.

squirrel cake with walnut sauce pleasure in simple things blog

Because the squirrel part of the cake is actually cooked twice, I thought that part of the cake may turn out a little dry…so here is the sauce I came up with to spoon over the cake. (Of course, it had to be a nut sauce!)

Walnut Sauce
1 cup maple syrup
2 Tablespoons honey
Pinch of cinnamon
Pinch of salt
3 Tablespoons unsalted butter, chopped into small pieces
¾ cup coarsely chopped walnuts
1 teaspoon vanilla extract

Lightly toast walnuts (optional) and set walnuts and vanilla aside. Combine remainder of ingredients in a saucepan and cook on low heat, stirring occasionally, until butter is melted (about 10 minutes). Remove from heat. Serve warm…when ready to use, stir in walnuts and vanilla before serving with the pound cake.

squirrel appreciation day pleasure in simple things blog

Thanks for stopping by! Remember to take pleasure in simple things, Jackie

P.S. If you are a squirrel lover, be sure to check out all the cute photos of squirrels in the squirrel photo album on my Facebook page.

Sharing with Elizabeth & Co, Coastal Charm, Cookin’ and Craftin’ and Sand & Sisal.

4 comments

birch bark diy bookmark valentines

January 16, 2015

white birch heart bookmark pleasure in simple things blog

Today on Friday field trip, I am sharing how I used some decorating leftovers from the holidays to create some cute Valentine bookmarks.

My outdoors theme left me with some rustic looking leftovers and I thought birch bark would be perfect to design a bookmark. I looked through my stash of white birch bark to find some flat, but sturdy, thin pieces to make my bookmarks. Using a craft knife, I cut a rectangle approximately 1 1/2″ x 5 1/2 ” from the bark for each bookmark.

Initial heart birch bark bookmark pleasure in simpel things blog

If you haven’t collected your own bark, you may be able to find some at a high-end garden store.  (I know I have seen it sold at Terrain.)  You won’t be needing very much – depending on how many bookmarks you plan to make, of course.

Next, to embellish the bark, I used a basic wood burning tool (Girl Scouts 101) and burned a heart pattern into the bark. On some of the bookmarks, I also added an initial. You can get as create as you like with this step – add an arrow, 2 sets of initials, etc. If you don’t have the basic wood burning tool, it is a handy thing to have and you can probably find one online for $10 to $15. Don’t get an entire set – just the simple, basic tool is all you need.

birch bark bookmarks with initials pleasure in simple things blog

I used a nail and a hammer to put a hole into the top of each rectangle so I could add a ribbon to the top of each bookmark. For the ribbon, I recycled the handles from my holiday shopping bags. Does the cream color ribbon with red accents look familiar? It is from the handles of an Anthropologie shopping bag! The jute looking one is from the handle of a Terrain shopping bag! I always save the handles for projects just like this!

heart bookmarks from birch bark pleasure in simple things blog

And, that’s it! Simple, right?

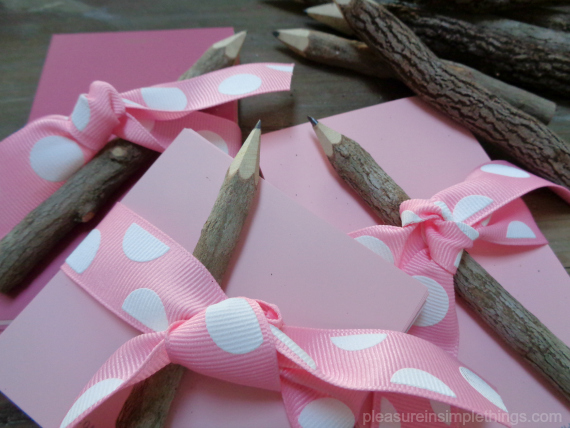
I also had some cute pencils left from my holiday wrapping that I transformed for Valentine’s Day. Twig pencils that served as package tie-ons at the holidays are now packaged with ribbon scraps and paint swatches – my favorite note paper – as Valentine memo packs! (Is it just me that enjoys memorizing the names of current paint colors?! I know…I am definitely color obsessed!)

paint swatch note packs pleasure in simple things blog

What holiday decorating leftovers can you transform into Valentines?  I hope I have inspired you to create some!

Note: You can use some sandpaper to soften up any rough spots you may find on your bark. You can also attach some felt or cardstock to the back of a piece of bark if it seems too thin or is not rigid enough for a bookmark.  Most importantly, be sure to follow the safety guidelines on the wood burning tool!

Thank you so much for stopping by!

Have a wonderful weekend and remember to take pleasure in simple things, Jackie

Sharing at Homework,  Thoughts of Alice, House of Hipsters, Nancherrow, and The Shabby Nest.

6 comments

restoration hardware gallery in ct

January 2, 2015

mixing textures at Restoration Hardware pleasure in simple things blog

Don’t you love walking through Restoration Hardware? Their use of a neutral color palette, thoughtful mix of textures, and minimal use of accessories is definitely right in line with my taste. And, the light fixtures? O.M.G.

lighting at Restoration Hardware in CT pleasure in simple things blog

All the stores are worth a visit, but if you happen to live near Boston, Greenwich, Atlanta, or West Hollywood; you have access to a very special store – the Restoration Hardware Gallery Store. If you don’t happen to live near these places, you can catch a little glimpse of what you are missing on today’s Friday field trip to the Connecticut store.

restoration hardware gallery in connecticut

Formerly on Greenwich Avenue, the store moved a short distance up the street to occupy the old historic Greenwich Post Office and become one of the four RH gallery stores. But, this did not happen until after the space was completely gutted and renovated. Click here to see more about the project.

The grand scale and dramatic lighting of this magnificent store make for a museum-like experience…

a collage of restoration hardware

magnificent lighting at RH pleasure in simple things blog

The store displays a luxury lifestyle with dramatic interior and exterior installations of home furnishings in a gallery setting.

stair case at Restoration Hardware in CT pleasure in simple things blog

bathroom at Restoration Hardware pleasure in simple things blog

Some pieces are a little too masculine for my taste and some a little too heavy on the industrial vibe, but for the most part, I would love to own any one of Restoration Hardware’s furniture pieces (if I had a large enough space to accommodate it, of course!).

chair at Restoration Hardware pleasure in simple things blog

textures at Restoration Hardware pleasure in simple things blog

I love examining paint finishes and have had fun trying my hand at recreating (in look anyway) them in some of my refinishing projects using Annie Sloan Chalk Paint.

table setting at Restoration Hardware pleasure in simple things blog

table accessory at Restoration Hardware pleasure in simple things blog

The Greenwich RH Gallery provides some amazing inspiration and I urge you to visit one of the four gallery locations if you should be provided the opportunity.

lighting at Restoration Hardware pleasure in simple things blog

I hope you enjoyed today’s field trip.

Thanks so much for stopping by.  Remember to take pleasure in simple things, Jackie

Sharing at The Shabby Nest, Kim Klassen’s Friday Finds, French Country Cottage, and House of Hipsters.

3 comments

january book giveaway!

December 30, 2014

page from Kinfolk pleasure in simple things blog

Hard to believe – not only is it the end of the month, but also the end of the year!  Where has the time gone?!

I am pleased to announce that Manda from Oklahoma is the winner of the December giveaway book Winter Cocktails by Maria Del Mar Sacasa!  Congrats Manda!  I know you will enjoy the book!  The two calendars are going to Ashley from Texas and Mary from Chicago.

For the first giveaway book selection for 2015, I have chosen The Kinfolk Table:  Recipes for Small Gatherings by Nathan Williams.  This book is definitely a winner!  The recipes in this book are a collection of recipes from home cooks from around the world where the author has taken us into the home of each of the contributors.  “Here you will find recipes not just for one-pot stews and refreshing salads, but for evenings spent with friends when the hours pass effortlessly, conversation flows naturally, cooking us participatory, and the meal ends with a satisfying sense of accomplishment.”

free giveaway book for January by pleasure in simple things blog

The book is a great way to set the tone for the start of a new year that includes many wonderful friends and many wonderful meals – demonstrating the joy in casual entertaining.  As much a coffee table book as a recipe book, this selection is sure to please!  (So much so, I am willing to send all 344 pages of this large, heavy book to the winner via mail!)

Leave a comment here or on Instagram, Facebook, or Twitter to be entered to win this great book selection that will help you discover the simple pleasures of a shared meal.  Good luck!

For those on Instagram, this month’s challenge is Winter Whites!  Whether it be your skinny white cords paired with a white angora sweater or the piles of snow outside your back door, white in winter is special…a visual treat! For the month of January, let’s share photos of winter whites, using hashtag #pleasuregram. I can’t wait to see your photos!!

Jan 2015 Instagram Challenge pleasure in simple things blog

Thanks so much for stopping by!  I am excited to start a new year sharing pleasure in simple things with you!  Happy 2015!  xo Jackie

8 comments

personalizing homemade party crackers

December 26, 2014

personalized party crackers for 2015 pleasure in simple things blog

Party crackers are nothing new. But, last year when a family member used them as wedding favors, I started giving them a little more thought. Why not make my own personalized version of a party cracker? So, I had been thinking about them for a while…I even saved all my empty toilet paper rolls (for over a year!) to use in creating some of my own.

For my research, I spoke to my friend from London. Julie filled me in on proper party cracker etiquette. The three required items that must be contained in the cracker – per tradition – are: a toy, a paper crown, and a joke. I planned on following tradition, but for my version, I decided to substitute a treat for the toy.

candy for new year's party crackers pleasure in simple things blog

I had the design aspect in my head and I was pretty sure I could come up with a good looking cracker as well as the right combination of contents…but, what about the noise the cracker makes when it is opened?! That was the part I wasn’t sure about! After looking around online, I found the ‘crack’ was actually a thin strip of paper that contained a little bit of gun powder called a cracker snap.  I purchased the cracker snaps from Olde English Crackers and found a video they posted on the assembly steps to create the crackers. Click here for the instructions. (Note: I did not use the rollers shown on the video and had no trouble making the party crackers without them. I did find it was very useful to make a center line with a pencil on both the toilet paper roll and the wrong side of the decorative paper to use as guides. )

papers for party crackers pleasure in simple things blog

Since my first set of party crackers were being created for New Year’s Eve, I decided the outside of the crackers would be black (with an added hint of green for an accent color) to coordinate with a set of black dishes I planned to use for New Year’s Eve dinner. If you decide to make some crackers, think about what color(s)/pattern(s) would look best on your dinner table!

I bought sheets of decorative paper at Jo-Ann Fabric and Craft Store (on sale) for just pennies a sheet. I chose coordinating black patterns with stripes, stars, and script writing. I personalized some circle gift tag stickers with ‘2015!’ from Tiny Prints (click here for website) in my black and green color theme and I used a green sparkle ribbon to tie the ends of the crackers.

contents of personalized party crackers pleasure in simple things blog

For the inside contents of the crackers, I decided on a neutral color scheme. I printed jokes on my home computer that I found online – adding a little embellishment with a gold marker. I crafted the paper crowns from a pretty taupe and white patterned tissue paper. And, for the treat, I made up little bags of champagne flavored candy that I found at Williams-Sonoma…so elegant and so appropriate! A little handful of homemade confetti added a little extra touch of gold to the contents!

making jokes for party crackers pleasure in simple things blog

Party crackers are so much fun to create – personalizing them is the best part! The only limitation is keeping your contents within the confines of the inside space of an empty toilet paper roll!

making personalized party crackers pleasure in simple things blog

I hope I have inspired you to try your hand at creating some party crackers on today’s Friday field trip! I already have some in mind for my 4th of July party this summer! If you need help with some ideas or have questions, send me an email and I’d be happy to help!

Thanks so much for stopping by! Remember to take pleasure in simple things, Jackie

Sharing with The Shabby Nest and Elizabeth & Co.

no comments

« Previous Entries     Next Entries »