Subscribe to Pleasure in Simple Things via RSS ReaderFollow Pleasure in Simple Things on InstagramFollow @InSimpleThings on TwitterLike Pleasure In Simple Things on FacebookFollow Pleasure In Simple Things on PinterestEmail Jackie

girls night out

July 22, 2016

water station pleasure in simple things blog

Making Mason jar terrariums is a fun and easy summer activity.

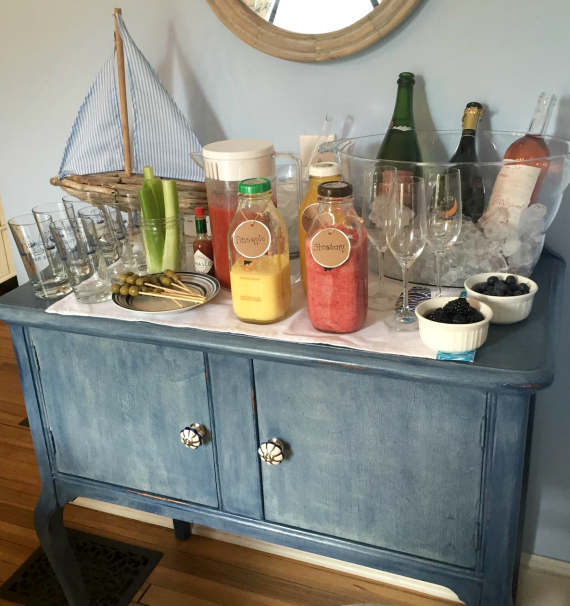
For today’s Friday field trip, I am bringing you to an outdoor garden to share this activity on a stunningly gorgeous summer evening.  Cold drinks and interesting conversation are the perfect accompaniments for this fun outdoor get together.

terrarium garden workshop pleasure in simple things blog

Why not add this activity to your next summer soiree?  A very basic terrarium can be easily created with Mason jars, potting soil, charcoal, and decorative pebbles.  All the materials needed are easily purchased at a local dollar store or discount store.

Ball jar plants pleasure in simple things blog

To create the terrarium, a 1” layer of pebbles is added to the jar, followed by a thin layer of charcoal and 3” – 4” of potting soil.  From there, moss and/or small plants are added as well as any decorative items.  After a light watering, the terrarium is complete and the lid can be screwed on.

mason jar plants pleasure in simple things blog

Adding a decorative feature like a small mushroom or animal gives the terrarium some extra character.  (The owls used in these terrariums are actually beads that were attached to toothpicks.) Providing raffia to your guests to tie around the mouth of the jar of the finished terrarium is also a nice detail to include.

terrarium owl pleasure in simple things blog

As an option, cute little instruction cards can be created and printed on a home computer.  Instruct the new terrarium owners to mist the garden lightly occasionally and to remove the top for a while if too much moisture develops.

 pleasure in simple things blog

I hope I have inspired you to have a little terrarium building activity at your next get together  – the perfect way to spend a beautiful summer evening!

Ball jar decorations pleasure in simple things blog

Thanks for stopping by.  Have a wonderful weekend!

Remember to take pleasure in simple things, Jackie

no comments

bridesmaid proposal bags

July 12, 2016

vegan leather bridesmaid proposal bags pleasure in simple things blog

Today, brides-to-be don’t simply ask a few close friends to serve as their bridesmaids.  Rather, they create a whole “would you be my bridesmaid?” occasion to request their friends’ services.

The most popular way to do this seems to be a ‘bridal box.’  This is when a box is sent to each potential bridesmaid through the mail.  Inside each box is a gift chosen by the future bride, requesting each recipient serve as a bridesmaid.

unique bridal proposal bags pleasure in simple things blog

I thought; why not use a ‘bridal bag’ instead of a box!  A custom bag seems so much cooler than a box!

Working with the future bride and my favorite custom bag creator – Ralph & Martha – this is what we came up with! (You may remember Ralph & Martha from my anchor bag post – click here to see more on that.)

ralph and martha bridal proposal bags

The resulting custom creation was a vegan leather bag displaying each gal’s initial in metallic gold and a gilded tassel pull!  When completed, the bride enclosed little surprises inside each bag before distributing them.

tassels on bridesmaid proporal bag pleasure in simple things blog

We toyed with the idea of printing the text ‘would you be my bridesmaid?’ on a custom fabric for the lining, but decided against it.  Instead, the bride wrote an individual personal note to each potential bridesmaid and the lining fabric was used as an opportunity to give a hint of the wedding ceremony location.

fern bag pleasure in simple things blog

The same fern fabric used for the bag’s lining was used to create a surprise bag for the bride-to-be!

bride's bag pleasure in simple things blogI hope you are inspired to create, or help create, a bridesmaid proposal that is unique!

Thanks for stopping by!

Remember to take pleasure in simple things, Jackie

2 comments

99 cent diy table numbers

July 5, 2016

Wedding Table Number 99cent DIY pleasure in simple things blog

The cost of throwing parties, particularly weddings, has gotten crazy expensive.  The good news is that the little details that make events special can definitely be beautifully executed with very little cost.  Like my friend Phyllis says “it’s not what you have, but what you make of it.”

Wedding Table Number DIY pleasure in simple things blog at ocean

These easy DIY table numbers are made from 99 cent plastic – yes, plastic – Ikea photo frames!  You may need to spend a little more than 99 cents to create one if spray paint and paint pens aren’t part of your craft supply repertoire.  I happen to have both of these items on hand.

diy wedding table number process pleasure in simple things blog

You can choose a color spray paint that best matches your party décor, but choose one with a label indicating adhesion to plastic.  I like metallic paints because they add an air of elegance to the final product.

Wedding Table Number DIY with shells pleasure in simple things blog

Purchase one frame for each party table.  Unwrap each frame, removing the two acrylic plastic inserts and place them aside.  Spray the 2 pieces of the frame(s) completely with 2-3 light coats of paint, following the directions on the spray paint can.

Wedding Table Number DIY protective covering pleasure in simple things blog

While the paint is drying, you can add the desired table number to one of the 2 acrylic pieces using a white, (or whatever color you choose), paint pen.  Be sure to remove the protective plastic covering the acrylic before you begin.  If you aren’t comfortable drawing a number freehand, no worries!  Simply print out a number/type style you like from your home computer and trace it!  That is the beauty of the acrylic!  Once completed, you can put the second piece of acrylic carefully over the painted piece to protect it from scratching.

Wedding Table No DIY pleasure in simple things blog

Lastly, screw the bottom piece of the frame into the top section and slide in the acrylic pieces.

Wedding Table Number DIY floral pleasure in simple things blog

Beautiful, right?  These table numbers coordinate well with many different party themes and decors.  I hope I have inspired you to give them a try!  Of course, you can always use your painted frame to display a photo!

Wedding Table Number DIY close up pleasure in simple things blog

Note:  I used Rust-Oleum metallic spray paints in the colors – some photos are in pure gold and some in hammered rosemary.  The pure gold is a smooth finish.  The Rust-Oleum hammered metallics create a textured paint finish that you can see in my close-up photo above.

Thanks for stopping by!  Remember to take pleasure in simple things, Jackie

no comments

laguna beach!

June 24, 2016

shoreline at Laguna Beach pleasure in simple things blog

I recently made my first visit to Laguna Beach!  It may have been a brief encounter, but it was a fabulous one!  I am sharing a few photos today on Friday field trip.

Laguna Beach pleasure in simple things blog

waves at Laguna BEach pleasure in simple things blog

I was in awe of this iconic beach and I had to be sure and document my visit with a few photos.  I hope they inspire you to take a trip to a beach – no matter how brief – on one of these marvelous summer days!

 Beach pleasure in simple things blog

I didn’t do any shopping that afternoon in Laguna, but I did bring back a valuable memento.  Holding the papers on my office desk is a smooth, pale gray, heart shaped stone that I have marked very carefully in white permanent marker with the letters L-A-G-U-N-A.

the Laguna Beach CA pleasure in simple things blog

It is a reminder that I will be back someday!

weather at Laguna Beach pleasure in simple things blog

Thanks for stopping by!

Have a wonderful weekend!  Remember to take pleasure in simple things, Jackie

no comments

family heirloom before & after

June 21, 2016

new finish and paint pleasure in simple things redo

I am excited to show you a finished piece I have been working on for quite some time.  You may have seen a little sneak peek of my progress a little while back, but today I am showing the completion of the project.  The piece is a special one because it is the only piece of furniture my friend Tracy kept from her mom’s home after she passed away.before & after with Annie Sloan Old Ochre pleasure in simple things blogI wanted to transform this old buffet into something a little more current for Tracy’s home.  First, I did some cleaning of the piece. Then, since the piece had been exposed to a lot of smoke and I was afraid the paint may not adhere properly, I took an extra step of starting with a coat of shellac.  Then, I painted the piece with two coats of Annie Sloan Chalk Paint in Old Ochre, making sure to use visible brush strokes – I think that adds some character for an aged look.

new Annie Sloan redo pleasure in simple things blog

After I had the entire piece painted, I decided I should have kept the top of the piece in a natural wood!  So, I stripped off the paint I had already put on and gave it a really good sanding with an electric sander.  From there, I added three coats of stain and a clear sealer.  I had made the right choice…I loved the way the top came out!

furniture redo finish with Annie Sloan pleasure in simple things blog

For the rest of the piece, I highlighted some areas with Annie Sloan Country Grey.  I love the subtle contrast between the Old Ochre and the Country Grey paint.  I also added a wash of Country Grey and water to add some depth of color.  Next, I added a coat of Annie Sloan clear wax. I did some light distressing before adding a second coat of wax and added some dark wax in areas.  I think the piece has a great aged look without being overly distressed.

old and new pulls and knobs pleasure in simple things blog

Next, I needed to update the furniture’s hardware.  The original knobs were very simple.  I decided to use something a little more ornate and found some knobs I loved for the piece at Anthropologie.  The pulls were a little harder to figure out.  You can see one of the old pulls above.  I wanted a more updated look, but nothing was available that appealed to me in the width of the old pull.  I ended up making a special order from Klaffs – a large bath and kitchen store in my area.  I would have to fill in the holes from the old pulls and drill new ones to accommodate a newer sized pull.  It took me a couple hours to look through a large selection of pulls before I made a decision, but ordering the new hardware was definitely the right decision…the new pulls are great for the piece!

new knobs on furniture redo pleasure in simple things blog

I think the new hardware is perfect!

new knobs pleasure in simple things furniture redo

Don’t you agree?

new stained top on furniture redo pleasure in simple things blog

And, I think the decision to stain the top of the piece was a great one as well!  The piece is ready for its new home!  I hope it serves Tracy’s mom’s memory proud!

finished furniture redo pleasure in simple things blog

Thanks for stopping by!

Remember to take pleasure in simple things, Jackie

2 comments

creating white sea glass

June 14, 2016

a weck jar after diy sea glass paint pleasure in simple things blog

Last week, I showed you how easy it is to create a sea glass look to glass using the new Krylon spray paint.  I showed a couple of examples to get you inspired.

a sea glass diy pleasure in simple things blog

I received so many emails asking why I didn’t include the ‘ice’ color in my post, I decided to dedicate today’s post to a demonstration of that particular color!

creating a sea glass jar pleasure in simple things blog

The ‘ice’ color of the Krylon sea glass spray paint actually happens to be my favorite of all the colors!  I guess I should have included it in my post last week, but here goes!  As I mentioned last week, it takes mere seconds to complete a spray painting project!  Here you can see me spraying a cute little Weck jar.

process of sea glass spray paint

And here, the beautiful result!  Ready to use in minutes!

a diy weck jar in sea glass pleasure in simple things blog

Thanks for stopping by!  Remember to take pleasure in simple things, Jackie

1 comment

a redo becomes a buffet bar

June 10, 2016

before and after furniture Annie Sloan Napoleonic blue pleasure in simple things blog

Normally, once I post about a redo on a piece of furniture, I don’t ever show it again.  Today I am going against the norm.  For Friday field trip, I am giving you a glimpse of a past furniture redo in its new home.  It started as a paint project in October 2015, when I transformed an old buffet with Annie Sloan Chalk Paint in Napoleonic Blue.

(For the full, original post of before and after photos, click here.)

The owner of the buffet recently used it in her coastal home to set up a bar for a brunch with friends and today I am showing you how great the piece looks ‘in action!’

new brunch bar pleasure in simple things blog

Not only does the bar buffet look wonderful, but the brunch food does as well!  Let me share the menu!

Marinated tomato and Burrata salad…

brunch salad pleasure in simple things blog

Broccoli and cheddar quiche…

brunch2 pleasure in simple things blog

Crème brulee baked French toast…

brunch3 pleasure in simple things blog

Chateaubriand roast with basil butter and rosemary…

brunch4 pleasure in simple things blog
and, of course, Mimosas!

brunch5 pleasure in simple things blog

Nice job styling the bar and creating the food, Ashley!  I am so glad the piece has a great home!  Thanks for sharing!

I hope I have inspired you to use a piece of your own furniture in a special way!  Thanks for stopping by!  Remember to take pleasure in simple things, Jackie

no comments

sea glass spray paint

June 7, 2016

Krylon sea glass paint pleasure in simple things blog

We have all made sea glass looking jars from glue, water, and some food coloring – haven’t we?  If you haven’t, please don’t even try it!  There is a new sea glass spray paint that makes this process so much quicker and so much less of a mess!  The effect is created, literally, in seconds -and dries almost as fast.  It is possible to transform your entire recycling bin of bottles in mere minutes!

demonstrating Krylon sea glass paint pleasure in simple things blog

I actually had an empty recycling bin when I decided to demonstrate this new Krylon spray paint, so I made a quick trip to the dollar store.  I found some great looking bottles for this exercise and sprayed some to use as table numbers – a fun way to dress up party tables!  After spraying, I just added numbers.before and after Krylon sea glass paint pleasure in simple things blogOf course, there are tons of ways to use the bottles once they are painted!  Like…making labels to add to a bottle – easy to do with a home computer!

sea glass painting pleasure in simple things blog

Because I ended up buying bottles from the dollar store, they are all the same size and shape, but the beauty of using this paint is that you can create a cohesive grouping of bottles by simply painting a variety of shapes and sizes all in the same color.

Krylon amber sea glass paint before and after pleasure in simple things blog

This Krylon sea glass paint is available in more colors than you probably have sea glass!  They include lemon, aqua, ice, cornflower, rose, sea foam, ruby, and amber.  Of course, though I didn’t use it for this exercise, ice is probably my favorite!  Yes, white is my favorite color in sea glass!

Here is an example of the amber color paint.  I used it on a clear glass candlestick.  When I put some of my brown sea glass next to the painted candlestick, look how similar they appear!

Krylon amber sea glass paint pleasure in simple things blog

Krylon sea glass paint at night pleasure in simple things blog


I hope I have inspired you to create something fun of your own in your favorite sea glass color using Krylon spray paint!

P.S.  For an evening party, battery operated lights in bottles are a nice addition. :)

Thanks for stopping by!

Remember to take pleasure in simple things, Jackie

no comments

june book giveaway!

May 31, 2016

Rising to the occasion book giveaway pleasure in simple things blog

It is the time of year for celebrations!

Having the ability to give an impromptu toast at a special celebration is definitely a skill.  So, why not be prepared and have the perfect toast prepared before you attend your next celebration?

pleasure in simple things giveaway book rising to the occasion june 2016

You can, if you win this month’s book giveaway!  As the winner, you can use one of the many toasts in this book at your next occasion or, use one as a springboard to create your own version of inspiring words!

Rising to the Occasion by Paul Dickson is a great resource to have on hand for your next special occasion.  Simply leave a comment on this post to be entered to win.  Good luck!

free book rising to the occasion pleasure in simple things blog

Congratulations to Emily,  the winner of last month’s book giveaway Salad Dressings by Jessica Strand.  And, thanks for your kind words Emily!  (Click here for more on this book.Have some fun creating some summer salads!  Thanks to everyone who entered!

Instagram users, read on!  Since June marks the start of summer, let’s share photos of beach finds this month!  Use hashtag #pleasuregram during the month of June to share!  I can’t wait to see your finds!

june 2016 instagram challenge plesure in simple things blog

Thanks for stopping by!  Remember to take pleasure in simple things, Jackie

5 comments

coastal in newport, ri

May 27, 2016

headboard detail pleasure in simple things blog

Earlier this week, I shared some of the wedding details from the Newport, RI wedding I recently attended.  Today, for Friday field trip, I am sharing some of the coastal décor details from my stay at the Newport Marriott.

The photos above and below are details from the bed headboard.

ewport Marriott light detail pleasure in simple things blog
The painting hanging on the bathroom wall created the feeling of a porthole.

port hole painting pleasure in simple things blog

The restaurant booths:

restaurant detail pleasure in simple things blog

Newport RI Marriott restuarant pleasure in simple things blog

The nautical themed art work was not limited to the bathrooms – there were plenty of pieces throughout the hotel.

painting at Newport RI Marriott pleasure in simple things blog

This light fixture was created from a collection of bottles.

light fixtures pleasure in simple things blog

Loved the numbers on the back of the balcony chairs!

balcony in hotel Newport RI pleasure in simple things blog

The use of ropes was a constant throughout.  Here are a couple additional examples:

rope detail in Newport Marriott pleasure in simple things blog

ceiling ropes pleasure in simple things blog

Maybe you have been inspired to create a couple of your own coastal touches?  Maybe from rope?

Thanks for stopping by!  Have a really marvelous holiday weekend and remember to take pleasure in simple things, Jackie

no comments

« Previous Entries     Next Entries »