Subscribe to Pleasure in Simple Things via RSS ReaderFollow Pleasure in Simple Things on InstagramFollow @InSimpleThings on TwitterLike Pleasure In Simple Things on FacebookFollow Pleasure In Simple Things on PinterestEmail Jackie

diy constellation easter eggs

March 6, 2018

Astrological sign Easter eggs by pleasure in simple things blog

I love dyeing Easter eggs.  Each year I like to come up with a new egg decorating idea.  And, I love creating a themed series of decorated eggs!  Remember the picnic theme, for example?  (Click here to see.)  This year I decided to create a series of Easter eggs depicting the astrological constellations.

I started by creating a backdrop for my star formations!  I added purple and a little bit of black paste food coloring to a ½ cup of boiling water with a teaspoon of white vinegar.  I used this to dye my eggs.  Once the eggs were dry, I used an old kindergarten technique to splatter white paint onto each egg.  This simply involves loading a stiff brush or toothbrush with paint and splattering it onto the eggs using a finger or popsicle stick flicked against the bristles of the brush.  (Something I first used when creating leaf prints in kindergarten art class!)
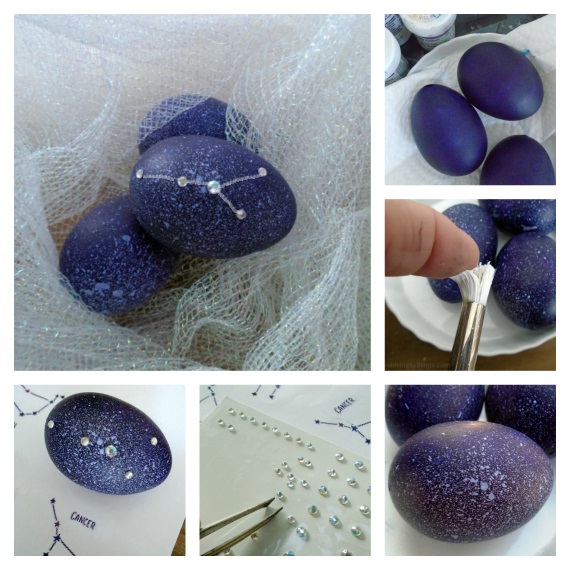
collage with markerNow that a night sky is created on the eggs, I can go ahead and create the individual star formations.  For this, I am using little stick-on crystals from the craft store.  I created a graphic for myself to use as reference for the placement of the stars for each constellation.  I decided to use a thin white marker to add some definition to the star arrangement – even though this wouldn’t happen in the actual sky!  I included a graphic here for you to use as reference when creating your own eggs designs.

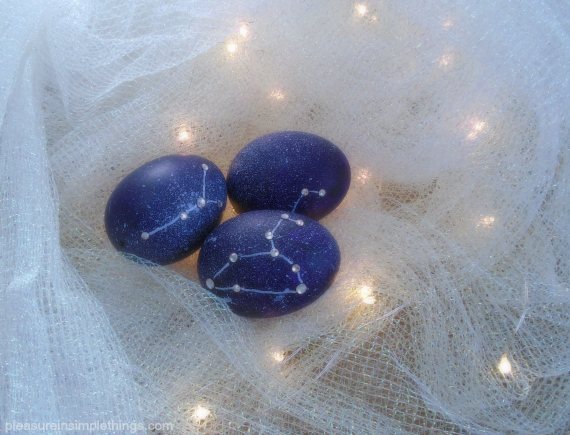
Star formations of astrological constellations

These eggs are easy to create and I think they are really cool looking.  Have fun with it!  Create an egg with your own sign, the signs of each family member, or all twelve signs!

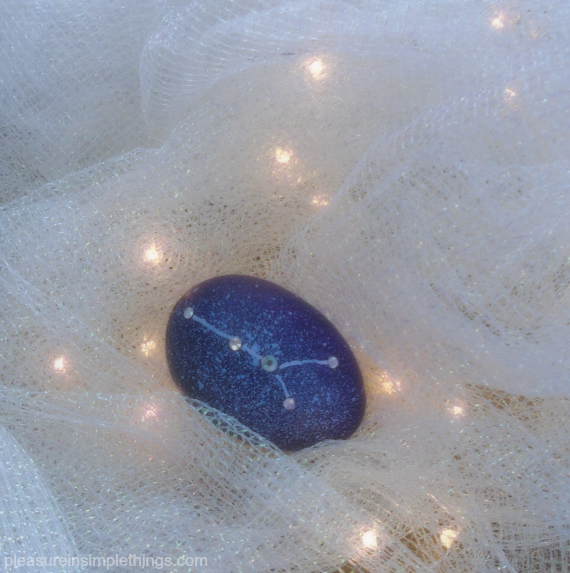
cancer constellation Easter egg pleasure in simple things blog

I made mine on emptied out eggs so that I can display them for Easter each year.

I hope I have inspired you to create some astrological sign designed Easter eggs!

Thank you for stopping by!

Remember to take pleasure in simple things, Jackie

no comments

valentine candy craft diy

January 26, 2018

making candy pops for Valentines Day

In the same way gingerbread houses are decorated for Christmas, or eggs for Easter, why not create candy skewers for Valentine’s Day?  In my last post, I showed you some elegant Valentine’s Day skewers I created as gifts.  Today, for Friday field trip, I am using the same idea as a fun children’s activity!

cookie skewers

candy pinwheel on a stick

Just assemble a table full of Valentine’s themed candy and/or cookies, and add the children!

candy snake sticks

Just be cautious when using skewers with children – safety first!  Consider the age of the children you are with, and be sure to supervise appropriately!  (You can even cut off the sharp ends of the skewers if necessary.)

valentine candy fun

You may just find that the finished skewers never make it to a recipient!  But, the children will have a blast creating (and eating) them!

Thanks for stopping by!  Have a fabulous weekend!

read my lips valentine

Remember to take pleasure in simple things, Jackie 
no comments

valentine, read my lips

January 23, 2018

gummy mouth pops

Doesn’t everything taste better on a stick?  Think about cake pops – a bunch of cake crumbs instantly become chic when placed on a stick!  Why not do the same thing for Valentine’s Day…elevating candy or cookies to a new level by simply adding a stick!

making candy hearts on a stick

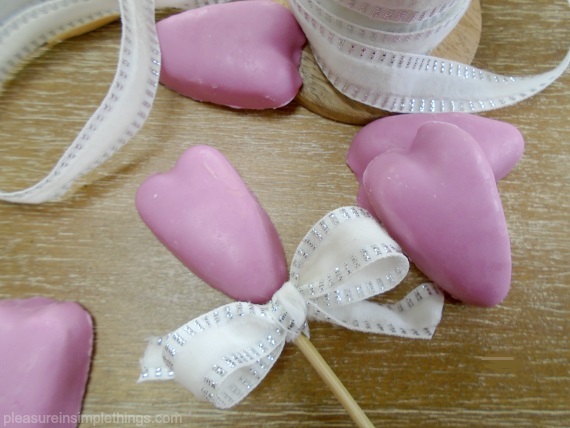
Using Reese’s peanut butter hearts to make these pretty skewers.

It is easy to transform treats into chic Valentine’s Day candy skewers to gift to loved ones.

heart on a skewer

One skewer can be a perfectly elegant gift (and very affordable!)

Valentine Cookie pop

Or, create a whole bouquet of skewers!

lip pops for Valentines

I hope you are inspired to create your own Valentine’s Day skewers!  If you want, package your creation in cellophane and add a Valentine’s Day note with a witty pun.  For my lip bouquet, I added a note that said “Valentine, read my lips.”  Leftover pieces of ribbons from holiday packages are perfect to tie to your finished skewers.

Reeses candy heart on a stick

Thanks for stopping by!

heart shaped cookies

Remember to take pleasure in simple things, Jackie

no comments

christmas movie nostalgia

January 5, 2018

The Winter Warlock

Last year I shared photos from the holiday display at the Beaumont Farm in Wallingford, Connecticut.  It was such a cool display of scenes from the movie Christmas Vacation.  Since I shared those photos, I came to realize that Bill Beaumont, owner of the farm, creates a display every year and has been for around 15 years.

the workshop

entrance to santas workshop

Each year, Beaumont creates a display using a classic Christmas movie as inspiration.  This year, I didn’t make it to the farm until after Christmas, but I still want to share this year’s display for today’s Friday field trip.

mountain of the whispering winds

Beaumont chose an oldie this year – a stop motion Christmas television special originally broadcast in 1970.  The Rankin/Bass production is called Santa Claus is Comin’ to Town, based on the song of the same name.

Topper the penguin

If you have ever seen this classic, you know Fred Astaire is the narrator of the movie.  He tells the story of how Santa Claus and several traditions came to be.

North Pole mail

Beaumont did an amazing job of portraying the movie on the corner of his farm – creating 9 characters and 6 scenes that truly give visitors the feel of the original production.

santas worskhop window

Welcome to Somber Town

I wasn’t sure I had seen the movie, but once I started touring the display, I instantly recognized the evil Winter Warlock…I also remembered Burgermeister Meisterburger and Fred Astaire’s postal carrier character.

Mayor Burgermeister Meisterburger

How about you?  Do you remember this movie?

wanted Kris Kringle

I would love to request Elf for next year’s display.  ;)

winter warlock

Thanks for stopping by!

Remember to take pleasure in simple things, Jackie
To see last year’s Christmas Vacation display, click here. 

no comments

tis the season

December 26, 2017

xmas in a tub

If you are a follower, you know I post to this blog every Tuesday and Friday without fail.  Guess what?  Today, I did not prepare a post.  Of course I won’t miss a post lol, but I didn’t prepare anything.

Yesterday, I totally lived in the moment with my family.  What a fabulous day!

Today, I am off to work.  So, no post!

In keeping with the wonderful day I had yesterday, I want to thank you all for sharing pleasure in simple things with me.  It is truly a gift to connect with so many people through this blog.

xmas stockings at ohio country living

I will see you again on Friday!

Have a fabulous day enjoying the wonders of the season!

Remember to take pleasure in simple things, Jackie xo

P.S.  These couple photos were taken at the Country Living Fair in Ohio. :)

no comments

ice, ice baby

December 22, 2017

homemade Irish Cream with home made coffee ice

Making homemade Irish Cream for the holidays is a tradition in my family.  My mom and sister always put it in their Christmas morning coffee.  I prefer to drink it cold.  A great addition to the cold version is coffee ice!  Making ice cubes in advance from leftover coffee makes this special holiday beverage perfect!  But then, a hint of coffee flavor makes many things perfect…think chocolate!

Making special ice cubes is a festive way to enjoy your favorite beverage on Christmas.  Depending on your drink of choice, you can choose to add fruit or herbs to your ice as an alternative to making coffee ice.  For the children’s beverages, try adding mini gummy bears or crushed candy canes to the ice!  What child wouldn’t like to see some gummy bears…or worms!…floating in their juice!

making coffee ice cubes for Irish Cream

Adding extra fun little details at the holidays is a great way to make the day special!

Using decorative ice cube trays is another festive idea.  Ikea usually has some cute ones!  Make little ice cube trees, angels, or other unusual shapes.  There are also trays available that make ice shot glasses if shots are more your thing!

frozen coffee shot glass

If you want our family recipe for homemade Irish Cream, click here.

I hope I have inspired you to make some special ice cubes for the holiday…a cute and easy detail to add to your holiday!

Thanks for stopping by and remember to take pleasure in simple things!

Wishing you and your family much joy this holiday season, Jackie xo

no comments

wrapping it up!

December 19, 2017

black and white xmas wrap

I am always excited to find a great recipe using saffron.  I have a nice big container of it that was a gift from a friend.  I treat it like gold – quite literally – since it is almost as expensive!  (Saffron is the world’s most costly spice by weight.)

pistachio saffron biscotti

Don’t saffron pistachio biscotti sound perfect to enjoy with a hot beverage by a fire?  I thought so!  I made up a batch from a recipe I found in my favorite holiday cookbook (currently)  – Holiday Cookies by Elisabeth de Nederlandens.

black white and trees wrapping

Now that holiday preparations are getting down to the wire, I am ‘wrapping up’ on all counts!  The biscotti is getting packaged on platters or in individual servings as gifts.  Other presents are also getting wrapped and placed under the tree!

biscotti on a plate

It is so hard for me to ‘wrap’ my head (pun intended) around the fact that we are in the last week before Christmas!  This week there will be a major focus on baking, wrapping, and holiday card mailing!  Stop back on Friday to share one last time before Christmas!

Thanks for stopping by!  I hope your holiday planning is going well and I hope you are inspired to get your baking and wrapping in check!

wrapping in black and white

Remember to take pleasure in simple things – especially during the holiday season, Jackie xo

no comments

bottle brush tree salt shakers

December 12, 2017

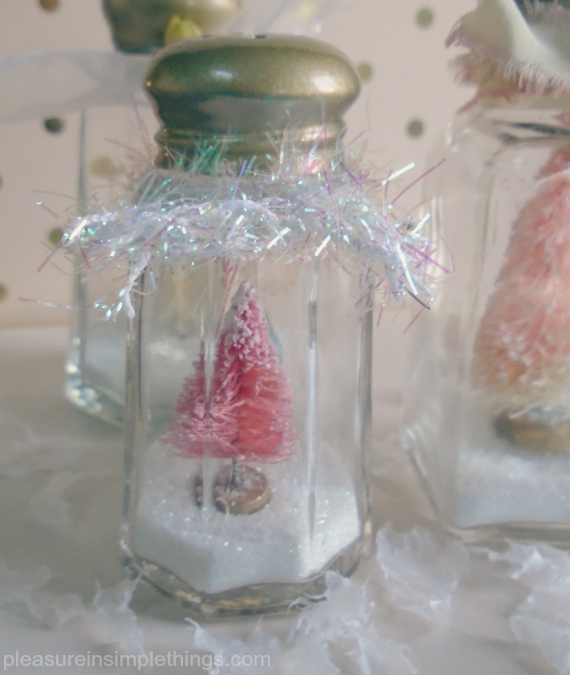
pink bottle brush tree in salt shaker

Everyone loves a salt shaker with a bottle brush tree for the holidays!  How do I know?  One of the most pinned holiday item of mine is of the salt shaker snow globes I made some years back.

holiday salt shaker diy

Because of its popularity, I am sharing a few new ones I made this year. The last ones you saw were all done in neutrals. (Click here to see.)  Today, the shakers were created to complement a pink and gold theme.

This is such an easy DIY.  For my pink and gold theme, I started by first spraying the tops of all the shakers with a matte gold metallic spray paint.

pink and gold xmas

To create a shaker, put the bottle brush tree you have chosen into the shaker.  I use a glue gun to put a bead of glue on the base to hold the tree securely in place.  (Sometimes I find it easier to use tweezers to put the tree in place.)  Then added some sparkly ‘snow’ – some pretty glitter – inside the shaker.

pink bottle brush in a salt shaker

Decorating with ribbon, beads, jingle bells, etc. personalizes the shakers.  This is a great way to use those little scraps of ribbon you haven’t been able to throw out!

An easy and fun DIY!  You may want to add names to each and use as place cards for a holiday meal.

white bottle brush in salt shakers

Look at this little one I made with a vintage snow baby in place of the tree!  I used some sea glass spray paint to frost the glass of the shaker.

salt shaker snow baby

I hope I have inspired you to make some bottle brush tree salt shakers!

Thanks for stopping by!

Remember to take pleasure in simple things, Jackie

no comments

green tea holiday bark

December 8, 2017

close up candy bark

I mentioned in a previous post that I found a great recipe book for trying some new food gifts this year.  Today, on Friday field trip, I am taking you into my kitchen to check out the first one I chose to make.  The recipe I tried is candy bark from the new recipe book Holiday Cookies:  Showstopping Recipes to Sweeten the Season by Elisabet der Nederlanden.  (For more on this book, click here.)

I couldn’t wait to make this!  I have friends that love green tea and I was sure the bark would look festive with green from the tea and red from freeze dried berries.

piece of candy bark

As it turned out, the recipe did not disappoint!  It looks super festive and tastes great.  I do have a few tips if you decide to make this for giving.

First, green tea powder can be super expensive – shop wisely!  I found some at HomeGoods in the food section for a great price!  You can also probably find it as a teabag.  Just be sure to check the label on whatever you purchase and be sure green tea is the only ingredient.  I found the freeze dried berries at a great price at Target in the section where trail mix and nuts are sold.

collage making candy bark

As far as preparation – do not let the dark chocolate layer get too cold before layering the green tea mixture on top!  What I found out is that the green tea layer does not adhere to the chocolate if it is too cold – as soon as the chocolate is firm, spread the green tea layer on top.  Also, work quickly to add the ingredients to the green tea layer because it sets up quickly!

christmas candy bark

This candy was so easy to put together and so quick to make!  Now, it just needs a cute package for gifting!

gift package of candy bark

Thanks for stopping by today!  I hope you are inspired to make a food gift of your own.  I have a couple more new recipes I want to try before Christmas!

last of candy bark

Have a wonderful weekend and remember to take pleasure in simple things, Jackie

no comments

advent calendar diy 2017

December 5, 2017

tablescape calendar diy for advent

For those of you that follow this blog regularly, you know I don’t create hanging Advent calendars.  I prefer a tablescape or mantlescape when coming up with my annual creation!

Advent Calendar diy tablescape

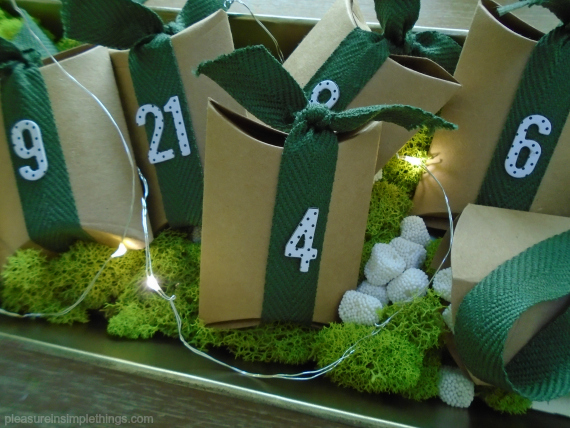
This year, I am using small pillow boxes to put together a very simple calendar.  If you want to make one, this is what you will need:

24, 3 1/2” brown paper pillow boxes; 26 feet of 3/4” ribbon of your choice, cut into 13” pieces; 1” adhesive numbers (be sure to have enough numbers for 1 through 24); small candies of your choice.

candies for Advent calendar

I often use champagne bubble candies when styling since I not only love the color white, but I love the way the candies look.  Champagne flavored candies also seem right for a special occasion like Christmas.  You may choose to substitute one of your favorite candies, something homemade, or a candy in a color that coordinates with your own holiday colors.

diy advent calendar supplies

The calendar is easy to assemble.  Fill each box with some of the candy you chose and close.  Tie a piece of ribbon, lengthwise, onto each box.  Use the adhesive letters to add the numbers 1 through 24 to the front of the boxes.

I found my adhesive numbers at a craft store– I thought the dot pattern played well with the candies I chose to use in the boxes.

Lastly, arrange the boxes in a grouping.

creating a diy Advent Calendar

For a mantel, an arrangement using some loose white birch logs would work nice.  For a tablescape, any favorite tray or bowl would work well.  For my Advent calendar tablescape, I am using plants, moss, and tiny lights in a long tray down the middle of my wooden dining room table.

Easy and fun!  I hope I have inspired you to create an Advent calendar for your home!

Advent calendar diy with lights

Thanks for stopping by!

Remember to take pleasure in simple things, Jackie

no comments

« Previous Entries     Next Entries »