Subscribe to Pleasure in Simple Things via RSS ReaderFollow Pleasure in Simple Things on InstagramFollow @InSimpleThings on TwitterLike Pleasure In Simple Things on FacebookFollow Pleasure In Simple Things on PinterestEmail Jackie

message in a bottle ornament diy

December 4, 2015

message in the bottle diy by pleasure in simple things blog

My imagination is in overdrive this year for my ornament designs since I chose sea glass as my holiday theme and I love anything with a coastal theme! I have so many ornament ideas, but I am limiting myself to a few designs because there is so much to accomplish in preparation for the holidays and not enough time to do it all!

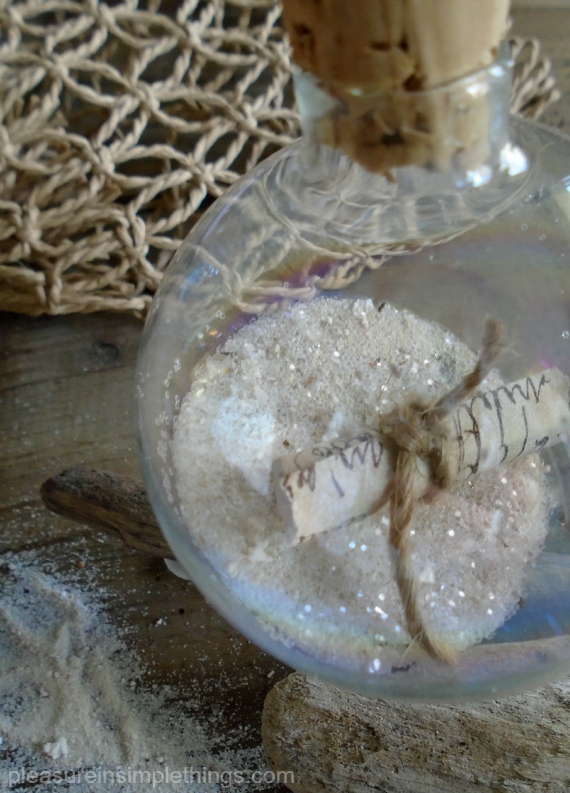
One ornament I knew I wanted to create was one that was inspired by a message in a bottle. Today, for Friday field trip, I am providing the instructions to make this easy to create ornament. I chose to use an iridescent, clear glass, hollow globe ornament instead of the obvious choice of a small bottle.

message in a bottle ornament supplies pleasure in simple things blog

Rather than write the ‘message’ myself, I opted to use a scrap of paper that already had writing on it, ripping the edges before rolling it up and tying it with a small scrap of twine.

I removed the top that came with the ornament and I poured some sand into the globe. Since it is the holidays, a little optional glitter is a nice addition to the sand! Next, I added the prepared message.

I replaced the top of the ornament with a cork. It is really simple to repurpose a cork since it is easy to trim with a knife to the size needed. After trimming the cork to the size I needed to fit snuggly in the top of the ornament, I screwed in a small screw eye and added a piece of twine for hanging. Any scrap of thin ribbon or rope will do in place of the twine.

making a message in the bottle ornament pleasure in simple things blog

That’s my ‘message in a bottle’ ornament! Easy, right?  This is a wonderful ornament to make as a gift for a newly married couple.  Use sand from their honeymoon for inside the ornament and write their wedding date or a love note on the ‘message!’

I hope I have inspired you to create your own message in a bottle ornament!

Thanks for stopping by! Have a wonderful weekend and remember to take pleasure in simple things, Jackie

no comments

i am thankful

November 27, 2015

Thanksgiving Pie pleasure in simple things giving thanks

It has been a very hectic week, but I had Thanksgiving off and so did my children, and I was able to share the day with family.

I took pleasure in so many of the wonderfully simple things that make a holiday so very special.  I thought I would share a few of the things I was thankful for this Thanksgiving Day:

I spent the day with my children!

Even though she needed to get up in the wee hours of the morning to start preparation of the 29 1/2 lb. turkey, my sis not only made a perfect bird and tons of food, but she took extra time to master a cherry pie garnish that put a smile on everyone’s face!

My mom couldn’t be at Thanksgiving, but she told me she loved me when I called to check in on her. :) She is someone I am thankful for every day!

Knowing how much I love lemon meringue pie, a friend spent the extra time to make me a whole pie of my own to take home!

thanks 2015 pleasure in simple things blog

And, the blessing I have that you are here to share pleasure in simple things with me…thank you!

I wish you all a fabulous holiday weekend!  xo Jackie

no comments

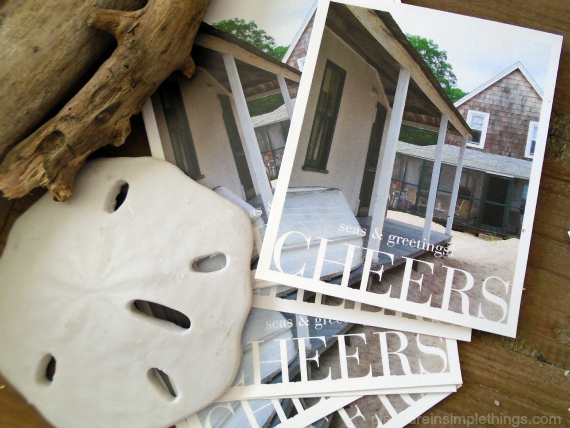
photo drink labels for the holiday

November 24, 2015

holiday drink labels pleasure in simple things blog

I love a good theme. Part of what makes a great entertaining theme successful is consistency in the details. It also makes it fun for guests – because they are finding cool ways the theme has been brought into every detail. When it is the holidays, I like to take the details to the highest level!

personalized drink labels pleasure in simple things blog

I  want to share one of these details with you today – and, that is bottle labels! I don’t know about you, but in my house there is a certain contingency that drink from bottles – beer to be exact! Because my guys are so particular about their beers – microbreweries and such, I am not able to choose a beer that sticks with my theme. The wine drinkers can be a little more flexible – and for this year’s sea glass theme, I may just be able to sneak in a Sea Glass wine to stay on theme!

sea glass themed holiday with drink labels pleasure in simple things blog

Instead of trying to fight the selections, I will just modify the look of the drinks that are chosen with my own personally designed labels! This can be accomplished easily with a home printer, some labels, and some favorite photos!

making photo drink labels pleasure in simple things blog

Today, for those of you who may have some ‘issues’ with setting up forms on your home computer, I am showing you some labels that can be easily created using a website that specializes in photo gifts. There are plenty of them out there. I happen to think Pinhole Press puts out an exceptional quality product and the labels here were ordered from their website.

themed holiday drink labels pleasure in simple things blog

Using photos from my time at the beach and my own wording, I created both a beer bottle sized label and a wine sized label that I will use for the holidays. Now, no matter what bottle comes into the house, it will be right on theme! Aah!

themed drink labels pleasure in simple things blog

I created one design for beer bottles and one for wine bottles.  If you are challenged in the computer design/printing department, you can check out how easily you can create labels using Pinhole Press by clicking here.

I hope I have inspired you to create your own special labels!

Thanks for stopping by! Remember to take pleasure in simple things, Jackie

no comments

whale ornament diy

November 20, 2015

making a diy whale ornament pleasure in simple things blog

For Friday field trip today, I am sharing instructions on how I created my first ornament design for holiday 2015 to coordinate with my sea glass theme…a whale! And, I made him in a sea glass shade!

I started by drawing a whale outline on a thin piece of scrap cardboard. I used the cardboard as a template to cut out the shape of the whale from the clay. If you are not big on drawing, you can certainly find a pattern online to print out and trace.

diy whale ornament template pleasure in simple things blog

Once I had my template completed, I prepared the clay. Softening the clay in my hands, I formed it into a ball and rolled it out with a rolling pin, as I would for cookie dough, to a ¼” thickness. Then, using my template as a guide, I cut out the whale shape using a dull knife. I added a hole in the top of the ornament using a straw – this is where I would add my wire for hanging. Following the directions on the package of the clay, I baked the shape in the oven.

 template and clay pleasure in simple things blog

Whale Ornament Supplies Needed:
• Modeling clay, 1 -2 oz. per ornament – will vary depending on size of ornament (my whale is 4” x 1 ½”)  I used FIMO in the desired color for finished ornament
• Rolling pin
• 20 gauge black wire
• Cardboard template (optional) or cookie cutter
• Acrylic paint in black and white
• Thin paint brush

I was surprised how easy the clay was to use and how sturdy it was when it came out of the oven.  Once the ornament was completed, I used the black wire to form a ‘spout’ of water. Twenty gauge wire is easy to shape without any special tools! I made one end into a ‘spout’ and I wrapped the opposite end of the wire through the hole I had created with the straw.  My whale looked great already!

diy whale ornament pleasure in simple things blog

As an optional step, I decided to sand the edges some – just to make them look a little less angular. (For a vintage look, rub a little bit of Annie Sloan dark wax to the edges of the ornament.)

Now. all I needed to do was to add the whale’s eye. I did this with a little bit of acrylic paint and a thin paint brush – first a little dot in white, and then a smaller dot in black.

I completed my first ornament design for 2015!  I will be making a few more in sea glass shades before the tree goes up!  My whale may also get a little clear glass glitter for sparkle. :)

final whale ornament pleasure in simple things blog

Have I inspired you to make your own whale? Or, maybe a variation on the design? You can use the same process to create something to coordinate with your own holiday theme.

Thanks for stopping by! Have a wonderful weekend and remember to take pleasure in simple things, Jackie

no comments

christmas feathers

November 17, 2015

christmas feathers in sea glass colors pleasure in simple things blog

Last week wasn’t a very good week for my ‘to do’ list! The rainy days threw off my whole painting schedule. I was so disappointed because I had planned to paint furniture outside and I was eager to finish a very special piece I am currently working on. (More on that in a future post!)  In addition, my holiday preparations pretty much came to a screeching halt as I got distracted with some cooking, cleaning, and all around general errands!

uss feathers for Christmas pleasure in simple things blog

But, as I was washing all the windows in my house the other day, I started thinking about how I would add some feathers to my holiday décor. I love feathers and I really want to incorporate some into my sea glass theme for the holiday – especially since they remind me of seagulls.

making sea glass feathers pleasure in simple things blog

So, I did get a little distracted from my windows with some holiday thoughts and I had to paint some feathers that evening while I had a vision! I decided I would paint some in metallic gold and some in metallic sea glass colors. They came out great and I know I will use them later in my place settings and maybe, also, in some of my gift wrap.  And, by adding a gold thread to the feather, it turns into a beautiful holiday ornament!

seagull feathers in metallic pleasure in simple things blog

Painted feathers are so beautiful and can really be adapted to any décor and are super easy to make.   Just paint feathers using acrylic paint by applying it gently using cotton swabs.

I think these feathers will look great with my sea glass holiday décor. . .I hope I have inspired you to use some feathers in your décor!

Thanks for stopping by! Remember to take pleasure in simple things, Jackie
no comments

diy sea themed advent calendar

November 10, 2015

sea glass diy advent calendar pleasure in simple things

I haven’t gathered up all the supplies I will need for my sea glass themed Christmas décor just yet, but I have been working on a few things and today I am sharing this year’s advent calendar.

The design I came up with to coordinate with my sea glass themed holiday, although a simple one, produced really beautiful results!

shell for a diy advent calendar pleasure in simple things blog

I started with Halloween candy from the clearance rack of a discount store. You know, that 75% off stuff?!

pleasure in simple things diy beach themed advent calendar

I wrapped up pieces of candy (the little boxes work really well) – one for each day – in white paper. With some natural twine, I tied a little beach find to each package…a piece of sea glass, a rock, a piece of driftwood…

white sea glass advent calendar pleasure in simple things blog

Then, I added a number to each.  (I made the numbers by printing them onto clear labels using my home printer and adhering them to each package.)

Next, I arranged each wrapped ‘day’ onto a wooden tray. So simple, yet so beautiful! Tucking a string of battery operated mini lights into the arrangement will add a beautiful glow to the natural materials I collected on the sand.

pleasure in simple things sea glass advent calendar diy

The perfect advent calendar for my sea glass Christmas theme! What do you think?

diy advent calendar sea glass pleasure in simple things blog

If this coastal look doesn’t go with your holiday theme, there are certainly many ways to change up the wrapped candy to accommodate whatever your theme may be. Here is an example of a variation using birch bark stars on the boxes instead of beach items. See how easy the calendar can be changed up to go with an outdoors theme? Use paper and decorative items that best fit with your décor. Then, arrange the packages in a basket, a silver bowl, a clear jar, or lined up on your mantel – whatever works for your holiday theme!

birch bark stars advent calendar pleasure in simple things blog

I hope I have inspired you to create your own version of an advent calendar. Seas & greetings! ;)

Thanks for stopping by! Remember to take pleasure in simple things, Jackie

Sharing with Sand & Sisal, Thoughts from Alice, and Finding Silver Pennies.

no comments

a sea glass christmas

November 6, 2015

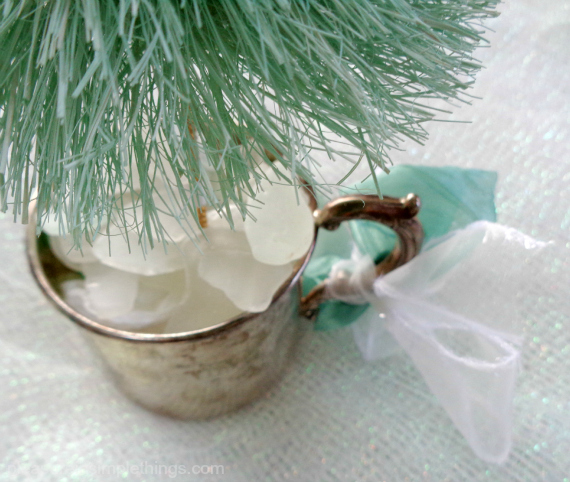
sea glass and vintage cup pleasure in simple things blog

I shared my 2015 holiday theme with you in the last post.  My inspiration for this year’s Christmas decor is sea glass.

So, for Friday field trip today, I am giving you a quick little glimpse into how my inspiration is taking shape.

sea glass christmas pleasure in simple things blog

The first items I always incorporate into my holiday theme are my children’s baby cups.  I love finding imaginative ways to bring them into my Christmas decor each year.  With the sea glass theme, it is pretty easy!   I am going to fill the cups with sea glass and sea glass colored bottle brush trees!

sea glass and white candy canes pleasure in simple things blog

What do you think?  Am I off to a good start?  Next post I will share my sea glass advent calendar design. :)

Thanks for stopping in and sharing!

seas and greetings pleasure in simple things blog

Have a wonderful weekend and remember to take pleasure in simple things, Jackie

no comments

holiday dreaming

November 3, 2015

candles on the beach pleasure in simple things blog

The last couple of years, I have been behind schedule on holiday preparations. When I think that it is already November and I am just now putting down some thoughts about my 2015 holiday theme, I feel so off my holiday game!

I have chosen a theme. Sea glass is my overall theme for this year. Of course, there are sure to be some other coastal influences mixed in. Inspired by one of the sea glass photos I took, I painted a few swatches of colors I would like to use for my holiday.

sea glass christmas paint

Looking through some more of my photos, my thoughts run to other things I may bring into my holiday décor…

seagulls for a beach glass xmas pleasure in simple things blog

Seagulls are a staple at the beach in the winter. I like the idea of representing them with feathers.  I always love adding feathers to the tree. I can also use them with twine in some of my gift wrap in plenty of sea glass colors.  The color of snow and the colors of sea glass look so perfect together for the holidays!

bottles for xmas pleasure in simple things blog

I also like the idea of ‘message in a bottle.’ I think I will make some ornaments in this theme.

I’m sure I will make a sea creature ornament or two also!  And, of course I will use plenty of driftwood from my collection.  The Christmas tree and piles of gifts will go into big baskets.  I have plenty to work with!

inspiration pleasure in simple things coastal holiday

My first DIY for the holiday season will be to create an advent calendar. I bought bagged Halloween candy; now on clearance. The bags of small boxed treats are perfect to craft an advent calendar. Buy some now yourself (be sure to get 24 – and maybe a few extra for snitching) to use for your calendar. If you don’t like my sea themed idea, you can always make a variation of it. I will show you how in an upcoming post.

Do you use a theme for your holiday?  What did you choose for this year?

Thanks for stopping by. Remember to take pleasure in simple things, Jackie

no comments

diy mini mummy pumpkins

September 22, 2015

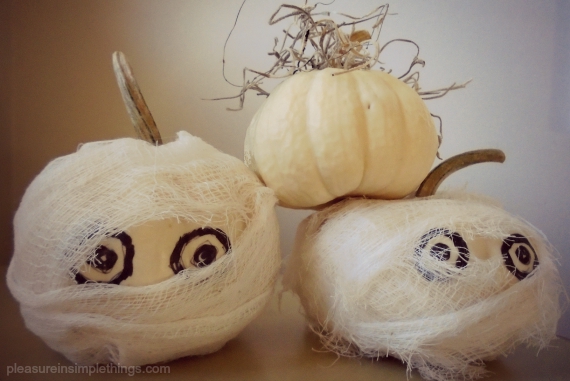
mini mummy pumpkins pleasure in simple things

I was inspired by a Pottery Barn pillow to create some pumpkin mummies for a child’s Halloween display.

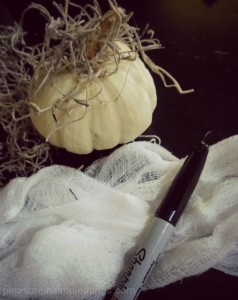
They are super simple to create and so darn cute! All you need are a few baby boos (mini white pumpkins), cheesecloth, a glue gun, and a black permanent marker.

Start by using the permanent marker to draw two eyes on the pumpkin – reference the photos here to guide your placement.

diy mini mummy pumpkin pleasure in simple things

supplies for a mummy pumpkins pleasure in simple things

Next, cut a long strip from the cheesecloth, approximately 1” – 2” wide. This can be adjusted based on the size of the pumpkin.

Wrap the cheesecloth around the pumpkin, keeping it in place by attaching it with beads of glue from the glue gun as you wrap. Be careful not to burn yourself – don’t push down the cheesecloth with a bare finger – because the cheesecloth is so porous, the hot glue will go right through to your fingers!

Also, be sure not to cover the drawn eyes completely! They need to peer through the cheesecloth!

diy mini mummy pumpkins by pleasure in simple things

There you have a pumpkin mummy! It is sure to add some whimsy to a Halloween table! Make one or a whole bunch! Wouldn’t they make adorable favors for a Halloween party? Or, a great gift for a favorite teacher?

Have fun with it!

Thanks for stopping by! Remember to take pleasure in simple things, Jackie

no comments

homemade ice cream on the beach

July 7, 2015

eating homemade ice cream on the sand pleasure in simple things blog

Did you enjoy your weekend? Mine was the best! So many of my family members were together and the fireworks were the best I’ve seen…all in all; a great holiday!

Today, I am trying to catch up with work and with household chores, but I am taking some time to share a recipe for the ice cream I made over the weekend.

Going into the weekend, I was having some trouble deciding what flavor ice cream to make. I thought I would try making s’mores flavor. It seemed like a challenge. Maybe roast some marshmallows first and add marshmallow, graham crackers, and chocolate chips. I still need to give that a try at some point!

cranking homemade ice cream pleasure in simple things blog

What I decided on for the Fourth of July was a ‘Ferris Acres inspired’ coconut chocolate chunk. You may remember Ferris Acres from this post (click here). I am not sure if it was the flavor or the work that went into the cranking that made it so good, but I thought it came out perfect! (I do need to give some credit to my daughter’s boyfriend – I had some helpers, but he did the lion’s share of the cranking!)

homemade coconut chocolate chunk pleasure in simple things blog

Coconut Chocolate Chunk Ice Cream Recipe (makes 5 quarts)
5 cups of milk (*see note below)
1 14 oz. can coconut milk, unsweetened
4 eggs
1 Tablespoon pure vanilla extract
2 ½ cups sugar
4 cups whipping cream
¼ teaspoon salt
1 14 oz. bag sweetened, flaked coconut, roughly chopped
3 1.5 ounce bars Ghirardelli Intense Dark Evening Dream 60% cacao bars, roughly chopped

*I substituted some of the 5 cups of milk with the coconut milk. I used the can of coconut milk first and then added enough milk to make 5 cups of liquid.

Beat eggs until foamy. Gradually add sugar, beating until thickened. Add cream, vanilla, and salt and mix thoroughly. Pour into ice cream maker canister. Add milk and stir well. (If your maker has a fill line, do not go over it.)

Put covered canister into fridge, as well as the prepared coconut and chocolate, until really cold.

pleasure in simple things ice cream makingPrepare in your ice cream maker. I use a hand crank using ice and pour salt over the ice. I used two bags of ice for this batch.

After the ice cream is done, stir in the cold chocolate and coconut and set the canister in the freezer overnight to set.

finishing a homemade ice cream pleasure in simple things blog

Eat plenty and often. ;)

Thanks for stopping by!  Remember to take pleasure in simple things, Jackie

Sharing with Sand & Sisal, Elizabeth & Co., and Coastal Charm.

2 comments

« Previous Entries     Next Entries »