Subscribe to Pleasure in Simple Things via RSS ReaderFollow Pleasure in Simple Things on InstagramFollow @InSimpleThings on TwitterLike Pleasure In Simple Things on FacebookFollow Pleasure In Simple Things on PinterestEmail Jackie

lovely apron upgrade

July 16, 2013

diy apron

diy apron

Today I wanted to share an easy way to upgrade a standard chef’s apron into something lovely. I was recently involved with organizing a charity garden event and I really wanted the hostesses to have coordinating aprons. The gardens were so amazing and we had some very tasty food prepared with a flower and herb theme…I needed aprons that were as lovely as the rest of the event.

Not wanting to spend much money, I decided to use a few embellishments to make a white chef’s apron contribute to our theme. If you know someone in the restaurant business, you may be able to score an apron or two at no cost. If not, you can purchase one at a restaurant supply store for $5 or $6.

The first thing I did was to add a flower photo onto the top of the apron front. This was easy to do with T-Shirt transfer paper. You can pick this up at any store that sells office supplies. I found my package at Target near the copy paper. I bought Avery brand Ink Jet T-Shirt Transfers. Six 8 1/2″ x 11″ sheets come in the container. Since I was printing a 5″ x 7″ photo, I was able to print two photos on one sheet. I chose a photo I had taken last spring of my lilly of the valley.

pretty napkin basket

I printed the page using a color printer and ironed the photos onto the aprons, carefully following the directions on the transfer package. I decided to add a little sparkle around the edges of the photo by applying some silver sparkle paint with a cotton swab.

pocket on diy apron

Then, I added a couple pockets by sewing on a rectangular shaped piece of fabric I found on the clearance table at the fabric store. First I sewed a hem on one of the long sides of the fabric – this would be the top of the pocket. Then, I attached the piece of fabric by sewing the two sides and the bottom

onto the apron. Sewing vertically down the middle of the pocket created the two pockets.

Rosemary sea salt shortbreads – one of the treats I made to serve at the Garden Tour.

And that was it! Using a photo transfer sheet and some scrap fabric that coordinated with my photo, I was able to upgrade my standard white apron into something garden party worthy!

diy apron

You can do the same for your next event!

Hope you enjoyed today’s post on upgrading an apron. I look forward to sharing more about the garden event in future posts.

Thanks for visiting! Remember to take pleasure in simple things, Jackie

Sharing at A Pinch of Joy and Timewashed.

3 comments

beachy shower gift

July 9, 2013

Mr. & Mrs. beach towels

Need a gift idea for a bridal shower?

On previous posts we shared creating a beach themed gift wrap, beach theme decorations, and a beach themed shell tote bag tie-on.Since I have gotten some emails asking what was actually inside the tote bag gift, today I am sharing a beach themed gift idea for a bridal shower.

This year, my go-to bridal shower gift was his and her beach towels.A nice beach towel is a necessity for all beach lovers and a natural gift choice for a summer shower!I chose some really large, bright striped, heavyweight matching beach towels and had them monogrammed ‘MR.’ and ‘MRS.’ So cute!A great item to pack for a honeymoon. :)

beachy gift idea

(I love monogrammed towels – I always had my kids’ towels monogrammed with their names to hang in the ‘kids’ bathroom; avoiding any question of towel ownership!Even a college student can appreciate a way to help safeguard a towel that may be left in a laundry or shower room.Note:Monogramming a small child’s name on a beach towel for use on a public beach is not recommended! )

beachy bridal shower gift

You can package the towels in a beach tote or basket.Try to include items special or unique to the couple…maybe something symbolic to where they met or a special interest.The couple receiving this gift tote were wine lovers… so a bottle of wine, acrylic wine glasses, and cocktail napkins were included in the tote.Of course, the bottle of wine tucked inside needed to fit the theme!Also, a holiday ornament inscribed with the town where the couple met was tucked into one of the glasses.

beachy bridal shower gift

A gift tag attached to the pull of the tote was made using an old beach photo of the groom’s mom that was photocopied onto a piece of cardstock.

DIY gift tag

Personalizing your gift for the couple is the fun part!If you don’t know the couple very well, you can usually get a good sense of their interests and color preferences by reviewing their gift registries.

I hope this bridal shower gift idea will inspire you to create a gift tote to give to a special couple in your life.

Thanks for visiting, Jackie

Sharing at The Shabby Nest and Craftberry Bush.

no comments

got nuts?

June 18, 2013

squirrel gift jar

For a friend’s birthday, I wanted to give her a little something acknowledging her squirrel obsession.

squirrel jar

squirrel jarInspired by many jars I have seen across the internet, I decided to find a plastic squirrel to affix to a jar to make a birthday gift.

To make something similar for a friend or as a party favor, decide on something to fit an obsession or theme and purchase a toy version at a craft or dollar store.

For myself I would have chosen a mermaid or something sea inspired ;)

Once I found the squirrel, I glued the figure onto a jar rescued from the recycling bin.  After the glue dried, I spray painted the jar top…figure and all.  I know the brown I chose isn’t a very summery choice, but I wanted to match the décor of the recipient.  Chalkboard paint would have been a fun option as well -“got nuts?” could have been written right on the lid with chalk.

top to squirrel jarThere are so many fun alternative ideas for this gift.  I know exactly what I would have made for my son if he were still small…I would have used an army man, painted the top with olive drab, and wrote “got ammo?”, filling the jar with water balloon ‘grenades.’    Or, I could have addressed his childhood train obsession and put a train on the lid top.  Of course, the contents would have to be bubble gum so I could write “got choo?”  A perfect choice for a train themed party favor!

Other ideas?  A shark on top with gummy fish…“got fish?”  A fish on top with gummy worms… “got worms?” A baseball player with sunflower seeds…”got seeds?” …come up with some using your favorite theme or obsession.

I decided to tie the “got nuts?” message onto the jar so it could be removed, but you can use whatever you prefer.  A chalkboard label on the side of the jar is a cute option.  Or, even etching cream … etch the words onto the side of the jar for an elegant look. 

easy to make squirrel jar

I filled the jar with peanuts and it is good to go.  A perfect ‘little something’ designed specifically for the recipient.

squirrel gift jar

Can’t understand a squirrel obsession?  Does this National Geographic photo I found on the web change your mind? 

squirrel

See more examples of squirrel cuteness I found across the web on my Facebook page by clicking here.

I hope you will use this tutorial as inspiration to come up with your own gift creation!  Thanks so much for visiting.

Remember to take pleasure in simple things, Jackie

Sharing at Better With Age and Craftberry Bush.

1 comment

random acts of flowers

April 26, 2013

flowers and seaglass

Today’s Friday field trip is a step back in time…back to the late 20th century…to celebrate the May Day (May 1st) tradition of leaving flowers anonymously on neighbor’s doorsteps as a signal to the start of spring.

flower quote by Monet

may day coastal flowers

For my May Day ‘baskets’ I used discarded cigar containers…apparently, some cigars are sold in glass tubes similar to a test tube…who knew?  So, I took some discarded containers and repurposed them as May Day flower containers to leave as surprises :)  Who wouldn’t enjoy finding some fresh flowers on their doorknob?  Using fresh flowers, some scraps of ribbon, twine, sea glass, shells, and driftwood I created some pretty May Day surprises to hang on unsuspecting…insert suspicious laugh here…doorknobs.

flower

May Day coastal flower

Flower quote from the Koran

May Day daisies

May Day daisies

flower quote

hanging May Day flowers

Pink flowers for May Day

pink  flowers for May Day

Emerson flower quote

a250endingFlower tubes 033

I hope this inspires you to come up with your own variation of this May Day tradition.  A fun way to celebrate spring and put a smile on someone’s face :)  Thank you for sharing this week’s Friday field trip…a trip back in history to celebrate May Day with flower surprises!

Giving flowers is a simple pleasure that can surely make a difference in someone’s day.

You only need a stem or two to let someone know they are thought of in a special way.

Thank you for visiting!  I will be busy the next couple days….you can follow my adventures on Instagram :)

Have a really wonderful weekend, Jackie

Sharing with Common Ground, Craftionary, Roses & Stuff, Shabby Nest, Coastal Charm, Little Red House, A Pinch of Joy, Mona’s Picturesque, and Nurture Photography Spring 2013.

20 comments

zip code catch-all tray

April 9, 2013

diy mercury glass zip code tray

I have been wanting to make something using a zip code for quite some time.  I don’t think 90210 is the only zip code worth embracing…the zip code from wherever you call home is the perfect one to display!  Or, a place you dream about visiting (should I look up the zips from the locales with the best beaches?…)  Anyway, this time I am using the zip code from my daughter’s home away from home…aka school.

mercury glass zip code tray

It is an easy DIY project…I will guide you through the steps…

diy zip code mercury glass tray

If you follow my procedure, you will need the following items:

  • a clear glass plate (I purchased mine at Target)
  • Con-Tact adhesive paper in clear
  • Krylon looking glass spray paint
  • a clear coat of some type (I used a spray)
  • a clean spray bottle
  • a computer printer

The first thing I did was to figure out how I would get the zip code onto the glass.  I decided to print it onto clear Con-Tact adhesive paper so that I could easily adhere it to the glass.  I picked out a font called Stohr Numbers on www.dafont.com.  Once you have the image you want to use, you will need to print it out in reverse image…to do this, either indicate the proper setting on the print settings of your printer or, you can use a graphics software.  You need to do this so that the sticky part of the Con-Tact paper is on the front of the numbers because you will be adhering it to the underside of the glass.

To accomplish this, I used clear Con-Tact paper (I love this product – I use it for so many things!).  I simply cut a piece of the Con-Tact adhesive paper and hand-fed it through my computer printer.  I used a scissors to trim closely around the numbers.  You can cut out the numbers individually, but I chose not to because I wanted to keep the spacing between the numbers exact.

I peeled off the backing of the Con-Tact paper and positioned the numbers where I wanted them, affixing them to the underside of the glass by rubbing firmly.  I scratched up the letters a little bit…just so they looked a little distressed.
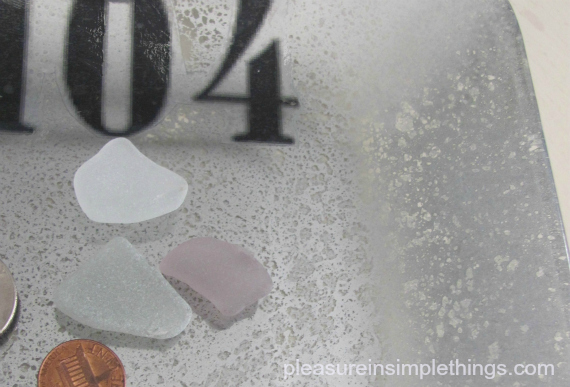
Now, I just needed to create the mercury glass effect.  You have probably seen items created with the Krylon looking glass spray paint – it seems to be one of the hot craft items right now…with good reason!  It is so cool!  It creates a mirror effect on glass.  This is created by spraying five thin coats of spray on the underside of the glass.

But, I did not just want a mirror effect…I wanted a mercury glass look…that is where the spray bottle comes in.

Put a little bit of clean tap water into the spray bottle and adjust the nozzle to a fine mist.  Then, read the instructions on the Krylon paint.

Before you start your spray painting, spray a fine mist of water on the underside of the piece.  Immediately spray your first coat of looking glass spray paint, following the directions on the can.  I sprayed a fine mist of water onto the paint after each coat for the first three coats.  After three coats were completed, I blotted (not rubbed) the back of the piece to absorb the water so that the mottling would receive two fine coats of the paint.  I guess everyone develops their own technique after trying this product, but I like the depth created by this method.

After the paint was dry, I sprayed a clear coat on the underside of the piece to protect the paint from scratching.

mercury glass zip code tray

That was it!  I finally got my zip code tray and I think it is a perfect place to drop off car keys!

I hope you enjoyed this DIY for a zip code mercury glass tray…what zip code will you choose to display?

Thanks so much for visiting, Jackie

I am sharing at Coastal Charm,  The Shabby Nest, Craftberry Bush, A Pinch of JoyCraftionary, and Common Ground.

6 comments

st. patrick’s day tea

March 12, 2013

shamrocks in a teacup

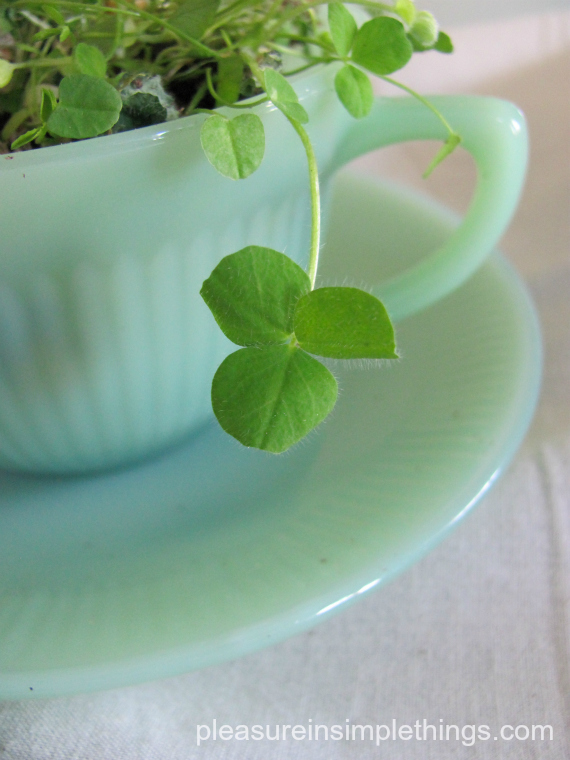
I saw some adorable little shamrock teacups and saucers in The Christmas Tree Shop (a bargain store here in New England) about a month ago and and all I could think of was planting shamrocks in the cup!  And, I had the perfect Irish friend to give it to.  So, I purchased one and waited for some shamrocks to be available for sale…which they always are as St. Patrick’s Day comes close.

shamrocks in a teacup

I was so excited when I saw a shamrock plant in one of the bargain stores…yes!

planting shamrocks

planting shamrocks for St. Pat's

I simply planted the shamrocks into the teacup…my one shamrock plant was big enough to use for two cups…I used the sweet little shamrock teacup and…

shamrocks in a teacup

A photo of shamrocks planted in a sweet little teacup for St. Patrick’s Day.

planted some in one of my Jadite cups to add a little St. Patrick’s Day spirit to my own home :)

shamrocks in Jadite

Get yourself some shamrocks and plant them in a container that makes you smile!  I can’t send you a shamrock-filled teacup, so, as a gift to you, here is a St. Patrick’s Day blessing you can pin or send to a friend :)  Happy St. Patrick’s Day!

An Irish Blessing for St. Pat's

Have a happy and safe St. Patrick’s Day week!

St. Patrick's Day teabag

Thanks so much for visiting, Jackie

P.S. Please ‘like’ my facebook page by clicking here or the facebook icon at the top of the page so I can share more ideas/inspiration during the week that don’t fit in my posts :)

I am sharing at Coastal CharmTimewashed, Shabby Creek CottageCrafts a la Mode, CrationaryThe Shabby Nest, Little Red House, and Craftberry Bush.

13 comments

sweet & handpainted for baby

February 26, 2013

diy handpainted onesie

Today I am making a baby gift for a friend and thought I would share the DIY instructions so you can create one for your favorite little one.  I love to paint baby clothes with original designs…this particular one is not difficult to create and can be accomplished quite easily no matter what your skill level.  This particular design creates a garment that is also very appropriate as an Easter gift.  I am breaking it down into simple steps that can be fit into your day between other activities.

Start out by purchasing your desired baby garment in an appropriate size for your recipient.  If the gift is for a baby that has not yet arrived, I recommend not getting the 0-3 month size.  Newborns vary in size and you don’t want to risk it being too small.  Always better to go bigger rather than smaller!   I prefer 100% cotton items for babies and I check the label to be sure I am purchasing an all-cotton item.  Wash and dry the garment to be sure any shrinking is done before you paint your design.  Paint also adheres better to a washed garment.

bannerdiy handpainted onesie

While your garment is in the dryer, you can make your stencil and assemble your materials. For the first part of the project, you will need the paint color you decide to use for the lollipop…pick a pastel pink, blue, or yellow.  I mixed my color, but you can purchase or use craft paint in the exact color you desire.  You will also need a stencil brush and a stencil.  No need for a fancy stencil.  I used a piece of cardstock…you can use a piece of a gift box, cereal box, or any miscellaneous cardboard that is ready for the recycling bin.  After you locate a piece, simply cut out a 2 1/2” circle.

Insert a piece of cardboard between the front and back of the garment to protect the back side of the garment in case the paint bleeds through.

Hold the stencil firmly in place and paint the color you have chosen using an up and down motion with the stencil brush…using an up and down motion will prevent paint from seeping under the edges of the stencil.

Let the paint dry thoroughly.

diy handpainted onesie

Iron the painted area, keeping the cardboard inserted and putting a clean rag over the design first to protect your iron.  This step will set the paint.

Now you will need a cotton swab, clear glitter paint, dimensional paint in a color close to the one you used for your circle, a dimensional paint in an off-white or beige for the stick of the lollipop, and a scrap of 3/8” ribbon – I like a polka dot ribbon, but any ribbon in a coordinating color will do (just make sure it is colorfast).

Next, use a cotton swab (one of my favorite ‘go-to’ utensils) to put glitter onto your painted circle.

Then, use a dimensional paint to add a spiral to your painted circle, starting from the middle of the spiral and painting free hand to the outside of the circle.  Then, paint the stick of the lollipop.  You may also decide to personalize the gift with the baby’s name.  If you decide to do this, wait until all the other paint is dry to reduce the risk of smudging it.

Let this dry overnight before sewing on a ribbon embellishment.  Be aware that small items can be potential choking items for small children.  I brush a little clear nail polish on the edges of the ribbon to prevent fraying.

I have used this same design idea to embellish a canvas tote bag, using three lollipops (pink, blue, and yellow) side by side and personalizing with the baby’s name.

handpainted onesie tutorial

I hope you enjoyed this tutorial on creating an adorable painted garment for your next baby gift.  Have fun with it!

I will be sharing this week at Craftberry Bush, The Shabby Nest, Craftionary, A Pinch of Joy, and Crafts a la Mode.

Thanks so much for visiting!  Remember to take pleasure in simple things, Jackie

9 comments

gift for book lovers

January 15, 2013

I am a real fan of personalized pencils and I love to give sets related to a theme…isn’t it always about a theme? The last time I made up a set of pencils for a gift, it was with a beach theme. This time, I am creating a set for book lovers. Since I put myself in that category, I had fun coming up with sayings to have imprinted on the pencils…restricting them to 30 characters.


Packaging a gift is always part of the fun. Usually I give sets of pencils in the great plastic tubes available at Garnish (like I did with the ‘beachy’ pencils), but I knew for this book lovers set I really wanted to do something with pages of a book. This is what I came up with:

As a fun wrap for a set of pencils for a book lover, I sewed two pages of an old book together to make the package and adorned it with flowers fashioned from book pages.


book lovers gift wrap

I love using the sewing machine as an unexpected way to put paper together. In this case, I sewed two old book

pages together making the package for the pencils. I also made some paper flowers and a leaf out of a book page and glued them onto the package. A small scrap of linen and some rubber stamps created the gift tag. Writing the name on the paper leaf would be another fun option as a way to label the gift.

Consider giving a set of pencils as a gift..it is fun coming up with the possible imprints for a theme, staying within the number of characters allowed for the imprint. This is an affordable and fun gift that can be used creatively for any holiday or occasion. If you need purchasing information, check the beach theme link above for ideas.

Thanks so much for visiting.

I am sharing this project on Craftberry Bush…check out the other projects posted!

Hope you are having a wonderful week and remember to take pleasure in simple things, Jackie

4 comments

diy nautical chalkboard

August 21, 2012

repurposing an old skim board

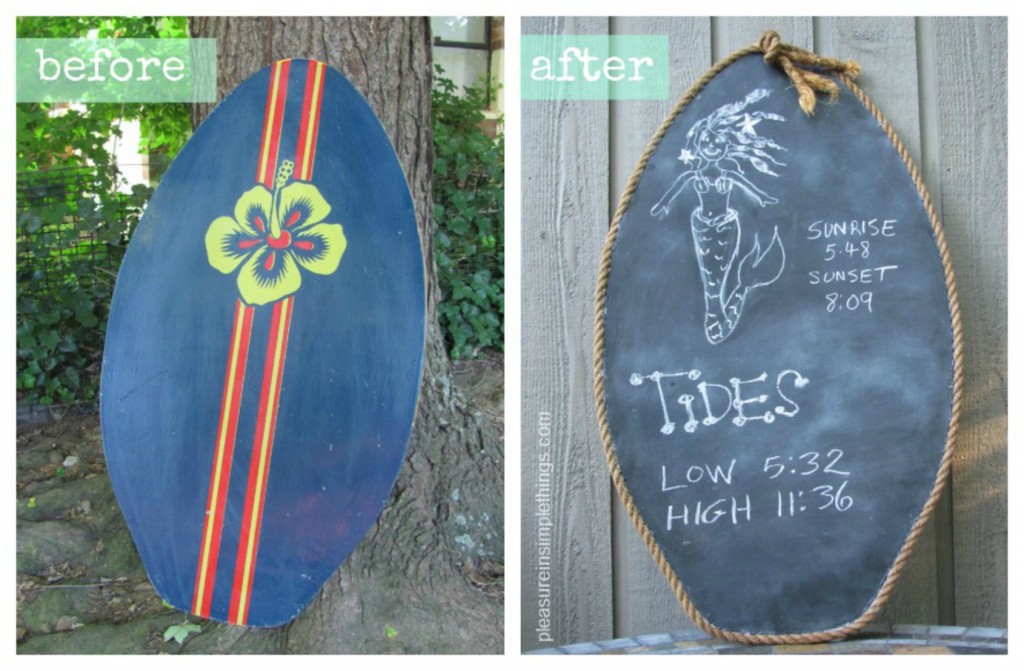
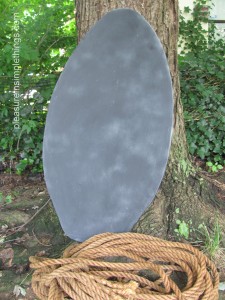
Creating a ‘beachy’ looking chalkboard from an old skim board was a lot of fun!  You can easily create one too…just follow my simple diy directions.  I completed this project spending $0.  I used all materials I already had at home.

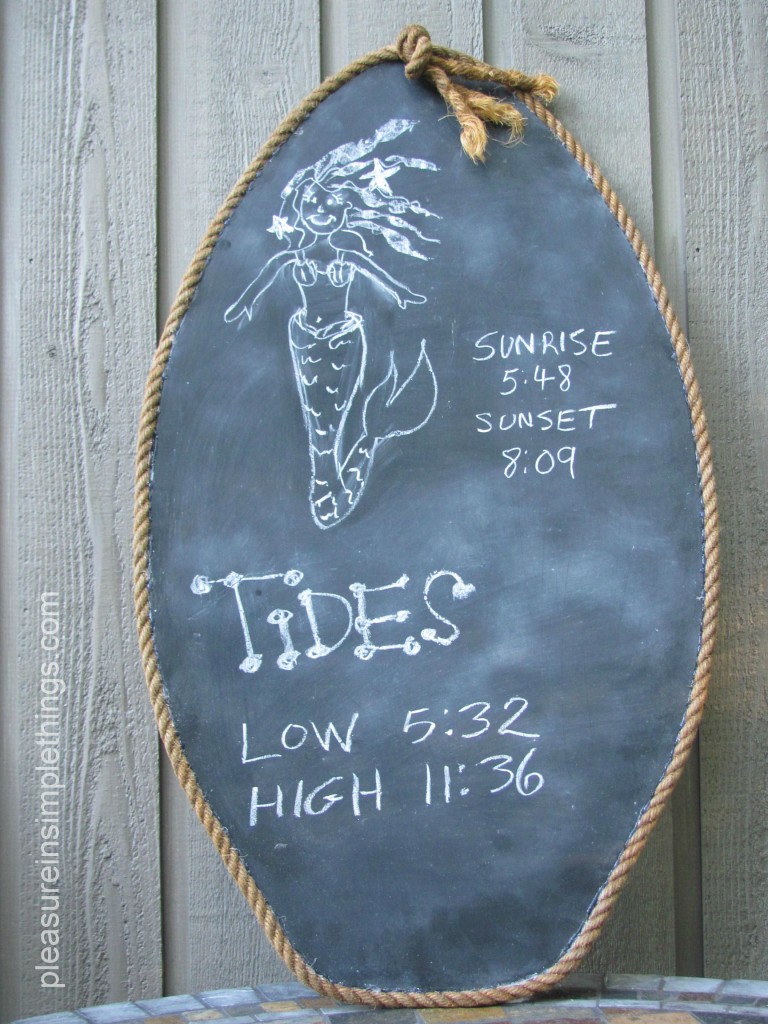
When I saw my daughter throwing out her old skim board, it gave me the idea to turn it into a chalkboard.  (Is there anything that hasn’t been turned into a chalkboard lol!)  It would make the perfect birthday gift for my sister!  She lives on the beach and is a weather fanatic…I wanted to make a chalkboard that she could use as a tide chart.  She has an outdoor patio and I could picture the perfect spot for it in a protected area.  It would also make a great menu board… an option when she entertains.

Supplies needed for project:

  • An old skim board check tag sales, Goodwill, or a sports consignment shop for an old one.  New ones probably go for $35 – $40 dollars at Target…at this time of the year, here in the East, all the summer items are on clearance, so you many find one for much less
  • Can of chalkboard spray paint
  • Glue gun and glue sticks I used 4 or 5 of the small sized sticks
  • Old rope approximately 3 yards – measure around the outside of your skim board to come up with the yardage you will need, remembering to add some extra if you want to tie a knot at the end like I did.  I had intended to look for rope at a marine store, but when I found this old one in the garage I thought it had more character (and it was free)
  • Drop cloth or old sheet to put the skim board on while painting
  • 1 piece of white chalk

I did the spray painting outside…if you choose to, make sure it isn’t a windy day or you will have trouble with the spray paint.

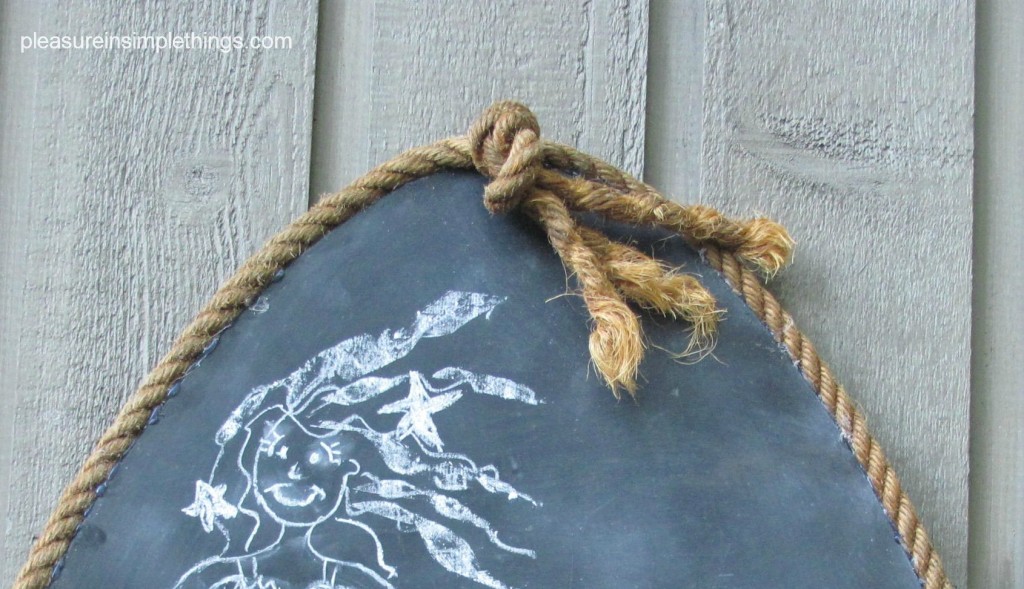
A photo of the top detail on the skim board chalkboard. I knotted the end of the rope before glueing to add some visual interest.

  • Assemble your supplies. 
  • Prepare skim board.  I lightly sanded the surface figuring the paint would adhere better.  I also washed it down with ammonia. 
  • Paint skim board.  Place the skim board on a large drop cloth or sheet.  Spray the top side of the skim board according to the instructions on the chalkboard spray paint.  Even though it suggested two coats, I did four – repeating the process a second time.  It was probably overkill, but it was hard to tell after the first coat if I had covered every spot with the second coat.
  • Prepare skim board surface.  As per instructions on the paint can, after waiting 48 hours, I took a piece of chalk on its side and covered the surface.  Then, wiped it off.

A photo of the skim board after I sprayed it with the chalkboard paint and put on and wiped off the white chalk. The rope is an old one I found in the garage that I glued around the edge for a finishing touch.

  • Glue rope around edge.  Just painting the skim board didn’t look finished to me, so I decided to glue a rope around the edge.  I knotted one end as a decorative touch, and glued it near the top of the board.  I continued using the glue gun to attach the rope all the way around.  I glued a small section at a time holding the rope firmly to the skim board until it dried.

Done.  THAT’S IT!  And, it looks great, right?  I chose to write on it before I gave it to my sister to show her what I thought she could use it for.  I love it.  And, I didn’t even spend one cent!  Be on the lookout for old skim boards!  There are plenty of ways you can add your own personal touches to it.  You can add shells, driftwood, etc. or stencil on an anchor or a personalization.  Happy skimming!

Thanks so much for visiting, Jackie

This project is being shared with Craftberry Bush Outdoor Linky Party and  Celebrating Everyday Life for their recycled & repurposed diy project link party.

9 comments

beachy pencil gift idea

May 6, 2012

mother’s day diy

I still enjoy a beautiful paper product and pretty writing utensils.  I am sure this is also true for many women from older generations…our moms and grandmothers, can also appreciate these ‘old school’ items.  Maybe pencils are a little nostalgic in this day and age, but I still think they make a nice gift; even if providing nothing else but a memory of a bygone era!

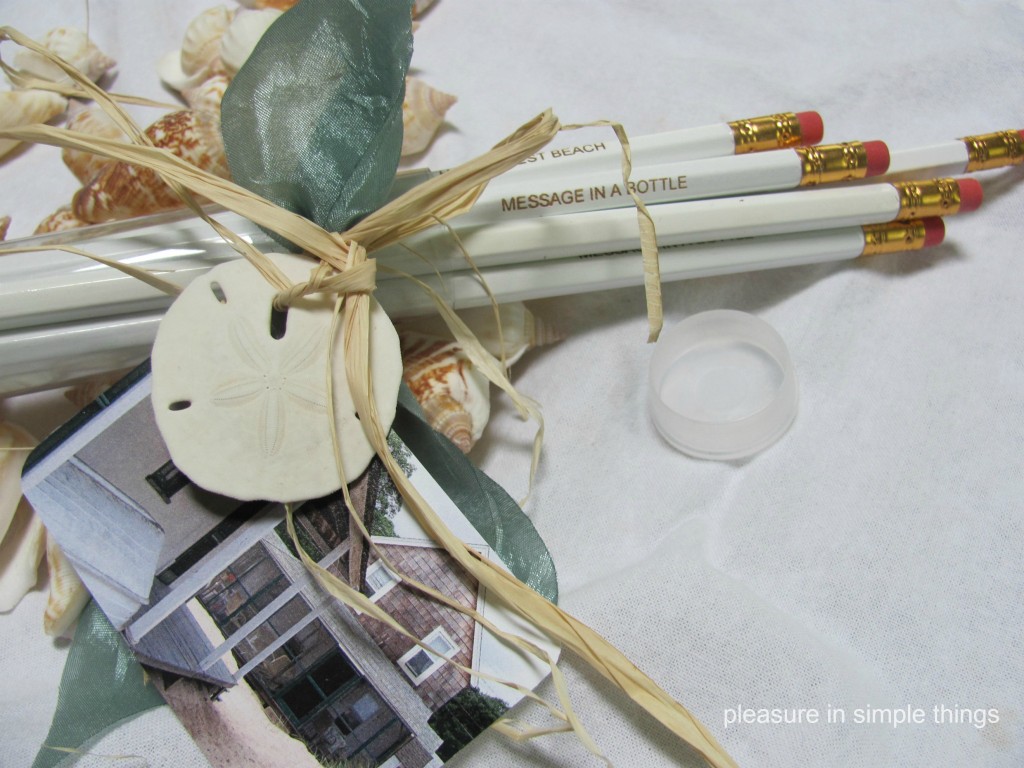
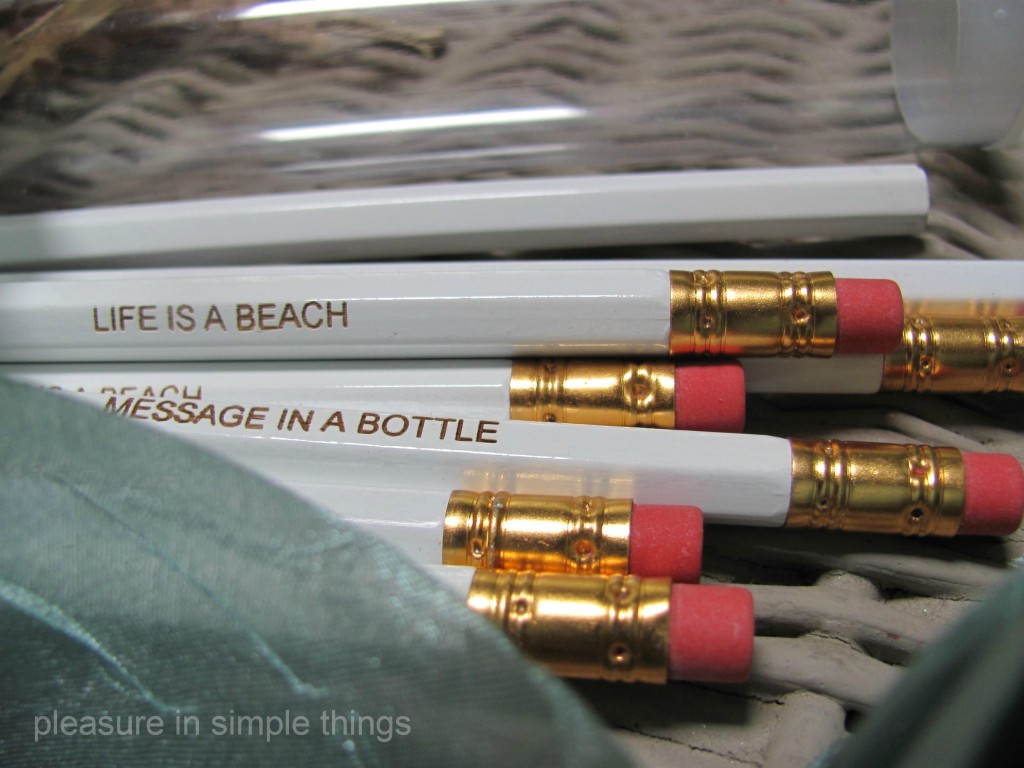
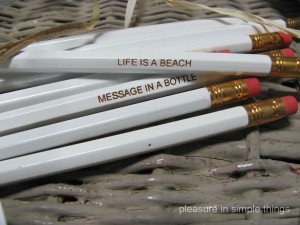
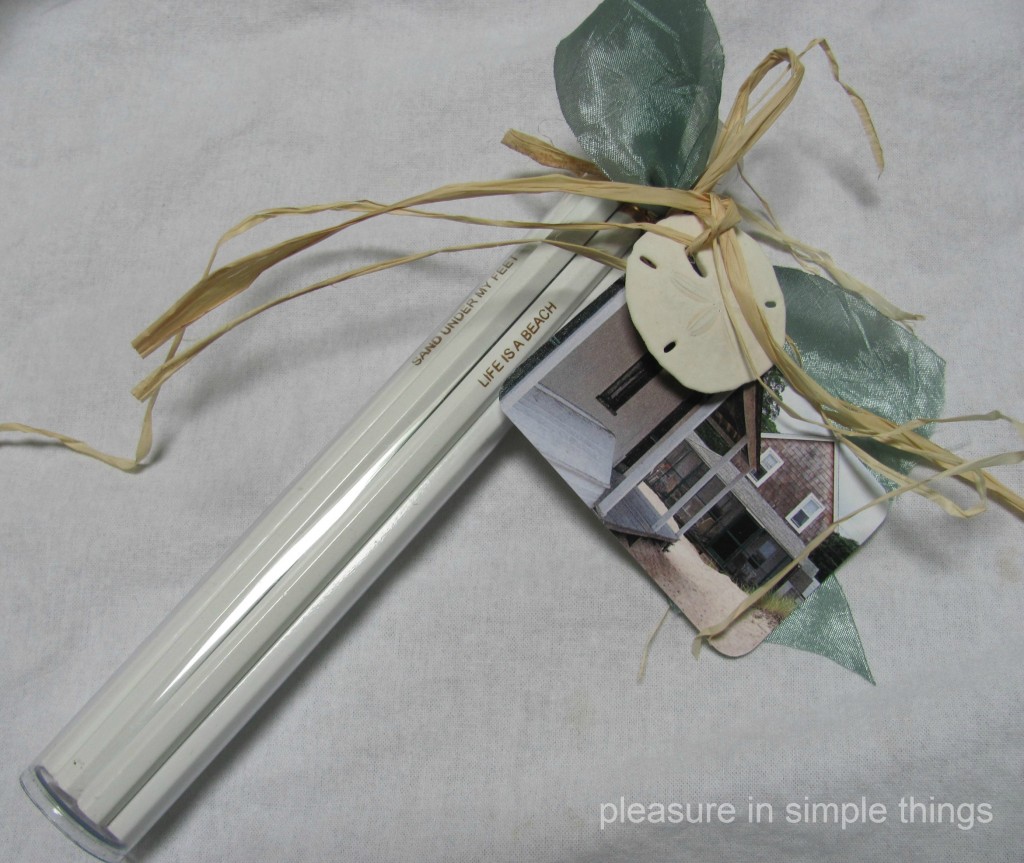
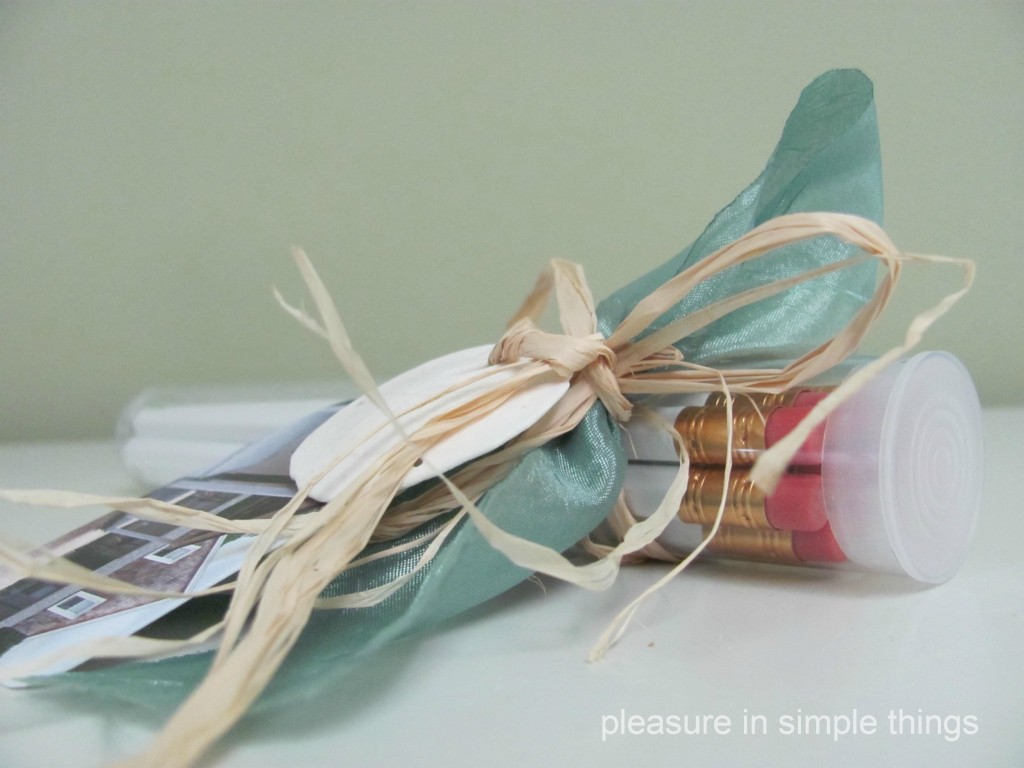
For this gift, I had white pencils imprinted and packaged them in a plastic tube for a practical and inexpensive gift idea.  I used a beach theme and the imprints I ordered for the pencils related to my theme:

  • life is a beach
  • sand & sea
  • message in a bottle
  • sand under my feet
  • sand dollars and seahorses
  • gonna need a bigger boat (no, I didn’t really use this one)

In keeping with the beach theme, you could also use the name or names of your favorite beaches, names of songs related to the beach, or song lyrics (think Beach Boys), surfer lingo (hang ten, surf’s up), quotes, your mom’s favorite sayings (“it’s gonna freeze like that”, “kids day is every day”), etc.  …you get the idea.  The pencils I ordered had a maximum of 30 characters, so I planned accordingly.  Maybe you already have some cool ideas for a Father’s Day set?

Ordering information for imprinted pencils is included at the end of this post.


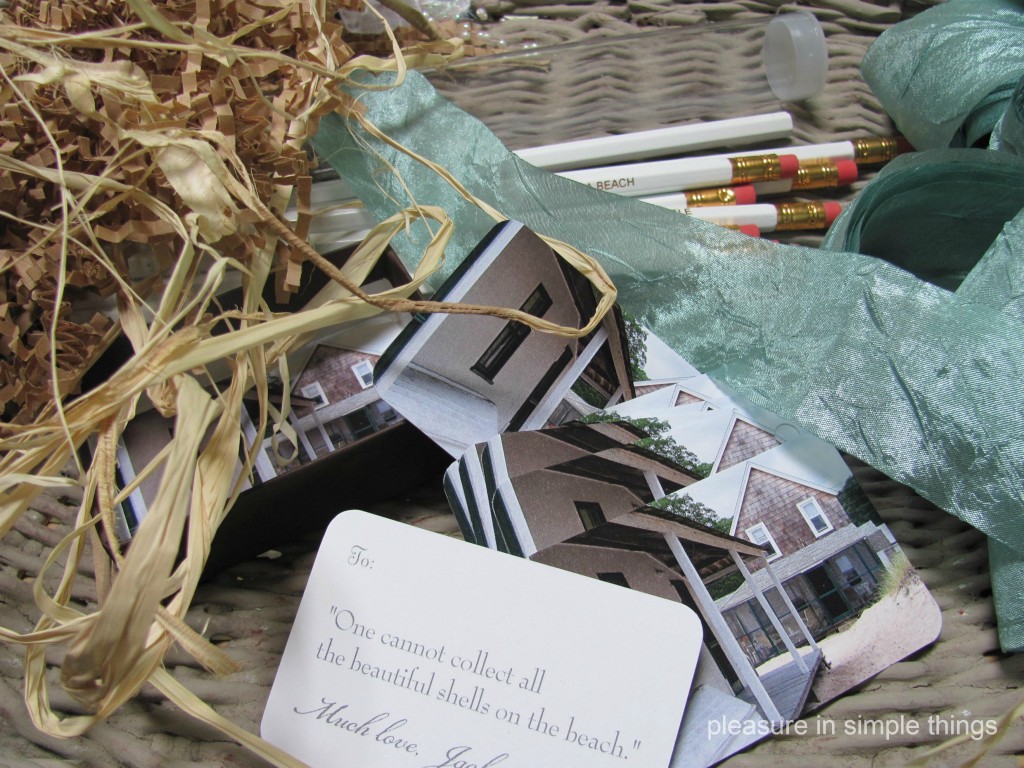
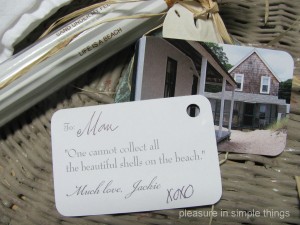
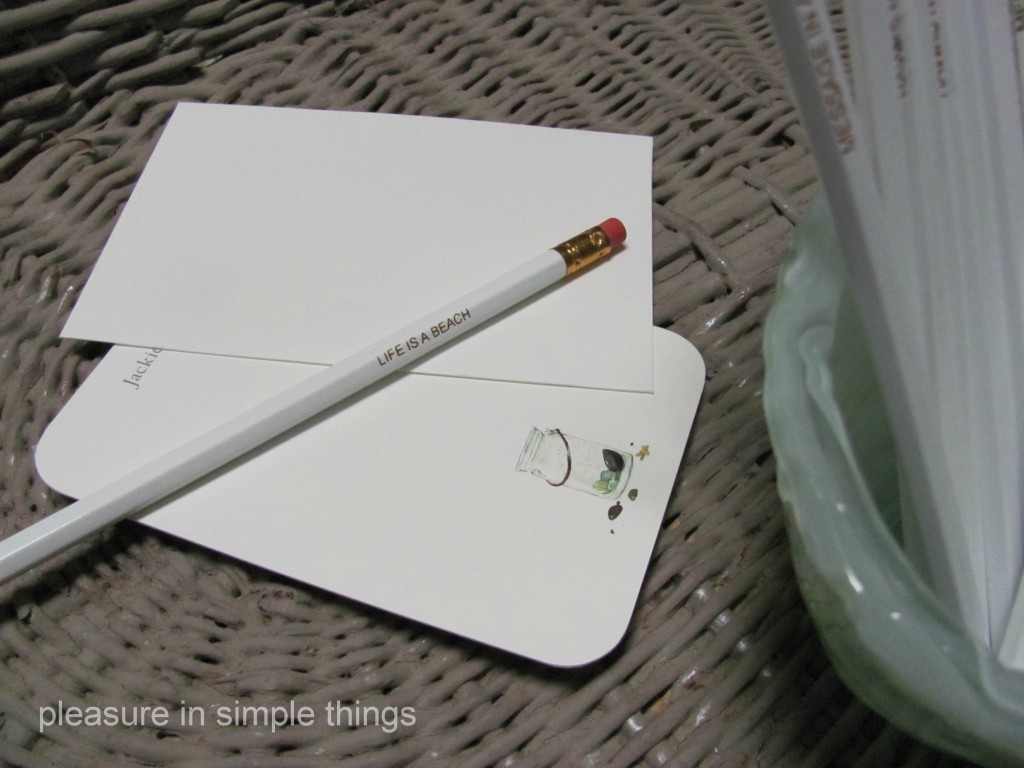
I personalized a gift tag by putting a photo on one side and a favorite saying on the other. Then, I simply punched a hole in the corner to tie onto the gift.


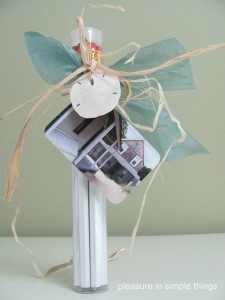
Here is the finished gift…I tied on a piece of ribbon and raffia and attached the gift tag and a small sand dollar.

Ordering notes:  I purchased the pencils at www.lillianvernon.com  White pencils are item 800247 and a set of 12 is $9.99 (they were on sale for $5.98 when I purchased them).  The same imprint is required on all twelve pencils, so you will need to order more sets if you want assorted sayings or quotes. If you are making more than one set, 24 pencils can be ordered for $14.99 on the same website as item 810260.  Remember though, only one imprint per set.  The plastic tubes came from www.thinkgarnish.com  They are called ‘clear plastic tubes with caps’. (I have also used them for candy or straws.)  They are priced at $1.60 each.  Eight pencils fit nicely into a tube.  Decide how many gift sets you want to make in advance so you can plan on the number of tubes and pencils and how many different imprints you will choose.  I have already planned out some Christmas gift pencils that I will package without the tubes…more on that when I start my holiday projects.  The gift tags I had personalized with my own beach photo (my favorite beach cottage…old black and whites of family beach trips work well also) and a favorite quote on the back.   This is really easy to do online using www.cardstore.com  Choose ‘stationery’ at the top of the site and then ‘personalized gift tags’.  You can order 25 for $15. and incorporate your favorite photo.  Put your imagination to work!  Contact me if you have any questions or need ideas for a particular theme.  Have fun with it!   


4 comments

     Next Entries »