Subscribe to Pleasure in Simple Things via RSS ReaderFollow Pleasure in Simple Things on InstagramFollow @InSimpleThings on TwitterLike Pleasure In Simple Things on FacebookFollow Pleasure In Simple Things on PinterestEmail Jackie

state gift tags

March 27, 2015

state shaped gift tags pleasure in simple things blog

Today I am sharing an idea for a gift tag – one that is in the shape of a state.  Come spend Friday field trip in my craft room!

I wanted to come up with a state gift tag design so that I could create two states and use them together on a gift for a baby shower. An upcoming shower is being held in Connecticut by the baby’s future aunt for a soon-to-be mom that lives in Florida. I thought state gift tags would be a great way to acknowledge both states on the gift I am bringing to the shower.

The tags were really easy to create. First, I found a website that had outlines of every state. I saved the photos of the two states I wanted– Connecticut and Florida – to my computer. After printing them out, I cut the shape of each state to use as a template for my tags.

steps in making state gift tags pleasure in simple things blog

The color theme for my gift is white, gold, and pink and I decided kraft paper would go great with the look. So, I glued brown kraft paper onto some cardboard, traced the shape of the two states, and carefully cut each one out.  To go with the theme, I painted the back of each tag pink using acrylic craft paint.painting map gift tags pleasure in simple things blogTo add some gold to the mix (carefully following the instructions), I added some gold leaf to the areas of each state that marked the hometowns of the two families, protecting my table with wax paper. Of course, if you make these, you may rather add a dot, star, or heart to mark a specific city/town within each state. Or, you may want to use a different color – one that coordinates with your own gift wrap color theme. This idea is also easily adapted to a wedding gift.

gold leaf on gift tags pleasure in simple things blog

Lastly, I used a paper hole punch to put a hole in each tag and I tied the two tags together with a gold cord. After the gold leaf adhesive was completely dry – I was done!

state shaped gift tags pleasure in simple things blog

I can’t wait to show you the gift I made!  But, I can’t share that until after the shower!

Thanks so much for stopping by!  Remember to take pleasure in simple things, Jackie

Sharing at Coastal CharmHouse of Hipsters, Nancherrow, Thoughts from Alice, and Craftberry Bush.

5 comments

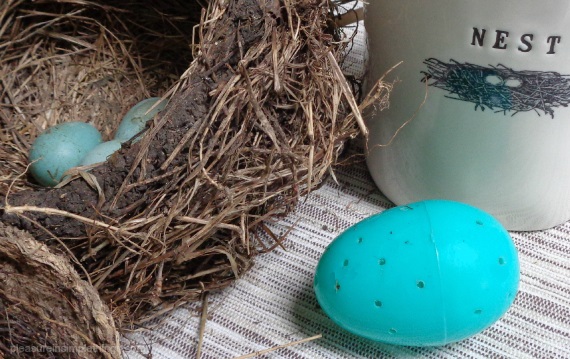
egg tea infuser diy

March 20, 2015

homemade tea infuser pleasure in simple things blog

I am a sucker for a cute tea infuser.  I have seen so many great ones…sometimes they are just too hard to resist buying!  Have you seen the one that looks like the Titanic?  The problem is – these store bought tea diffusers, though cute, never hold enough tea for my taste.  So, today for Friday field trip, I am taking you into my kitchen to show you a quick and easy homemade tea infuser.

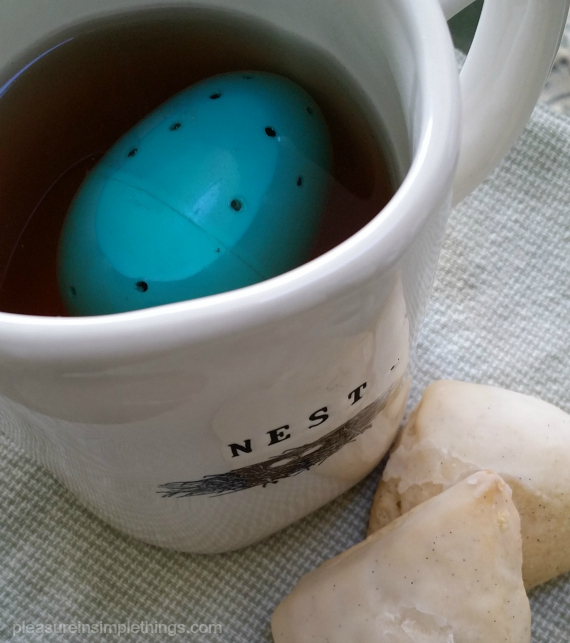
easter egg tea ball pleasure in simple things blog

Not only is it cute and seasonal, but it holds plenty of tea!  First, purchase some small plastic eggs – the kind that are used to fill with treats.  There are plenty of them around at this time of year!  I found a bag of 12 assorted colors at Target for less than $2.  I figure if they are food safe to put candy inside, they must be safe enough for tea!  (And, since I don’t even bring my tea water to a boil, I don’t think the plastic will be in danger of melting lol!)

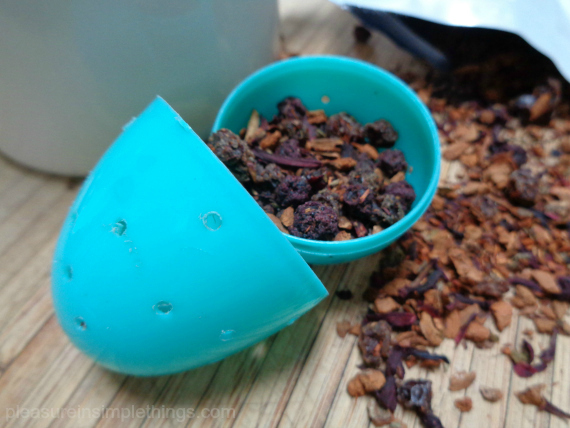
easter egg tea diffuser pleasure in simple things blog

Now just (carefully) use a power drill to make some holes in the egg.  That’s it!  Determine which size drill bit to use based on the tea you normally use.  You obviously don’t want the holes so big that all the tea slips through.

Now you have a reusable infuser!

And, they also make for a great gift paired with a pretty mug for your favorite tea drinker!

eggs for crafting tea infusers pleasure in simple things blog

We are expecting four inches of snow today…I may need an extra cup of tea or two! ;)

Thanks for stopping by!  Have a wonderful weekend welcoming the new season!  xo Jackie

Sharing at House of Hipsters, Nancherrow, and Love of Home.

3 comments

top 10 spring obsessions 2015

March 10, 2015

spring obsessions 2015 pleasure in simple things blog

Now that spring is almost here, it is time to share my top 10 obsessions for the new season!  Here they are, in no particular order:

stuart-weitzman-spring-2015-sandal-styles03

1. First, I must tell you, I am totally in love with gladiator sandals! I have had this obsession before. I know what happens. I get a pair, I wear them once or twice and then, I am over them. Because of my history, I am trying so hard to resist some of my current gladiator favorites. Valentino and Stuart Weitzman (pictured here) both have pairs that make a sandal lover swoon. But, neither pair is within my budget, so I will surely be shopping Marshalls, TJ Maxx, and Target for a similar look this spring.
 

aparis vignette mug from anthropologie

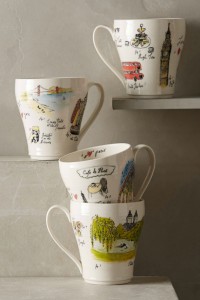
2. I can’t spend spring in Paris? How sad. But, how about a little hint of this romantic city with my morning coffee? These darling city vignette mugs at Anthropologie really hit my fancy! A new mug for the office is an easy and inexpensive way to celebrate the new season. If you would rather dream about New York or London, mugs celebrating these cities are also available at an Anthropologie store or on their website.

3. Ben & Jerrys has done it again! The new ice-cream flavor The Tonight Dough is inspired by one of my favorite all-around entertainers – the talented Jimmy Fallon. What do you get when you put a Jimmy Fallon inspired flavor together with Ben & Jerry’s? Caramel and chocolate chip ice creams with chocolate cookie swirls and gobs of chocolate chip cookie dough and peanut butter cookie dough! Whoa! If you are a big Fallon fan like I am, you may have seen the new ice cream flavor introduced on the first episode of the Tonight Show’s second season. Jimmy is donating all proceeds from the sales of the flavor to the non-profit organization SeriousFun Children’s Network. So, you can feel good knowing your indulgence is giving back by helping children with serious illnesses. Click here to learn more. Thanks for giving me two more great reasons to love ya Jimmy!

TonightDough-jimmy fallon and ben and jerrys

4. Particularly after the long, hard winter we are experiencing here in Connecticut, I am tired of wearing the heavy sweaters, long underwear, mittens and scarves that have been required in below freezing and subzero temperatures! I am so looking forward to wearing dresses! I am not saying I can’t wear a dress this winter, but with a real threat of frostbite when any scrap of bare skin shows, choosing a dress has not been a fun option! I will definitely be buying a few new fit and flares to mark the occasion of some warmer weather!
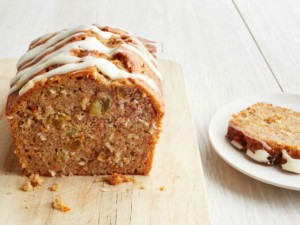
Food Network Magazine 50 Quick Breads Recipes 5. Quick breads are always good and, with the help of Food Network Magazine, it is easy to create one of 50 (yes, I said 50!) different varieties in a snap! Using a few basic recipes, they have come up with easy variations to create 50 different and delicious choices of quick and easy-to-make breads. With both sweet and savory recipes, ranging from sun-dried tomato-pesto to cinnamon bun, it is easy to find one to suit the occasion or the ingredients I have on hand! Click here for the link to the recipes. Enjoy!

6. I am obsessed with Michelle Masters’ art! Michelle combines a gardening love with her artistic talent by creating topiary inspired designs. My obsession with her art is not limited to the season, but her fresh garden creations scream spring and are just beyond cute! With a wonderful selection of home products and stationery – and always new items to choose from – I love picking up some new designs for myself and for gifts! You can see all the beautiful items she creates by clicking here for her website.

Easter-Bunny-and-Hen-Topiary

7. Lately I am experiencing a real fascination with old, weathered brick.  Currently, my dream house (the one that is ever evolving in my head), has a messy mortar backsplash.  I recently discovered Robin Sprong’s amazing wall coverings that speak directly to my obsession for messy mortar and old brick! Sprong has made it possible to put up wallpaper with a very realistic pattern of old bricks or concrete – how cool is this?! A messy mortar backsplash can be installed as easily as putting up some wallpaper! Thank you Robin Sprong!

aRobin Sprong white washed brick wallpaper

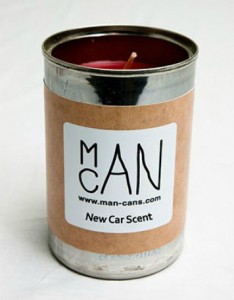
anew car smell man can8. Have you heard about ManCans? When my son requested candles as gifts for his new place, I started looking around for some alternative scents to florals and I found ManCans. These candles come in wonderful ‘manly’ scents like Fresh Cut Grass, Bacon, Sawdust, and New Car. These candles are made in soup cans after the contents have been donated to a soup kitchen. So, in addition to finding a great and inexpensive ‘nongirly’ candle, a purchase is also helping feed people! Wouldn’t one or a few of these make a great Father’s Day gift? Maybe the scent of Memphis Style BBQ or New Mitt would appeal to your Pop? So fun! Click here for the website.

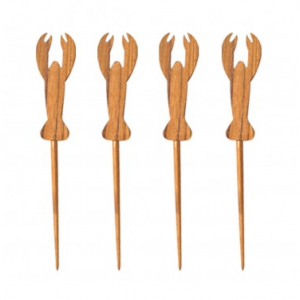
9. When visiting other cities, there are always certain stores that are just prerequisites for inspiration. Like Ballard set-of-4-lobster-picksDesigns when visiting Atlanta, Lillian August in Connecticut, ABC Carpet & Home in NYC, or Terrain when visiting Philadelphia. In Boston, one of these spots is Lekker Home. A cool collection of brands and an interesting variety of products make it a fun place to peruse. For the spring, I am ‘jonesing’ for many of the non-breakable sea life themed items that are perfect now that entertaining will soon hit the outdoors. Reusable lobster-motif picks and sea life melamine plates are a couple of my favorites!
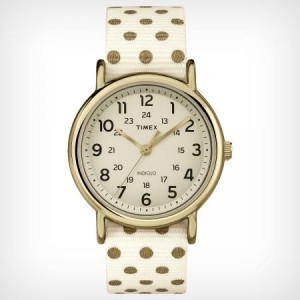
weekender with gold dots10. It is so fun to change up accessories in the spring and Timex makes it really easy to add a couple new casual watches to the mix!  I am obsessed with their weekender watch with gold polka dots on the (reversible) band.  You may know I have a polka dot obsession -heck, I even have a Pinterest page full of dots and stripes!  Love this watch!

I hope you enjoyed sharing my top ten obsessions for spring. I would love to hear about some of yours!

*Please note that photos in this post were not taken by me, but were taken from the respective websites.

Thanks for stopping by!  Remember to take pleasure in simple things, Jackie

Sharing with House of Hipsters, Thoughts from AliceCraftberry BushSand & Sisal, Elizabeth & Co., and Homework.

no comments

driftwood trinket dish diy

February 24, 2015

diy trinket dish for $3.99 pleasure in simple things blog

I will let you in on a little secret. Well, I don’t know if it is actually a secret since I am sure many others have discovered this wonderful little tidbit. Are you ready?

IKEA sells a 6” x 6” candle tray for $3.99. It is a beautifully simple, white ceramic square tray and has four protective rubber feet on the bottom. Why is this a wonderful tidbit?

easy to make trinket dish pleasure in simple things blogThis candle tray makes the best trinket dish ever! At only $3.99, it is perfect to create a beautiful – yet quick, easy and inexpensive – trinket dish!

ikea candle tray to trinket dish pleasure in simple things blog

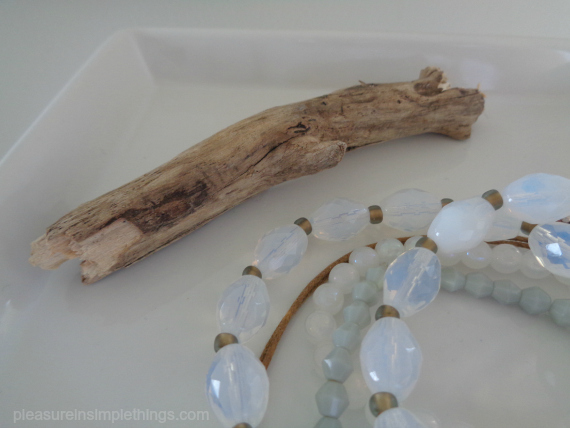
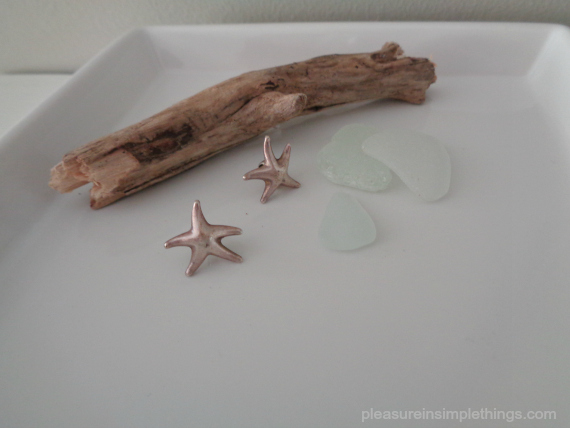
As a decorative addition to my dish, I chose an interesting piece of driftwood, approximately 4” long, from my collection of driftwood pieces. Because of the porous nature of the driftwood, I chose to use caulk as an adhesive to mount the driftwood to the tray. If you use a decorative addition made of a different material, be sure to consider the item you are adding when choosing a glue. For the most part, E6000 glue or Gorilla glue is probably the best choice of adhesive. (Be sure to follow directions carefully.)

driftwood trinket tray diy from pleasure in simple things blog

Why driftwood? I have something of a collection of trinket dishes with a nautical theme and a piece of driftwood coordinates great with my bedroom décor. I love the simple white dish with an interesting (aren’t they all?) piece of driftwood from my favorite beach!

driftwood diy trinket dish pleasure in simple things blog
The driftwood can easily be substituted for something that coordinates with your décor or the décor of the recipient – if the dish is a gift. You can pretty much add any embellishment that hits your fancy…just glue it down with good, strong glue and you are good to go!

diy trinket dish from ikea candle tray pleasure in simple things blog

I have made so many different variations of this trinket dish! Ideas include spray painted animals or figures, cars (think Father’s Day), or natural elements. If you are stumped, shoot me an email and I will help with ideas! Have fun with it!

diy trinket dish from IKEA tray pleasure in simple things blog

Thanks so much for stopping by!

Remember to take pleasure in simple things, Jackie

Sharing at Sand & Sisal, Shabby Nest, House of Hipsters, Nancherrow, and Thoughts from Alice.

1 comment

love letter heart tags diy

February 13, 2015

love letter heart gift tag pleasure in simple things blog

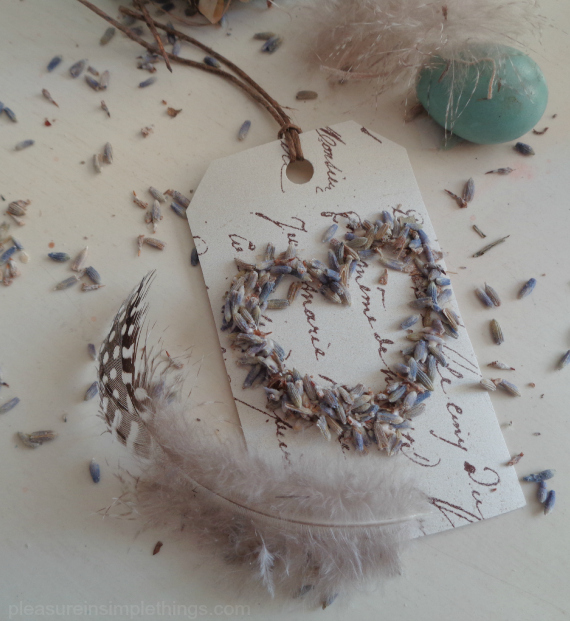
For Friday field trip today, I am sharing one last Valentine’s Day idea before the weekend. These are really sweet, easy to make love letter tags made with hearts of dried lavender. I have been on a lavender kick lately – adding lavender to my shortbread cookies, making lavender heart shaped linen sachets, and now…using lavender on gift tags!

heart love letter gift tag pleasure in simple things blog

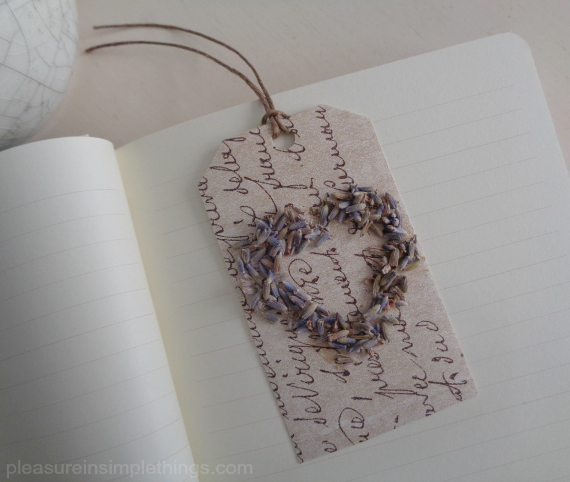
Just follow the easy steps pictured and you can have some romantic tags put together in no time flat! There are plenty of options for the ‘love letter’ part… you can use printed paper from the craft store, paper from an old book – an old poetry book is perfect – or, print something from your computer printer.

diy love letter heart tag pleasure in simple things blog(1.) Cut a piece of cardstock to size and (2.) glue ‘love letter’ paper to the front of it. (3.) Draw a heart shaped bead of glue onto the front of the card. (4.) Sprinkle dried lavender over the glue and press lightly. ( 5.) Let dry before shaking off excess lavender. (6.) Trim the top corners of the cardstock and use a paper punch to add a hole. Add some twine or cord.

love letter lavender heart gift tag pleasure in simple things blog

That is all it takes to create a romantic little tag with a wonderful hint of lavender fragrance!  Enjoy!

lavender heart diy gift tag pleasure in simple things blog

Thanks for stopping by! Have a wonderful weekend!

love letter lavender heart gift tag from pleasure in simple things blog

Remember to take pleasure in simple things, Jackie xo

Sharing with Nancherrow, House of Hipsters,  Craftberry Bush, Crafts a la Mode, The Shabby Nest, and French Country Cottage.

10 comments

easy lavender heart sachets

February 10, 2015

easy diy linen heart sachets pleasure in simple things blog

Who wouldn’t want to receive a heart on Valentine’s Day? A great way to give one is to gift a homemade heart-shaped sachet.

pink linen heart sachets pleasure in simple things blog
Today I am sharing some really easy ones I made up using lavender. These sachets are created with just a basic straight sewing stitch and do not require any measuring at all. I used a sewing machine, but they can also be sewn by hand if need be.  (If you would rather try a sachet with a no-sew method, click here for a great option.)

pretty diy heart sachet pleasure in simple things blog
I made a template using a piece of scrap paper by folding it in half and cutting out the squatty heart shape I wanted…approximately 6 1/2 “ across – making it palm size and the perfect little heart to tuck into a drawer. I purchased a small piece of pale pink linen and pulled out a scrap of white linen I had at home in my pile of fabric scraps. Muslin would also work.

lavender heart shortbread cookies pleasure in simple things blog

Another great way to use lavender for Valentine’s Day…add some to your heart shaped shortbreads! (Be sure to use culinary grade lavender.)

I stamped a message on a small piece of the white linen and pulled threads to fray the edges on all four sides. Using the heart template I made, I cut two heart pieces from the pink linen. On the right side of the fabric on one of the pink linen hearts, I positioned the white message piece and attached it with one short running stitch up the middle.

making a lavender heart sachet pleasure in simple things blog
Then, I positioned the two heart pieces – right sides out – together and stitched around the border, roughly 1/4 “ from the edge. Remember – I did no measuring! About 1” before reaching around the heart with the stitching, I stopped to add in the lavender. I spooned in enough lavender to get the look I wanted. Then I went back and finished the stitching.making lavender heart sachets pleasure in simple things blog

I think these sachets are so sweet…and, the lavender smells so lovely!

Because I wanted the look of the raw edges on my heart, it really simplified the sewing and made this a super easy project for any skill level! There is still plenty of time to make some up before the weekend!

lavender heart sachet diy pleasure in simple things blog (2)
Thanks for stopping by! Remember to take pleasure in simple things, Jackie

Sharing with Sand & Sisal, Homework, and Elizabeth & Co.

no comments

polka dot fringed pencils diy

February 3, 2015

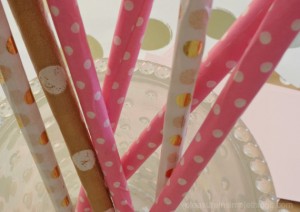
diy tissue paper pencils and heart tag pleasure in simple things blog

I think most of us that love creating are collectors – often collecting beautiful scraps to recycle for imagined future projects. Today, I am sharing one way I use my salvaged tissue paper by providing a tutorial for creating pretty fringed pencils. How earth friendly to use recycled tissue paper and old pencils that have been in the junk drawer, for who knows how long, to make these cute pencils!

fringed pencil diy pleasure in simple things blog

Because Valentine’s Day is so close, I have chosen to use tissue paper that coordinates with a Valentine’s Day theme in one of my favorite patterns…polka dots! Join me as I channel my inner Kate Spade! (Am I the only one that has a polka dot Pinterest board?)

Supplies Needed
Pencils (round)
Spray adhesive
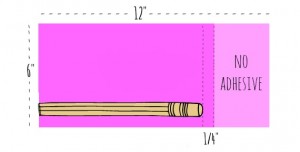
Decorative tissue paper – one 6” x 12” piece for each pencil

Start by deciding how many pencils you will create, and cut the appropriate number of tissue paper pieces. A tissue paper with a little more weight is preferred over a super thin variety.

(You can also use a paper cocktail napkin – by separating the top layer and using that in place of the tissue paper. The fringe will not be as long if you choose to use a napkin, since they are not the full 12” specified. Also, I find the cocktail napkin does not hold up as well as the tissue paper when sharpening the pencil. The beige with white polka dot pencil shown here was made with paper from a cocktail napkin.)

Kate Spade inspired polka dot pencil diy tutorial from pleasure in simple things blog

kate spade inspired pencil tutorial pleasure in simple things blogSpray the wrong side of the tissue with the adhesive, being sure to plan for overspray (protect the area), leaving a section without spray (use a piece of paper to mask the area from spray). The reason for the non-adhesive section is because you don’t want adhesive on the area that will be the fringe. With care, lay the piece of tissue paper on a clean, flat surface – adhesive side up. Carefully line up the pencil in the corner of the tissue paper remembering that the adhesive is in place and put it directly on the right spot the first time. The eraser side will be on the inside, and the writing side on the outside edge, of the tissue paper. Roll the pencil tightly down the length of the tissue paper.

Cut the end of the tissue paper to make the fringe, stopping within a 1/2” of the eraser end of the pencil. You will want to make cuts approximately 1/4” spaces apart – this does not need to be exact – by placing the bottom of your scissors inside the tube you created at the pencil end. As the final step, twist the fringed end of the pencil…because there is a little adhesive on this end, it will keep the twist in place. Trim the fringe to desired length, if needed.

polka dot pencils inspired by Kate Spade tutorial pleasure in simple things blog

That’s it! Cute, right? I made a tag from a round cut from a pink paint swatch and added a gold leaf heart. If you are giving your pencil(s) as a Valentine to a youngster (or someone young at heart), you may want to add a gift tag with a corny Valentine saying like:
• You’ve got the right stuff!
• You are just write for me!
• Write on!
• You’re all write with me!

I hope you enjoyed today’s fringed pencil craft. Maybe I have inspired you to make up a batch to match your office décor, or… to match your kitchen where you keep the grocery list?

polka dot pencil craft pleasure in simple things blog

Thanks for stopping by! Remember to take pleasure in simple things, Jackie

Sharing with NancherrowCraftberrry BushThoughts from Alice, Sand & Sisal, Homework, and Elizabeth & Co.

2 comments

birch bark diy bookmark valentines

January 16, 2015

white birch heart bookmark pleasure in simple things blog

Today on Friday field trip, I am sharing how I used some decorating leftovers from the holidays to create some cute Valentine bookmarks.

My outdoors theme left me with some rustic looking leftovers and I thought birch bark would be perfect to design a bookmark. I looked through my stash of white birch bark to find some flat, but sturdy, thin pieces to make my bookmarks. Using a craft knife, I cut a rectangle approximately 1 1/2″ x 5 1/2 ” from the bark for each bookmark.

Initial heart birch bark bookmark pleasure in simpel things blog

If you haven’t collected your own bark, you may be able to find some at a high-end garden store.  (I know I have seen it sold at Terrain.)  You won’t be needing very much – depending on how many bookmarks you plan to make, of course.

Next, to embellish the bark, I used a basic wood burning tool (Girl Scouts 101) and burned a heart pattern into the bark. On some of the bookmarks, I also added an initial. You can get as create as you like with this step – add an arrow, 2 sets of initials, etc. If you don’t have the basic wood burning tool, it is a handy thing to have and you can probably find one online for $10 to $15. Don’t get an entire set – just the simple, basic tool is all you need.

birch bark bookmarks with initials pleasure in simple things blog

I used a nail and a hammer to put a hole into the top of each rectangle so I could add a ribbon to the top of each bookmark. For the ribbon, I recycled the handles from my holiday shopping bags. Does the cream color ribbon with red accents look familiar? It is from the handles of an Anthropologie shopping bag! The jute looking one is from the handle of a Terrain shopping bag! I always save the handles for projects just like this!

heart bookmarks from birch bark pleasure in simple things blog

And, that’s it! Simple, right?

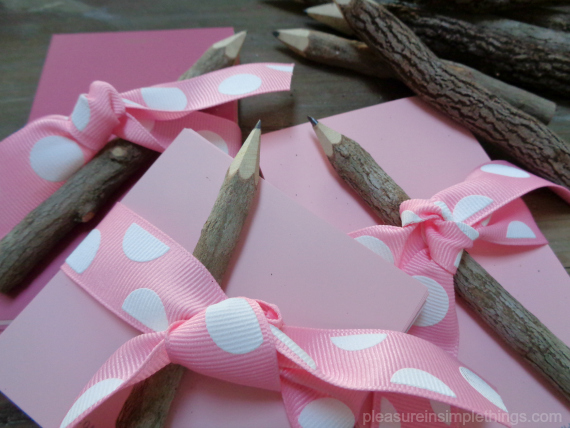
I also had some cute pencils left from my holiday wrapping that I transformed for Valentine’s Day. Twig pencils that served as package tie-ons at the holidays are now packaged with ribbon scraps and paint swatches – my favorite note paper – as Valentine memo packs! (Is it just me that enjoys memorizing the names of current paint colors?! I know…I am definitely color obsessed!)

paint swatch note packs pleasure in simple things blog

What holiday decorating leftovers can you transform into Valentines?  I hope I have inspired you to create some!

Note: You can use some sandpaper to soften up any rough spots you may find on your bark. You can also attach some felt or cardstock to the back of a piece of bark if it seems too thin or is not rigid enough for a bookmark.  Most importantly, be sure to follow the safety guidelines on the wood burning tool!

Thank you so much for stopping by!

Have a wonderful weekend and remember to take pleasure in simple things, Jackie

Sharing at Homework,  Thoughts of Alice, House of Hipsters, Nancherrow, and The Shabby Nest.

6 comments

diy feather ornaments

December 16, 2014

white feather glitter ornament pleasure in simple things blog

It is hard to believe Christmas is only a little over a week away! But, there is still some time to make some ornaments as gifts. I am sharing two easy DIY ideas on making feather ornaments. A woodland holiday theme needs to include feathers, nests, and birds – don’t you think?

One way is to put a feather or feathers into a clear hollow glass ornament. I did this in three different variations this year:

1.  I used a clear drying glue to add silver glass glitter to the outside bottom of the glass globe and added a spotted feather inside the globe.

dotted feather ornament pleasure in simple things blog

2.  I used a cotton swab to add dots of clear drying glue and glued white glass glitter to the dots. When dry, I added a white feather and a pinch of silver glitter inside the globe.

white dot and feather ornament pleausre in simple things blog

3.  I dipped two feathers into some silver glass glitter before placing them into the globe. To keep them positioned correctly, I used a glue gun to glue the tops of the feathers near the top of the ornament. This doesn’t show, because the place where the feathers are glued is covered when the metal piece for hanging the ornament is repositioned on the ornament top.

close ups of glitter feather ornaments pleasure in simple things blog

The second way isn’t using an actual feather, but rather… using heavyweight cardboard to create a feather design. Simply draw or trace a feather onto cardboard (I made mine black for purposes of demonstration – it is best to use the same color as your glitter so a different color will not show through). Cut out the feather shape using a craft knife and cut a hole for adding a string or ribbon. Use clear drying glue to cover the cardboard with glass glitter – one side at a time.

process of making a feather glitter ornament pleasure in simple things blog

Add a ribbon or string for hanging. I used black and white baker’s twine because I am giving my feather ornament as a gift, and the black and white color scheme best reflects the taste of the recipient.

packaged feather ornament pleasure in simple things blog

I decided to package it with a favorite Emily Dickinson quote. I used my computer printer to print the quote onto a clear label and used the label to seal the ornament in a clear cellophane bag. I think it makes a thoughtful gift.
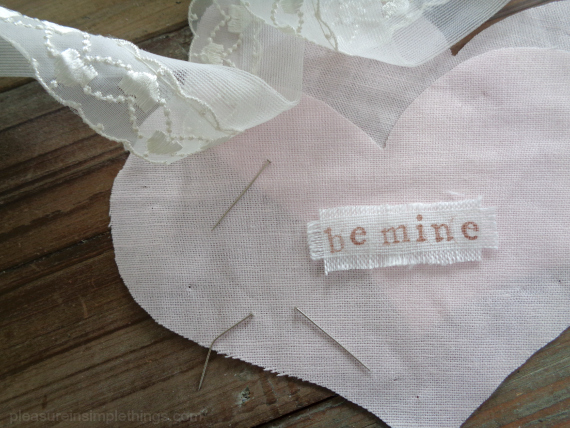
emily dickinson quote pleasure in simple things blog

I hope these ideas have inspired you to create some ornaments using feathers.  Have fun with it!

Thanks for stopping by!  Remember to take pleasure in simple things, Jackie

Sharing at Elizabeth & Co., Sand & Sisal, and Coastal Charm.

no comments

zip code pillow gift

December 9, 2014

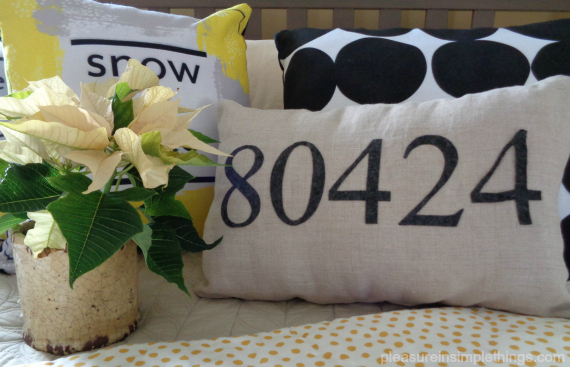
adding a zip code to a pillow gift pleasure in simple things blog

I love using zip codes in gifts! Giving a gift with the zip code from a special place – a hometown, the location of a new home, a vacation or honeymoon spot, or a college town – is such a thoughtful way to recognize a favorite or significant place of the gift recipient.

You may remember the decorative zip code tray I made a while back. (Click here for instructions to make a zip code tray.) Today, I am sharing instructions on how to add a (no sew) zip code to a homemade pillow!

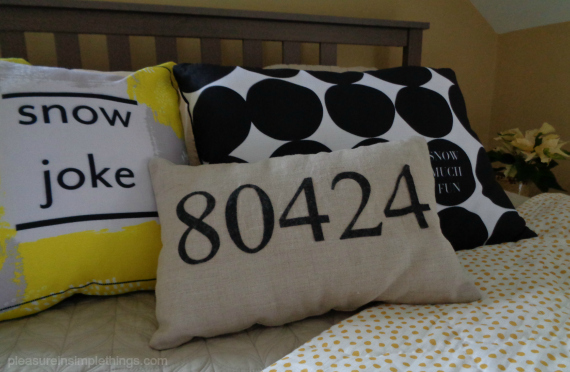
I made a pillow with the zip code for Breckenridge – one of my son’s favorite snowboarding places in Colorado – to add to a group of snow themed pillows I had made for his apartment.

pillows for snow boarders pleasure in simple things blog

I had planned on using an iron-on fabric adhesive to keep the zip code numbers in place and then to add decorative stitching around the edges of the numbers. As it turned out, the instructions on the adhesive I choose said “do not sew” on the instructions so, I ended up not including the decorative stitching to my design.

I chose linen for the pillow and gray felt for the zip code numbers. I used a product I purchased at a fabric store called HeatnBond Ultrahold to adhere the numbers.

zip code pillow on a bed pleasure in simple things blog

I decided on a 12” x 16” finish size for my pillow and cut the fabric appropriately. (If you decide to use a pillow form for your pillow, be sure to create a size that will accommodate it. If you are using polyfill to fill your pillow, you obviously do not need to be exact in your measurements.)

So, before proceeding to make the pillow, the desired zip code needed to be added to one of the pillow pieces. This was not hard to do, but took a little time and patience.

zip code pillow collage of instruction photos pleasure in simple things blog

First, I printed out numbers from my computer in a size and type style that looked appropriate for the finished pillow size. I cut out the five numbers from the computer paper.  (Cut only one paper number for a duplicate number.) I cut a piece of felt in an appropriate size to accommodate the five numbers I cut out. Following the instructions on the fabric adhesive, I used an iron to adhere the fabric adhesive to the BACK of the felt. Then, I flipped the numbers and traced them onto the paper of the adhesive. BE SURE to trace the numbers BACKWARDS (flipped on reverse side) so that they will come out the appropriate way when cut! I carefully cut out each number from the tracings. I removed the adhesive backing from the felt numbers and positioned them onto the right side of the linen piece I was using for the front of the pillow. Following the instructions on the adhesive, I ironed and bonded the numbers to the fabric.

Zip code complete! I then proceeded to finish sewing and stuffing the pillow. It is perfect for the snow themed holiday gift for my son…the perfect addition to a snowboarder’s apartment!  Now I am thinking I should make more – so many snowboarding states, so little time!  I also made one for a new home owner.  (For my own home I am thinking zip codes from favorite beach towns in neutral and sea glass hues!)

Love a themed gift! It’s snow much fun! ;) I can’t wait to coordinate the wrapping!

snow themed pillows pleasure in simple things blog

Note: The snow pun pillows in this post were ordered from Tiny Prints. Every year when I order my Christmas cards, I go a little crazy ordering other products I see on their site…this year; I couldn’t resist all the wonderful pillows that were available to personalize. If you want a zip code pillow and would rather not sew it yourself, you can easily personalize one using this website (click here for website)…or, even add a photo to a pillow. If I had a photo of my friend’s new home, I could have made a pillow with a photo of the home on the front! Next, I may order a pillow with a photo of my son snowboarding to add to his gift!  Another option to create a zip code pillow is to buy a pre-made pillow cover (Ikea has some nice ones) and follow the instructions I’ve provided to add a zip code.  I hope I have inspired you to create a themed gift for someone special!

Thanks for stopping by! Remember to take pleasure in simple things, Jackie

Sharing with Thoughts from Alice, Elizabeth & Co., House of Hipsters, and Sand & Sisal.

7 comments

« Previous Entries     Next Entries »