Subscribe to Pleasure in Simple Things via RSS ReaderFollow Pleasure in Simple Things on InstagramFollow @InSimpleThings on TwitterLike Pleasure In Simple Things on FacebookFollow Pleasure In Simple Things on PinterestEmail Jackie

updated mahogany secretary

October 15, 2019

detail of inside

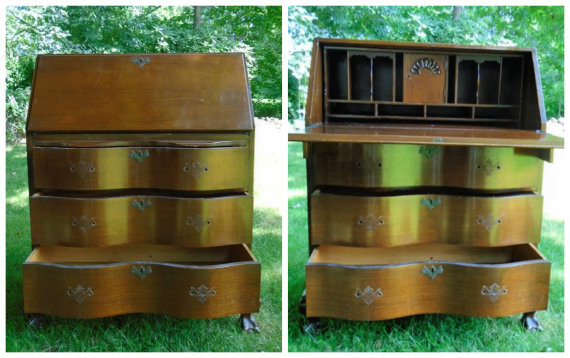
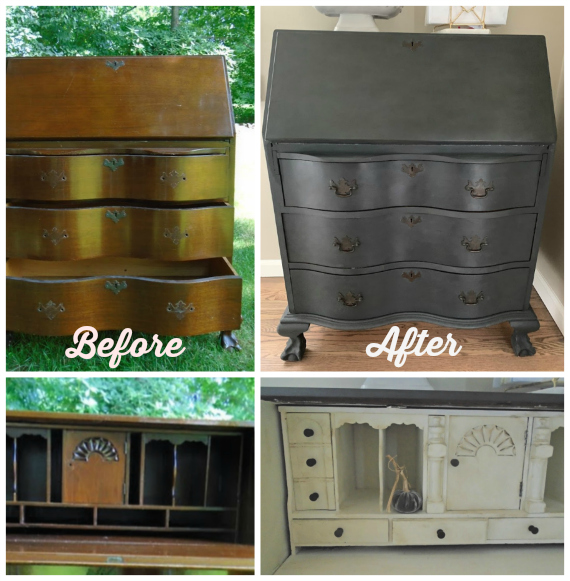
Graphite and old white are the Annie Sloan Chalk Paint colors I chose to update an antique solid mahogany secretary.  I think the dark charcoal color adds a little more sophistication to the desk than a solid black would.

Before desk photos

This piece is one I am doing for myself, so of course it has been on the back burner for some time!  I plan on using it for my stationery – I think I am one of the few that still uses it!

ASC Gray

I didn’t use any fancy painting techniques on this piece, but the job was extremely time intensive because of all the little nooks, crannies, and secret compartments!  I started by putting a shellac coat on all the interior parts to be painted in the old white.  I needed to seal the mahogany so none of the color would seep through the white – an orangey yellow often comes through white with this type of piece if it hasn’t been sealed.

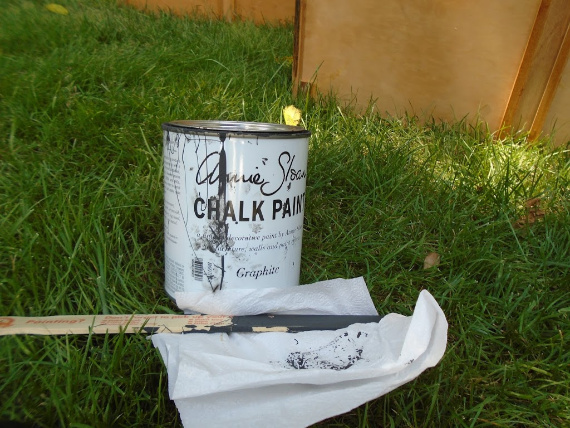
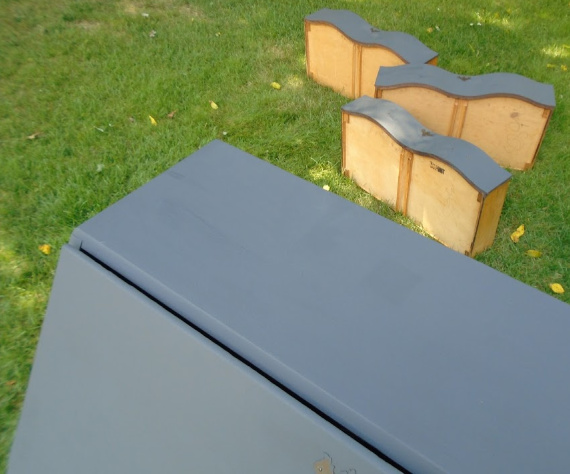
painting ASC Gray

The outside of the piece was straightforward painting – I used the graphite and painted two coats.  After a coat of shellac on the inside, I painted two coats there as well.  After the painting was complete, I added a coat of Annie Sloan clear wax.  I did not do any distressing on this piece, but I did put a second coat of wax using Annie Sloan dark wax.  I wanted to give the graphite a deeper color and I also wanted the old white to look really old.  I was sure to rub dark wax into some of the nooks and crannies!

before and after graphite secretary

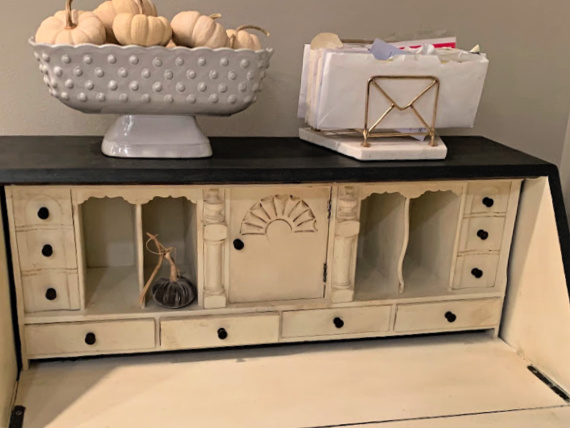
I used all the original hardware.  I really like the old, dark hardware with this piece – the inside hardware looks especially nice against the old white paint and in combination with the graphite paint on the outside.


showing after photo of inside

I am so happy to have the piece completed and ready to store all my paper products.  I see a Felix Doolittle order in my immediate future!

Thanks for stopping by!

Remember to take pleasure in simple things, Jackie

no comments

plenty of eat

August 23, 2019

eat sign

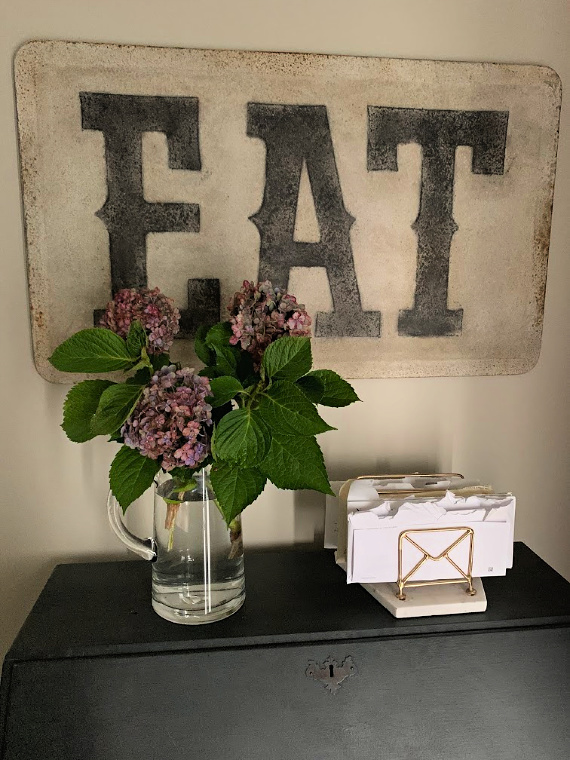
What do you think of my new metal eat sign?  I thought it was perfect for my kitchen!  The colors, size, and texture are super!

It certainly makes a statement – don’t you think?

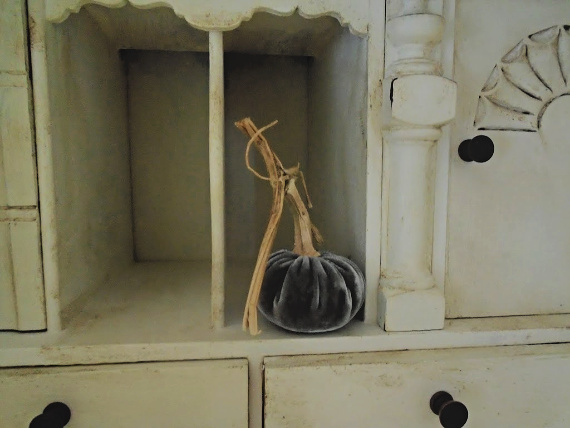
There is another reason I am sharing this photo with you besides showing you my sign…this photo gives a hint of the next furniture redo project I am working on.  It is in Annie Sloan charcoal gray and I can’t wait to finish so I can give you the full reveal!

Have a wonderful weekend and remember to take pleasure in simple things, Jackie
no comments

vintage dresser before & after

August 20, 2019

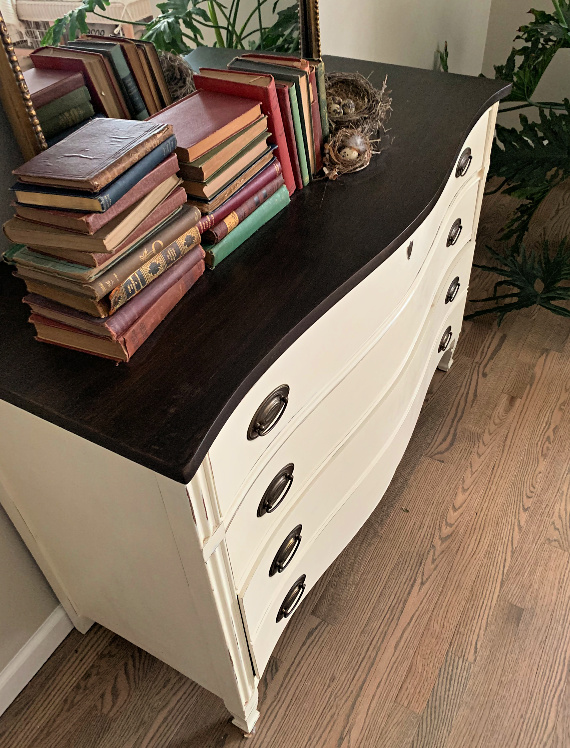
top of dresser after

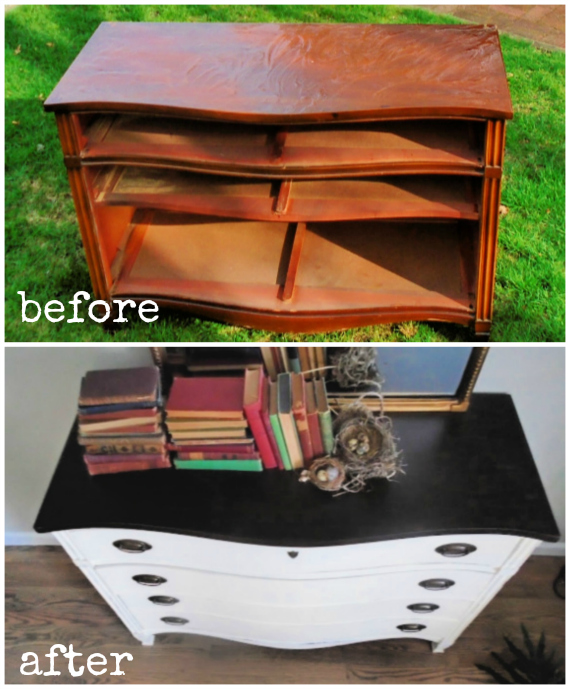
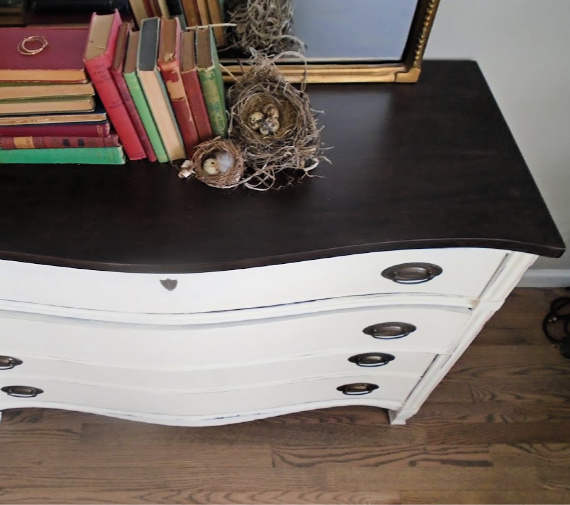
Do you remember the vintage dresser I was refinishing?  I finally took a few photos of the ‘after’ to share with you.  It is an old mahogany piece – I’m sure you’ve seen similar pieces.

before and after dresser

Most of the furniture I refinish is for others, but this piece is staying with me!

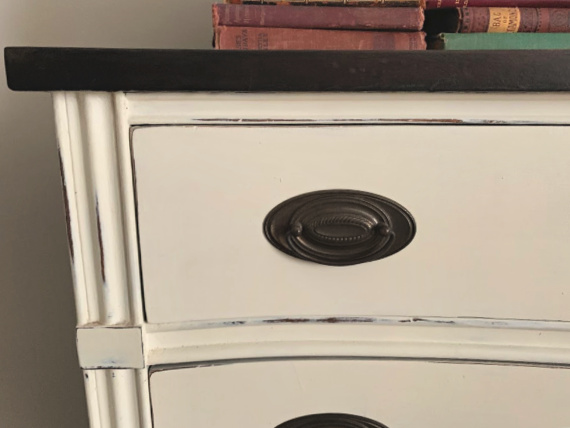
left corner close up

Here are the steps I took to transform the piece:

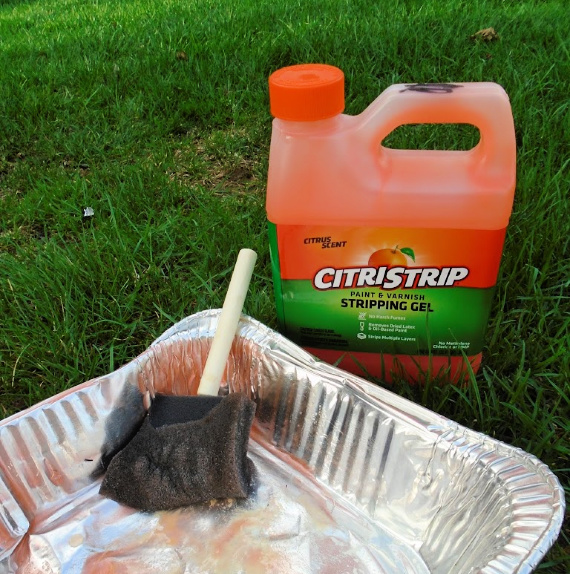
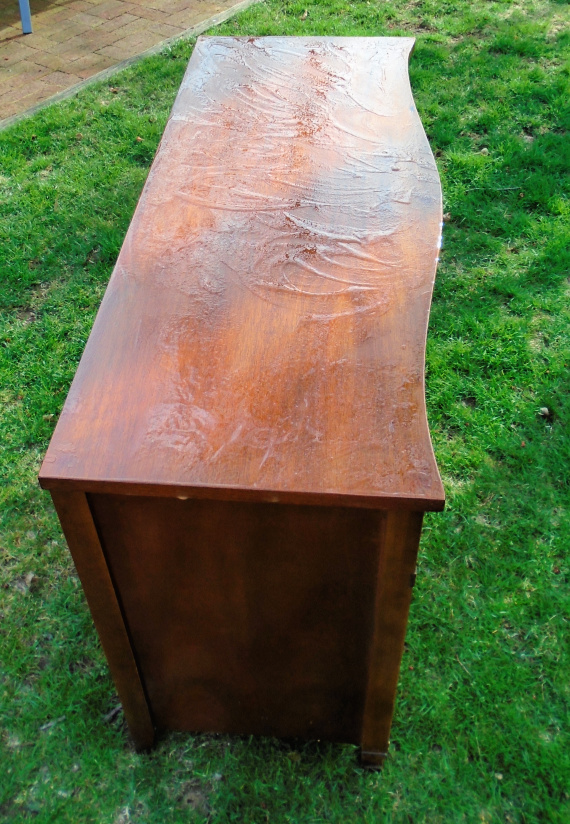
  • Stripped the finish off the top
  • Sanded the top with fine grade sandpaper
  • Stained the top (in ebony) – I used 2 coats
  • Sealed the top – I used 4 coats
  • Painted a sealer over the rest of the dresser (to prevent the stain from bleeding through the light color paint)
  • Painted the dresser in Annie Sloan Chalk Paint in Old White – 2 coats
  • Waxed with Annie Sloan clear wax (all but the top)
  • Lightly distressed
  • Waxed with second coat of Annie Sloan wax in clear (all but the top)

I retained the original hardware without altering it since I love the dark color in combination with the ebony stain on the top of the piece.

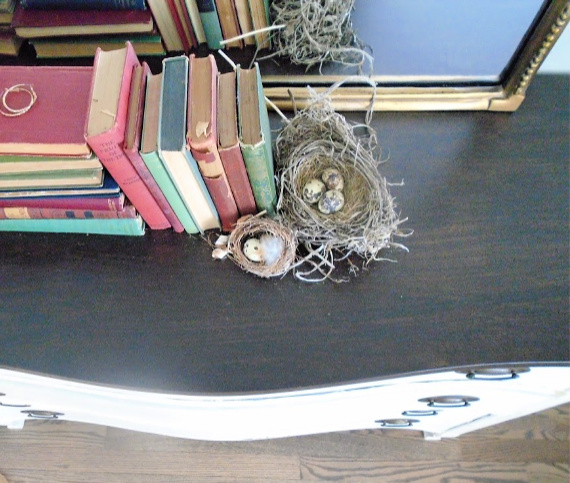
birds eye view after

Isn’t it beautiful!?  I love it.  I ended up styling my entire bedroom around this piece.

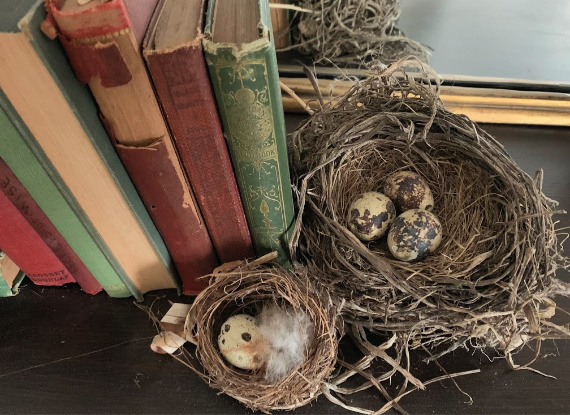
nest collection

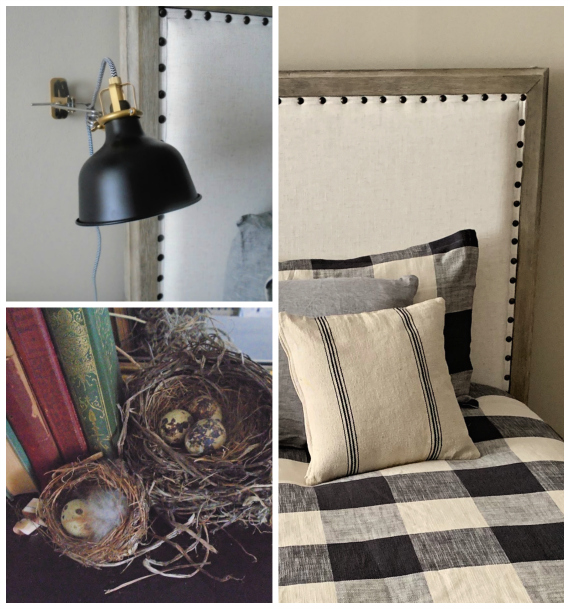
I put a buffalo plaid duvet on the bed and combined a couple of my favorite motifs (with my collections – old books and bird nests) to style this vintage dresser.  The crowning jewel was to add a mirror.  I thought the mirror that originally went with the piece was too ‘matchy matchy’ for my taste.  I originally thought I would just go without a mirror, but I soon found out I really liked having a mirror in the bedroom, so I set out to find a vintage looking piece.

old books and nest

I didn’t really expect to find anything I liked to fit my budget until Ballard Designs had a 40% off sale with free shipping and I was able to purchase the perfect piece!

mirror

My biggest bargain in the room was the bedside wall lamp.  Every one I liked had a price tag over $100.  And I had all but given up on the idea of including a lamp in my room until I came across the perfect one for $19.99 at IKEA!  Score!

bedroom details

The dresser ends up being my favorite piece of furniture!  I hope you enjoyed seeing how I transformed this old dresser!  Thanks for stopping by!

dresser side view

Remember to take pleasure in simple things, Jackie
P.S. Click here to see how I refinished the mahogany side table that matched this dresser.

no comments

new beginnings

May 28, 2019

Before dresser

Hi friends!  I know my furniture redos usually show a ‘before’ and ‘after’ in the same post.  But, today I am only showing the ‘before’ of a current piece I have been working on.

Like me, the piece is starting a new beginning!  I have given new life to a vintage mahogany dresser and I am taking it with me on a new journey!

stripping top

As you read this, I am on my way to a new beginning…leaving a place I’ve lived for a long, long time.  I am looking forward to sharing some future projects with you as I prepare to downsize everything in my life!

dresser top in process

I am going to give you one little peek as to how I refinished the dresser my daughter used growing up – a family heirloom.  It is renewed and ready to join me!  Because of my moving out, I don’t think I will be posting on Friday, but I will be back next week!  And, I will share, in more detail, my new dresser!

after

Here is a little peek of the ‘after.’ As you can see, I decided to keep the original hardware. What do you think the rest of the piece looks like?

Thanks for stopping by.  Remember to take pleasure in simple things, Jackie
no comments

before and after bench redo

April 17, 2018

after photo of bench fabric

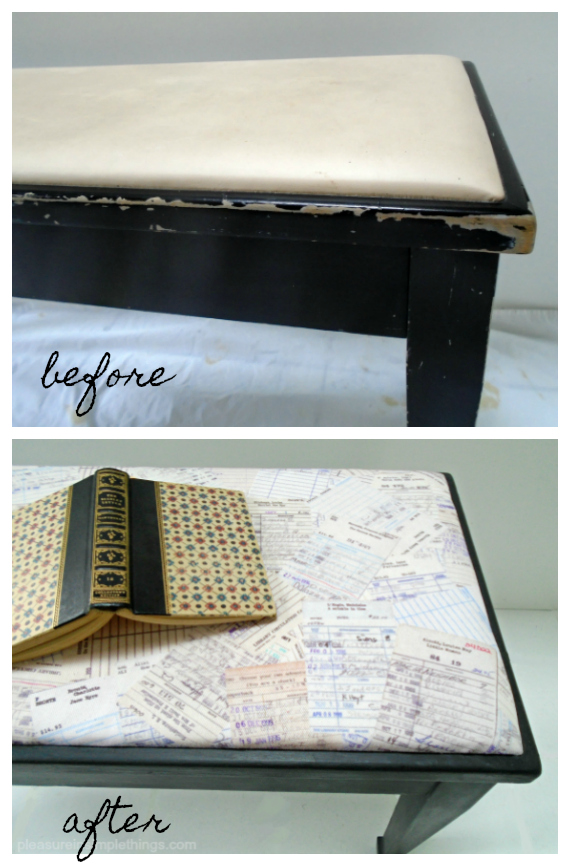
This bench was just crying out for a little loving, don’t you think?

before photo of library bench

I just couldn’t resist updating this bench with some Annie Sloan Chalk Paint and some Spoonflower fabric!

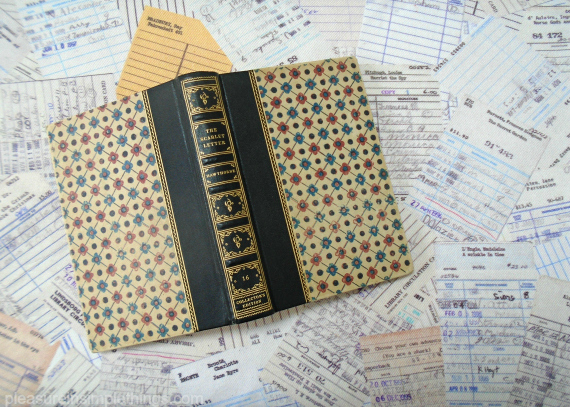
First, I chose a library themed fabric from Spoonflower and put in my online order for one yard of a cotton canvas.  If you haven’t checked out Spoonflower before, I highly recommend it.  You know how you may have an idea for a fabric you want and when you go to the fabric store to find it, you are really disappointed when they don’t anything close to what you imagined?  Well, with Spoonflower it is possible to find a fabric in most any theme you may imagine!

I prepped the bench by taking off the cushion and I prepped the fabric by washing, drying, and ironing it.

spoonflower fabric

The original color of the paint on the bench was black.  I chose to paint it with Annie Sloan Chalk Paint in graphite.  (I was a little bit tempted to choose a red paint, but if I bought a can in red, I knew I would never use the rest of the can!)  Because I chose such a dark color paint, I had no worries about color showing through from the old finish.  I simply painted the bench with two coats of graphite and waxed it with Annie Sloan clear wax.  I let the first coat set and applied a second coat of clear wax.

starting upholsteryI removed the old fabric from the top of the bench using a screwdriver and pliers.  I was happy to find the padding in good shape since, beyond my labor, I really couldn’t spend more than the cost of the paint, wax, and fabric for this update.   Using a staple gun, I carefully reupholstered the top of the bench in the super cool fabric I found at Spoonflower and reattached it to the bench.

before and after annie sloan redo bench

The second coat of wax wasn’t totally dry when I took these photos.  When it was, I buffed the piece with a soft cloth.  Project complete!

overview top of bench finished

Thanks for stopping by!

Remember to take pleasure in simple things, Jackie
no comments

amsterdam green dresser redo

November 7, 2017

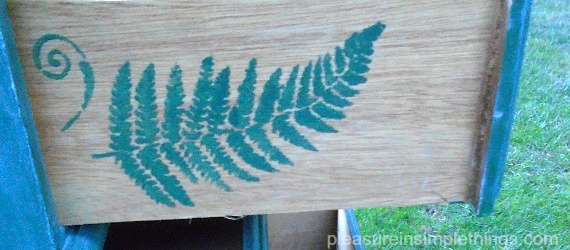
ferns on dresser drawer

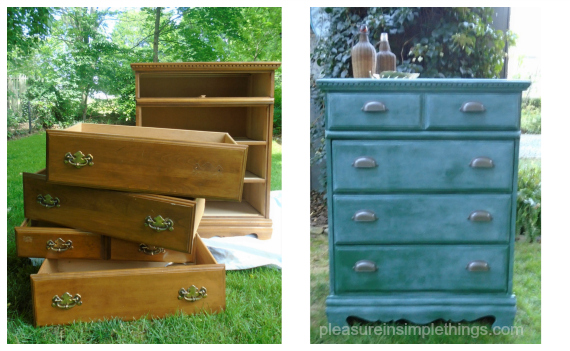
Annie Sloan Amsterdam Green.  I have been so eager to paint a piece of furniture with this color Chalk Paint!

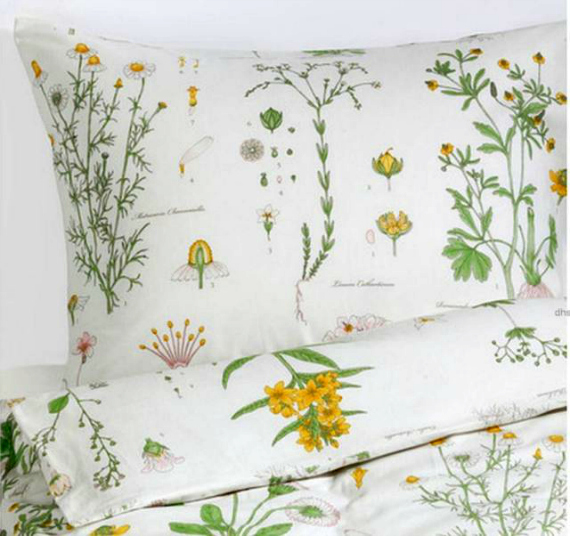
I got my chance on a recent dresser renovation.  My color choice was inspired by the Ikea Strandkrypa floral patterned duvet cover.

The dresser is part of a guest room décor project of mine.  The bed in the room is covered with the Strandkrypa comforter  – giving me a botanical/gardeny vibe inspiration for the room.

Ikea comforter inspiration

When I came up with my plan for the room, I wrote down my ‘dream’ dresser dimensions for future reference and hoped to find a cast-off dresser in the future.  It was only about 3 weeks later that a sturdy wooden dresser out on a curb, ready for the trash pickup, would catch my eye and end up matching my measurements almost exactly!  Unreal!  And, when I asked the homeowner if it was okay to take the item from his front yard, he proceeded to load it into my car!  When does that ever happen?  Perfect dimensions AND no heavy lifting?!

before and after dresser Annie Sloan Amersterdam Green

I wanted the room where the dresser would reside to have a gardeny vibe, inspired by the bedding.  I  had already refinished an heirloom bedside table for the same room – now my mission was to redo my new- found, no cost discovery!  (To see the side table before and after, click here.)

Amerstdam green Annie Sloan dresser

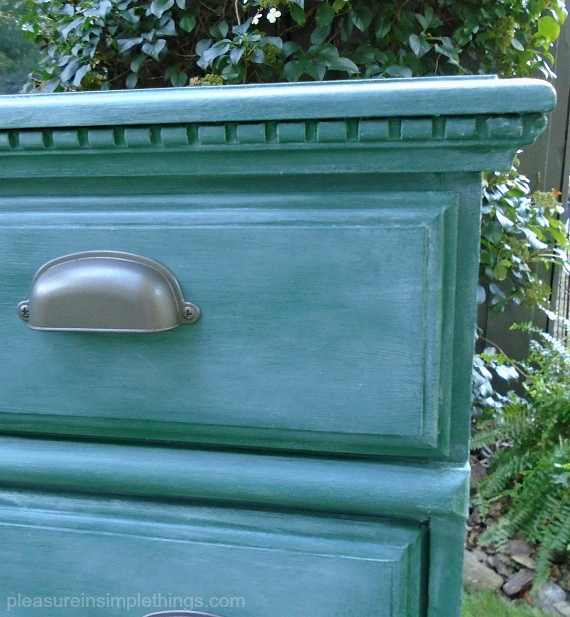
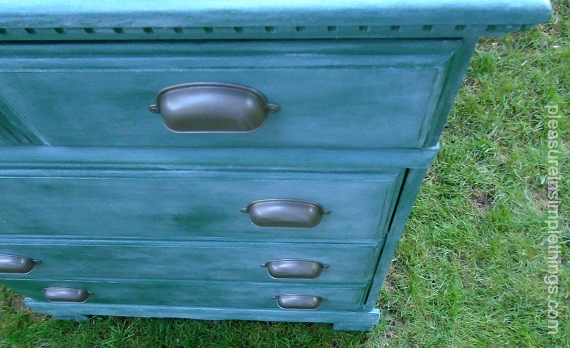
I thought bin pulls would be perfect to replace the old drawer handles.  The only reasonably priced ones I was able to find were in a silver tone.  Since the ones I found were perfect, except for the finish, I just sprayed them with Rustoleum spray paint (in hammered bronze).

dresser drawers Amsterdam Green Annie Sloan

Though I was tempted to sand and stain the top of the piece, I knew the owner would rather a solid color piece, so I resisted the temptation!  If I was redoing it for myself, I would have stained the top in a darker color stain – like a Minwax dark walnut – but, for this client, a light distressing and simple whitewash was all the piece needed…A pretty straight forward painting project.

fern stencils on dresser drawers

I sealed the piece first, since experience has taught me old stains can bleed through and I wanted a true Amsterdam Green.  Then, I painted the piece with two coats of the Amersterdam Green.  For the white wash, I used Annie Sloan Old White thinned with water – about 60% water.  I painted on the wash and quickly rubbed it down with some cheesecloth to give it an old, weathered look.  I let the paint set a few days, before giving it a coat of clear wax.  I later added an extra coat of clear wax.  Lastly, I added the new pulls.

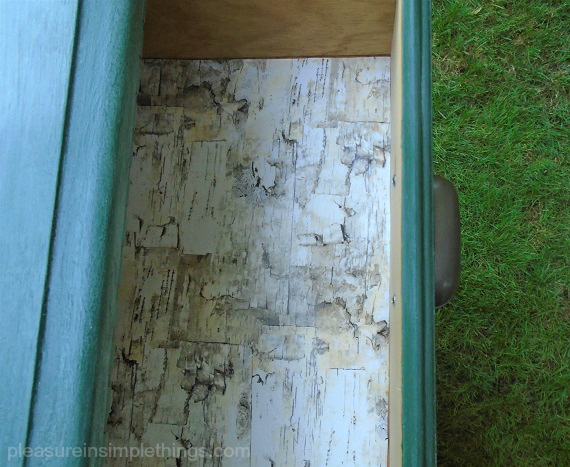
white birch drawer liner

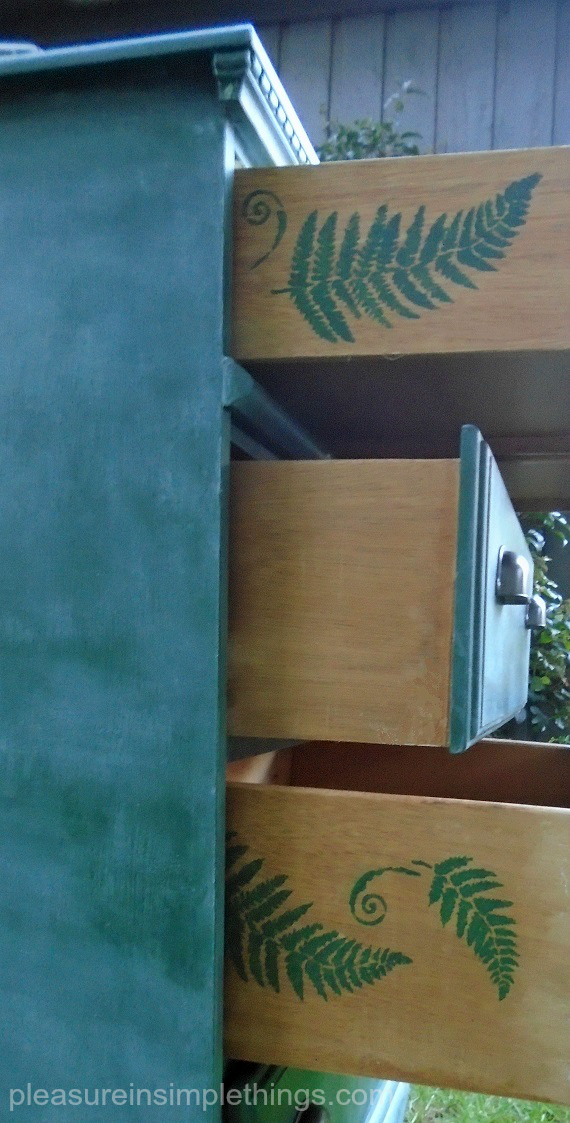
Since I always try to add some interesting details, I came up with a couple for this dresser.  I stenciled some ferns, using the same Amsterdam Green, on the sides of two of the drawers for an unexpected surprise and also added some birch bark looking paper as drawer liner.

Complete!

Thanks for stopping by and sharing my latest painting project!

Remember to take pleasure in simple things, Jackie
1 comment

diy home office on a budget

July 14, 2017

office drawer

Change can be sad.  As much as I enjoy a good redo, I was hesitant to change my daughter’s childhood bedroom.  When she was young, I had put together a Polynesian themed bedroom for her that was filled with mahogany furniture and burgundy and gold bedding colors – all reminiscent of her favorite family trip to Florida.

When the room became empty, I decided to make it my home office.  I started with an empty room, a soiled wall-to-wall carpet and some old dusty paper lantern light fixtures.

diy home office from a bedroom

For Friday field trip today, a peek at the beginning of this new home office!

I painted the two-toned gold walls with a greige color neutral.  I used a Behr custom mix from Home Depot – very close to their color Aged Beige. The ceiling was painted white as well as all the trim.  What a great fresh start…except for the soiled rug, of course.

memo board in office

From there, I chose a desk first.  I found a nice, simple writing desk at Target and purchased it during one of their huge sales when they offered free shipping.  The desk has nice lines and would fit my computer comfortably.  After assembling it, the only change I made was to the knobs – I replaced the ones provided with a pair in brushed gold.  The desk chair was a previous diy…click here to see the before and after.

new office desk chair

home office lightingDuring the same Target sale when I acquired the desk, I also ordered a simple, gold toned floor lamp.  The room already has a trio of paper lanterns (that required a heavy cleaning – I just couldn’t bear to get rid of them!).


home office desk detail HomeGoods accessories

I also added a second piece of renovated furniture I refinished years ago – a standing piece I use to store my photograph albums – the nondigital variety.

home office diy

I covered the one window in the room with a $17. Roman shade that I ordered from JC Penney.  How do they even sell them that cheap!?

Since the carpet in that room was SO trashed – my daughter did a number on it – and ignoring it didn’t seem to help, I opted to cover it.  My budget did not allow for a complete floor renovation and since the room is so small, it wasn’t hard to find an area rug to cover most of it.  I chose a circle shaped, natural fiber rug in a driftwood color from Ballard Designs.  They were having a 25% off sale with free shipping – perfect!

bedroom to office redo

Now the fun part of adding the accessories!  I purchased all the decorative items at HomeGoods, including a gorgeous canvas that is a world map in greiges and metallic gold!  I love this piece!

HomeGoods canvas detail

I still have work to do in the room – in scraps of free time I have a gallery wall to complete – I am in the midst of framing some favorite old photographs as well as hanging a white board calendar and an old doily made by my grandmother.

HomeGoods mail holder

It does give me satisfaction to know there is still some of the old bedroom when you look hard enough – like the telltale signs of an old pet hamster gnawing on the carpet or pieces of memorabilia that haven’t been removed from the walk-in closet!  In an odd way, this helps make the room that much more comforting…a perfect new office!

HomeGoods waste can

Thanks for stopping by!  I hope I may have inspired you to think about redoing or updating a room!

HomeGoods desk plate home office

Have a fabulous weekend and remember to take pleasure in simple things, Jackie
no comments

before & after bedside table

March 7, 2017

Bedroom table after photos pleasure in simple things blog

Today, I am sharing the ‘after’ photos of the little mahogany side table I shared last post.  The piece belonged to the owner’s great grandmother and I was determined to redo the table to  fit nicely  into her new home.

before and after side table with Annie Sloan ochreDid you guess what neutral I chose to paint the piece?  I decided on Annie Sloan old ochre.  It is a nice neutral that has a warm tone and will combine well with both white and gold tones.  The piece will be used as a bedside table and, since I’ve seen the bedding in the room, I decided to find accessories to combine with the piece to look great in its new location!

Bedroom side table after photo pleasure in simple things blog

I started with a coat of shellac since the mahogany was sure to show through a light color paint.  Next,  I painted the piece with two coats of Annie Sloan chalk paint in old ochre.  Then, I added a coat of clear wax.  In keeping with the tastes of the owner of the piece, I didn’t do any distressing, but I did add a coat of dark wax in some spots.  This accented some of the details and added a little depth  of color.

Bedroom side table after photos wax pleasure in simple things blog

For the hardware, I used the original pull and just added a little metallic to brighten up the old finish.

Bedroom side table after hardware pleasure in simple things blog

Lastly, I added some fun accessories to coordinate with the bedroom where the little table will be residing.  The tea leaves scented candle, lamp, print, and plant all came from Target.  The cute succulent paper I used for the drawer liner came from Paper Source.

Bedroom side table after photo drawer pleasure in simple things blog

For such a straight forward paint job, it created quite an update, don’t you think?

Can’t wait to see the table with the new accessories in its new home!

Thank you so much for stopping by!  Remember to take pleasure in simple things, Jackie
no comments

its always in the details

March 3, 2017

Bedside Table revamp acessories pleasure in simple things blog

A February day with temps in the high 50’s?  What does that mean?  Furniture painting projects, of course!

Because of space limitations, nearly all my furniture redo projects are limited to the outdoors.  With the record breaking temperature last week, thoughts of tackling one of the projects in queue was inevitable.  I decided to start with a little bedside table that would be a straight-forward project.  The owner wants a simple, single color neutral as a finish.  And, even though I really want to paint the piece charcoal gray and sand and stain the top, I think it is important to create something the owner would truly love in her home.  Especially since the piece belonged to her great grandmother.

bBefore Mahogany Side table pleasure in simple things blog

The table just needs a little love to make it current.

For Friday field trip today, I am giving you a ‘before’ photo and a little hint of the details I have started to put together to make the piece perfect for the owner.  I am putting together some accessories to go with the finished piece to make it really personal to the recipient.

Bedside Table revamp drawer pull pleasure in simple things blog

Can you guess what color I am painting the piece?

Remember, the owner wants a neutral.  I will give you a hint that it is an Annie Sloan color.

Bedside Table drawer liner pleasure in simple things blog

Well, let me get back to work…

I hope you will join me on Tuesday to check out the finished piece!

Thank you so much for stopping by!  Remember to take pleasure in simple things, Jackie
no comments