Subscribe to Pleasure in Simple Things via RSS ReaderFollow Pleasure in Simple Things on InstagramFollow @InSimpleThings on TwitterLike Pleasure In Simple Things on FacebookFollow Pleasure In Simple Things on PinterestEmail Jackie

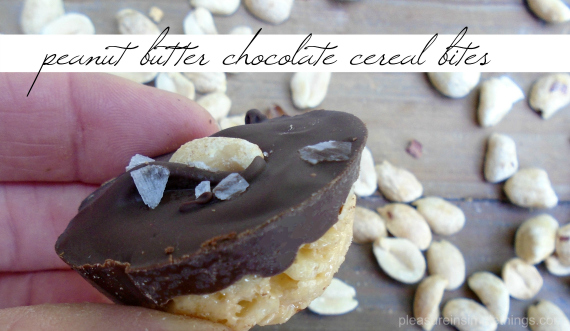
peanut butter chocolate cereal bites

June 26, 2018

pb choc cereal bites

I recently wanted to make a dessert as a gift for a person celebrating a new job.  I know he likes peanut butter and chocolate candies and I know he likes cereal treats, so I decided to combine the two and come up with a special treat!  Making a bar like a cereal treat didn’t seem ‘fancy’ enough for the occasion though, so I made the sweet as individual little cups!

I simply varied the recipe I use for a basic cereal treat to come up with a yummy peanut butter/chocolate version.  They required a little more work than a bar, but I think you will agree the results were great!  If you’d like to try, I am sharing the recipe.  Enjoy!

pb choc cereal bite recipe

Peanut Butter Chocolate Cereal Bites

  • 3 Tablespoons unsalted butter
  • 1, 10 oz. package of marshmallows
  • ½ cup peanut butter
  • 6 cups crispy rice cereal
  • 1, 12 oz. package semi-sweet chocolate pieces
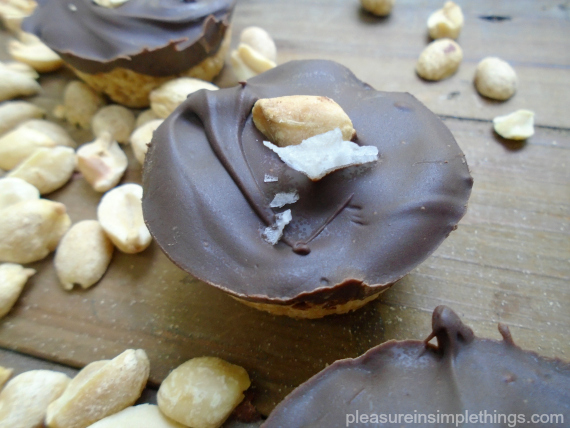
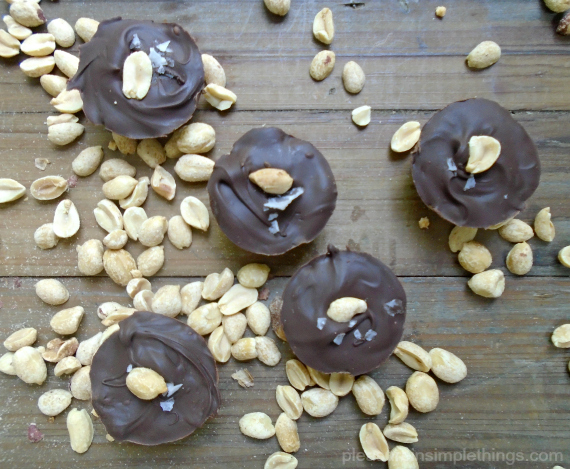
  • peanuts and sea salt flakes for garnish

pb chocolate cereal bites

Coat a mini muffin(s) pan with cooking spray.  (I used a pan for 24 and had extra ingredients that I used to make bars in a coated 8” x 8” baking pan.)

In a large saucepan, melt butter on the stove over low heat.  Add marshmallows and stir until completely melted.  Remove from heat.  Stir in peanut butter until melted.  Add cereal and stir until well coated and all ingredients are evenly incorporated.

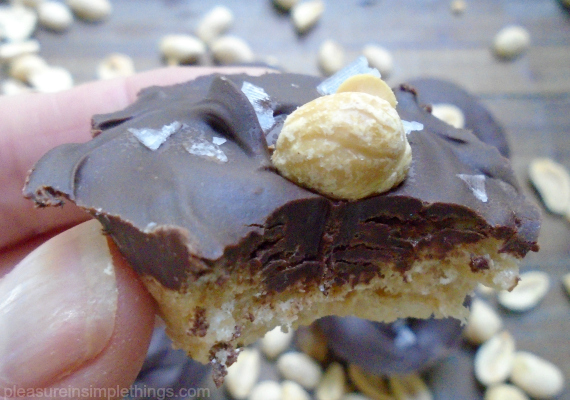
Press about a Tablespoon of the cereal mixture into the bottom of each well.  There will be a little bit of room left to add some chocolate.

peanut butter choc crispy cereal treat

Melt the chocolate over low heat in a double boiler, stirring frequently.  Remove from heat when just melted.  Spoon about a teaspoon of chocolate into each well, smoothing the top with the spoon.

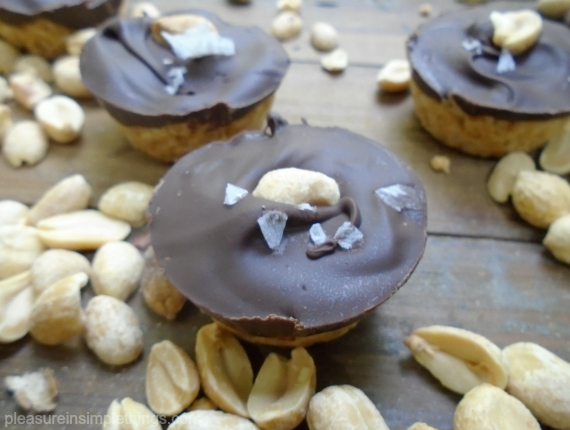
Finish with peanuts and flakes of sea salt.  Set in the fridge.  Store in an air tight container.  These are best fresh, but there shouldn’t be any problem with them hanging around too long!

yummy cereal treat bites

Thanks for stopping by!  Remember to take pleasure in simple things, Jackie

no comments

creating honey pairings

June 19, 2018

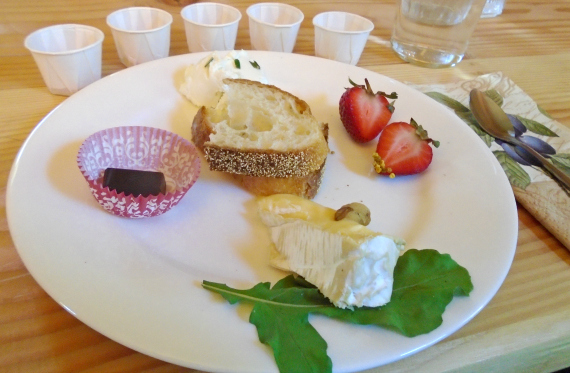
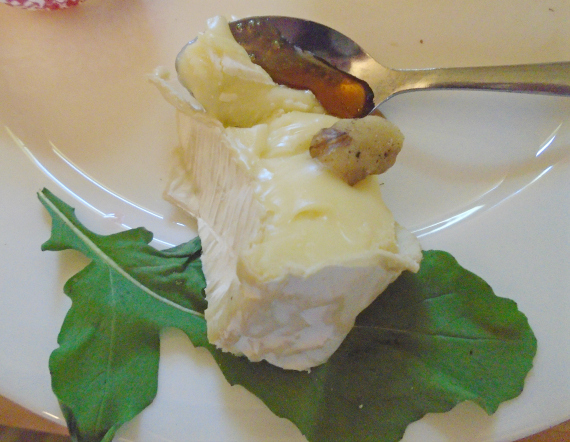
brie pairing with honey

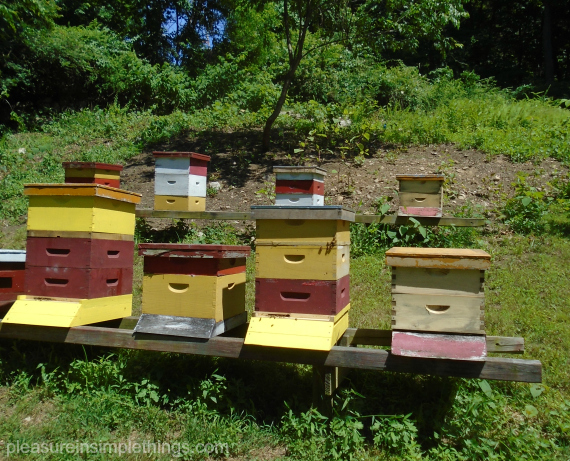
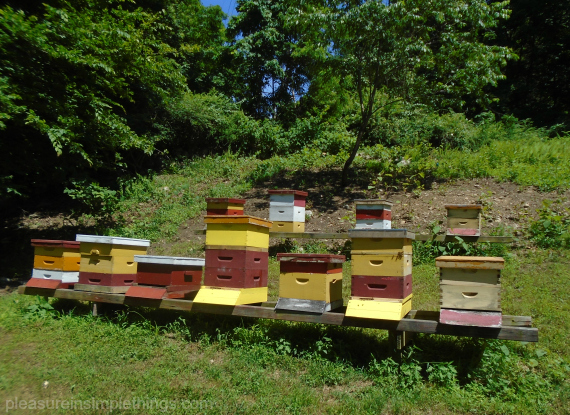
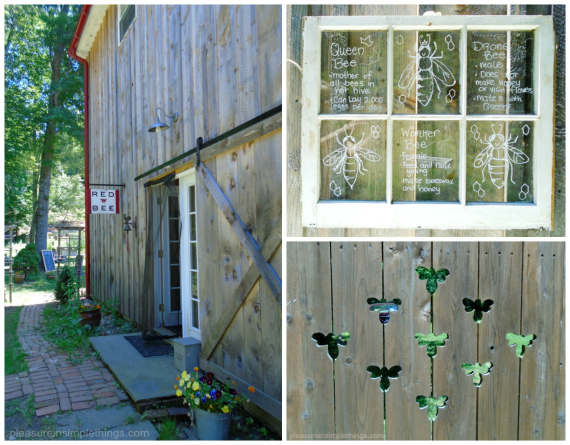
Connecticut is lucky to be the home of Red Bee Honey.  And, lucky for me, I was able to have the opportunity to visit!

bees at Red Bee Honey

Carla Marina Marchese is the beekeeper behind this iconic brand and I couldn’t ask for a better source to learn about honey!

Visiting Red Bee Honey in CT

How did she become involved with beekeeping and honey?

In 2000, Marina was unexpectedly invited to visit a neighbor’s apiary where her first taste of fresh honey from the beehive would change the course of her life. This moving experience inspired her to take a risk and quit her job, build a beehive, and acquire a colony of Italian honeybees to become a full-time beekeeper.  It was on a visit to Montalcino, Italy, “The City of Honey”, that Marina became passionate about the diverse flavor profiles of varietal honey determined by the type of nectar gathered by the honeybees.

Pairings for honeys

Today, I want to share the five honey pairings I tasted during my visit.  They were all so yummy!  I think this will help expand your imagination on how to serve different varieties of honey:

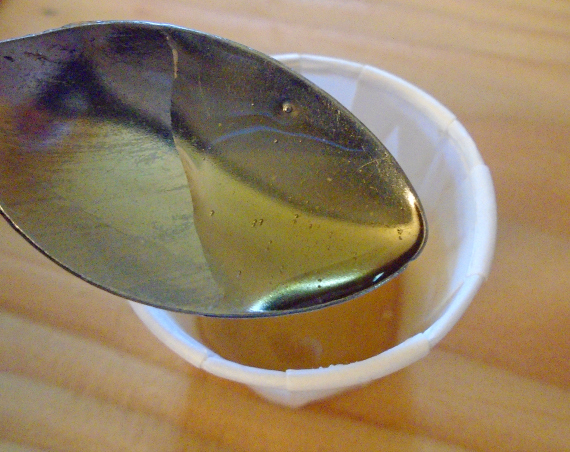
honey on a spoon 1

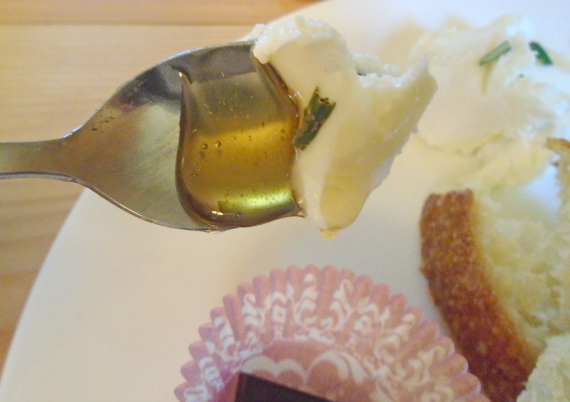
1.  orange blossom honey paired with goat cheese and rosemary

pairing goat cheese with honey

2.  goldenrod honey paired with strawberries

3.  tulip poplar honey paired with brie, walnut and arugula (pictured in opening photo)

4.  raspberry honey paired with dark chocolate

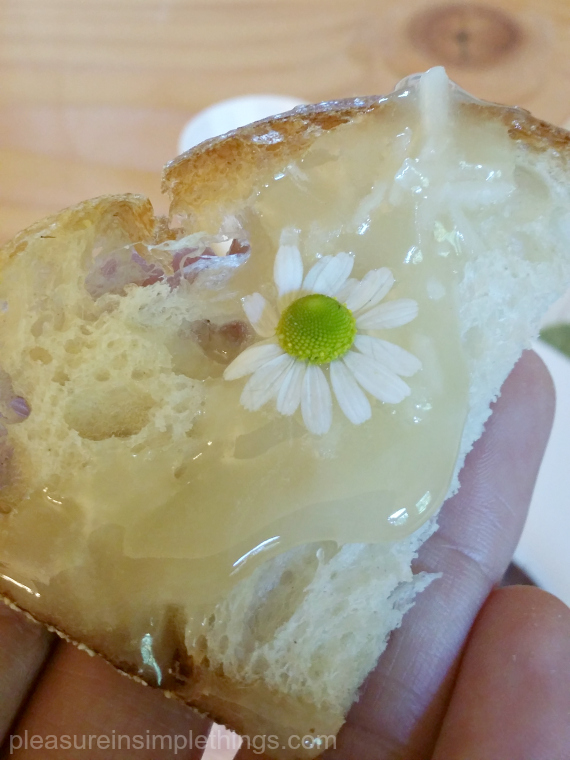
5.  clover honey paired with coconut and flower blossom

honey with blossom

Sounds yummy, right?  Honey is the perfect addition to a summer cheese tray!

I hope I have inspired you to look for interesting honey varieties at farmer’s markets and specialty stores (True, quality honey is not sold at grocery or big box stores!) and to think about interesting pairings!

hives at Red Bee in CT

Note:  Marina is a member of the Italian Register of Experts in the Sensory Analysis of Honey and founder of The American Honey Tasting Society.  Her best-selling book Honeybee: Lessons from an Accidental Beekeeper chronicles her entrepreneurial journey into beekeeping.  Marina also wrote the chapter on honey in the international best-selling book Beekeeping for Dummies.

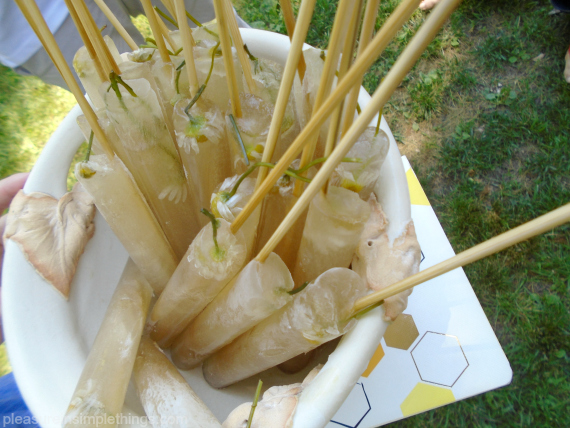
herbal tea ice pops

Herbal tea ice pops molded in glass test tubes.

Thanks for stopping by!  Remember to take pleasure in simple things, Jackie
no comments

la mercerie cafe nyc

June 15, 2018

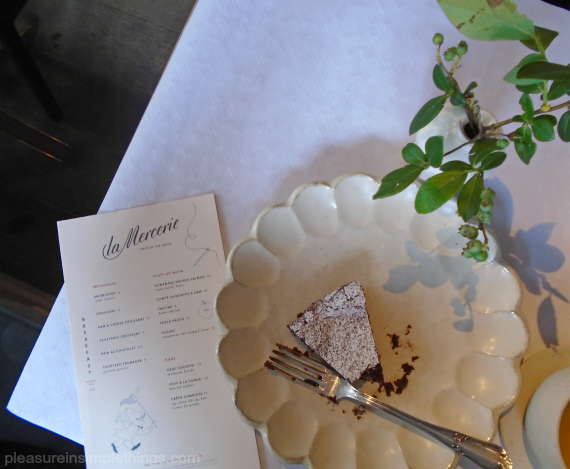
table at Le Mercerie

I love design centers – particularly in New York City – they are SO inspiring!  One of my favorite places to meander around while in the city is ABC Carpet & Home.   But recently I heard some buzz about a new furniture and lighting store in Soho and I was curious!

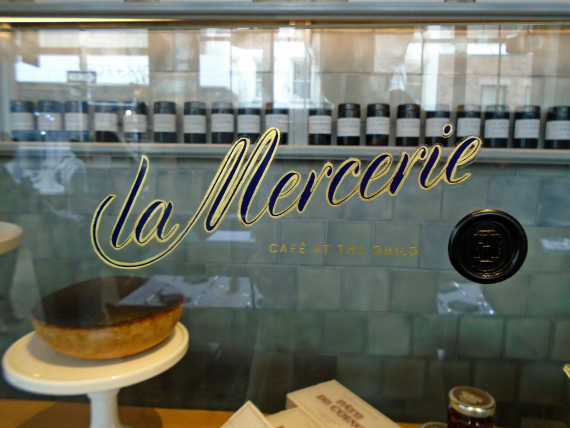
La Mercerie sign

baked items at Le Mercerie

I used a free scrap of time while in NYC recently to check out Roman & Williams Guild.  I knew La Mercerie Café and Emily Thompson Flowers were located at the Guild as well and my plan was to check out Roman & Williams and the flower shop while visiting the French café for a coffee or tea.

Mountain laurel at RW

My plan worked out perfectly since the café was my favorite part of the visit!  It is the perfect spot for a coffee or tea and dessert.  (Breakfast or an all-day menu is available.)

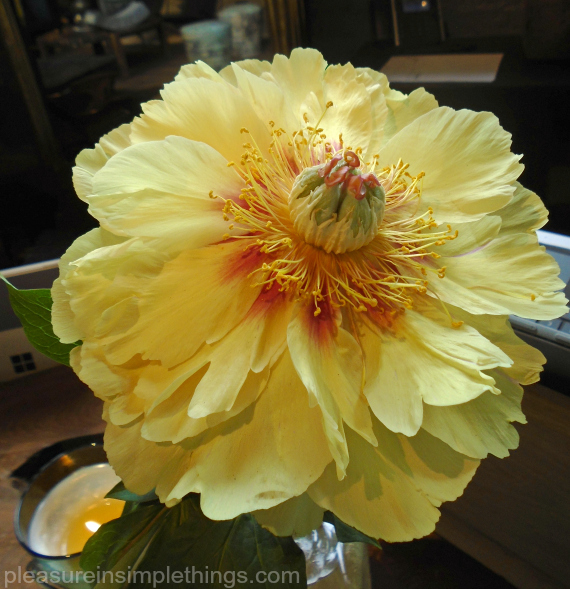
flower perfection

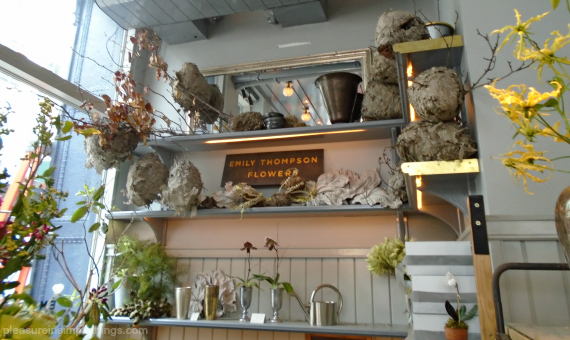
Emily Thompson flowers

I did take a casual stroll around the furniture store (well beyond my personal budget), but the aesthetic of the surroundings while seated in the café – with Emily Thompson’s wares in full sight – is what I found most inspiring!

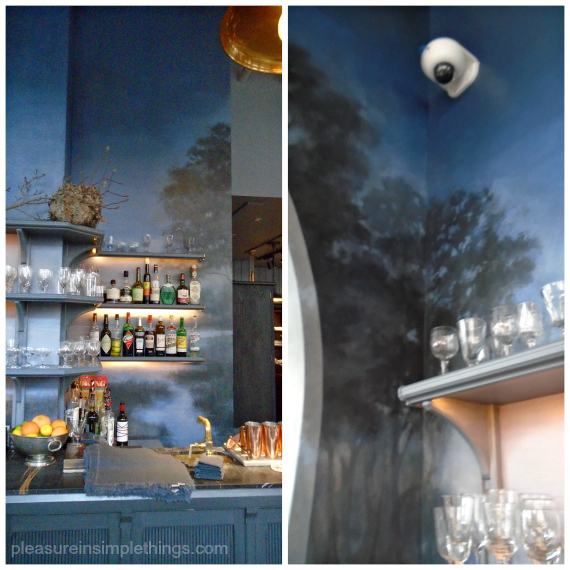
wall painting at La Mercerie

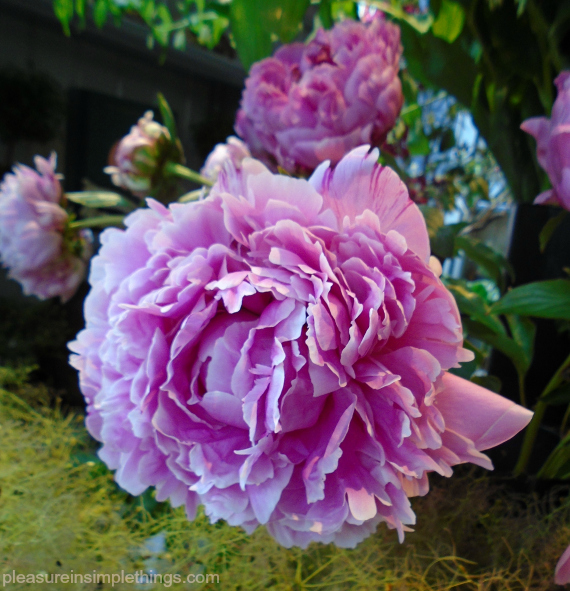
peony love

I hope you enjoy some photos of my visit on today’s Friday field trip.  I would add La Mercerie Café to your list of places to visit while in the city.

view at Le Mercerie

sitting at Le Mercerie

Have a wonderful weekend!  Thanks for stopping by!

Roman and Williams Guild

Remember to take pleasure in simple things, Jackie
no comments

frozen rosemary fudge pops

June 12, 2018

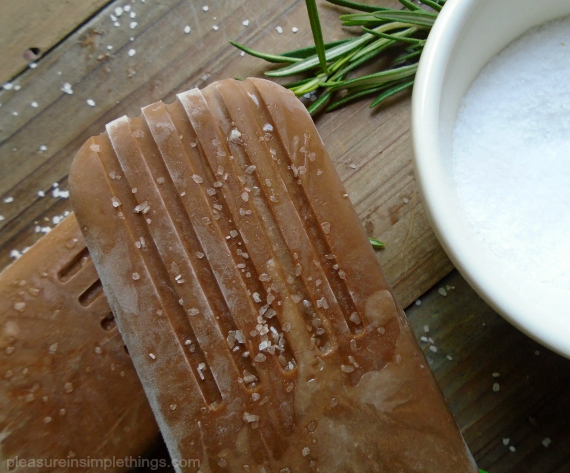
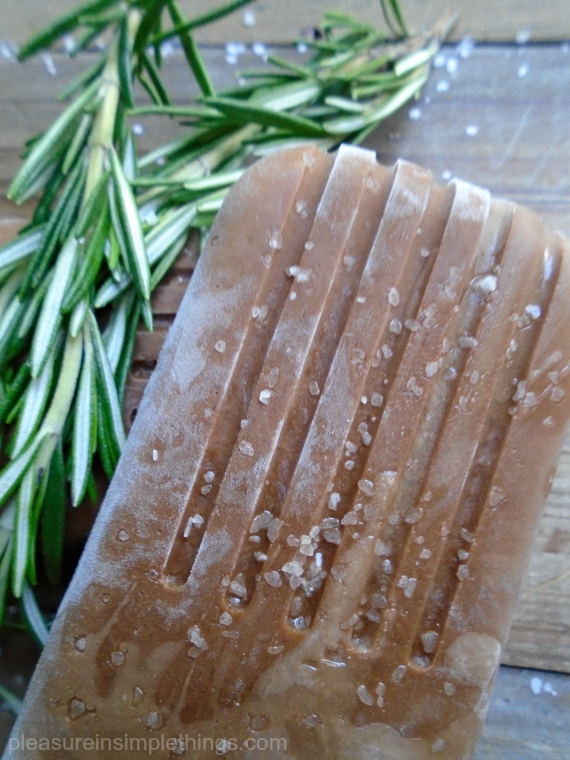
fudge pops finished in salt

For me, there certainly is a lot of nostalgia associated with frozen treats.  When I was a kid, the Good Humor driver would take his dinner break on our corner.  And, I could buy a frozen fudge pop from the dairy farm across the street whenever I had enough coins to do so or whenever I could talk my dad into buying.  (He would say:  “You fly, I’ll buy.”)

These days, I try not to go overboard with the desserts, but I still love anything frozen – whether it be drinks, desserts, or pops.  I like to make my own frozen pops now, so I can control what goes into them. And, I love to experiment with a variety of fruits and flavors.

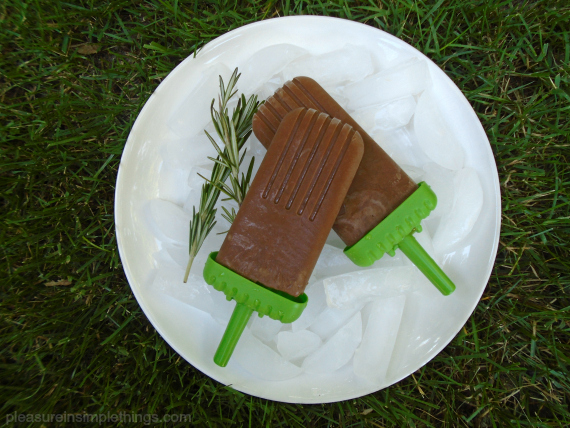
homemade fudgesicles in the grass

Recently, I discovered a fabulous source for frozen pop recipes – a book called Glow Pops by Liz Moody.    Not only are the pops made from these recipes delicious, but they are made from nutritious ingredients!  Even if you don’t use the exact recipes in the book, the inspiration for using healthful ingredients in frozen pops is worth its purchase!

One example is my updated, healthful version of the fudge pops from my childhood, adapting a recipe from Glow Pops!   Adding rosemary to the flavor profile and finishing them with salt brings these pops to a whole new ice pop level!  Yummy!!

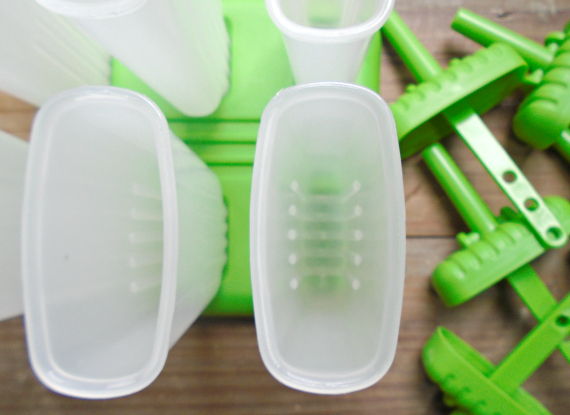
popsicle holders

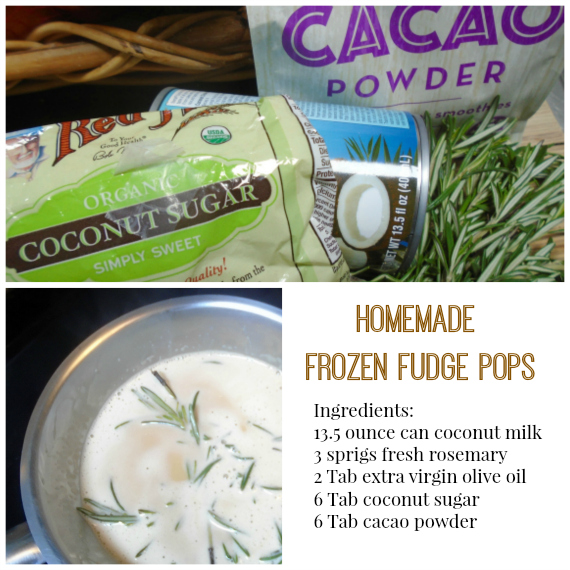
Empty a 13.5 ounce can of coconut milk (I buy it in the International aisle at the grocery store – leche de coco) into a pan and heat on medium high heat on the stove.  When it boils, turn off the heat and add 3 sprigs of rosemary from the garden – let it sit 20 minutes to infuse the flavor.  Remove the rosemary and pour the mixture into a blender, adding 2 Tablespoons extra virgin olive oil, 6 Tablespoons organic coconut sugar and 6 Tablespoons of raw organic cacao powder.  Blend until smooth and pour into ice pop molds.  Freeze.  Sprinkle with sea salt when ready to eat.  This makes 4 (4 oz.) pops.

pop ingredients

If you need an ice pop mold, Home Goods and Marshall’s always have them.  I love Crate & Barrel’s Zoku Mod ice pop mold – it is designed to fit into freezer doors.  Crate & Barrel also has a good rocket ice pop mold that is actually on sale right now for $3.47!

close up rosemary fudge pop

Do yourself a flavor (pun intended!) for the summer and get Liz Moody’s book Glow Pops and an ice pop mold!  A very small investment for some really huge flavor enjoyment!

Thanks for stopping by!

Remember to take pleasure in simple things, Jackie
no comments

mint watermelon iced tea

May 29, 2018

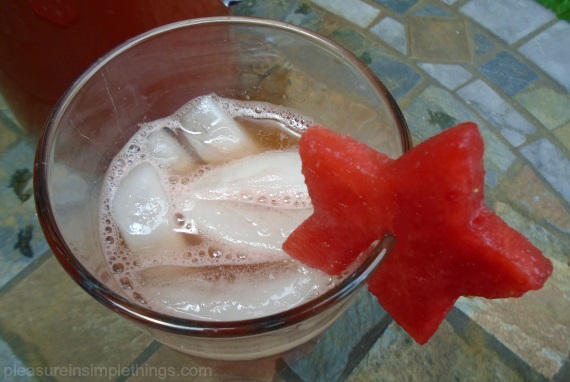
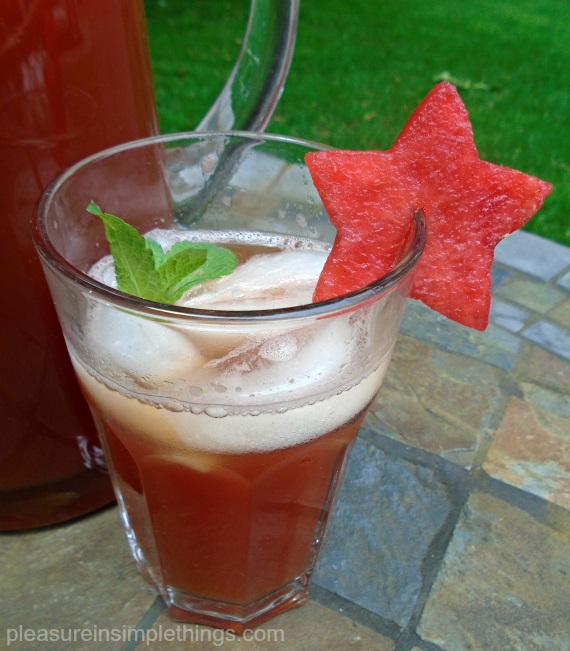
festive ice tea glass

Don’t you love the new item section at Trader Joe’s?  It is always so fun to see the latest products offered for sale and there are always some great ones!  (How about that cauliflower gnocchi?!)

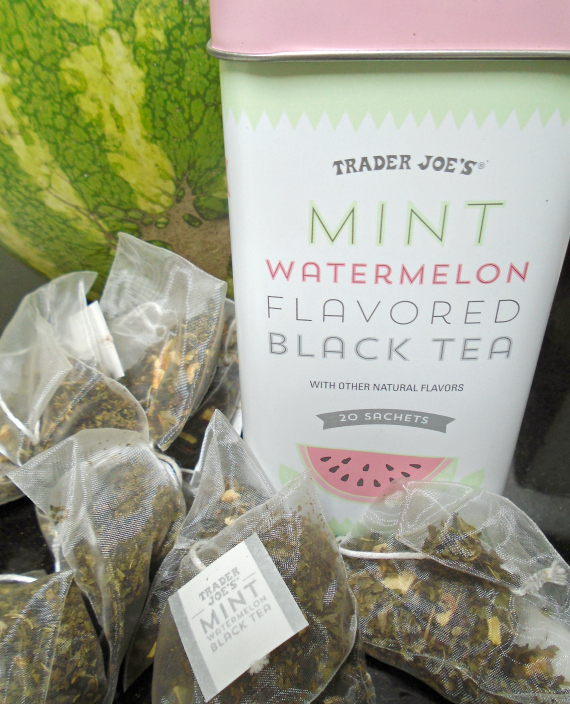
One of the newest products I picked up on a recent visit was the mint watermelon tea.  I planned to make up some iced tea for Memorial Day weekend and was immediately drawn to the ‘watermelon’ part of the tea description – even though the ‘mint’ part was mentioned first.

mint watermelon tea

When I made up a batch of the tea, I found the mint flavor was definitely way more pronounced than the watermelon flavor.  But, after a little adjustment, I got the subtle watermelon flavor I was after!

I brewed up 2 ½ quarts of tea, using 10 tea sachets.  After steeping and cooling the tea, I added some watermelon puree to it before pouring it into a pitcher.  To make the puree, I just cut up some fresh, seedless watermelon and liquified it in the blender.  (I cut the watermelon into small cubes and used 3 cups worth in the blender.)

watermelon and mint garnish in ice tea

If you love mint, you will probably like this tea without the adjustment.  I don’t use sweetener in my tea, but you may want to add some if you like some sweetness to your tea.

I hope you enjoyed a wonderful holiday weekend!  Here’s to a short work week!

Remember to take pleasure in simple things, Jackie
no comments

kane’s famous donuts

April 13, 2018

honey dipped at Kanes

I can’t say donuts are my favorite thing.  I can’t even say I’m a big donut lover.  But, when a donut place receives national recognition for its donuts, I am definitely curious to try them!  This happened to me recently when I was visiting the North Shore.

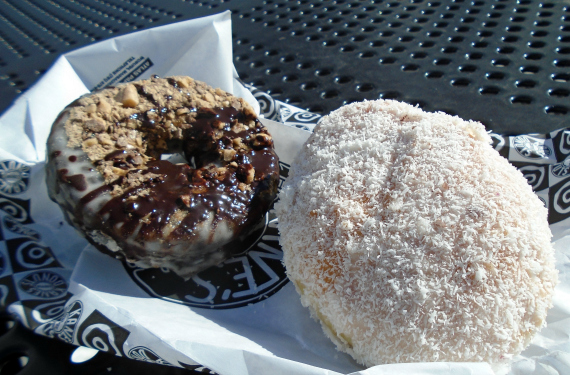
two donuts from Kanes

Since we were close enough to Kane’s Donuts in Massachusetts ‘to taste it’ on a recent visit to see my son, he drove me to the unassuming little neighborhood shop in Saugus and treated me to Kane’s for a Sunday morning breakfast!

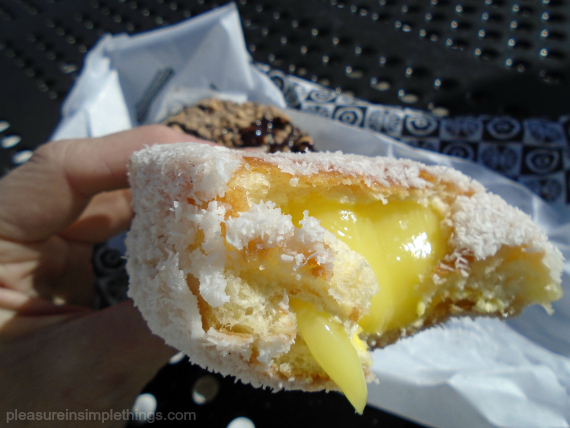
Lemon coconut donut

The long line in front of Kane’s moved pretty fast and, before I knew it, I was in front of the display case trying to decide which donuts to order!   I didn’t want to go too nuts, so I decided I would pick just two.

Kanes Donuts

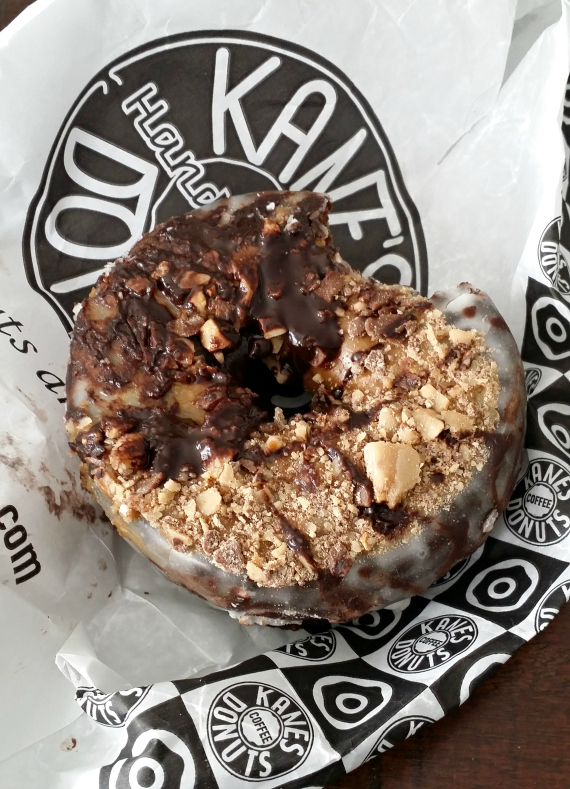
My son had already ordered the honey dipped – which Travel & Leisure Magazine named the best honey-dipped donut in America! – so I knew I could try his and proceeded to order a couple additional flavors to sample.  I decided on coconut lemon and turtle for my two choices.  One was filled and one had chocolate – seemed like a good variety!  The lemon coconut had an outside covering of coconut and so much lemon filling, I couldn’t eat any more after finishing it.  I had thought I would just take a couple bites and move on to the turtle one, but  that didn’t happen – the lemon coconut one was just SO good, I couldn’t stop eating it!  (I ended up saving the turtle one and devouring it later that evening.)

Kanes turtle donut

After my tasting, I can definitely see why Kane’s was named one of the Top 10 Best Places for Donuts in America by Bon Appetit, one of America’s 50 Best Donuts by Saveur, and Best Donuts in New England by Yankee Magazine.  This local hot spot, using fresh and local ingredients to serve up donuts since 1955, is definitely worth a visit!

Kanes Donut Sign

Note:  This Massachusetts icon now also has a location in Boston.

Thanks for stopping by today for Friday field trip!

Have a great weekend and remember to take pleasure in simple things (like a fabulous donut!), Jackie

no comments

mother’s day lavender almonds

April 10, 2018

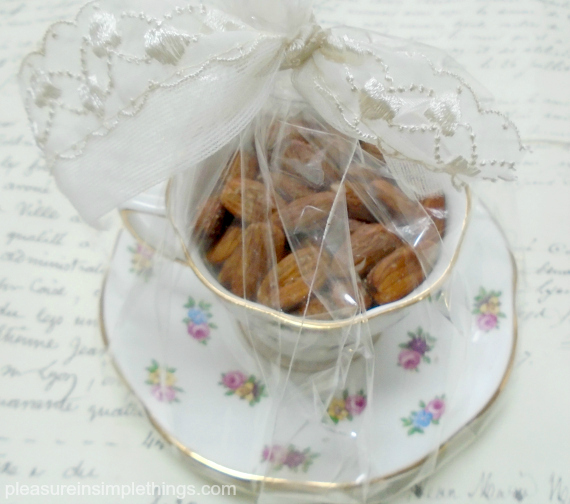
lavender almonds in a teacup

On my last trip to Boston, I was at the market near the waterfront.  One of the vendors was selling many different flavors of a variety of nuts.  I tried quite a few flavors and picked out some to bring home.

After I got back home and sampled my purchases, I found my favorite of the nuts were the ones flavored Limoncello lavender.  I thought the aroma and subtle taste of the lavender on the nuts was fabulous!

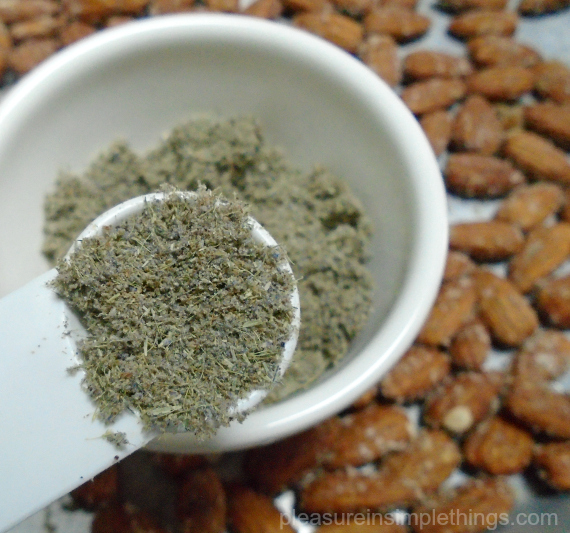
measuring lavender for flavored almonds

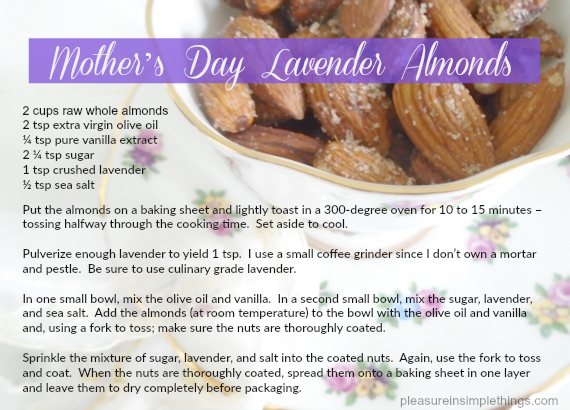
The nuts I brought home didn’t last very long and I found myself wishing I had more!  It wasn’t long before I decided to make my own lavender flavored almonds…substituting vanilla for the Limoncello.  After several attempts at creating vanilla lavender almonds, I found the recipe here to be the winning combination of ingredients.

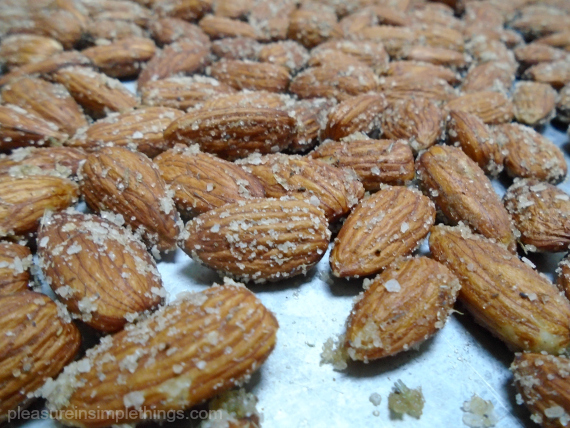
making lavendar almonds

I wish someone had invented a scratch and sniff computer screen so you could smell the heavenly aroma of the lavender!  Give the recipe a try – maybe you will be inspired to adjust the flavors/amounts to your own taste and come up with your own flavor combination!

pleasureinsimplethings recipe for lavender almonds

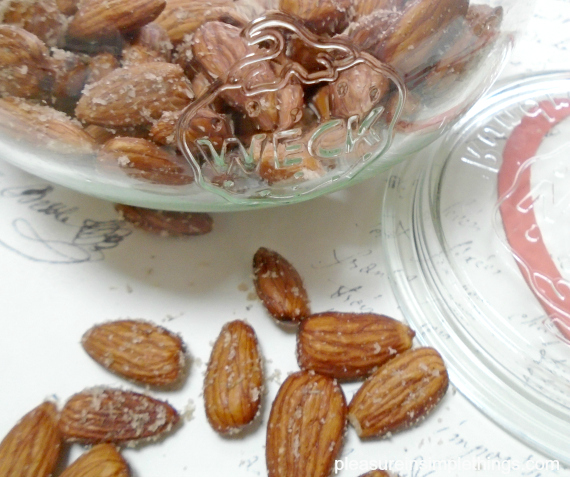
I think this treat is great to gift for Mother’s Day!  Try packaging the almonds in a pretty jar or a vintage teacup!

lavender almonds in a Weck jar

Maybe for the next holiday I will try to recreate my second favorite flavor –  the bananas foster flavored nuts!

Thanks for stopping by!  Remember to take pleasure in simple things, Jackie
no comments

chicks in a puddle

March 27, 2018

easter table peep

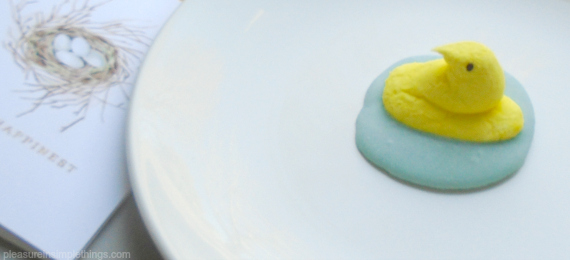
Even though Easter usually has no shortage of candy available, it is still fun to add a candy favor to each Easter place setting.  You have seen me make edible candy nests in the past (or candy turkeys at Thanksgiving), but today I am making ‘chicks in a puddle.’

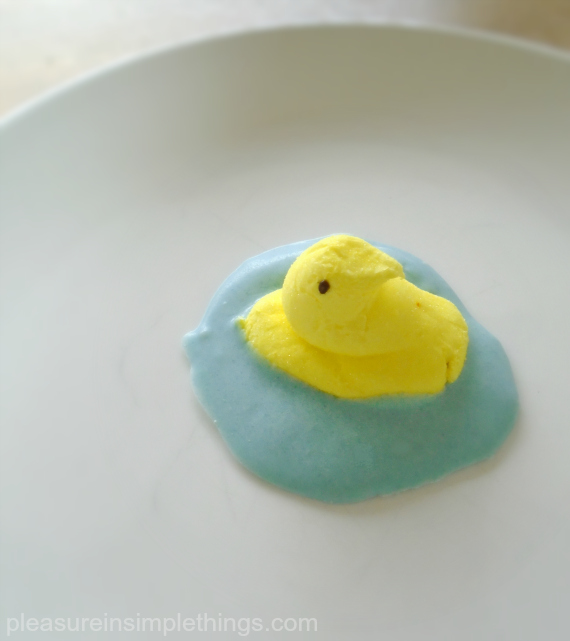
chick in a puddle on a plate

You can easily replicate these in minutes as a super simple DIY.  Only 3 items are required to pull it off – candy chicks, white chocolate baking pieces, and a little blue food coloring.

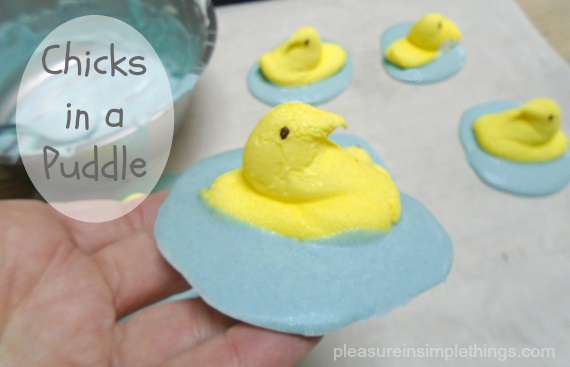
chicks in a puddle

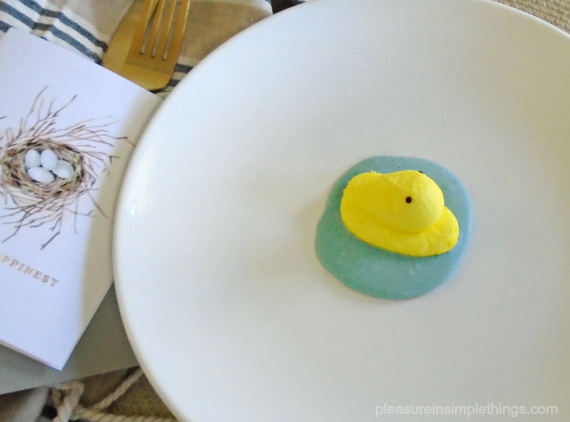
My ‘chicks in a puddle’ are simply candy chicks sitting in a ‘puddle’ of white chocolate that has been tinted blue!

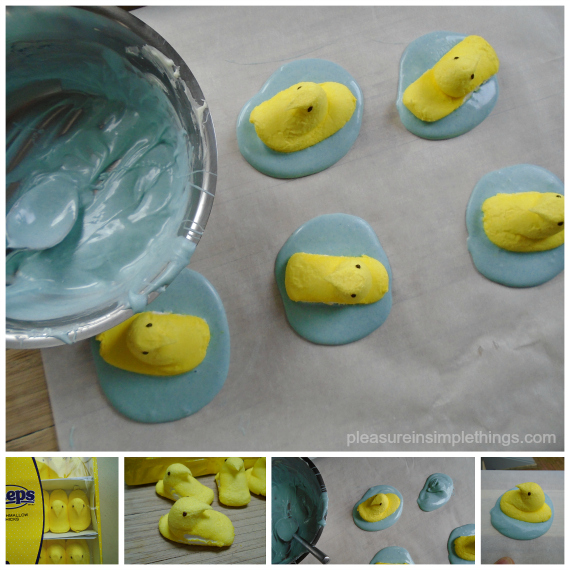
To create your own, melt some white chocolate chips, from the baking section of the grocery store, in a double boiler.  When melted and smooth, add a little food coloring to the chocolate – to tint it a light blue color – and mix thoroughly.  With a teaspoon, spoon the chocolate in small ovals onto wax paper or parchment to create ‘puddles.’  While the chocolate is still warm, press a candy chick into each ‘puddle.’   Place the ‘puddles’ into the fridge for a minute or two to speed up the setting.

This can be a fun activity with the children or grandchildren!

making chicks in puddles

That’s it!  Aren’t they cute little additions to the dinner plates?

chick on a plate with card

I hope you are inspired to create some chicks in a puddle for your Easter table!  A great tie-in for a child’s Easter basket is the book Puddle by Hyewon Yum!

Thanks for stopping by!  Remember to take pleasure in simple things, Jackie
no comments

polar bear easter egg

March 20, 2018

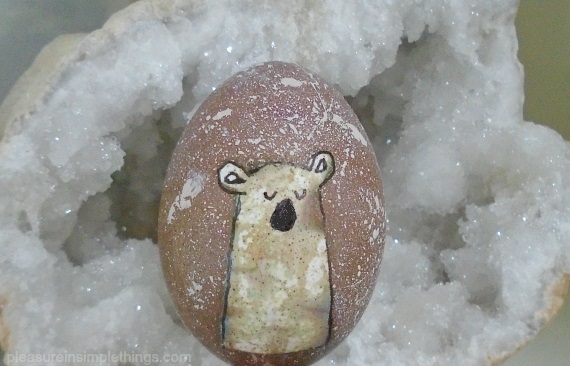
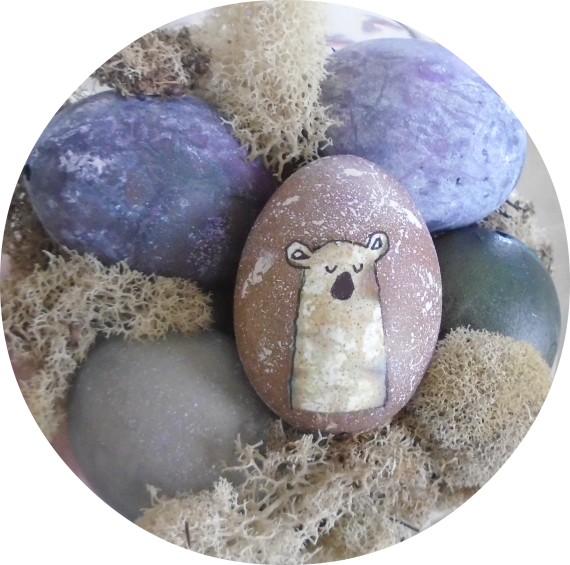
polar bear on a glacier Easter egg

Today, I am sharing another DIY Easter egg design.  And, even though you may not be interested in making a polar bear designed Easter egg, you can use the technique I used here to create a design of your own.

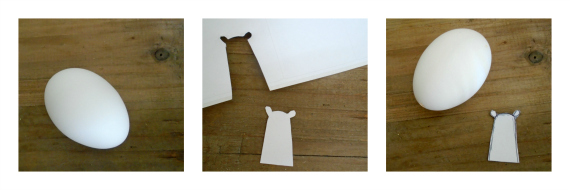
I started with an emptied-out egg.  The first thing I needed to do was to make a polar bear template to use on the egg.  I used a mailing label to draw a simplistic design of a polar bear.  Why a mailing label?  Because, I would next adhere the sticker shape I created to the egg.  Since I was dyeing the egg to contrast in color from the white polar bear, the shape of the sticker would resist the dye – leaving a white polar bear shape on the egg.

preparing egg and template for polar bear egg

removed sticker on polar bear egg

Removing polar bear shaped sticker after dyeing the egg.

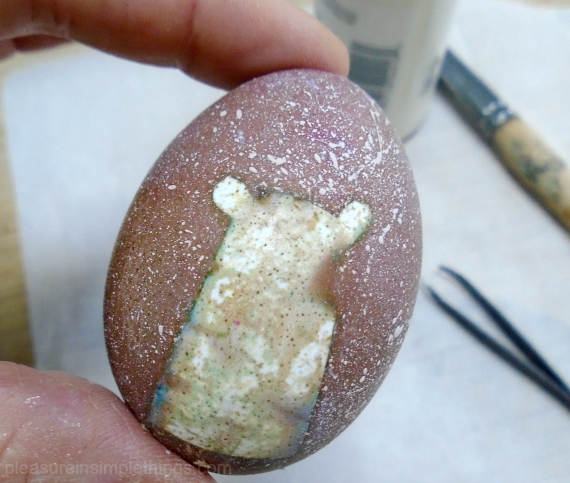
After the egg was dyed, I splattered it with white paint, using the same technique I used on my constellation designed eggs.  I really glopped the paint on, because I wanted to give a suggestion of a heavy snowfall!

When the paint was dried, I used a pair of tweezers to carefully pull the sticker off the egg.  As you can see, it didn’t keep the spot perfectly white – some dye did get under the sticker.  The effect is almost like a batik.  Wax can be used in place of the sticker (like that used for Ukrainian Easter eggs) to eliminate any dye from getting through, but I really like the effect when some dye makes it under the sticker.

Finally, I used a thin, black, permanent marker to outline the polar bear shape and gave him a nose and some eyes.

plesureinsimplethings blog easter egg

Pretty easy, right?  This same technique can be used in so many ways.  I created the polar bear for a friend, but I may continue the theme by creating a penguin next!  Are you wondering what has me thinking of such cold weather friends for Easter instead of bunnies and chicks?  Must be that New England March snow!

I hope I have inspired you to create some new Easter eggs designs!

Thanks for stopping by and remember to take pleasure in simple things, Jackie
no comments

bunny ear napkins with eggs

March 13, 2018

bunny tail easter eggs

Have you ever folded your Easter dinner napkins to look like bunny ears?  You probably have.

Today, I am sharing how to DIY some Easter eggs to use with your folded bunny ear napkins!  I like to make bunny tail eggs for my napkins!

bunny easter eggs with bunny ear napkins

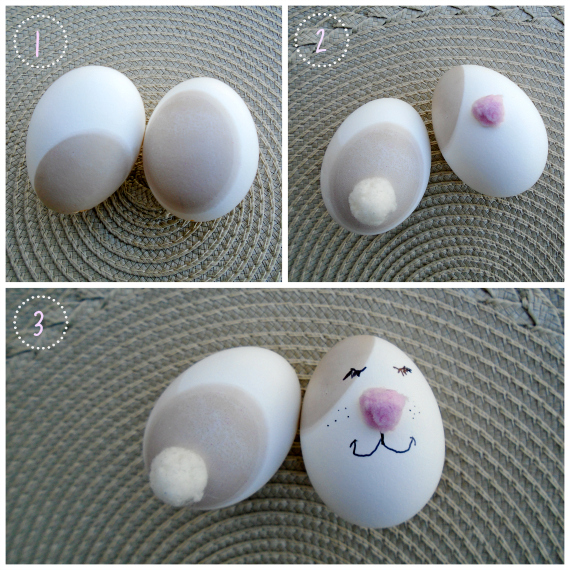
Since I was making one to show you, I decided to also make one with the front of a bunny to demonstrate how easy it would be to include bunny face eggs as well.  You can choose to make just the backside eggs to use with your napkins – like I do – or, mix up bunny backsides and bunny faces on your Easter table!

bunny tail easter egg for ear napkins

All you need are pompoms to glue to the eggs.  Use a white one for the bunny’s tail and a pink one for the bunny’s nose.

To add a little character to my bunny, I first added some spots to the eggs so my bunny would not be pure white.  I did this by making up a taupe egg dye and adding a little bit of color variation to my bunny.  Black or gray dye work for ‘bunny spots’ as well.  Once you have dyed your eggs – if you choose to – use a glue gun to add the tail and nose to your bunny eggs.  A fine point permanent marker is perfect to add the rest of the bunny face detail to the egg with the pink ‘nose.’

bunny ear napkin egg preparation

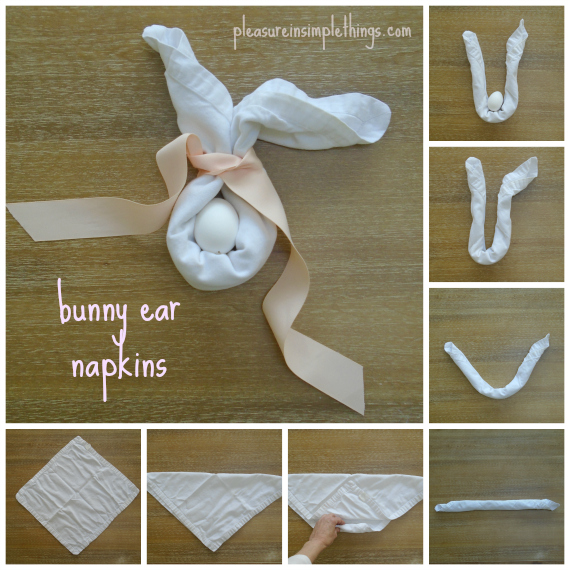
Once the eggs are complete, Use the diagram here to help fold two napkins appropriately.  Add ribbon to keep the eggs in place and to position the ‘ears.’

bunny ear napkin instructions

A perfect little DIY for your Easter table!  Change up the bunny and napkin colors to best match your décor.  I used taupe and white, but you can use whatever colors work for you.  Eggs dyed gray paired with gray napkins work well too.  You can also create a variety of different expressions on your bunnys’ faces.  Have fun with it!

Thanks for stopping by!

Remember to take pleasure in simple things, Jackie
no comments

« Previous Entries     Next Entries »