Subscribe to Pleasure in Simple Things via RSS ReaderFollow Pleasure in Simple Things on InstagramFollow @InSimpleThings on TwitterLike Pleasure In Simple Things on FacebookFollow Pleasure In Simple Things on PinterestEmail Jackie

valentine coconut lime truffles

February 5, 2013

Valentine truffles

There is a certain amount of class in going ‘against the grain’…like wearing white in winter.

To me, this element of surprise adds a certain elegance…the same holds true in creating food…

This is the feeling that is captured in the coconut lime truffles made from white chocolate that I am creating for Valentine’s Day giving.  Although my Valentine’s Day confections may look like little snowballs, the flavor is more reminiscient of a tropical locale.  The white chocolate is a refreshing departure from the typical Valentine’s Day choice.

Valentine truffle

A photo of a Valentine coconut lime truffle… sure to steal a heart :)

If you haven’t made candy before, don’t despair…even a novice candy maker can have excellent results with truffles…no candy thermometer is needed, and there is plenty of room for creativity.  Try substituting your own favorite flavors and coatings.  If you don’t like coconut, you can try crushed gingersnaps as a coating – I have tried them  also and the flavor combination with the lime is great.

coconut lime truffles

Valentine Coconut Lime Truffles Recipe (makes 12,  1  1/4″ truffles)

  • 7 oz. of good white chocolate (Ghiradelli or Lindt)
  • 2 Tablespoons of heavy cream
  • 2 Tablespoons of fresh lime juice
  • 1 cup flaked,  sweetened coconut (spread onto a plate for easy clean up)

Melt the chocolate, very slowly, in a double boiler.  Remove from heat and whisk in cream and lime juice.  Put into fridge until firm enough to roll into balls (about 2 hours).  Roll into 12 balls – then rolling each into coconut to cover.  Store in the fridge, but be sure to let sit a little before serving so they will melt in your mouth :)

Funny that I buy 4 oz. bars of chocolate and my recipe calls for 7 oz. ;)

valentine truffles

What better way to a heart than a homemade truffle?  Enjoy.

valentine coconut lime truffles

 Thanks so much for visiting.  Remember to take pleasure in simple things, Jackie

P.S. I am sharing this recipe at Pinch of Joy, Blissful Whites WednesdayThe Well Crafted Home, and The Inspiration Gallery at Craftberry Bush.

4 comments

homage to hot tea month

January 22, 2013

National Hot Tea Month

Did you know January is National Hot Tea Month?  When I happened upon this fact, I wanted to create a dessert as an homage to the occasion.  I am a little obsessed with Food Network, so, with Kitchen Stadium in the back of my mind, I attempted to create a dessert using tea as the secret ingredient.

Earl Grey is my favorite tea, so I knew that was the starting point.  My first impulse was to make a cookie…the wonderful flavor of the rosemary shortbreads I made over the holidays was fresh in my mind.  Earl Grey shortbread?  Seemed a little too obvious for Kitchen Stadium.

Ice cream?  Creme brulee?  My final idea:  a cream puff filled with Earl Grey infused whipped cream.  To finish it off; a lemon glaze…it is tea after all…lemon should pair well.

cream puffs infused with Earl Grey infused cream

A photo of pleasure in simple thing’s homage to National Hot Tea Month. Cream puffs filled with Earl Grey infused cream and topped with fresh lemon glaze.

After a few experiments, I found that six Earl Grey tea bags were the amount that gave the result I was looking for.  I heated up whipping cream and used the tea bags to infuse the cream.  Then, I put the cream in the fridge overnight…okay, in kitchen stadium I would need to use the blast chiller.  Anyway, I chilled the cream.  That way, I was able to get the Earl Grey flavor into the cream.  After I made a standard cream puff, I filled it with the cream and added a simple lemon glaze.  Perfect!  I think I was pretty successful in creating my homage to National Hot Tea Month!

Probably everyone has a cream puff recipe, but I will include one here with the cream and glaze recipes, for your convenience.

Earl Grey Infused Cream

  • 1 1/2 cups of heavy whipping cream
  • 1 1/2 Tablespoons of confectioners sugar
  • 6 Earl Grey teabags

Heat the cream until very hot, but not boiling.  Steep 6 Earl Grey teabags in the cream for a good 15 minutes, until the cream turns a beige color from the tea.  Squeeze the excess cream from the tea bags before discarding them.  Cover the cream and put in the fridge overnight (or the blast chiller for a short time ;) ).  When you whip the cream, add the confectioners sugar gradually.  Don’t whip the cream too far ahead of the serving time.

Lemon Glaze

  • 1/2 cup confectioners sugar
  • 1 1/2 Tablespoons fresh lemon juice
  • grated lemon peel (optional for garnish)

After cream puffs are filled, mix the sugar and lemon together and spread over the top of each puff.  Sprinkle with grated lemon peel, if desired.

Cream Puffs (Choux Paste)  18 to 20, medium-size

  • 1 cup water
  • 1/2 cup unsalted butter
  • 1/4 teaspoon salt
  • 1 teaspoon sugar
  • 1 cup flour
  • 4 eggs (plus 1 additional egg for glaze)

Preheat oven to 425 degrees.  Lightly grease a baking sheet and set aside.  In a pan over medium-high heat, bring water, butter, salt, and sugar to a boil.  When butter melts, remove pan from heat, add flour all at once, and beat with a wooden spoon until well blended.  Reduce heat to medium.  Return pan to heat and stir vigorously with a wooden spoon until mixture forms a ball and leaves sides of pan.  Remove pan from heat and let mixture cool for 5 minutes.  Add eggs, one at a time, beating mixture after each addition until smooth.  Let batter cool for 10 minutes before shaping.

Use two spoons to shape the cream puffs.  With one spoon, scoop up about 1 heaping Tablespoon of batter.  With other spoon, push batter off first spoon and drop in a mound onto prepared baking sheet.  Place mounds about 2 inches apart.

In a small dish or cup, beat 1 egg with 1 teaspoon water.  Brush egg glaze lightly over tops of puffs, being sure it doesn’t drip down sides and onto baking sheet (preventing proper rising of puffs).

Bake in upper third of preheated 425 degree oven for 15 minutes.  Reduce heat to 375 degrees and bake for 5 more minutes.

Cut a slash in lower side of each puff and continue baking for 10 minutes or until puffs are firm, dry to touch, and golden brown.  Let cool on wire racks.  Use within 24 hours; or wrap airtight and freeze.  Makes about 18 – 20 medium-size puffs.

When ready to fill, carefully cut the top (upper third) from each puff (scoop out moist , doughy interior if desired).  Shortly before serving, fill with a heaping Tablespoon of the whipped Earl Grey infused cream and spread top with lemon glaze.

Cream Puffs filled with Earl Grey infused whipped cream and topped with fresh lemon glaze.  How do you think they would fare in Kitchen Stadium?

Served with a cup of tea…what better way to celebrate National Hot Tea Month?

Thanks so much for visiting, Jackie

I am sharing at the Inspiration Gallery at Craftberry Bush, Blissful White Wednesday at Timewashed, and Well Crafted Wednesday at The Well Crafted Home

3 comments

grilled cheese from a truck

January 18, 2013

Caseus cheesetruck

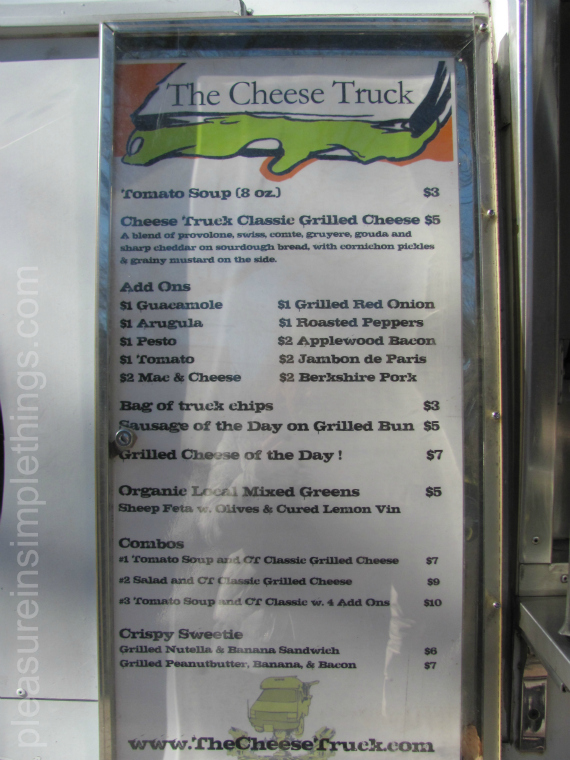
Today’s field trip is a lunch excursion.  I had some business in New Haven and decided, while I was in the Yale University neighborhood, to take a lunch break at my favorite food truck…The Caseus Cheesetruck.  This truck is a mobile version of Caseus Fromagerie Bristro – a restaurant and cheeseshop in downtown New Haven.  The star of its show is grilled cheese.  Who doesn’t like grilled cheese?  If you don’t, you will most likely find a version you will like here.

There are many combinations of ingredients available…one better than the next!  You can bypass cheese entirely and order a soup or salad….or, how about a grilled nutella and banana?

With temperatures in the 20’s and a stiff wind, it probably wasn’t one of my better ideas.  During the week, the truck is always parked on or around the Yale campus so the surroundings are always fun to admire, and on this trip I was trying to use them as a distraction from the cold.  I have an obsession with the doors on campus, so I tried to concentrate on them and not on my impending frostbite!  I almost decided to give up on taking any photos entirely as my fingers went completely numb!

I forged on…determined to show those of you that might not have ever seen the truck, just what it looks like.  Don’t let the sunny look fool you…it was freezing!!

Admiring the doors of the buildings on Yale University campus while walking to the Caseus Cheesetruck for lunch.

I opted to go for the traditional grilled cheese – in the case of Caseus, this involves a combination of seven or so cheeses.  I decided to add one ingredient – pesto (just because I love pesto).  I do think a classic grilled cheese and a tomato soup is a great choice for a first-timer.  It helps you realize just how elevated this standard can be when prepared by Caseus.

A photo of my choice for lunch from the Caseus Cheesetruck…the classic with pesto added. The sandwiches are served with a side of pickles and mustard.

There have been times (when the weather was nicer and my visit to the cheese truck was more leisurely) when I have been lucky enough to witness a ‘cheese truck challenge’ in process.  This is something worth witnessing at least once.  Any one customer able to consume 10 sandwiches in under an hour recieves the sandwiches free and can name the sandwich.  The challenger is required to add at least one ingredient other than cheese to the sandwiches.  The “tekin” for example, is named after Etkin Tekin.    Tekin was the first one to successfully complete the challenge.  His creation consisted of adding guacamole and bacon and he completed the challenge in 32 minutes and 4 seconds.
It is a fun visit, challenge or not…

The cheesetruck is definitely worth trying – if you go, maybe just pick a day where the temperature is at least a little above freezing!

Thanks so much for visiting!

Please have a wonderful weekend and remember to take pleasure in simple things, Jackie

no comments

valentine raspberry stuffed french toast

January 8, 2013

Yes, I have already started thinking about Valentine’s Day…the sweet part anyway!  Valentine’s Day is about all things sweet.  Even those that shy away from sweets give it a shot on February 14th!  I always think of an indulgent breakfast or bunch as the ultimate way to celebrate Valentine’s Day.  As a lover of all french toast, particularly the stuffed variety, I came up with a combo fit for a sweetheart…raspberry and mascarpone cheese make up the inside and combine perfectly with a hint of almond and some coconut on the outside. With the ingredients ready ahead of time, this decadent Valentine meal won’t take much longer to prepare than your standard breakfast, but will prove so much more appropriate!  If time is super short on the 14th,  you can always postpone preparing this dish until the weekend.  The recipe is for two, but it would be easy enough to increase the ingredients accordingly if you are making a family meal.

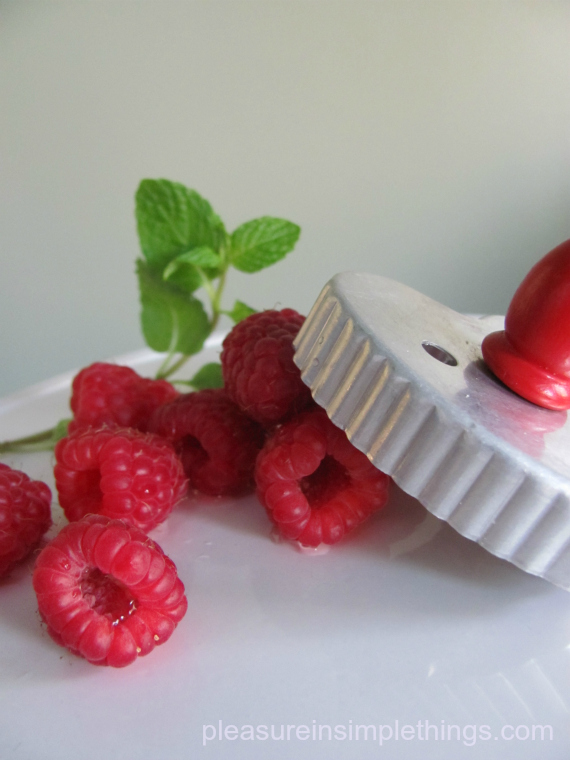
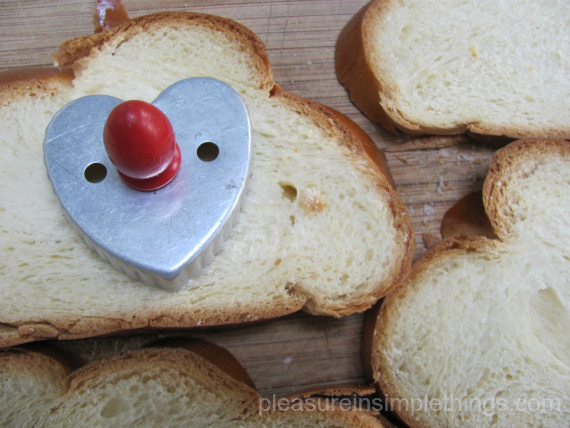
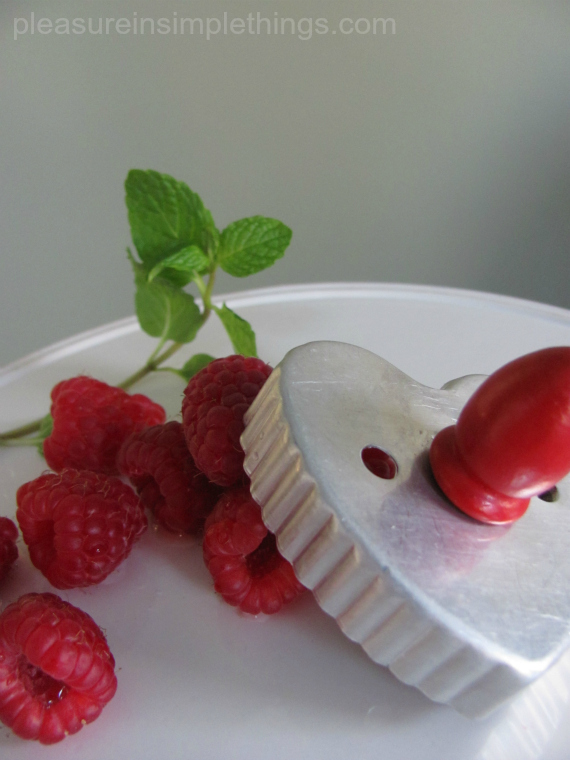
For an added show of affection, I cut a heart shape into the bread with a cookie cutter :)

Recipe for Valentine’s Day Raspberry Stuffed French Toast for Two

Ingredients

  • 4 slices challah bread, cut to ¾” thickness
  • ½ cup mascarpone cheese
  • ¼ cup seedless red raspberry jam
  • Approx.  ¼ cup sweetened flaked coconut
  • 2 eggs, whisked
  • ¼ cup milk
  • 1/8 tsp almond extract
  • Oil as needed
  • Butter
  • Sliced almonds for garnish
  • Fresh raspberries for garnish
  • Fresh mint for garnish
  • Confectioner’s sugar for garnish

Directions

  1. Mix cheese and jam in a small bowl.
  2. In a separate shallow dish, beat eggs and stir in milk and almond extract.
  3. Spread coconut on a plate.
  4. Lightly brown both sides of the bread in the oven.
  5. If desired, cut a heart shape with a cookie cutter in two slices of the bread, reserving the hearts.
  6. Spread the cheese filling thickly over the solid pieces of the bread and top with the heart cut piece.
  7. Heat oil at medium high heat in a frying pan large enough to accommodate the two sandwiches.
  8. Dip each sandwich in the egg mixture (let sit in the mixture a few seconds to absorb), coating both sides.  Then coat both sides in the flaked coconut.
  9. When oil is hot, add a pat of butter to the pan and fry the sandwich, cooking till hot and lightly brown on both sides – flipping once.
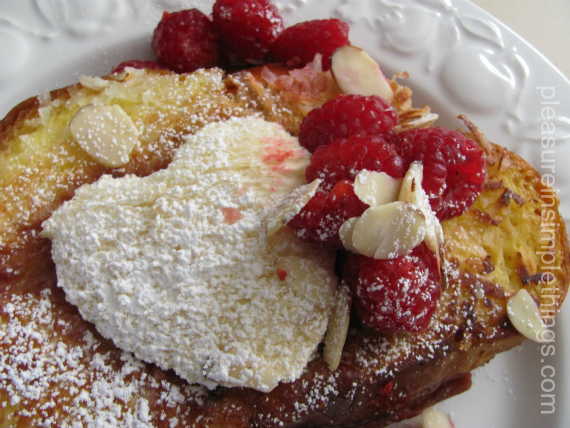
  10. Put onto a serving plate and add the reserved heart cutouts, sift with confectioner’s sugar.
  11. Garnish as desired with fresh raspberries, sliced almonds, and sprigs of mint.


Serve with champagne and a chocolate?  Just as special served with juice in a ‘fancy’ glass if you are serving to the sweeties under 21!

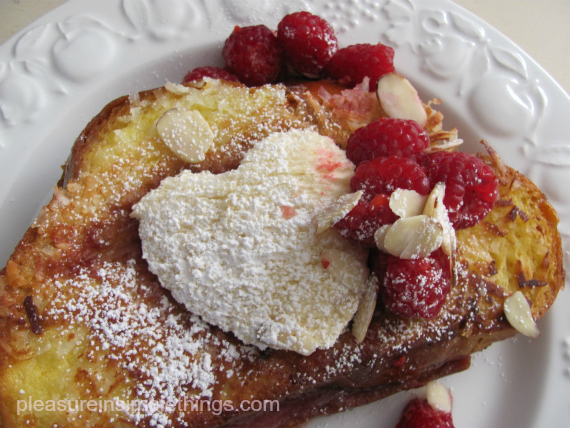
A photo of valentine raspberry stuffed french toast. Challah bread is filled with mascarpone cheese and raspberries and a hint of almond and coconut is added in this creation fit for a sweetheart.

I hope you will enjoy this valentine raspberry stuffed french toast…on Valentine’s Day…or, any day!

Thank you so much for visiting.

Remember to enjoy the pleasure in simple things, Jackie

3 comments

discovering brooklyn cuisine at terrain

December 28, 2012

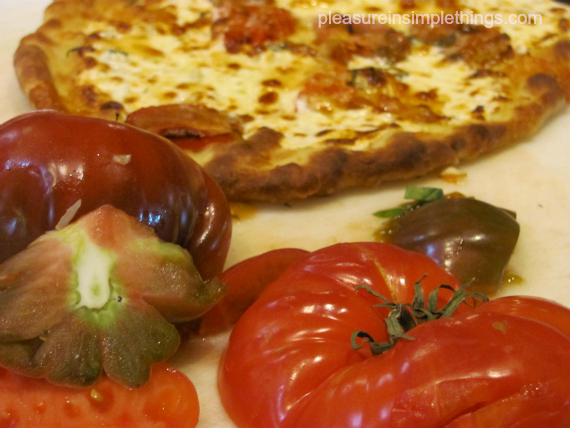
Terrain pizza

Today’s Friday field trip is a visit to one of my favorite places, Terrain, to attend a cooking class. This class is different than others I have attended, because it focuses on recipes from a specific area of the U.S. rather than those made with a specific ingredient. The area is Brooklyn, NY. The inspiration for the class is a book titled The New Brooklyn Cookbook.

If you are like me, the last thing you want to focus on after all the holiday eating is to eat! So, just sit back and enjoy looking at the photos!

The first thing we created together during class was some pizza…you really can’t think of any New York food without thinking of pizza! Even though I have made pizza many times before, I enjoyed the discussion as our instructor, Jen, led the class. How can you not have a fun time when you are kneading pizza dough!

Terrain cooking class

A photo of our Terrain cooking class instructor. The Westport store offers a fun variety of cooking and craft classes. Here the instructor is creating Brooklyn style pizza.

Of course, an added bonus while taking any class at Terrain is to check out all the beautiful products they have in the store…

Terrain measuring bowl

Here is a perfect example… I fell in love with this beautiful measuring vessel that our ice water was served in!

Another product at the store that we used during the class was the white truffle salt…a great addition to one of our pizzas!

Terrain truffle salt

Terrain cooking class

The freshest ingredients are always on hand for the classes at Terrain…

Terrain cooking class

Terrain cooking class pizza

And, in this particular case, since we were checking out all things Brooklyn…

Brooklyn beer

The pizza was a really fun thing to create, and even more fun to eat!

Terrain pizza

We had alot of fun with it. But, as I mentioned, I have made pizza before…The real “lightbulb” moment recipe for me was the next one we tried out from the book…

I was pretty much a ‘beet virgin’ …beets were always a staple at my grandmother’s table when I was growing up, but they have never been a part of my kitchen. The roasted beet salad recipe that we tried out from the Brooklyn cookbook totally opened up my mind to beets!

The salad we created was incredible…

Beet salad

The cooking class was a really fun time. I’ve had a couple Brooklyn eateries on my list of places to visit for quite some time…this class may have just given me a little more motivation to follow through on my Brooklyn visit. I was told the cookbook that provided the

recipes we used during the class is no longer available in print. I looked on Amazon and found that they have a digital copy, if you are interested in obtaining The New Brooklyn Cookbook. It is a great collection of recipes from some wonderful restaurants in Brooklyn.

If, like me, you are interested in exploring more recipes using beets, I am currently trying some interesting ones…For those of us new to beets, Angela, on the blog Oh She Glows has really great, clear instructions on how to create a Citrus Beet Salad with Creamy Avacado Lime Dressing. Chef Martin Kouprie from Toronto creates a beet salad using chocolate! I love to see inventive uses for chocolate…his recipe is like a kitchen stadium creation!

Do you have a favorite beet salad recipe? I would love to hear about it!

I hope you enjoyed this peek into a Terrain cooking class…maybe it will spark a trip to Brooklyn…or, trying a new beet recipe! If you live anywhere near one of the two Terrain locations, I would recommend trying one of the classes.

Have a wonderful weekend as 2012 comes to its close.

Thanks so much for visiting, Jackie

1 comment

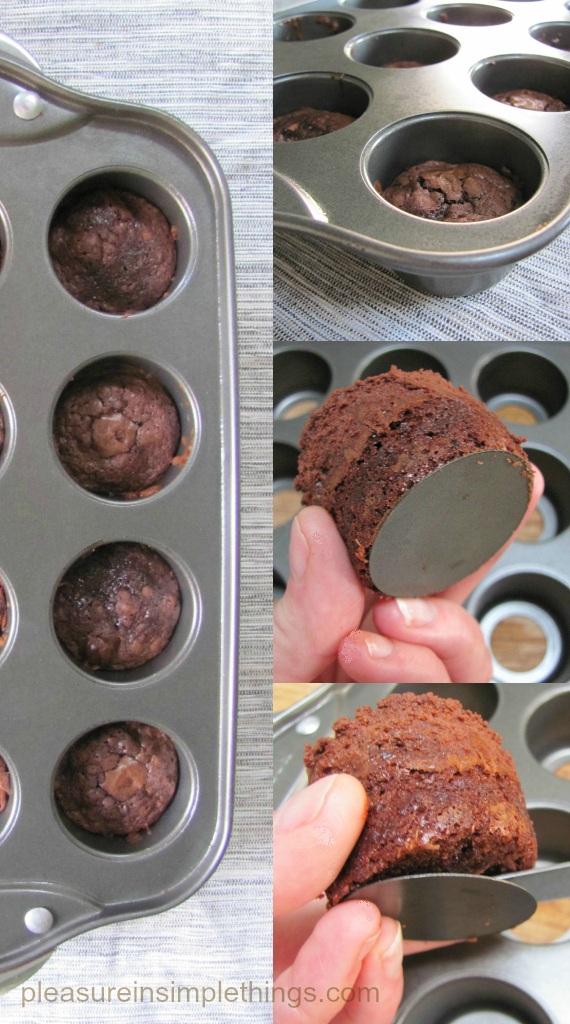
individual brownie mousse tortes

November 20, 2012

Don’t you think desserts look so much more elegant as single servings?  I think so.  That is the reason I purchased a cheesecake pan (with removable bottoms) that bakes up a dozen mini cheesecakes at a time.  I was thrilled the first time I used it and created a dozen salted caramel cheesecakes.  Yes, the pan was a pain to clean…especially the twelve little removable bottoms!…but, I thought so worth it!  I decided recently to try out the pan again.  This time, I adapted a favorite brownie torte recipe my friend Tracy gave me over (I guess I won’t say how many) years ago!

I was able to perfect a recipe after a couple tries and the results were fantastic.  With the holidays upon us, it is the perfect decadent dessert to impress your guests.

The tricky part is definitely the baking time.  Obviously, the baking time is reduced for a small single serving dessert when the original recipe is for a full-sized torte.  In this instance, there are two layers.  The bottom layer is basically a brownie and the top layer is a chocolate mousse.

brownie mousse torte

First, prepare a brownie recipe – either your own or a box.  I like to prepare mine from scratch, but sometimes it is so much less expensive to buy a boxed mix, it is hard to resist!  The only thing I changed was to add two teaspoons of instant espresso and a few mini chocolate chips into the batter.  I filled each compartment a little less than half with brownie mix.  It ended up being about half the usual cooking time – a total of 18 minutes.  You will have to watch carefully.  The first batch I made, I filled the compartments half way and found after they cooked there was not enough space left for the mousse.  This was easily corrected (but time consuming) by taking each torte out and slicing it to create a thinner bottom layer.  The second batch, I knew not to put very much batter in each section.  I had quite a bit of batter left, so I cooked the remainder in a muffin tin to cook and eat as brownies.

browniemoussetorte

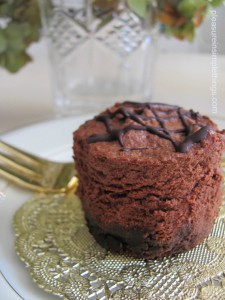
A photo of individual brownie mousse torte.

After the brownies cooled completely, I made a mousse and filled over each brownie to the top of the compartment with the mousse.  After this step, I garnished each dessert, by melting 1/2 oz. of baking chocolate and drizzling over the top of each torte.  Then, the pan was put into the fridge to set.

Chocolate Mousse Recipe (for top layer)

  • 1 & 1/2 cups semi-sweet chocolate chips
  • 1 oz. unsweetened baking chocolate
  • 1 tsp. instant coffee or espresso powder
  • 1/4 cup water
  • 2 Tbsp. butter
  • 1 cup whipping cream

In a small saucepan, combine chocolate chips, 1 oz. unsweetened chocolate, 1 tsp. instant coffee, 1/4 cup water and 2 Tbsp. butter.  Cook over low heat, stirring constantly, until mixture is smooth.  In small bowl, beat whipping cream until soft peaks form.  Fold warm chocolate mixture gently into whipped cream. 

When you are ready to plate the desserts, carefully remove each one by pushing from the bottom carefully….if there is any sticking, you may need to loosen the outer edge with a dull knife.  My pan is made of a nonstick surface and I didn’t have any trouble getting the desserts out of the pan.  The bottom ring of each compartment of the pan needs to be removed by slipping a knife carefully underneath each one.

It may take a little extra work to make the torte in individual portions, but I think it is well worth the result.

I hope you will try these indivdual brownie mousse tortes for your holiday table.

Thanks for visiting.  Have a blessed Thanksgiving… and, remember to take pleasure in simple things, Jackie

3 comments

easy caramel corn

October 30, 2012

This time of year is a natural for popcorn.  Caramel corn?  Even better!  Very seasonal and very yummy. For a long time I was intimidated just thinking of trying to make it.  Plus, all the recipes always called for popping popcorn the old fashioned way – on the stove.  These days, I would never think of doing that – it creates such a mess!  Microwave popcorn is so much easier and neater!  So, I would like to share the instructions for making this delicious treat using the ‘conventional’  bag of microwave popcorn!

I love it because I always have the few ingredients needed to make it in my house, so if I decide to turn the usual popcorn up a notch…I am ready!  Of course, you wouldn’t want to buy a butter flavored popcorn…pick something unflavored or, a natural flavor.  I buy the grocery store brand  organic ‘natural’ flavor.  It has a little salt in it, but that’s it.  I don’t add any salt of my own since I don’t normally use much salt.  You may decide you want to add some.

One batch (or 3 oz. microwave bag) fits great on a cookie sheet, so if you decide to make more than one batch, just plan for one cookie sheet per bag.  You might fit two bags on one sheet if you have a really large baking sheet.

This is a great snack for the sports fans in the house…a sweet departure from the usual nachos while watching the big game.  If you are making this for the kids,  you can toss in peanuts (aka Cracker Jacks) and/or candy corn as fun additions.

Because I planned on serving this batch of the caramel corn I made to ‘the guys’, I got a little ‘corny’ (pun intended) with the presentation and served it in a tin that announced it as “the best ever caramel corn.”

A photo of caramel corn made using microwave popcorn and served in a chalkboard tin.

Tins are a great way to store and present the caramel corn.  This tin was spray painted completely with chalkboard spray paint – making it easy to change up the message, depending on its use.  An easy way to repurpose an ugly tin!  This one has been used many times over and will later serve as storage for holiday treats and  be adorned with some fun red and green chalk.

Easy Caramel Corn Recipe

  • 3 oz. bag of microwave popcorn, popped  (I use the natural flavor – it just has a little bit of salt)
  • 6 tablespoons unsalted butter
  • 1/3 cup packed light brown sugar
  • 3 tablespoons light corn syrup
  • 1 teaspoon pure vanilla extract

Heat oven to 300 degrees.

In a medium saucepan, combine the butter, sugar, and corn syrup.  Cooking over medium heat, stir constantly until the mixture bubbles and lightens in color, 4 or 5 minutes.

Remove from heat.  Stir in the vanilla.

Pour over the cooked, cooled popcorn in a large bowl and toss to coat with a rubber spatula.

Spread the popcorn mixture on a lipped baking sheet and bake 30 to 35 minutes, when the color will deepen, tossing once halfway through cooking time.

Remove from oven and toss before letting cool on the baking sheet.  Wait until completely cool to serve.

Store in a tin or other airtight container at room temperature.  You can keep it for up to a week…if it lasts that long!

Hope you enjoy this easy caramel corn recipe.  You might want to spray paint a tin of your own to store it in…you can later use it for holiday cookies!

Thanks for visiting, Jackie

5 comments

cheese & herb fondue in a pumpkin

October 16, 2012

I love using pumpkins for serving containers and flower vases at this time of year.  When I saw this idea about cooking a fondue in the oven right inside a pumpkin, I thought it was great!  I soon found out that it also tastes great!  I’d like to share the recipe…a great one for seasonal entertaining.  A great appetizer or first course served right from the pumpkin!  Here is the recipe I used, taken from one published by the Fig Cooking School in New Haven, CT.

 Ingredients:

  • 1/4 cup chopped shallots
  • 1/4 pound stale bread, cut into small cubes
  • 1/4 pound cheese, such as gruyere, emmentahal, cheddar, smoked gouda, asiago, parmesan, or any combination, cut into 1/2 inch cubes
  • 3 cloves of garlic pressed or minced
  • 1/4 cup fresh scallions, chopped
  • 2 teaspoons or more of fresh herbs (i.e., parsley, rosemary, thyme)
  • 1/2 cup dried cranberries
  • 1 sugar or Cinderella pumpkin, weighing about 3 pounds
  • 1/3 up or more of heavy cream

Preparation:

  1. Preheat oven to 350 degrees.
  2. Sautee shallots until they are crispy and set aside.
  3. Combine chunks of bread and cheese along with cranberries.  Season with salt and pepper.
  4. Add shallots to the bread and cheese mixture.  Combine well.
  5. Add any herbs you choose, along with the scallions and the garlic.  Toss well.
  6. Using a very sturdy knife, cut off the cap of the pumpkin, just as you would a jack-o-lantern.
  7. Scoop out the stringy pumpkin and the seeds and generously salt the inside of the pumpkin.
  8. Pack the filling tightly into the pumpkin (there shouldn’t be any air pockets.)
  9. Pour in cream until the bread mixture is moistened and there is a bit of liquid on top (do not have the bread “swimming” in heavy cream).
  10. Put the cap back on and bake until the ingredients are bubbling and the meat of the pumpkin is tender enough to be pierced with a fork.  Do not let it burn; the pumpkin will turn black and collapse as it cools.


A photo of the fondue prepared and put inside the pumpkin – ready for the oven.

Place a large spatula under your creation and move it gently to a beautiful platter.

Serve as a side dish or an appetizer on small plates.

A photo of the completed fondue from the oven – ready to serve on small plates.


I hope you enjoy this creamy pumpkin fondue at one of your seasonal gatherings!

Thanks for visiting, Jackie

no comments

using that leftover pumpkin

October 9, 2012

3 pumpkin recipes

I know it seems like I am going into autumn kicking and screaming…and, maybe I am (a little)…I do love summer (miss it already!)  But, I am doing my best to embrace the new season.  Of course one of the true signs, especially here in New England, is pumpkins!  We have quite a few places to pick pumpkins here in Connecticut and visiting a farm is a sure-fire way to get in the seasonal spirit.

In my house, we love to use fresh pumpkins for our favorite pumpkin recipes, but there always seems to be too much or not enough pumpkin for what the current recipe requires…when there is not enough, I end up supplementing with canned pumpkin (100% pumpkin…not pie filling) and when there is too much, I have a few favorite ways to use the leftover pumpkin.

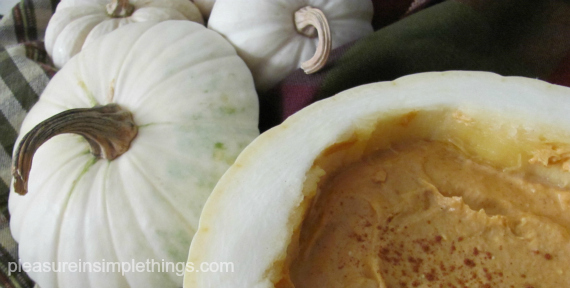
PUMPKIN CREAM CHEESE is a great way to use any leftover pumpkin because you can adjust the recipe to whatever amount you have left.  It is a great dip for apple slices or gingersnaps (or you could make your own ginger cookies using the recipe from this previous post https://pleasureinsimplethings.com/great-ice-cream-sandwiches/).  Served in a pumpkin, (approximately 5″ diameter pumpkin  is a good size for 8 oz. of cream cheese) this spread makes a nice addition to a seasonal table.  It is also great as a spread on bagels.

Pumpkin Cream Cheese

  • 8 oz. cream cheese, softened
  • 1/2 cup sugar (you can use white or brown)
  • 1 cup pumpkin
  • 3/4 teaspoon cinnamon
  • 1/4 teaspoon ginger
  • 1/8 teaspoon cloves

Blend the cream cheese until smooth, then add the rest of the ingredients and blend together until smooth.  Store in the fridge.  Tastes better when made ahead so that the spices have time to blend together.

ICED PUMPKIN LATTE is something I not only use leftover pumpkin for, but also leftover coffee!  I always save any extra coffee from the morning to drink as iced coffee later in the day, storing it in my fridge.  With a little extra effort, I can have a pumpkin latte.  This is a real treat for me since I usually drink my coffee black.  You may think of this time of year as one for warm weather drinks, but I enjoy iced drinks all year ’round…I am sure this would taste just as good warmed up, if you are so inclined.  I find it tastes best to make ahead and store in the fridge so that the spices have a chance to really blend…yum!

Iced Pumpkin Latte

  • 2 cups milk
  • 4 tablespoons pumpkin
  • 2 tablespoons sugar
  • 2 tablespoons vanilla
  • 1/2 teaspoon pumpkin pie spice*
  • 1/2 cup strong coffee or 2 shots of espresso

Add the pumpkin and the sugar to 1/2 cup of the milk and whisk or blend until dissolved.  Add this and all the remaining ingredients into a pitcher and store in your refrigerator.

When ready to serve, be sure to stir to combine…if you want your drink foamy, you can either briskly whisk or put into blender to add air. (I don’t bother with this step – I just stir enthusiastically!)

Pour into a cup with ice.  Makes two servings.  If you want to get fancy, you can add whipped cream and sprinkle cinnamon on top.  Enjoy!

*to make your own pumpkin pie spice, you can mix 1 and  1/2 teaspoons cinnnamon, 1/2 teaspoon nutmeg, 1/4 teaspoon cloves, and 1/2 scant teaspoon of ginger – measure accordingly for your recipe

PUMPKIN PIE SMOOTHIES are a great way to use leftover pumpkin as well as yogurt or bananas you may have left over.  Pretty much any yogurt or fruit you have around the house tastes good in a smoothie, so don’t be afraid to vary the recipe according to what you have on hand.  This pumpkin pie smoothie recipe is adapted from Chop Chop magazine:

Pumpkin Pie Smoothie

  • 1/4 cup orange juice
  • 1/4 low-fat or skim milk
  • 1/2 cup plain low-fat yogurt
  • 1/4 cup pumpkin
  • 1/2 ripe banana
  • dash or cinnamon
  • 1/2 teaspoon vanilla extract
  • 2 or 3 ice cubes

Put all the ingredients in the blender.  Blend on medium until mixture is smooth, about a minute.

If you find you still have pumpkin left after using these recipes, you can freeze it in a plastic bag in the size desired…you can freeze 1 cup for the cream cheese recipe to defrost when you need a quick appetizer.  You can also put tablespoon increments into an ice cube tray, popping into a plastic bag when frozen, to keep handy to defrost for future iced pumpkin lattes!

These are just a few easy ways to use your leftover pumpkin.  I am sure you can think of many more…it is really easy to add pumpkin to muffins, pancakes, or waffles – chocolate chip pumpkin waffles anyone?

Enjoy!  Thanks for visiting, Jackie

1 comment

penzys spices

October 5, 2012

friday field trip

I often talk about the amazing spices I use in my cooking and recipes.  Today, since I need to restock on some items, I thought I would make our Friday field trip to Penzys Spices in Norwalk, CT.  I have been to the Penzys location in Grand Central Station in New York City also, but it wasn’t until my lastest visit to the Norwalk store that I discovered there are 68 retail locations!  I never realized Penzys locations spread across the country.

It is extremely easy to become addicted to Penzy’s products.  Once you try something from Penzys, it is impossible to use grocery store spices again…the product is so superior and makes food so much more flavorful.  My visit was prompted by a need for more mulling spice.  Last weekend I used the last of what I had to make some mulled cider to enjoy by a bonfire.  I had been making myself pumpkin lattes lately and needed a change!  Mulled cider is so seasonal and so simple using the Penzy spice combination.

Including Penzy flavorings in holiday baking is an instant way to improve any recipe.  If you want to try a product and one of the 68 stores is not within visiting distance, check out the website:  www.penzeys.com  I really prefer to actually visit the store. I enjoy looking at the variety of products and collecting the recipe cards that are displayed throughout the store.

One of the most important tips about spices that I have learned at Penzys is to store spices AWAY from any type of heat source.  Don’t so many people store their spices on top of the stove?  To maintain strong, fresh flavor, spices need to be stored properly.  Heat, light, moisture and air all speed the loss of flavor and color.  Avoiding light is also important and is the reason spices should be put inside a cupboard or drawer.  Definitely keep any type of open spice rack out of direct sunlight.

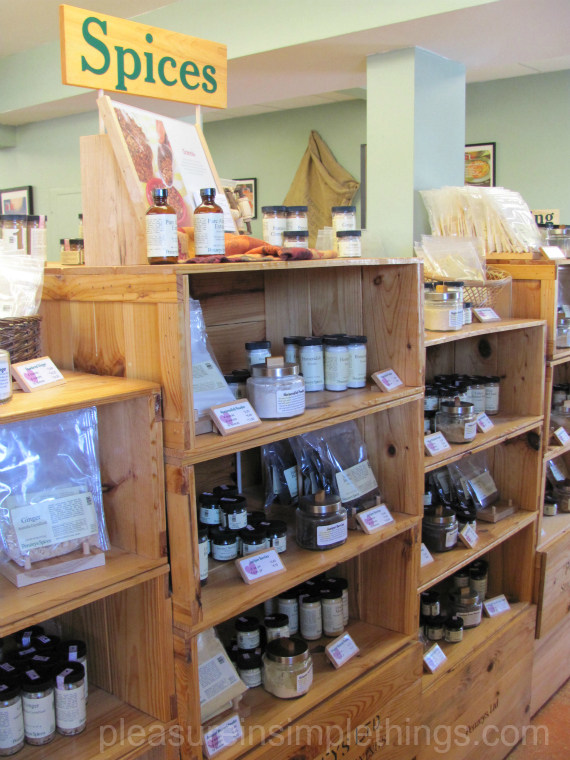
A photo of an array of spices offered for sale at Penzys Spices in Norwalk, CT.


A photo of one of the many gift assortments available at Penzys Spices in Norwalk, CT.

Everyone has their own favorite spices, but I think my favorite from Penzys would be the fajita spice.  I can no longer make chicken fajitas without marinating the chicken in the easy recipe on the Penzys fajita seasoning jar.  It is fabulous.  And, because I love to bake, it would be hard for me to do without the vanilla and cinnamon.  This time of year cocoa, pumpkin pie spice, lemon rind, etc. are all great flavorful items to add to baking.  And, there is a whole chili section in the store!

I asked at the store about the shelf life of the average spice…don’t we all have a few spices we bought for one recipe and have had on the shelf for ages?!  WHAT is that spice lol?!  A good guideline is to buy a one year’s supply of herbs or ground spices, and a one to two year supply of whole spices.  Most spices are havested only once a year, so it does not make sense to discard them after a shorter period than a year.  The flavor components will dissipate over time so it is not wise to keep them long beyond a year.  When in doubt?  Smell it.  If it smells strong and spicy, use it.  If not, toss it.

Next time you are in the market for spices, give Penzys a try…I think you will be glad you did!

Thanks for visiting, Jackie 

3 comments

« Previous Entries     Next Entries »