Subscribe to Pleasure in Simple Things via RSS ReaderFollow Pleasure in Simple Things on InstagramFollow @InSimpleThings on TwitterLike Pleasure In Simple Things on FacebookFollow Pleasure In Simple Things on PinterestEmail Jackie

new beginnings

May 28, 2019

Before dresser

Hi friends!  I know my furniture redos usually show a ‘before’ and ‘after’ in the same post.  But, today I am only showing the ‘before’ of a current piece I have been working on.

Like me, the piece is starting a new beginning!  I have given new life to a vintage mahogany dresser and I am taking it with me on a new journey!

stripping top

As you read this, I am on my way to a new beginning…leaving a place I’ve lived for a long, long time.  I am looking forward to sharing some future projects with you as I prepare to downsize everything in my life!

dresser top in process

I am going to give you one little peek as to how I refinished the dresser my daughter used growing up – a family heirloom.  It is renewed and ready to join me!  Because of my moving out, I don’t think I will be posting on Friday, but I will be back next week!  And, I will share, in more detail, my new dresser!

after

Here is a little peek of the ‘after.’ As you can see, I decided to keep the original hardware. What do you think the rest of the piece looks like?

Thanks for stopping by.  Remember to take pleasure in simple things, Jackie

no comments

a valentine mug cake

February 12, 2019

mug cake ingredients

Have you ever made a mug cake?  They are great!  Essentially, it is a cake made in a mug.  Certainly, a single size serving of cake made in a mug (with no extra dishes to wash) is a great invention, don’t you think?

For Valentine’s Day, I am sharing a recipe for a mug cake using Nutella and raspberries.  You can change up the recipe a little to accommodate your own tastes if you’d like.  The nice thing about experimenting with mug cakes is that you aren’t using too many ingredients if you decide to scrap one and keep trying different variations.

mug cake for Vday

This recipe was created from all ingredients I had on-hand.  Something chocolate is a must on Valentine’s Day and, of course, I needed a little something red – hence, the raspberries!

Make one as a special Valentine treat to yourself!  Or, print up the recipe for it and attach it to a pretty mug as a Valentine gift!

Valentine Mug Cake Recipe

  • ½ cup minus 1 Tablespoon all-purpose flour
  • 2 teaspoons cocoa powder
  • 3 Tablespoons sugar
  • ¼ teaspoon baking powder
  • 3 Tablespoons milk
  • 2 ½ Tablespoons plain Greek yogurt
  • 1 Tablespoon Nutella (plus extra for spreading on top)
  • 1 Tablespoon crushed raspberries
  • 5 mini marshmallows
  • Extra marshmallows & raspberries for garnish

Combine the flour, cocoa powder, sugar and baking powder in a mug.  Add remaining ingredients to the mug and stir well to combine.  Cook in the microwave for 1 1/2 minutes on 80 percent power or just until a toothpick inserted comes out clean.  Cool 1 minute.  Spread the top with additional Nutella if desired and garnish with marshmallows and raspberries.

eating a mug cake

Enjoy!

Happy Valentine’s Day!  Remember to take pleasure in simple things, Jackie

no comments

diy sentiments jar

January 15, 2019

creating memory jar 2019

Do you keep a gratitude journal?

I am doing something a little different from a journal for 2019.  I am keeping a jar of memories that document special feelings I have towards my children.

I am so appreciative of the two wonderful children I am blessed with and I created a way to collect all the special feelings I have toward them throughout the year.

diy jar for 2019

The idea is simple.  When I have one of those “aww” moments, I will write something down on a slip of paper to help me remember it and drop the slip of paper into my sentiments jar.

looking down at sentiment jar

Those of you who have a vinyl cutting machine can easily use it to decorate a jar – maybe just simply the word “gratitude” affixed to the jar.  Other ideas for jars are “laughable moments,” “2019,” “accomplishments,” “kids say the darndest things” …you get the idea!

sentiment jar with lid

In my case, I am very specifically documenting sentiments related to my children, so I created something appropriate to decorate my jar.  And, since I don’t have a vinyl cutter, I designed and printed something on a color printer and glued it onto the front of a clear glass jar.  Here is what I created, if you’d like to use it:

my favorite

With Valentine’s Day coming up, a cool variation might be to create a “favorite romantic moments” jar for yourself or as a gift!  If gifting, include pre-cut slips of paper and tie a pretty pen or pencil to the jar.  For fun, add a few candy message hearts scattered on the bottom of the jar!

I hope I have inspired you to document some of your memorable moments in 2019!

Thanks for stopping by!

Remember to take pleasure in simple things, Jackie

no comments

new skills for a new year

January 4, 2019

lettering quotes on old books

To say I will try new things in this new year doesn’t seem like anything new!  I’m always trying new things and can never seem to find the time to try everything I’d like to!

One of these things is calligraphy.  When I was in junior high school, I excelled at pen and ink lettering and was surprised when parents asked to purchase my watercolor and pen and ink posters at the school’s annual art fair.  Back then, we wrote quotes in Old English in ink on large sheets of parchment paper.

hat is hat

For a long time, I have wanted to do some lettering in a more modern way than my days of penning in the Old English typestyle!  Lettering has made a comeback big time, even though new computer programs and cutting machines have made it easier than ever to create lettering digitally.

first practice

Lettering is the type of skill that requires a lot of practice – since consistency is key – and it is hard to carve out enough time to do so!  A few hours in an afternoon probably isn’t enough time to master any skill, but that is all I have been able to allocate to lettering thus far!

Since I am such an admirer of old books, I had a DIY idea that is very personal to me.  I want to create some quotes I like on old books.  Unfortunately, there is not much room for error – once the ink is down, that is it!  I tried one as a test.  After only a couple hours of practice – not too bad.  That first letter didn’t really come out the way I wanted.  Oh, well!   I think I need a lot more practice before I put any more ink to book!

quote on a book

Do you have any plans to try a new skill in 2019?  Why not?  Choose one and run with it!

Thanks for stopping by!

Remember to take pleasure in simple things, Jackie

no comments

christmas in a teacup

December 11, 2018

gnomes in a teacup close up

Would you like to try a Christmas craft that is a little different from creating a gingerbread house?  Maybe even a little less intimidating?  How about crafting a holiday scene in a teacup?

gnomes in a teacup

I recently met a good friend at a tea house for breakfast and came upon these lovely centerpieces on the tables…instant smile makers!

reindeer with a teacup

Of course this one is my favorite…it most closely matches my decorating style!

teacup snowballs for sale

Isn’t this a great DIY craft idea?  Even for inexperienced crafters, creating a little holiday teacup scene is not intimidating at all!  A few little decorative items and some artificial snow are all that is needed to transform a teacup and saucer into an enchanting holiday scene!

penguin in a teacup

I love this idea!  I have plenty of vintage teacups since I sometimes use them to serve crème brulees or to plant moss or small plants.  If you don’t own any, pick one, or several, up at any Goodwill or tag sale.  Better yet, use a family heirloom to build your miniature scene!

birdbath in a teacup

I can’t wait to take out my box of miniature white bottle brush trees to get started!  You know I don’t decorate in red and green for the holidays, so I can’t wait to create some scenes in neutrals!  I think shells and sea glass are also in order!  I see coastal holiday scene teacups in my future!

snow house in a teacup

I hope I have inspired you to create some Christmas scene teacups of your own this holiday!  Use your imagination and have fun with it!

cardinal on a bench tea cup

Thanks for stopping by!  Remember to take pleasure in simple things, Jackie

no comments

easy sheet music christmas trees

November 20, 2018

music theme trees

When I wear my visual merchandiser hat, I am always trying to embrace new ways to find low cost décor.   This is a challenge when a store has a small or nonexistent budget for display.  In styling a store in a music theme this holiday season, I am enjoying creating some little ‘musical’ touches to add to the styling.

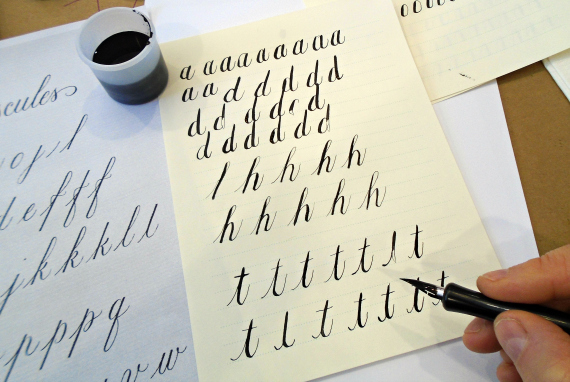
One really great, no cost supply for decorating in this theme is sheet music.  Old, tossed out sheet music becomes a fabulous component for all kinds of DIY opportunities!

diy music trees

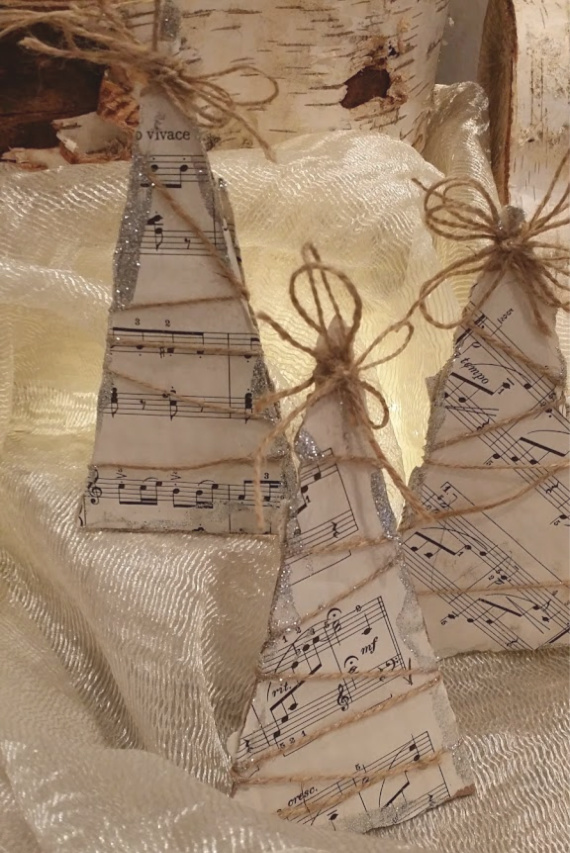
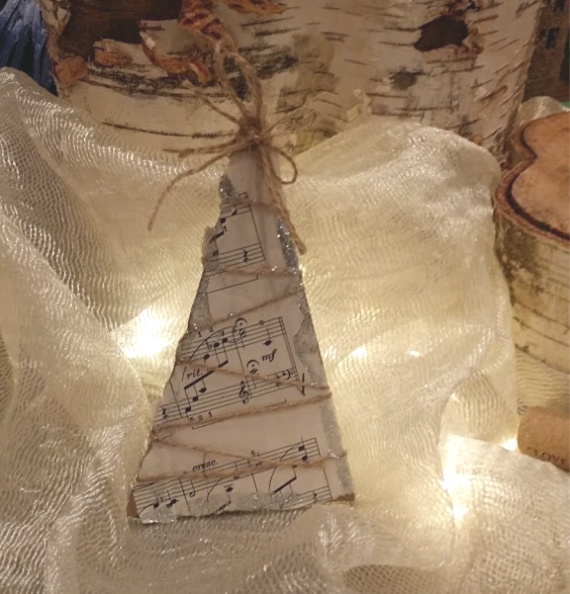
One very simple DIY – with no cost at all – is creating sheet music trees.  Using some basic scraps from the craft room, it is super simple to create some fun ‘musical’ trees!

For supplies:  cardboard (I used tossed out boxes – check your recycling bin), old sheet music, scraps of twine, scissors, glue, glitter.

sheet music trees

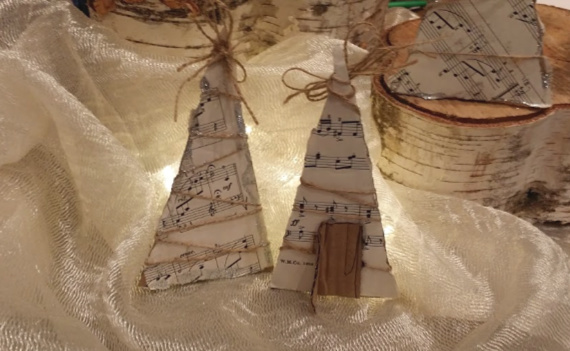
Cut cardboard triangles for the trees.  You can even create a whole forest of varying sized trees for your mantle! (Or, add numbers for a cool Advent calendar!)  Glue sheet music on both sides of the cardboard.  I overlapped the sheet music and ripped it to size, rather than cutting it, to create a ragged edge.  Use twine to decorate the tree – adding some extra on top to create a bow tree topper.  Spread some glue on the edges of the cardboard and sprinkle with glitter for a little holiday sparkle!  Use additional cardboard in a folded triangle shape to glue to the back of the tree as a stand.  (If you want to get fancy, you can use a wood slice and a dowel for standing the trees, but I didn’t have these supplies or a drill handy and I wanted to keep my trees at no cost.)

diy xmas music trees

And, that is all it takes to create some cute ‘musical’ trees!  I hope I have inspired you to create some of your own!  I can’t wait to add these babies to a holiday jewelry display!  I will be coming up with more DIY holiday décor from sheet music in the days ahead.

Thanks for stopping by!  Fa- la-la!

Remember to take pleasure in simple things, Jackie

no comments

diy tic-tac-toe

November 13, 2018

sand and sea diy

Now that we are well into November, are you starting to think of Christmas?  I have tried to cut back on my holiday shopping and this seems a common way of thinking among my friends as well.

I think it is far better to give experiences rather than material presents and I am trying really hard to keep that guideline in my mind as the holidays approach!

tic-tac-toe on the beach

That being said, there is nothing like a little homemade gift to surprise a little one come the holiday!  And, a homemade gift can definitely help create an experience as well!

Today’s DIY project is the perfect example!  It is super easy to make and it can be used to create a fun experience to give a child – how to play tic-tac-toe!

supplies for homemade game

The only supplies you will need are:  a small muslin bag (mine is being reused from a jewelry purchase), embroidery thread or baker’s twine, a sewing needle, and a handful of small items.  I used sea glass for my small items but you can use pebbles, shells, buttons, or small candies like m&ms…be creative and use what you have!  I made my DIY tic-tac-toe for no cost at all!

travel tic-tac-toe diy

I used brown and white baker’s twine to sew a tic-tac-toe board onto the muslin bag.  Then, I just collected a handful of sea glass in two different colors to use as the playing pieces.  The pieces are handily stored inside the bag when not in use.

collecting sea glass for diy

How easy is that!  I hope I inspired you to create a DIY tic-tac-toe game to gift to that perfect little someone this Christmas – personal instruction included!

diy tic tac toe on the beach

Thanks for stopping by!  Remember to take pleasure in simple things, Jackie

no comments

sea glass green and white pumpkins

October 23, 2018

white pumpkins and hydrangea

One of my favorite color pairings with white pumpkins is the color of green sea glass.  I am talking about the color green that is also the color of Jadeite.  And, also the color you can find in hydrangea when they  turn color in the fall.

A far cry from the traditional orange and black colors of the season!

pleasure in simple things blog white pumpkins

My love for the green/white combo is how I originally got started planting inside white pumpkins.  These images are from something I posted on planting succulents in a white pumpkin back in 2012.  To see the original post, click here.

hydrangea and white mini boos

I hope you are inspired to try a new color combination with white pumpkins this Halloween season!

succulents and Jadeite

Thanks for stopping by!  Remember to take pleasure in simple things, Jackie

no comments

making chenille pumpkins

October 2, 2018

chenille in the hand...

Now that it is October, I guess I can get really serious about my pumpkin making!  You know I love making velvet pumpkins with real pumpkin stems at this time of year.

chenille pumpkin from a bedspread

Although I love making pumpkins of velvet, in addition, each year I enjoy experimenting with a new, different fabric for pumpkins.  Remember last year I tried some cashmere?

chenille pumpkins with more fab stems

Well, this year my experiment is becoming an obsession!  And you thought my obsession was about stems!  Well, it is about stems – it’s always about stems lol!

chenille in neutrals

But, the new fabric obsession has become repurposing a vintage material – chenille!  It turned out to be convenient timing that cleaning out my linen closet happened at the start of fall.  I couldn’t bear to throw out a vintage chenille spread that, in the past, has adorned both the bed of my grandmother and of my daughter.  I decided to repurpose the spread into pumpkins…with real stems, of course!

white and pink chenille pumpkin

closeup of chenille

I hope these photos help inspire you to create some pumpkins from a repurposed material – like a treasured keepsake!

Thanks so much for stopping by!

pretty pink chenille pumpkin

Remember to take pleasure in simple things,  Jackie

no comments

october book giveaway!

September 28, 2018

breast cancer awareness pumpkins (2)

This is one of those months when the book giveaway is not a book!  For October, the giveaway is handmade pink velvet pumpkins.  Pumpkins; because it is October and pink; because October is breast cancer awareness month.

I encourage everyone to display at least one pink pumpkin during the month, preferably in a really visible location – like a front porch.  A great way to show support for breast cancer awareness month!

Inside the home, a clear container, a terrarium, or a cloche is great for pink pumpkin display! The container I used here is from Terrain and I am constantly changing up its contents to suit the season!

breast cancer awareness pumpkins (2)

To win your very own velvet pink pumpkins, made by me, just leave me a comment saying you’d like to win!  The winner will be chosen at random at the end of October from the comments received during the month.  Win and you will be able to display some pink velvet pumpkins each October!

Congrats to Mary Beth (a self-proclaimed pencil geek) , the winner of the September giveaway of the journal and the set of pencils with my custom imprints.  Click here to see more on the giveaway.

pink pumpkins in a terrarium

Instagram users, please read on.  For the month of October, let’s share our pink pumpkins!  Use hashtag #pleasuregram to share any photos of pink pumpkins on display – by you or by someone else!

pink pumpkin

Thanks for stopping by!  Remember to take pleasure in simple things, Jackie

1 comment

« Previous Entries     Next Entries »