Subscribe to Pleasure in Simple Things via RSS ReaderFollow Pleasure in Simple Things on InstagramFollow @InSimpleThings on TwitterLike Pleasure In Simple Things on FacebookFollow Pleasure In Simple Things on PinterestEmail Jackie

gift for book lovers

January 15, 2013

I am a real fan of personalized pencils and I love to give sets related to a theme…isn’t it always about a theme? The last time I made up a set of pencils for a gift, it was with a beach theme. This time, I am creating a set for book lovers. Since I put myself in that category, I had fun coming up with sayings to have imprinted on the pencils…restricting them to 30 characters.


Packaging a gift is always part of the fun. Usually I give sets of pencils in the great plastic tubes available at Garnish (like I did with the ‘beachy’ pencils), but I knew for this book lovers set I really wanted to do something with pages of a book. This is what I came up with:

As a fun wrap for a set of pencils for a book lover, I sewed two pages of an old book together to make the package and adorned it with flowers fashioned from book pages.


book lovers gift wrap

I love using the sewing machine as an unexpected way to put paper together. In this case, I sewed two old book

pages together making the package for the pencils. I also made some paper flowers and a leaf out of a book page and glued them onto the package. A small scrap of linen and some rubber stamps created the gift tag. Writing the name on the paper leaf would be another fun option as a way to label the gift.

Consider giving a set of pencils as a gift..it is fun coming up with the possible imprints for a theme, staying within the number of characters allowed for the imprint. This is an affordable and fun gift that can be used creatively for any holiday or occasion. If you need purchasing information, check the beach theme link above for ideas.

Thanks so much for visiting.

I am sharing this project on Craftberry Bush…check out the other projects posted!

Hope you are having a wonderful week and remember to take pleasure in simple things, Jackie

4 comments

diy ornament from ikea heart

November 13, 2012

diy ornament

I found this three pack of glass heart ornaments at IKEA for $5.99.  Boy, did that get my holiday spirit in full swing!  It was tough to limit myself to one package…but,  I did.  My initial intent was to monogram an initial on the front…very simple, very elegant.  But, I ended up changing my mind as I got going.

ikea ornament

First off, I removed the ribbons – red and white gingham is just not my thing… I decided to use some scraps of paper I had with some (French?) writing…it seemed romantic and the perfect thing to combine with a heart.  I cut the paper to the size of the heart.  I then brushed Mod Podge on the right side of the paper and adhered it to the glass.  When it dried, I wrote my (romantic) message on the back with a super fine permanent marker and brushed Mod Podge over it to protect it.

diy ornament

Next, I embellished the heart with a little key and some sparkle.  There are many ways to go with decorative touches, but I thought the key went so well with the heart and the romantic theme.  I used old twine to tie the key onto the ornament and used my glue gun to add a little piece of glittery twig.

diy ornament

A photo of my completed ornament crafted from an IKEA glass heart ornament.

Lastly, I tied on my own piece of ribbon to replace the gingham.  I have plenty of various ribbons, but I really liked the look of the seam binding…it is actually white seam binding that I had coffee stained to look less white and more ‘antiquey’.  That’s it!

diy ornament

For the second heart, I also decided to use paper with script writing.  For the third, I used an old book page that I first rubber stamped with a crown.

diy ornament


diy ornament

There are so many ways to adorn these beautiful (and affordable!) glass hearts, and making ornaments is a great way to use scraps of paper and ribbon you may have left over from other projects.  Nostalgic black and white photographs would also work really well.  Wouldn’t these ornaments also make great shower or wedding favors?  Or, to give as a great ‘first home’ or ‘first holiday together’ ornament?

diy ornament

This is just one of the many ways to use this item…and there are many more great items for holiday gift creations at IKEA.  I have a few more IKEA projects in mind.  If you live near an IKEA, I suggest a trip…it will definitely spark some creative ideas!  I hope you enjoyed this ornament diy.  This is my first official ornament creation for 2012!

diy ornament

Thanks so much for visiting!  Take pleasure in simple things, Jackie

3 comments

3 quick tips for organizing holiday wrapping

November 6, 2012

organize ribbons with a hanger

Can you believe it is already November? November for me signals getting my holiday plans in order. I start making and buying holiday gifts as early as June, and when November approaches I like to think I am pretty well organized. One thing I take stock in as soon as November hits is my holiday wrapping. Traditionally, I like to wrap everything on Thanksgiving weekend – so that means when November rolls around I need to have all my wrapping necessities in order! Working full time makes being organized, particularly around the holidays, a must! While everyone else is shopping the day after Thanksgiving, I am enjoying my wrapping (I love wrapping gifts!)

Then I can spend the height of the holiday season soaking in the season and working on handcrafted items and decorations instead of stressing!

I thought I would share with you the three organizing tips I find most important to prepare for holiday gift wrapping. They have worked so well for me.

The first thing I do is organize my ribbons. I like to use a hanger to keep all the ribbons in order and I organize by color families. I always use natural tones in my wrapping. It makes it much easier if you limit yourself to a color family…that way, you can buy pretty ribbons you may see any time during the year, knowing they will play into your theme. I have been collecting coastal themed ornaments my whole life and I always decorate with whites and natural tones. Each year I may pick an accent color – like turquoise, burgandy, or lime green – and add some accents, just to change things up a little. Brown kraft paper is always a staple for me as are brown kraft handled gift bags that may be painted or decorated in some way, and assorted shells and natural items.


The second thing I do is to put any package tie-ons, gift cards, shells, etc. into a hanging shoe holder with clear pockets. This makes it really easy to see what I have that I can use or what I may need to pick up. Having everything laid out in front of me makes it so much easier when I start my wrapping.


The third, and definitely the most important organizing tip for me for holiday wrapping, is to color-code the gifts for my family. I pick a color scheme for each person and wrap all their corresponding gifts appropriately. Even little items inside the Christmas stockings are wrapped in the appropriate color scheme. This makes things so easy. Items can be wrapped the second they are purchased (to prevent snooping!) and there is never any question as to who the package belongs to. When it comes time to put the gifts by our tree, I simply group them by the wrapping and add some last minute embellishments…each person has their own decor! You can choose a favorite color, school colors, etc. This system really works great. Because I have been using this system for so many years, I usually pick the color or theme for each family member the year before when I find an inspirational wrapping item I really love on an after-holiday sale rack.

I hope you enjoyed these three quick and easy ways to get your holiday gift wrapping items organized.

Let the wrapping begin!

Thanks for visiting, Jackie

4 comments

diy ballard designs burlap wreath

October 12, 2012

This week, friday field trip is through the pages of the Ballard Designs catalog.  Don’t you just love this catalog!? 

It is always such an exciting day when the Ballard Designs catalog arrives in the mail!  So many beautiful things!  This burlap wreath really caught my eye when I opened the latest edition in this week’s mail.  I love the neutral color and, heck, I have plenty of scrap burlap around…I know I can make my own!  Do you want to try your hand at making a Ballard Designs inspired wreath?  Read on.

A photo of my completed diy Ballard Designs inspired burlap wreath.

These are the materials I used:

  • 60 pieces of burlap – 1″ x 8″ rectangles
  • some additional burlap scraps (to cover the wreath)
  • 1, 8″ grapevine wreath
  • glue gun and glue sticks

(optional:  white ribbon and white berries or other decorative accents)

First, I covered the wreath with scraps of burlap just in case it showed through.  I simply used scraps I had and glued them onto the grapevine wreath using the glue gun.

BIG WARNING!  Since the burlap is such an open weave, the hot glue is going to be extremely dangerous…I suggest you use something other than your fingers to press down onto the burlap or wear some type of gloves to protect your fingers from burns.  Be very careful!

I cut rectangles from the burlap – 1″ by 8″ pieces…I cut mostly by eye, so the sizes of the pieces were not extremely accurate.  I estimated that I would need about 50 loops and ended up needing 60.  From here on, it is just a matter of glueing on the strips by gluing one side and then the other side directly to it.  I just glued them randomly around the wreath, filling in spots that seemed empty as I went.

The strings happened pretty naturally as pieces would unravel…I helped a few along.

And, that is it!  I really love it!  The original was hung with a long strip of burlap, but I wanted to use a white ribbon.  I also decided to add some decorative white berries.  I planned on saving it as a holiday decoration, but I like it everywhere I hang it…I think I may leave it on one of my inside doors…maybe I will add some sparkle to it come the holidays!

If you are a Ballard Designs catalog  ‘virgin’, do yourself a favor and check it out:  www.ballarddesigns.com

I hope you enjoyed this friday field trip with a Ballard Designs catalog inspired diy burlap wreath!

Thanks for visiting, Jackie

P.S. This wreath is posted on “Friday Happy Hour” …check out some of the other great ideas:  http://www.craftberrybush.com/2012/10/party-time-happy-hour-5.html

11 comments

easy candy table favors

September 28, 2012

friday field trip

Don’t you LOVE that section in Target where everything is a dollar?  I can’t walk into the store without stopping to look at everything in that section…I always end up picking up something I have to have!  It is only a dollar, after all!  This trip, I was on a mission to find an item in the dollar section that I can use as a favor to hold candy.  When the college kids are home, it is always fun to include a favor on the table for family dinners.  Candy is a natural with the kids (of all ages) and at this time of year it seems a little more legitimate!  There were quite a few possibilities when I started rummaging through the shelves.  (You can check out a few more of the options on my facebook page  www.facebook.com/insimplethings .)

But, when I came across these zippered burlap ‘pencil cases’, I knew they were perfect!  Plenty of room for candy and very seasonal!

Here is what I did to dress up my $1. find!

First, I decided I wanted to add the word ‘boo’ in black letters.  A personalization or the word ‘treat’ were also options I considered.  I also toyed with the idea of glow-in-the-dark paint, but decided I liked the stronger contrast of the black against the burlap.  I simply stenciled the three letters onto the bag using cardboard stencils and black acrylic paint.  (Slipping a piece of cardboard in the case to protect the other side in the event paint should bleed through.)


I cut a length of ribbon and tied it to the zipper pull.  I chose a black grosgrain with white polka dots.

And, that’s it!!  Great favor for a dollar, don’t you think?  And, plenty of room to fill with candy!  (Oh…I did buy rubber spiders at Target also…they were 4 for a $1!  Love the white polka dots on this one!)

A photograph of a favor for a seasonal table made from an item purchased from the Target $1. section.


Hope you have some fun creating seasonal table favors from Target’s $1. section –  great for those with a sweet tooth ;)

Thanks for visiting, Jackie

5 comments

photo tutorial for velvet pumpkins

September 25, 2012

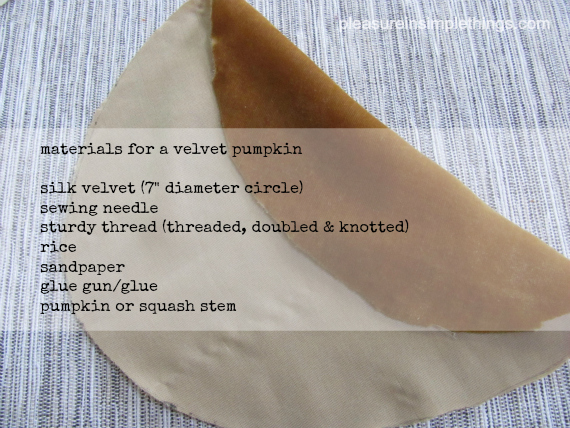
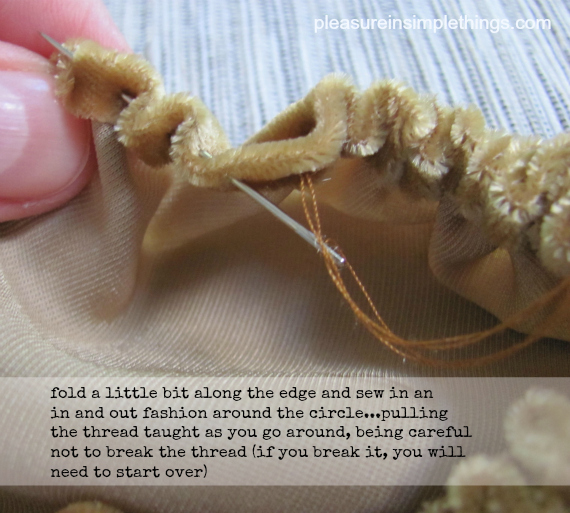
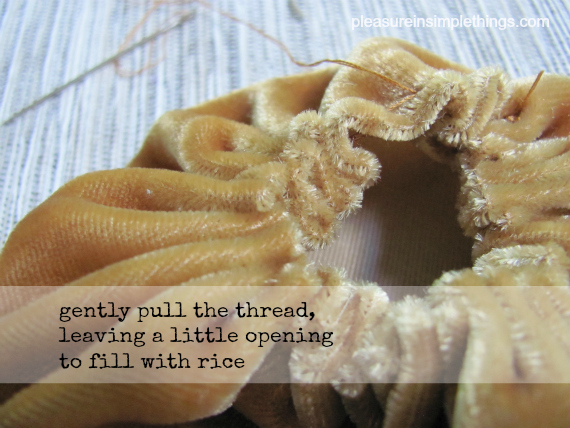
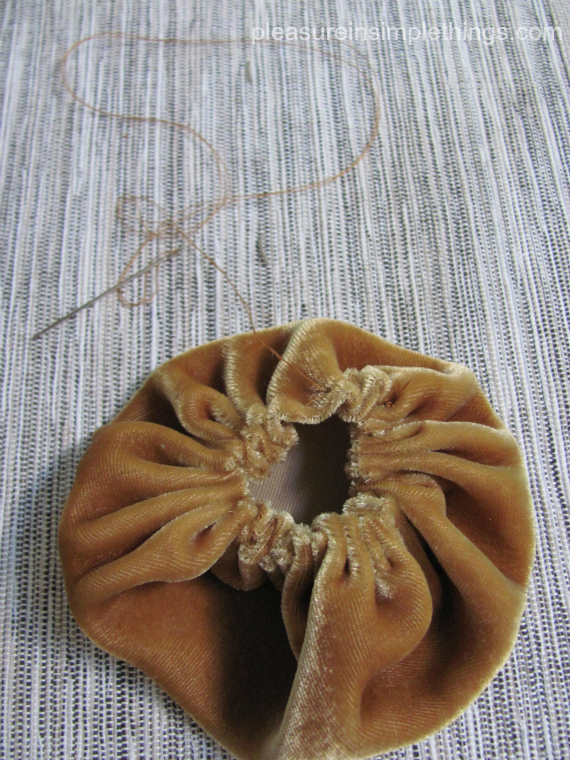
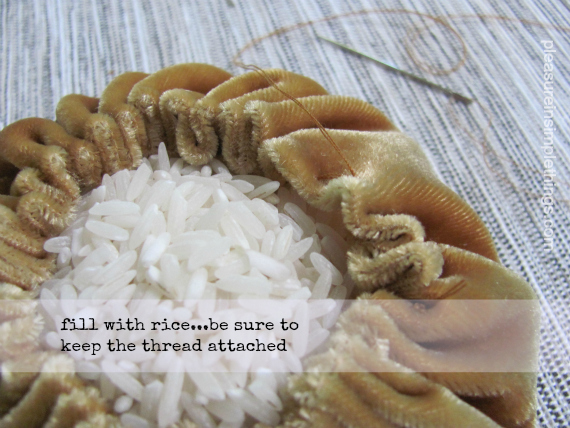
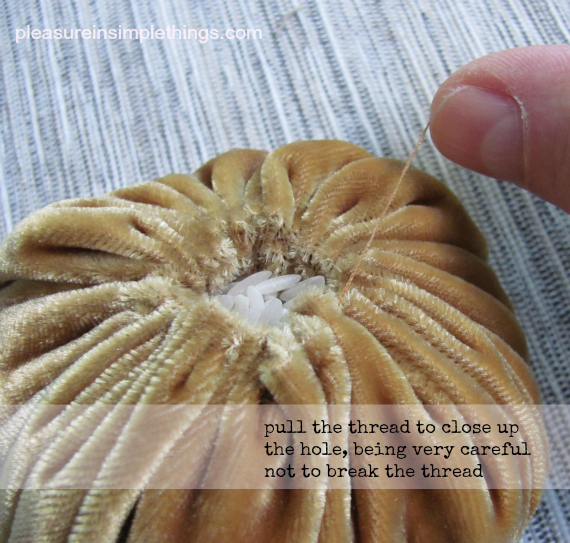
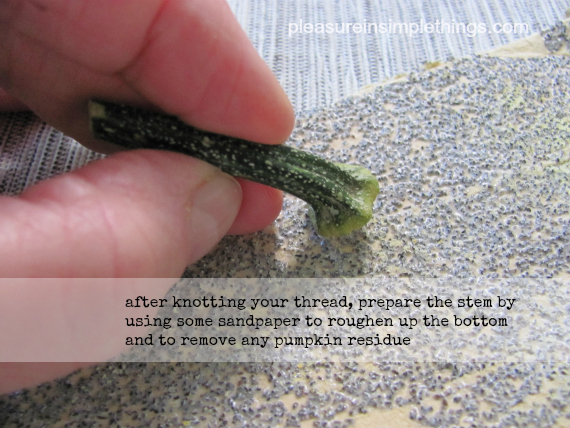
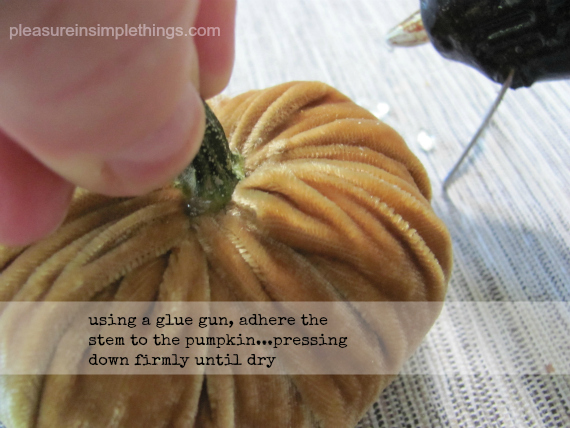
Notes: I decided to try and present directions best I could since I had so many requests for instructions.  I hope this helps.  I think part of the success of this project is to have a beautiful velvet.  I used a silk velvet.  As much as I love white, I think the velvet fabric colors that show depth are more beautiful – you can’t really see depth in the white.  They did not carry silk velvet at the local craft store or many of the fabric stores.  I was able to find it at a fabric store in Norwalk, CT called Banksville Designer Fabrics (www.banksvilledesignerfabrics.com).  I am sure there must be some sources online also, but I didn’t check.  Banksville had a half yard minimum which cost $12.50.  With a half yard you can probably make approximately twenty 7″ pumpkins.  A 5 lb. bag of rice would probably be sufficient for a dozen pumpkins.  Rice is pretty inexpensive, so if you plan on making a lot of pumpkins, buy a huge bag.  Stems can be found at pumpkin farms from unwanted pumpkins or squash.  I think the crazier stems you can find, the better – the stem can really add personality to the pumpkin.  If you don’t have any farms nearby, you can purchase a small pumpkin for a $1 at a grocery store if you have no other way to get a stem.  I think part of the beauty of these pumpkins are the real stems, but I have seen people use sticks from trees or cinnamon sticks on fabric pumpkins.  I think driftwood is also a fun option.  Of course, you can use the same procedure  I demonstrate to make pumpkins from other fabrics. I love to seek out new fabrics…like at Mood in New York City.  I also often use fishing line instead of thread (particularly on larger pieces) since it is so strong and won’t break.  If you aren’t crafty or would rather purchase some really beautiful velvet pumpkins rather than make them, look at http://www.hotskwash.com/hot-skwash-online-store/ .  This is the company that made the pumpkins that inspired me to try and create some and they sell them in an amazing array of colors.  If you have any questions on how I created mine, please send me an email and I would be happy to help you out! 

Thanks for visiting, Jackie

7 comments

diy paint can packaging

September 11, 2012

Candy in a can.

They say the way to a man’s heart is through his stomach…the reason food is always an accepted and appreciated gift for any guy. Most guys (or anyone, for that matter) have a special dessert or snack that they particularly enjoy and giving it for their special day can only bring heartwarming smiles . Whether it be pistachios, homemade brownies, popcorn…whatever. In the case of a young relative, it is candy…he apparently inherited a sweet tooth …couldn’t tell you from who ;)

His birthday is coming up and I want to collect some of his favorite confections and package them in a clever way as part of his gift. I am going to use a paint can…doesn’t seem appropriate to go to Home Depot to pick up birthday packaging? Actually, the small paint can is less than $3., so it costs less than some gift bags. Plus, I really enjoy repurposing items in an unconventional way. The bigger cans can be fun for gifts also. And, since they have handles, there are infinite possibilities for cool ‘tie-ons’. For food gifts, I prefer the smaller size especially since I don’t really want to encourage the consumption of the amount of sweets the large size can would accomodate! (The large cans are great for holiday gifts…keep this in mind come December.)

While I am at Home Depot, I also pick up some paint sample swatches…I use them for so many craft projects…they are like construction paper for the adult craft set. They make great gift tags, mats for small photos, etc. And, of course, they come in virtually any color. (I also keep a stack of sea-colored swatches on my desk that I use for note paper.) For this project, I grab some swatches in nautical looking colors since that is what I envision for this gift. I know I want to put some Swedish Fish in the can and the nautical theme will work well with that in mind.

A photo of my paint can packaging. This one is decorated with an anchor cut from chalkboard Contact paper.

A photo of a candy gift packaged in a decorated small paint can.

As it turns out, when I get home I decide to use some leftover chalkboard Contact paper to decorate the can. I cut a piece in the shape of an anchor. I also decorated a second, more ‘adult’ themed can to show you that it is possible to create a more sophisticated look using paint cans as packaging.

So, with a glue gun and some scrap materials, a couple of paint cans are transformed into some great gift packaging. The beauty of these cans is that they mail really well – great to send off to those college kids at Valentines Day, Halloween, or at finals time.

A photo of paint can packaging using more of a sophiscated style…I used scrap ribbon, squares cut from paint sample swatches, and a starfish – all attached using a glue gun.

I just

love the novelty of the recipient having to open them with a screwdriver ;) If you are sending them off to your college student and you don’t think they have a screwdriver, include one in the box – everyone should own a screwdriver.

Have fun creating some designs of your own. If you need some particular theme ideas, I would be happy to help.

Thanks for visiting, Jackie

2 comments

diy nautical chalkboard

August 21, 2012

repurposing an old skim board

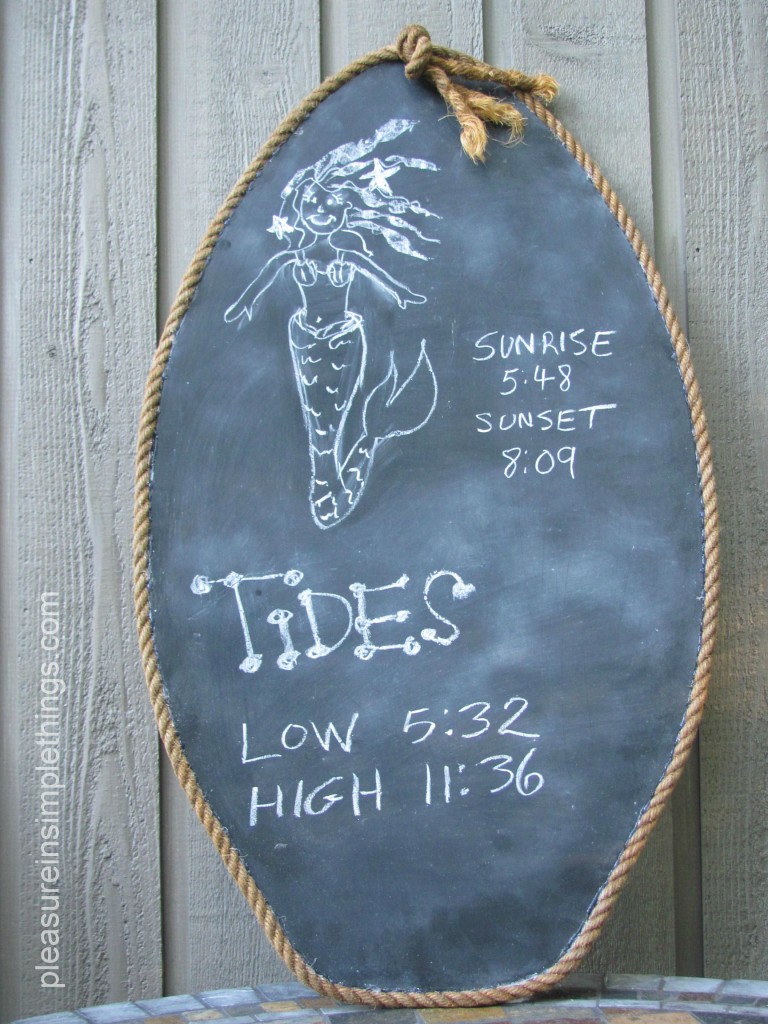
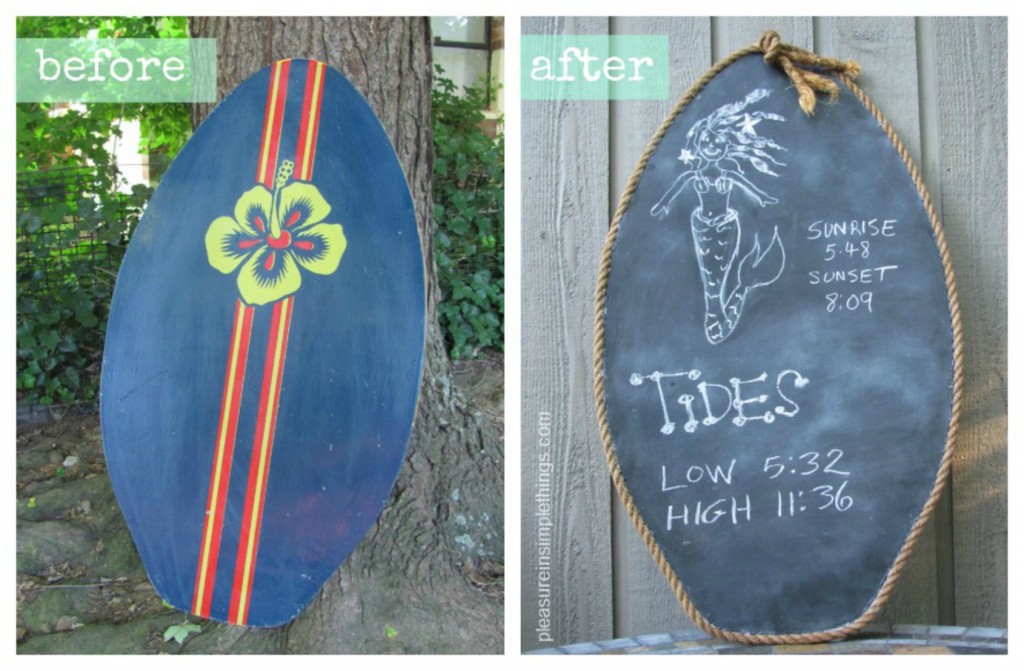
Creating a ‘beachy’ looking chalkboard from an old skim board was a lot of fun!  You can easily create one too…just follow my simple diy directions.  I completed this project spending $0.  I used all materials I already had at home.

When I saw my daughter throwing out her old skim board, it gave me the idea to turn it into a chalkboard.  (Is there anything that hasn’t been turned into a chalkboard lol!)  It would make the perfect birthday gift for my sister!  She lives on the beach and is a weather fanatic…I wanted to make a chalkboard that she could use as a tide chart.  She has an outdoor patio and I could picture the perfect spot for it in a protected area.  It would also make a great menu board… an option when she entertains.

Supplies needed for project:

  • An old skim board check tag sales, Goodwill, or a sports consignment shop for an old one.  New ones probably go for $35 – $40 dollars at Target…at this time of the year, here in the East, all the summer items are on clearance, so you many find one for much less
  • Can of chalkboard spray paint
  • Glue gun and glue sticks I used 4 or 5 of the small sized sticks
  • Old rope approximately 3 yards – measure around the outside of your skim board to come up with the yardage you will need, remembering to add some extra if you want to tie a knot at the end like I did.  I had intended to look for rope at a marine store, but when I found this old one in the garage I thought it had more character (and it was free)
  • Drop cloth or old sheet to put the skim board on while painting
  • 1 piece of white chalk

I did the spray painting outside…if you choose to, make sure it isn’t a windy day or you will have trouble with the spray paint.

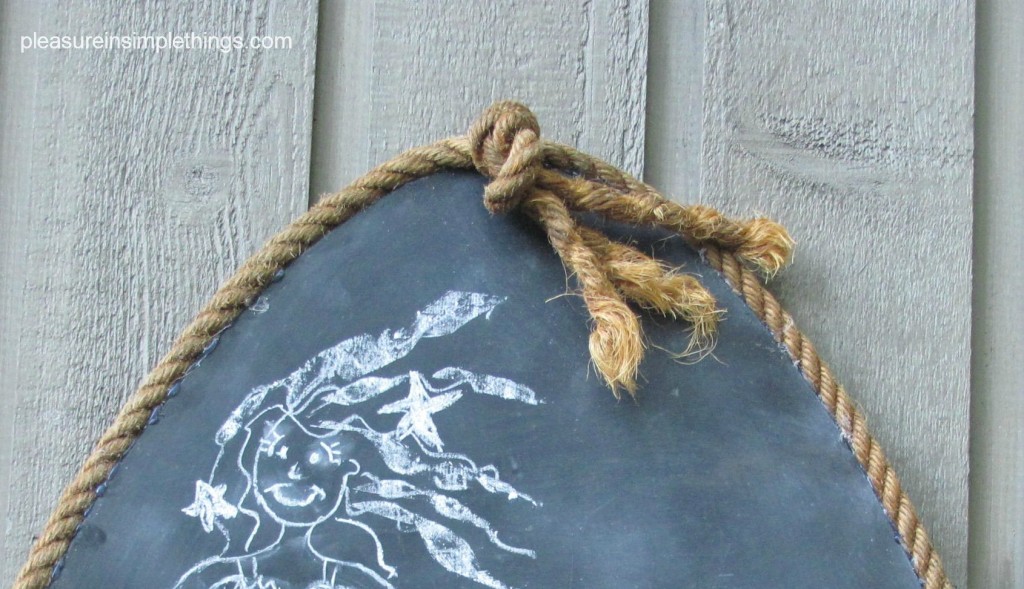
A photo of the top detail on the skim board chalkboard. I knotted the end of the rope before glueing to add some visual interest.

  • Assemble your supplies. 
  • Prepare skim board.  I lightly sanded the surface figuring the paint would adhere better.  I also washed it down with ammonia. 
  • Paint skim board.  Place the skim board on a large drop cloth or sheet.  Spray the top side of the skim board according to the instructions on the chalkboard spray paint.  Even though it suggested two coats, I did four – repeating the process a second time.  It was probably overkill, but it was hard to tell after the first coat if I had covered every spot with the second coat.
  • Prepare skim board surface.  As per instructions on the paint can, after waiting 48 hours, I took a piece of chalk on its side and covered the surface.  Then, wiped it off.

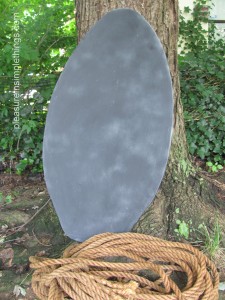
A photo of the skim board after I sprayed it with the chalkboard paint and put on and wiped off the white chalk. The rope is an old one I found in the garage that I glued around the edge for a finishing touch.

  • Glue rope around edge.  Just painting the skim board didn’t look finished to me, so I decided to glue a rope around the edge.  I knotted one end as a decorative touch, and glued it near the top of the board.  I continued using the glue gun to attach the rope all the way around.  I glued a small section at a time holding the rope firmly to the skim board until it dried.

Done.  THAT’S IT!  And, it looks great, right?  I chose to write on it before I gave it to my sister to show her what I thought she could use it for.  I love it.  And, I didn’t even spend one cent!  Be on the lookout for old skim boards!  There are plenty of ways you can add your own personal touches to it.  You can add shells, driftwood, etc. or stencil on an anchor or a personalization.  Happy skimming!

Thanks so much for visiting, Jackie

This project is being shared with Craftberry Bush Outdoor Linky Party and  Celebrating Everyday Life for their recycled & repurposed diy project link party.

9 comments

caviar nails

August 14, 2012

college girl style trends

My college student daughter and I are always trying to recreate the latest fad.  We love working together to find an easy and inexpensive way to figure out the latest trends.  We figured out how to find the materials to attach feathers to the hair without the assistance of a salon…and, yes, we tried out hair chalking…our most recent project was caviar nails.

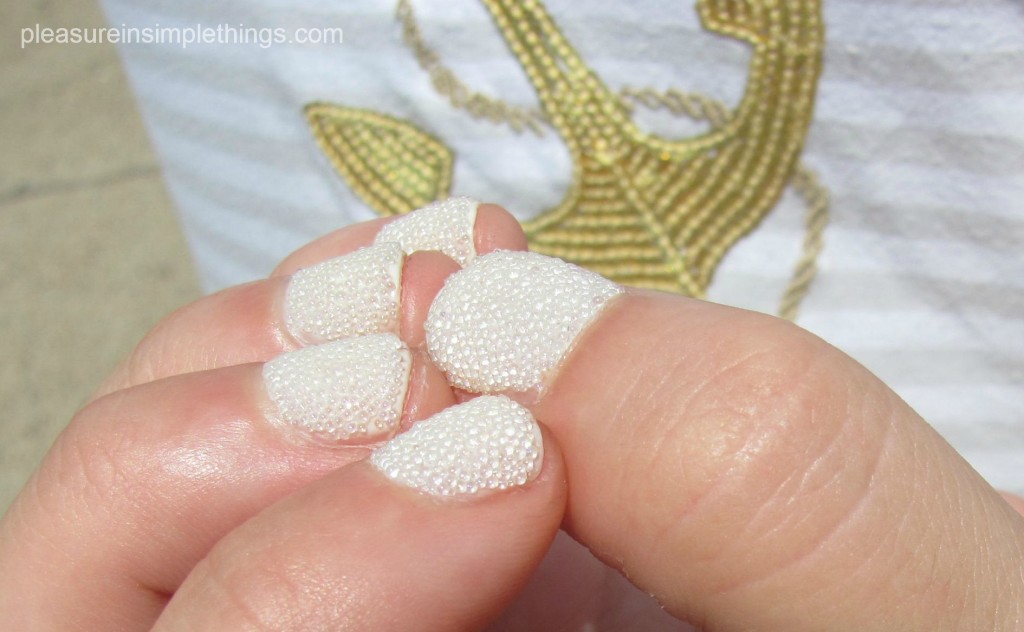
While shopping at Sephora together, we saw a caviar nail kit that was selling for $25. It provided all the materials necessary to create one of these caviar manicures.  It is a 3-D effect where caviar-like beads sit on the nails.  The nail sample next to the product was really neat looking.  We loved the white one.  I thought it would be a great manicure for a wedding.  But, $25!  It didn’t look like something that could be that hard to recreate…we were on a mission!

We scanned the craft stores to find some type of small bead to use as the ‘caviar.’  At the third craft store we visited, we found something called microbeads.  They sell for $2 or $3 a bottle.  Wow!  They looked just like the ones on display at Sephora!   The beads were located in the scrapbooking section, so apparently they are used in scrapbooking.  They come in a huge assortment of colors.  Even though we really liked the white, we decided to buy a set so we could experiment with different colors.  The box of 6 bottles had an assortment of six colors and cost under $10.

A photo of microbeads used in creating a caviar manicure.

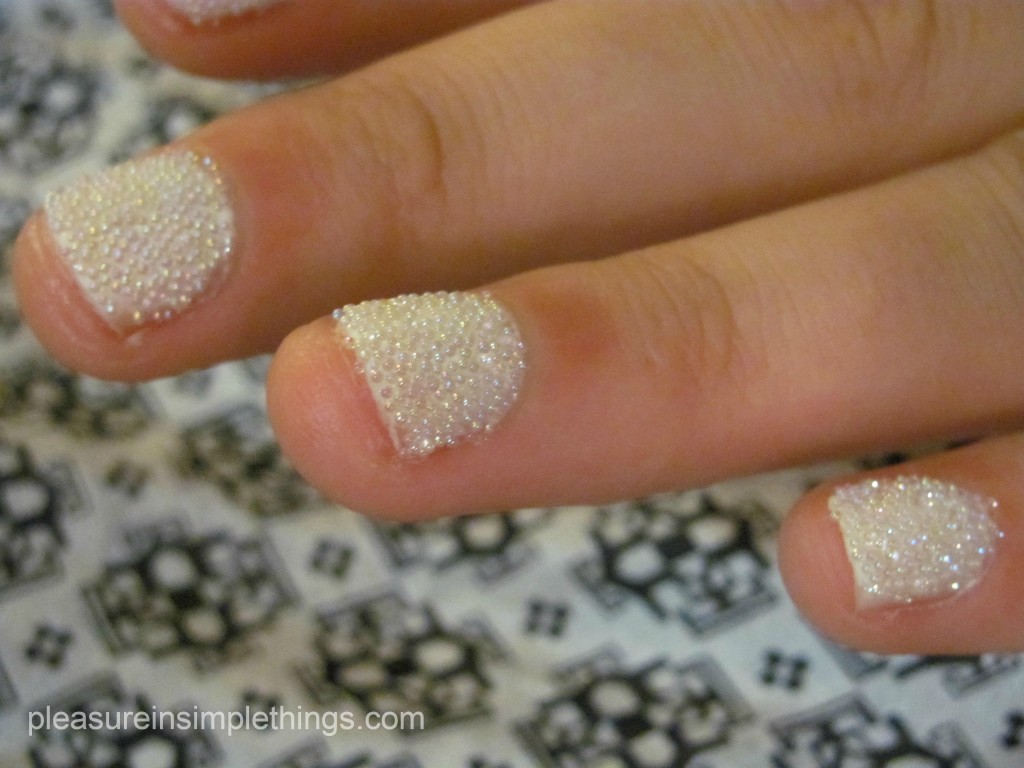
Well, our first attempt created the white manicure with very little effort.  It only required some nail polish and the microbeads!  Easy.  Since we already had the polish and used a very small amount from one bottle of microbeads, it probably only cost pennies to create the caviar manicure.

This is how we did it:         

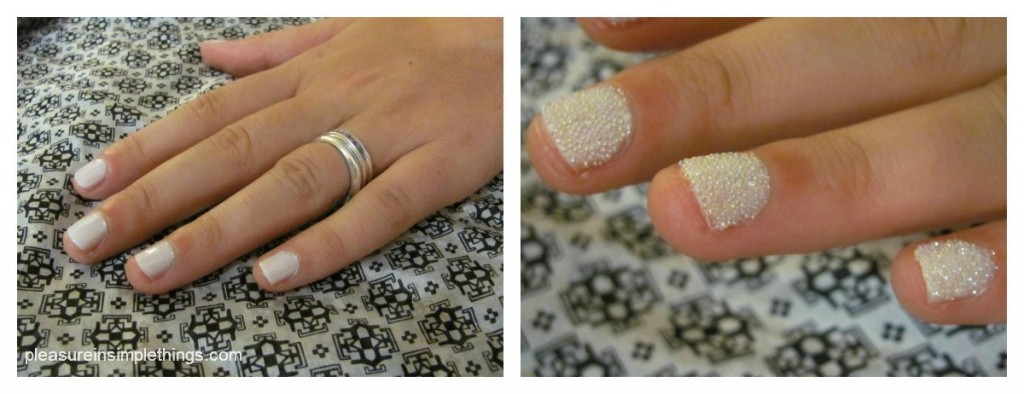
FIRST applied white polish to nails.

THEN poured clear microbeads onto wet polish (putting a little bowl underneath to catch the extras – we just put these right back into the bottle) 

That’s pretty much it.  We put clear polish on top to protect the beads ( that changes the color a little bit).

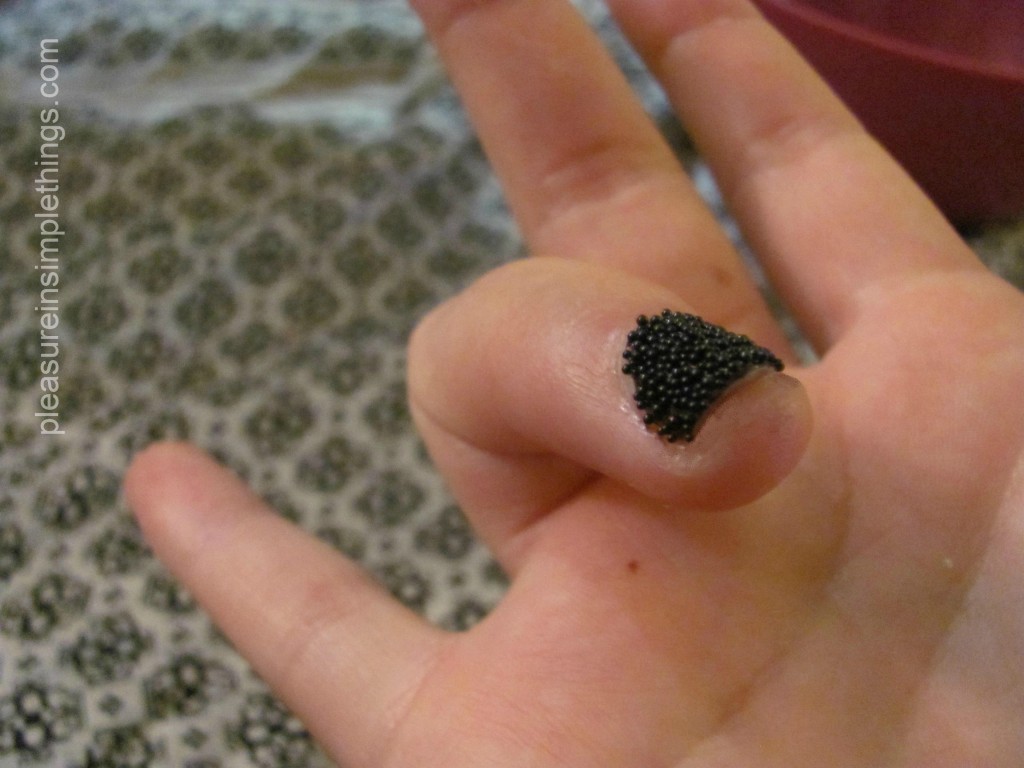
We decided the caviar manicure was cool but should either be used for a special occasion, or just for one accent nail, since it doesn’t last more than a couple days before the beads start coming off.  For best results, use a color polish that matches the bead color you decide to use…then any gaps between the beads aren’t noticeable.  We tried black right away because we had some black polish on hand.

Caviar nails….conquered!  Our next project:  ombre hair!

Glad these trends are experimented on my daughter and not me ;)

Have you tried any trends with your daughter?   Would love to hear about it!  Thanks for visiting, Jackie

5 comments

5 great ways to use sea glass

July 31, 2012

“One cannot collect all the beautiful shells on the beach.  One can collect only a few, and they are more beautiful if they are few.”
—Anne Morrow Lindbergh

Okay, after spending countless hours searching for sea glass, you are pleased with your collection this season.  Are you tempted to add it to that one big jar you have in some nondescript location?  Don’t do it!  There are better ways to put these beautiful treasures on display.  Here are five great and easy ways to use your favorite pieces of sea glass…no drill, glue, or special talent required.  (Be sure to click on the photo collages below to see the sea glass treasures full screen.)

IN YOUR GARDEN  Sea glass looks great as a decorative touch in your garden.  It gives a fresh look to a birdbath or garden container.  It is also a neat way to finish off a potted plant by covering the top of the soil.  Maybe the thank you gift for the weekend you spent at your friend’s beach house is a plant finished off with the treasures you collected while visiting. 

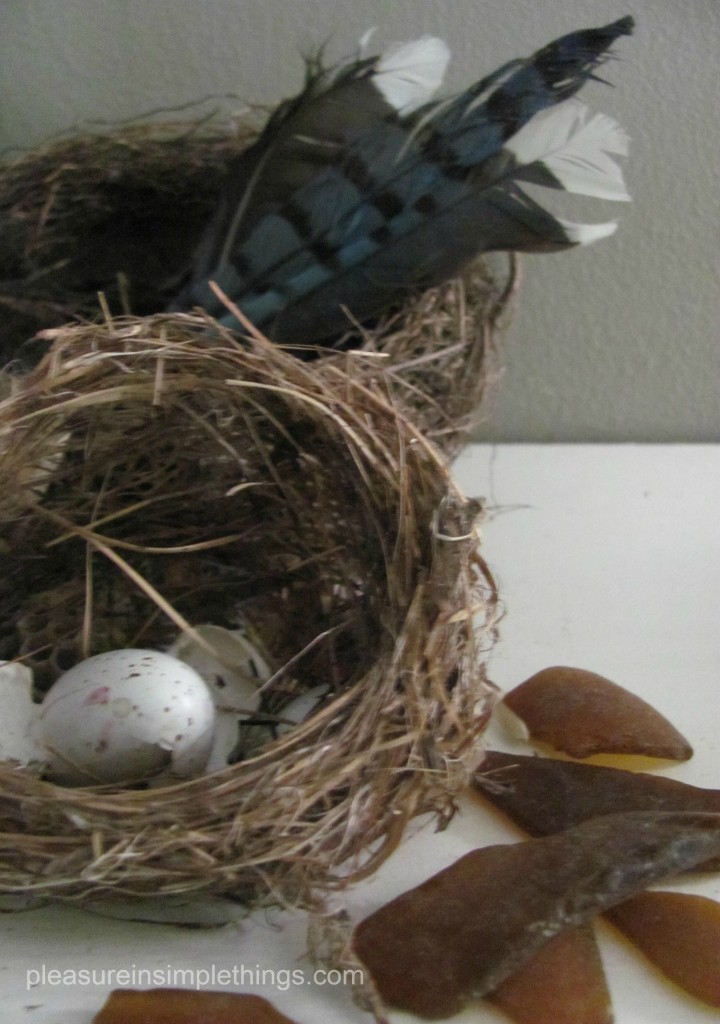
ON A SHELF  A great way to display favorite pieces in your home is on a shelf, bookcase, or coffee table.  Just use a couple favorite pieces to highlight them as special, or group them by color for some great impact.  They look wonderful used in combination with other natural items like driftwood or a bird’s nest.  A unique piece can look great under a small dome on your mantle.

AS A VASE FILLER  Using sea glass to fill a vase is always a great way to bring the beach into your home.  Pieces can be used in a vase with fresh flowers or to anchor a candle in a jar.  Putting pieces in a mason jar and adding an old nostalgic black and white beach photo is a great addition to a summer mantle.  If you have a large collection, filling a glass lamp is another option.  I like to use a filled vase to serve skewered summer appetizers or desserts.

MAKE AN EASY AIR FRESHENER  Gather some pieces of sea glass into a small dish or teacup to use as an air freshener.  Just add your choice of fragance oil.  I found some really great oils at a local herb store, but most craft stores also carry it.  You can pick a floral scent or something reminiscent of the sea and surf.  Yard sales or Goodwill stores are great sources for pretty dishes that are sure to sell for under a dollar.  Or, use that odd teacup you haven’t been able to throw away.

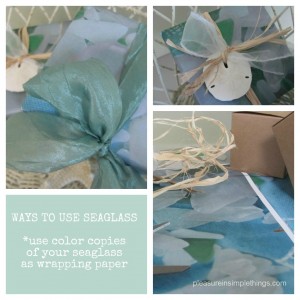
TO CREATE WRAPPING PAPER  Take a photo of some pieces of your collection.  Get a color print of it on your home printer or at the local copy center to use as wrapping paper.  An easy way to add the beauty of the sea to a gift.  Use raffia or pretty sea-colored ribbon and tie on a shell to complete the look.  Use your new giftwrap for any occasion.  It is a great departure from the giftwrap typically used for the holidays..using it brings recollections of  warm memories of the sand and sea no matter how cold it may be outside :)

Thanks for visiting, Jackie

This project is being submitted to Celebrating Everyday LIfe recycled & repurposed diy project linky party

5 comments

« Previous Entries     Next Entries »