Subscribe to Pleasure in Simple Things via RSS ReaderFollow Pleasure in Simple Things on InstagramFollow @InSimpleThings on TwitterLike Pleasure In Simple Things on FacebookFollow Pleasure In Simple Things on PinterestEmail Jackie

monogrammed shell package tie-on

June 4, 2013

monogrammed shell package tie

‘Tis the season for gift giving.  I know it is not December, but I find this time of year requires more presents than the holidays!  There are so many showers, weddings, and other festive occasions.

I have the uncanny ability to turn any gift-giving opportunity into a ‘beachy’ moment.  This summer I am truly in my element since I am invited to several beach-themed bridal showers.  For one of the showers, I created a simple, diy package tie-on using a couple of shells, a little bling, and some twine…easy and elegant!

monogrammed shells for gift wrap

Find or purchase two shells that you like and coordinate well with the item you are using them with.  The first thing to do is to put a couple holes in the top of each shell.  You may want to have a couple extra shells on hand in case this part of the process should offer up any complications…aka break the shell.  I am lucky enough to have a friend that has a dremel tool that can help me out with projects like this.  Using a dremel with water is the optimum way to go if you make holes in alot of beach finds!  If you don’t have this type of tool or can’t borrow one, you can use a nail, but there is a higher chance of cracking or breaking the shell.  You can get by with one hole in each shell…for my application, I found that the shells hung better with the two holes.

creating monogrammed seashells

diy monogrammed seashell package tie-on

You have seen me use chalkboard paint to write on the inside of shells…this time I wanted something more elegant, so I am using self-adhesive rhinestones that I bought at a craft store.  It is really easy.  Using tweezers, I just attached the rhinestones one at a time onto the inside of the shells in the shape of the the initials of the future bride and groom.  The rhinestones are inexpensive and go a long way…I still have some left from my Easter egg decorating!

monogrammed shell package tie-on

I am using my tie-on on a tote bag, so I used twine to tie a shell on each end and placed it around the handle of the bag as an alternative to monogramming the tote.  (The rest of the gift will be shared on a future post.)  So sweet!  A wonderful way to make a gift for a special couple truly special!

I hope you can use this idea and make some monogrammed seashells for one of your special bridal shower gifts this summer!

Thanks so much for visiting!  Please take a moment to click ‘like’ on my Facebook page and if you use Instagram, please click ‘follow.’  for more sharing!

Remember to take pleasure in simple things, Jackie

Sharing at Craftberry Bush, City Farmhouse,   A Pinch of Joy and Coastal Charm.

5 comments

homemade nautical gift wrap

May 28, 2013

diy nautical giftwrap

Do you want to create some gift wrap?  A nautical design?  A certain color scheme?   Done, done, and…done!  All easily accomplished with kraft paper.

I have a thing for brown kraft paper…I admit it.

I love the way it looks and it is just so versatile.  I actually have two commercial size rolls housed in my basement as you read this.

I recently created some gift wrap using kraft paper for a beach-themed shower coming up and thought I would show you how easy it is to create.

homemade giftwrap with anchors

The supplies needed to create this anchor patterned gift wrap:

  • kraft paper cut to the size(s) needed for the gift(s) you are wrapping
  • off-white (or desired color) acrylic paint
  • anchor (or desired motif) shaped sponge*
  • ultra fine point black permanent maker

visual tutorial diy nautical giftwrap

*Note:  You can use a precut sponge or cut one yourself.  Popular shapes are available precut at craft stores.  If you want an unusual shape, you may need to cut the sponge yourself.  (I once wanted one in the shape of the Tin Man for a Wizard of Oz party theme – needless to say, I had to cut it myself – I still have it though, if you should ever have the need to borrow it!)

diy nautical wrapping paper

diy nautical wrapping paper with anchors

Directions:  Cover one side of the (moistened) sponge with paint and blot onto a paper towel.  Press lightly onto the kraft paper to print the design.  Continue to print the motif in the pattern desired on the paper, filling the sponge with paint as needed.  After letting the paint dry thoroughly, outline (messily) each anchor design with the marker.

diy nautical gift wrap

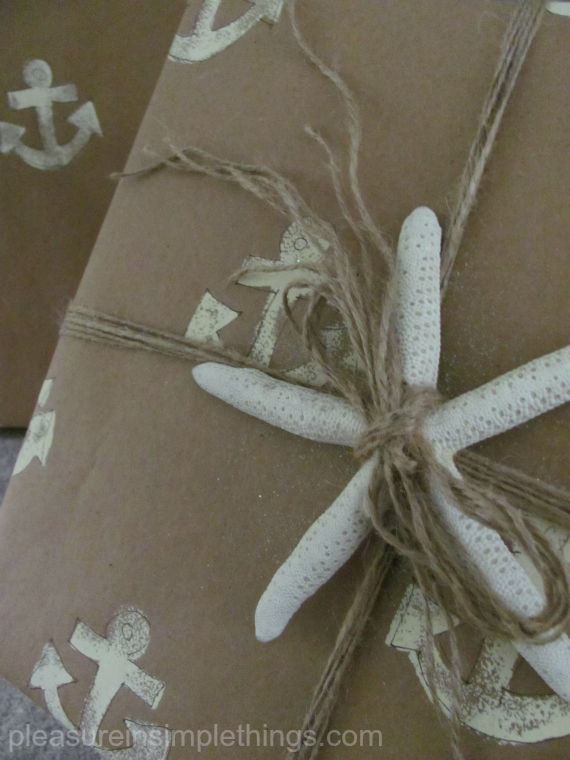
You are ready to use your paper as gift wrap!  Just tie with some twine, rope, or raffia and you are good to go!  You can also add a starfish or some other ‘beachy’ item if you are so inclined.

homemade nautical gift wrap

Hope you enjoyed this simple kraft paper gift wrap tutorial.  One of the many great ways to use kraft paper!  Use the motif and color you desire and have fun with it!

Ahoy & happy giving!

Thanks for visiting, Jackie

Sharing at Coastal Charm,  Pinch of Joy, and Craftberry Bush.

6 comments

displaying a special treasure

May 14, 2013

grandmas wedding ring

The most valuable piece of jewelry I own is probably made out of stainless steel.  It is my grandmother’s wedding ring.

Paper Source paper

Most valuable because it is a symbol of the generations…because of my grandmother’s wedding came my mom, because of my mom came me, because of me came my children….how can you measure the value of a symbol like that? 

displaying a wedding ring

This symbol was the one piece of jewelry I never took off…until recently…when I was getting a medical exam and I was asked to remove it.  Well, you know what?  I could not get it back on!  It seems my finger had miraculously grown in an extremely short period of time!  I certainly was not cutting the ring.  So, with Mother’s Day still fresh on my mind, and memories of generations of moms filling my thoughts, I decided to create a way to display my prized possession.

displaying a vintage ringI had a beautiful Pottery Barn frame in my closet for a long (too long) time, waiting to be used.  I had ordered a bunch of frames for a series of photographs and one had arrived to me broken.  The nice people at Pottery Barn quickly replaced it and told me not to go to the trouble of returning the broken one…So I was saving it for a future project.  Displaying my grandmother’s ring was the perfect use for it! 

To make it look a little more modern, I decided to cover the mat and headed out to the Paper Source that just opened in our area to select a suitable paper.  They have such a large selection of archival quality papers in an amazing array of patterns and colors.  Rather than choosing something nostalgic looking, I decided to go with something more modern and chose a paper that had a brown matte background with a silver metallic nature design.

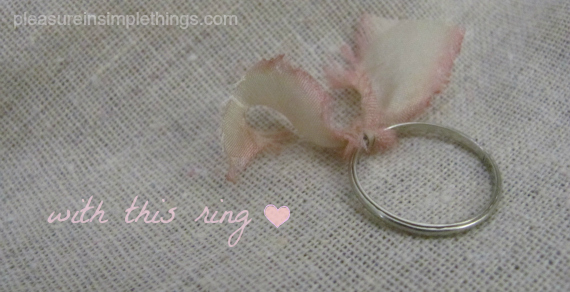
It was an easy project.  I just glued the paper onto the mat board and sewed the ring onto a piece of linen after adding a piece of ribbon.  I love this project…so fitting for a nostalgic Mother’s Day activity.

steps to displaying a wedding ring

I hope my next nostalgic project will be one of wedding songs…The songs from my mom’s and my grandmother’s wedding….I asked my grandmother when she was still alive and 92 years old, the title of her wedding song…I wrote it on a piece of paper.  I asked my mom the same and added it to the list.  My intention was to create something special using the two song titles and the title of my own wedding song. 

paper from paper source

When I recently went to look for the song titles in the ‘safe place’ I had left them, I discovered I couldn’t remember where that ‘safe place’ actually was!  I hope to run across that slip of paper one of these days…I can no longer replicate it since my mom no longer remembers what her song was and my grandmother is no longer with us…maybe I will find that slip of paper before next Mother’s Day.  Hope so :) 

vintage wedding ring

Thanks for stopping by and sharing some memories with me.

Remember to take pleasure in simple things, Jackie

Sharing with Coastal Charm, Craftberry Bush, and Shabby Nest.

2 comments

repurposed brown bags

April 16, 2013

bookmark made from a Terrain bag

April 22nd is Earth Day…in the spirit of the day, I am repurposing the brown bags I have accumulated from my Terrain purchases to use them in some fun and beautiful ways.  If you aren’t lucky enough to have a Terrain near you, any brown bag will do!  The Terrain bags have one up on the traditional brown bag since they are embellished with some beautiful floral designs.  You may have other stores you frequent that use brown bags with some type of design that would make your creations more interesting…Trader Joe’s, as an example.

Once I got started with this, I realized I could create a number of posts…I had so many ideas!  But, I limited my creations to seven.  Here is the bag I started with:

Terrain shopping bags

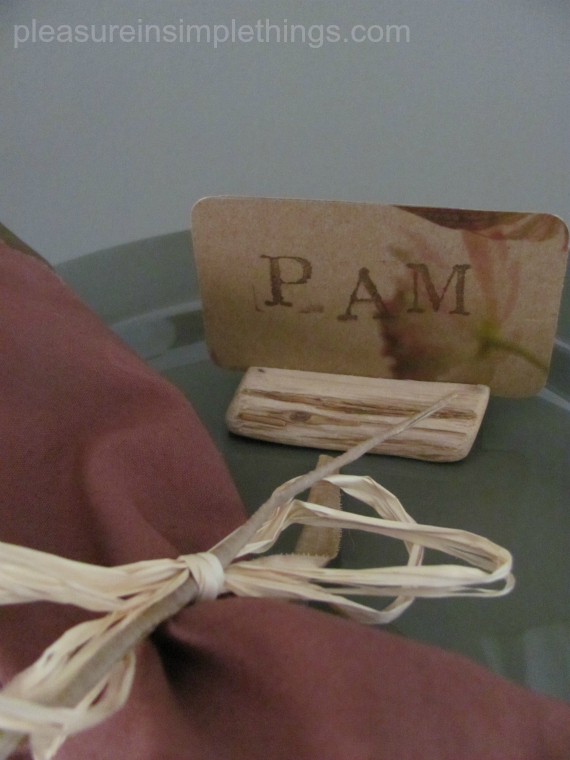
This first item I made is a place card.  I used a piece of cardboard from the bottom of the bag and glued some of the bag onto the front and back.  Then, I rounded the corners and stamped a name onto the front of the card.  Anchoring it into a piece of driftwood gave it the perfect finishing touch!

place card from Terrain bag

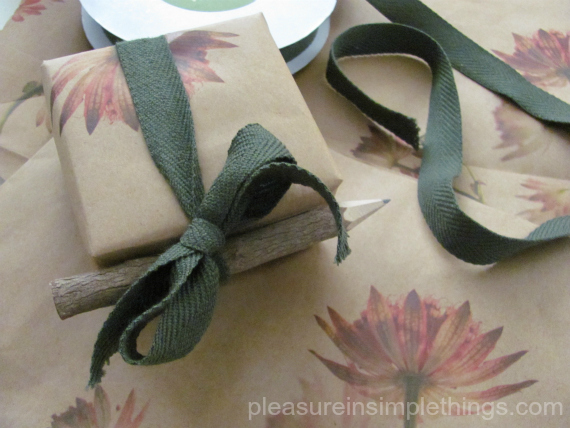
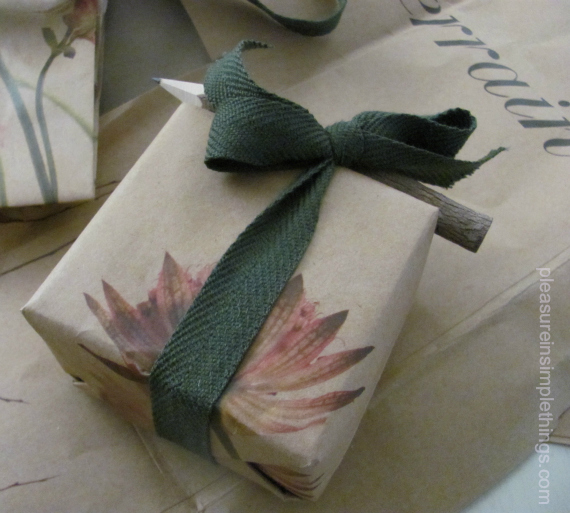
Wrapping paper is an obvious use for the bags and here I used a bag as wrapping… in combination with some pretty forest green ribbon and a natural twig pencil (both from Terrain):

wrapping paper crafted from a Terrain bag

wrapping paper from a Terrain bag

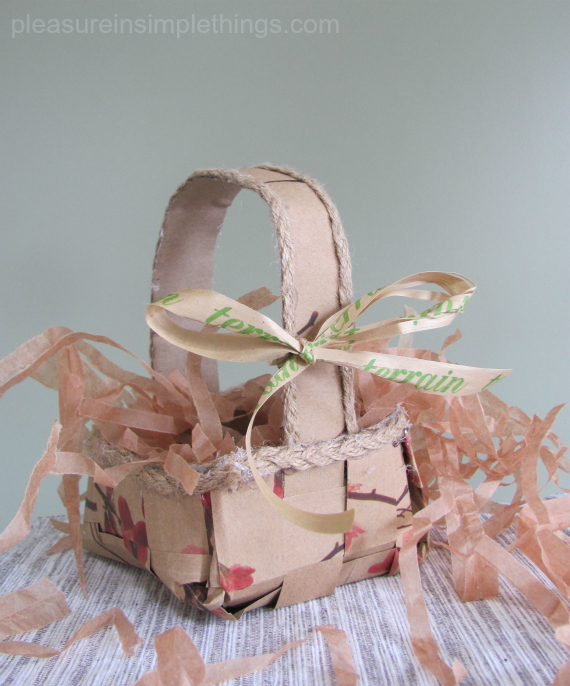
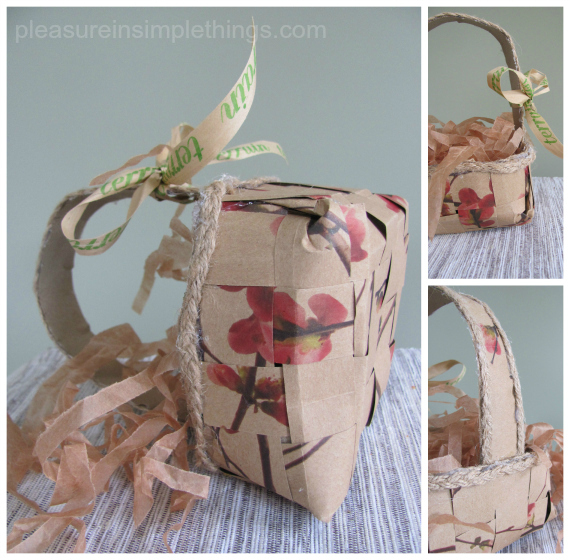
Cutting a bag into strips and weaving the strips together suggests a wealth of possible items…here, I created a basket with some woven strips.  I also used the handle of the Terrain bag as an accent on the edges and shredded (in my home shredder) some of the tissue to create the filling.  I was even able to utilize a piece of Terrain ribbon that was used on one of the bags I received from the store.

basket woven from a Terrain bag

basket crafted from a Terrain shopping bag

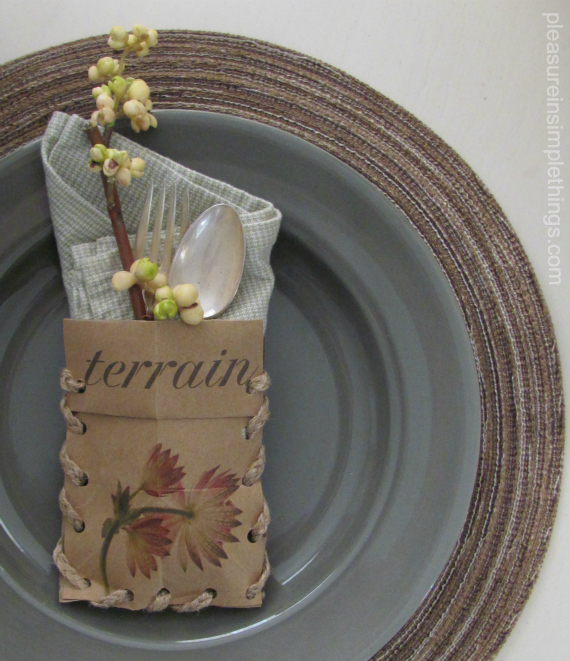
For the next use, I created a pretty utensil holder using a bag, a bag handle, and a paper punch:

cutlery holder fashioned from a Terrain bag

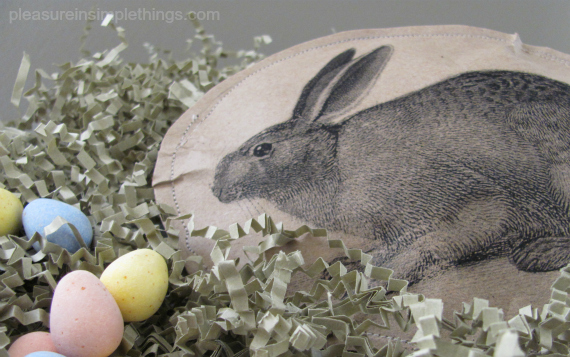
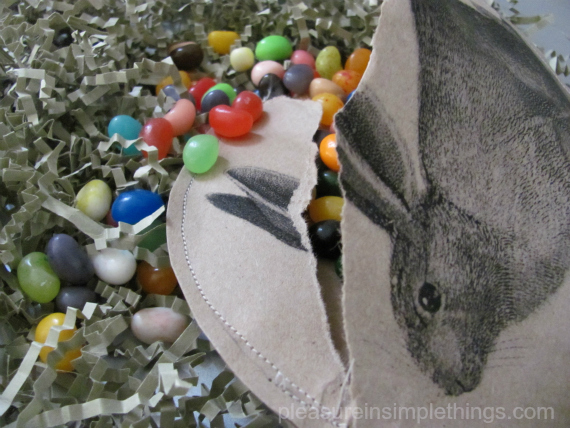
If you read my Valentine post, you know I made Valentine treat containers…I love to make treat containers for any occasion.  Here, I printed this beautiful vintage rabbit image I found on The Graphics Fairy onto the bag…I cut a piece of the bag and fed it through my home printer.  Then, I used my sewing machine to create a beautiful treat container.  This one contains jelly beans…the container needs to be ripped open to discover the contents!  Fun, right?

Treat sack from a Terrain bag

treat sack from a Terrain bag

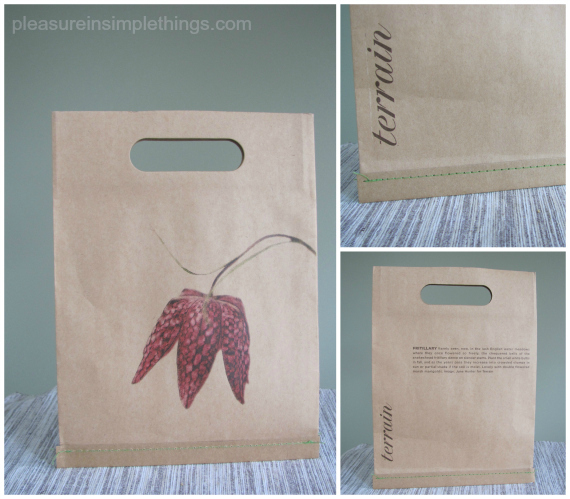
Here is another Terrain bag…notice the green stitching on the bottom of the bag and the cut out handle…

Terrain shopping bag

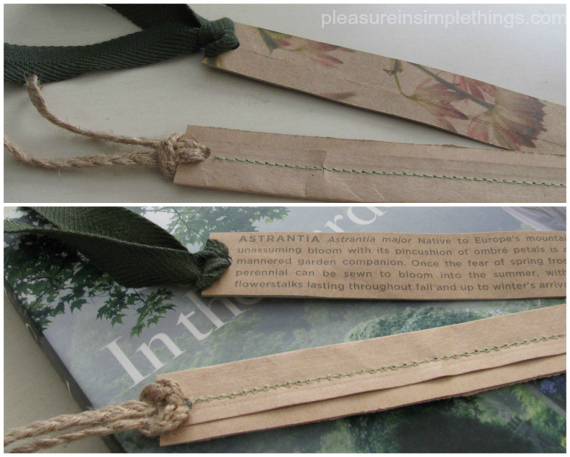
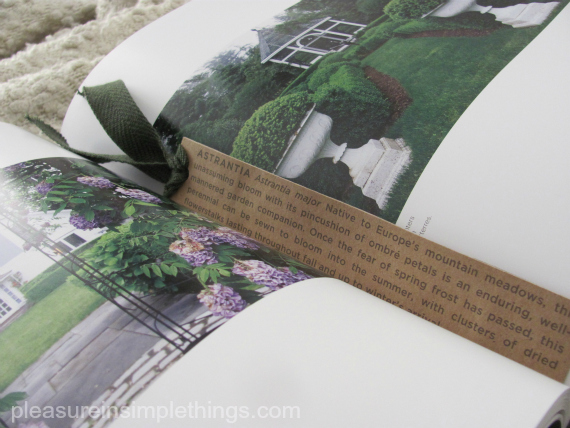
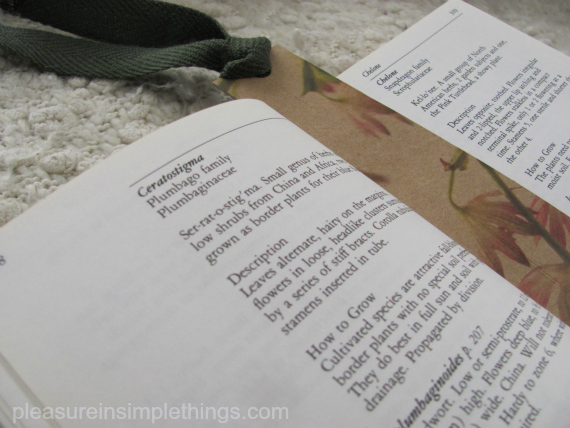
I was able to utilize the stitching and the flower description on the back of the bag in creating a couple different variations of a bookmark.  The one with the stitching also utilized the handle from another bag:

Bookmark from a Terrain bag

bookmarks made from Terrain bags

Bookmark from Terrain bags

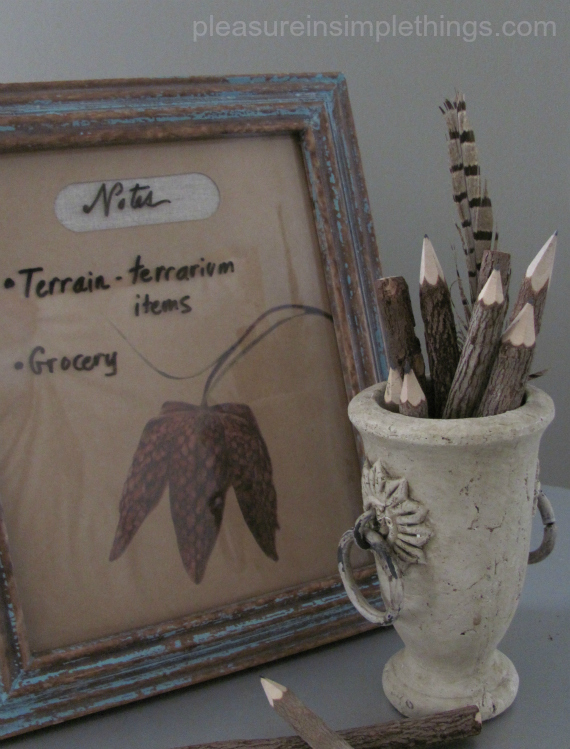
I embraced the style of bag for the dry erase board I created.  I simply framed the bag.  I love how the opening for the handle serves as a place to write ‘notes.’

dry erase board from a Terrain bag

So, these are some of my creations made from repurposed brown bags…a great way to serve the environment.  I hope you will be inspired to create some repurposed projects of your own :)

Thanks for visiting!

Remember to take pleasure in simple things, Jackie

I am sharing at Little Red House, Pinch of Joy, Craftberry Bush, Common Ground,  The Shabby Nest, and Coastal Charm.
12 comments

transforming terracotta pots

April 12, 2013

Spring flowers

We won’t be going very far for Friday field trip today…just outdoors!  The weather this week in Connecticut has been amazing, and any free time I had this week was spent on planting preparations… It didn’t help that I had a garden club meeting this week…during the lecture portion of our meeting, I was furiously writing notes of all the things I want need for my garden.  My thoughts have been consumed with plants!

Planting isn’t done around ‘these parts’ until Mother’s Day (my traditional planting day), but that hasn’t stopped me from planning and dreaming.  It is going to be a particularly tough year to make the yard look nice since we had a couple really bad storms this year that destroyed much of the garden – particularly large shrubs and trees.

painted terracotta pot

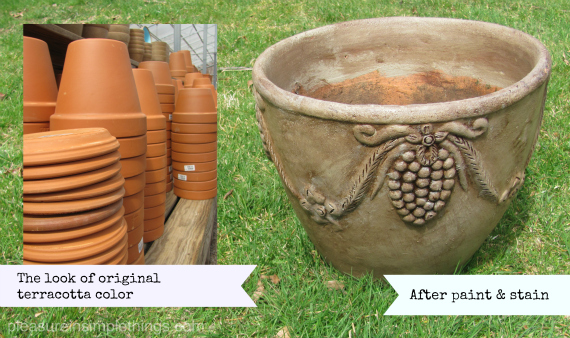
The beautiful results of my terracotta pot transformation using house paint and gel stain.

Because of this, there is so much more I want  need than my budget will allow.  One thing I was determined to replace this year was the ugly terracotta pots that we use to plant some of the herbs.  I say ‘ugly’ because I really dislike that new terracotta orange (you know how I feel about orange) look.  For me, they are an eyesore.  I thought they may ‘accidently’ break in the garage before planting season this year, but I want to use my garden budget to buy more living things, not to replace pots.

terracotta pot transformation

So, I decided to see what I could do to transform the terracotta pots I already have into something I could enjoy looking at!  I found it was a really easy fix and I wanted to share the process with you in case there are others out there that are cringing over the look of their terracotta!

Certainly there are plenty of methods to ‘weather’ terracotta or to create moss, etc.  I did not do that.  I went on a ‘hunt’ around the house to find things I could  use for the transformation without making a purchase.

upgrading a terracota pot

And, I found I needed very little.  Some leftover house paint, stain, and a rag did the trick!

First, I simply painted the (bright terracotta) pot with some house paint (it happened to be Benjamin Moore Kingsport Gray).  This color will coordinate nicely with the exterior of my house which is sided in cedar and stained with ‘driftwood’ (of course my house is painted a color with a ‘beachy’ name…what did you expect lol).

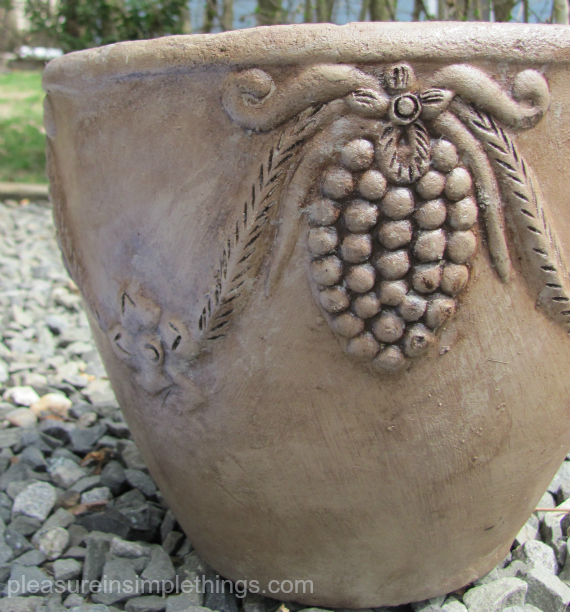
After that dried (I left it overnight), I used some gel stain (Minwax in Hickory that I had left in the basement) on a rag to give some dimension to the look.  I rubbed some on, and using the rag, rubbed it off…pretty easy, right?  My pot had a design on it and I made sure to get a lot of stain on the design part so that I could have it settle into the crevices.  Although my pot had a bright, new look, it was a few years old which made it even better for this process since any cracks or scratches looked great when the stain settled in.  You can do this same process repeatedly if you want more color or depth.  After I was done, I dabbed a little of the paint onto the highest part of the design…just as a highlight.

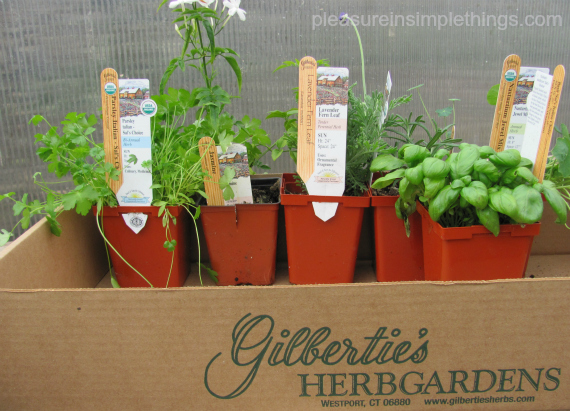
Fresh herbs

My first purchase of the season…some herbs from Gilbertie’s.

What an easy way to give terracotta pots a little more interest without making any purchases!  If you don’t have these items in your house, you can do a simple whitewash.  Everyone has some white paint left somewhere…just thin it down a little bit and paint it over your pot to get rid of the new orange look.  These pots may be the least expensive, but they don’t have to look that way!  You can easily transform them with some leftover paint and/or stain.  Have fun with it!  I can’t wait to add some plants to my new creation :)

Have a wonderful weekend!

Remember to take pleasure in simple things, Jackie

Sharing at Crafts a la ModeCraftionary, and  The Well Crafted Home.

1 comment

zip code catch-all tray

April 9, 2013

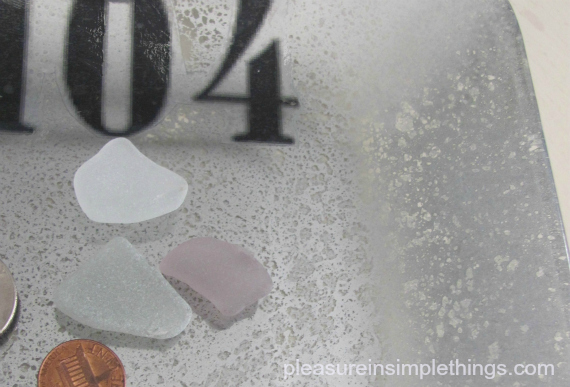
diy mercury glass zip code tray

I have been wanting to make something using a zip code for quite some time.  I don’t think 90210 is the only zip code worth embracing…the zip code from wherever you call home is the perfect one to display!  Or, a place you dream about visiting (should I look up the zips from the locales with the best beaches?…)  Anyway, this time I am using the zip code from my daughter’s home away from home…aka school.

mercury glass zip code tray

It is an easy DIY project…I will guide you through the steps…

diy zip code mercury glass tray

If you follow my procedure, you will need the following items:

  • a clear glass plate (I purchased mine at Target)
  • Con-Tact adhesive paper in clear
  • Krylon looking glass spray paint
  • a clear coat of some type (I used a spray)
  • a clean spray bottle
  • a computer printer

The first thing I did was to figure out how I would get the zip code onto the glass.  I decided to print it onto clear Con-Tact adhesive paper so that I could easily adhere it to the glass.  I picked out a font called Stohr Numbers on www.dafont.com.  Once you have the image you want to use, you will need to print it out in reverse image…to do this, either indicate the proper setting on the print settings of your printer or, you can use a graphics software.  You need to do this so that the sticky part of the Con-Tact paper is on the front of the numbers because you will be adhering it to the underside of the glass.
To accomplish this, I used clear Con-Tact paper (I love this product – I use it for so many things!).  I simply cut a piece of the Con-Tact adhesive paper and hand-fed it through my computer printer.  I used a scissors to trim closely around the numbers.  You can cut out the numbers individually, but I chose not to because I wanted to keep the spacing between the numbers exact.

I peeled off the backing of the Con-Tact paper and positioned the numbers where I wanted them, affixing them to the underside of the glass by rubbing firmly.  I scratched up the letters a little bit…just so they looked a little distressed.

Now, I just needed to create the mercury glass effect.  You have probably seen items created with the Krylon looking glass spray paint – it seems to be one of the hot craft items right now…with good reason!  It is so cool!  It creates a mirror effect on glass.  This is created by spraying five thin coats of spray on the underside of the glass.

But, I did not just want a mirror effect…I wanted a mercury glass look…that is where the spray bottle comes in.

Put a little bit of clean tap water into the spray bottle and adjust the nozzle to a fine mist.  Then, read the instructions on the Krylon paint.

Before you start your spray painting, spray a fine mist of water on the underside of the piece.  Immediately spray your first coat of looking glass spray paint, following the directions on the can.  I sprayed a fine mist of water onto the paint after each coat for the first three coats.  After three coats were completed, I blotted (not rubbed) the back of the piece to absorb the water so that the mottling would receive two fine coats of the paint.  I guess everyone develops their own technique after trying this product, but I like the depth created by this method.

After the paint was dry, I sprayed a clear coat on the underside of the piece to protect the paint from scratching.

mercury glass zip code tray

That was it!  I finally got my zip code tray and I think it is a perfect place to drop off car keys!

I hope you enjoyed this DIY for a zip code mercury glass tray…what zip code will you choose to display?

Thanks so much for visiting, Jackie

I am sharing at Coastal Charm,  The Shabby Nest, Craftberry Bush, A Pinch of JoyCraftionary, and Common Ground.

6 comments

lemon floral place setting

April 2, 2013

flowers in a lemon

For a great pop of spring color at a place setting, arrange some flowers in a fresh lemon.  Since you only need a few flowers and some lemons to create these cheery floral arrangements, they are an economical way to add some pretty freshness to a spring table.

flowers arranged in a lemon

fresh lemons

diy flowers in a lemon

You will need half of a large lemon for each place set at your table, in addition to some fresh flowers and some floral oasis.  As you can see, I am reusing an old piece of oasis.  After slicing a large lemon in half, cut and remove the insides of each half, keeping the rind intact.  (Don’t waste the insides…I used mine to make Arnold Palmers.)  Cut a piece of floral oasis to fit snugly in each lemon half.  Saturate the oasis so that it is wet but not dripping.

Arrange a few flowers in the color(s) of your choice – purchased or from your garden – in the foam.  You will only need a few for each half.  I have also added a little Spanish moss to mine.

The perfect little arrangement to adorn a place setting :)

fresh flowers in a lemon

fresh flowers in a lemon

Hope you enjoyed today’s easy diy fresh lemon floral place setting arrangements.  A fast, easy, and inexpensive way to add some bright freshness to your spring table.

Thanks so much for visiting.  Remember to take pleasure in simple things, Jackie

Sharing this post at Coastal Charm, Common GroundCraftionary, and Craftberry Bush.

no comments

favorite ways to decorate easter eggs

March 5, 2013

easter egg decorating

Decorating Easter eggs has always been a passion for me.  I have never stopped enjoying decorating eggs.  When I was small everyone in my family had their own favorite way to decorate the eggs…my mom had a steady hand and could do a great job creating stripes with the dye…those with less patience just threw the egg in the dye and left it while moving on to another activity.

Me, I always liked to try something different.  And, over the years I have discovered that there are an infinite number of ways to decorate eggs.  I usually plan one whole day before Easter to work on Ukranian egg dyeing and another to replicate the natural egg dyes my grandmother created (I will post these next week) from fruits and vegetables…that is in addition to a general egg dyeing session.

Today, I would like to share some of my favorite ways to decorate Easter eggs that I have used over the years.  I hope they will create some inspiration for you as you create your own.  Here are seven of my favorite ways to decorate Easter eggs:

easter egg decorating

Numbers or letters are always a motif I like on any home product so, of course, I also like to use them on eggs.  These numbers were simply written on using a marker.  Pick your favorite style of number and draw it right onto the egg.

easter eggs


decorated easter eggs

Letters can be written on in the same way….or, you can use some self-adhering rhinestones from a craft store to add some bling.

blinged easter egg

I love to create eggs that look like eggs in nature and I have tried many different techniques.  For example,  splattering paint onto the egg with a toothbrush is great for creating speckled eggs.  For a simple technique that creates a great result, simply apply gel stain to the surface of the egg by using an old rag.  For these eggs, the color I used was called mahogany.

easter eggs

Okay, technically this is not an egg ‘decoration’, but more like an egg ‘creation’, but I had to include it as one of my favorites.  This is a very easy technique and I love the way these eggs coordinate with my coastal style.  Use whatever twine, ribbon, etc. you may like and apply it to a small balloon after coating the twine with ModPodge.  Yes, it is messy, but very easy.  Once the twine is wrapped around the balloon in a desired pattern and has dried, pop and remove the balloon, and you have a beautiful twine egg!

easter eggs with twine

twine easter eggs

Using chalkboard paint is a favorite of mine because it makes a great Easter placecard.  The chalkboard paint is applied directly to the egg.  These days, chalkboard paint can be purchased or made in a variety of colors, so you don’t have to limit your choice to black.  Here I wanted a black and white egg, but you are only limited by your imagination.  You can dye the egg first if you prefer or want to dye the egg to match the color of your decor.

easter egg placecard

Seldom is anything decorated done in my house without some type of coastal influence.  Here, I have dyed a batch of eggs and then used small rubber stamps to add some of my favorite coastal words…sand, sea, surf, sun.  Inspirational words work really well also.  Of course, names of guests or family members is another option.

coastal decorated easter eggs

Here are some more coastal inspired eggs.  In this case, I used stickers to mask off a white area.  I created the shape I wanted by cutting it out from Contact paper and stuck it onto the egg where I wanted the pattern to remain white.  Then the egg was dyed.  After it dried, I used a very thin permanent marker to outline the shape and add a few details.

coastal easter eggs

I hope you enjoyed sharing some of my favorite ways to decorate Easter eggs.  Use these easy techniques as inspiration to create some of your own decorated Easter eggs.  Please pin your favorite!  If you want to keep the eggs indefinitely, be sure to remove the contents of the egg before dyeing.

decorated easter egg

Thanks for sharing.  Remember to take pleasure in simple things, Jackie

P.S. Sharing this post at Coastal Charm, Craftionary, Timewashed, The Shabby Nest , A Pinch of Joy, 6 Days of Spring at French Country Cottage,  The Inspiration Gallery at Craftberry Bush, and At The Picket Fence.

26 comments

sweet & handpainted for baby

February 26, 2013

diy handpainted onesie

Today I am making a baby gift for a friend and thought I would share the DIY instructions so you can create one for your favorite little one.  I love to paint baby clothes with original designs…this particular one is not difficult to create and can be accomplished quite easily no matter what your skill level.  This particular design creates a garment that is also very appropriate as an Easter gift.  I am breaking it down into simple steps that can be fit into your day between other activities.

Start out by purchasing your desired baby garment in an appropriate size for your recipient.  If the gift is for a baby that has not yet arrived, I recommend not getting the 0-3 month size.  Newborns vary in size and you don’t want to risk it being too small.  Always better to go bigger rather than smaller!   I prefer 100% cotton items for babies and I check the label to be sure I am purchasing an all-cotton item.  Wash and dry the garment to be sure any shrinking is done before you paint your design.  Paint also adheres better to a washed garment.

bannerdiy handpainted onesie

While your garment is in the dryer, you can make your stencil and assemble your materials. For the first part of the project, you will need the paint color you decide to use for the lollipop…pick a pastel pink, blue, or yellow.  I mixed my color, but you can purchase or use craft paint in the exact color you desire.  You will also need a stencil brush and a stencil.  No need for a fancy stencil.  I used a piece of cardstock…you can use a piece of a gift box, cereal box, or any miscellaneous cardboard that is ready for the recycling bin.  After you locate a piece, simply cut out a 2 1/2” circle.

Insert a piece of cardboard between the front and back of the garment to protect the back side of the garment in case the paint bleeds through.

Hold the stencil firmly in place and paint the color you have chosen using an up and down motion with the stencil brush…using an up and down motion will prevent paint from seeping under the edges of the stencil.

Let the paint dry thoroughly.

diy handpainted onesie

Iron the painted area, keeping the cardboard inserted and putting a clean rag over the design first to protect your iron.  This step will set the paint.

Now you will need a cotton swab, clear glitter paint, dimensional paint in a color close to the one you used for your circle, a dimensional paint in an off-white or beige for the stick of the lollipop, and a scrap of 3/8” ribbon – I like a polka dot ribbon, but any ribbon in a coordinating color will do (just make sure it is colorfast).

Next, use a cotton swab (one of my favorite ‘go-to’ utensils) to put glitter onto your painted circle.

Then, use a dimensional paint to add a spiral to your painted circle, starting from the middle of the spiral and painting free hand to the outside of the circle.  Then, paint the stick of the lollipop.  You may also decide to personalize the gift with the baby’s name.  If you decide to do this, wait until all the other paint is dry to reduce the risk of smudging it.

Let this dry overnight before sewing on a ribbon embellishment.  Be aware that small items can be potential choking items for small children.  I brush a little clear nail polish on the edges of the ribbon to prevent fraying.

I have used this same design idea to embellish a canvas tote bag, using three lollipops (pink, blue, and yellow) side by side and personalizing with the baby’s name.

handpainted onesie tutorial

I hope you enjoyed this tutorial on creating an adorable painted garment for your next baby gift.  Have fun with it!

I will be sharing this week at Craftberry Bush, The Shabby Nest, Craftionary, A Pinch of Joy, and Crafts a la Mode.

Thanks so much for visiting!  Remember to take pleasure in simple things, Jackie

9 comments

fun valentine ideas

January 29, 2013

diy felt heart

Valentine’s Day is coming up and I want to share some of my ideas to make it a little more fun!  As I got going on this post, I realized I had gotten really carried away…I had so much I wanted to share!  I was afraid it was just too much to read in one post (since we are all so busy!) and I went back and edited it down to my favorite six ideas.  Check back the next two Tuesdays for additional Valentine’s Day posts!  Enjoy! 

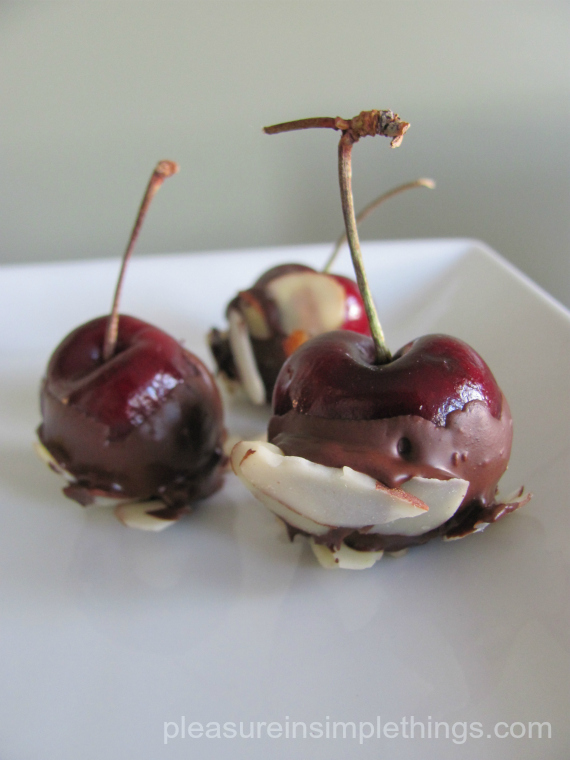
NOSTALGIC     When I was growing up, there were some ‘given’ items my grandmother would always have on hand…like, fried potato sticks in a can or candy that looked like orange circus peanuts.   These were items she could purchase at the local discount store that was within her walking distance – since she never learned to drive.  Every year around Valentine’s Day, one item she was sure to have on hand was a big box of chocolate covered cherries…the kind with the super gooey centers.  As a tribute to my grandmother, I am serving my own version of chocolate covered cherries (minus the gooey center) – now a standard on Valentine’s Day.  Simply dip some fresh strawberries in melted chocolate…I added slivered almonds…yum :)

chocolate covered cherries

REFRESHING     Forget the sugary sodas or diet drinks this Valentine’s Day.  Try a refreshing glass of water lightly flavored with fruits and/or vegetables.  I like cucumber flavored water – adding a few raspberries to give some Valentine’s color!  Just let the water sit overnight for a wonderfully subtle flavored water in the morning…a refreshing change from soft drinks.

diy flavored water

SALUD    If a more potent drink is you or your sweetie’s preference on Valentine’s Day, shot glasses fashioned from ice are a ‘cool’ way to deliver it.  These were made from a shot glass mold sold by Fred Flare, but if you wanted to be inventive, you could make your own from two disposable cups  – one inside the other .  To make them a little more romantic, I floated a couple of flower petals in the water before freezing.  Salud!

photo of ice shot

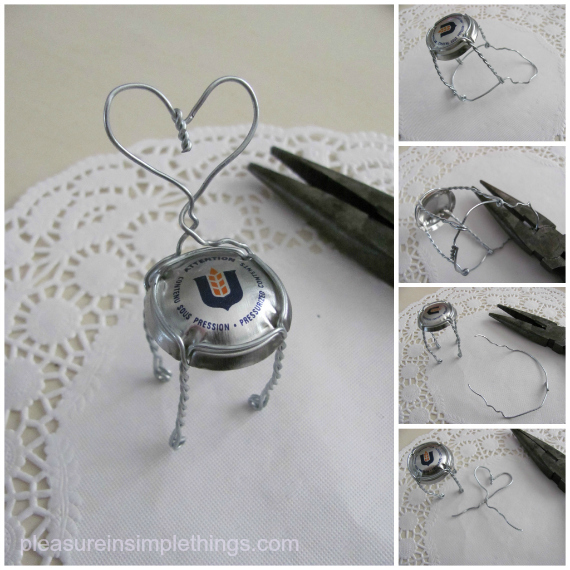
CREATIVE      If champagne is your beverage of choice, be sure to save those cages!  I guess chairs fashioned from champagne cages are nothing new, but I only recently became aware of this activity.  There are even established competitions on the best designed chair!  Who knew?  You may want to start your own competition!  For my first creation, I designed a chair with a heart-shaped back in the spirit of Valentine’s Day.  To make a basic chair, all that is needed is a leftover champagne bottle cage and some pliers.  Fun!  This may have started a whole new interest in champagne drinking for me :)

champagne cage chair

SURPRISE     Don’t forget the kids.!  Valentine’s Day is on a weekday this year and a strategically placed note in a lunch box is sure to brighten a little one’s Valentine’s Day.  (Some of my best work has been slipped into a grammar school lunch box!)

Anything a little different from the usual can make your child’s lunchtime special.  It has been a long time (longer than I want to mention) since my kids have been in grammar school…but, one of my favorite things to do for them was to make surprise packets from brown paper.  I would cut two identical shapes from brown paper.  On one, I would use the sewing machine to make a decorative pattern.  (If you don’t have a sewing machine, you can hand stitch.)  I would then sew the two pieces together – leaving a small opening to insert treats.  After enclosing the candy, raisins, etc., I would sew up the opening – totally enclosing the items between the two hearts.

The fun part was that the packet had to be ripped open to reach the treats inside!  If your kids are new to this, you might want to stamp the words “open me” or “rip me open” on the outside so they aren’t hesitant to do so.  If you are a room mother (like I was), these make great party favors for the class Valentine’s Day celebration.

diy treat containers

If you would rather give something nonedible, another great little surprise are these really fun temporary tattoos I recently found online.  Key word here is temporary!  These are sure to put a smile on your littlest valentine’s face!

THOUGHTFUL     I originally made these cute felt hearts last year after I found easy directions to make them on Purl bee. I filled them with candy and slipped them into the packages I sent out to the college students for Valentine’s Day.

diy felt heart containers

Since then, these cute little items have found a much more valuable use.  When heading to the gym after work, earrings worn during the work day are tucked into these felt pouches as a way to protect them and to keep them from getting lost.  Now, I make them to give to others as jewelry cases.  They are also great to house odd buttons…a thoughtful Valentine’s Day gift.

diy felt hearts

I enjoyed sharing some of my fun Valentine’s Day ideas with you.  I am also sharing at The Inspiration Gallery & Craftionary.   I hope you will try one or two…or, be inspired to create something new.

Thanks so much for stopping by, Jackie

11 comments

« Previous Entries     Next Entries »