Subscribe to Pleasure in Simple Things via RSS ReaderFollow Pleasure in Simple Things on InstagramFollow @InSimpleThings on TwitterLike Pleasure In Simple Things on FacebookFollow Pleasure In Simple Things on PinterestEmail Jackie

diy wire gift tags

November 19, 2013

diy holiday package tag

I adore holiday decorating and baking.  Gift wrapping, in particular, is a passion of mine and I always start thinking about design details for my packages as soon as I establish a holiday theme – months before the holiday season approaches.

I assembled some of the materials I knew I would need for my woodland gift wrapping ideas quite some time ago…hoping to squeeze in some of my planned projects in free moments.

diy wire package ties

Working 15 hour days isn’t particularly conducive to fitting in creative activities, but I did use a couple of late night hours recently to work on some gift tags I had envisioned a while back.

Using wire from the craft store, I very simply bent the wire to form words to use as gift tags on my gifts…choosing fun holiday words or the name of the gift recipient.  I chose an antique bronze colored wire and picked the strongest gauge that I could still shape using my hands.  (Pliers are an option if you would rather use a tool or don’t have significant hand strength.)  I formed a loop on either end of the word shape to use as a ribbon loop and cut the end of the wire with pliers being sure to check for sharp edges and using a file or sandpaper to smooth any rough spots…

diy holiday word ties

I shaped the words freehand, but you can certainly use a handwritten word on paper or print out a word from your computer to use as a pattern.

diy holiday gift ties

These packages will coordinate nicely with the others I have planned for my woodland theme. ;)  Wire is available in a wide choice of colors in the craft store, so you can choose one to match your own holiday theme.   

holiday woodland package

These word creations have so many uses – they can be used as ornaments, to identify a Christmas stocking, or as a wine bottle gift tag.  It is an especially great idea to use one on a gift for someone that can never find anything printed with their unique name!

diy holiday gift ties

I hope you will try your hand at some of these fun wire word gift tags for holiday packages and create some to coordinate with your own holiday decorating.

Thanks so much for stopping by.  Remember to take pleasure in simple things, Jackie

no comments

repurposing clothespins

November 5, 2013

days of week clothespins

I guess being born a Virgo and a firstborn explains how the simplest of organizing ideas can get me excited.

Using extra clothespins as an organizing tool is a perfect example…yes, I find this exciting!

Who hasn’t used a clothespin to hold a chip bag closed? 

But, by adding a few stamped letters and a freebie refrigerator magnet, I gave a few clothespins some more specific daily assignments.  Days of the week clothespins are a great way to help organize the week’s menu by clipping recipe cards onto the appropriate day that you will need them… an easy way to have some clothespins doing double-duty in your kitchen.  Also a great way to remember a coupon you may need to use on a specific day during the week.

clothespin decor

You can also add a little character to some old style clothespins by adding a coat of whitewash and then using a little sandpaper to give a worn appearance.  I like to use these as ‘clips’ for markers on my appetizer trays…here for a dessert tray, I also added a splash of gold to go with a gold theme. 

I am also incorporating some clothespins into my woodland holiday theme table decor…using a glue gun to add some pheasant feathers and some scrap velvet to some clothespins, they will stand in for more traditional napkin rings.  I always have plenty of feathers on hand, but if you don’t have access to game bird feathers, you can certainly pick some up at the craft store.

clothespin advent calendar

Another use for wooden clothespins to tie into my woodland theme is to use them with mini brown bags to create a natural element Advent calendar…stamp the days on the clothespins and clip natural materials to bags you have filled with surprises.

jar for thanks

A jar full of leaves from the backyard serves as a ‘jar of thanks’ …a slip of paper from each guest on Thanksgiving Day, giving a message of thanks, is folded and included in the jar to be read later in the day.

Do you have any great uses for wooden clothespins?

Thanks so much for stopping by.  Remember to take pleasure in simple things, Jackie

no comments

thanksgiving treats

October 29, 2013

diy candy turkey

Using a few confections, it is easy to create some cute candy turkeys to use Thanksgiving Day at place settings or as an after dinner activity for the little ones.

When my children were very young, I put together these candy turkeys to bring to my family’s Thanksgiving feast at my sister’s home. 

Thanksgiving candy turkey

Even though the kids are now well beyond grammar school age, candy turkeys have become something of a tradition at our Thanksgiving celebration.  (As much a tradition as my brother-in-law playing “Alice’s Restaurant” as background music!)

candy to make turkeys

So, at my sister’s at Thanksgiving, not only does she supply more varieties of pies than people, but also the ingredients for making candy turkeys.

Using a few candy ingredients and some melted chocolate as the ‘glue,’ the turkeys are easy to put together.  (My sister has sometimes successfully substituted prepared canned frosting.)

candy diy thanksgiving turkey

Don’t pass up this wonderful opportunity to embrace playing with your food!

Note:  for instructions to make the acorn ornament to use as a napkin ring, click here.

Thanks so much for stopping by…

Remember to take pleasure in simple things, Jackie

5 comments

quick lime dip

October 22, 2013

lime dip

The flavors of lime and graham cracker taste so great together, don’t you think?  Think key lime pie…yum!

My mom serves a lime dip with mini graham cracker pretzels at the holidays and it is always a big hit.  I decided to create a version of my own.

The lime flavor dip was easy to recreate.  I used a cream cheese base and just added some lime flavor and some sweetness…so easy!

Using an electric hand mixer, I beat a package of cream cheese and added the juice from 3 limes, a couple tablespoons of lime zest, and confectioner’s sugar to taste.  Easy, right?  Just add some mini graham crackers and serve.  I didn’t find any pretzel shaped ones like the ones my mom served, but I did find some all natural mini grahams in the grocery store.

creating a lime dip

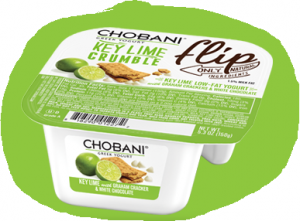
Chobani flip in key limeSince the filling of key lime pie is made with sweetened condensed milk, you can use that as your sweetener if you want to stay more true to the taste of a key lime pie.

Great to serve as a snack or as a dessert!

If this flavor combination appeals to you, be sure to try the Chobani yogurt “flip” in key lime crumble!  “Flips” are my latest obsession!  (Almond Coco Loco is my favorite!)

Thanks for stopping by and remember to take pleasure in simple things, Jackie

no comments

dreaming of a white halloween

October 15, 2013

white pumpkin halloween

Who says Halloween decorating has to be black and orange?  I prefer white…think ghosts, tangles of spider webs, fangs…all white!  So, why not decorate with white?

Of course decorating with treats is a requirement…and there are some great white options.  Because I love white decorating, I often create white dessert tables at the holidays.  White is a fun option for Halloween treats also!

For visiting adults on Halloween, champagne bubbles are the perfect sweet!

white halloween treats

Decorating a white Halloween. Create a white on white polka dot pumpkin by creating white dots with acrylic paint, white nail polish, or white felt and glue. Champagne bubbles in treat sacks continue the dot theme.

Champagne bubbles for a white Halloween

These “yum” sacks are better suited to the young ones.  Fill with white jelly beans, mini marshmallows, or white gum drops to appeal to younger tastes.

halloween treat sacks

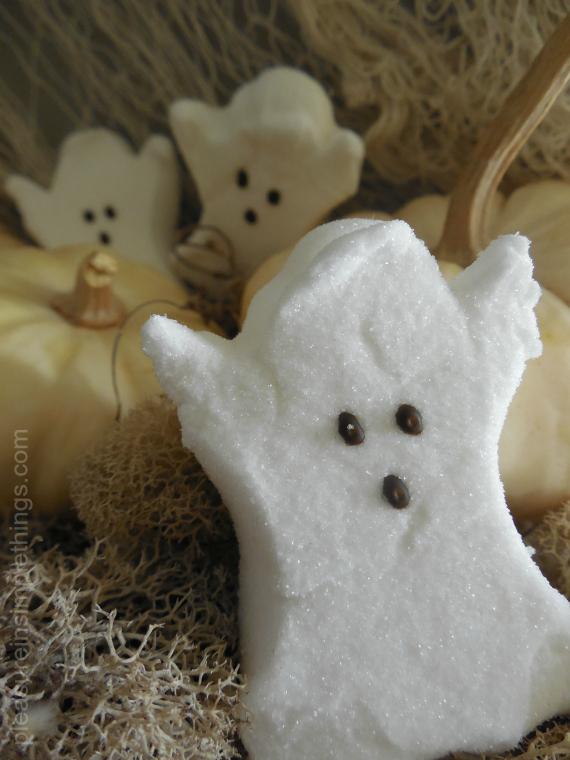
I made these ghosts from a traditional meringue recipe.  Flavoring them with root beer makes them a fun and different sweet for Halloween.  The color from the root beer extract also gives them a vintage color.  Eyes are easy to create with a toothpick and some black paste food coloring.

homemade meringue ghosts

If you would rather purchase your ghosts, the traditional ‘Peeps’ come in ghost form…

all white halloween decor

decorating a white Halloween

I hope you are inspired to create some white Halloween of your own!

white pumpkins

white halloween

Homemade caramel apples dipped in white chocolate and coated in sliced almonds still to be made ;)

white halloween votives

Some easy-to-make votives to spread your Halloween message…wrap votives in white linen stamped with appropriate letters.

Thanks so much for stopping by.  Remember to take pleasure in simple things, Jackie

Sharing at Craftberry Bush,   A Pinch of Joy, and The Well Crafted Home.

1 comment

goodbye garden

October 11, 2013

planting flowers in a white pumpkin

There is no denying that fall is Connecticut in beautiful.  But, to make way for the beauty of the changing leaves, the flowers vanish.

fall collage

This is the time of year when I have to take in my favorite bird bath to protect it from being broken by the first frost…For Friday field trip today, I thought we would go outside and take a look in the garden to see what survived the start of autumn…

lavendar

There is plenty of euphorbia…it seems to like this time of year…among it, one lone piece of lavender…

end of summer flowers

Not much else…some mums of course…and, a monster black-eyed susan vine.  I decided to create something with the few flowers I had left…to capture one last look at my garden…so I arranged them in one of my white pumpkins to bring into the house.

mums in a pumpkin

This is easy to do…if you want to create one, just cut off the top of a pumpkin, hollow out the inside, and add floral foam to arrange the flowers.  (You might remember last year I planted succulents.)

flowers in a pumpkin

I like my little reminder of what is left of summer in my garden.

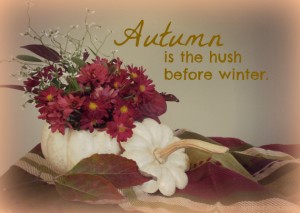
fall quote

Thank you so much for stopping by.

Remember to take pleasure in simple things, Jackie

no comments

velvet acorns

October 8, 2013

velvet acorns

This year I am making velvet acorns.  And, since I am going for a woodland theme holiday, I am also making some velvet acorn ornaments to use for my holiday decorating.  You may remember my velvet pumpkins from last year…I had so much fun picking out velvet fabrics, sewing up the pumpkins, and adding real pumpkin stems.

velvet acorns

I even posted some easy diy instructions on how to make the velvet pumpkins. Acorns are easy to make using the same method as the pumpkins…using real acorn caps.  Aren’t they adorable!  To make your own, just cut the diameter of the velvet (acorn) circle twice the diameter of the acorn cap you will be using with it.

velvet acorn ornament

To make the ornament, be sure to put a hole in the acorn cap and add a thread for hanging before you glue the cap to the velvet.  For a little added holiday glitz, I also added some sparkle to the acorn cap with some glitter.

making velvet acorns

Why not take a walk in the woods this week and collect some acorns to make some velvet acorns?

velvet acorn

They are easy to make and add a beautiful woodland touch to your fall decor.

velvet acorn

You may also want to start on some holiday ornaments!

velvet acorn ornament

Thank you so much for stopping by.

Remember to take pleasure in simple things, Jackie

Sharing at Craftberry Bush, Common Ground, and The Shabby Nest.

11 comments

pine straw bale planting

October 4, 2013

pine straw bale

How many times have you seen hay bales and corn stalks used to decorate the outside of a home at this time of year?  Pretty standard, right?  When I saw a workshop scheduled at Terrain for planting pine straw bales, I was intrigued…what exactly would be done with the bales?

pansies for pine straw bale planting

It turned out that Terrain designer Angela actually planted right inside the bale!  I thought it was so cool that I wanted to share this week on Friday field trip.

flower for pine bale planting

A really great idea that can be tailored to any color scheme or taste.  Start with a pine straw bale and some plants that you like or that will coordinate with the outside colors of your house…

mums for pine bale planting

Using scissors or something sharp, cut out spots to plant inside the bales – adding soil as your planting medium.

pine straw bale planting

Looking down on a finished pine straw bale planting created by designer Angela at Terrain in Westport, Connecticut.

pine straw bale planting

After Angela planted the selection of plants she had chosen, she added some green moss around the plants and a few white pumpkins (I wonder if that was for my benefit lol!) to complete the look.

pine straw bale planting

Great idea, right?

pine straw bale planting

Just be sure to place your pine straw bale in it’s spot before you start planting…Angela had hers on a cart so she didn’t have to worry about lifting it after it was completed.  It looks great from every angle!  I love the contrast between the plants and the pine straw.

pine straw bale planting

I hope this will inspire you to try creating one of your own bale plantings…something a little different for your seasonal decor…thanks Angela!

pine straw bale planting

If you don’t have a Terrain near you, you can easily find pine straw bales at Home Depot.

pine straw bale planting

Thanks for stopping by!

Have a great weekend and remember to take pleasure in simple things, Jackie

Sharing at Craftberry Bush and The Tablescaper.

1 comment

mini white pumpkins 3 ways

September 24, 2013

white pumpkin

I am not a big Halloween person.  Granted, I do like planting in pumpkins, making pumpkins, carving pumpkins, and eating pumpkins.  And… I certainly like candy!  But I’m really not into the whole black and orange decorating thing and I don’t find being scared out of my wits an enjoyable past time. 

It was not until the white pumpkin hit the scene that I took a dedicated interest in Halloween decorating.

I thought today I would show you some ways to use mini white pumpkins this season and maybe you too would get hooked on using them in your Autumn decor! 

Here are three easy ways to change up white pumpkins for autumn decorating.

white pumpkin

A really easy way to dress up a white pumpkin is with some metallic paint.  Just a little acrylic paint sponged onto a white pumpkin dresses it up for the fanciest of occasions.

white pumpkin and roses

Plasti Dip is another great material to use on white pumpkins.  It easily and instantly adheres to the pumpkin and can be tinted in any color.  I used some pink I had tinted from a previous project for these pumpkins.  Even the stems are fair game!  Love it!

Plasti Dip Pumpkins

For a Halloween party, black Plasti Dip dripped down a white pumpkin would look nice and creepy!

Plasti Dip pumpkin

Plasti Dip pumpkin

A really great thing about white pumpkins is that it is so easy to coordinate them with any color.  When I wanted some gray toned pumpkins to use with zinc items,  I just tinted some white pumpkins gray!  I rubbed the surface with a little black paste food coloring to get the perfect color to use with my table setting!  I sprayed the finished project with a matte finish clear coat.

gray pumpkin

What can you do with some mini pumpkins for your next get together?  Have fun with it!  Use hash tag #pleasuregram to share your mini white pumpkin creation on Instagram.

Thank you so much for stopping by!  Remember to find pleasure in simple things,  Jackie

1 comment

better in threes

September 10, 2013

anchor triptych

Doesn’t putting any photo into a frame make it look better?  In the same way, I think putting a painting on canvas immediately ‘legitimizes’ it.  For this reason, I decided to create a quick ‘work of art’ on canvas for my daughter’s new apartment. 

While helping her move in, I noticed that there was an empty spot on the bathroom wall – a long, tall shape.  The bathroom was done in white and beige and had a hint of blue, so I thought a painting using beige and blue could tie everything together nicely.

What would fit the unusual space?  A triptych!  This is a painting divided into three sections.  I would choose three canvases that would fill the space appropriately…I decided an anchor would be my subject matter since the painting was going in a bathroom space and my daughter has a love for anchors. 

painting a triptych

I put three canvases together and drew a very rough sketch of an anchor with pencil.  I didn’t want to get too serious with it…just a very quick painting using the basic shapes and whatever acrylic craft paint I had left from previous projects…mixing beiges and blues.

Any basic pattern will work.  Just be sure the picture hits all three canvases.  If you don’t feel comfortable working with a pencil sketch, you can easily find something online to copy and trace.  You can even use your computer or a copier to adjust the size of the picture.  If that still seems intimidating to you, you can decoupage a picture onto the canvases – requiring no drawing or painting at all!

anchor triptych

The painting took about 10 minutes since I just did a ‘messy’ impressionistic view of an anchor and added very little detail. 

I was able to create a painting that used the appropriate color scheme and a favorite motif to add to my daughter’s newly decorated bathroom…fun!  I’m hoping my daughter will send me a photo of this new creation when she hangs it on the wall.  If so, I will share it with you on my Facebook page.

anchor triptych

I hope this has inspired you to create your own triptych!  Send me an email if you need some help or ideas.

Thanks so much for stopping by and remember to take pleasure in simple things, Jackie

Sharing on Shabby Nest.

2 comments

« Previous Entries     Next Entries »